#also if anyone has that photo in better quality or without the watermark... you know where to find me
Note
i’m actually going to cry at ur lewis and seb in the prince au bc it’s not something i thought would happen but it did and i’m so so so glad for u expounding on them!!! i love it so much i hold them so close and dear to my heart… thank you thank you thank you
thank you all for asking about it!! i don't have that fic/installment written yet so it wouldn't have come out for another few weeks at least but i'm so excited to talk about them. truly one of my favorite side plots in prince au. like i just sent this pic to gabby

and i was like "obviously lewis has been out for ages and rolls up to charity galas with his husband sporting a mustache straight of the 80s" and look at us now :)
#i imagine the charles/pierre girlies (gn) will also like parts of the au#but i'm no expert on them unfortunately#i think we have a few pairings in there at least mentioned... very self indulging. god bless#also if anyone has that photo in better quality or without the watermark... you know where to find me#rosy.ask#prince au#prince au sewis
20 notes
·
View notes
Text
Easy editing software for beginners.
Let’s define ART.
Art is defined by a lot of people but the best definition that I’ve read is that it was “something that is created with imagination and skill” which means that anyone is capable of being an artist by making their own craft.
There are different categories of art such as literature arts, visual arts, graphic arts, plastic arts, performing arts, architecture and also music, everything that surrounds us is a form of art. Art can help us in so many ways we can imagine. Most people use art to express their thoughts, as their hobby and even as their job, like for example a painter. A painter creates a different world of expressing thousands of thoughts using random colors, it creates a magnificent art. To some people, art can also help them reduce their stress and anxiety. Some of us might not be aware if it but each and every one of us has our own contribution in art, in any form of it and not just by painting or drawing. It could also be by sculpting, knitting, making handicrafts, graphic designs, editing videos and etc. We have a thousands of thoughts that kept in our minds, drowned by the deep thinking can also lead to a thousand possibilities. Just focus and let your imagination work. Sometimes, you will be surprise on what you can do, because sometimes, even without knowing it, we surpasses our limits.
As a fellow photo and video editor, let me share you some art weapons on what editing software you can use to try to serve as your own weapon in producing arts. Try to explore and bring your imaginations to life.
This list includes editing software for both photos and videos that you can use for whatever equipment you are using.
1. Adobe Photoshop CC
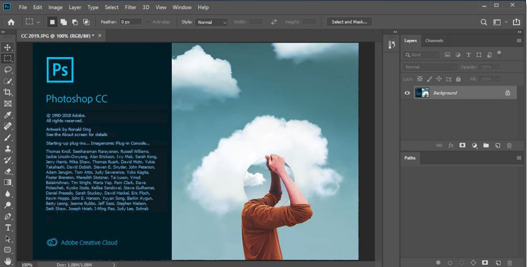
Photoshop CC has many features that you can explore. Even though it does come with an affordable monthly cost, it is an impressive photo editing application and probably the best out there!
2. Adobe Lightroom CC
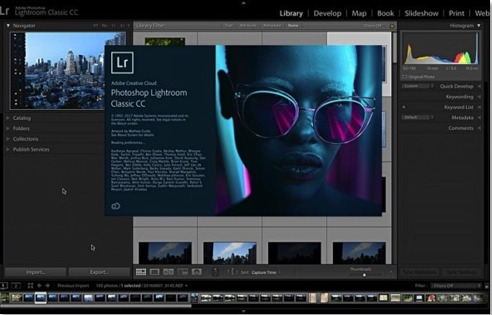
This software has the ability to store images on your computer and your other devices. It also gives you the ability to spice up the colors of your photos and make dull-looking shots more vibrant.
It also comes with a cost but with its features, it is all worth it!
3. Figma
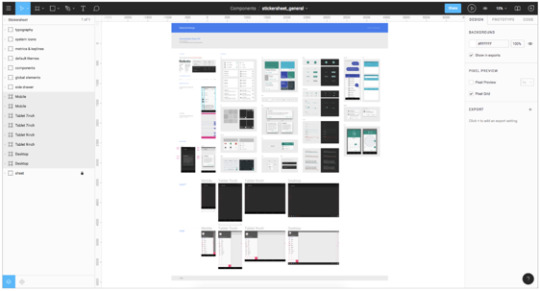
This software is the second-best photo editing software out there! It is a collaborative interface design tool that allows the whole team to process, test and create better designs faster, only in one tool!
And might I add, it’s FREE!
4. Fotor

Fotor is a free photo editing software that comes in mobile, web and desktop. It features a full package of tool that should cover most of your basic essential needs in photo editing.
It can help you do an instant fix and if you need more control, you can find tools to resize, crop, rotate and straighten your images. It also has a feature where you can remove the background.
I have given you the top 4 photo editing software that is out there. Now, let’s move on and see a list of top video editing software!
1. Adobe Premiere Pro
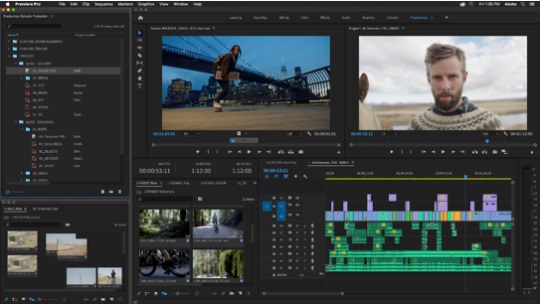
This software is a paid-for video editing software used by top professionals when it comes to making YouTube videos, advertisements, short films and even TV commercials and movies.
It is the best video editing software of all. It can be used to import video, audio and graphics. It can also be used for all basic video editing tasks necessary for producing high-quality and high-definition video.
2. Final Cut Pro
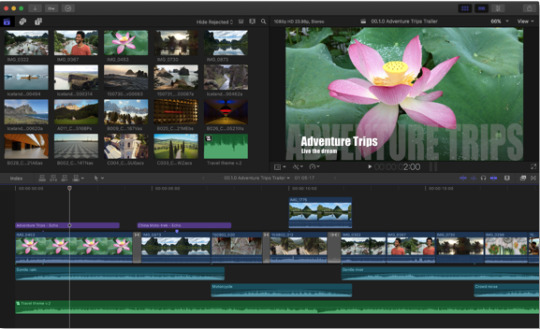
Final Cut Pro is a professional video editing software for Apple devices. It is a one-time payment and is a subscription-free software.
Its features include 360-degree video, HDR and advanced tools for color correction.
It is also EASY TO USE. Most of the professional video editors have been loving this software because of its innovative Magnetic Timeline, grouping tools, wide range of effects, good organizational features and the simple ways to add and edit audios. If you are an Apple user, you should definitely try this one!
3. Filmora
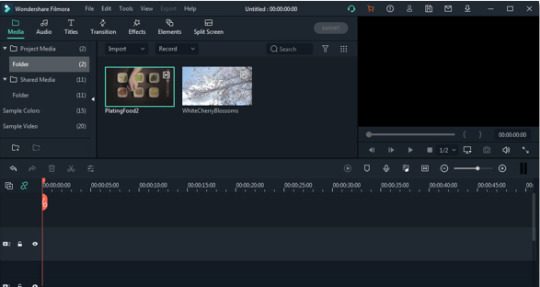
Filmora is the suggested video editing tool for enthusiasts. This is also easy to use.
There are so many options for titles, effects and filters designed for YouTubers and filmmakers. It also has a library where you can choose royalty free sound effects and music. This is a paid tool but the free version includes all the same features and tools as the paid one. The only difference is, your videos will have a brand watermark on them.
4. KineMaster

There is also a professional video editing software on your smartphone or tablet that doesn’t require money. KineMaster is one of them! This software is available for all Android devices and Apple devices.
This has a smart and easy-to-use system and also lag-free. It allows you to edit multiple layers, add texts, add animations, play with the audio tracks and edit frame by frame.
These are the photo and video editing software that you can freely use to start making your own craft. At the beginning of pursuing your passion in editing it might not be a easy path to take, however, always remember that we only truly learned on the path that brought us the pain and sacrifices as it will give us the experience in life that will make us stronger and better than our past self. To learn, to seek for new things are what made us grow as a person. Always look for something to learn and something to practice to, and you may always start by what you've learned today.
- Felierica
4 notes
·
View notes
Text
How to Hire a Face Painter for Your Event

So, you need to hire a face painter. While the art of face painting is nothing new to the majority of us who've frequented carnivals, fairs, and other events that draw the attention of children, the practice of hiring one for private, intimate affairs like birthday parties is. Previously, such efforts were reserved for those who wanted extravagance and had the money to bring it to even the simplest of get togethers. In recent years, the face painter has made onto the wish list of many a child with a birthday party looming around the corner... much to bafflement of some of their parents.
As with any entertainer you invite into your private events, hiring a face painter can be a stressful process if you aren't armed with a little basic knowledge and a few insider tricks to help you smooth out the waters. If you take the time to line up your ducks and employ the guidelines below, your little one will be thrilled to have an extra special treat for his/her special day, and you'll have some pretty colorful memories to pat yourself on the back with.
Hiring a painter isn't hard. However, it does take a little time if you want to ensure that you get your money's worth. With that said, let's jump right in!
Timing:
Face painters are the hot thing in party planning nowadays. So much so, that many corporations have begun hiring painters, clowns and other children's entertainers for store openings, family days and customer appreciation events. Why am I telling you this? Because corporations are, for the most part, three steps ahead and often book painters months before their event. What does this mean to you? It means that most established painters have limited availability, particularly when you call them 3 days before your Saturday event. If it is at all humanly possible, nail down the date and location of your event as soon as you can and then start looking for a painter. The more time you give yourself to locate your artist before your event, the better chance you'll have of getting one that knows how to handle your event,which equates to a lower stress level for you!
Finding the Right Painter:
I'm just going to come out and say it: Not all painters are created equally. This isn't a slight, it's a fact, and I'm sorry if some egos are wounded with this declaration. There are several degrees of separation within the face painter ranks and it's important to know something about that if you want to make an informed decision. Firstly, you have your professional face artist/painter vs. hobbyist painter. The professional painter will have a business-like approach to event and everything from the telephone consultation, to follow up conversations and their appearance will reflect that you're dealing with a professional. The hobby/new painter is either just getting started and is working his/her way up to professional status, or is truly someone who just sees face painting as a hobby. You will often pay more for a professional... and you know the saying about getting what you pay for. But anyone can call themselves a professional painter and the client would be none the wiser, so what are some things to expect from a true professional face painter?
• A website complete with information about the artist, service offerings and photos of faces that he/she actually painted. Buyer beware! Some painters "borrow" stock images or watermarked images from other painters. The reason for the warning is that you may not get the quality of painting you thought you were. If in doubt, ask the painter if every face displayed was painted by him/her. Craigslist isn't the necessarily the best place to find a professional painter; however, many pros post ads that link back to their websites on Craigslist to reach a larger customer base.
• A binding contractual agreement that not only details the service you'll be receiving, but assures that the painter you hired will not abandon you at the last moment. The artist may or may not require a retainer payment in order to confirm your booking.
• Professional products. Pros should NEVER use Acrylic, Tempera, Poster, or any paints intended for use in crafting. Craft glitter can be dangerous when used on the skin/face, so true pros opt for cosmetic glitter.
• Appropriate attire that distinguishes him/her from your guests. A suit and tie aren't necessary, but flip flops and shorts are often frowned upon.
• A clean, concise setup. Hygiene is just as important as first impressions and if the first impression is that of a hot mess, you're might want to reconsider.
• A repertoire of designs that the artist can execute efficiently and with expertise. A professional will only present images that he/she has painted and for the most part have those designs committed to memory.
Naturally, there aren't an unlimited supply of professionals and, to be honest, sometimes your budget simply won't allow for one. Yes, it's usually best to hire a professional, but sometimes you just can't. New painters are entering the professional ranks all the time and can still be held to the same high standards that the pros adhere to. Ask the questions and you'll be sure to find a painter able to do an excellent job for you.
Contractual Agreements/Retainers:
Today, many seasoned painters have turned to the contractual agreement as a way of securing party bookings. The agreement is usually a simple reiteration of the clients contact information, event information, and an agreement to the terms of the booking. This agreement is binding and two sided. It is a promise of service from the artist to you and likewise, a promise to honor the payment agreement you've made with the artist. The contract may contain terms that address things such as cancellation, rescheduling, deposits, illness, and setup.
Most painters who use contracts require them to be signed in order to confirm your booking. There may also be a request for a retainer/deposit which may or may not be refundable (depending on the terms of the contract). The retainer is a good faith deposit that is usually required to confirm the booking. The reasons for a retainer are many, but the primary reason has to do with supply and demand. You see, when an ethical painter agrees to a booking, he/she must then decline any other booking requests that would cause a conflict with that booking. If a client decides to cancel the event or booking without giving the painter adequate notice, that painter has not only lost money from that cancelling client but also all of the potential clients he/she had to turn away.
Pay careful attention to the terms of the booking agreement! If the painter requires confirmation (either via signed contract, retainer, or both) within a certain time period, make sure you do just that! Once that time period elapses, the contract is null and void and you may just find yourself back at square one in your search. If the painter decides to book with a client who is willing to take her terms and conditions seriously, there will be little you can do about if you didn't follow the specified directions to confirm you booking.
We all know that shitake happens, so try to keep the lines of communication open with your painter if you won't be able to meet the confirmation deadline. However, don't string the painter along in hopes of getting him/her to do your event without having to sign anything or pay anything upfront. Many painters will not show up for unconfirmed bookings and some even require the unconfirmed booking be paid in full electronically before agreeing show. The painter is fully within his/her rights to refuse to service your event if you refuse to comply with contact terms, it's as simple as that.
Insurance:
The majority of professionals carry some form of liability insurance. This isn't a requirement and you may encounter many newer or hobbyist painters who don't carry this protection. This coverage is a safeguard both for the client and the painter in the event of some unforeseen damage to property or injury the painter is responsible for. The painter may not openly inform you of the presence of liability coverage (due to those who would then seek to exploit with false claims), but the question of insurance should always be asked.
Materials:
First, a PSA: Acrylic paint is not face paint! The known carcinogenic ingredients of craft paints were never intended to be intentionally placed on the skin, as these harmful components can leach into the skin with prolonged contact. The manufacturers of these craft products have publicly confirmed this fact. Furthermore, the manufacturing environments for craft products aren't subject to the same stringent foreign contaminant allowances and hygiene standards as that of a cosmetics manufacturing facility.
Responsible painters only use FDA compliant, professional cosmetic quality materials. In fact, most liability insurance providers require that covered face painters only use pro face and body art makeup. The question of materials should always be approached. It's not rude, nor compulsive to insist upon knowing what be put on your guest's skin. The last thing you want is to have your guests calling you about allergic reactions to products that should never have been used in the first place.
Any face painter who denies the potential harm in using acrylic, poster, tempera, or other craft paints should be avoided. Some seasoned artists may even offer assurances based on their testimony of many years without complaint. The truth of the matter is, the low cost of the craft paint face paintings make it easier for parents to disregard any minor adverse reaction as the cost of getting their child's face painted. Unfortunately, many of these parents remain unaware of the safer, albeit more costly alternative available. Painters who use acrylics are able to charge so little for their work because their materials cost so much less than professional products. The same level of attention should be given to the type of glitter the painter uses. In addition to the difference in ingredients used to color craft glitter versus cosmetic glitter, most craft glitters are cut with sharp edges which could scratch the skin and eyes while cosmetic glitter, which is intended to be used on the face is cut with rounded edges to limit eye irritation.
If you don't ask any other questions of the painters you are considering, ask about their products. Seek out those who only use FDA compliant face and body makeup and cosmetic grade glitters. You'll be glad you did and so will your guests.
Portfolio/Website:
Ask your painter for his/her website, and if it's at all possible, take the time to look at it to get an idea of what you can expect. The website is also a good way to get an idea of the personality of the painter and his/her professionalism. If you're conducting your search for a painter via the internet, don't stop your search at the banner ads on the top of the search. Those ads are expensive paid ads and often aren't a reflection of the quality of painter you're getting as much as they are of the amount of money he/she allocates to advertising. In this age of SEO manipulation, search engine ranking doesn't guarantee you the best quality of painter you can afford. Take the time to review the pages of as many painters as you can. You may just be surprised at what you find!
Established painters pride themselves on having a portfolio of work that showcases their skill set. You should always ask to see a portfolio of the painters work. Ensure that what you are looking at is the painter's actual work as opposed to images "borrowed" from other artists. Don't fall prey to what we in the face and body art industry call the "bait and switch". There's nothing more disenchanting than to hire a painter who enticed you with images of the work of other (sometimes award winning) painters, only to find that what they produce looks nothing like what they advertised or that they have to paint using a book or picture as a guide. The majority of painters have their designs committed to muscle memory and even if we haven't painted a design in a while, a simple glance is all we need to get our creative mojo going. A portfolio full of pictures that a painter feels he/she can paint is not a guarantee that your expectations will be met in the amount of time promised.
Booking Duration:
What determines the amount of time you need to hire your painter for? Well, many things. Your face painter is, unfortunately, only human and therefore the amount of faces he/she can paint within a given time period is limited. The average number of faces that a painter can paint in an hour can vary anywhere from 8-30 (or more in some extreme, minimalist painting situations). This number is contingent upon the types of faces being painted. Full faces often take a while longer than paintings that cover less facial area. Professional painters train to be able to execute a wide variety of faces within an industry accepted time frame.
Your painter will be able to tell you the minimum and maximum number faces can be painted within the time period he/she specifies. With that information, he/she will recommend a minimum booking time required to paint all of your guests. It is highly recommended that you pay close attention to this information. Many a parent has been faced with extending the booking or the difficult task of deciding which guests won't be painted as a result of disregarding the painter's recommendation. Are there instances where the painter can paint one or two more faces than they originally quote? Certainly! Usually this is a byproduct of other guests requesting faces that take less time than was allocated per guest. However, when you tell your painter that you are only having 12 guests and he/she shows up find 20 eager faces waiting, the painter isn't obligated to paint any longer than the agreed upon booking duration without further compensation. If your painter has another obligation following your event, you may not be guaranteed a booking extension to keep those additional guests happy, so it's up to you to either be upfront about the anticipated number to be painted at your party or very selective about who want to be painted. Many parents underestimate the lure of face painting on older attendees and even adults and therefore only factor in the number of young children when quoting their guest count. This isn't your grandma's face painting. Today's face painting is more artistic and appealing to males, females, young and old. Just a little something to keep in mind.
For larger events, simple math will give you're an idea of what you can expect from a face painter. There is no way humanly possible for a face painter to paint 60 faces in an hour. That would equate to roughly 30 seconds per face after you factor in the time it takes to get a child situated for painting, fidget time, the reveal process and getting the child out of your chair. Once your guest list strays into the hundreds, you can expect a suggestion of multiple painters for multiple hours to cover that volume. Unrealistic expectations will only exasperate your painter and leave you with unsatisfied customers. One of the biggest misconceptions is that a request for the painter to only paint small cheek designs will be a suitable solution to the large guest list-tiny budget conundrum. In truth, it often takes a lot longer to paint a little Choo Choo train on a moving target (aka, a child's face) than to paint a full face Spiderman. The reason for this is that cheek art requires a greater level of detail in a small space and thus the painter must slow down in order to avoid painting a multi colored "whatzit?" on your child's face. So the bottom line is, you should listen to what the painter tells you about his/her limitations and what you need to do to facilitate your needs being met. There's nothing more frustrating for all involved than to marry unrealistic expectations to the very real, very human limitations of an entertainer.
Booking Costs:
A professional painter generally runs between $50/hr. and $200/hr. depending on your area and their level of experience. Keep in mind that there may also be a minimum booking duration. This cost may seem exorbitant at first glance, but it really isn't. You see, it's a rare painter who works a 40 hour work week. In fact, most painters work primarily on the weekend and there are only so many bookings that can be added to that weekend appointment book. It's generally a good idea to remember that you're not only paying for the time the painter will be painting for, but also the administrative, material, training, and transit costs that go into your booking. When you hire me to face paint for your event, you're not just paying me to come paint for you, you're paying for the continuous training I undergo in order to be able to deliver the quality of work you expect in a timely manner, the time it takes to do the booking paperwork, administrative costs of being a painter, as well as the time/gas it costs me to get to your event and back. A simple 1 hour booking could easily equate to a 3 hour block of transit/administrative time for which I'm not being directly compensated for.
So what are some of these additional cost factors painters must consider?
• Training: Most painters set themselves on a tract of constant training which can cost thousands per year.
• Materials/ Material replacement costs: A Professional painting kit can run anywhere from $150 for the hobbyist to thousands for the more established pro.
• Liability insurance
• Background checks
• Website & maintenance
• Administrative tasking: Those contracts and correspondances don't write themselves.
• Event preparation. This is particularly true if your event is a themed one that requires a special repertoire of design options.
• Travel time, gasoline and vehicle wear and tear.
As with everything, these factors have a huge bearing on the price point a painter sets for his/her services. For the most part, a painter's rate is the price point that would make doing your event worthwhile, which is why there is a minimum booking duration. If you are planning a multiple day/hour event the painter will usually be able to offer you a lower rate for the bulk booking duration.
Face painting isn't free for the painter. Even practicing costs us. If you are looking to secure a painter for a charity function, school event or other event that would solicit for service donations, keep in mind that what may appear to be a simple donation of time to you is actually a lot more to the painter you're soliciting. We must factor in the material replacement costs, the cost of missed booking opportunities (that would result from doing your event), and the possible benefit, if any, of doing your event could have for his/her business before deciding to offer his/her services pro bono. If someone told you that they got something for free from merchant A, would you not then look to merchant A for the same great deal? In the case of face painting, one free donation of services can easily beget a ton of calls for like donations. It's for this reason that many painters limit their charitable service donations to a scant few per year. It never hurts to ask, but don't be surprised or offended if your painter proposes options that make the arrangement more of a win-win for both of you. If you're running a charity or non-profit, the painter may also ask for proof of your tax status and just for the sake of argument, a private birthday party is not considered a non-profit event.
A quick note about the "e" word:
Another peeve of painters is the dangling of what I like to call the "exposure carrot" in the faces of potential painters. Exposure can be beneficial for the new painter trying to get their name out there, but it holds little value for the established painter. Just as you can die from exposure to the elements, a face painter's business can suffer from exposure to clientele who will expect them to also do their events for little to no compensation, particularly when the primary patrons to the event are not likely to hire a painter themselves. Exposure has its benefits, however, if you were able to find your painter through a web search or other advertisement then, odds are, he/she is pretty well exposed already Painter in thane.
1 note
·
View note
Text
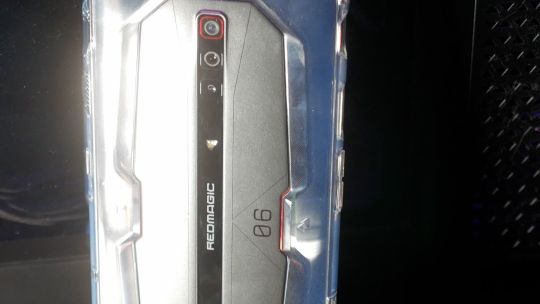
Nubia Red Magic 6 Pro Gaming Phone Review: The Advantage is Real
Nubia Red Magic 6 Pro
9.00 / 10
Read Reviews
Read More Reviews
Read More Reviews
Read More Reviews
Read More Reviews
Read More Reviews
Read More Reviews
Read More Reviews
Read More Reviews
Read More Reviews
Read More Reviews
Read More Reviews
Read More Reviews
Read More Reviews
Read More Reviews
See on amazon
All in all, the Nubia Red Magic 6 Pro is a great gaming phone. It's not the best phone on the market compared to the software offered by devices like the Samsung Galaxy S21, but it's pretty close. When you consider the price, anyone looking for a gaming phone should consider this one, as it offers impressive specs for the dollar amount.
Key Features
Snapdragon 888
16GB RAM
Large, high-res screen
Dedicated gaming mode with physical switch
165Hz refresh rate
Specifications
Storage: 256GB
CPU: Qualcomm Snapdragon 888
Memory: 16GB
Operating System: Red Magic OS 4.0 based on Android 11
Battery: 5050mAh
Ports: USB-C, 3.5mm
Camera (Rear, Front): 64MP/8MP/2MP
Display (Size, Resolution): 6.8-inch, 2400X1080
Pros
High specs for the price
Shoulder triggers
Ultra-high 165Hz refresh rate
500Hz touch sampling rate
Cons
Doesn't come with 67W charger in box
Buy This Product
Nubia Red Magic 6 Pro amazon
Shop
// Bottom
One place that has continuously evolved in the Android space is gaming phones. While traditional smartphones are always moving forward, gaming phones tend to push the limits even further. Perhaps that's because gaming phones are newer. Or maybe it's because gamers demand more from their hardware. It could be a little of both.
Whatever the reason, the Nubia Red Magic 6 Pro gaming phone is definitely all about pushing the limits of what we expect from a smartphone. It's packed with all kinds of gaming-focused features and specs that rival some of the most expensive Android flagships on the market.
However, it manages to rival those phones are a $699 price tag, which is quite reasonable for what the phone brings to the table.
youtube
Red Magic 6 Pro Specs
Because this is a gaming phone, it's really all about the specs. Starting with the processor, you'll find a Snapdragon 888. When it comes to flagship smartphone processors, this is the current model that the best devices are using (along with Samsung's latest Exynos chipset).
It also has 16GB of RAM and 256 GB of internal storage. You'll have a hard time finding a mobile application or game that requires more than 16GB of RAM, so everything should run with ease.
Since it is using a Snapdragon 888 processor, you'll get 5G connections across all the major bands. Of course, you'll need to live in an area with 5G support, but even if you don't, it has full support for LTE as well.

To put it simply, the Red Magic 6 Pro has everything you could want under the hood. Playing games that push smartphones to their limits requires specs that can hang, and the Red Magic 6 Pro brings all of that and then some.
If you want to save a little money, you can drop down the Red Magic 6, which features 12GB of RAM and 128GB of storage. You still get a Snapdragon 888 and all the other benefits, but the RAM and internal storage are slightly lower. Though if you're concerned about optimal performance, you're probably better off spending the extra money.
We went with the Pro version for our testing, as we wanted to make sure we're running the best version of the phone through its paces.
Screen and Size
The screen is a solid 6.8-inches with a 2400 X 1080 resolution. Obviously, it would be nice to get a 4K display, but at this price, FHD+ with a 20:10 aspect ratio is solid enough.

What makes this screen stand out isn't the size or resolution, though. It's the ridiculous adaptative refresh rate. You can set the screen to refresh as fast as 165Hz, which is absurd. Of course, very few apps and games support such high refresh rates, but you do notice the smoothness when scrolling through the OS.
It's a really lovely screen overall, especially when you consider the price. Videos, games (which we'll dig into more heavily in the next section), and just about everything else looks really good on the display.
Gameplay Performance
This is a gaming phone, so gaming performance is essential. In fact, it's the most critical aspect to look at when deciding if this device is suitable for you.
Before we get into the actual gameplay experience, let's first talk about the device's performance from a benchmark standpoint. Whether you're testing the processor or graphics card, this phone truly impresses on all of the popular tests.
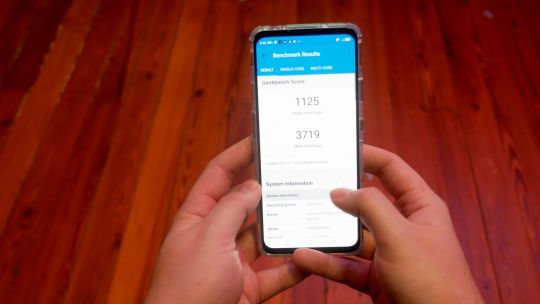
For example, when you run it through GeekBench, you get an absurd single-core score of 1125 and a multicore score of 3719. To put that into perspective, the OnePlus 9 Pro scored 1081 on the single-core score, while the ASUS ROG Phone 3 achieves 951. Basically, it scores highly across the board.
Moving over the 3DMark's Wild Life test, the phone excelled there as well. It scored a 5,904, which makes it the 12th most powerful phone in terms of performance. However, only two of the phones that scored higher are Android devices, so realistically, it's the third most powerful phone in its class.
Personally, I don't enjoy mobile gaming all that much. I like the feel of actual buttons when I'm playing games, and as much as smartphone game developers get creative with their controls, they just can't replicate the feeling of actual buttons.

However, the Nubia Red Magic 6 Pro does a great job of making the mobile gaming experience as enjoyable as possible. It offers several key features that make this possible.
First, there are customizable touch-trigger buttons on the top of the phone. These replicate the triggers of a controller, though without the tactile feel offered by actual buttons. Still, the high sampling rate makes them accurate and functional.
There's also the absurd 500Hz touch sampling rate, which means that your every action is read by the phone quickly. In some cases, this can lead to real competitive advantages over your opponents in games like Call of Duty or PUBG. It's almost cheating.
And even if you're not playing competitive games, having a high sampling rate means that you can rely on the phone to react according to your presses. For example, a game like Dead Cells that requires twitch reactions and precision platforming will play better with the high touch sampling rate.

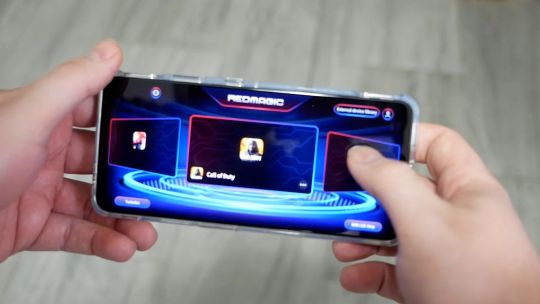
There's also a dedicated gaming mode in the OS that you can access via a physical switch on the side of the phone. Simply flick it to get rid of all the annoying notifications and other phone stuff. Instead, you'll see a simple screen with all of your installed games and several options you can use to customize your gaming experience.
In the gaming mode, not only do you have a quick way to launch your games without distractions, but you can control some of the other functions of the phone. For example, you can set up the location for the shoulder triggers, change the RGB lights on the back of the device, and adjust the fans.

All in all, this is the best experience I've ever had playing games on a smartphone. Will it convert me into a dedicated smartphone gamer? Probably not. But it will make the times I decide I want to play mobile games a more fun experience, and that's all you can really ask.
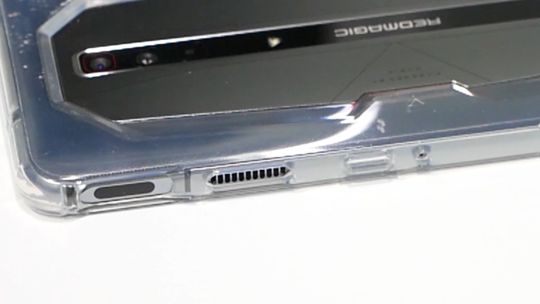
Cooling
Keeping itself cool is where this phone really shines. There are seven different cooling methods and heat transfers tucked inside the device, and they all do an excellent job of keeping things cool. You'll find fans, a vapor chamber, high thermal conductivity copper foil, thermal gel, a cooling graphite thermal pad, and an aviation-grade aluminum heat sink.
Unlike traditional smartphones, there are actual vents along the side of the phones that allow the air to leave the device and keep things flowing nicely. You can actually hear the fans spin up when you start playing games, so you know they're working.
Fortunately, they're relatively small, so they don't make too much noise. If you're playing a game with the sound on, it'll block out the fan noise easily.
If that's not enough for you (it was plenty for me), there are even cooling accessories that you can buy to keep the device running like ice. ZTE Nubia sent us one of the cooling fans that attach to the phone and is powered by the USB-C port and while it's cool, it seems like overkill. The phone stayed plenty cool enough in my testing that I just didn't feel like I needed an additional fan.
On top of that, having a cable running from the extra fan to the phone felt cumbersome. Unless you're really struggling with heat issues (and I don't see how you could with all the other cooling mechanisms) I'd avoid the additional fan, as it just doesn't seem like a worthwhile purchase.

All in all, the Nubia Red Magic 6 knocks it out of the park in terms of cooling. No matter what game I ran, it felt significantly cooler than any other phone I've used before.
Camera System
The camera definitely isn't the focus of this phone, but it's not something Nubia just tossed aside and forgot about either. The phone comes with a triple camera system. It has the primary 64MP camera with an f/1.79 aperture. There's also an 8MP ultra-wide lens with an f/2.2 aperture and a 2MP lens.
On the front, you'll find a basic 8MP camera. It takes decent enough selfies, but they're certainly not going to blow your mind.
One thing that annoyed me about the camera is the watermark it places on your photos by default. Sure, you can go into the options and turn it off, but it really shouldn't be there in the first place. No one cares that my photo was shot with a Red Magic 6. In fact, seeing the watermark is more likely to annoy them than convince them they need to own this phone themselves.
Video is one place where the Red Magic 6 shines. It's not so much that the lenses capture great video in terms of quality (though it is good enough), but it's the ridiculous quality of options and framerates available that make it stand out. You can capture video at up to 8K resolution at 30fps. You can film in 4K at 30 or 60fps, 1080p at 30 or 60fps, and 720P at 30fps.
There's also support for 1080P at 240fps and 720P at 480fps if slow-motion videos are your thing.

The front-facing camera can record video in 1080P or 720P at 30fps, which is definitely sufficient for a selfie camera.
All in all, photos and videos captured with this won't rival flagships like the Galaxy S21 or Apple's iPhone 12 Pro, but they will look good enough that you can share them proudly on social media without feeling like you're left behind. And if anyone questions your photos, just challenge them to a game of Call of Duty Mobile and make them suffer.
Battery
The battery in this phone is definitely one of its unsung heroes. While most of the marketing focuses on the performance of the Nubia Red Magic 6 when it comes to playing games, the large battery deserves just as much love. It comes with a 5050mAh battery, which is more than sufficient for extended gameplay sessions.
Of course, the phone needs a large battery to power that 165Hz display and the fans to keep it cool. Fortunately, the phone easily made it through a full day with battery to spare with normal usage, which included a decent amount of time spent gaming.
As big as the battery is, the fact remains that at some point, you will run out of juice and you will need to charge your phone. Fortunately, the phone comes with 30W quick charging out of the box and supports up to 66W quick charging. However, for the latter, you'll need to purchase a separate charger, as the 66W charger isn't included.
Still, even with the slower charger, you can still get a lot of power in a short time. You can fully charge the phone in a little over an hour, which is excellent for those times when you need to get back out there shooting fools in Call of Duty or PUBG.
As always, you can use the phone while it's charging too. So really, there's no reason to ever have to stop gaming, assuming you can find an outlet nearby.
Final Thoughts
All in all, the Nubia Red Magic 6 Pro is a great gaming phone. It's not the best phone on the market compared to the software offered by devices like the Samsung Galaxy S21, but it's pretty close. When you consider the price, anyone looking for a gaming phone should consider this one, as it offers impressive specs for the dollar amount.
Nubia Red Magic 6 Pro Gaming Phone Review: The Advantage is Real published first on http://droneseco.tumblr.com/
0 notes
Text
The Best Blu Ray Burning Software For Mac Free

The Best Blu Ray Burning Software For Mac Free Software
The Best Blu Ray Burning Software For Mac Free 2017
The Best Blu Ray Burning Software For Mac Free Download
The Best Blu Ray Burning Software For Mac Free Full
How to burn Blu-ray discs on a Mac. A Blu-ray Disc has advantages over a standard DVD: the picture and audio quality are better, and if you haven't got a fast internet connection, buying a disc.
Making a mixtape or accumulating your favorite videos on a DVD on a Mac can be hectic if you don’t know what you are doing. To accomplish this task seamlessly, you can always use DVD burning apps for Mac. Although, it is hard to decide which software could solve the purpose.
Jul 07, 2015 BurnAware is a very simple and easy to use CD/DVD/Blu-ray disc-burning app. You can use it to create data backups, audio CDs and to create or burn ISO image files. The free version also lets you create bootable discs, which is really handy.
Best DVD Burner for Mac 1. Burn is open source DVD/CD burner software, it has gained wide reputation for doing basic burning tasks. You can even use Burn for Mac to copy DVD files (.dmg, iso, cue/bin, etc.). This DVD burner even supports authoring.
Jan 23, 2019 The best free Blu-ray player software VLC Media Player is a free, open-source program that’s been around since 2001. It has adapted quite well to new audio and video formats as they’ve been developed and released. If you want a free Blu-ray player application, this is probably your best bet.
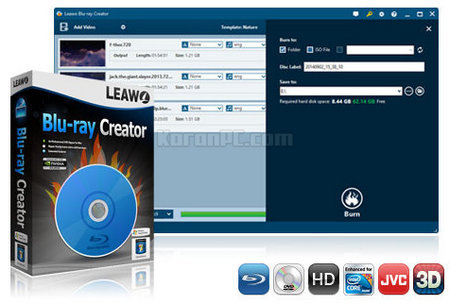
Leawo Blu-ray Creator It is one of the best Blu-ray burning software that allows you to burn the videos directly to the Blu-ray disc or save them in your PC as Blu-ray folder. It lets you customize the video and preview it before burning to the Blue-ray disc. Here are some of its features.
In this post, we have listed some of the DVD burning software for Mac.
Why To Choose CD/ DVD Burner Software for Mac?
Everyone has different reasons when it comes to choosing software which could burn a DVD on Mac. Some want to keep their media collection safe while some want to keep a backup of their data as there is always a risk of theft, data loss. The basic reason for using software is to make copies to ensure the data is safe.
You might be thinking at this time when people love to watch movies, TV shows on online streaming services, DVD burning seems to be a bit old-fashioned. However, some of us still want to keep the collection as many of old classics or prevalent TV shows and movies are not yet available on online streaming service. This may also come handy if you want to keep your favorite shows and movies offline
How Does it Work?
The DVD burning software extracts ISO image of a DVD and copies it to your hard drive or allows you to burn a new DVD. The software makes it possible to choose what you want to copy.
Let’s check out some of the best software to burn CD/DVD on Mac.
Best DVD Burner For Mac In 2020
1. iSkysoft DVD Creator (Mac)
iSkysoft DVD Creator is a DVD burner for Mac which consists of all the great quality of software which helps to burn CD & DVD. You can easily burn a disc and copy your content. It enables you not only burn DVD but you can also create a slideshow of your favorite photos with music. The software has a user-friendly interface so anyone can use it. All you need to do is drag the videos and drop them into the software window. Now select edit videos or DVD menu, then click “Burn” to start the process. The process will get completed in no time as the software burns the disc with high speed. No quality loss of the content.
See Also:10 Best Data Recovery Software for Mac
2. Any DVD Cloner for Mac
Any DVD Cloner for Mac is one of the best DVD burning software for Mac as it helps to burn DVD to DVD, ISO image file, DVD folder. It enables you to eliminate all DVD copy protections including RC, CSS, RCE, APS, and UOP. It can make copies of your DVDs with high speed. With the help of the software, you can get movies from DVD to iPod, PSP, iPad, iPhone, Xbox360, and Android devices in different formats such as M4V, MP4, MKV formats.
3. Xilisoft DVD Copy for Mac
Xilisoft DVD Copy for Mac is another DVD burner for Mac which can make it extremely easy to copy and backup a DVD. You also get to choose what file or movie you want to copy at a destination. This software has a capability to duplicate DVDs on Mac OS with original video and audio quality. One of the easiest software to use with a clean interface. It is compatible with DVD-RAM, DVD+-R/RW, and almost all DVD burners and players.
4. DVD Cloner for Mac
One of the best DVD burner software, DVD Cloner for Mac makes it easy to copy DVD with quality. The software is capable of copying protection systems and accessing all the region codes. It gives freedom to copy DVDs no matter what encryptions it has, to various destinations such as ISO image file, blank DVD disc and more. It also provides you with different options while copying the file from the source such as movie-only copy, customized copy, movie complete copy and more. You can preview the movie title with an inbuilt DVD player to make sure that you have copied the correct content.
5. Leawo Bluray Copy for Mac
Leawo Bluray Copy for Mac is one of the best DVD/CD burners for mac which could be used to burn a DVD/CD. It helps you to backup DVD disc & Blu-ray and allows you to create a folder, ISO film disc with fast speed. The software can take 1:1 disc to disc backup of, DVD-9, BD25, DVD-5, and BD50 with original quality. The software can also copy 3D Blu-ray disc with 3D effect intact. With 1:1 Blu-ray disc copy mode, a 3D effect of a source file is not changed when copied to destination disc.
6. Filmora Video Editor
Yet another good DVD burning software for Mac is not only good for burning discs but also can edit videos with advanced tools such as Picture in Picture, audio mixer, split screen, screen recording and more. Import audio, videos, and photos of any format apply effects, make changes to the video with editing tools and then send the video to DVD. You will not face quality loss in videos, photos, and other content on burning DVD. It is compatible with MOV, FLV, MP4 and more.
7. Burn
Burn is an amazing DVD burner for Mac software which solves the purpose of burning DVDs and comes with advanced options too. It is considered as one of the best CD burner software for Mac as it burns audio-CD discs easily. All you need to do is drag and drop your audio files on Burns audio list. You can also change advanced settings such as file dates, file permissions and more. Moreover, you don’t have to worry about conversion, the software does that for you. You can also choose what quality and size of the content you want.
8. Disk Burner
One of the best CD burner software for Mac, Disk Burner makes it easy to store all your media and other content on CDs and DVDs. Moreover, it heeds attention to data security as well. The software is powerful and works fastly. To burn the disc, all you need to do is insert CD or DVD, select the folder and choose “Burn CD or DVD”
See Also: Best Free CD Recovery Software For Mac
9. Simply Burns
Simply Burns is one of the best DVD burning software for Mac which has a simpler interface. Simply Burns is an open source software. The software allows you to burn videos and photos to DVDs. 1:1 Copy mode helps to get the exact copy of the content. The Rip Disc mode enables you to grab the tracks from an Audio CD.
10. iTunes
iTunes is a default software for Mac which helps to organize, play and buy media files. Additionally, the native app acts as a DVD burner for Mac as well. You can burn DVDs and store your music files, movies, and other content. To do so, you need to create a playlist and drag and add content to the playlist. Then control-click the playlist and choose Burn Playlist to disc to initiate the process.
So, these are some of the best DVD burning software for Mac. Try the one that matches your requirements and let us know what worked for you in the comments section below. You can also subscribe to our Newsletter for the latest tech updates
What Do You Think?
1 Responses
If you are looking for the Blu-ray disc burner that you can use on your Mac then you have definitely come at the right place. Though a large number of such software are available, but many of them have no compatibility with Mac. If you are a Mac user and are looking for an efficient Blu-ray burning software then you have come at the right place. Here, we are enlisting the best Blu-ray burners that you can rely on. What's more, we also recommended the best Blu-ray disc converter for Windows users.
Part 1. Top 6 Blu-ray Burning Software for Mac
Here we list top 6 Blu-ray disc burning software for Mac system, which allow you to convert videos to Blu-ray disc easily and clearly, so that you can play them on TV or other playable devices.
Blu-ray creator is the perfect software that you can use to burn any video or audio files to Blu-ray discs on your Mac. The user-friendly interface of this software is much easy to use that even the new users will be able to use it without any problem. It is not only the Blu-ray burning that this software supports, but it also enables you to edit the video before burning them to CD. You can add title, watermarks and special effects to the videos before burning them. It is available for $39.99.
Features:
Is able to convert all the major video formats.
Supports a great range of Blu-ray output formats which include BD-RE, BD-50, BD-25, BD-R and more.
Along with burning the videos to Blu-ray disc, it also saves their copy to the hard drive.
Fast and quality burning.
The entire conversion process occurs in transparency, you will be able to see the real statistics.
Enable you to burn the video to Blu-ray disc or save them into a Blu-ray folder.
Looking for an easy way to burn videos to Blu-ray? Then you must go for choosing the Express Burn. With a good support to all the video formats, BD formats and a simple conversion procedure, Express Burn enables you to burn whichever format and video you want to burn. The simple Blu-ray burning process enables you to burn the videos at fast speed, ensuring good quality at same time. It is available for $49.99.
Features:
Express Burn supports all the well-known video formats.
You can choose among the standard or wide screen formats.
Provides you the option to edit videos before you burn them to Blu-ray disc.
Simple but decent interface that you will love to use.
Blu-ray disc burning without affecting the quality of the video.
Though Roxio Toast was there to meet all your video conversion related needs, but the Blu-ray burning has only been enabled in Roxio Toast 14 Pro. Like above given software, the process of Blu-ray burning is also simple with this software. You just need to load the videos, select various customization options and click on the burn button. You will be thinking that how this software is better than others, so, let us tell you some features of this software. Roxio Toast 14 Pro will cost you $150.
Features:
Easy to use interface.
A large of options for selecting output formats.
Can burn almost all the video formats to Blu-ray disc efficiently.
Fast and quick burning which is not affected by the size.
It provides you a large number of editing options for your videos.
It is best for all- new as well as experienced users.
It is one of the best Blu-ray burning software that allows you to burn the videos directly to the Blu-ray disc or save them in your PC as Blu-ray folder. It lets you customize the video and preview it before burning to the Blue-ray disc. Here are some of its features.
Features:
Clear and concise user interface that enhances the user experience.
High speed Blu-ray burning.
Full quality retention.
Undoubtedly, supports all the major audio and video formats.
Multi-language support
It is a powerful application that enables you to burn different video formats to Blu-ray disc. Along with creating the Blu-ray copy of the video files, it also enables you to do the basic editing and customizing various output options before clicking on the “burn”. Its user-friendly interface lets the users to create the Blu-ray copies of the videos.
Features:
Different tools and configurations are available.
Fast processing
Easy to use interface.
Provide support for various video and audio formats.
If you are looking for a program with high performance and flexible burning then Blu-ray creator for Mac is the best option. The built-in editing tools feature a highly intuitive interface for video creation and Blu-ray burning. Its customization options let you have plenty of control on the videos to be burned. It is available at $39. 95.
Features:
Support all video formats for Blu-ray creation
Customize menu
Easy software operating mode for BD creation
Fast conversions without affecting the quality of video
Interface with multilingual support
Part 2. Recommended Easy-to-use Blu-ray Burner for Windows Users
However, if you are a Windows user and are looking for the Blu-ray burning software, then we would like to recommend you Wondershare DVD creator. It allows you to burn the videos and image files in any format to the Blu-ray disc. With a lot of customization options, it allows you to edit the videos to required format and customize DVD menu with different parameters before burning them to the Blu-ray disc. Here are some features of this burning software:
Wondershare DVD Creator
Burn videos or photos in any format to Blu-ray/BDMV/DVD/ISO file.
Additional tools like burning Data Disc, ISO to DVD, creating photo slideshow, editing videos, copying DVD, converting DVD to video, one-click to burning DVD/Blu-ray disc, etc.
Built-in video editor with functions of Trim, Crop, Rotate, Subtitle, Watermark, Effects, and others.
Create Blu-ray disc menu with 100+ DVD menu templates and customization such as changing background picture/music, adding text, editing thumbnail, etc.
Burn videos to Blu-ray disc with real-time preview, super fast burning speed, and high-quality output.
Supported OS: Mac OS X 10.14, 10.13, 10.12, 10.11, 10.10, 10.9, 10.8, 10.7, 10.6, Windows 10/8/7/XP/Vista.
Security Verified.5,150,814people have downloaded it.
Video Tutorial of How to Burn Videos to Blu-ray Disc with Recommended Blu-ray Burning Software for Windows
How to Burn Video to Blu-ray Disc on Windows with Wondershare DVD Creator
The Best Blu Ray Burning Software For Mac Free Software
Step 1 Choose Blu-ray Disc Type
Download, install and open Wondershare Blu-ray creator on your PC, then choose Create a Blu-ray(BDMV) Disc option to begin with.
Step 2 Add and Edit Video to Blu-ray Disc
To add files to the program, click the ' + ' icon on the interface and you can browse and add videos or photos present on your PC. Simply drag and drop to import files is also supported.
You can see all added files on the letf pane as thumbnail. Click the pencil-like icon on the thumbnail to open the Video Editor window, and you can edit videos here by cropping, trimming, rotating, applying effects, adding watermarks, and others. Feel free to skip this step if you want to keep your video original.
The Best Blu Ray Burning Software For Mac Free 2017
Step 3 Choose Menu Template and Make Customization
Click the Menu tab and you can see 100+ free templates for your Blu-ray disc menu on the right panel. Choose one you like and double-click to apply. Hit the icons upon the active window and you'll be allowed to make further customization such as changing background images, adding music, adjusting aspect ratio, etc.
The Best Blu Ray Burning Software For Mac Free Download
Step 4 Preview and Burn Blu-ray Disc
You're allowed to check your creation under the Preview tab, go back and make changes if something dissatisfied you. Next, move to the Burn tab and choose Burn to disc option, select Burning Settings like Disc Label, Burner, TV Standard and others. Finally, click the Burn button to start converting videos to Blu-ray disc on Windows quickly and easily.
With Wondershare DVD Creator, you can also burn videos and photos to DVD on Mac system with the same high-quality output of Blu-ray disc.
The Best Blu Ray Burning Software For Mac Free Full
0 Comment(s)
0 notes
Text
Resize Images For Mac

How Do I Resize Photos For Mac
Mac Image Resize Tool
Mac Image Resizer Download
Resize Images For Mac
Resize Images For Email
Resize Images For Macbook
Most of the digital cameras these days are designed to offer very high picture resolution. They produce crystal clear images but the image size also goes as high as up to tens of megabytes. It is not possible to share such heavy images on other devices. You may also waste lots of bandwidth and time to upload these photos to online libraries.
The best idea to deal with this heavy image size trouble is to find ways to lower down the image resolution. You can do it easily by simply converting them to other size efficient formats before uploading or emailing them. The great news is that you can even reduce a 10MB file to a 1MB file without facing a noticeable loss of quality. In order to do this, you have to use right tools to initiate conversion so that images can be easily restored in another file format. There are so many apps that can offer you the ability to resize multiple images at a time as well; so they can help you to save much of your time. Below we have highlighted 15 most popular freeware tools that can help you to reduce the size of images on Windows, Mac OS, and Linux platform.
All these tasks are easily accomplished using Preview, Mac’s default application for viewing images. Use Mac’s Preview App to Resize Images. Open the image in Preview, and open up the Markup Toolbar by clicking the toolbox icon from the main toolbar. Next, click the resize icon. Images can take up a lot of space on a site, both visually and physically. If they haven’t been optimized or sized appropriately they’ll slow the site down, making for an unpleasant experience and potentially losing you money. Pichi can optimize and resize your images.
Enables you to apply more than 200 effects to your photos to make them better.
Crop or cut pictures to the size to meet any of your need.
Help you to remove any unwanted objects from your photos.
Allow you to use the Creative Blur to refocus your photos in a click.
Top 15 Batch Image Resizers for Window/Mac/Linux:
1. Irfanview:
Free
Supported Formats: BMP, JPG, GIF, TIFF, MP3, MOV, AVI, and many more.
Supported Systems: Windows.
IrfanView is an excellent image editor with lots of impressive features. It allows users to edit, rename, resize, convert and adjust several images together.
In order to resize your batch files, simply go to the file, choose “Batch Conversion/Rename”, drag images from top part of the window to the input area. Choose batch actions and hit the start batch option to initiate selected editing task. It can also be used for fine-tuning of image colors, but the only drawback is that the interface is not much user-friendly.
2. PhotoMagician:
Free
Supported Formats: PNG, JPG, and
Supported System: Windows.
This simple and basic editing tool has few valuable features to offer. Although it is commonly used for image resizing, users can also add various effects to their images using this tool and files can also be converted to other formats with ease.
To resize your multiple images using PhotoMagician, simply add all photos to the input folder and then specify the output folder for saving processed images. Do desired basic settings and then hit Process Image buttons. There is no help available for this software tool so beginners may find it little difficult to use.
3. Phatch:
Free open source tool.
Supported Formats: BMP, JPG, PNG, TIF and many more.
Supported Systems: Windows, Mac OS X, and
This user-friendly software tool handles all popular media file formats with ease and the most awesome thing to know about this tool is its ability to duplicate folder hierarchies. Phatch can be used to rotate, resize, apply perspective, shadows and rounded corners to images.
The official website of Phatch is loaded with lots of documents that offer easy to understand instructions about all activities that can be performed on this software. Beginners may find this data quite useful to learn the advanced features of Phatch. While doing batch processing, users simply need to select files to be processed, then enter editing specifications manually and finally hit the save button.
4. XnConvert:
Freeware
Supported Formats: JPEG, Raw, SVG and 500 more.
Supported Systems: Window/ Linux/ Mac OS.
There are lots of amazing things to do on this awesome image editing platform. You can choose metadata editing feature, choose transforms like resize, crop and rotate etc options. XnConvert also allows users to do fine adjustments for images by adjusting saturation, contrast and brightness levels. You can also enhance the appearance of images by using advanced filters and effects. The best thing to know about this user-friendly editor is that it is currently available in more than 20 languages so anyone can access it with ease.
To process your batch files, add them to the input tab and then choose required actions from the action tab. Set the output file details at output tab and then initiate changes. It will be soon highlighted in the preview window that you can save with ease.
5. BIMP:
Free
Supported Formats: GIF, PNG, JPG, TIFF, BMP, and many more.
Supported Systems: Windows.
BIMP is little-complicated choice for your image resizing needs. Although it is a feature-rich batch editor, the installation process is quite annoying. This software does not come alone, rather it installed two additional programs to the system. Don’t hit next, next buttons blindly, prefer to read all instructions to keep your device secure. This tool can be used to convert files, add customized watermarks, resize, convert and rename images.
Users can simply choose the batch images and upload them quickly to the application for editing. Choose desired action to be performed and initiate the changes. You can define image dimensions manually to create customized photos. This lightweight software takes very less time to process various batches of media files.
6. FastStone:
Free
Supported Formats: JPEG 2000, TIFF, PNG, BMP and JPEG.
Supported Systems: Windows.
FastStone is a popularly used image resize that allows users to edit individual images as well as can process batch collections. This tool can help you to convert file formats of various media inputs and can also be used to rename batch files.
With this simple tool, you can easily convert batch files to another file format with few clicks of the mouse. Simply choose your images and then go to the advanced options on the screen. From the wide range of features, chose desired effects like color adjustments, rotation, resizing and many more. If you want to use same options again and again, they can also be saved to a file for immediate access for upcoming conversions. Finally hit save button to get your output. The same procedure is followed for Batch Rename mode as well. The only disadvantage is that users cannot use the batch rename and batch convert feature at the same time.
7. PIXresizer:
Free
Supported Formats: TIFF, PNG, BMP, GIF, and
Supported Systems: Windows.
There are wide ranges of image resizing methods that can be used in Pixresizer. This software can also perform automatic recognition task to get the best file size. Many experts prefer to use this software tool to resize, rotate, convert images in batch collections. The great news for users is that it allows them to save the EXIF information for future needs. With all such impressive features, PIXresizer becomes the best choice for digital photographers and webmasters as well.
It follows a simple four-step workflow that can be easily understood by beginners as well. In order to make the processing much easier, you can use apply recommended settings option simply. However, the smart ratio calculation feature allows users to adjust image properties to get professional results. Many users also prefer to use this tool for creating thumbnails.
8. Resize2Mail:
Free
Supported Formats: GIF and JPEG only.
Supported Systems: Windows.
This image editing tool is commonly used by digital camera owners, travelers, webmasters and all those individuals who need an immediate solution to image resizing needs. It is best choice to resize images and send them to your near and dear ones via emails.
The three-step image conversion process can be easily converted by simply selecting the image that is required to be processed. To do this you can use the browse option and then choose the preferred size of the output image; finally, hit the Okay button at the bottom portion and your file will be soon converted online. This image editor tool supports only two file formats and there are limited features as compared to other tools available in the market.
9. Fotosizer:
Free and Pro version available.
Supported Formats: TIF, GIF, PNG, JPG, BMP etc.
Supported Systems: Windows.
This image editor tool is popular among professionals due to its interesting resizing and conversion related features. There are numbers of customized resizing options along with several useful presets that anyone can access with ease. Users can also keep XMP tags and JPEG Exif on this tool. Fotosizer is currently available in several languages and is commonly accessed at different corners of the world.
The editing system is quite advanced where users can easily select numbers of output formats to convert files. The 10 mask patterns and 6 preset can be combined to achieve best details. The batch conversion process is quite easier, you can choose your images, select resize settings from available presets or customize them by directly entering width and height in %; ultimately hit the processing button to initiate desired changes.
10.FixPicture:
How Do I Resize Photos For Mac
Free
Supported Formats: PDF, ICNS, ICO, TGA, BMP, GIF, PNG, TIFF, and JPEG etc.
Supported Systems: Online Editing App.
This free online editing tool is more popular among digital camera owners. It can handle maximum file size of 3MB and extends support to more than 400 file formats for easy conversion. This online editor offers the fastest way to convert images into another preferred format, it can also rotate, crop and resize them with ease. FixPicture also allows users to edit images with additional effects like normalize, emboss, sharpen, blur and grayscale.
In order to process your files, you can browse them easily from your PC and then select output format. The quality of the output image can also be rated as good, better or best with variable output file size. Make desired selections and then hit the convert option. This too may take time to process heavier images and the speed also depends upon the speed of your internet connection.
11.FILEminimizer Pictures:
Free
Supported Formats: EMF,
Supported Systems: Windows.
You will be happy to hear that FileMinimizer Picture software tool has the ability to reduce the size of your JPEG images from 5MB to 0.1MB with ease. It means you can achieve conversion up to 98% using this tool. This batch processing software assists in compression of whole galleries and photo albums at once. Users can easily select compression level out of 4 available options to get the best outcome. The easy to access drag and drop features make this tool more useful for editors.
You can add multiple images to the conversion list at once and then choose desired features for optimized files; adjust all settings and finally hit the optimize file option to initiate action.
12.High-Quality Photo Resizer:
Free
Supported Formats: BMP, JPG, TIFF, PNG, and many more.
Supported Systems: Windows.
This easy to access batch processing system offers easy editing services to professional editors as well as beginners. You can easily select your editing requirements to process heavy images.
The conversion process is quite easier. All that you need to do is choose input file images, then select desired width and height to get the customized image, Choose output file format and hit Update and Resize option. Users can also apply additional effects such as color effect, flipping action and rotation as per need. It needs around 4MB installation space on your disk.
13.ImageConverter.EXE:
Free
Supported Formats: BMP, PSD, MAT, GIF, MPC, JPG and many more.
Supported Systems: Windows
Image Converter.EXE is known as a flexible and fast image processing system that follows efficient conversion program while extending support to 55 output formats and 110 input formats. There are 40 different effects for easy selection and they can also be applied to batch mode. The easy to use step by step interface of this converter appears easy to use for beginners as well.
The batch support of this advanced software tool can process thousands of images at once. You can select all your desired files and load them to system window. Choose desired effects and conversion formats and allow conversion.
14.ImageBatch:
Free
Supported Formats: BMP, GIF, PNG, and JPEG etc.
Supported Systems: Windows.
Mac Image Resize Tool
This lightweight file converter is commonly used for batch processing of various images based on EasyBMP and LibGD libraries. It can assist users to initiate direct conversion between various file formats without waiting so long. Image batch can also help you to rotate, clip, crop and resize images; the unique thing is its ability to add watermarks as well.
There is no need to install this tool on your window PC; it can work efficiently without installation. You can choose your files now, do basic settings for output file format and execute a process to get converted file.
15.Plastiliq Image Resizer:
Free
Supported Formats: JPEG, BMP PNG, JPG, and TIFF etc.
Supported Systems: Windows.
This system is quite easier to access with its simple drag and drop features that can be used by beginners with ease. You can find this software online with well designed and easy to understand user guide. There is multiple images resizing options with easy adjustments of desktop, fit, percentage, height, width etc.
There are so many amazing things to do on this platform. Users can simply select their multiple input files, add desired output specifications, provide destination storage address and hit the convert option.
Mac Image Resizer Download
Special Note:After you tried these batch image resizers, I believe there are many beautiful photos at your hand . Under this situation, if you want to futher do somethig for your these bath photos, then you could try a newly relaeased product Fotophire Slideshow Maker . This program could turn your photos into amazing slideshow in seconds. with 3 simple steps , you could enjoy the animated slideshow with music or other effects ! Come on, just come to try it's free trial !
Personalize your slideshow with more than 180 templates
Add 75 built-in tracks or choose music from your local computer to your slideshow
Save or share your slideshow to social network in one click
3 super easy steps to make a slideshow with photos or videos
Resize Images For Mac
Conclusion

Resize Images For Email
With all these amazing tools, photo resizing and conversion task become quite easier. You can choose any of the available software for your system and start experimenting right now. However, if you need an advanced solution for your editing needs, you can go for Fotophire. This software tool can also process batch images but at the same time, it offers many other interesting editing abilities as well.
Resize Images For Macbook
Hot Articles
0 notes
Text
How To Offer A Free Graphic Design Services And Still Make A Healthy Living
As a graphic designer of some 20+ years, it's fair to say the industry has changed quite drastically within the space of just a few years. Long gone are the days of extended liquid lunch meetings with clients and seeing marketing budgets that would extend to photo-shoots in some far-off exotic destination. These days small businesses and start-up companies are living hand-to-mouth and aren't going to pay through the nose for a graphic design services, which they perceive, rightly or wrongly, isn't going to give them value for money.
So what's to be done? The graphic designer needs to make some money to live off of and expand their business while the client wants to pay as little as possible on marketing to enable them to succeed. The answer lies in the old adage 'giving the customer what they want' in this case - a quality graphic design service for free. Here we offer a few simple ideas you can implement without too much trouble and get genuine business flowing through to you in next to no time.
Free Design Consultation
This almost goes without saying but there are still some graphic design services who think charging prospective new clients to come and visit their premises to discuss a possible upcoming design project, is acceptable. Of course, there are many more designers who wouldn't dream of charging for what is very often an informal discussion between two parties with no obligation on either part. However, even if it's a meeting that lasts half an hour or less, this is still taking a bite out of your working day/hourly design rate. So if you're not going to charge the would be client for your time and advice, make sure you at least let them know it and publicize the fact on your website or marketing leaflets that you offer a complimentary, no obligation, initial design consultation. It will set the client at ease who might otherwise be thinking the longer the meeting goes on the bigger the bill they'll be getting in the post. Throw in a cup of coffee and biscuit and bobs your uncle - how can they refuse to go with you?
Free Graphic Design Offer
Now, this may go against many designers instincts, devaluing the graphic design services across the board, however, if you look at the bigger picture, it starts to make perfect sense. In much the same way as a retail store will entice shoppers in with a loss leader item in the shop window at a throwaway price, the canny graphic designer can also offer a free/low cost design offer to try and land the bigger job round the corner. For example, if you've just designed a spanking new logo for a business, the hard work and time spent tweaking and refining it has been done so why not offer a free stationery set design as part of the logo design package? It's not going to stretch the designer much more in terms of time to knock up a letterhead, compliment slip and business card and you can always offer to print them if you offer a design and print service which you will then be able to recoup coast wise for the small additional time you've spent.
Another quality design service which always goes down well is to offer any brochure design customers a free digital page flipping version of the brochure. There are a quite a few online companies these days such as YUDU that will take your designed pdf brochures or newsletters and convert them quickly into lovely dynamic e-brochures that can be embedded to websites or emailed as links. Offer this as an additional free service to your clients and more often than not it will be this part of the service they're most interested in, forgetting any effort that goes into the actual brochure designing.
Free Royalty Free Images
Any designer worth their salt will have accrued over time a veritable arsenal of vector graphics, extra large format photos and interesting background textures that can be invaluable when laying out marketing brochures, leaflets and newsletters. These days it's fairly easy for anyone to go online and pull off some thumbnails pictures to illustrate any document. However, once you explain to your customers that printing one of their tiny website gifs at full page resolution is going to result in a blurry/palpitated abomination, then hopefully they'll see the valuable service you can provide by offering a free selection of royalty free images from your own unique collection. Particularly if it means saving them shelling out to buy large format images from some of the online image libraries, which don't always come cheap.
Free Dummy Brochure Design
For any substantial brochure design or regular newsletter graphic design services job on the horizon, there's no better way of proving your worth to a potential client than by offering to put together a sample spread or page, free of charge, stressing that there's no obligation on their part to take things further if they're not happy. Yes, every now and again you'll find yourself working for a would be customer only to find them going cold on you once the dummy design has been submitted for them to see. More often than not though, if you are confident of your design abilities, you'll find that clients having gone some way down the road with you and built up some rapport will usually be keen to take things through to fruition, meaning that couple of hours spent dumping up a page, pays off big-time in the long run. Plus if you secure your pdfs with a password or watermark protection you can ensure that they can't be used without your permission if nothing comes from it.
0 notes
Link
GIMP is the best free and open-source alternative to Adobe Photoshop. Even though it is not as powerful as Photoshop, it is a great tool for photographers if they have the right plugins and tools. We have mentioned the best 23 Plugins for GIMP so that you can make the best use of the software.
How to Install GIMP Plugins?
Most of the plugins can be automatically downloaded by opening the folder and double-clicking on the installer. But, few of them are either python(.py) or script-fu(.scm) type. So you have to download them manually. Follow the steps below:
Unzip the plugin’s zip file.
If your plugin is in a .py format, move it into the GIMP Plug-Ins’ folder. The path will be something like – “C:\Program Files\GIMP 2\share\gimp\2.0\plug-ins”.
If your plugin is in a .scm format, move it into the Scripts’ folder. The path will be something like – “C:\Program Files\GIMP 2\share\gimp\2.0\scripts”.
Finally, restart GIMP.
1. BIMP (Batch Image Manipulation Plugin)
This plugin helps you crop, resize, rename, rotate and watermark as many images as you want. BIMP saves a lot of time and does its job quite well. It lets you preview changes in the plugin window. It can be installed very easily using the installer. Overall, it’s a must-have a GIMP plugin.
Download
2. G’MIC (GREYC’s Magic Image Computing)
G’MIC has the ultimate range of filters that you can apply and enhance your photos. It has more than 500 filters and effects to make your photos look fantastic. Other than filters, the plugin allows noise reduction, red-eye removal and other repairing jobs. In most of the cases, the default settings are found to be enough but you can even customize it as you want.
Download
3. FX Foundry
FX Foundry has a wide collection of effects and scripts to customize your photos. After installation, it has its own menu in GIMP and makes the features more accessible. Every effect comes with its own dialog where you can tweak the settings before making any changes to your images. It's the best GIMP plugins to use for image editing.
Download
4. Layer via Copy/Cut
Professional image editing always done in layers. This GIMP plugin allows you to play with layers just like Photoshop. This plugin allows you to make different layers for applying multiple changes or to group them. It makes copy, cut & moving layers very simple and easy.
Download
5. Contrast Fix
Sometimes photos only require a little bit of contrast adjustment to be the best version of itself. And, Contrast Fix makes it easy to use and apply. Install the plugin, adjust the lighting using the slider and that’s it. It’s one of the most used GIMP plugins out there.
Download
6. Resynthesizer
This plugin is similar to content-aware fill in Photoshop. Resynthesizer is used to remove unwanted object from images, better texture control, repeating textures, transfer texture from one image to another, image healing, etc. If you are into professional photo editing, this GIMP plugin can give your works a new touch.
Download
7. UFRaw
UFRaw GIMP plugin is very useful for professional photographers. This plugin makes editing RAW images possible in GIMP. You can use different image corrections like exposure control, colour adjustment, temperature setting, etc. You can edit photos in bulk, by using its Batch Workflow mode to edit multiple photos at once.
Download
8. Refocus
Correcting blurred images is now easier for GIMP users, thanks to this plugin. Refocus attempts to correct the blurred image by enabling you to adjust certain parameters.
Download
9. Wavelet Decompose
Low light and incorrect camera settings usually result in a noisy image. Wavelet Decompose helps you in removing these noises using simple sliders and the plugin makes your photos look sharp and shining. The plugin uses some advanced form of frequency separations and divides the image into multiple layers. This way you have more control over each and every detail and so you can decide whether you want to keep them or not.
Download
10. DarkTable
Dark Table is an amazing plugin for professional editors, it will enable you to edit RAW images easily. It has a very useful set of tools and a user-friendly interface. Unlike, other RAW image editors, you don’t have to spend too much time to learn it. Just add it to GIMP and you’re good to go.
Download
11. GPS (GIMP Paint Studio)
GIMP Paint Studio (GPS) offers more brushes, gradients, patterns, palettes, splashes, tools, presets, etc. The goal of GPS is to provide an adequate working environment for graphic designers and artists.
Download
12. Draw Arrow
Adding arrows to images is one of the most common things in image editing. But if your hands are not steady, you will face a lot of trouble. Draw Arrow is one of the most useful GIMP plugins that makes drawing arrows quite simple and easy for everyone.
Download
13. Scripts Bundle
If you start searching scripts for GIMP, you will find several scripts for each of your tasks. But not everyone is so free to do this thing again and again. This offers a collection of 100+ scripts that GIMP users often use like for image repairing, for image sharpening, for sketching, for effects, etc.
Download
14. Hugin
Hugin is a great tool for merging multiple images and creating Panorama. You just need to select images, specify a few common points and that’s it. Hugin will automatically create a beautiful Panorama for you. This tool fixes excessive exposure and angle issues while creating Panoramas. It’s available for Windows, Linux and Mac and works as a standalone application.
Download
15. Watermark
Watermark is necessary nowadays. People always want to use your graphics without giving you any credit. This plugin allows you to add text watermarks easily. You can also use the second plugin in case you want to add an Image Watermark.
Download Text Watermark Plugin
Download Image Watermark Plugin
16. Quick Sketch
Quick sketch tool transforms your Image into a sketch-like image. This GIMP plugin applies sketch effects on your images easily. You just need to adjust the blur using the slider and you are done.
Download
17. Liquid Rescale
There are two types of Image Compression – Lossless and Lossy. Liquid Rescale is an effective plugin that lets you resize images without losing any image quality. There are many image editors out there which are based on Lossy image compression. They just know – how to make a 1MB size image to 50KB, Liquid Rescale is almost similar to Photoshop’s Content-Aware Scaling. After installing, you will find it in the Layers menu.
Download
18. Stitch Panorama
There are many popular online and offline tools to make panoramic images, but if you are a GIMP user, this plugin is the best. Unlike other Panorama plugins, it comes with all the essential features that are required to make a beautiful Panora ma image. You can merge multiple images, correct colours, blend and even perform distortion seamlessly.
Download
19. Lens Fun
Lens distortions are very common in photography and there Lens fun comes in. It allows you to fix lens distortion easily and also provide useful options like Chromatic Aberration, Vignette and Scale to fit.
Download
20. Elsamuko’s Filters
Filters make photos look vivid and more professional. This tool is a must for a professional photographer or a normal GIMP user, you can use these filters for several photos. GIMP is a cross-platform image editing tool and so there are many filter sets available for it.
Download
21. Save For Web
Save For Web is one of the most popular and useful GIMP plugins. After installation, you will find it under File Menu. Just select the settings and it will scale, crop or compress images before uploading them to your website. If you are a blogger, a web designer, a graphics designer or anyone who prepare images, this GIMP plugin is definitely for you.
Download
22. GAP (GIMP Animation Package)
GIMP Animation Package or GAP is very useful for producing simple Animations. For a Linux system, install GAP through symantic or you can even compile it by yourself. Windows users can install it using the installer. Once installed, you can access its features under the Video menu. Iyt has over 100 scripts that you can use to create amazing animations.
Download
23. Beautify
Beautify is a must-have GIMP Plugin that you can install and add beautiful filters to your photos. It’s lightweight and has a simple interface. You just need to load your photo and start trying filters. It also comes with a preview window and brightness, contrast, saturation sliders.
Download
Read More:
GIMP Vs Photoshop: An In-depth Comparison
Snapseed Vs PicsArt – Which One to Choose?
Adobe Photoshop Camera is the New Goto Filter App for Android and iOS[Download Apk]
via TechLatest
0 notes
Text
Keep your photos from getting stolen on the internet
You went all the way up there to take that photo—no way you should let somebody else make money off of it. (Blake Cheek Unsplash/)
If you post your photos online, there’s a good chance someone will eventually steal them. I’ve had my photos stolen to be used on websites and even to catfish people on online dating apps—and it can happen to you.
You should know that any photo you take is, theoretically, protected by copyright. That means there are some things you can do to both prevent someone from stealing your work, and enforce this protection in case theft happens to you.
Copyright 101
Copyright arises automatically whenever you make an original creative work (by taking a photo, for example). But, at least in the U.S., copyright is “essentially toothless” if you don’t also register the work with the U.S. Copyright Office, according to Coco Soodek, a lawyer at Seasongood Law, Inc. Because this is not a simple process and costs between $35 and $55 per application, a lot of photographers don’t do it—especially amateurs.
Let’s imagine you find someone has stolen one of your photos and reposted it on their website without your permission. If you have your work registered with the Copyright Office, you can sue them for statutory damages in federal court. This could mean compensation from $750 to $30,000 per work—and up to $150,000 if the copyright infringement was intentional—as well as reimbursement of your legal costs. If your work isn’t registered, you’re limited to suing for the actual damage caused by the infringement (like loss of earnings). But here’s the catch: you have to win the case.
“All litigation is expensive, cumbersome, and unpredictable,” Soodek says. If you’ve registered the work and think you can show intentional infringement, it may be worth going to court. But if whoever you’re suing could mount a credible defense or won’t be able to afford to pay you a large fine and reimburse your attorneys’ fees, litigation is a risky option. At minimum, a copyright infringement case costs $20,000, according to Soodek.
And things can get even more complicated if the person or company who infringed your copyright is outside the U.S. While there are international treaties that protect copyright across borders, trying to enforce them is murky, expensive, and difficult. Suing somebody in a foreign country involves hiring a local lawyer, litigating the suit, and enforcing the judgement—all expensive and mysterious processes.
And there’s a reason Soodek keeps mentioning the expense: Lawyers are expensive, fighting a court case is expensive, and, unless your copyright has been blatantly and willfully infringed in a way that has cost you a huge amount of money, even if you win—and that’s a big “if”—it might not be worth it.
Instead of relying on the judicial system for copyright enforcement, photographers are generally better off taking proactive steps to protect their work and limit possible damage if it does occur.
Register your work
Yes, that's a pretty photo of a rose, but that might not be enough to register it as creative work. And yes, that sucks. (Antonio Scarpi via Deposit Photos /)
The easiest way to register your work with the U.S. Copyright Office is through their website. You can register up to 750 unpublished or published photos in a single application for $35. You’ll need to upload a digital file of each photo you’re copyrighting—technically called a deposit—as well as a list of their titles and when they were published (if they were published). Online applications are processed in an average of three months, though it can take as long as 16 months, the Copyright Office says.
Be warned, though: The Copyright Office stresses that “although most photographs are protected by copyright, the Office will not register photographs that lack a sufficient amount of creative expression.”
“If you aren't bringing something of your own, some artistic direction to the image, it isn't an original work of authorship,” Soodek says.
By this standard, you can take a picture of a rose and it could be good, but the likelihood that your photo is copyrightable will still be low. There’s an appeal process you can go through if the office decides your photograph is not original enough, but ultimately, they have the last word.
For the best protection, Soodek recommends you register your images within three weeks of publication—which includes posting them on your website or social media accounts. You can also register them before you publish them anywhere. If you don’t register them within this timeframe or before any infringement, your legal options will be limited.
While Soodek recommends registering images as the “bare minimum” that a photographer should do, it may not be worth the trouble if you’re an amateur and won’t be making use of the increased protections. If you’re still concerned about your work being used by other people, consider submitting a single application at the end of the year with all your best photos. Other than that, it may not be worth the time and financial cost if you only post your images on Instagram.
Embed your copyright metadata
By default, your camera embeds a lot of information into every file. This metadata can also include your name and contact information. (JESHOOTS.COM via Unsplash/)
Another protection option is to embed copyright metadata in your photos before sharing them online. Almost all DSLR and mirrorless cameras will do it automatically as you shoot—you’ll just need to enter your name, contact details, and any other copyright information in the settings. You can also use Lightroom (in the Library Module), Photoshop (go to File and then File Info), or another image editor to add it afterward.
If someone steals your photo and you can show they deliberately removed an embedded copyright notice, you may be able to prove intentional infringement. Unfortunately, many websites, including Twitter and Instagram, remove metadata by default. Of the major social networks, only Facebook preserves the copyright information. Similarly, Google indexes photos without their metadata. Many web content management systems (CMS) remove it, too. For example, the CMS PopSci uses to build its stories removes copyright information from my photos.
So to be blunt, embedding your copyright information is a good idea, but not something you can rely on. Only 3 percent of images on the web have copyright data embedded—and that’s excluding images posted on social media.
Watermark your images
A watermark is significantly more effective than embedded copyright metadata because it is part of the actual image file—it can’t be removed without cropping or otherwise editing the photo.
The downside of watermarks is that they’re generally ugly—big ones can detract from the image as a whole, and small, subtle ones are easily cropped. Whether ruining your photos by using a watermark is worth the copyright protection is a big debate in the photography community.
If you want to watermark your images, you can add one in Photoshop, Lightroom, or any other image editing program. There are even mobile apps like eZy Watermark (iOS, Android) that will watermark your smartphone photos.
Don’t upload large files
If there is nothing there for someone to steal, it just can’t be stolen. Never sharing your photos isn’t really a viable solution, but you can be careful with the quality of images you upload to the internet. If someone is stealing your photo to print, put on a t-shirt, or use in an ad campaign, they will need a high-resolution file—and a 1200-pixel-wide, low-quality JPEG just won’t cut it.
If you’re sharing your images on social media, some sites shrink files for you. Facebook and Instagram both automatically compress and resize your photos, and although Facebook gives you the option to upload your images in higher quality, I’d suggest you ignore it.
The place where you need to be the most careful is actually your own website. It’s tempting to upload the full-resolution photo and let your CMS handle all the resizing. Unfortunately, this can leave the original file available for anyone to download with a bit of URL tweaking. When it comes to protecting your work, it’s better to resize your images yourself using your image editor of choice. If your website displays things at 1000 pixels wide, upload 1000-pixel-wide images.
While uploading lower-quality files won’t stop people from stealing them, it at leasts limits what they can do with them. Low-resolution photos will still work around the web—but at least someone won’t be able to turn them into products and sell them.
Look for infringements yourself
No, uh, that's not the best way to look for copyright infringement online, dude. (BrianAJackson via Depositphotos/)
Copyright infringement is a silent crime—unless you actively look for people stealing your photos, you’re unlikely to find them.
The simplest way to do this is with a dedicated service like Copytrack or Pixsy. Both work in much the same way: you upload your copyrighted images and they crawl the internet for people using them without your permission. If they find someone using a stolen image, you can send a takedown notice and even attempt to get compensation. If they’re successful, the service takes a cut.
If your photos are regularly being stolen, using Copytrack or Pixsy is a great option. They’re no win, no fee services (although Pixsy does charge for monthly plans) so there’s no real risk to you—and you certainly won’t be $20,000 out of pocket if it doesn’t work out.
Think twice (or three times) before suing
As Soodek stressed time and time again, suing is expensive—it should really only be a last resort. You’re far better off limiting your exposure to copyright theft by uploading low-resolution, watermarked images and using a service like Copytrack or Pixsy to monitor and send takedown notices.
And if you’re determined to go the legal route, talk to a lawyer about sending an invoice and a strongly worded letter threatening to sue first. “It can be surprisingly effective,” Soodek says.
from Popular Photography | RSS https://ift.tt/2TsFmMu
0 notes
Text
These 10 #Travel and #Tech Products are a must have for your Holidays 2018 Wish List! #CTATravel
Disclosure: This is an event recap. This post is NOT compensated.
I am woefully behind on Event Recaps thanks to a summer that brought a devastating fire on the Fourth of July due to someone sneaking up to the roof of my apartment building and throwing illegal fireworks, followed by a death in the family a week later, and culminating in me twisting BOTH my ankles and spraining my wrist a week after that!
To say it has been a "challenging' summer would be a complete understatement.
All the events I did get to attend before my world came crashing down were pretty amazing, and while it may take me awhile I promise I will get to each and every one of them.
I had the chance to attend the Techlicious/Consumer Technology Association/CES Lunch and Learn event at Quality Italian Restaurant in Midtown New York City.
I will start with the hot tech first and then lead into the great food!
These are the great products I was exposed to (these are NOT reviews, I got to see the products at the event, not road test them personally, so these are first impressions)
Since the nice reps from Roku were seated at my table, I will start with Roku first:
Roku Streaming Stick
I am totally getting sick of dealing with my Cable Company, and with features like Hotel and Dorm Connect the Roku Streaming Stick is perfect for both Travelers as well as College Kids hitting the dorm. Why pay the hotel a million bucks to rent a movie when you can just bring along your own streaming stick? Retail Price = $49.99 - these were in our gift bags but I didn't get a chance to test mine as it was lost in the fire, if Roku sends out a replacement I will definitely provide you guys with a full review.
The next brand has been at several events I regularly cover including The Luxury Review/The Luxury Tech Show and I haven't had a chance to take the demo or speak to the reps (in this instance it was my arrival time, at LTS my time at certain booths ran overtime during the Press Preview time period and once that event opened up to non-press it was just too crowded to get in there.) But I have wanted to take the demo and will have to make sure to do it next time I see HTC Vive.
HTC Vive
I love that Virtual Reality is being used by the travel/hospitality industry to help you tour a destination or a hotel room without ever leaving the comfort of your couch. Retail Price = $1,399 (definitely a splurge but Vive Pro definitely has one of the richest content libraries available on SteamVR and VIVEPORT.
Ashley Chloe Helix Cuff
You guys know I am called #TheOfficialTwitterPartyDJ via Twitter because I am a Twitter Party Hostess with the Mostest who LOVES Music and hasn't met the twitter party yet I couldn't find the right song for. I am always on the market for new audio and when I can combine my love of audio and tech with my love of fashion and accessories all the better! My Audio 'Form Meets Function' pick from the event is definitely The Ashley Chloe Helix Cuff. The world's first wearable wireless Bluetooth headphones with cVC noise reduction, AptX Technology, Smart Multipoint Connectivity and Bluetooth 4.1. Retail Price = $99.00 - $249.99 (The pricier one is the Helix 24K Gold Edition, love the exclusive color! I would have to listen to Bruno Mars 24K first on these!) Earbuds not getting twisted or destroyed in my cavernous handbag, PRICELESS!
myCharge Pride Limited Edition Power Bank
myCharge Pride Limited Edition Power Bank was donating 5% of Pride Month Power Bank Sales to The Trevor Project, and since later on this year I got to cross attending Ru Paul's Drag Con off my bucket list (full post to come) - this got me a thumbs up every time I pulled it out to keep my phone charged during the conference. This is a little bulkier than some of the Power Bank's I have used in the past, but love the on and off button, how fast it charges my devices and how long it holds its own charge. The plug for the wall flips out, and this charges itself AND the device simultaneously. This one definitely gets a thumbs up from me, and something like this can cross off nearly everyone on your list! Retails for $34.99
Hum by Verizon
With holiday travel at it's peak and everyone driving to visit family and friends, the Hum by Verizon certainly helps prove that 'those who wander are not lost'. With pinpoint roadside assistance, you can get the help you need by using the Hum App to request 24/7 roadside assistance, there is also a mechanics hotline, stolen vehicle assistance, maintenance reminders, you can check your safety score (this helps keeps insurance costs low), vehicle diagnostics and you can also turn your car into a Wi-Fi Hotspot allowing passengers to stream, surf and game on the road (eliminating the dreaded "Are We There Yet?" Questions, PRICELESS).
Sony WH-1000X M3 Wireless Headphones
The Sony WH-1000X M3 are pricey at $349.99, but these wireless, noise cancelling beauties offer five hours playback from a mere 10 minute charge, perfect for us frequent fliers who struggle to find an outlet or left our trusty powerbank behind. We were shown the M2's but the M3's are already out now. I need these in my life and am sad they were not in the gift bag!
Sony SP700N true wireless earphones
With extra bass and the Google Assistant built into these Sony SP700N true wireless earphones, you can make easy hands free at the click of a button, enjoy digital noise cancellation or ambient sound which lets you hear essential sounds. The compact carrying case not only keeps them secure, but holds an additional two full three hour charges, so you can power them on the go! These sound perfect for my morning commute, and I am bummed that these weren't in the gift bag either. These Retail for $149.99.
Sony RX100 Advanced Camera
Sony was showing their RX100 Advanced Camera with 1.0 Sensor, while it may be portable, the specs are definitely not 'lightweight'. It is a 20.2 MP, with a SteadyShot that reduces blur even in low light, HD video capabiity for beautiful video and full manual control for creative photography. It retails for $369.99. Not in the gift bag either, le sigh. I have had my eye on the Sony a7rIII which I played with last year during Fashion Week at Sony Square Space in NYC and then again at this year's Photo Plus Expo. I took a picture with it that served as a Best Buy contest entry during the Expo which is featured on my Instagram page here: https://www.instagram.com/p/BpbS1-TAXLt/ - I have to say I am bit more inclined to the A7RIII, but this has a $2,799 retail price tag making the RX100 a bit more holiday budget friendly. But as Photography is a huge part of my career, not just a hobby/passion, I am telling Santa I want the A7RIII (42.4 MP with 14-bit RAW output!) for Christmas! I really have been a very, very, very, good butterfly this year.
Speck Presidio for iPhone X
Speck Presidio for iPhone X offers 8 foot drop protection! While I am an Android girl and have never owned an iPhone, I have witnessed a ton of friends, family and colleagues drop their uber expensive phone and ended up walking around with a cracked screen - not cute. Why not make a small investment in protecting it instead? At $39.95 ($27.96 if you act fast to nab the extended Cyber Week deal) it gives you something absolutely PRICELESS - peace of mind!
Modobag - Motorized Luggage
See that image above? That is a grown man riding on Modobag - Motorized Luggage, it convinced me to give it a go:
Actually I watched TWO men ride this thing before I opted to get on it myself.
Zip through the airport terminals and never miss a flight, on a single charge the Modobag has the ability to travel up to 6+ miles based on a rider weight of 180 pounds, it has an indoor speed of 4 MPH, and outdoor speed of 7 MPH, three times a regular walking pace, and it goes to full charge in two hours. It also has two USB ports for individual or simultaneous charging. I totally want this for Christmas, as a Blogger this would be my portable office for press trips! I really want this! The Retail on Modobag is $1,495 - which considering designer luggage costs three times as much, and does not haul you around in addition to your stuff, this is actually a steal!
I also wanted to share some photos of our meal:
CTA Travel Tech Lunch Menu
Above: CTA Travel Tech Lunch Menu
Shrimp Cocktail Appetizer
Above: Shrimp Cocktail Appetizer (shared by our table, I swear I didn't all that!)
Baby Kale Tricolore Salad
Above: Baby Kale Tricolore Salad
Sausage and Pepper Garlic Toast
Above: Sausage and Pepper Garlic Toast
Mediterranean Branzino, Pesto Rosso with Qi Tuscan Fries
Above: Mediterranean Branzino, Pesto Rosso with Qi Tuscan Fries (you know I usually go for the seafood/fish dish!
Above: Sometimes I am not fast enough to nab a shot before hungry Editors tear into something, but I oddly like this shot all the more for having some pieces missing!
Chocolate Coffee Malt Cannoli with Pistachio Gelato
Above: Chocolate Coffee Malt Cannoli with Pistachio Gelato
QI Signature Lemon Meringue Tart
Above: QI Signature Lemon Meringue Tart
MY TAKE:
These items are perfect for anyone on your list, and are going to score major brownie points with travel lovers and tech enthusiasts of any age. Again these are impressions as I got to play with these products at the event. Should I get review units I will give those items their own day in the sun with full reviews.
My photos are watermarked, un-watermarked photos were used by media with permission.
This is the second year I have attended this event, (the food is always amazing) just in case you missed last year's which focused heavily on Photography and Photography tips for getting better shots, check it out here: https://www.ascendingbutterfly.com/2017/10/techlicious-ctatech-ctaphotonyc-lunch.html
This by far has been the second worse year of my life, second only to almost dying in 2011. It zapped every ounce of writing energy out of me. Not to mention left me without a computer until Black Friday Sales enabled me to get a laptop. I am just not one of those bloggers who can blog solely via phone. I do not have millenial thumbs and have no idea how they can get so much typing done on a mobile touch keypad.
I am slowly but surely trying to get myself ramped up again.
And am considering either a re-design or a complete re-branding.
I do have some overdue giveaways so check back often.
For those of you who have sent me personal emails checking in on me, Thank You!
I know our Inspirational Messages of the Day and Gratitude Sundays have been missed, and I will find a way to bring them back soon. Let's just say getting myself motivated has been difficult enough lately.
This event put some great products on my radar, I definitely wouldn't mind seeing any or all of these under my Christmas Tree or stuffed inside my stocking this year.
Readers: Which of these do you want most? Do you already have any of them?
·٠•●♥ Ƹ̵̡Ӝ̵̨̄Ʒ ♥●•●•٠·˙˙·٠•●♥ Ƹ̵̡Ӝ̵̨̄Ʒ ♥●•●•٠·˙˙·٠•●♥ Ƹ̵̡Ӝ̵̨̄Ʒ ♥●•●•٠·˙
FTC Disclosure: No monetary compensation has been received, and all opinions are 100% my own! I am disclosing this in accordance with the Federal Trade Commission 16 CFR, Part 255 - Guides Concerning the use of endorsements and testimonials in advertising, you may check our Giveaway and Disclosure Page for additional information regarding Ascending Butterfly Disclosure.
These 10 #Travel and #Tech Products are a must have for your Holidays 2018 Wish List! #CTATravel published first on https://vsguides.tumblr.com/
0 notes
Text
8 Successful Ways to Turn Trends into Blog Content
Earlier this month, I wrote about a few top trends in the pet industry that were on display at the Global Pet Expo. Knowing what’s popular and growing in the industry is a great start but converting those topics into engaging content is the real success.
To help give you a kick start, I’m sharing my eight foolproof ways to turn trending topics into quality content.
Product Round-Ups
Keeping an eye on trending products in your relevant industry is a great way to come up with new post ideas and topics to cover.
One easy way to share information about trending products is in a round-up. For these posts, you can start by gathering images and basic information about the products to display them in a visually appealing way.
I recommend creating an image of all the products that you can feature on Pinterest. Also, don’t be afraid to put your own twist on the descriptions to make your post more personable and relatable.
Since outdoor adventures with pets is a growing trend, one example might be to do a round-up of products to use for camping with your dogs. One of my favorite round-ups that I’ve done was one on outdoor dog products.
Round-ups are also an excellent opportunity to include affiliate links. Just make sure to disclose. Want to give your readers a bit more? See the next idea!
Product Comparisons
If you have experience with certain products and can share actual opinions and experiences, then you may want to consider the route of a product comparison over a round-up.
Product comparisons can be a bit more work because you have to provide more detailed information. However, because of that, it can end up being even more successful than round-ups long term. We all love that evergreen content, don’t we?
You’ll want to share high-level information for these posts, like the price, product name, where to get it as well as providing feedback on how the product worked for you. Was it successful? Did you have issues? At the end of your post, you may want to declare a winning product or rank all the ones that you tried out.
One of my favorite comparison posts was from You Did What With Your Weiner on Dog Subscription Boxes.
A top trend in the pet industry at the moment is calming products, so one example would be to compare the different products you’ve tried out with your pets.
Opinions on Current Events
There have been several controversial topics surrounding pets popping up in the news recently. As a pet lover, all it may take is a simple word like “airplane” to arouse some strong feelings in you. We all have opinions, and if you can eloquently express yours without being too emotional, then an opinion piece might be a great option for you.
Just be aware that anytime you choose to cover a controversial topic, you open yourself up to criticism and trolls. Don’t let that get you down. You have a strong voice and should be using it! No matter what, don’t waste your time arguing with someone who isn’t open to conversation.
Relevant Helpful Tips
If you don’t want to share your true opinion or get into a controversy war, you can still write about current events. This might actually be my favorite way to turn trends into topics.
Instead of directly tackling the controversy head on, you can discuss it by sharing tips to avoid it altogether.
However, you can also share helpful tips that don’t just have to do with controversial current events. Natural disasters, holidays and even trending products could inspire a post. You can share tips on how to prepare for a disaster, what holiday foods to avoid, or do a deep dive into information about a specific trending product.
Solve a Problem
There’s nothing more helpful than working to solve a problem. Sharing information and tips are great, but “How-To” content is the future. Plus, it does great on Pinterest!
A “How-To” post explicitly tells the reader how to solve a problem they are facing. You want to break down the process into easy to follow steps with photographs to support your words. The key here is simplicity. Anyone should be able to follow along with your instructions.
Pet food will always be a hot topic. Many pet bloggers were inspired to find better food alternatives for their pets thanks to some of the big pet food recalls in the past. If you relate, you can write a post about how to read pet food nutrition labels or how to translate pet food packaging.
Hashtag Exposure
There are tons of social media trends, and as a blogger or influencer, it’s pretty much your job to take advantage of social media trends that relate to you.
GIFs have been big for a while, so share ones that resonate with you or you can even make one of your pets!
Photos and hashtags also have trends, so it’s important to keep an eye on what is popular.
Twitter’s “trending” is a great place to start and you might as well jump on the bandwagon if there is something that connects to pets for some extra exposure.
DIY for Special Events
If happy trends are more your thing, then you might want to consider doing a timely DIY project for a special event.
Pick your event inspiration at least 2-3 months in advance, so that you can share your content before the event happens. I love picking fun holidays, like Star Wars Day.
Just let the inspiration take you away and remember to break down your post into simple, executable tasks with pictures for support.
There are also one-time events that you can take full advantage of like the Royal Wedding. Castle dog treats or a DIY costume for the watch party would have been perfect!
Create a Parody
I will never forget the first time I saw the Dog Ross video from Crusoe the Celebrity Dachshund. It was too good and so relevant to the internet’s obsession with Bob Ross.
Your dog might not be a celebrity painter, but you can definitely still stage a fun parody photo shoot or short video. Start small and don’t forget to watermark your work in case it does go viral!
What other ways do you turn trends into blog topics? Share in the comments below!
Jessica Shipman is a bargain hunter, food lover, and software engineer figuring out how to be a pet parent for the first time. She shares her journey with her two dogs Ralph and Luna on her blog Beagles & Bargains. After getting an Ivy League degree and hands-on experience on a corporate web development team, Jessica has decided to change things up. She launched jessicashipman.com to make web technology easy and more accessible to bloggers and small business owners. Stop by for free tips or to learn more about her web development consulting.
The post 8 Successful Ways to Turn Trends into Blog Content appeared first on BlogPaws.
8 Successful Ways to Turn Trends into Blog Content syndicated from https://thehuntingdogblog.wordpress.com/
0 notes
Text
8 Successful Ways to Turn Trends into Blog Content
Earlier this month, I wrote about a few top trends in the pet industry that were on display at the Global Pet Expo. Knowing what’s popular and growing in the industry is a great start but converting those topics into engaging content is the real success.
To help give you a kick start, I’m sharing my eight foolproof ways to turn trending topics into quality content.
Product Round-Ups
Keeping an eye on trending products in your relevant industry is a great way to come up with new post ideas and topics to cover.
One easy way to share information about trending products is in a round-up. For these posts, you can start by gathering images and basic information about the products to display them in a visually appealing way.
I recommend creating an image of all the products that you can feature on Pinterest. Also, don’t be afraid to put your own twist on the descriptions to make your post more personable and relatable.
Since outdoor adventures with pets is a growing trend, one example might be to do a round-up of products to use for camping with your dogs. One of my favorite round-ups that I’ve done was one on outdoor dog products.
Round-ups are also an excellent opportunity to include affiliate links. Just make sure to disclose. Want to give your readers a bit more? See the next idea!
Product Comparisons
If you have experience with certain products and can share actual opinions and experiences, then you may want to consider the route of a product comparison over a round-up.
Product comparisons can be a bit more work because you have to provide more detailed information. However, because of that, it can end up being even more successful than round-ups long term. We all love that evergreen content, don’t we?
You’ll want to share high-level information for these posts, like the price, product name, where to get it as well as providing feedback on how the product worked for you. Was it successful? Did you have issues? At the end of your post, you may want to declare a winning product or rank all the ones that you tried out.
One of my favorite comparison posts was from You Did What With Your Weiner on Dog Subscription Boxes.
A top trend in the pet industry at the moment is calming products, so one example would be to compare the different products you’ve tried out with your pets.
Opinions on Current Events
There have been several controversial topics surrounding pets popping up in the news recently. As a pet lover, all it may take is a simple word like “airplane” to arouse some strong feelings in you. We all have opinions, and if you can eloquently express yours without being too emotional, then an opinion piece might be a great option for you.
Just be aware that anytime you choose to cover a controversial topic, you open yourself up to criticism and trolls. Don’t let that get you down. You have a strong voice and should be using it! No matter what, don’t waste your time arguing with someone who isn’t open to conversation.
Relevant Helpful Tips
If you don’t want to share your true opinion or get into a controversy war, you can still write about current events. This might actually be my favorite way to turn trends into topics.
Instead of directly tackling the controversy head on, you can discuss it by sharing tips to avoid it altogether.
However, you can also share helpful tips that don’t just have to do with controversial current events. Natural disasters, holidays and even trending products could inspire a post. You can share tips on how to prepare for a disaster, what holiday foods to avoid, or do a deep dive into information about a specific trending product.
Solve a Problem
There’s nothing more helpful than working to solve a problem. Sharing information and tips are great, but “How-To” content is the future. Plus, it does great on Pinterest!
A “How-To” post explicitly tells the reader how to solve a problem they are facing. You want to break down the process into easy to follow steps with photographs to support your words. The key here is simplicity. Anyone should be able to follow along with your instructions.
Pet food will always be a hot topic. Many pet bloggers were inspired to find better food alternatives for their pets thanks to some of the big pet food recalls in the past. If you relate, you can write a post about how to read pet food nutrition labels or how to translate pet food packaging.
Hashtag Exposure
There are tons of social media trends, and as a blogger or influencer, it’s pretty much your job to take advantage of social media trends that relate to you.
GIFs have been big for a while, so share ones that resonate with you or you can even make one of your pets!
Photos and hashtags also have trends, so it’s important to keep an eye on what is popular.
Twitter’s “trending” is a great place to start and you might as well jump on the bandwagon if there is something that connects to pets for some extra exposure.
DIY for Special Events
If happy trends are more your thing, then you might want to consider doing a timely DIY project for a special event.
Pick your event inspiration at least 2-3 months in advance, so that you can share your content before the event happens. I love picking fun holidays, like Star Wars Day.
Just let the inspiration take you away and remember to break down your post into simple, executable tasks with pictures for support.
There are also one-time events that you can take full advantage of like the Royal Wedding. Castle dog treats or a DIY costume for the watch party would have been perfect!
Create a Parody
I will never forget the first time I saw the Dog Ross video from Crusoe the Celebrity Dachshund. It was too good and so relevant to the internet’s obsession with Bob Ross.
Your dog might not be a celebrity painter, but you can definitely still stage a fun parody photo shoot or short video. Start small and don’t forget to watermark your work in case it does go viral!
What other ways do you turn trends into blog topics? Share in the comments below!
Jessica Shipman is a bargain hunter, food lover, and software engineer figuring out how to be a pet parent for the first time. She shares her journey with her two dogs Ralph and Luna on her blog Beagles & Bargains. After getting an Ivy League degree and hands-on experience on a corporate web development team, Jessica has decided to change things up. She launched jessicashipman.com to make web technology easy and more accessible to bloggers and small business owners. Stop by for free tips or to learn more about her web development consulting.
The post 8 Successful Ways to Turn Trends into Blog Content appeared first on BlogPaws.
from News And Updates About Pets http://blogpaws.com/executive-blog/8-successful-ways-to-turn-trends-into-blog-content/
0 notes
Text
Session 1: Motivational excerpts
I am an artist…
Or so I say…
I am now a working artist in a small indie game company. However, I still think that my skills are not enough to make high quality art hence, the name crappycrafts. I am not saying that my boss was wrong to hire me but it’s just that I want to deliver more.
I am a lazy person. I am ambitious as well. Very contradicting huh? I am aware that I can’t reach my dreams if I stay lazy af but I can’t help it! Sleeping and playing games are just so fun to do!!! Thinking about it though, I have so much passion in playing games to the point that I exert so much effort to finish the story, complete all the missions/quests and get all items/equipments. That is why I don’t understand why I am being lazy to do things for the better of myself, right? I know for sure that if I exert the same effort that I put into games into learning and practicing art then I’ll get to achieve my ultimate goal, my ultimate quest in life and that is to be a professional artist. (my personal definition of professional is “being someone who doesn’t need a diploma or anything but someone who is knowledgeale in his craft and able to produce something that can level the standards of the community and the industry.)
I graduated college with a degree in BSIT with specialization in Digital Arts. It’s not an art school where I studied and as a matter of fact, college sucked. I didn’t learn a single thing in that course that helped me to get where I am now. What it thought me is that I can never learn the fundamentals unless I take interest to it (even without a teacher). So let’s get to the point shall we?
I am starting this blog(?) for the sake of keeping track with my studies. Hopefully I stay motivated. I am very bad at updating stuffs too so I am getting anxious as I am writing this but I have to learn how to negate my lazy self so I can continue forward.
I will be studying the book of Andrew Loomis, “Figure Drawig For All It’s Worth”. Almost all artists I saw online recommends his book and I’ve already read the book before but of course, I didn’t take it seriously. I just read it without grasping things and without applying and practicing those. I already started reading it again and I got some excerpts from it that I think are important to highlight.
All these excerpts can be found in the ‘Opening Chat’ section of the book.
You love to draw. You wish to draw well. If there is any chance, you greatly wish to make a living at it. - pg. 15
Honestly, I never thought that I will pursue art as a career. When I was a kid, I just draw whenever I feel like it. I can’t really say it was a hobby since it’s very rare that I draw although back in high school, I got so much passion in drawing that I draw even though everything I do looks like crap. Well, I still draw crappy art up to this day. I am one of those people who didn’t know what they wanna do in life and I just had to pick a course to take in college and so I said, “yeah well, I draw so maybe do that” I didn’t know I’ll regret that decision so much.
I believe that greater chances of success lie in the mental approach to the work, rather than in sheer technical knowledge - pg. 15
I am lazy… I already said that, right? So even if I get the urge to draw something and be creative, I just shrug the idea and think of it as a bother and that I’ll just exhaust myself. Someone slap me please…
I feel that talent means little unless coupled with an insatiable desire to give an excellent personal demonstration of ability. I feel also that talent must be in company with a capacity for unlimited effort, which provides the power that eventually hurdles the difficulties that would frustrate lukewarm enthusiasm. - pg. 15
Talent, well, I think that there are really gifted people. However, I also believe that talent is worth nothing if it’s not put into practice. It will stay stagnant and will never improve if not taken care of. Like a seed that needs to be watered and exposed to sunlight, talent needs effort to achieve improvement (but exposure isn’t a good deal to take advantage of artists so please stop that nonsense)
…what is of greatest importance and subordinates what must be there is of less importance - pg. 15
I used to get compliments for taking good pictures. So I thought that I have a good sense of composition but that isn’t the case. Taking pictures are a lot easier than drawing a whole scene. In pictures, I just need to position the camera in a nice perfect angle to capture my message but in drawing, I need to think of what things would make up the message I want to convey.
Everything about your pictures is, and should be, a little of you- pg. 16
This is probably the easiest thing I could do in all of these important points Loomis stated. I always put something of me in my art to the point that sometimes, I overshadow the personality of the character I wanted to portray. So far, I have 13 official OCs that I plan to create a comic of and they have varying personalities. I am an introvert and an extreme one so I always find it hard to portray my OC that is an extrovert. I suppose I need to control the amount of me that I put into things.
Good drawing is neither an accident nor the result of an inspired moment when the Muses lend a guiding hand. - pg. 17
THIS HITS HARD because you know what? I always rely on the supernatural being to bless me the motivation and the ability to draw sometimes. And at times when I feel really exhausted, I just thought that maybe the being is not here to bless me. Pretty ridiculous, right? I keep giving excuses not to draw or practice and yet I get frustrated when I can’t achieve what I have in mind.
Use another’s style as a crutch only-until you can walk alone. - pg. 17
There are lots of artists out there nowadays that has a distinct art style e.g, Kawacy, WLOP, Ilya Kuvshinov, Gabriel Picolo, Artgerm, Sakimichan and more that anyone would be able to tell that it’s their artwork without even looking at the watermark. I’ve been seeing other new artists out there that I could tell that they were influenced by some of these masters I mentioned. There’s nothing wrong with that and I am actually awed that they managed to get the technique from another and use it for their own. However, I honestly feel that anyone can have this distinct art style if we keep developing what we gained from others. So far, I have very inconsistent art style since im a crap.
… nurture individuality and not produce imitation. - pg. 17
I started out drawing by merely imitating a photo of a character. From the pose, to the expression, to the colors, and more. Of course, just like most of artists out there, I thought that this is what it means to draw. Apparently, that’s wrong. Drawing as a person can be different as drawing as an artist. An artist adds creativity to the creation and not just imitating what is seen.
Technique is not so important as the young artist is inclined to believe; the living and emotional qualities- the idealization you put into your work- are far more important - pg. 18
Every artist, every person has different experiences in life. These experiences enables us to think differently and have varying opinions. This creates a unique idea and personality within us and we can learn how to turn it into something creative that is new and that will define us.
For the next post, I’ll be tackling the chapter one of the book. I’ll probably take out some excerpts again and anything hat could be helpful to highlight.
0 notes
Last Seen Blogs

yurupedia
ゆるキャラ「ゆるペディア」日替わりセレクシ

skyeet-the-writer
Skye

marjency
Marjency

abonnymouse
Phanfiction Blog I guess

mattmoorewrites
Matt Moore Writes