#but there is already a layer of mod podge on him
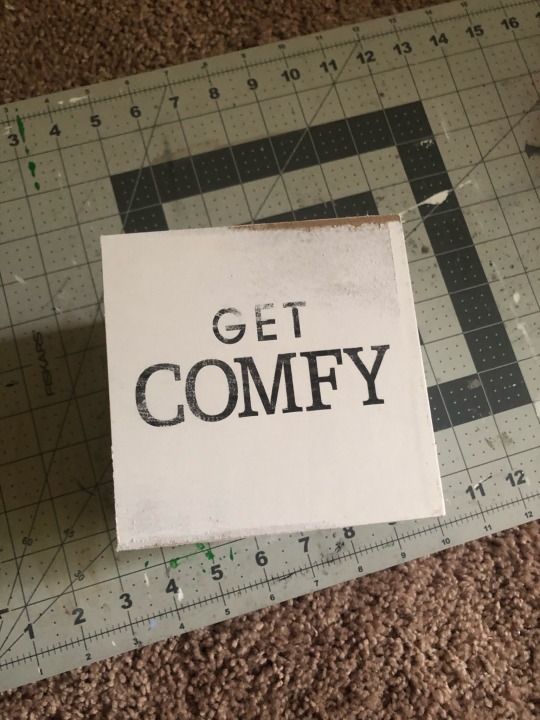
Text
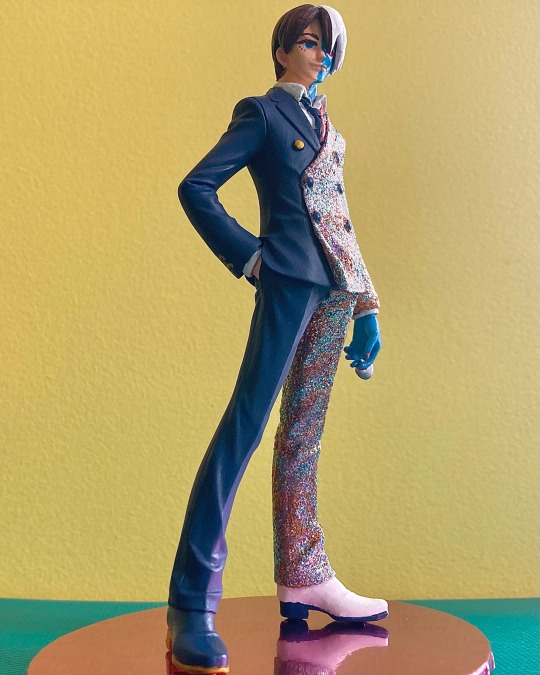
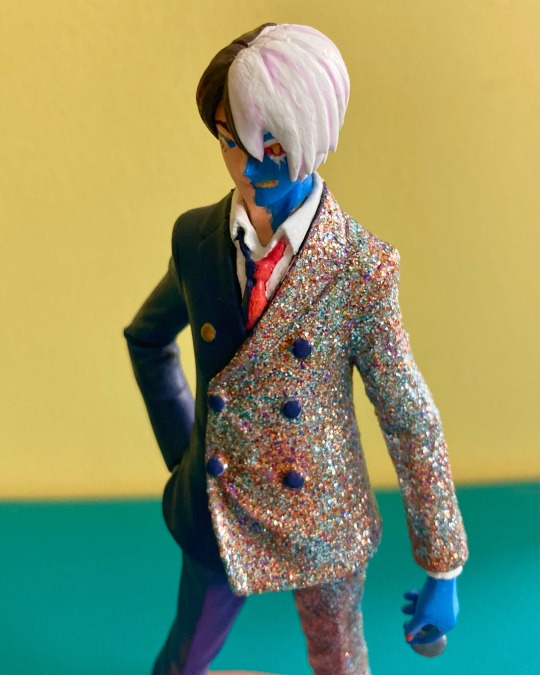
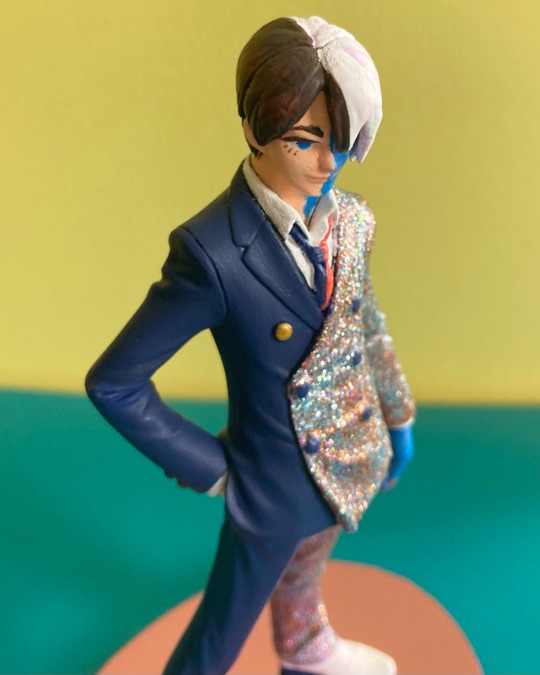
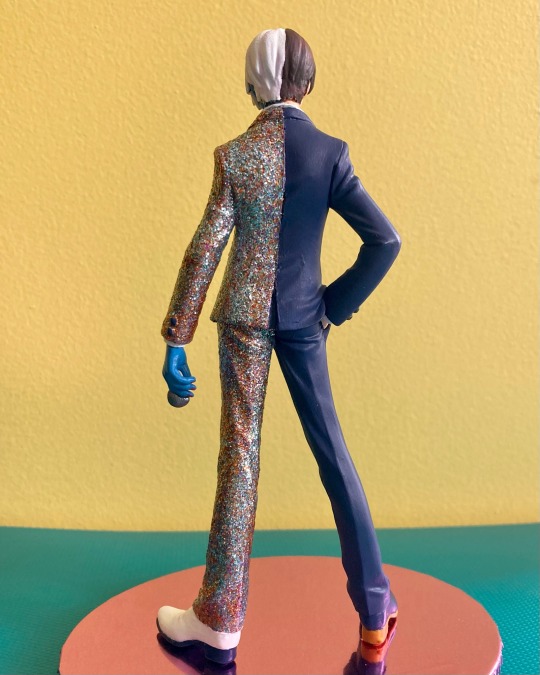
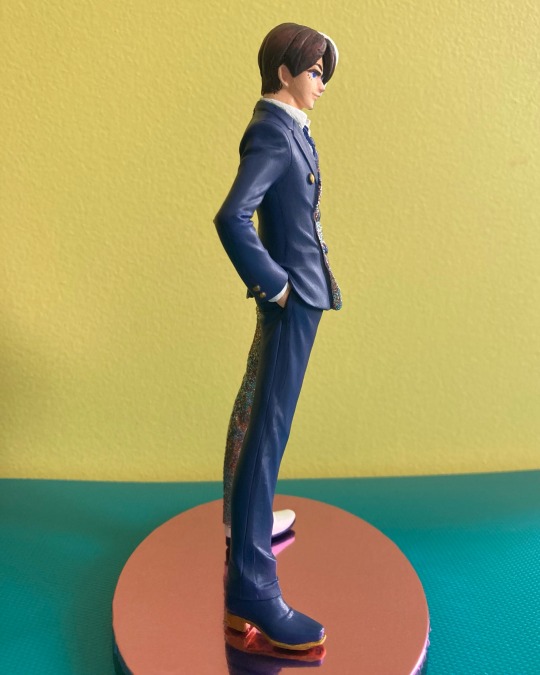
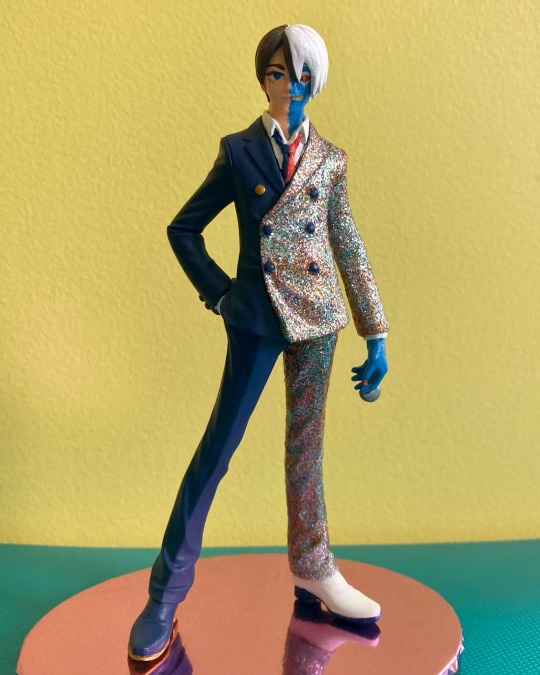
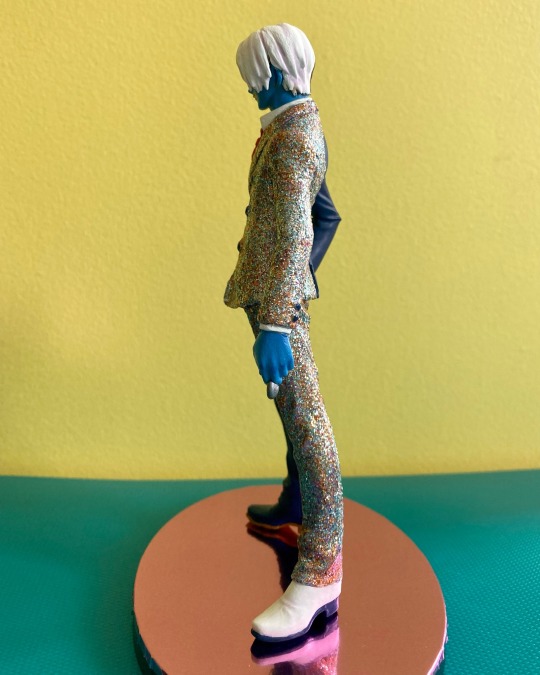
Bishonen TwoFace figure is done :)
#i might just need to spray him with a layer of super clear just in case#but there is already a layer of mod podge on him#two face#harvey dent#figure custom
86 notes
·
View notes
Text
From Cute to Creepy.
Probably my favorite thing to do is re purpose things I find in the store so I can make them my own style. Take these Easter signs and this guest room decoration.
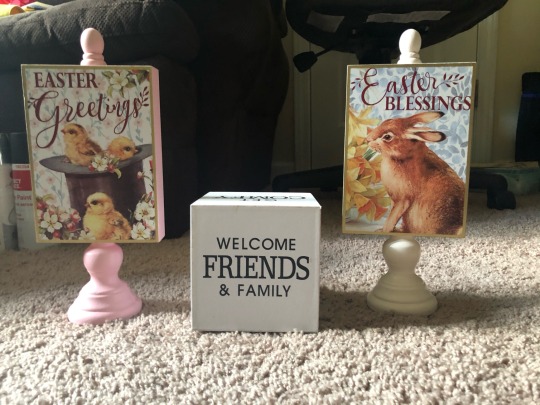
Cute on their own right? However, they’re just not my style. So this is how I took them from cute to my style!
Supply List:
- Some signs. I found all three of these items at Michael’s. The Easter signs were 70% off and the cube was 50% off. You can use literally anything you see in the store, these are just a couple of examples.
- Chalk paint. I used the brand Waverly, specifically the white and the grey color called elephant (I got both from WalMart).
- Painter’s tape (or masking tape).
- Scrapbook paper/ cardstock in a print you like. I’ll have a link to where I got the patterns I picked once we get to that part.
- Mod Podge. Any finish will do, I have matte on hand.
- An electric sander or sand paper.
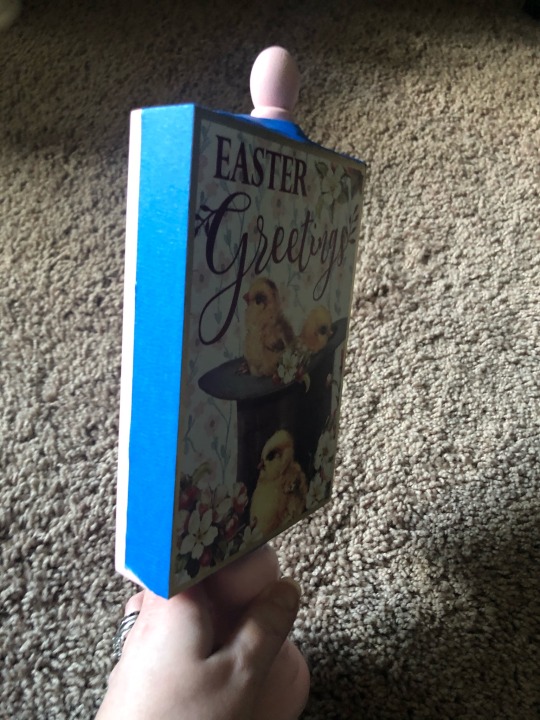
I started by using painter’s tape (you can also use masking tape) around the edges of the pink sign. I wanted to keep that pink color because it goes with what I’m going to use to cover up the image.
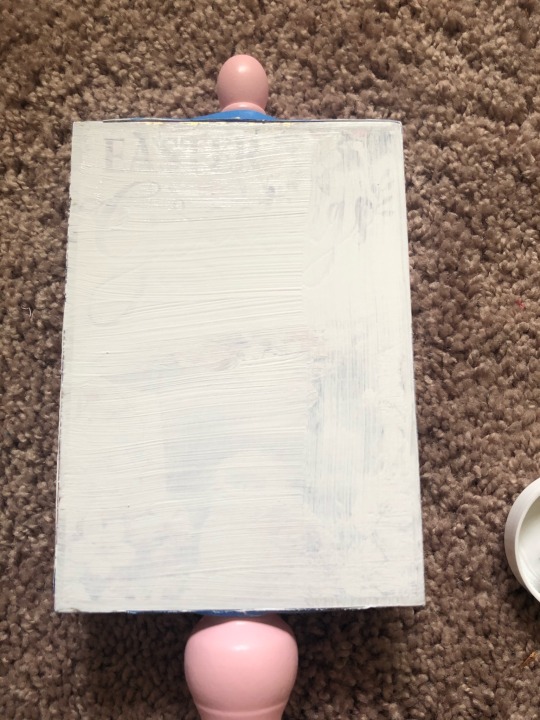
Just to make sure that the image of the chicks wouldn’t show through, I gave it 2 coats of white chalk paint. I love chalk paint because you don’t need a lot of it to cover up/ paint something plus it dries pretty quickly and matte.
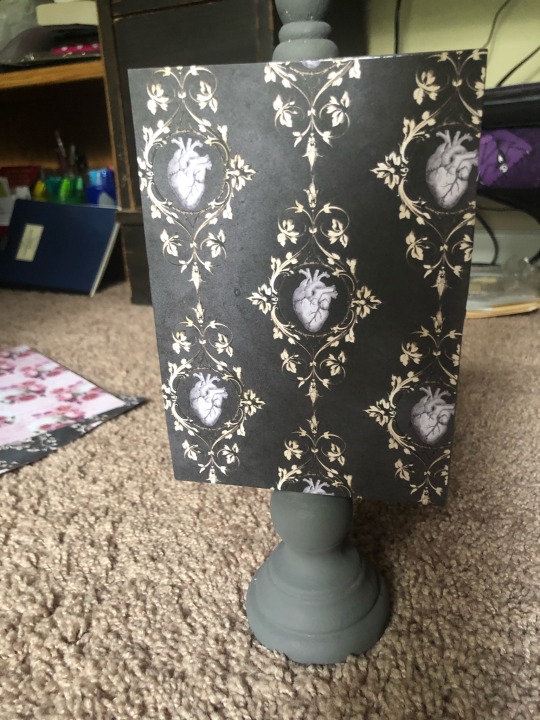
Once I had my image sufficiently covered, I picked out what paper I wanted to use. I picked this one because it’s just one of the best images I’ve ever seen!
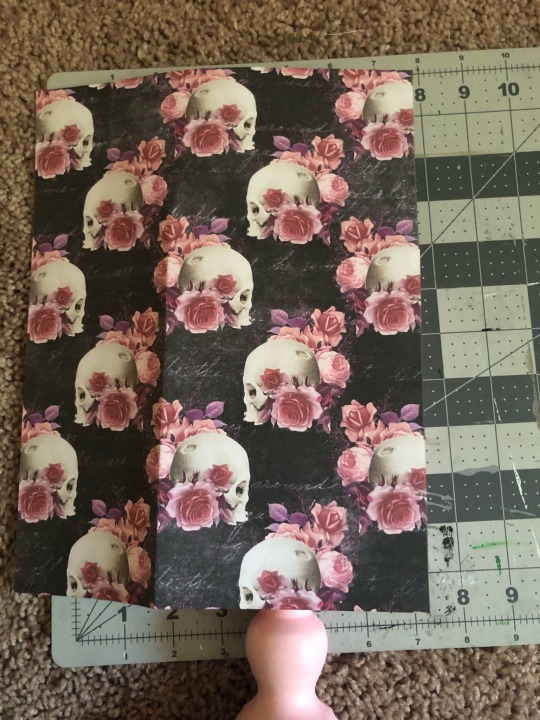
It’s perfectly dark and creepy with a dash of pretty flowers on it. I found it from THIS Etsy shop, which has been a GAME changer for me. I used to have to wait until Halloween when Michael’s gets all of their scrapbook paper in, but not anymore! I just selected the image I liked best (I found this one in the Pink Skulls Collection) and printed it out on some card stock paper I had on hand. I prefer card stock because it’s a little thicker (that’s what she said) than your regular printer paper.
To make sure the image would fit, I folded the paper to make creases where I wanted to cut. Normally, I’d trace out a pattern but this particular piece would not lay flat. Once I’d made the creases as defined as I could, I just cut along the lines and then checked it make sure it would fit, and trimmed off any excess.
Once I was happy with how it looked, I used some mod podge and a sponge brush to apply a thin layer on to the surface of the project and then placed the paper on top of it and smoothed it out to avoid bubbles.
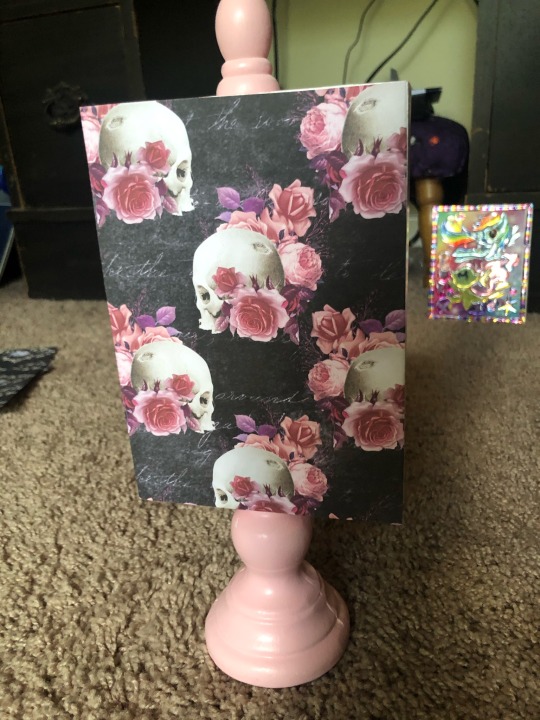
There you have it; this is how the first one turned out! I think I turned out really cute and kinda creepy all at the same time!
For the second sign, I did the same thing I did in the first. I Taped off the edges and painted the image over with the white chalk paint to make sure it was covered up. Once the paint is dry, I peeled off the painter’s tape and then painted the edges of the project with this grey chalk paint. After 2 coats, I was pretty pleased with how it turned out! I wasn’t worried about the paint job being perfect since it would be covered up any way.
The paper I picked for this sign was from the same Etsy shop I linked above. This came from THIS collection. It’s from the Edgar Allan Poe section (I’m a NUT for all things dealing with him.)
Anyway, so I repeated the same steps as in the first project to get the paper to fit (creased and cut) and then this is how it turned out:
Can you guess which Poe tale this paper is from?
For the 3rd and final project, I wanted to recover this block I found. The first step though was to remove the rough texture from the block so that the paper would stick to the surface.
I have an electric sander that I used, but any sand paper would do the job (I’m really impatient).
So, once I had the rough texture off, this is what I was left with.
I picked out some paper I liked to cover all of the sides of the box and, since this laid flat, I was able to trace out the size that I wanted and cut it out. I, once again, used mod podge and my sponge brush to spread a thin layer on to the side I was covering and smoothed it out as I went to avoid bubbles or wrinkling.
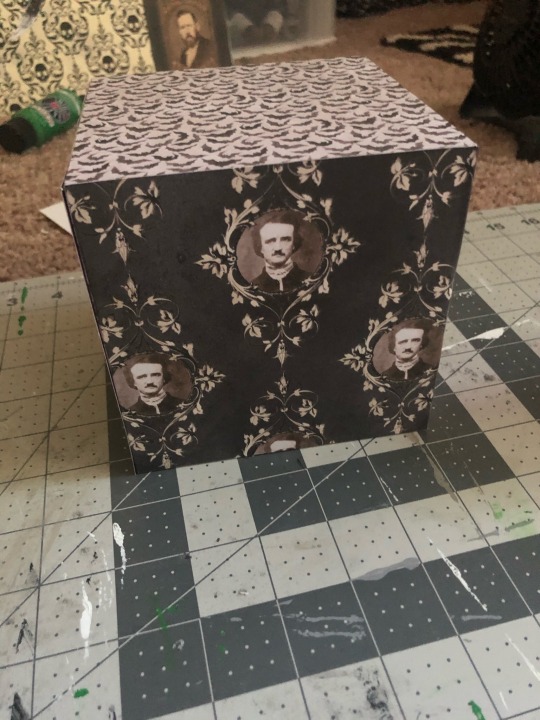
I repeated this step until all of the sides were covered and this is how it turned out.
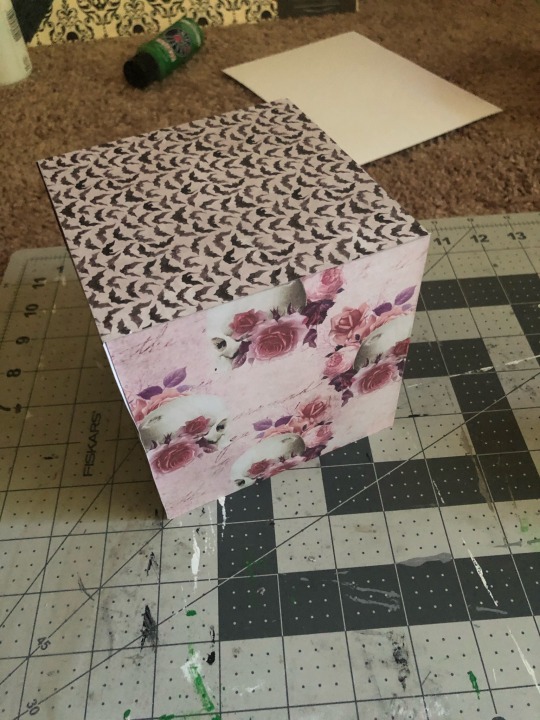
I couldn’t get enough of the Poe paper I found, so of course, I HAD to use this one one side of the project.
Now, where you put these is completely up to you. All three of these pieces are currently on a shelf at work, and I’ve already gotten a few compliments on them!
Hope you guys enjoyed this first round of DIYs, thanks for following! If you want to be tagged in posts like this, just let me know! Thanks again for all of your support, it really means a lot to me!
DIYers:
@flamencodiva @sandlee44 @screechingartisancashbailiff @algud
15 notes
·
View notes
Last Seen Blogs

iptv-russia
IPTV в России
goldencordelia
.Cordelia.

nanikicrea
Naniki Crea

silly-bean
Welcome to Beantown
