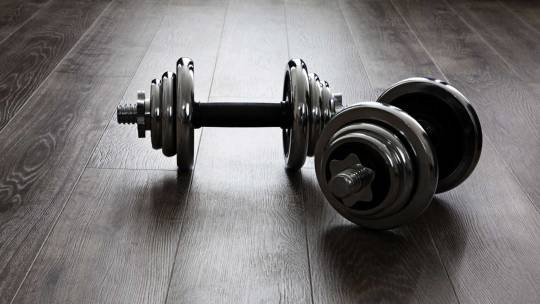
#cap 60 inch weight lifting bar set up
Text
Cap Up Chocolate Bar
With the importance of Cap Up Chocolate Chocolate Bar the District of Columbia just passed Initiative 81 for Magic Mushrooms to be Legal. Which makes entheogenic plants like psilocybin (magic mushrooms) and ayahuasca the lowest priority for law enforcement. What to know before you get gifted Psilocybin Chocolate Bars is delicious. And perfect for many occasions while traveling to Washington DC. Whether planning a museum tour with a friend, checking out the D.C. monuments, hosting a brunch party. Want to be elevated so you can protest 100% at the White House, or looking to send your dinner party guests off. With a little elevated experience, this one up bar dosed to make those experiences that much more memorable.
https://mungusshrooms.com/product/cap-up-chocolate-bar/?attribute_pa_chocolate-bars=3-chocolate-bars

#2006 dodge grand caravan sxt cap up bar#amazon cap pull up bar#bar iii men's joe cap toe lace-up oxfords#black#Buy magic Mushrooms online#cap 60 inch weight lifting bar set up#Cap bar chocolate mushroom#cap barbell chin up bar#cap barbell doorway sit up bar#cap barbell doorway sit up bar walmart#cap barbell hhe-003bk doorway chin up bar#cap barbell power free standing pull up bar#cap barbell pull up bar - hhe-002a#cap barbell pull up bar door width#cap barbell pull up bar walmart#cap barbell pull-up bar:#cap barbell xodus vkr chin-dip pull up bar#cap doorway chin up bar#cap doorway chin up bar installation instructions#cap doorway chin up bar weight#cap doorway sit up bar#cap doorway sit up bar instructions#cap pull up bar#cap pull up bar and dip station#cap pull up bar squat rack#cap push up bar#cap sit up bar#cap squat rack with pull up bar#cap strength pull up bar#Cap Up Chocolate Bar
0 notes
Link
Weights for improving your strength and fitness can be made out of many common household items. Milk jugs, canned goods and assorted everyday objects can help you stay in shape. So save your money and keep fit all at once!
[Edit]Steps
[Edit]Making Lighter Homemade Weights
Use a milk jug. Fill a clean, plastic gallon jug with water, sand, rocks, or concrete. Make sure that the jug has a handle; you will use this to complete your exercise reps. Use the handles to lift and lower the jug like you would any hand weight or dumbbell.
With milk jug hand weights, you can do bicep curls, tricep exercises, bent-over rows, pec flyes, deadlifts, and shoulder raises.
You can also hold these weights to your sides when you are doing squats or lunges.
Lift canned goods. Canned goods that fit into your hands work well as simple hand weights. This is especially good if you are starting out and trying to build muscles slowly. Use larger canned goods as heavier weights or medicine balls.
Make dumbbells from plastic water bottles. Instead of recycling your plastic water and soda bottles, refill them with water, or put pebbles or sand in them instead. When filling them, make sure to weigh them so the weights are the same for both hands. Lift the bottles like you would any dumbbell.[1]
Make arm weights with water bottles. Instead of using the water bottles for hand weights, this method attaches multiple bottles to your arms like wrist weights. Before you put them on your arms, fill them with sand. For heavier weights, add water after you fill them completely with sand.
When they are filled, scotch tape the plastic bottles all the way around your forearm. The tape does not touch your skin; it only touches the bottles to hold them together. You can also use duct tape, just don't attach it to your skin. Place the bottles just tight enough so they do not slide off your arms.
Make a weighted medicine ball from a basketball. Take an old basketball and drill a hole into one of the black stripes. The hole should be big enough to funnel in the weighted material. Place a funnel in the hole and fill with sand or pebbles until you have achieved the desired weight. Use a bike tire patch kit to fill the hole. You can also use duct tape if you don't have a tire patch kit.[2] The repurposed ball can now be used just like a medicine ball.
Make wrist weights from socks. Fill a clean sock with dry beans. Alternately, use pebbles or small craft rocks for a heavier weight. Sew or glue the open end of the sock closed. Then, sew the ends together, or sew Velcro onto the ends so you can remove it easily.
Use a scale to adjust the weight. Fill the sock as full as you want based on weight and then cut the excess fabric. If you want to make heavier weights but the inside material won't fit, use a larger sock.
When choosing a sock, make sure to choose one long enough to wrap around your wrist. If the sock is too long, fill it until it will wrap around your wrist, then cut the excess fabric before closing the end.
Use packets of rice or beans. These packages are great for mini-weights if you are a beginner. You can use them right from the cabinet for bicep curls and other small weight-lifting moves.
Cut bicycle tire tubes into hand weights. Take a bicycle inner tube and cut it into equal lengths. Secure one end of the tube with duct tape, then fill the tube with sand. Close the other end with duct tape. You can either leave them flat or bend them into circles until the two ends are touching and secure the ends together with duct tape.[3]
This is a great method for making weights of different sizes. Start with 1 or 3 pounds. You can also try 5 or even 8 pound weights. Use a scale to weight out the weights before you close them.
Make a weighted vest. Get a fishing vest or a vest with multiple small pockets. Fill plastic bags with sand or concrete and place in all the pockets. Run, do pull ups, push ups, or go walking while wearing the weighted vest.[4]
Use paint cans. Hold paint cans in your hands by their handles. Most paint cans are a little heavier than plastic bottles or cans of food, so you can use them as you build muscle. The handles allow you to use the cans like dumbbells.
[Edit]Making Heavier Homemade Weights
Use buckets. Fill a bucket with sand, rocks, concrete, or even water. Use it to do curls or attach two of them to a bar or board and use as a bench press.
Make a barbell with water bottles. Take 2 packs of 6 bottles each and duct tape them symmetrically to an iron bar you can grip easily. This barbell will be good for any exercise you do with a barbell, like lifts and presses.
If these 2 packs are too much, don't use half filled bottles. Half-filled bottles will slosh around and shake the bar. Instead, tape individual filled bottles to the bar.
If 2 packs aren't enough, use four or six packs of bottles taped to the bar. Alternately, tape individual bottles to each end of the bar. First line them horizontally along the bar side by side, then stack them on top of each other. Make sure to leave plenty of room for your hands to grip the bar in wide and narrow grips.
The taping must be functional. Make horizontal, vertical, and diagonal rounds to wrap the packs to the bar.
Find old tires lying around the yard. Tires are used in many workout and bodybuilding routines. You can add additional weights to regular tires when doing workouts, or you can go to a junkyard and find tractor tires. Flipping them and tying a rope to them to pull behind you are only two ways you can use a tire as a weight.[5]
Build a slosh tube. Slosh tubes are long plastic tubes filled with about 40 pounds of water. But the workout benefits come from the uneven, sloshing water, which makes you use muscles as you try to keep the water balanced as it goes from one end of the tube to the other. You can make your own slosh tube with a PVC pipe. The pipe should be about 4 inches in diameter and 9-10 feet long. Place a cap on one end, then fill the pipe halfway with water. Cap the other end.[6]
Use a duffle bag to make a sandbag. Sandbags are similar to slosh tubes in that they are unstable, shifting weights that require you to engage more muscles. To make an easy sandbag, fill 5 or 6 gallon freezer bags with sand. You want the sandbag to be around 50 or 60 pounds. Double bag the bags so they don't break, and then tape the end. Place the bags into the duffle bag. Zip up the duffle bag, and you are ready to work out![7]
An alternate way to make a sandbag is to use an old army/navy rucksack or canvas laundry bag. Use contractor garbage bags to fill with pea gravel. You can fill them with 10, 20, or 25 pounds. Fill 5 or 6 bags with gravel, and secure them with duct tape. Add them to the bag until your desired weight.[8]
Add and remove bags of sand or gravel for different weights. Use a scale to determine how heavy the bag is before you start working out, and add or remove weight accordingly. If you don't want to change the weight, you can add the sand or gravel directly into the bag. You cannot easily remove the weight or add weight if you do this.
Make sure to leave some room in the interior bags so the sand or gravel can move around.
If you are adding a large amount of weight, use a sturdier duffle bag.
[Edit]Making Homemade Kettlebells
Use a milk or juice jug. Fill a clean, plastic gallon jug or bottle with water or sand. Make sure that the jug has a handle; this is needed to complete kettlebell exercises.
Use old paint cans as kettlebells. Since old paint cans are meant to withstand being swung around, they can make great improvised kettlebells. Simply repurpose your paint can dumbbells to use in kettlebell exercises.
Make a kettlebell out of a potato sack. Purchase a potato, rice, or sugar shipping sack, which can be found at most grocery stores. Fill the sack with sand until you have reached the desired weight. At the top of the sack, tie a loop for your hand. Use rope or duct tape to secure the loop so it doesn't detach. You can reinforce the sides and bottom of the bag with duct tape.
You can use this method to make multiple kettlebells of different weights. Use a scale to measure out how many pounds you are putting into the sacks before tying the top of the sack.
[Edit]Homemade Weight Ideas
Everyday Objects to Use as Weights
[Edit]Warnings
Test the homemade weights carefully before using them in intense workouts. You want to make sure the tape is secure or that nothing will fall out or off and hurt you.
If using a homemade barbell as described or otherwise, make sure to employ spotters as appropriate to ensure your safety. This is especially important in the bench press, where muscular failure could result in a crushed larynx or worse.
Be careful with your homemade kettlebell; if your wrist hurts after (or during) your workout, stop using it and buy a kettlebell.
Always consult with a doctor or qualified health professional before beginning an exercise program.
[Edit]Related wikiHows
Warm up for Weight Lifting Exercises
Get Fit
Get Wider Shoulders
Get Better Biceps
Make Finger Weights for Hand Physical Therapy
[Edit]References
[Edit]Quick Summary
↑ http://www.popsugar.com/fitness/photo-gallery/23464035/image/23464468/Hand-Weights
↑ http://www.everylastrep.com/garage-gym/diy-garage-gym-equipment-weights#
↑ http://rosstraining.com/blog/2009/08/18/homemade-mini-weights/
↑ http://www.everylastrep.com/garage-gym/diy-garage-gym-equipment-weights#
↑ http://www.artofmanliness.com/2009/04/23/the-diy-gym-8-pieces-of-equipment-that-will-get-you-strong-save-you-money/
↑ http://www.marksdailyapple.com/build-your-own-slosh-tube/#axzz3PVVuZqb0
↑ http://www.girlsgonesporty.com/articles/fitness/sandbagging-fitness-how-to-make-a-homemade-sandbag/
↑ http://www.nerdfitness.com/blog/2012/07/19/sandbag-workout/
0 notes
Text
CHAPTER 2 - MAKE IT SO
After hauling the buck back into town, we finished the inspection. The front gate had a bit of damage. It’s build was simple enough, a galvanized steel gate with razor wire wrapped and tangled around it. It was basically a giant swinging thorn bush. Some of the wire on the bottom had been worn through from repeatedly swinging across the pavement of M-60, the main road through town. Because of this, the entire bottom row of razor was compromised. Pieces would begin to fall off in three foot sections and anything crawling, which is something our zombie friends tend to do from time to time, would easily get through. A point I intended on bringing up at the meeting that night.
“Well, if it was up to me,” Jared said as he eyed the deer, snout to tail. “I’d say hand out a little extra rations tonight, but the Captain will probably want to make jerky made out of it so it will last longer. Can’t say I disagree. It would just be good for everyone to have a normal-sized meal for once. Damn Michigan winters, those will kill us before the zombies do.”
“Yeah, probably.” Addy agreed.
“Are you going to go see him?” He asked her.
“Yeah.” She said, then turned to me. “I’ll check the bulletin board for work orders.”
I nodded.
“Just make sure you tell him my idea too.” Jared said.
“Will do.” She said as she hopped into the old blue pickup carrying the fallen king of the forest.
I walked to the shop, which was just a small shed next to our house. It had dirt floors that had been trampled to a dull shine. The wood of the walls had a grey tone to it, showing it’s age. You would’t dare slide your hand across it unless you wanted a palm full of splinters.
I was looking at a piece of flat bar stock. 5160 high carbon steel, forty-two inches long. I’d like to say I knew the type of steel because I did a grind test or was able to pull a laboratory out of my ass, but the numbers “5160” were written on it. Knowing the type of steel you’re handling is extremely helpful, especially when it comes to hardening and tempering. Different types of steel call for different procedures. Fickle shit, steel is.
There was something in there. Indeed there always is, I just needed to get rid of all the extra shit. Michelangelo said the same thing, probably more elegantly, about his David sculpture. You just needed to remove everything that isn’t the thing you want. What I wanted was something practical, yet a little more classy than a baseball bat with nails, or something like that. This would be my David, the tool I would use to cut the heads from my undead enemies.
I thought of practicality first, like a combat knife. It should have an eighteen inch saw tooth edge on the spine going up from the hilt. Secondly, I thought of beauty, like a Katana. A curved edge, better for slicing than chopping and a top edge, making a semi-double edged weapon. I could dig up some clay, add some water, and apply the pasty mixture to the blade while I do the heat treatment, giving it a traditional Japanese Hamon. (For those of you who are not bladesmiths, a Hamon is the squiggly line that runs the length of the blade on a katana).
This sword is the furthest thing from traditional. I thought to myself.
Which was true, a traditional Japanese blade would be pattern-welded steel smelted by hand in a mud smelting furnace, shaped with traditional tools, and blessed by a guy in a dress. Again, I had none of those, and I wasn’t going to wear a damn dress.
The design called for a full tang blade. I had sheets upon sheets of different colored micarta, a wonderful material which was easy to make. I planned on using the black and red layered micarta to make the blade handles and, for that beast, a scabbard as well. Black, red, and polished to a matte finish. Sexy.
I drew my pattern on the bar stock. I gave it an elongated hilt so it could be a two-handed blade. The steel was straight as an arrow, but once the clay for the hamon was applied and it had been heated and quenched, there would be a slight upward curve.
The edge of the hack saw blade rested against the black marker line I had drawn on the steel. I was preparing to put my weight into the first cut when Addy burst into the shop.
“Manallis needs to talk to us.” She said.
I sighed, and placed the hack saw on the work bench.
We walked over to the school and Manallis was talking to a member of his squad. He glanced over to Addy and I and gestured to his guy that he would speak to him later. He looked down at the ground as the gap between us began to shrink.
“Hey, Cap.” I said.
“You ever do anything with that piece of steel I brought you?” He asked.
“I was actually just getting the design figured out a few minutes ago.”
“Sorry to interrupt.” He said, though I could tell he wasn’t really apologetic for it. Whatever he wanted to talk to us about was more important. “I have some ideas for the school. A renovation. Do you think you could weld aluminum?”
“It’s tricky, but yeah, I think I could. What for?”
He pointed at the glass double doors that made the front entrance of the school building.
“In an emergency, the general plan is to just stack stuff behind the doors in the hopes that it will be good enough to keep anything unwanted out. Well that makes me a little uncomfortable. I want to put up aluminum plates on those doors with peepholes. Ya know? Really make this place impregnable.”
I loved the idea. An impenetrable fortress? That sounded good. A safe haven to hunker down while a herd of zombies passed through.
“What about the noise?” Addy asked.
“What do you mean?” Manallis asked.
“Won’t you need a generator to run the welder?”
“That would definitely be a problem. Any way around that?” Manallis asked.
“I could use an acetylene torch and gas weld it.”
“Can you give me a list of everything that you need?” He asked.
“Sure. You got a pen? I can tell you right now.”
“Yeah.” He pulled a small note pad from his breast pocket and removed a golfer’s pencil from the binding.
“What do you need?”
“Okay.” I started. “You should be able to find everything I need at one of the farm houses. They’re pretty common. Hell, my Dad even…”
“I don’t think he wants to hear about your Dad, Milo.” Addy cut me off.
“I’m sure he was a great guy.” Manallis added.
“Sorry. I need—he was a good—anyway. I need a bottle of oxygen, it’ll be a K size tank, about five feet tall. Also a bottle of acetylene, same size. The regulators for the tanks should already be on them, if not, just look for a…”
“I know what a regulator looks like.”
“Okay, sorry. Ahem—so. Make sure you grab the torch too. I’ll need some aluminum wire and flux.”
“Flux?” Manallis asked.
“Yeah, when it’s heated it eats away oxidized metal and helps the molten aluminum bind. That’s why astronauts use special tools in space. There’s no oxygen in space, which means no oxidation, so metal can instantly fuse together. The molecules—”
Manallis was quiet, but visibly annoyed.
“Flux?” He asked again, firmly.
“He needs borax.” Addy cut in.
“Borax. See how easy that was? No need for a lesson in space travel.”
“Sorry.” I said, slightly embarrassed.
“Anything else?” He asked.
“Nope, that should be fine.”
Manallis turned away but Addy cleared her throat.
“What about the aluminum plates?”
“I’m sure we can find something Milo can cut into size.” He replied.
“Well,” I said. “we could just make the plates. We could find scrap aluminum, melt it down, and pour it into a mold built to the size that we need. Trust me, it will be a lot easier than cutting it by hand and we’ll save saw blades. I’ll do it during the day so any light made by the fire won’t attract anything.”
“That sounds good. Think you could get the molds built by tomorrow?”
“I’ll have them done by this afternoon.” I assured him.
“Kiss ass.” Addy muttered.
“Shut up.” I elbowed her in the ribs.
“Great.” Manallis said. “I’ll get some of my guys out looking for the things you need.” He turned on his heel and went back to examining the school.
Addy and I gathered some lumber from around town and nailed the molds together. We made them bigger than the doors so we could line the inside of the border with red bricks. We placed a single red brick in the mold at eye level to act as the peephole. When the molten aluminum was poured, there would be a brick sized hole to look through. the base of our mold was a concrete slab where some building used to be but was long torn down. It was the closest thing to a smooth, flat surface that was heat-resistant-ish. All-in-all, we were done in a little over two hours. We would need to make a run to get firewood, and lots of it, water as well. With a fire that size, we would need to be able to put it out by nightfall.
One of the houses had a huge cast iron cauldron in the front yard, once used for planting flowers. Luckily the bottom hadn’t rusted through and was still thick enough to hold up to the heat it would be facing. With a handful of the townsfolk’s help, Addy and I were able to get it in the truck and over to the slab. It would be our crucible.
We started spreading the word about the needed aluminum. We got rolls upon rolls of aluminum foil, toys, and random car parts. Everything we received went right into the crucible.
I found a solid steel bar from a weight set that could be used to lift the crucible from the fire with a man on both sides. A third man would take another bar to tip the crucible. It was during this stage of planning that a problem arose.
Splash.
A stream of molten aluminum falling to the ground was bound to send burning droplets of liquid fire upward. I added sheets of plywood to the sides of the mold to prevent myself and whoever would be helping me from receiving some serious injuries.
Addy and I built twin, Y-shaped supports on both sides of both molds so we could set the bar holding the crucible on them while we poured the molten metal into them. They were made from wood. Four inch by four inch beams with ninety degree metal brackets of the top. The steel bar would sit in these brackets.
It was something of a relief to know that we were making headway against the dead. With those aluminum plates, the school truly would be solid. A place to hold out. We would go over everything with the rest of the community at the meeting that night. After those plates would go up, it would just a matter of time before the zombies would die out while we waited safely. Or so we thought.
0 notes
Text
1969 Dodge Dart: Evolutionary Dart
This is the story of one man’s dream becoming reality. Like so many other enthusiasts, it’s a story of patience, vision, and taking advantage of those opportunities as they occur.
Clinton Grell, like so many of us, got the performance bug while in high school. His first experience came while helping his buddy pour a concrete slab for his garage. In that garage was a 1970 440cid 6-Pak Challenger. In exchange for his labor, the Challenger owner took Grell to the Mopar Nationals in Columbus in the summer of 1999.
That’s all it took to set the hook.
A peek under the rear bumper reveals just a taste of the sophisticated suspension components Grell added to get this Dart to plant its massive P315 rear Mickey Thompson Sportsman tires.
While it would’ve made sense for Grell to be an E-Body fan, Grell went another way and decided that he would build a late 1960s Dart since A-Bodies were more affordable than the more popular E- and B-Bodies. They also, due to their lighter weight, responded well to performance modifications. Throughout high school and college he set out mentally designing the perfect A-Body. It had to be a stroker small-block, and it had to be fast. Honing his skills through the customization of sport motorcycles, he graduated from two wheels to four shortly after getting married. Now a mechanical engineer by trade, but still restricted by a limited budget at the time, he decided to intensify the search for his elusive Dart project. It was an advertisement in Craigslist that was to turn things around.
“In November 2011, I came across a Craigslist ad for a 1969 Dart in Sedalia, Missouri. I called and spoke with owner Rex Morrill,” said Grell. “The way Rex talked about the car’s performance could make anyone feel total excitement about the car. This Dart was the culmination of all his years of racing and building cars. He told me that he’d built the car to ‘go fast and look good!’ and I believe that I had already made up my mind that I was going to buy the car regardless of what I found when I looked at it.”
Powering the Dart is a 417-cid small-block Mopar engine that puts it solidly in the 10-second quarter-mile club. The engine compression was set at 11:1 so that Grell can use his Dart for dragstrip or cruise night duty.
So Grell borrowed a pickup truck from his friend, Clay, and the two drove from his home in Wichita, Kansas, to Missouri. From his first ride in the car there were warning signs but Grell had stars in his eyes. A first warning sign should have been the combination of a high-horsepower 416-cid small-block engine (13.9:1 compression) and four-wheel drum brakes. On a testdrive down a deserted street near Morrill’s home, the take off pressed them both deep in their seats. Unfortunately, the landing wasn’t smooth, as the Dart nearly took out a stop sign and came to rest in a neighbor’s front yard. It was an inauspicious start to be certain, but regardless of the adventure, that Dart was coming home with Grell.
Said Grell, “Since I’ve owned the car, the Dart has had a total engine rebuild, two different transmissions, three sets of wheels, three different rear ends, three front ends, three torque converters, and three different steering boxes. It’s hard to believe that I’ve changed so many components multiple times and to think of all the frustrations I went through trying to find the perfect combination — not to mention the finances and willpower it took to see it through to the end.”
To feed the “big” small-block is an Edelbrock Victor W2 intake manifold and a Holley 950-cfm carburetor.
But those frustrations were broader than simply drivetrain and suspension deep. Upon his arrival home, Grell noticed bubbling under the paint in the rocker panels. Removal of the fuel cell and interior carpeting revealed a huge amount of rust not only in the flooring but in the rear crossmember, rear framerails, and inner quarter-panels. Taking care not to disturb the exterior paint, he cut out the rusted panels and replaced them with new. He repaired the framerails and installed a new rear crossmember from Auto Rust Technicians. He coated the underside of the car with POR15 and filled the frame with Eastwood internal frame coating.
From there, things were to evolve in a not so terrific way. To generalize, Grell has rebuilt most of the car, much of it due to rust and general corrosion. As noted he’s made an assortment of changes to the drivetrain, none more notable than the engine rebuild. Having diagnosed engine damage due to metallic flakes on the spark plug electrodes, the entire engine had to be rebuilt by Headway Engine Service (owner Stuart Goertzen) in nearby Buhler, Kansas.
The interior is all business with a set of Procar Pro-90 seats covered in black vinyl. The steering wheel is a grant Elite and for tunes – well you have to refer to that awesome powerplant underhood. The rollbar is designed to protect the occupants with a removable bar that allows entry to the rear seats.
Goertzen recommended dropping the compression down to a more manageable 11:1 compression after discussing Grell’s desire to run on 91-octane pump gasoline. Many of the original engine internals were reused, including the Eagle crankshaft, Edelbrock Victor W2 intake, Chrysler W2 hears, Harlan Sharp rockers, and splayed main caps. Taking the bore out to 4.035-inch and inserting new JE custom pistons and using the 55cc W2 hears made the compression at lot more manageable. Chad Speier at Speier Racing Heads completed the mild flow work getting the ports up to 300 cfm at 0.700-inch lift reworked the heads. REV custom valves were responsible for 5 cfm of additional flow all by themselves.
Today, the car’s best run, after all of Grell’s perseverance, is 10.49 seconds at 128 mph. While that was plenty gratifying, He never forgot about Morrill, that Dart’s original owner, who came down with cancer not long after Grell hauled the Dart down to Kansas. The two had stayed in touch over the years with Morrill clearly living vicariously as Grell told him of each change he had made to the car along the way.
Commanding the GM 200-R4 overdrive transmission is this Precision Performance Products Kwik-Shift II shifter bolted to a Racecraft shifter mount.
Grell finally hit his target of dipping into the 10-second range on his second pass resulting in a 10.994 run during an event in Tulsa. At the event, he videoed the landmark accomplishment and posted it on YouTube for Morrill to see, since he could no longer travel due to his health. Morrill was elated at the performance of the Dart. Said Grell, “I was happy to know that he was able to watch the car again before he passed. I think it was something he wanted to see before he went.”
Today, Grell continues to massage the Dart in a quest for even faster time slips. Yet he delights in taking the car on cruise nights with his family, the rollcage specially built by Holzman Race Cars to allow passengers into the rear seating. A labor of love, this Dart represents on man’s dedication to seeing a dream come true – one that he shares with all that will buckle up and take a ride.
This high-tech instrument panel is more sophisticated than you may think. After reworking the wiring system of the Dart, Grell installed SpeedHut, Evolution Series Programmable gauge system, which uses a GPS speedometer. This IP is far beyond the factory analog gauge package and the owner, Clinton Grell, fabricated the dashboard.
Concludes Grell, “Stuart [Goertzen] once told me that the engine builds that fought him the most usually turned out best in the end. I always kept that in the back of my head and when things got rough with one part of the build, that it would be all that much better in the end. Once it was back together, all those headaches seemed a lot less significant than when I was dealing with them in the moment. Without the tremendous support from my wife, help from friends, and the mass borrowing of tools that I needed along the way, the completion of the car wouldn’t have been possible.”
Fast Facts
1969 Dodge Dart
Clinton Grell, Wichita, KS
The oversized radiator and twin electric cooling fans ensure that the “big” small-block runs cool regardless of the task.
ENGINE
Type: 417-cid V-8 small-block Mopar engine
Bore x stroke: 4.035 (bore) x 4.000 (stroke)
Block: Factory OE block 0.030-inch over bore
Rotating assembly: JE Reverse dome 266cc pistons, Eagle crankshaft, Eagle 6.123-inch connecting rods.
Compression: 11:1
Cylinder heads: Mopar Performance W2 Cast Aluminum reworked/ported by Chris Speier, 2.055-inch REV intake valves
Camshaft: Comp Cams Solid Roller – 0.645-inch lift intake and exhaust, 266-degrees duration intake, 272-degrees duration exhaust at 0.050-inch lift, Harland Sharp 1.5:1 roller rocker arms
Induction: Edelbrock Victor W2 intake with Holley 950-cfm carburetor
Oiling system: high-volume system
Exhaust: TTI 1 7/8-inch primary tube headers with 3-inch collectors, Dynomax Ultraflow mufflers
Ignition: Pertronix Billet Distributor with Modified MSD-6ALD ignition and Taylor 50 Plug wires
Cooling: oversized radiator with electric cooling fans
Engine built by: Headway Engine Service, Stuart Goertzen, Buhler, KS
DRIVETRAIN
Transmission: GM 200-4R overdrive transmission built by Bergeron Racing
Torque Converter: FTI lockup, 9.5-inch diameter, 4,500-stall speed
Shifter: Racecraft shifter mount, Precision Performance Products Kwik-Shift II shifter
Driveshaft: stock, factory restored to original
Rearend: stock Chrysler 8.3/4 with 3:23: ratio with Sure-Grip
The manual braking system avoids the issue of configuring a power brake booster, which would require engine vacuum to operate. The front Wilwood brakes and rear disc system replace the factory drum brakes — which previously almost ended the Dart’s — and Grell’s life.
CHASSIS
Front suspension: HDK Coilover suspension with 2-inch drop spindles
Rear suspension: Dana 60 with Richmond 4.56:1 gears, Summer Brothers axles
Steering: Mustang II rack-and-pinion
Front brakes: Wilwood 12.19-inch drilled and slotted disc with Wilwood calipers
Rear brakes: drilled and slotted, unknown manufacturer
Paint: Zach Noel of 20 by 20 Hot Rods
Dashboard fabrication: Clinton Grell
WHEELS & TIRES
Wheels: 17×4 (front) and 15×10 (rear) Billet Specialties Street Lite
Tires: 26×6.00×17 Mickey Thompson Front Runners Tires (front) and 315/60-15 Sportsman Tires (rear)
Clinton Grell could hardly have imagined that someday he would own a Dart as cool as this. To get to this level however it took amazing levels of effort to resurrect this rusty A-Body into a 10.49-second quarter-mile performer.
This CSR electric water pump allows Grell to cool down the engine by circulating coolant even when the engine is off. These are very popular with racers who need to cool down the engine between runs.
The Dart’s original TTI headers were too far gone to be replaced. As is standard faire with Mopar guys, another set of TTI stainless steel headers were installed, featuring 1 7/8-inch primary tubing and 3-inch collectors. Electric cut-outs help please the cruise night crowd.
Steering has been upgraded with a Mustang II rack-and-pinion system. The biggest change, however, is the swap out of the factory torsion bars for an HDK coilover front suspension. The improvement in cornering, braking, and overall handling was dramatic, according to Grell.
Keeping in step, the Dana 60 rear end is supported by coilover suspension and ladder bars that plant the rear tires when the big small-block sends torque rearward.
When Grell first purchased the Dart, it was the removal of the original fuel cell that revealed the first of the rusty panels. Well those are all gone and replaced with factory-style sheetmetal and a new fuel cell and Aeromotive SS fuel pump.
The factory-style fiberglass hood was painted black and drafts air into the engine compartment thought this functional scoop.
The rake of the classic Dart is just perfect with narrow tires up front and big fatty’s in the rear. The awesome paint was applied by Zach Noel of 20 by 20 Hot Rods.
Narrow 17×4 Billet Specialties Street Lite wheels are wrapped with Mickey Thompson front runner tires up front.
In the rear, these huge 15×10 Mickey Thompson stick the landing and help the lightweight Dart to 128-mph plus quarter-mile speeds.
What self-respecting Dart would be caught dead without its deck graphic? This black stripe is a classic Mopar Muscle adornment found on all upscale high-performance Darts.
The chrome red paint sizzles in the late Kansas sky for this photo. Certainly the previous owner Rex Morrill could never had envisioned just how cool his classic Dart would become.
The post 1969 Dodge Dart: Evolutionary Dart appeared first on Hot Rod Network.
from Hot Rod Network https://www.hotrod.com/articles/1969-dodge-dart-evolutionary/
via IFTTT
0 notes
Text
American Football Uniform |Jersey |Manufacturer and Exporter|Pakistan
THE AMERICAN FOOTBALL PLAYER'S UNIFORM
It isn't the uniform that makes unique one football player from the others; it's his ability and heart. Be that as it may, the uniform and its defensive cushions are a fundamental piece of playing football, something any player would be reckless to take the field without.
Do you want to source sportswear? Contect Us
Why the requirement for this protection? All things considered, the NFL is comprised of players extending in weight from 150 to 360 pounds and in range from 5'5″ to 6'9″. Some of these varying sizes can seat press 550 pounds and run the 40-yard dash in as quick as 4.2 seconds. As a result of the differed weights, sizes, qualities, and paces of NFL players, the most ideal security is important. Littler players need to have the capacity to play without agonizing over being pulverized by each one of those vast bodies.
HE JERSEY
The pullover is the uniform's shirt. The pullover is fundamentally every player's character and denotes his loyalty to a particular group. The pullover must be sufficiently huge to cover the shoulder braces.
Each NFL group shirt accompanies an alternate numeral to recognize one player from another. The numerals, which show up on the front and back of the pullover, are 8 inches high and 4 inches wide. Most secondary school and school groups have similar particulars, and some additionally put the number on the pullover's sleeve.
In the NFL, particular positions wear certain numerals. For instance:
Quarterbacks and kickers wear from 1 to 19.
Running backs and cautious backs wear from 20 to 49.
Linebackers wear from 50 to 59 or 90 to 99.
Hostile linemen wear from 50 to 79.
Cautious linemen wear from 60 to 79 or 90 to 99.
Collectors wear from 10 to 19 or 80 to 89.
On the back of each NFL pullover is the player's surname in letters that are 2 1/2 inches high. His name shows up over the upper-back simply over the numerals.
Do you want to source sportswear? Contect Us
Caps AND FACE MASKS
The cap and face veil are intended to shield a player's face and head from genuine damage. Numerous players additionally wear a mouth watch to shield their teeth and keep themselves from staying quiet. A couple of players even wear another defensive top outwardly of the head protector for included security.
Head protectors can come outfitted with these highlights:
Jaw ties: To keep the caps cozily set up.
Air-filled inside pockets: To anticipate genuine blackouts, numerous protective caps have air-filled pockets inside them. A player tests his cap by staying his head inside it and after that shaking it for comfort, additionally ensuring that it's cozy. In the event that it's too tight, he basically discharges air from the air pockets.
Face veils: The adjusted metal material that includes all face covers can't be more than 5/8 inch in distance across. Most linemen wear a face cover called an enclosure, which has a ban stretching out down from the center and best of the cap to beneath the nose region. There, this bar joins a few bans that stretch out from the two sides that totally keep a rival's hands from coming to inside the face territory and under the jaw. Nonetheless, few quarterbacks and recipients have a face veil with a bar dividing their eyes, since they need to guarantee they can see obviously; many likewise leave the jaw uncovered.
Sunshade: Some protective caps have a sunshade over the eyes to keep sun glare from meddling with the player's vision. This sunshade likewise shields adversaries from seeing the player's eyes, which may give the player preference since rivals can't see where the player is looking.
Cushions
Cushions are important to assimilate the numerous physical blows a player takes amid an amusement and secure all aspects of his body.
By the head protector, the shoulder braces are likely the main defensive apparatus players wear. These cushions secure a player's shoulders, in addition to his sternum locale, from damage. Some of these cushions likewise cover the highest point of the arm and the rotator sleeve. Different cushions incorporate thigh cushions, elbow cushions, hip cushions, tail cushions, and knee cushions, in spite of the fact that not all players wear them. A few quarterbacks even wear fire coats to ensure their rib confines, which are helpless when they lift their arms to toss the ball.
SHOES AND CLEATS
Football spikes come in 1/2-inch, 5/8-inch, 3/4-inch, and 1-inch lengths. Wearing the correct projection is certainly essential for footing. On the off chance that a player doesn't have the best possible footing inside or outside on a sloppy surface, he can't carry out his activity and perform at the most abnormal amount. What kind of fitting you utilize relies upon various elements:
Conditions on the field: The shorter fitting, which makes a player less inclined to damage, is worn on dry, firm fields since it gives the perfect footing to these quick fields. On a tricky grass field, a player — particularly a major lineman over the line of scrimmage — necessities to burrow profound to pick up footing. In that circumstance, the player changes to a 3/4-or 1-inch fitting, contingent upon how he's moving (halting and going) amid warm-ups.
Position: Receivers and running backs frequently wear shoes with less spikes than the bigger, more physical players do.
Field material: For counterfeit surfaces, most players wear a shoe that has a sole of many elastic nubbed, 1/2-inch spikes. Some linemen incline toward a ball compose shoe, particularly on indoor turf where there's no way of rain and the surface isn't as smooth.
Since counterfeit surfaces have a tendency to be sticky, players need to have the capacity to skim over the surface. They would prefer not to stop on a dime and change bearings. Numerous players trust that moment stop and restart can be risky to their knees and lower legs.
#american apparel football jersey#american football jersey black#american football jersey buy#american football kit bag#american football jersey custom#american football jersey china#american football kit designer#american football jersey girl#american football jersey germany#american football game jerseys#american football league jersey#american football jersey mockup free#american football jersey manufacturers#american football officials uniform#american football jersey pakistan#american football kit suppliers#american football jersey training
0 notes
Text
Best Dumbbells for Home
New Post has been published on https://goodfitnesspower.com/best-dumbbells-home/
Best Dumbbells for Home
Best Dumbbells for Home
Best Dumbbells for Home
Bestseller No. 1
3505 Reviews
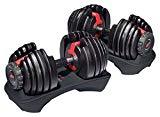
Bowflex SelectTech 552 Adjustable Dumbbells (Pair)
Each dumbbell adjusts from 5 to 52.5 pounds; adjusts in 2.5-pound increments up to the first 25 pounds
Lets you rapidly switch from one exercise to the next
Combines 15 sets of weights into one, using a unique dial system
Eliminates the need for multiple dumbbells cluttering your workout space
Two year warranty on weight plates and parts
$213.68
Buy Now On Amazon
Bestseller No. 2

727 Reviews
AmazonBasics 20-Pound Dumbbell Set with Stand, Silver Lettering
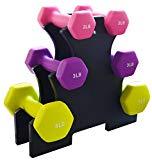
3 pairs of dumbbells in 2-pound, 3-pound, and 5-pound sizes
Ideal for resistance training
Neoprene coating on weights allow for a secure grip
Made for indoor and outdoor use
Easy-to-assemble weight stand included
$24.99
Buy Now On Amazon
Bestseller No. 3
882 Reviews
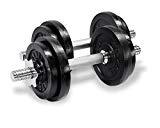
Yes4All Adjustable Dumbbells 40, 50, 52.5 , 60, 105 to 200 lbs
VARIETY OF WEIGHTS AVAILABLE: Yes4All offers 40, 50, 52.5, 60, 105, 200-pound Adjustable Dumbbells
CAST IRON WEIGHT PLATES FIT 1-INCH OR 1.15-INCH STANDARD BAR: Holes on weight plates fit standard bars of 1" diameter (Set of 40, 50, 60 lbs) OR 1.15" diameter (Set of 52.5, 105, 200 lbs). Durable cast iron plates covered with black paint finish preventing rust and corrosion for lifetime use
14-INCH OR 16-INCH DIAMOND KNURLED CHROME HANDLE: Constructed of high-quality, textured chrome handle for secure, firm, and non-slip grip
STAR-LOCK COLLARS WITH LOOSE-RESISTANT RUBBER BANDS: Threaded ends with star-lock collars provide a safe, secure workout & easy weight plate changes
EASY USE & STORAGE: Take seconds to assemble and take out the weight plates. Small, convenient, and easy to store. All-for-one dumbbells eliminate the need for multiple dumbbells in your workout space. Suitable for performing toning body workouts, core fitness, strength exercises and heavy leg lifts
from $35.66
Buy Now On Amazon
Bestseller No. 4
155 Reviews
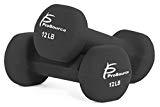
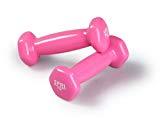
ProSource Set of Two Neoprene Dumbbells Coated for Non-Slip Grip, 1 lb-12 lb
Toned Muscles - Great for use in any fitness class or program to tone muscles, including cardio for higher intensity
Non-slip Grip - Colorful neoprene coating ensures a non-slip grip and provides protection against calluses
Variety - Comes in wide range of color-coded weights for gradual progression - ideal for at-home workout programs
No Rolling - Hexagonal shape prevents rolling when setting them down to stay in place for a safe workout environment
Convenient - A range of dumbbells help maintain fitness without a gym, and the compact size stores easily
Set of two, neoprene dumbbells (3 lbs each)
from $5.68
Buy Now On Amazon
Bestseller No. 5
1242 Reviews
SPRI Deluxe Vinyl Dumbbells (Set of 2)
Comfortable, no-slip vinyl coating is easy on floors
Perfect addition to aerobics and step workouts
Can be held in hands while walking to boost calorie-burning
Add intensity to every workout and sculpt strong, lean muscles
Create your own custom resistance routine with a range of weights, coated in vibrant colors
from $7.99
Buy Now On Amazon
Bestseller No. 6
1158 Reviews
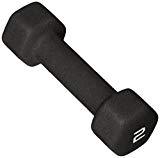
CAP Barbell Neoprene Coated Dumbbell, Single
Cast iron dumbbells are neoprene-coated for durability and to help protect you, the floor and other fitness equipment
Help tone and sculpt your arms, shoulders and back
Hexagonal shape for easy stacking and roll-free use
Sold Individually
from $1.50
Buy Now On Amazon
Bestseller No. 7
109 Reviews
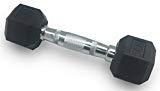
Everyday Essentials Barbell Rubber Coated Cast Iron Hex Dumbbell, Single
High quality Solid Cast Dumbbell Encased In Rubber
Solid Metal Chrome Finish Contoured (Ergo) Handles
Protects Floors and Equipments
Hexagon shaped dumbbell heads are designed to prevent rolling and provide easier storage
Sold as single
from $9.90
Buy Now On Amazon
Bestseller No. 8

293 Reviews
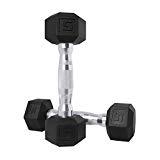
CAP Barbell Urethane Coated Hex Dumbbell
Sports
from $8.99
Buy Now On Amazon
Bestseller No. 9
742 Reviews
CAP Barbell Color Coated Hex Dumbbell
Coating has no chemical smell unlike many rubber dumbbells
Made of solid cast iron with a protective colorful coating
Contoured chrome handles
Hexagon shaped dumbbell heads are designed to prevent rolling and provide easier storage
Sold individually
from $5.92
Buy Now On Amazon
Bestseller No. 10
37 Reviews
BalanceFrom Dumbbell Set with Stand
3 pairs of dumbbells in 2-pound, 3-pound, and 5-pound or 3-pound, 5-pound, and 8-pound sizes. Ideal for resistance and other trainings
The durable, neoprene material coated cast iron is great for indoor and outdoor workouts
Neoprene coating on weights allow for a secure grip. The hex shape of the dumbbells prevents them from rolling
Easy to assemble. Weight stand is included. A assembly tool is included for your convenience too
All genuine Everyday Essentials products are covered by a 2-year warranty
from $23.85
Buy Now On Amazon
Post ID is empty in Rating Form ID 1
0 notes
Text
Killer-Looking and Running 1,100-Horsepower 1982 Chevy Camaro
In October 2015, Brian Wise crashed his racer to scrap—but he was able to walk away from it without wounds. He sorely wanted to get right back up on the horse … but didn’t want to build one from scratch out of his back pocket when what he really needed was a good roller, a proven car. Recycling someone else’s pile meant he’d spend less time in the shop and more time out racing. While this is sometimes a good way to go, you might end up unfixing all the crap the other guy did before beginning your project.
He knew right where to go. “This car was built, loved, and raced for 17 years by our good friends Jim and Monika Frendt,” said Brian with a smile. “Jim and I had been discussing what I might build and he tossed out the idea of selling me his pride and joy. After talking with my wife and my pal Troy Aves, we hooked up the trailer and made the 600-mile trek to Jim’s.” During that interlude, Brian formed the rough draft in his head of how to exploit the 1982 Camaro.
On the leg through Kansas, they stopped in Topeka to see another of Brian’s cohorts, fabricator and chassis builder Tim Webb. After hours of sticking their heads together, the boys had filled in the blanks on the rough copy and emerged with the course of action.
“We took the car home, stripped the interior out and test-fitted the drivetrain. It was set for the return trip to Webb’s for the front chassis work to be done and for him to have the headers fabbed up.” Tim’s brother Chris used the lull to string the Spaghetti Menders harness and switch panel that Brian had stripped from his wrecked racer. While he and Tim were up there, they installed the VFN dashboard.
Brian’s a 275 drag radial proponent and active in the Limited 275 class. Mindful of his recent dance on the dark side, he wanted the next envelope to be even more secure. Brian sought steel-helmet refuge under a 25.5-cert rollcage erected by Riffel Motorsports in Newton, Kansas.
Tim Webb carried on, constructing the tubular front clip as well as an aluminum engine mount, the mid-plate, and the radiator support. Menscer Motorsports/AFCO struts comprise the suspension. The Strange Engineering front brakes carry minimal two-piston calipers on 11-inch rotors. To prepare the drive end, Webb hoisted the Moser/Racecraft axlehousing and located it with the multi-adjustable Menscer/AFCO assemblies, an antisway bar, and a modified Spohn torque arm. Wilwood 11-inch discs fit neatly behind the foot-wide rear beadlocks.
Concurrently, many miles from Haysville, Kansas, TRE Racing Engines down in Cleveland, Texas, was building a 582ci DRCE race block with a Callies crank, MGP aluminum rods, and a complement of Bill Miller’s high-compression forgings. The Comp roller features nearly an inch of lift. Brodix Head Hunter castings are CNC-ported and feature 496-cfm intake ports.
A Victor II intake manifold hosts a giant Accufab throttle body and a fat Nitrous Outlet fogger that liberates 800 hp additional. Tim’s last big effort went into building and routing the exhaust system. He stepped the header primaries from 2.5 to 2.75 inches and channeled the trash through 4.5-inch horns that blossom business-like through the fenders, as is the style these days.
For the drivetrain, there was no other choice than a Flip-O-Matic. A what? For decades in Wichita, Flip Williams has been doing automatic race boxes. Since the 582 would make more than ample grunt in a weight-balanced 3,200-pound berserker, the transmission in Brian’s third-gen is a Coan Turbo 400 that Flip converted to a more expedient two-speed operation.
To some of us older chaps, a white drag race Camaro is immediately reminiscent of anything with the name Jenkins on it. It’s not very exciting but considering its mission and its function, the Arctic White palette is perfect, even more so were it dotted with sponsor logos. Originally, the body rehab was administered by Jim Frendt, Rob Seaton, and painter/racer Jake Delmonico in St. Paul, Minnesota. Before it was repainted in 2013, the fuel filler cap was shaved and the car stripped of even more superfluous bits to satisfy the bare-bones weight bogey.
In the cockpit it’s civilized, no echoes, no stripped-out doors or bleak bare floors and it’s all minimally covered with something that looks real. Brian plants himself in the Jerry Bickel carbon-fiber bucket seat, pulls the G-Force harness over his shoulders, hawks the Holley digital gauge pack, and then kicks the shifter into gear. “The car made its first pass in September 2016. It briefly held the Tex 275 class record with a 4.74 at 147. But mainly, I compete in Limited 275 Radial Tire series at Kansas City International, Tulsa Raceway, and North Star Dragway in Denton, Texas.” On October 14, 2017, he ran a 4.70/151 with a tight 1.12-second 60-foot time.
Brian’s been captured by the sheet of solid sound for more than 30 years and says that it was his first job at an automotive machine shop that did it—the owner was big into drag racing. For the white Camaro’s second term, Brian gathered Tim Webb, Chris Webb, Troy Aves, Shannon Wise, James Wise, and Jason Metcalf. Further, he says the calculations wouldn’t have turned out as well without help from Killer Wax, Ultra Collision Repair, Down Right Racing, and Seibert Performance.
What for him was the most challenging aspect of the accelerated 10-month build we asked? “Being patient,” he said. We think there’s more to come from Brian Wise and his dedicated cabal. CHP
Tech Check
Owner: Brian and Shannon Wise, Haysville, Kansas
Vehicle: 1982 Camaro
Engine
Type: Chevrolet Performance DRCE 2 block
Displacement: 582 ci
Compression Ratio: 14.0:1
Bore: 4.610 inches
Stroke: 4.375 inches
Cylinder Heads: Brodix Head Hunter 24-degree, CNC-ported, 496-cfm intake runners, 2.40/1.85 valves, blended bowls
Rotating Assembly: Callies crankshaft, MGP aluminum connecting rods, BME pistons, Total Seal ring packs, King bearings
Valvetrain: Jesel 1.8:1 shaft rocker system, titanium retainers, Victory valvesprings, Jesel beltdrive
Camshaft: Comp Cams 60mm roller (0.950-inch lift, 288/316-deg. duration at 0.050), TRE fabricated rocker covers
Induction: Edelbrock Victor II intake manifold, Accufab 2,200-cfm throttle body, Nitrous Outlet Stinger 3 fogger (800-shot), Holley Dominator ECU, 3-gallon RCI fuel cell
Ignition: MSD Digital-7 Plus controller, MSD primary wiring
Exhaust: Stainless stepped 2.5-to-2.75-inch primaries, 4.5-inch collectors built by Tim Webb (Topeka, KS)
Ancillaries: Meziere water pump, SPAL fan, custom radiator support
Machine Work: TRE Racing Engines (Cleveland, TX)
Built By: TRE Racing Engines
Output (engine only): 1,100 hp at 8,000 rpm, 800 lb-ft at 6,500 rpm
Drivetrain
Transmission: Coan Turbo 400 (assembled/converted to two-speed by Flip-O-Matic Transmissions, Wichita, KS), Coan converter, finned pan
Rear Axle: Moser M9, spool, 4.10:1 gears, Strange Engineering 35-spline shafts, Precision Technologies 3-inch chrome-moly driveshaft
Chassis
Front Suspension: Stock spindles, tubular clip by Tim Webb, aluminum front- and mid-plates, Menscer/AFCO struts, AFCO springs, chrome-moly rollcage 25.5-cert installed by Riffel Motorsports (Newton, KS)
Rear Suspension: AFCO springs, Menscer/AFCO dampers, Wolf Racecraft antisway bar, modified Spohn torque arm
Brakes: Strange Engineering 11-inch rotors, two-piston calipers, front; Wilwood 11-inch rotors, two-piston calipers, rear; Strange Engineering master cylinder
Wheels & Tires
Wheels: M/T Pro 5 15×3 front, M/T Pro 5 (w/ Racecraft beadlocks) 15×12 rear
Tires: Hoosier Drag Front 26.0/4.5 front, M/T Pro Drag Radial 275/60 rear
Interior
Upholstery: Jerry Bickel Race Cars
Material: Cloth
Seats: Bickel carbon fiber
Steering: Custom post, Grant Performance GT wheel
Shifter: TCI Outlaw
Dash: VFN fiberglass dash hydrodipped in carbon-fiber film by Leading Edge Graphics
Instrumentation: Holley EFI 5.7-inch digital screen gauge pack, wiring by Tim and Chris Webb
Exterior
Bodywork: Jim Frendt, Jake Delmonico, Rob Seaton
Paint By: Jake Delmonico (St. Paul, MN)
Paint: PPG Arctic White
Hood: Down Right Racing fiberglass (Vero Beach, FL)
Grille: Stock
Bumpers: Stock
The post Killer-Looking and Running 1,100-Horsepower 1982 Chevy Camaro appeared first on Hot Rod Network.
from Hot Rod Network http://www.hotrod.com/articles/killer-looking-running-1100-horsepower-1982-chevy-camaro/
via IFTTT
0 notes
Text
A Woman Shows Men How A Charger Ought To Be Built & Driven!
Back in 1982, this guy named Bruce Feirstein wrote a book called “Real Men Don’t Eat Quiche.” Meant satirically, most diehard Mopar guys still fondly remember the part about what sort of cars real men drove. Yep, good ’ol real Pentastar muscle iron, even if only a few of us ever got the chance to swap pistons out in our blown Hemi Road Runner as a regular, fun afternoon activity. Despite its politically incorrect undertones, it is not yet banned in the 21 century, and it might be worthwhile finding a copy of this former New York Times best-seller, just for old times’ sake. But, hey, we digress…
Meet “real woman” Jennifer Galambos. She and her husband John live in Anaheim, California, and they have spent the past few years upgrading one of the most iconic muscle car packages to ever come from Detroit: the 1968 Charger. While values have pushed a lot of these examples into the realm of “restore for the trailer” crowd, the Galambos crew decided it would be better to live up to the reputation these machines created, building the Dodge into a street-track cruiser that trips the timers down in the ten-second zone.
“My first muscle car was a ’69 Chevelle that I purchased from my uncle and drove as a daily driver in the late ’90s,” she told us. “I didn’t know too much about cars back then but had the desire to learn more and do my own tinkering. I always loved the bad guy’s car from the movie Bullitt. After my husband John told me that the hit man car was a ’68 Charger, I decided to focus on finding one that I could make my own.”
That effort led to a real R/T that was located in Las Vegas, which is where we also shot this story over a decade later. Jennifer and John made the purchase and she soon began to get busy with learning some of the ins and out of getting the Dodge back in shape. Though the car was already a driver when bought, it needed some work fairly early on. A real woman, she jumped right in.
“That was the beginning of a long road of work to get her to the shape and condition she is today,” admits the 37-year-old company comptroller. “We started with the dreaded wiring; I became very familiar with a soldering gun. Then the 440 engine that was in the car when we bought her had issues and I ended up throwing a rod out of the bottom of the block on the freeway heading back from a drag race at Barona.”
We have shown a lot of Chargers on these pages in the last three decades, but what made this one special is how it is used. Since the couple works in the real world like most of us, there was a limited budgeted, and many of the cosmetic things they wanted were put on the back burner for things the car needed for driving and racing. That’s ok, because it’s more fun embarrassing that loudmouth with the bright shiny Corvette by beating him in front of his girlfriend, especially when he sees afterward that Jennifer did the deed.
“The car was off the road for a while as we saved funds to build a stroker motor,” says Jennifer. “So while the engine was out of the car, I sanded and painted my engine bay. We also prepped a fiberglass hood as the engine would no longer fit under the factory one and I didn’t want to cut a hole in the original. The rest of the body we haven’t done a lot with. That Viper Red paint is probably around 17-plus years old.”
The body is still all steel save for the hood, which now has an opening made for the scoop to protrude through. By carefully considering other parts, the car hits the scales at 3,660 pounds even with a full interior. One change that helps in this was going to the Caltracs mono-leaf rear spring and bar layout, pulling off the heavy OE multi-leaf pack. The suspension is tunable by using Calvert’s adjustable shocks on all four corners as well. Welded-in subframe connectors tied it all together, and then adding fresh PST polygraphite bushings freed up the front end, an important consideration since the Charger has manual steering. Braking was also upgraded, with 11.75-inch sliding caliper 1978 Cordoba front discs and rear Wilwood discs now mounted on the Dana 60 housing. A dual master cylinder from Wilwood balances it all out.
Since we are still talking about a streetable package, the rolling package doesn’t feature skinny dragster wheels. Rather, under the nose are vintage 15×7 Indy Slots rims with 235/60R15 BFGoodrich rubber. Wider 15×10 ET III slot-type rims hosting Hoosier 325/50R15 drag radials are out back. What is coolest is that custom backspacing on these rims meant they snugly fit into the OEM wheelhouses. No minitubs on this one! The car still retains the OEM torsion bars and front sway bar. These are all very reasonable adaptations, and looking like the sort of mods that keep ’em guessing just what is possible once the red Charger pulls up next to you at the traffic signal.
“Everything needed to be beefed up so we wouldn’t have to worry about parts failure on the track or in traffic,” Jennifer notes. “I also can drive my car pretty much anywhere except when it’s raining, so I enjoy taking family and friends for rides down to the beach for a cruise or to pick up some yummy sushi or tacos locally. In fact, there are even a few valets who know me well and let me park my own car! I’ve also taken her on several car cruises, one of them being an annual Anza Borrego cruise which puts the car through corners and mountain terrain.”
Power for the program came from a noteworthy source, the legendary Joe Jill at Superior Automotive in Placentia. Again, nothing exotic was used here, but the circa-1968 440ci RB wedge pegged the dyno needle at 651 ponies once it was back together. Following machine work, pieces from Eagle and Ross pushed the displacement to 511 inches. That mill now sports 10.43:1 compression pistons, one of Jill’s well-selected cam grinds, and a timing and valve gear combo from Manley, Cloyes, Manton, and Harland-Sharp. Eye candy that also puts power down on pavement came from Edelbrock in the form of weight-saving aluminum RPM Performer cylinder heads and a matched low-profile dual-quad intake hosting a pair of ex-Carter Edelbrock 750 AFBs. These are topped by the injector-shaped air box that now comes up menacingly right through the hood.
Other upgrades helped as well. Spark comes from aftermarket parts including a Mopar distributor, MSD Blaster coil, and MSD 8.5mm wires. TTi long-tube headers and Dynomax Race Bullet mufflers rattle the windows next door. Keeping it all cool meant taking that power-robbing factory fan off the pulley and replacing it with twin electric units mounted behind a big Mark 7 radiator.
Making the driveline work in a street/strip car is never as easy as it seems. Spending money here is smart and it went into an A727. Protrans took the Torqueflite apart, added upgraded planetaries and lightweight internals, then capped it off with a reverse valve body and a 3,400-rpm stall converter. Though it retains the OEM ratios, the benefit is less horsepower-robbing weight in the driveline itself. Behind this is a Dana 60 with an Auburn SureGrip set-up and a 3.54 final gear ratio. Coupled to the larger rear tire, the car can hook and go but remains reasonably sane on the boulevard.
“Typically, I’ll fill the tank in Anaheim and drive to Famoso or Vegas, drag race all weekend, then drive her home. That’s what our goal was, to make a true street/strip car.”
Jennifer noted that the interior is just as God and Chrysler intended, and again, there is nothing here done for sheer appearance value. The factory steering wheel and dash are still in place, and a locking-design B&M Pro Ratchet shifter is in the console. Aftermarket gauges note what is going on under the hood. Legendary supplied reproduction seat upholstery and the fun began. “Yes, I learned the frustrating art of using hog ring pliers,” she joked.
“I started out not knowing a whole lot about drag racing, but after my very first trip down the quarter mile at Las Vegas Motor Speedway in 2003, I was hooked,” she says. “The Inaugural Mopars At The Strip, my husband and I both had our Chargers in the Mopar Muscle True Street Challenge. Her best time so far was at March Meet 2017 at Famoso, where she ran 10.94 at 121 mph running the Hoosier DOT drag radials and leaving the line at idle. We didn’t want to chop up the pretty body, so she’s running cage-less for now,” then added, “but the car sometimes runs a little quicker than the 11.49 cage requirement.”
As a life-long fan of real horses, Jennifer even uses distaff terms like “her” and “she” when referring to the car. All in all, here is a classic Charger that handles, runs hard, stays off the trailer, and gets driven like it should. As a result, we think Jennifer could probably even teach some of the hobby’s real men how to enjoy that classic iron. And if they don’t like it? Let ‘em eat quiche…
Fast Facts
1968 Dodge Charger R/T
Jennifer Galambos
Anaheim, CA
ENGINE
Type: 511ci wedge design based on factory RB block
Bore x stroke: 4.375 (.055-inch over) x 4.25
Block: OEM cast; cleaned and machined at Superior Automotive, clearanced for
Eagle reciprocating upgrades
Rotating assembly: Eagle crank, Eagle rods, Ross pistons, Total Seal rings ARP fasteners
Compression: 10.43:0
Cylinder heads: aluminum Edelbrock RPM Performer
Camshaft: Comp custom-grind solid roller, Intake 230/236 degrees duration at.
050-inch lift, .603-/.608-inch lift
Valvetrain: Harland Sharpe 1.6 rockers, Manley valves, Manley springs,
Manton pushrods
Induction: Edelbrock low-profile dual-quad
Fuel system: 2x4BBL Edelbrock Competition Series AFBs
Exhaust: TTi headers, Dynomax Race Bullet mufflers
Ignition: MSD and Mopar
Cooling: Mark 7 aluminum radiator with twin electric fans
Fuel: 91-octane pump gas
Other: injector replica scoop from Summit, Braille light weight battery,
high-output Mopar alternator
Output: 651 hp and 720 lb-ft torque
Engine built by: Superior Automotive, Jennifer and John Galambos
Best quarter-mile e.t.: 10.94/120 mph
DRIVETRAIN
Transmission: 1968 A727 by Dave and Darren Smith of Pro Trans (manual reverse pattern
valve body, Pro Ratchet shifter, custom Continental torque
converter (3,400 rpm stall)
Driveshaft: American Drive Lines shaft with 1350 U-Joints, Mark Williams yokes
front and rear
Rearend: Chrysler Dana 60 with Dutchman axles, 3.54 ratio, Auburn SureGrip, factory width
CHASSIS
Construction: Factory with Mopar welded-in subframe connectors
Front suspension: factory torsion bars, PST bushings, Calvert adjustable shocks
Rear suspension: Caltracs mono-leaf springs with adjustable bars, Calvert adjustable shocks
Steering: OEM manual
Front brakes: conversion to big-bearing—spindle 11.75-inch rotor with
sliding caliper (circa 1978 Cordoba)
Rear brakes: Wilwood disc layout, associated dual master cylinder
WHEELS & TIRES
Wheels: 15 x 7 Indy Slot Mags (front), 15 x 10 ET Fueler with custom
backspace (rear, no mini tubs)
Tires: BFG 235/60R15 (front), 325/50R15 Hoosier DOT drag radial (rear)
INTERIOR
Seats: Legendary replacement, black
Instruments: OEM cluster, Stewart-Warner aftermarket gauge set, large-face
tachometer
Stereo: dual exhausts! (factory thumb-wheel AM Music Master)
Shifter: B&M Pro Ratchet with T-handle top, console-mounted
The engine bay is clean and functional, while 511 inches of dual-quad RB wedge allow for serious performance. Due to the tall scoop design, a fiberglass hood was used, the only body-lightening component in this build-up. Note the small Braille battery, selection of black and bare metal cues on components, and nicely-smoothed firewall.
Upgrading suspension and braking pieces makes a difference, especially when you intend to drive the car. This master cylinder made the use of front and rear disc brakes of differing design possible, while PST’s polygraphite bushings throughout the front suspension helped the machine handle better. Jennifer gets to use it all, as the car has manual steering, eliminating yet another horsepower-robbing accessory.
Running 10s in any street car is a challenge, so two things are paramount: saving weight and taking drag off the drivetrain. This Mark 7 aluminum radiator and twin electric fans do both; the only pulley still working off the front of the motor drives the alternator. Selecting aluminum heads and intake, a smaller battery, and fiberglass hood helped get the car to scale at 3,660 lbs. event with Jennifer in the driver’s seat.
The factory interior remains intact, indeed, some small details have been left unattended to so that the money goes into making the rear tires work better. Jennifer used Legendary covers on the seats and handled some of that fun electrical harness wiring. The car uses S-W gauges and a B&M Pro Ratchet shifter with a Hurst T-handle over the reverse valvebody ‘flite by ProTrans.
Want to see what a functional 21st century rear set-up looks like? This is John Calvert’s race-designed-but-street-capable Caltracs mono-leaf spring and associated pre-load bar. The layout is behind an ET Fueler custom back spaced 15×10 rim, which allowed a 325/50R15 tire from Hoosier to fit under here without using minitubs. Finally, note the Wilwood disc outfit through the wheel openings.
Seen from behind is the business end of the driveline. The Dana 60 is bulletproof, with a nice 3.54 gear set. The short tailpipes exit just ahead of the wheel wells. Meanwhile, that relocated fuel line and filter on the big OE 22-gallon tank help make sure the 500 inches up ahead never gets too thirsty.
Jennifer Galambos has spent many years and hours building this Charger into a true street-strip beast. She admits that she takes it anywhere, and often refers to the car as “her.” A cruiser capable of 10-second times, few ’68s are still set up for this much fun.
The post A Woman Shows Men How A Charger Ought To Be Built & Driven! appeared first on Hot Rod Network.
from Hot Rod Network http://www.hotrod.com/articles/woman-shows-men-charger-built-driven/
via IFTTT
0 notes
Last Seen Blogs

wefoundlibertalia
endure and survive

r0xyonzefir
R0xy Rid0 💚

whimsicallyconfusedforlife
Lovesquare Once Upon A Time….

jijakarim
One Man Blog