#macOS High Sierra
Text
now i know why i havent been playing trendsetters omg.....its 3DS and desmume only does ds T_T citra incompatible with my version of mac. i licherally have the game but if i can’t post for my fans? i shan’t play!
#lmk if youre able to emu 3ds on macos high sierra lol i need help v_v#also need to switch to windows. apple gay af#squeaks
5 notes
·
View notes
Text
Macos high sierra 10.13 iso

#Macos high sierra 10.13 iso mac os
#Macos high sierra 10.13 iso download zip
#Macos high sierra 10.13 iso install
#Macos high sierra 10.13 iso update
Plugged in usb installer to my hp pavilion laptop not any other laptops to extract native ACPI files by pressing F2 and F4 during startup at cover I needed to patch “ IRQ Fix” and “OS Check Fix (Windows 7)” into my DSDT as the following:
#Macos high sierra 10.13 iso install
Now my USB installer is bootable but It will get stuck in gray screen if I try to install High Sierra.
#Macos high sierra 10.13 iso update
Finally I needed to update my CLOVERX64.efi since its very old by downloading the latest rehab man clover then installed it to any empty usb disk then copied CLOVERX64.efi from /EFI/CLOVER and replaced it to my usb installer. From I downloaded and copied (FakeSMC.kext,VoodooPS2Controller.kext,SATA-100-series-unsupported.kext) to /EFI/CLOVER/kexts/Other In EFI/CLOVER/kexts/Other I deleted all kexts. In /EFI/CLOVER/kexts I deleted all folders except Other. Set /ACPI/SSDT/Generate/ ( CStates= YES, PStates= YES) Renamed /ACPI/ #DropTables to DropTables Renamed /ACPI/ DropTables to #DropTables Created Devices/ FakeID/ IntelGFX=0x12345678 Downloaded and chose config_HD3000_ist renamed it to ist replaced it in /EFI/Clover and edited it using PlistEdit Pro: Then I didn’t check Inject ATI or Inject NVIDIA. Downloaded UniBeast-8 then opened it, chose my usb drive, High Sierra,Legacy Boot Mode.
#Macos high sierra 10.13 iso mac os
formatted the entire usb to Mac OS Extended (Journaled) / GUID Partition Map Opened disk utility then view Show All Devices Downloaded mac high sierra 10.13 from mac app store using any Mac laptop. Unlike booting from NEC ports, I get stuck in a screen like a bios. USB Mac High Sierra installer can boot from Intel ports. I tried to follow his guide but my laptop refuses to boot from usb stick. Unlike other guides and laptops you just simply follow the rehabman's guide. This laptops needs specific steps to make usb installer bootable on this laptop using tool called UniBeast-8 and then update CLOVERX64.efi file in the clover to the latest. Shut down the system (this helps the the brightness bar to show up)Īfter that you got High Sierra 10.13.2 fully working without walking through the rest of my guide except you need to fix the app store. Repair permission by just opening kext utility Don't forget to install AppleBacklightInjector.kext to /L/E by typing in terminal: The clover needs to be replaced to your clover folder in HD after you delete it and kexts needs to be installed by kexts utility.
#Macos high sierra 10.13 iso download zip
Install the system to your HD drive then install bootloader only from MultiBeast - High Sierra 10.2.0 after that download zip file I renamed it “Hp Pavilion dv6-6c65sx CLOVER + Essential kexts. You can make installer High Sierra usb using UniBeast-8 Legacy mode then delete the entire EFI folder in the EFI partition and download zip file that I attached called (High Sierra Installer EFI.zip ) and paste it to your usb installer in EFI partition. * Do you have the same laptop and you are noob and lazy to follow my guide? Many thanks to RehabMan who helped me during this process. 16gb usb to make Mac high Sierra 10.13.2 usb installer and 32gb usb to install high sierra on because I didn't want to mess and lose data in my internal hard drive. In this guide I used 2 usb sandisk sticks. You will notice that there are no differences except the unibeast version and multibeast version I already made a same guide for this laptop with Sierra 10.12.6 this link My aim is to provide easy steps for what I did to make my laptop works with high Sierra 10.13.2. Some of the steps I did during installation not sure if they are right or the wrong way. This is a guide for the Hp pavilion dv6-6c65sx laptop. Building a CustoMac Hackintosh: Buyer's Guide
0 notes
Text
Macos high sierra 10.13.1

MACOS HIGH SIERRA 10.13.1 INSTALL
MACOS HIGH SIERRA 10.13.1 PRO
Note: Only perform steps 5 and 6 if you intend to do a clean install. The USB drive you just created by holding down the Option key while turning on the machine, and selecting the drive. When the operation completes, boot your target unsupported Mac off Next, select your USB drive in the Target Volume list, and click "Start Operation."Ĥ. *Ensure that the tool successfully verifies the app.ģ. Open the "macOS High Sierra Patcher" tool, and browse for your copy of the macOS High Sierra Installer App. Insert your desired USB drive, open Disk Utility, and format it as OS X Extended (Journaled).Ģ. High Sierra detects it as just a standard mouse, preventing you fromĬhanging some trackpad-oriented settings.ġ. View changelog and download older versions here A USB drive that's at least 8 GB in size In the Menu Bar, simply select "Tools > Download macOS High Sierra." Supports High Sierra, or by using the built-in downloading feature of the tool. This can be obtained from the Mac App Store using a machine A copy of the macOS High Sierra InstallerĪpp. Partition of your currently installed copy of OS X, open Terminal, and If it's not or you're unsure, just boot into your Recovery
MACOS HIGH SIERRA 10.13.1 INSTALL
Note: Make sure SIP is disabled on the system you intend to install The 2007 iMac 7,1 is compatible if the CPU is upgraded to a Penryn-based Core 2 Duo, such as a T9300. Early-2008 or newer Xserve (Xserve 2,1, Xserve 3,1) Early-2009 or newer Mac Mini or white MacBook (Macmini 3,1, MacBook 5,2) Late-2008 or newer MacBook Air or Aluminum Unibody MacBook (MacBookAir 2,1, MacBook 5,1)
MACOS HIGH SIERRA 10.13.1 PRO
Early-2008 or newer Mac Pro, iMac, or MacBook Pro I also have a YouTube video going over the whole process. Take a look at the FAQ located at the bottom of this page as well. Or comments? Feel free to contact me at Please
0 notes
Text
Macos high sierra installer

#Macos high sierra installer install
#Macos high sierra installer upgrade
MacOS High Sierra introduces Metal 2, the next-generation of Apple’s Metal graphics API that was launched three years ago. Even existing Macs will benefit from the HEVC software encoding in High Sierra, but newer Mac models include HEVC hardware acceleration for even better performance. High Sierra includes High Efficiency Video Encoding (HEVC, AKA H.265), which preserves better detail and color while also introducing improved compression over H.264 (MPEG-4 AVC). Most of us won’t notice these improvements, but we’ll benefit from better, faster, and safer file handling, which I think all of us can appreciate. Many of these improvements, including enhanced performance, security, and reliability of data will provide immediate benefits to users, while others provide a foundation for future storage innovations and will require work by Apple and third parties to support in their products and services. We went into detail about the enhancements and improvements that APFS has over the previous file system, HFS+, in an earlier post. Apple touts APFS as a new file system optimized for Flash/ SSD storage and featuring strong encryption, better and faster file handling, safer copying and moving of files, and other improved file system fundamentals. It’s already in iOS: now High Sierra brings APFS to the Mac.
#Macos high sierra installer upgrade
Under the Hood of High Sierra Apple File System (APFS)Īpple has been rolling out its first file system upgrade for a while now. We’ll cover both the inner and outer improvements coming in this new OS. Its major focus is on improving the base OS with significant improvements that will support new capabilities in the future in the file system, video, graphics, and virtual/augmented reality.īut don’t despair there also are outward improvements that will be readily apparent to everyone when they boot the OS for the first time. High Sierra, as the name suggests, is a follow-on to the previous macOS, Sierra. To make that easier, Backblaze offers this macOS High Sierra upgrade guide. You want your data to be safe from unexpected problems that could happen in the upgrade. A new OS from Apple is exciting, But please, before you upgrade, we want to remind you to back up your Mac.
#Macos high sierra installer install
It’s a free upgrade, and millions of Mac users around the world will rush to install it. On Tuesday, we learned we don’t have long to wait-the new OS will be available on September 25. Apple introduced macOS 10.13 High Sierra at its 2017 Worldwide Developers Conference in June.
0 notes
Text
Macos high sierra download on windows

MACOS HIGH SIERRA DOWNLOAD ON WINDOWS MAC OS
MACOS HIGH SIERRA DOWNLOAD ON WINDOWS INSTALL
Optimized Storage: The cloud storage capabilities introduced in this release included automatic local storage clean up, which would remove local copies of data that had already been committed to the cloud.
MACOS HIGH SIERRA DOWNLOAD ON WINDOWS MAC OS
iCloud Drive: This feature enabled Mac OS users to unify their documents and data across all of their Apple-compatible products, allowing for better access and control.Siri: This intelligent assistant was first featured on the desktop versions of the Mac OS in this release and brought with it a whole host of voice commands and capabilities that were previously limited to iOS devices.
MACOS HIGH SIERRA DOWNLOAD ON WINDOWS INSTALL
You can install Mac OS Sierra from MacUpdate if you would like to try it out or reinstall it.ĭownload Mac OS Sierra and access its features: These were addressed with later releases of Mac OS and are no longer a problem. There are some Mac OS Sierra problems and known issues, but these are minor.Įxamples of these small issues include the unreliability of the Auto Unlock feature and some Siri glitches. Compatibility starts with late 2009 Macs and mid-2010 MacBooks. It needs 2GB of RAM and 8GB of storage to run properly. There are no major problems with Mac OS Sierra, and the requirements for this release are minimal. It adds voice commands via Siri, as well as cloud storage and enhanced space management Mac OS X Sierra is easy to use and is very familiar to Mac OS users. It comes with apps such as Siri and iCloud Drive, as well as additional features and enhancements over earlier versions of the operating system. Mac OS Sierra features many new capabilities for Apple devices, and its public release date was September 20, 2016, from Apple.
0 notes
Text
Macos high sierra 10.13 download

#Macos high sierra 10.13 download how to#
#Macos high sierra 10.13 download for mac#
#Macos high sierra 10.13 download mac os#
#Macos high sierra 10.13 download drivers#
Please download the iClarified app or follow iClarified on Twitter, Facebook, YouTube, and RSS for more Apple tutorials. Use software update or find links to download other macOS installers below. If your Mac doesn't support the very latest operating system, you may still be able to upgrade to a more recent OS.
#Macos high sierra 10.13 download mac os#
These Mac models are compatible with macOS High Sierra:Īpple recommends you install the latest Mac OS that is compatible with your device.
Some features require a compatible Internet service providerįor details about your Mac model, click the Apple icon at the top left of your screen, choose About This Mac.
14.3GB of available storage to perform upgrade.
Step 2: click on the green download button that will.
#Macos high sierra 10.13 download how to#
How to Make a Bootable macOS High Sierra USB Install Key How to install macOS High Sierra Step 1: make a backup of your files (not compulsory but recommendable).
To create a bootable macOS High Sierra USB Installer, follow this tutorial: The size of the download is 4.8GB and the update is. Check out gibMacOS for an automated tool. Apple has released macOS High Sierra 10.13 for download in the Mac App Store today, as promised. You can also try the macOS High Sierra Patcher.Įxpert users can use the following sucatalog link to retrieve the required components. If you have an issue obtaining a full installer from the Mac App Store, make sure you are on the latest version of Sierra or higher. You can download the latest version of macOS High Sierra from the Mac App Store using the following link:
#Macos high sierra 10.13 download drivers#
Epson will provide macOS 10.13 High Sierra drivers and software for Epson products on an on-going basis. This sort of practice is not sustainable - we cannot require people to keep replacing machines year on year.Here are direct links to download Apple's macOS High Sierra installer for your Mac. Get Epson support for macOS High Sierra 10.13. It would be helpful if Microsoft updated the misleading information and would stop people wasting their time. I also have paid for copy of Microsoft 2011 which is perfectly adequate for my needs on this machine but the activation server has been switched off so I am not even allowed to downgrade. Once I have downloaded the 1.8GB of application, it won't install as the installer specifically states that macOS 10.14 or greater is required. I have stumped up the money for a MS365 subscription (I use this on another machine) and it specifically states that it is compatible with macOS13.6 I KNOW it is not state of the art but I am not trying to render massive 3d scenes - it is perfectly adequate and has a nice big display. I just need it for a bit of lightweight spreadsheet and wp work. The latest software it will run is macOS 13.6. Play music at the same time on multiple AirPlay 2. AirPlay 2 for iTunes 12.8: Control your home audio system and AirPlay 2-enabled speakers throughout your house. This update is recommended for all users. I have had to replace the HD in an old but perfectly serviceable 27" iMac. The macOS High Sierra 10.13.6 Update adds AirPlay 2 multiroom audio support for iTunes and improves the stability and security of your Mac. Note: Please follow the steps in our documentation to enable e-mail notifications if you want to receive the related email notification for this thread. If an Answer is helpful, please click "Accept Answer" and upvote it.
#Macos high sierra 10.13 download for mac#
If not, you may choose one older version of the Office for Mac on the following articles, then click "Install package" and try to install on your MacBook.īut please note, installing a new version of Office for Mac is still a best practice. To get the best experience of using Office for Mac, could you please upgrade your MacOS to Big Sur (11), Catalina (10.15) and Mojave (10.14 )? New installs of Microsoft 365 for Mac or Office 2019 for Mac will also require macOS 10.14 or later. If you continue with an older version of macOS, your Office apps would no longer receive any updates including security updates. You have the Microsoft 365 for Mac or Office 2019 for Mac?Īs of the December 2020 ( build 16.44) update for these 2 versions of Office, macOS 10.14 Mojave or later is required to receive updates.
0 notes
Text
Macos high sierra download xcode

Macos high sierra download xcode update#
Macos high sierra download xcode full#
Macos high sierra download xcode software#
Macos high sierra download xcode mac#
This is a handy site that lists the major XCode releases as well as the macOS requirements.
Macos high sierra download xcode software#
You can view the Version History for the XCode app in the app store, which will list the software requirements. Which version of Xcode should I download? Apple File System requires all-flash internal storage.Older versions of XCode can be found at the Apple Developer site (you will need to login with your AppleID). Some features have hardware requirements. Some features require an iCloud storage plan. Some features may not be available in all regions or all languages.
Build state-of-the-art apps with features that accelerate common machine learning functions.
Discover immersive tools for content creation with support for virtual reality.
Macos high sierra download xcode mac#
Get the most out of the graphics capabilities of your Mac with the new and improved version of Metal.Create and watch high-resolution video with High Efficiency Video Coding (HEVC), which uses up to 40 percent less space without sacrificing quality.Įnjoy next-generation graphics and computation with Metal 2.Step up to the new standard for 4K video: HEVC. Protect your entire drive with built-in native encryption for greater security.Enjoy faster and more reliable backups.Experience greater responsiveness when performing common tasks like duplicating a file and finding the size of a folder.
Macos high sierra download xcode update#
Update to a new file system architecture designed for all-flash Macs.
Upgrade the performance, reliability, and security of your Mac with the new Apple File System.
Share and work on any file in iCloud Drive with other people so it is always up to date with the latest edits.
Set up your family with a few clicks and add capabilities when needed.
Share a single iCloud storage plan with your family and keep everyone’s data backed up and safely stored.
Copy and paste files between your Macs using standard copy and paste commands.
Enjoy personalized music recommendations from Siri when you listen to Apple Music.Ĭopy and paste files from one Mac to another with Universal Clipboard.
Hear more variations in intonation, emphasis, and tempo when Siri responds to you.
Get music suggestions from a more natural-sounding Siri.
Take a Live Photo during a video call to any supported Mac, iPhone, or iPad.
Pin your favorite notes so they’re always at the top of the list.
Organize your information using configurable tables.
Check the status of a flight by typing the airline and flight number in the Spotlight search field.
Save space on your Mac with compressed messages.
Macos high sierra download xcode full#
Use Split View when composing new email in full screen.Instantly find the messages most relevant to your search using Top Hits.Customize your browsing experience with new per-site settings for Reader, page zoom, content blockers, and more.Prevent websites and ad networks from tracking your browsing with Intelligent Tracking Prevention.Stop web video with audio from playing automatically.Improve your browsing experience with Safari. Create printed photo products and more using new third-party project extensions.Rediscover images from your library with new Memories themes including pets, weddings, outdoor activities, and more.Access third-party apps directly from Photos and save the edited images back to your Photos library.Fine-tune color and contrast in your photos with new Curves and Selective Color tools.Conveniently access all of your editing tools in the redesigned Edit View.Easily locate and organize your content with the new sidebar.Make short videos from your Live Photos using new Loop and Bounce effects.It’s macOS at its highest level yet.Įasily organize, edit and view your photos in Photos. macOS High Sierra also refines the features and apps you use every day. New technologies at the heart of the system make your Mac more reliable, capable, and responsive - and lay the foundation for future innovations.
1 note
·
View note
Text
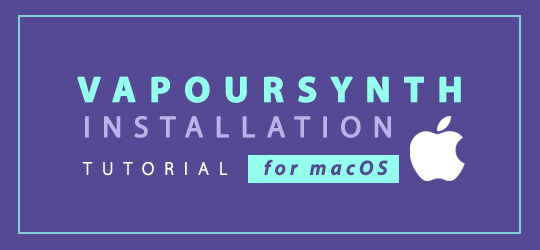
VAPOURSYNTH INSTALLATION TUTORIAL (macOS)
— if you’ve always wanted to try vapoursynth but have been intimidated by the installation process, then this tutorial is for you!
— target audience: macOS from High Sierra and later (ie: Catalina, Mojave, Big Sur, Monterey)
About Vapoursynth (VS)
vapoursynth is an application for video manipulation. for gif makers it helps to resize, crop, sharpen, denoise, and clip videos into small gif-able segments with minimal loss to the original file quality. for more information visit the official site here. the application works for both mac and windows (however this tutorial is meant to guide mac users since the installation process can be more confusing on that OS). for users familiar with avisynth, this is a similar program (however unlike the former, it is also compatible with macOS)
This two part video tutorial references this HackMD tutorial by nibreon throughout tutorial. (you will also find how to download on windows there).
To access the tutorial please access the following YouTube links:
part one // part two
103 notes
·
View notes
Text
Idk how to explain this without being long-winded, but it’s my blog so whatever.
Basically, I have a 2011 MacBook Pro 15”. I’ve replaced the battery and upgraded the RAM and replaced the 500GB HDD with a 500GB SSD. It’s great! The machine is truly the fastest mobile computer I have.
The 2011 MBP was let go from software updates a while ago, meaning, natively, macOS High Sierra is as high as I can get the thing.
Luckily, this computer is from an era when Apple actually made computers and not eWaste, so I just erased macOS off of it and flashed Zorin OS (an Ubuntu-based Linux distro) onto it. The computer is now even better! It’s my primary productivity machine. The display, speakers, battery life, and thermals are all pretty bad, but it’s just so snappy and problem free I can’t help it.
Now, when I set up Zorin OS I used LVM Encryption to encrypt the entire disk. Basically, upon booting, before anything happens, I’m prompted with a password box. Once I put in the encryption key, the computer would continue booting and bring me to my usual login screen. Great! Easy peasy, extra secur-sy. Well. That was the case.
Somehow, in my efforts to find a way to stop Linux from using my MBP’s Discrete GPU in favor of its Integrated (more efficient, less power hungry) one, I broke something in the EFI or SMC idk. Reinstalling didn’t help. MacOS Recovery mode didn’t help. The only way I fixed it was by wiping the device, running the installer USB, downloading the script I used to fuck it up, and then running it to undo what I previous had it do. This worked. Luckily, I was keeping the machine backed up with Timeshift. So, I wiped the computer again and installed Zorin OS, fresh, reinstalled Timeshift, and restored from backup. The only problem?
When I reinstalled Zorin, I didn’t use LVM Encryption because I was tired of having to manually type in that 25 randomized character password I chose. As a result, now every time I boot the computer, I’m prompted with a “Waiting for encrypted device, (name).” That prevents the machine from booting for about 5 minutes until it just randomly decides “ope, never mind” and finally takes me to my login screen. It does nothing in prohibiting me from using the computer expect prolong it. It’s just annoying and weird as hell, and I have no idea how to get rid of it.
Clearly, the way Timeshift resorted the device has it thinking it’s still an encrypted volume, and I have no idea how to tell it that it is not.
But anyway, it just aggravates me, and I needed to ramble and vent about it. Carry on.
#rambles#computer#computer operating system#os#software#linux#zorin#zorinos#zorin os#annoying#annoyance#apple#fuck apple#macbook#macbook pro
9 notes
·
View notes
Text
The past days of my adventure in Aruba
Bon Dia! Today i will be going over tuesday and wednesday, and what i did in these 2 days!
So on tuesday I started the day and got to meet Dwayne, the other member of the IT department of the university of Aruba. He welcomed me with open arms!
Once i sat down he handed me an old laptop and asked me to make a fresh install on it. And so I did, once that was done I had to install a series of applications to make it user-friendly. Which is where i met Ninite. Ninite is an online tool where you get a broad selection of applications. You tick the boxes of the apps you need and hit download. This will give you 1 executable file which installs all of the apps you needed. Pretty nifty if you think about it! Then Dwayne showed me how to add the laptop to the domain so it became functional.
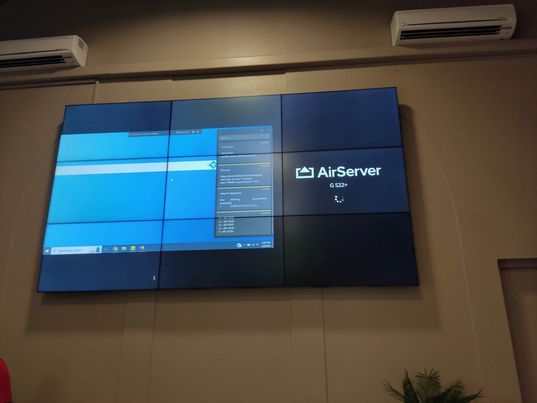
I then went on lunch break, after my lunch break i went back to work. This didn't last long. After a couple minutes, Glennrick came in and told me we had to go to the aula. He showed me this series of 9 televisions linked to eachother, creating a giant screen that plays 8K resolution videos. He showed me one of those videos and then we went to work. For an upcoming symposium we needed a 3rd monitor so the students of the symposium could read their notes on that monitor.
Once we were done i quickly made a clean image of the fresh laptop I made that morning and went on my way home. That evening we went to Madame Janette, next to our resort. We had a few drinks and went home for the night.
On wednesday morning, Glennrick showed me more about their firewalls and internet providers.
Once we were done, Glennrick had to go to a meeting, so I spent the rest of the day in Dwayne's office. He gave me a macbook to completely clean up. Because they were using MacOS High Sierra, which is no longer supported by Apple servers, I ran into a couple issues.
Once I was done with that macbook I got to help some more with prepping for the upcoming symposium.
That evening we went downtown, looked at some shops, and visited this cute bar called Mambo Jambo. We had a drink there and went home. Where we were met with a power outage...
All-in-all. the past 2 days were pretty fun and interesting!
Signing off for now! Hope to see you guys in the next post! <3


3 notes
·
View notes
Text
Get fl studio free


Download the Fruity Loops for MAC free and let us known if you face any problems while installing or trying to make it work. The only drawback about FL Studio was its non-availability for MAC OS X users but that gap has been covered now and MAC users can also get their hands on it and start working on their electronic beats right away.
Advanced yet easy to use MDI capabilities.
Great selection of instruments and effects.
Users can make all kind of their preferred electronic music.
FL Studio is currently being used by Hit-Boy, 9 th Wonder, Jahil Beats, Boi-1da, Soulija Boy, Alex da kid, MdL and Lex Lugar. After doing this the user will have the same version of FL Studio Fruity Loops software that he registered for.įL Studio is one of the best software out there when it comes to music editing and is also used by some famous Music Producers though the software didn’t get as much attention as it should have. After doing that, the user will have to browse to the location where he has saved his FLregkey.Reg file and select it.ģ. Click on the FL Studio menu and select Register FL Studio from the drop down menu.Ģ. If you are an old FL Studio Fruity loops registered customer then you can unlock this DEMO version. Paste the downloaded file here and you are good to go. After you download the Arial.ttf file, go to the specified folder here (C: /Users/USERNAME/Library/Application Support/FL Studio/Bottles/flstudio/drive_c/windows/fonts ). Download the Arial.ttf file from there.ģ. To fix this issue in Fruity Loops (or FL Studio), follow the steps belowĢ. Common issues faced while using FL Studioįor most of the users, the software works fine but a lot of users have been having this issue where the software won’t show any text in its pull down menu. Dive deep into professional project files and learn about songwriting techniques, sound design, project file organization, and get 200 free samples & loops. The first startup of Fruity Loops might take a lot of time so don’t worry and wait patiently as it loads. Don’t not worry it’s a beta version and still has all the necessary features that a user would need to install it.ĥ. Upon launching FL Studio, an image will appear on the screen saying DEMO. 37 value FREE for a limited time 100 privacy. 37 value FREE for a limited time Watch For Free. Learn how the pros get their mix radio-ready with this FREE advanced course Watch For Free. After you download the file, install it and launch it.Ĥ. Learn how to mix a track in FL Studio, from start to finish. The software is around 470 MB in size and shouldn’t take too much time to download if you have a good internet connection.ģ. How to download Fruity Loops for Mac OS XĢ. The beta version is only compatible with OS X. The program is still in its beta stages and might have some bugs but they will be fixed in time. But we will be showing you guys how to get in on your MAC if you are a MAC user. FL Studio and is a popular beat making software that is only available for Windows Platform. Therefore, to advance you towards getting the software here is a guide on how to download FL Studio free trial. For the Mac version, you need macOS 10.13.6 (High Sierra) and later.In this article, we will be going to show you how to download Fruity Loops for mac free (now called FL Studio). However the free trial does give you the opportunity to play around with almost all the features of FL Studio with no time limit. This version is compatible with Windows 8 and Windows 10. The full product can be purchased from the publisher’s website with prices starting at $99.00 depending on the package. In general, the app seems as safe as any mixing software. As always, we recommend reading the official Privacy policy in order to take note of the way FL Studio uses your data. It seems that the software has no history of security issues or abusive data collecting. How To Get FL Studio 12 For Free Full Version (2018)How To Get FL Studio For FreeDownload Link. This is perfect to seek inspiration and develop further your personal style.
Samples: Enjoy different samples with the DirectWave sampler from the software’s library.
Effects: There are more than 80 effects and plugins to manipulate, sample, compress, delay, distort and many more actions.

Support: The program can support recording sounds from external sources to the computer, as well as the use of VST audio plugins, among other possibilities.
Tools: It contains sequencers, synthesizers, virtual instruments and several tools to make mixes and compose songs of a professional standard.
Here are some of the FL Studio software’s main features:
2 notes
·
View notes
Text
How do I download Windows 10 on my Mac for free without Boot Camp?
Macs don't come with a Windows 10 installation disc, so if you want to install it on your Mac, you'll need to use Boot Camp. But there's a way to install Windows 10 without using Boot Camp: by downloading and installing it through the Windows 10 Creators Update. This is free, and it doesn't require any extra hardware or software.
How to install Windows 10 on a Mac using Boot Camp?
If you have a Mac and you want to install Windows 10 on it using Boot Camp, here's how to do it. First, make sure your Mac is running macOS High Sierra or later. If it isn't, you can update your Mac software by going to the App Store and clicking Updates in the toolbar.

Then, download and install the Windows 10 ISO file. Next, open Boot Camp Assistant, which is in the utility folder of your Applications folder. In Boot Camp Assistant, click Continue and then select "Create a Windows 10 installer disk." When the process is finished, insert the disk into your Mac. Restart your computer while holding down the Option key. In the Startup Manager window that appears, select the disk with the Windows logo on it and click Start-Up. After your computer has restarted, follow the instructions on-screen to complete the installation of Windows 10 and you know more details https://today4pc.com/ from this blog website.
Download the Windows 10 ISO file
Microsoft Windows 10 is the latest release of the Microsoft Windows operating system. Windows 10 ISO file is the official disc image of Windows 10 and can be used to install or reinstall Windows 10 on a PC. The ISO file can also be used to create a bootable USB drive or DVD.
Install Boot Camp drivers
If you're running a Mac and don't have Boot Camp installed, you can still download and install Windows 10 using a free tool called Parallels Desktop. This software will allow you to use your Mac's resources to run Windows 10, instead of having to use up all the RAM in your computer. After downloading and installing Parallels Desktop, open it up and click on the "Install Windows 10" button. You'll then be asked to create a new account or sign into an existing one.
Partition of your Mac's hard drive
Windows 10 is one of the most popular operating systems on the market. It is available both as a free download for individual users, and as part of a subscription package for businesses. If you want to install Windows 10 on your Mac without using Boot Camp, there are several methods you can use.
Start the Windows 10 installation process
Windows 10 is a personal computer operating system developed and released by Microsoft as part of the Windows NT family of operating systems.

It was announced in September 2014 and released in July 2015. Windows 10 introduces what Microsoft describes as "a new generation of Windows", with a focus on "enabling more personal computing experiences" across different devices.
Conclusion
In the conclusion of an article, the author typically summarizes the main points that were made and provide a final thought on the topic. In some cases, the conclusion may also provide readers with information on what they can do to learn more about the subject matter or how they can get involved in the discussion.
2 notes
·
View notes
Link
Check out this listing I just added to my Poshmark closet: iMac 21.5-inch (Mid-2011) Core i5 2.5GHz MacOS High Sierra.
0 notes
Text
does sophos ssl vpn work with high sierra
🔒🌍✨ Get 3 Months FREE VPN - Secure & Private Internet Access Worldwide! Click Here ✨🌍🔒
does sophos ssl vpn work with high sierra
Sophos SSL VPN compatibility
Sophos SSL VPN is a popular choice for organizations looking to secure remote connections. One of the key considerations when selecting a VPN solution is compatibility with various operating systems and devices. Ensuring that the SSL VPN is compatible with a wide range of platforms is essential for seamless connectivity and user experience.
Sophos SSL VPN offers excellent compatibility with major operating systems such as Windows, macOS, Linux, iOS, and Android. This broad range of supported platforms allows users to connect securely from their preferred devices, whether they are using a desktop computer, laptop, smartphone, or tablet.
Additionally, Sophos SSL VPN is compatible with popular web browsers such as Google Chrome, Mozilla Firefox, and Safari. Users can easily access the VPN portal and establish secure connections using their preferred browser, making it convenient and user-friendly.
Furthermore, Sophos SSL VPN is designed to work seamlessly with other Sophos security products, providing a comprehensive and integrated security solution for organizations. It offers advanced security features such as multi-factor authentication, endpoint security compliance checks, and secure remote access to corporate resources.
In conclusion, Sophos SSL VPN offers excellent compatibility with a wide range of operating systems, devices, and web browsers. Its seamless integration with other Sophos security products makes it a robust choice for organizations looking to secure their remote connections effectively.
High Sierra Sophos SSL VPN connection
When it comes to establishing a secure connection for remote access, High Sierra users often turn to Sophos SSL VPN for their connectivity needs. This software solution offers a reliable way to connect to a corporate network from a remote location, ensuring data protection and privacy.
Setting up a Sophos SSL VPN connection on High Sierra is a straightforward process that involves installing the necessary client software on the user's device. Once the software is installed, users can easily configure the connection settings to establish a secure tunnel to the corporate network. This encrypted tunnel ensures that data transferred between the remote device and the network is protected from external threats and interception.
One of the key benefits of using Sophos SSL VPN on High Sierra is its compatibility and ease of use. The software is designed to work seamlessly with the High Sierra operating system, allowing users to connect to the VPN with just a few simple clicks. Additionally, Sophos SSL VPN offers advanced security features such as multi-factor authentication and endpoint compliance checks, further enhancing the security of the connection.
Overall, High Sierra users looking to establish a secure remote connection can rely on Sophos SSL VPN for their connectivity needs. With its user-friendly interface, advanced security features, and seamless compatibility with the High Sierra operating system, Sophos SSL VPN is a reliable choice for ensuring data protection and privacy during remote access sessions.
Sophos SSL VPN functionality on High Sierra
Title: Understanding Sophos SSL VPN Functionality on High Sierra
Sophos SSL VPN offers a robust and secure solution for remote access to corporate networks, even on macOS High Sierra. With its compatibility and reliability, users can connect to their organization's resources with ease, ensuring productivity and security.
High Sierra, the operating system version for Mac, presents unique challenges and requirements for VPN functionality. Sophos addresses these challenges effectively, providing a seamless experience for users. One notable feature is its compatibility with the latest security protocols and encryption standards, ensuring that data transmitted over the VPN remains confidential and protected from unauthorized access.
Setting up Sophos SSL VPN on High Sierra is straightforward, thanks to its intuitive user interface and detailed documentation. Users can easily configure the VPN connection settings and establish a secure connection to their organization's network in just a few simple steps. Additionally, Sophos provides comprehensive support resources, including troubleshooting guides and online forums, to assist users with any issues they may encounter during setup or operation.
Once connected, users can access corporate resources such as files, applications, and intranet sites securely from anywhere with an internet connection. Sophos SSL VPN utilizes advanced authentication mechanisms, including multi-factor authentication and certificate-based authentication, to ensure that only authorized users can access the network.
Furthermore, Sophos SSL VPN offers advanced features such as split tunneling, allowing users to route only specific traffic through the VPN while accessing the internet directly for other activities. This optimizes bandwidth usage and improves overall performance, especially for bandwidth-intensive tasks.
In conclusion, Sophos SSL VPN functionality on High Sierra provides a reliable and secure solution for remote access to corporate networks on Mac devices. With its compatibility, ease of setup, and advanced features, Sophos SSL VPN is an excellent choice for organizations looking to enhance their remote access capabilities while maintaining a high level of security.
High Sierra VPN software compatibility
High Sierra is a popular operating system developed by Apple that is known for its security features and enhanced performance. Many users choose to use a Virtual Private Network (VPN) for an added layer of security and privacy while browsing the internet. However, one common concern among High Sierra users is whether VPN software is compatible with the operating system.
The good news is that most reputable VPN providers offer software that is compatible with High Sierra. By ensuring that the VPN software is up-to-date and compatible with the latest version of High Sierra, users can enjoy a secure and private internet browsing experience.
When selecting a VPN provider, it is important to confirm compatibility with High Sierra before making a decision. This can usually be done by visiting the provider's website or contacting their customer support team.
Using a VPN with High Sierra can help protect sensitive information, prevent tracking, and bypass geographic restrictions. Whether you are using your Mac for work, personal use, or streaming content, a VPN can enhance your online security and privacy.
In conclusion, High Sierra VPN software compatibility should not be a major concern for users, as most VPN providers offer software that is compatible with the operating system. By choosing a reputable VPN provider and ensuring compatibility with High Sierra, users can enjoy a secure and private internet browsing experience.
High Sierra VPN troubleshooting Sophos SSL VPN
When it comes to troubleshooting issues with High Sierra VPN and Sophos SSL VPN, it is essential to understand some common problems and their potential solutions to ensure a smooth and secure connection.
One of the most frequent issues users face is difficulty connecting to the VPN server. In such cases, first, verify that the VPN server address and login credentials are correct. Ensure that the internet connection is stable and that there are no firewall restrictions blocking the connection.
Another common problem is slow connection speeds. This can be caused by various factors such as network congestion or insufficient bandwidth. To improve speed, try connecting to a different VPN server or upgrading to a higher-speed internet plan.
Intermittent disconnections are also a prevalent issue that users encounter. To address this, check for any software updates for both High Sierra and the Sophos SSL VPN client. Additionally, adjusting the VPN settings or restarting the client and the device can help stabilize the connection.
If you are experiencing error messages while trying to connect, carefully note down the error code or message. This information can assist in diagnosing the issue and finding a specific solution for it.
In cases where these troubleshooting steps do not resolve the problem, reaching out to your IT administrator or contacting technical support for High Sierra VPN and Sophos SSL VPN can provide further assistance in resolving the issue effectively.
0 notes
Text
does avast secureline vpn work with the firefox browser
🔒🌍✨ Get 3 Months FREE VPN - Secure & Private Internet Access Worldwide! Click Here ✨🌍🔒
does avast secureline vpn work with the firefox browser
Avast SecureLine VPN compatibility
Avast SecureLine VPN offers versatile compatibility across various devices and platforms, ensuring secure internet access for users regardless of their preferred device or operating system.
For Windows users, Avast SecureLine VPN is fully compatible with Windows 10, 8.1, 8, and 7, providing a seamless and secure browsing experience. Mac users can also enjoy the benefits of Avast SecureLine VPN, with compatibility extended to macOS 10.13 (High Sierra) or later versions.
Moreover, Avast SecureLine VPN is available for mobile users, supporting both Android and iOS devices. Whether you're using a smartphone or tablet, you can safeguard your online activities and protect your privacy on the go.
Avast SecureLine VPN doesn't stop there—it extends its compatibility to other platforms as well. Linux users can utilize this VPN solution to enhance their online security, with support for Ubuntu and Fedora distributions among others.
Furthermore, Avast SecureLine VPN offers compatibility with routers, allowing users to protect all devices connected to their home network. By installing the VPN directly onto the router, users can safeguard their entire network and enjoy secure internet access for all devices.
Avast SecureLine VPN's compatibility isn't limited to devices—it also integrates seamlessly with popular browsers like Chrome and Firefox. This ensures that users can protect their online activities regardless of their preferred browsing platform.
In conclusion, Avast SecureLine VPN offers extensive compatibility across a wide range of devices and platforms, allowing users to enjoy secure internet access and protect their privacy wherever they go. With support for Windows, Mac, mobile devices, routers, and browsers, Avast SecureLine VPN ensures that users can stay safe and secure online, no matter how they choose to connect.
Firefox browser integration with VPN
Firefox browser integration with VPN offers users enhanced privacy and security while browsing the web. With the increasing concern over online privacy and data security, many internet users are turning to Virtual Private Networks (VPNs) to encrypt their internet connection and mask their IP address. Firefox, one of the leading web browsers, has recognized this need and has integrated VPN capabilities to provide users with a seamless and secure browsing experience.
By integrating VPN directly into the Firefox browser, users can easily enable VPN protection with just a few clicks, eliminating the need for third-party VPN software or browser extensions. This integration simplifies the process of setting up and using a VPN, making it accessible to a wider range of users, including those who may not be tech-savvy.
One of the key benefits of using Firefox browser integration with VPN is enhanced privacy. By encrypting internet traffic and routing it through a remote server, VPNs prevent third parties, such as internet service providers and hackers, from monitoring users' online activities. This protects sensitive information, such as login credentials, personal data, and browsing history, from being intercepted or tracked.
Moreover, VPN integration in Firefox enhances security by providing an additional layer of protection against cyber threats. By masking users' IP addresses and replacing them with IP addresses from VPN servers located around the world, Firefox VPN helps to prevent location tracking and restricts access to websites and online services that may be restricted in certain regions.
Overall, Firefox browser integration with VPN offers users a convenient and effective solution for safeguarding their online privacy and security. By combining the trusted features of Firefox with the anonymity and encryption provided by VPN technology, users can enjoy a safer and more private browsing experience.
User experience with Avast SecureLine VPN on Firefox
Avast SecureLine VPN is a popular choice for users seeking to enhance their online privacy and security. When it comes to using this VPN extension on Firefox, users have reported a generally positive experience, though there are some notable aspects to consider.
One of the key benefits of Avast SecureLine VPN on Firefox is its ease of use. The extension seamlessly integrates into the browser, allowing users to activate it with just a few clicks. This simplicity makes it accessible to users of all technical levels, from novices to seasoned professionals.
In terms of performance, Avast SecureLine VPN delivers reliable speeds and stable connections for most users. Whether streaming content, downloading files, or simply browsing the web, users can expect minimal interruptions and consistent performance.
Additionally, Avast SecureLine VPN offers a wide range of server locations, allowing users to access geo-restricted content and browse the web anonymously from virtually anywhere in the world. This flexibility is particularly valuable for users who require access to specific websites or services unavailable in their region.
However, some users have noted occasional connectivity issues or slowdowns when using Avast SecureLine VPN on Firefox. While these issues appear to be relatively rare, they can be frustrating for users who rely on consistent performance for their online activities.
Overall, the user experience with Avast SecureLine VPN on Firefox is largely positive, offering simplicity, reliability, and flexibility for users seeking to enhance their online privacy and security. Despite some minor drawbacks, the extension remains a popular choice among Firefox users looking to safeguard their online activities.
Troubleshooting Avast SecureLine VPN and Firefox issues
Avast SecureLine VPN provides users with a secure and encrypted connection to the internet, ensuring privacy and anonymity while browsing online. However, users may encounter issues when trying to use the VPN with the Firefox browser. If you are facing problems with Avast SecureLine VPN and Firefox, here are some troubleshooting steps to help you resolve them.
Update Avast SecureLine VPN: Ensure that you are using the latest version of Avast SecureLine VPN. Outdated software can cause compatibility issues with the Firefox browser.
Update Firefox: Similarly, make sure that your Firefox browser is up to date. Installing the latest updates can help in fixing any compatibility issues with the VPN.
Clear browser cache: Clearing the browser cache and cookies can sometimes resolve connectivity issues between the VPN and the browser.
Check firewall settings: Your firewall settings may be blocking the connection between Avast SecureLine VPN and Firefox. Adjust the firewall settings to allow the VPN and browser to communicate.
Disable browser extensions: Some browser extensions or add-ons may interfere with the VPN connection. Temporarily disable any third-party extensions and try reconnecting the VPN.
Contact support: If you have tried the above steps and are still experiencing issues, reach out to Avast customer support for further assistance. They may be able to provide a solution tailored to your specific problem.
By following these troubleshooting steps, you can hopefully resolve any issues you are facing with Avast SecureLine VPN and Firefox, ensuring a smooth and secure browsing experience.
Enhancing online security with Avast SecureLine VPN on Firefox
In today's digital age, ensuring online security is paramount, especially when browsing the web using Firefox. With the increasing prevalence of cyber threats and privacy concerns, internet users need reliable tools to safeguard their data and maintain anonymity. Avast SecureLine VPN emerges as a robust solution to enhance online security for Firefox users.
Avast SecureLine VPN offers a seamless integration with Firefox, providing users with a layer of encryption that shields their internet activity from prying eyes. By rerouting internet traffic through encrypted tunnels, this VPN effectively masks users' IP addresses, making it nearly impossible for hackers, ISPs, or government agencies to track their online movements.
One of the standout features of Avast SecureLine VPN on Firefox is its ability to bypass geo-restrictions and access region-locked content. Whether streaming videos, accessing websites, or using online services, users can enjoy unrestricted access to the content they desire, regardless of their physical location.
Furthermore, Avast SecureLine VPN employs bank-grade encryption protocols to ensure that sensitive data, such as passwords, financial information, and personal messages, remains secure from interception. This added layer of protection is particularly crucial when connecting to public Wi-Fi networks, where cybercriminals often lurk to steal valuable data.
With Avast SecureLine VPN on Firefox, users can browse the web with confidence, knowing that their online activities are shielded from prying eyes. Whether for personal privacy or business security, this VPN delivers peace of mind in an increasingly interconnected world. By prioritizing online security, Firefox users can enjoy a safer and more private browsing experience, free from the threats that lurk in the digital realm.
0 notes
Text
does avast for mac include a vpn
🔒🌍✨ Get 3 Months FREE VPN - Secure & Private Internet Access Worldwide! Click Here ✨🌍🔒
does avast for mac include a vpn
Avast for Mac VPN compatibility
Avast is a well-known cybersecurity company that offers a range of products to protect devices against online threats. One of its popular offerings is Avast SecureLine VPN, which allows users to browse the internet securely and anonymously by encrypting their connection.
When it comes to compatibility, Avast SecureLine VPN is designed to work seamlessly across different platforms, including Mac devices. Mac users can easily download and install the Avast SecureLine VPN application from the Avast website or the Apple App Store.
Avast SecureLine VPN for Mac is compatible with various versions of macOS, ensuring that users can enjoy a secure internet browsing experience regardless of their operating system. Whether you are using an older version like macOS High Sierra or the latest macOS Catalina, Avast SecureLine VPN has got you covered.
By using Avast SecureLine VPN on your Mac, you can access geo-restricted content, protect your online privacy, and secure your connection while using public Wi-Fi networks. The application offers fast server connections, unlimited bandwidth, and a user-friendly interface, making it easy for Mac users to enjoy a seamless VPN experience.
In conclusion, Avast SecureLine VPN is compatible with Mac devices and provides users with a reliable and secure VPN solution to protect their online activities. Whether you are a casual internet user or someone who values privacy and security, Avast SecureLine VPN for Mac is a great choice to consider.
Secure online browsing with Avast for Mac
Avast for Mac is a powerful antivirus software that offers comprehensive protection for Mac users, ensuring secure online browsing. With the increasing number of cyber threats targeting Mac devices, having a reliable security solution is essential to safeguard your sensitive information and privacy.
One of the key features of Avast for Mac is real-time protection, which continuously monitors your online activities and blocks malicious websites, phishing attempts, and malware in real-time. This proactive approach helps prevent threats before they can harm your Mac, giving you peace of mind while browsing the internet.
In addition, Avast for Mac offers a dedicated Wi-Fi security feature that scans your network for vulnerabilities and alerts you to any potential security risks. This is crucial when using public Wi-Fi networks, as cybercriminals often target these networks to steal personal information.
Furthermore, Avast for Mac includes a robust firewall that acts as a barrier between your Mac and potential threats from the internet. It monitors incoming and outgoing network traffic, allowing you to control which applications can access the internet and ensuring that your data remains secure.
Overall, Avast for Mac is a reliable and effective solution for securing your online browsing experience. By combining advanced security features with user-friendly design, Avast offers Mac users the protection they need to stay safe in today's digital world.
Avast for Mac VPN integration
Avast for Mac VPN integration offers users a secure and reliable way to protect their online privacy while using the internet. With the increasing number of cyber threats and privacy concerns, having a VPN integrated into your antivirus software is essential for keeping your personal information safe.
Avast, a globally recognized name in cybersecurity, has developed a powerful VPN service that seamlessly integrates with their Mac antivirus software. By enabling the VPN feature, users can mask their IP address, encrypt their internet connection, and browse the web anonymously. This added layer of security prevents third parties from monitoring your online activities and helps to protect your sensitive data from being compromised.
The Avast VPN integration for Mac also allows users to access geo-restricted content, such as streaming services and websites, by changing their virtual location. This feature is particularly useful for individuals who travel frequently or want to enjoy content that may be restricted in their region.
Furthermore, Avast's VPN service ensures fast and stable internet connectivity, without compromising on speed or performance. Users can enjoy seamless browsing, streaming, and downloading without experiencing any lag or buffering issues.
In conclusion, Avast for Mac VPN integration is a valuable tool for anyone looking to enhance their online security and privacy. With its user-friendly interface, robust encryption technology, and high-speed servers, Avast VPN seamlessly integrates with Mac devices to provide a safe and unrestricted internet experience.
VPN features in Avast for Mac
Avast, a renowned name in cybersecurity solutions, offers a robust VPN service tailored specifically for Mac users. Avast VPN for Mac boasts a range of features designed to enhance online privacy, security, and accessibility.
One of the standout features of Avast VPN for Mac is its strong encryption protocols. With military-grade encryption, users can rest assured that their online activities, including browsing history, communications, and sensitive data, are shielded from prying eyes. This encryption extends to public Wi-Fi networks, safeguarding users' information even when connected to potentially insecure hotspots.
Another key aspect of Avast VPN for Mac is its extensive server network. With servers located in numerous countries worldwide, users can bypass geographic restrictions and access region-locked content with ease. Whether streaming their favorite shows or accessing websites unavailable in their region, Avast VPN enables Mac users to enjoy a truly global internet experience.
Moreover, Avast VPN for Mac prioritizes user privacy by implementing a strict no-logs policy. This means that Avast does not track or store users' online activities, ensuring complete anonymity while browsing the web. Additionally, the built-in kill switch feature automatically disconnects the user's internet connection if the VPN connection drops, preventing any data leakage in the event of a connection failure.
Furthermore, Avast VPN for Mac offers intuitive, user-friendly software, making it easy for even novice users to navigate and customize their VPN settings. With a simple click, users can connect to the fastest available server or choose a specific location to suit their needs.
In conclusion, Avast VPN for Mac delivers a comprehensive suite of features designed to protect users' online privacy, security, and freedom. With its robust encryption, global server network, commitment to privacy, and user-friendly interface, Avast VPN is a top choice for Mac users seeking reliable VPN protection.
Avast for Mac privacy protection
Avast for Mac offers robust privacy protection for users seeking to safeguard their sensitive information and online activities. With cyber threats on the rise, it is essential to have reliable security software that can effectively shield your personal data from unauthorized access and potential breaches.
Avast for Mac utilizes advanced features such as real-time scanning, firewall protection, and secure browsing to ensure comprehensive privacy protection. The real-time scanning feature constantly monitors your system for any malicious software or suspicious activities, providing an extra layer of defense against cyber threats.
The firewall protection in Avast for Mac acts as a barrier between your device and external networks, allowing you to control which apps have access to the internet and prevent unauthorized connections. This helps prevent sensitive data from being transmitted without your knowledge or consent.
Furthermore, Avast for Mac includes a secure browsing feature that detects and blocks malicious websites, phishing attempts, and online trackers that may compromise your privacy. By warning you about potentially harmful websites, Avast helps keep your sensitive information safe while browsing the internet.
In conclusion, Avast for Mac is a reliable privacy protection solution that offers a range of features to safeguard your personal data and online activities. By utilizing advanced security measures such as real-time scanning, firewall protection, and secure browsing, Avast helps Mac users stay one step ahead of cyber threats and protect their privacy effectively.
0 notes
Last Seen Blogs

defelefashion50
Без названия

planetjeon
i wonder

murdochbyrnes
Musty from Pokéman go snap on ninteno 69

sad-nap-records
Sad Nap Records

beautyholicsby
Untitled