#pancake makes the sea guard tunic
Text

Not my best gathers but honestly who’s looking at the gathers when these cuffs are turning out so pretty?
#is my blog slowly turning into just aesthetic sewing photos#pancake makes the sea guard tunic#trop#embroidery#once the second cuff is finished i will do more crow’s feet for all the slits#i’ve got little ‘smoke’ mother of pearl buttons to use for the cuffs#i also need to source a belt with a similar scroll pattern but something tells me a search for ‘viking belt’ will find me what i want
251 notes
·
View notes
Text
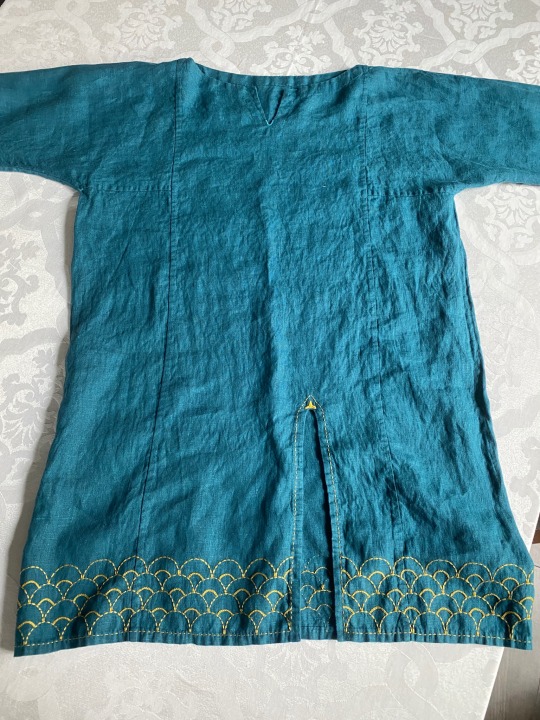
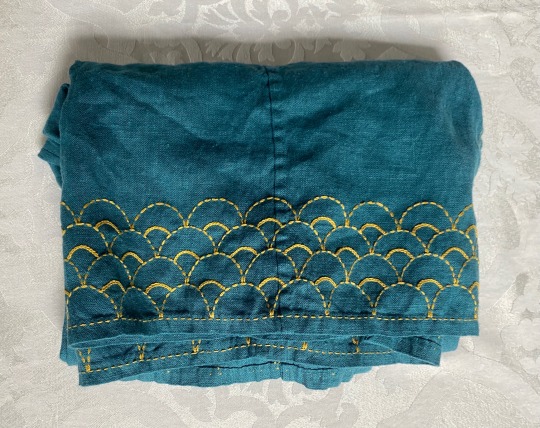
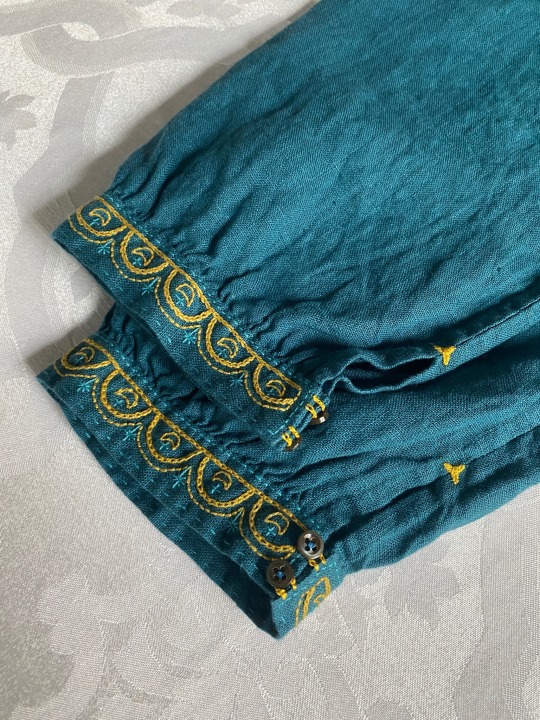
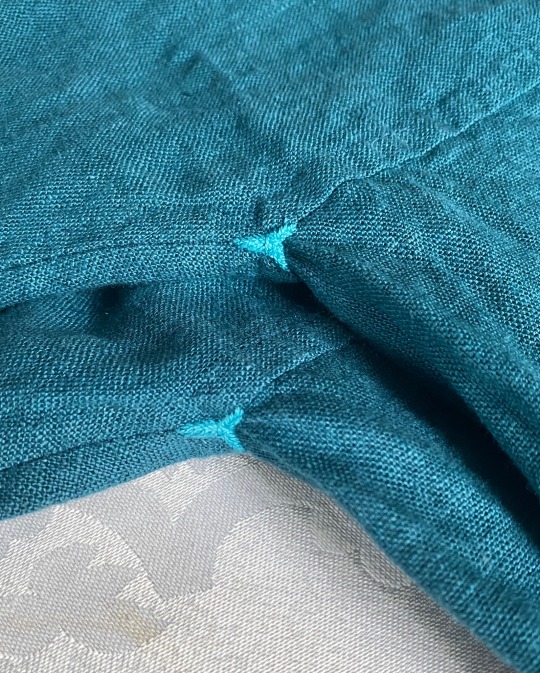
I finished this a couple weeks ago, but I realized I hadn’t posted these pics! This ceremonial Sea Guard tunic was such a fun undertaking, and I could not be happier with how it turned out. If you want to make your own, I’ll be putting together instructions soon because me and Danielle have bullied talked @longsightmyth into making one.
73 notes
·
View notes
Text

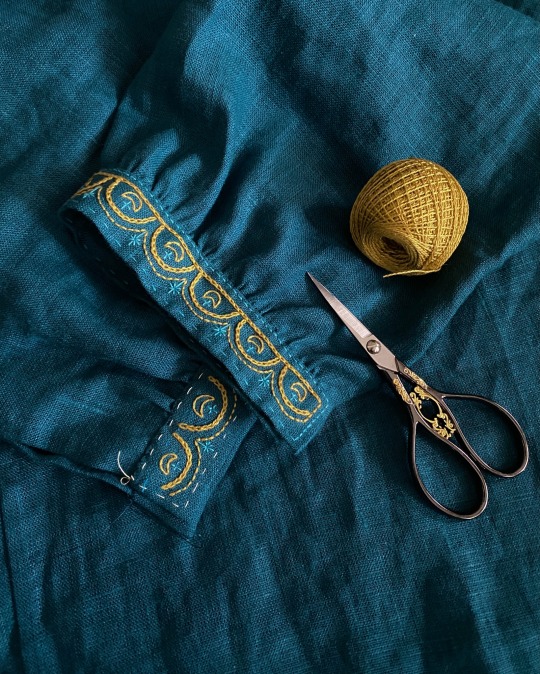
One cuff embroidered! I’m leaving off the borders because this is getting topstitched after i attach it to the sleeve.
It took me awhile to settle on an embroidery design for the cuffs and collar of my Sea Guard tunic, since the in-show versions were left completely plain. I gathered as many references as I could of different Numenorean decorative motifs, including those on the architecture and weaponry.
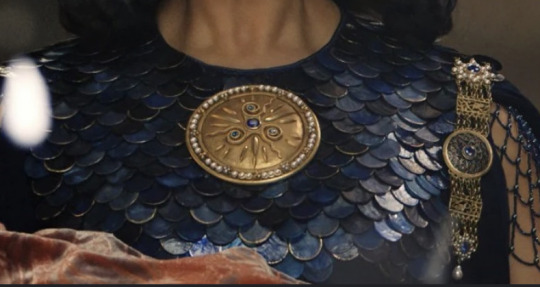
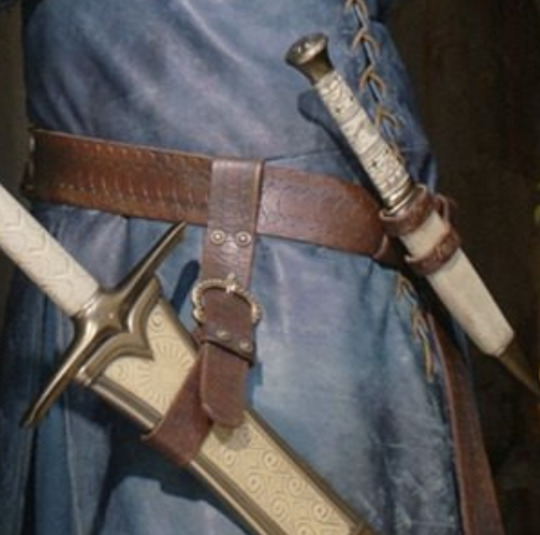
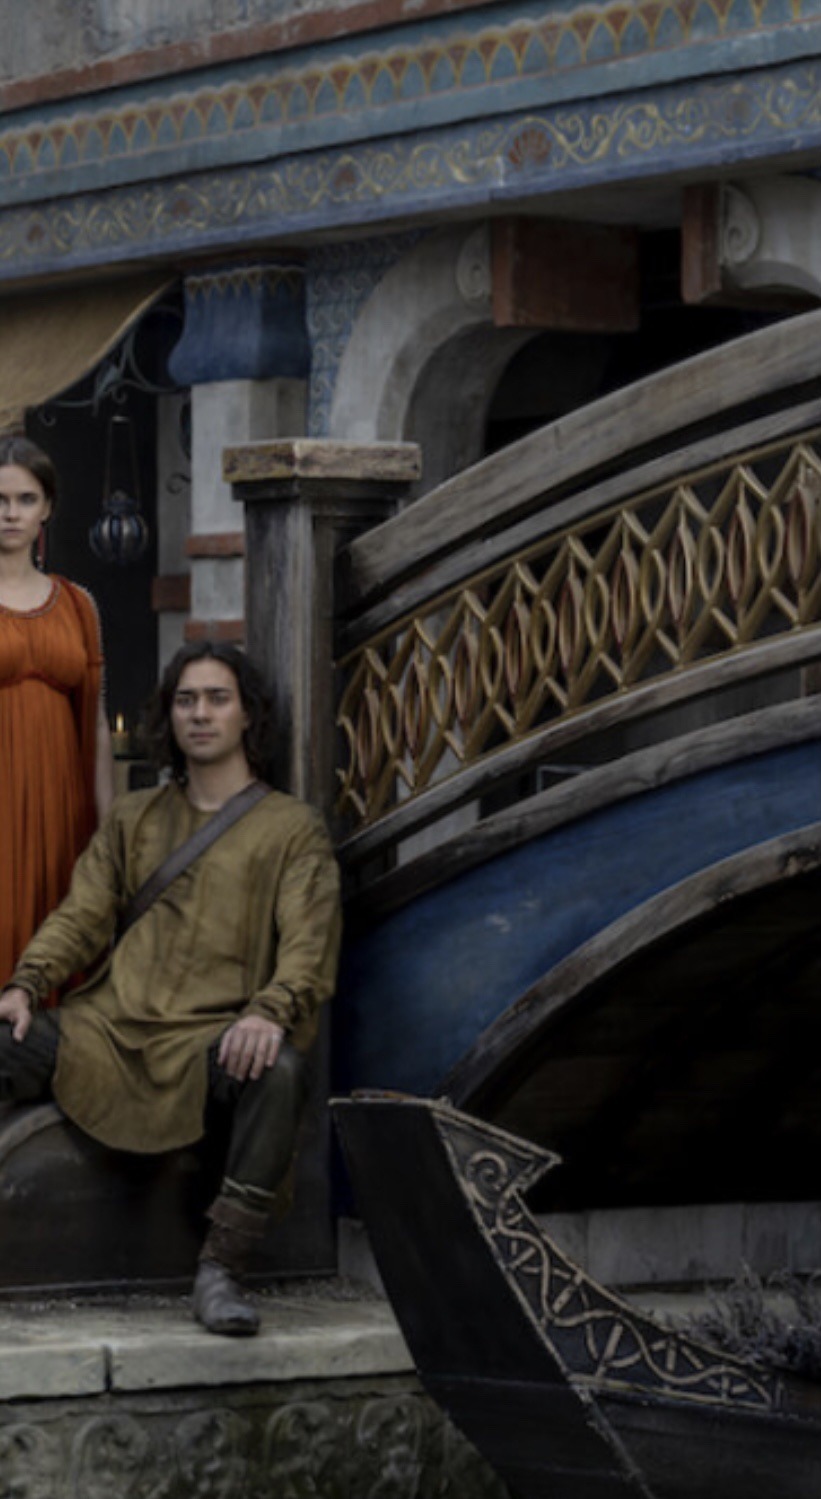
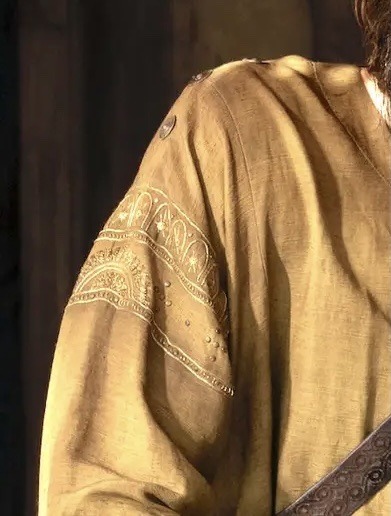
From there, I dug around for a pattern that matched the aesthetic and settled on this:

It’s an antique pattern part of a larger, wide floral design. I pulled just the border and tweaked it to suit my taste and also to better match the style and symbology of Numenor. At some point I subconsciously decided this is Isildur’s tunic specifically, so the crescent moons felt particularly appropriated. The dots and flourishes were replaced with stars to echo Elendil’s dagger and give a nod to the lineage of Elros.
101 notes
·
View notes
Text
Kay this is why you don’t post things at 1am, I realized the diagram and instructions required a lot of edits so I’m just taking down that post for now. I’ll make up for it by giving y’all a materials list for the Sea Guard Cadet Tunic:
So. You want to make the Sea Guard Tunic. You will need:
2 yards of teal medium-weight linen or wool. All pattern pieces, excluding the cuff interlining, will be cut from this. I used linen from fabrics-store.com in the color “Sphinx.” For a fully screen-accurate wool tunic, use this wool from renaissancefabrics.net (currently sold out, but will probably be restocked)
1”x22” of a lightweight but stable fabric for interlining the cuffs. I used a different linen I had lying around. A plain cotton or something similar will work just as well. Silk organza is bizarrely good as an interlining but it is also ass to work with, so I don’t recommend it for this project.
Sewing thread. I used 50wt Kinkame silk thread from britexfabrics.com, color 47. You can use whatever regular sewing thread you have on hand, but you will have to wax your thread if hand-sewing with something other than a high-quality silk thread. Treat Gutermann silk sewing thread like it’s cotton.
4 small buttons (2 on each cuff). Mine were 1/4” diameter vintage shell buttons. You can also substitute these for 2 larger 1/2” diameter buttons, 1 for each cuff.
Size 8 or 9 quilting “betweens” (or whatever you prefer). These are shorter than regular sharps. Nicole Rudolph, who is an excellent historical costumer, uses embroidery needles, which are thicker and longer than sharps. This all comes down to personal preference and comfort. Betweens work for me, but they may not work fo you. Test out different needle types and invest in them when you find a good fit. I used the size 9 betweens from Clover.
Size 28 tapestry needles, if sewing linen. Just trust me on this. The blunt point will make all the seams so much less annoying, and you will need them if you want to do any embroidery. You may still find it necessary to fell the seam allowances using a smaller sharp needle. I use the ones from Piecemaker’s. Note: you can find these at a cheaper price from other online shops, and I can’t vouch for their shipping because I didn’t order mine from them, but I want to link to their shop directly.
Fabric scissors. I used embroidery scissors for everything. This is stupid. Do not do that, it takes forever and is deeply unnecessary. Use regular fabric sheers unless you’re a masochist like me and need everything to be perfectly on grain or you’ll go bonkers.
Beeswax, for waxing your thread. You don’t need this if you are using a smooth silk thread like Kinkame or Tire silk threads. You can get it from Burnley and Trowbridge. One thing of wax will last you forever and is a good investment even if you use silk for this project. I got mine many years ago from Whole Foods, in the…health and beauty aisle? The one with all the essential oils. It is also sold by various Indigenous-owned small businesses!
Optional:
Embroidery thread of your choice. I used a size 12 perle cotton from Valdani in shade 152, and a size 16 perle cotton from Finca in shade 4074. Valdani perle cottons can be found on etsy, and I got my Finca perle cotton from roseground.com, a UK-based lacemaking supplier.
Beads, if you want some sparkle. Size 11 and 8 seed beads would work well, especially if trying to emulate the show’s aesthetic. I get beads from direct.auntiesbeads.com which sells them in little bulk-quantity baggies. I didn’t bead my tunic, but I may bead future TROP cosplays.
You may want to have a 0.65mm (very small!) crochet hook, if sewing with silk thread. Instead of using a seam ripper, I pull my stitches out and reuse the thread. You can do this with other threads but they will start to fray and fall apart very quickly. Kinkame and similar silks will not. The crochet hook helps speed up the process. Always remove stitches in reverse of the direction you put them in, on the chance you pierced your thread on the backside. This allows you to maintain the longest possible usable length of thread.
48 notes
·
View notes
Text

Whaddya think, Numenorean enough to pass muster?
#pancake makes the sea guard tunic#trop#cosplay#im sorry if you guys are sick of seeing these cuffs#ive actually already attached both cuffs to the tunic and i just need to topstitch the second one#but i ran out of daylight for nice pics#i will make a lil guide for this tunic#i think i may have mentioned that already#it’ll include the drafting instructions (stupid simple) and materials i used
36 notes
·
View notes
Text
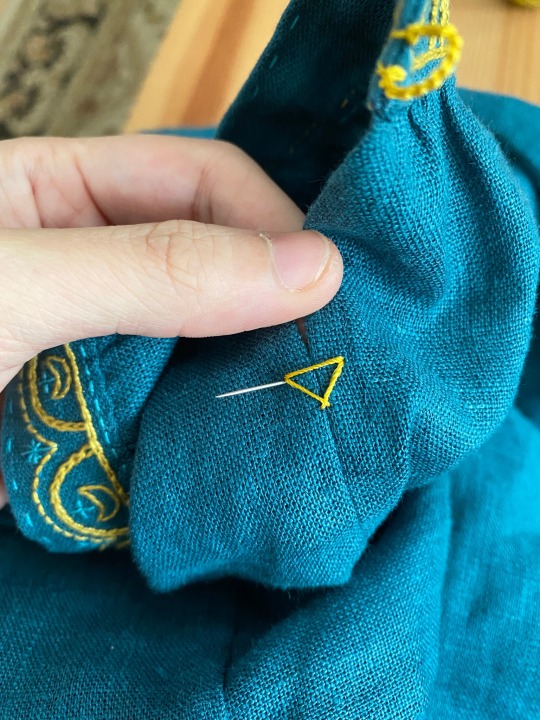
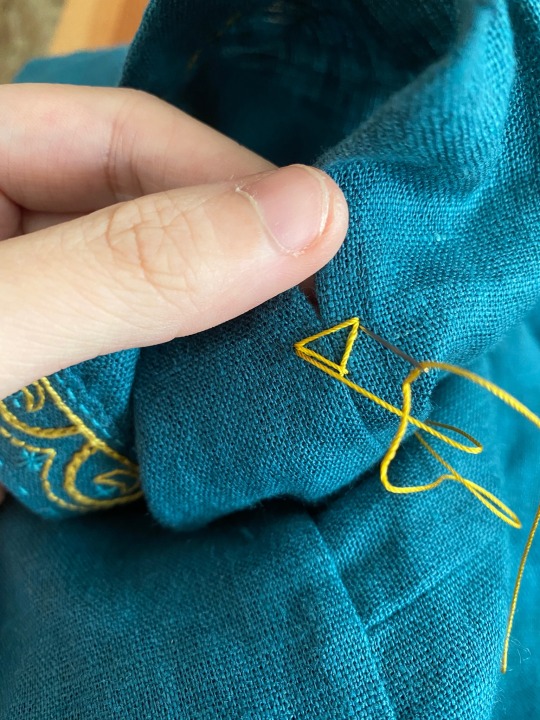
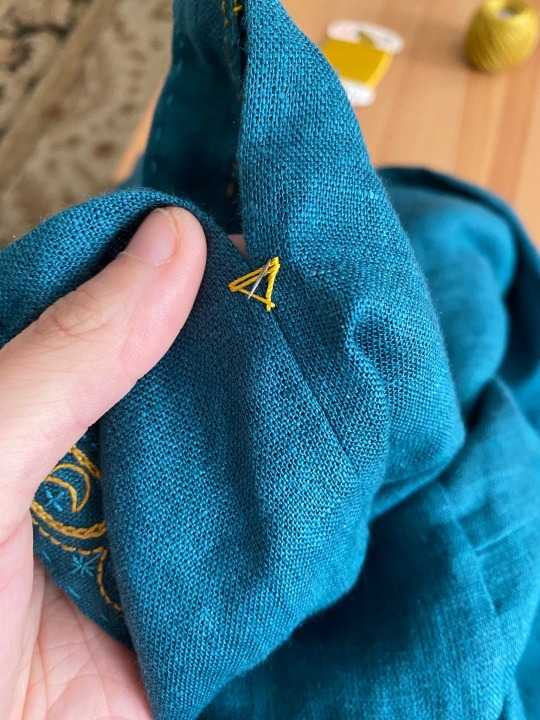
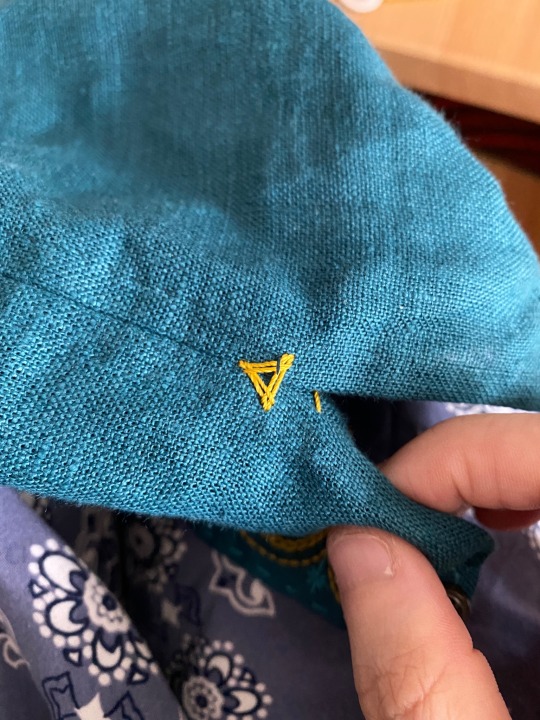
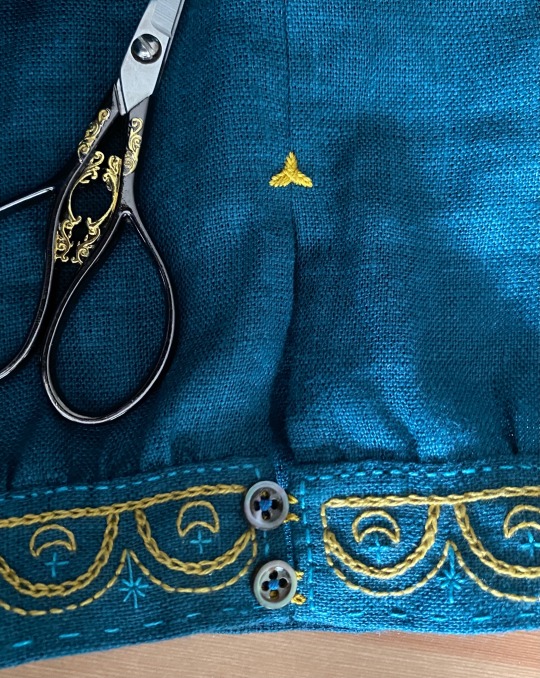
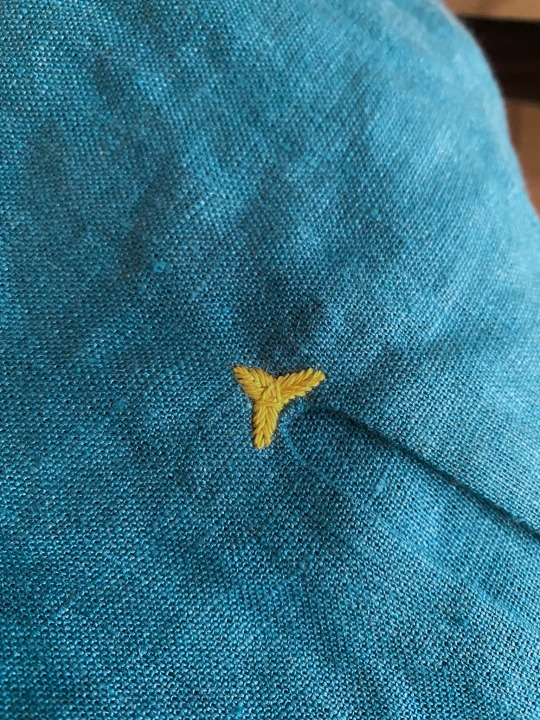
Crow’is feet tacks!
The way i sew mine is a little different from the standard, and i intentionally don’t draw the outline of a triangle so that they naturally draw inward towards the middle to form that sort of trefoil shape. If i were to draw an outline and follow it exactly, i would get a triangular tack. I didn’t bother with that for this because:
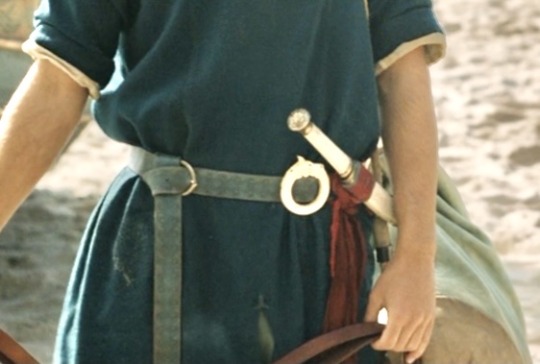
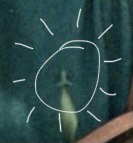
That’s a crow’s foot tack!
#trop#cosplay#pancake makes the sea guard tunic#pancake talks textiles#the sleeve tacks were done in silk bc i needed those to actually be strong#the front slit tack is almost entirely decorative since the front slit is fully faced#so that one was done in the same gold perle cotton i used for all the other embroidery#the back slit was just buttonholed
44 notes
·
View notes
Text
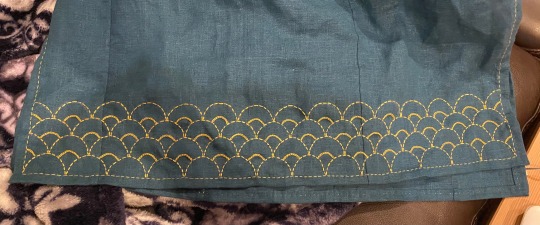
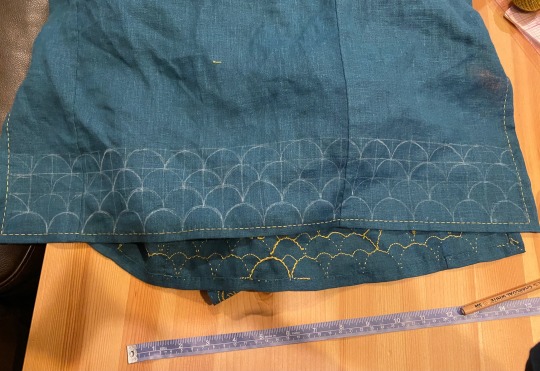
One flap complete and one flap traced! You can see the backside of my embroidery in the second pic, and it’ll probably be visible when worn, but i think it’s neat enough that I don’t really care lol. Those keen of eye may notice that the direction of the chain stitches alternates between rows.
#i was highkey obsessive about weaving in my tails#pancake makes the sea guard tunic#stitch witchery#cosplay#sorry about the lighting lol now that winter break is over i’m back at my day job#and that eats up all the pretty daylight#i’ll have better pics on saturday probs
22 notes
·
View notes
Text
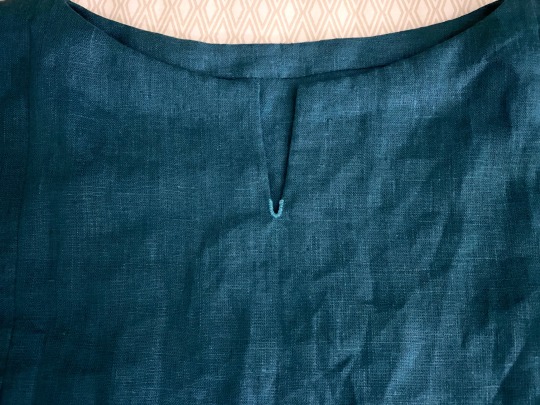
The neckline is complete! The construction process was a lil bit fussy because of all the paneling nonsense needed to make it relatively screen-accurate. Construction notes under the cut:
I started by drafting the neckline shape onto a piece of linen, making sure the sewing line was the exact size of the final neckline and that the width of the facing at the side corners would fully cover the tiny shoulder seam connecting the front and back center panels. That got basted on, right sides together and then backstitched in place once I was happy that everything was even and perfectly aligned:
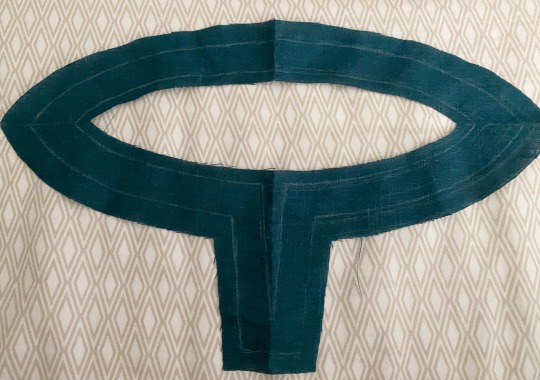
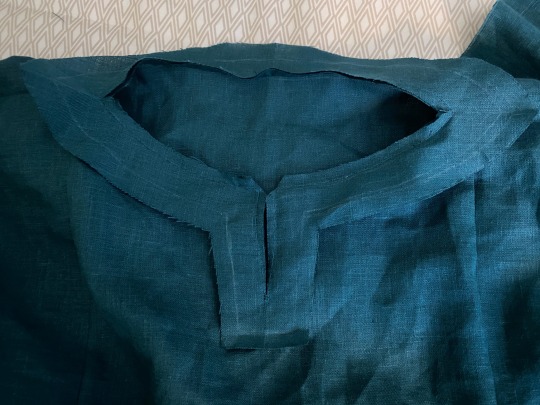
Then I cut open the center neckline notch, which I’d left uncut to maintain the integrity of the fabric because linen frays really easily. The facing gets turn in to the wrong side and the two little points pushed out with an awl. The seam allowance at the corners was clipped to fold in neatly, and the curves were notched to lie flat when turned under:
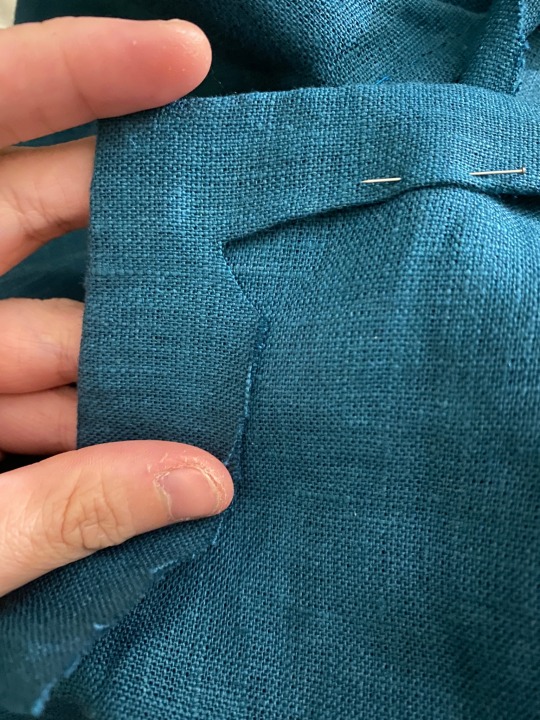
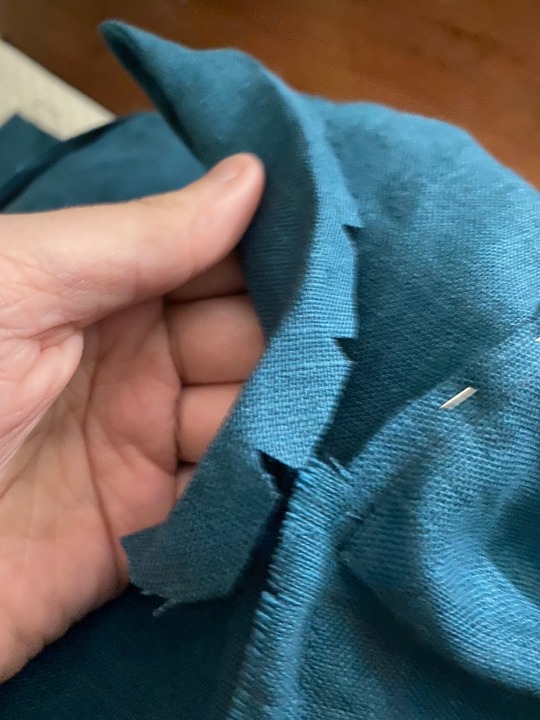
The seam allowance of the side panel was clipped on either side of the shoulder seam:
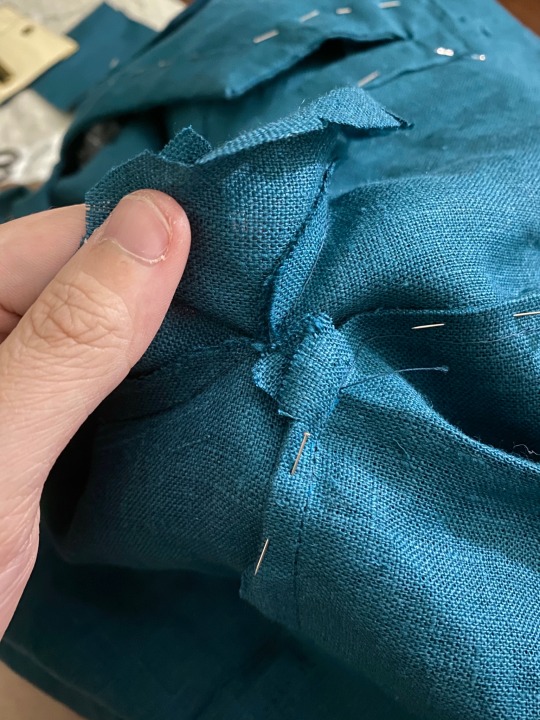
The seam allowances on either side get tucked under but I didn’t fell them yet at this point because I wanted to finish off the neckline first. I just pinned them in place while I felled down the edge of the facing. The bit at the shoulder was left untucked and flat so that it wouldn’t make a weird ridge under the facing:
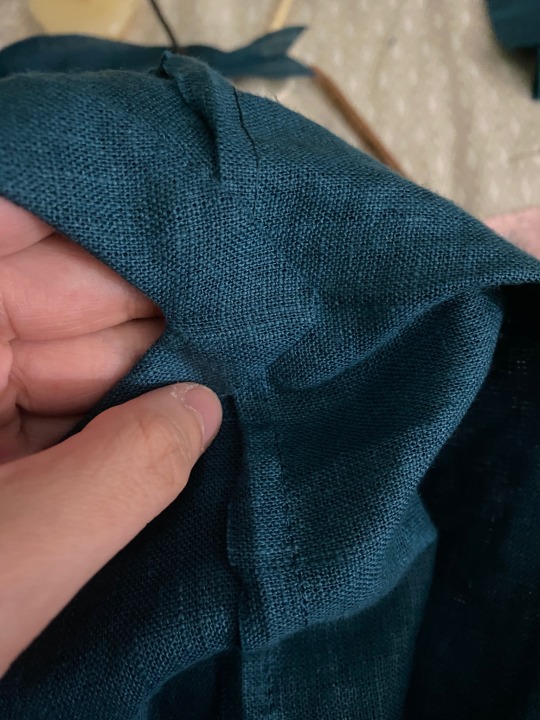
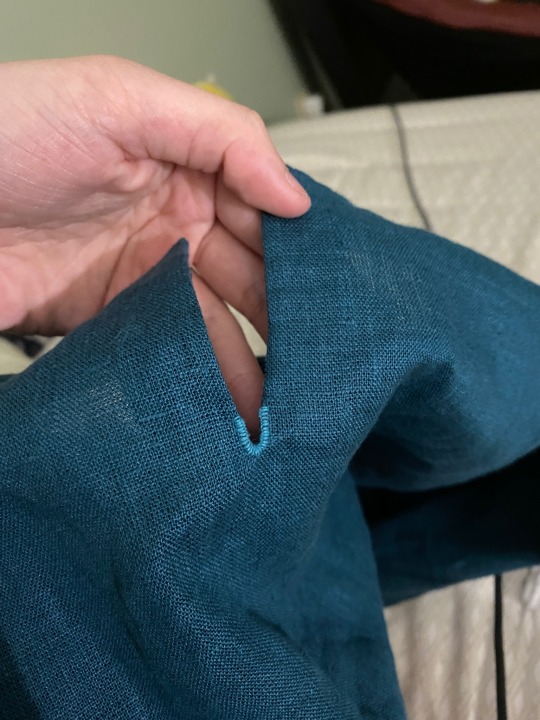
Outside turned out all neat and pretty!
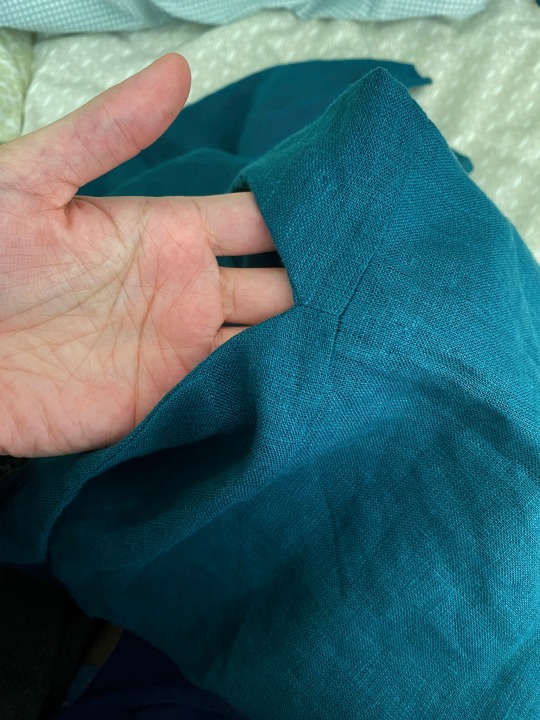
Then the final step was doing a little V of buttonhole stitches right in the valley of the notch to prevent any fraying:
20 notes
·
View notes
Text
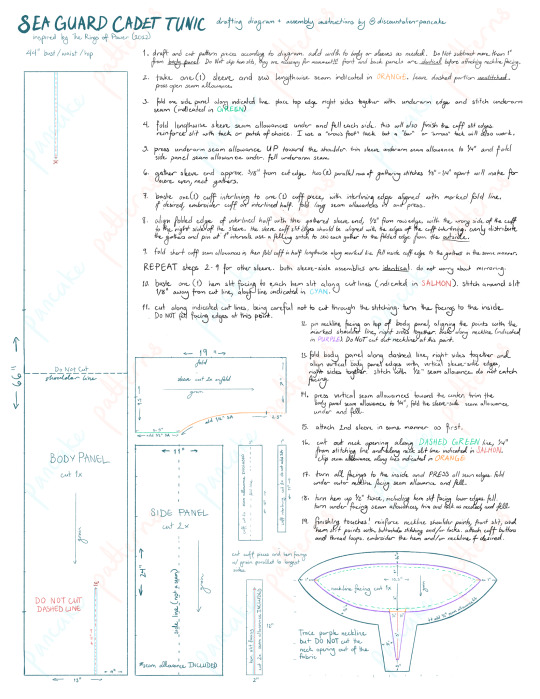
Typed out instructions with photos to follow! Basically a compilation of my process posts, but streamlined so you don’t make my mistakes.
This is not a cutting layout. Please arrange your pattern pieces as best they fit onto your specific yardage. Pieces are drawn to scale but the neckline facing is not the same scale as the the other pieces! Neckline facing should be at 1:4 scale, and the other pieces are at 1:8, but please refer to measurements. For the most accurate fit, prewash and press your fabrics before cutting!
This pattern was drafted to fit a 40” bust and similar hip circumference. It has plenty of ease for up to a 42” bust and/or hip but you will want to increase width if you are larger than that. I’m sorry I can’t offer a multi-sized pattern at this point, but the pattern is very easy to alter! I’ll make a post explaining exactly where I recommend adding width/length to get the fit you need.
Edit: please tag me if you make the thing so I can see it!
#trop#cosplay#costuming#pancake makes the sea guard tunic#and now you can too!#and yes that is all my handwriting#including the watermarks#yes i watermarked it; it was a lot of work to put this together and i’m not charging anyone anything for it#i am considering drafting a handful of embroidery designs and putting those up in an etsy shop or something
19 notes
·
View notes
Text
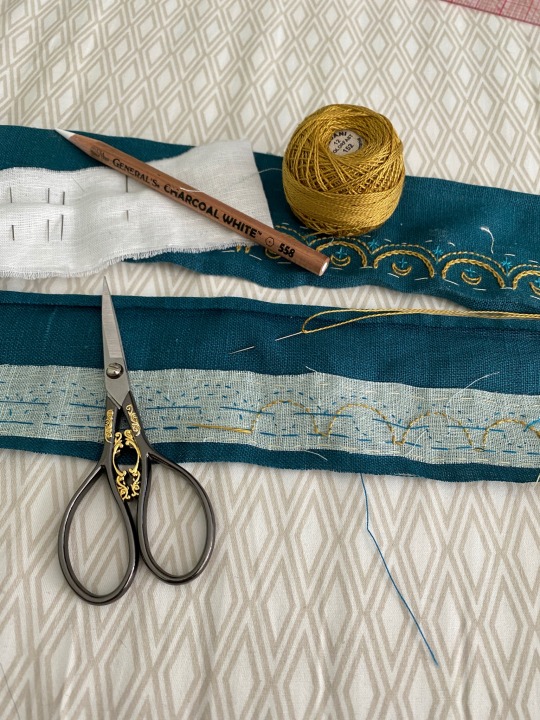
A little peek at the back! I basted the primary lines into the piece because my white charcoal pencil was neither precise nor persistent enough. Also, you can’t tell from this image, but I mirrored the direction of the chainstitches on the second cuff. Because I could.
#also! as you can see i am not using a hoop or frame for this!#you can in fact do a lot of embroidery things without one#which i find especially suited to small pieces like this#cosplay#pancake makes the sea guard tunic
13 notes
·
View notes
Text
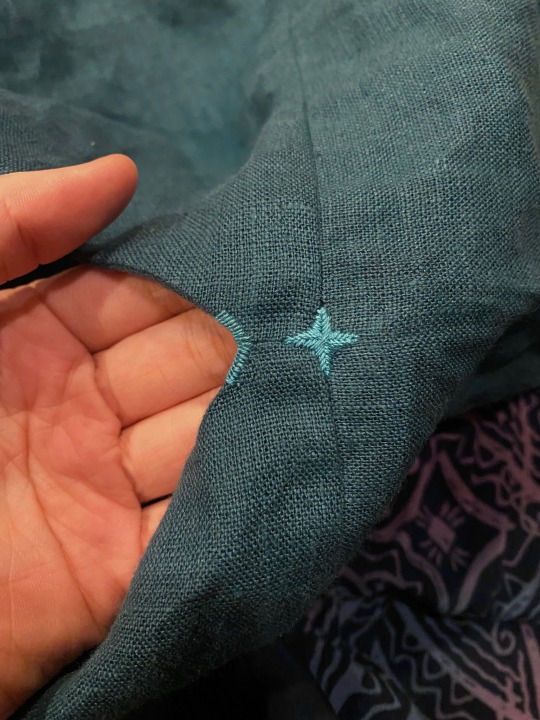
Psst! You can turn the crow’s foot tack into a star with you choice of points, simply by altering the number of sides of the base polygon! I wouldn’t recommend going higher than six, and three is still my favorite, but in some areas the four-pointed tack can be pretty useful, like at the intersection of the perpendicular seams where the body panels connect to the sleeve. I also buttonhole-stitched the V where the front and back meet, since that will receive a lot of strain and the facing alone probably isn’t enough.
The Sea Guard tunic is officially complete, and my next update will be the first full reveal before I wear it to the renfaire in april!
#pancake makes the sea guard tunic#i was originally going to add more embroidery around the neckline but i’m too tired lol#i think it looks good enough#and i can always add embroidery later on if i feel it really needs it
13 notes
·
View notes
Text
i’m gonna do it, i’m gonna make the fucking sea guard tunic, it has catapulted itself to the top of my cosplay to-do list somehow despite being one of the most categorically unflattering designs i’ve ever seen. It also happens to be dead simple, it is literally just rectangles with the occasional slit and a neckline facing which is literally one of the easiest ways you can finish a neckline?? obviously i’m gonna complicate things by embroidering a wave pattern on the hem like i drew on my valandur fanart but.
#pancake talks textiles#pancake makes the sea guard tunic#also yes im still working on the chemise a la belle#rn im finishing up the actual undergarment chemise which will be worn under it#then the petticoat and stays#then i can move on to the pretty outer bits
10 notes
·
View notes
Text
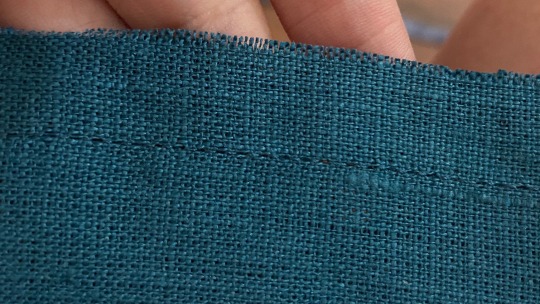
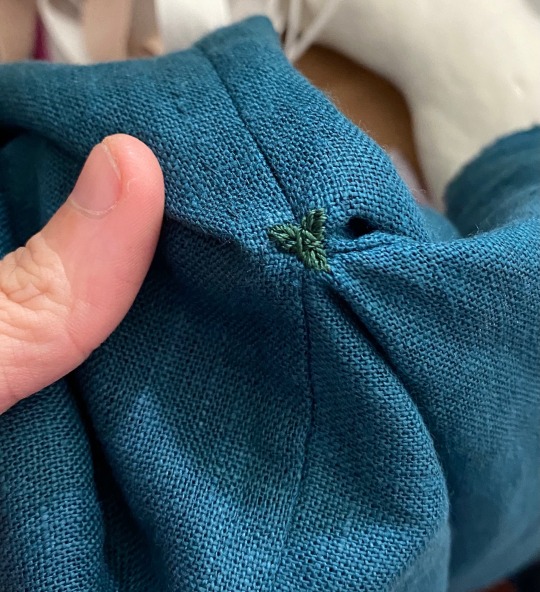
The sea guard tunic is coming along nicely! My signature crow’s foot tack turned out a lil bit elven in this deep green hehe
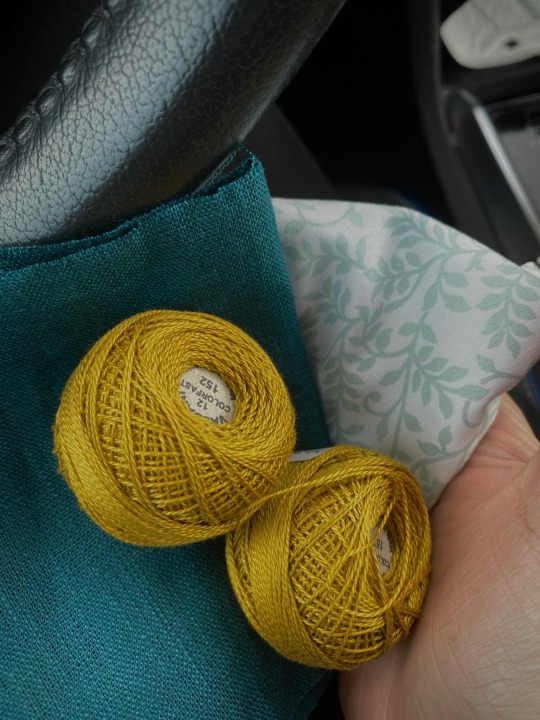
And I found this muted olive-gold perle cotton, which i think will be perfect for the embroidery i’m adding on to the original design.
9 notes
·
View notes
Text
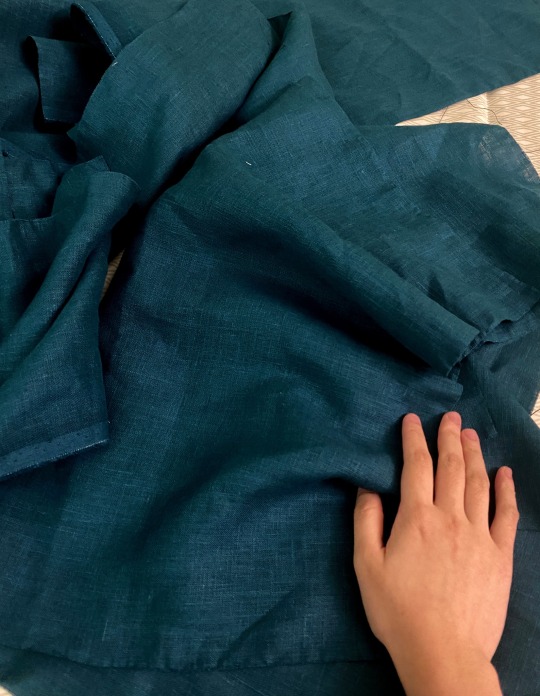
😏
#pancake makes the sea guard tunic#yes i can tell the pieces apart no i did not mark them lmao#i haven’t cut the necklines yet because i’m not 100% sure how i want to proceed yet#because the shoulders of this thing are just. so weird.#i also need to make an undershirt but that’s not a priority rn
7 notes
·
View notes
Text
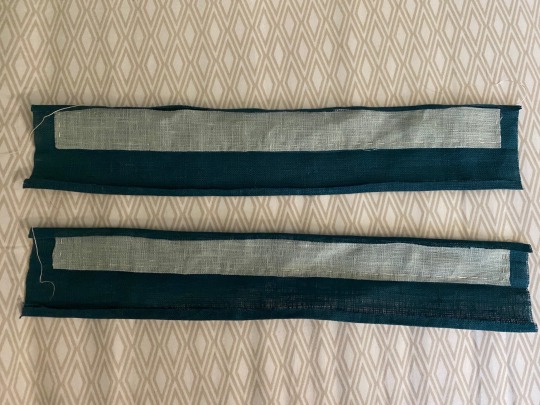
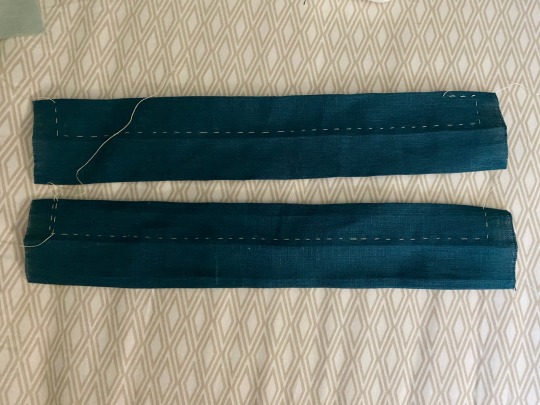
Cuffs prepped! I used a lighter weight linen as an interlining to keep the cuffs from stretching over time and basted the strips on along three sides (might go back and do the fourth side but it’s not that necessary) to keep them from moving around. I also cut them without seam allowance, because I don’t want to add to the bulk along the edges. I didn’t bother with invisible basting because I’m going to pull those stitches out after I embroider the cuffs. The embroidery itself will keep everything in place permanently.
Now i just need to decide what to use for the button loops.
#pancake makes the sea guard tunic#the body of the tunic is complete sans cuffs#all that will remain after this is the reinforcemnt tacks for the slits and all the decorative embroidery
2 notes
·
View notes
Note
Hi Pancake! Congrats on finishing the tunic. I already think it look lovely, from the pieces that I've seen. The embroidery is very nice, I think you said there were half moons on the pattern but upside down they made me think of little boats/ships. 😄Looking forward to seeing it in full.
Can you talk a little bit of how you got into costuming? What's a thing you made in the past that you're proud of?
Have a nice day!
(sent from my main, fanblog is insufficient-earth- skills)
Thank you! I love your boat interpretation, it’s so appropriate for the costume and the culture. I think I mentioned before that I chose moons and stars because of Elendil and Isildur’s names and the star motif on Elendil’s dagger. I’m not sure when exactly O settled on this being Isildur’s ceremonial tunic, but that’s what my brain latched onto!
As for how I got started in costuming specifically, it was really out of spite lol. My mom taught me to sew by hand and do cross-stitch embroidery when I was very little, probably around when I was five or six, and I dabbled in it on and off for ages. In college I made a simple slip dress and not much else, and around the same time, I started being friends with @longsightmyth amongst others, here on this blog. Which is relevant because we had a shared beef with the stupid clothing in fantasy novels.
Also turned out we both liked watching Bernadette Banner on youtube, and that was kind of how the [#myth and pancake make underpinnings] tag was born. Then along came the Cinderella dress color controversy, during which Myth kind of broke our little corner of tumblr by bringing to everyone’s attention that glass is green. That spawned a whole lot of weird outrage over whether the dress is white or blue or silver, while Myth staunchly defended the concept of a glass-green gown. So then I designed said gown and started prepping to make it, partly as a joke, partly because it is a color I love and wanted to showcase.
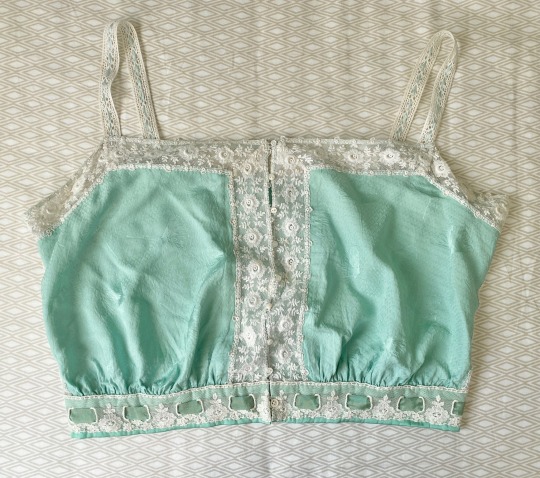
This is my favorite thing I’ve made so far, and it’s actually the first piece in the Glass Gown ensemble. It is an Edwardian-style camisole made from a silk and rayon jacquard that I fell in love with when I came across it on etsy. The lace is vintage and deadstock, and the buttons are also vintage. Everything else is new. I’ve worn it a few times but I want to have a proper chemise and corset to go under it before I take pictures of myself in it. The waistline is sized for me in a corset, so it’s a little too small normally.
#pancake answers#im actually going to make something from the same base pattern as that camisole in the near future#but it will look very different and hopefully be appropriate for work#which this camisole definitely is not lol#also you may be seeing more Sea Guard tunics soon! from other folks who know who they are
19 notes
·
View notes