#which means that more watts are being put through the lights than there are amps and volts to support it
Text

look at my genius children staring directly into a bright light
#and this is where i talk about lighting in the tags cuz im a nerd#obviously the light is brighter than normal#which means that more watts are being put through the lights than there are amps and volts to support it#when this happens the light gets really bright and then usually catches on fire#which didn't happen in this situation but thats also a good way to go blind#school spirits#wally clark#rhonda school spirits#charley school spirits
77 notes
·
View notes
Text
First Take Review: Valvet Soulshine Preamplifier & A4 Mk.II Amplifier
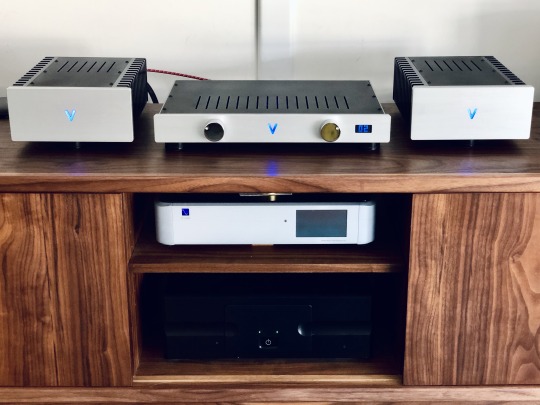
I stumbled upon the Valvet brand fairly randomly. Looking back at my original email to Alfred Kainz of highend-electronics, Valvet’s US distributor, it appears I caught wind of the niche German marque via a review of their E2 amplifier ($2,990) on 10audio.com. In it, Jerry Siegel compared it with some very well-respected solid state and tube competition - Pass, First Watt, Cary - and came away smitten with the musicality of the little 20-watter. I perused the rest of the Valvet line and was immediately drawn to how it blended sleek, unassuming styling with a focus on tried and true design approaches. Tube preamps with solid state amps (no Class D in sight), super quality passive parts, minimalist Class A and single-ended topologies, all in urban-lifestyle friendly packaging... Valvet was speaking my language. The relative obscurity of the brand (at least here in the States) and lack of online reviews only added to the intrigue. A review was clearly in order, and Alfred was kind enough to oblige us with the Soulshine tube preamp ($5,890 in the configuration we received) and A4 Mk.II monoblock amplifier ($7,890).
Alfred provided this description of the company:
Valvet is located in Bargteheide, in the north of Germany, near Hamburg. What we have here is a very consistent vision by designer Knut Cornils in design and execution. Knut founded the company in 1991 and has been building Class-A amps since 1982. Knut has evolved a distinctive architecture of Class-A modules using high-quality components in minimal designs, featuring valve pre-amplifiers with separate power supply and solid-state mono-block power amplifiers.
Valvet Soulshine Tube Preamp ($5,890)
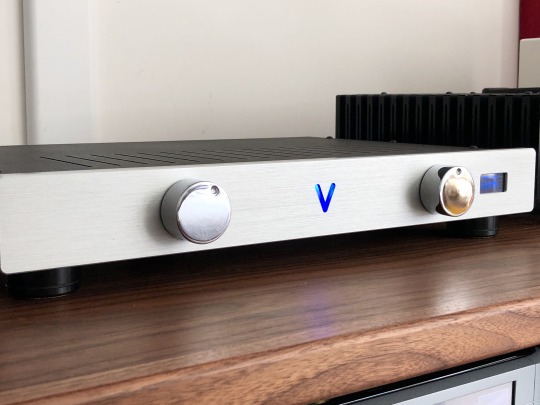
The Soulshine is Valvet’s top preamplifier line and comes in a number of configurations. The model we received is a line stage and includes a compact external power supply and stepped attenuator with remote control. Recently, two further upgrades became available: the Soulshine IIz ($8,890) featuring a dual-mono external supply, and the Soulshine Trio ($10,990) with built-in phono stage and quad supplies. @mgd-taww has the full review of our base configuration coming out imminently, but I'll share some observations from my time with the unit.
I really dug the sleek look of the Soulshine - super slender, with a minimalist front panel sporting two polished chrome knobs, a 2-digit volume display and the Valvet "V" softly glowing in blue. There's zero panel markings, which makes input selection a bit of a guessing game, and slightly odd is the fact that the free-spinning volume knob (it's a rotary encoder for the electronically-controlled attenuator) has a dimple to indicate position, despite it being completely uncorrelated with the actual volume setting. The attenuator itself works extremely well - volume control is a bit on the coarser side, definitely not 1dB across the range, but adjustments are quick, smooth and noiseless other than the gentle clicking of the internal relays. Best of all, the outputs are quickly muted to eliminate any possibility of transients on power-up or turn-off which can be a real hazard with tube designs. The back-panel features 4 inputs - 2 balanced XLR, 2 unbalanced RCA - and both RCA and XLR outputs. The power supply is external, connected with a light, flexible and detachable umbilical cord. Under the hood, the circuit is simple and the parts are high quality, with relatively neat hand-soldered point-to-point wiring (Teflon-sleeved silver in our model). Like any tube component, it'll need some room to breath, but it generates a fairly moderate amount of heat and will fit in shelves with less clearance than typical tube pre's with tall chassis and upright tubes.
Tonally I found the Valvet to be fairly nondescript, and I mean that in the best possible way. There is just a hint of extra juice in the mid-bass, and the low end isn't as extended and tightly-controlled as the solid-state Bryston BP-17 Cubed ($4,500), but otherwise things felt quite neutral and in order - another example of the convergence of tube and solid state tonality over time. The top end had clarity and extension and there was neither the upper-midrange forwardness nor the rolled-off treble that one sometimes gets with tubes.
What it did have was a uniquely singing tone in the midrange that made it particularly expressive with soft melodic passages. E.g. on a performance of the Rachmaninoff Romance by cellist Alicia Weilerstein [Tidal], a passionate rendition of the theme is followed by a pianissimo echo. Through the Soulshine, the delicate passage sounded wonderfully quiet and intimate, yet still expressive; on the Bryston it came across a bit threadbare and pale. Every once in a while this could also come across as a bit of thickening, like just a dash too much cornstarch in the sauce - e.g. with Magdalena Kozena's Mozart arias, the ethereal floatiness of her voice came across slightly more opaque than I heard with the Pass Labs XP10. Tradeoffs, tradeoffs...

Bryston BP-17 Cubed, Valvet Soulshine and Pass Labs XP10 locked in battle
I (or more accurately, my wife and I) heard a bit more editorializing going on with harmonics and timbre. One late evening I was playing some tunes on the Soulshine, Beethoven Symphony No. 2 to be precise, and my wife commented that the orchestra sounded rather sharp (pitch-wise) and nasal. Normally this is how American woodwind players describe European ensembles (who do indeed tune their A's higher and use totally different technique, reeds and often instruments). But in this case, it was a Montreal Symphony performance which she never previously commented on sounding particularly European. Switching back to one of the solid state pre's (the Bryston or Pass XP10) restored the expected timbre - her ears are particularly sensitive, and I can only surmise she was picking up on harmonic distortion being introduced by the tubed Soulshine. I could hear it as well, but to me it was pretty mild, and probably 99% of people won't notice it to the same degree.
The other area where THD may be coming into play is soundstaging. The Valvet has a healthy dose of that holographic tube feel, suspending instruments across a deep, airy and three-dimensional space... so much so that my wife actually felt the sound to be “too 3D,” something I doubt you’ll ever hear an audiophile say. Nelson Pass under his First Watt enterprise shared a design for a very simple 2nd-order harmonic distortion generator, called the H2, as a fun way to add some color to sound. He made this interesting observation about the phase of such distortion:
So why is the phase important? Well, it's a subtle thing. I don't suppose everyone can hear it, and fewer particularly care, but from listening tests we learn that there is a tendency to interpret negative phase 2nd as giving a deeper soundstage and improved localization than otherwise. Positive phase seems to put the instruments and vocals closer and a little more in-your-face with enhanced detail.
My sense was that the Soulshine adds more of the “negative phase” second harmonic - it has that deep holographic stage, without sounding up front and “technicolor” as some tube designs are wont to. Again, to my wife’s ears this effect sounded a little phasey and unrealistic, but I’m guessing many audiophiles will eat it up.
Some other notable and positive aspects of the Soulshine... it's extremely quiet, with nice black backgrounds. In fact, I found it to be nearly dead silent even when cranked to max volume, and considerably quieter than the Bryston which always had some level of audible hiss. Dynamics were strong, the Bryston capturing big hits in the bottom end with more slam and edge, the Valvet otherwise having more verve and nuance - piano in particular had great weight and presence on crescendi. There was a sense of ease, with plenty of headroom even on the loudest, most cacophonous orchestral passages, though I did find dynamics varied a bit with the volume setting, a likely consequence of placing the attenuator after the tube gain stages thus creating variable output impedance. Separation of instruments was excellent - whether listening to a small chamber ensemble or symphony orchestra, tonally-adjacent voices like viola vs. second violin came through with clarity and color. And while lesser preamps can blur the region below middle C (262Hz) into a bit of a soupy blend, the Soulshine clearly distinguished the lower registers of the cello from the left hand of piano accompaniment on sonatas.
All in all, the Soulshine struck me as a lovely and enjoyable preamp. Musically expressive and pure, it was significantly more engaging than the Bryston BP-17 Cubed, and made for an interesting counterpoint to the Pass Labs XP10 ($5,250 before being replaced by the XP12). I didn’t mention the Pass so far as @mgd-taww also uses the XP10 as his reference preamp, so I’ll let him do the honors of an in-depth comparison in his coming review.
Valvet A4 Mk.II Class A Monoblock amplifier ($7,890)

The A4 represents the 2nd generation of Valvet’s original Class A monoblock design, the A3.5. This latest “Mk.II” iteration includes 33% larger power transformers (400W), more filtering (132,000µF each!) and upgraded parts throughout including audiophile-brand resistors and cotton-insulated silver wiring. Allegedly this brings the performance of the Mk.II closer to Valvet's flagship A4e ($9,890), a souped-up 4-chassis model with larger external power supplies and a bit more power. Despite the Class A design, the A4 is downright petite, each monoblock measuring just 230 x 110 x 310 mm (9 x 4.4 x 12.2 inches) but feeling hefty and solid - I don’t have the weight on me, but you’ll definitely want to firmly grasp each one with two hands. Power is rated at 55 watts/8Ω, 90 watts/4Ω in full Class A operation. In what seems to be a new craze (Pass Labs XA25 and models from GamuT come to mind), the output stage uses a single pair of high-power transistors per channel, and the signal path is direct-coupled with no global negative feedback.
My first night with the A4 ended in disaster. I still don't know what happened - my best guess is a wire got crossed in the hookup to my REL T-9 subwoofer - but upon powering up one of the monoblocks, sparks, a small flame and smoke ensued. Clearly something shorted out somewhere, and the A4 being a true minimalist design with zero protection circuitry means any mishap can end in catastrophe. Fortunately no human, animal or other device was harmed, but after weeks of anticipation to hear the amps, I was heartbroken. In my desperation, I listened a bit to one speaker through the other functioning amp, just to get a taste... and even from that crippled mono reproduction, I could already tell there was something very sweet and special about the A4, which made my misfortune even more agonizing.
Alfred Kainz was extremely understanding and had the amps shipped back to Knut @ Valvet for repair. A while later I got them back, and this time I completely steered clear of the REL hookup, instead feeding the subwoofer from my preamp just to be safe. The amps have worked absolutely flawlessly since so the only lesson here is to be extremely careful setting them up, which the manual also states very clearly...
With that out of the way... I think these are some very special amps. While I've heard Class A amps plenty of times in other systems, it's my first time having one in my own, and it was easy to hear from the first notes what all the fuss is about. There's a purity and density of tone, a freedom from electronic haze and grain, a fluidity of expression that's subtle in absolute terms but significant in visceral ones. Great Class A amps have given me the feeling of emancipating music from the chains of typical solid-state limitations, making Class AB (and certainly Class D) designs sound synthetic and mechanical by comparison. The Valvet is delightfully expressive, sweet and pure, with an honest and unforced way of capturing the warmth and beauty of a performance. The Bryston 4B Cubed, a 300W Class AB powerhouse, impressed me with how it carried some of these lovely qualities to a surprising degree, but the Valvet communicates with a higher level of musical connection and tactile presence.
At times, I've heard Class A amps come off a bit dark and slow vs. a very transparent Class AB design. I hear no such issues with the Valvet - in fact, it has all the speed of the Bryston 4B3, with even more dynamic alacrity and nuance. Twists and turns of a phrase are conveyed with uninhibited momentum. Its highs are as sweet and refined as I’ve heard in my system, but with no sacrifice of brilliance. Vocals have richness and complexity, and the variegated harmonics of the violin and oboe have startling trueness. And while it doesn't have the big Bryston's bass slam and depth, it still packs plenty enough wallop to be satisfying with rock and electronic fare. The Mk.II upgrades included a significant stiffening of the power supply, seemingly to good effect - close your eyes, and you would never guess you were listening to an amp rated at just 55 watts. It's by no means a current monster so I would stick with at least moderately-efficient speakers that don’t dip too low in impedance, but I’ve heard 150-watt amps that don’t have this level of control and explosiveness. Certainly compared to a 60-watt integrated like the Ayre AX7e or Bryston B60, the Valvet sounds like a powerhouse.

I'll have much more to say about this wonderful amplifier in the coming months. One of the things I'll need to work on is getting some good comparisons on hand (the Pass XA25 and XA30.8 come to mind). And I have a much larger, 3.5-way reference speaker on order which will stress the Valvet's drive and current capability far more than my current 2-way monitors. In the meantime, if you value beautiful, engaging yet truthful reproduction, I strongly recommend an audition of the Valvet A4 Mk.II - it's captivated me enough to earn a long-term home in my system.
2 notes
·
View notes
Text
Vaping safety with Light: Coils
This post I’m dealing with how to use your coils safely. Some of these will relate to building your own coils, but others can be applied to either prebuilt, disposable coils OR self-built.
Sooooooo yeah.
Prime your coils first
This means to let a fresh coil soak up e-juice when you first install it. Prime times might vary by coil brand and type, but generally you want to let it soak up juice for a good few minutes. This way, you don’t end up getting a dry hit, and possibly burning the cotton within.
Some will need you to put a good drop of juice on all side intakes, and within the coil itself (where the cotton is). Most of the time, you can just get the coil in, fill the tank, and just leave it for a couple minutes. Something I like to do is turn my airflow restrictor to absolute minimum airflow and do a couple good “dry pulls” (which is to inhale it as though you were taking a hit, but don’t actually fire) to ensure enough juice is soaked into the cotton.
If you’re building on a RDA, make sure you saturate the cotton well when you drip. Try not to overdo it though. When you sense things are getting dry, it’s time to drip again.
Prebuilt: Check the wattage rating
Prebuilt coils will usually have their resistance in ohms as well as their rated wattage printed on them. Make sure you stay within the rated range, else you run the risk of burning coils. You obviously don’t want that, because not only is that not safe, you’ll go through coils like crazy. Some coils, such as Aspire’s Cleito 120 (standard), will say on the box they can handle much higher, but if you are unsure, stay within the rating.
After priming, take a hit or two on the lower side of the rating to get things going.
Check the coils periodically
When vaping regularly for a while, you should check the coils every couple days to see how they’re holding up. Is the cotton burning? Are you getting a bit of a burnt taste sometimes after a while? It’s probably time to replace it. Most prebuilt coils, especially if you’re like me and vape pretty much all the time, will get you a good week of frequent vaping before they start to go.
Building: Know Ohm’s Law and check your resistances
Before you vape on a coil you’ve built yourself, check its resistance first. You can do this with a multimeter, but if you don’t have one (protip: get one, they’re handy to have around anyway) many newer regulated mods can also instantly check and display it when the atomizer is screwed on.
Ohm's law states that the current through a conductor between two points is directly proportional to the voltage across the two points. As the current is set by the values of the voltage and resistance, if you increase the voltage, the current will increase. The formula is: V = I/R, where V = voltage, I = current, measured in amperes/amps (A), and R = resistance, measured in ohms (Ω). Those three values can be shuffled around the formula, so as long as you know two of the values, you can calculate the rest. To find wattage, you use P = V x I -- P being power, measured in watts (W).
If you don’t care or are just not good at math, Ohm’s law calcuators are plentiful online.
In this case, the voltage and current come from your batteries. Say you have a freshly charged battery at 4.2V and your coil’s resistance is 0.5Ω. So you do it like this:
4.2 / 0.5 = 8.4
4.2 / 8.4 = 35.3
4.2V, 0.5Ω, 8.4A, 35.3W. So if your battery has a 10A limit, you’re well within that limit. But if, say, you’re using a dual mech mod in a series setup, you’ll be doubling your amp draw per battery, and you will want to have higher resistance in your coil setup so as not to overdraw (and cause a battery vent/explosion).
For a more personal example, I’ve got right now a 0.23Ω coil running, and I know my batteries are roughly around 3.6V. So let’s figure this:
3.6 / 0.23 = 18.4
So that’s 18.4A, and my batteries have a 20A limit, so I’m within safe draw levels. (Never mind the fact I’m on a regulated mod, it’s just an example.)
Note that as a battery drains, voltage and current will decrease.
What this all means to you is that if your coil is too low or too high resistance, you are going to fuck something up if you don’t accomodate it. If you are pulling more amps than your batteries are rated for, they can potentially vent or explode. You obviously don’t want that.
I should also note that most of this applies to mechanical mods. If you’re using a regulated mod--and you should be if you’re starting out--it will generally contain protections and do the heavy lifting for you. Don’t get cocky, though, because this is all still good to know.
Building: Choosing wire type
The main three wire types used are kanthal, nichrome, and stainless steel.
Kanthal is a ferritic iron/chromium/aluminum alloy. It’s good for pure wattage vaping, but note that it is NOT usable for tempature control, for those devices that feature it. It also contains no nickel, so if you have even a minor nickel allergy, this is what you’ll want to use. Many prebuilt coils are made with either this or stainless steel, and will usually be labeled as such.
Nichrome is an alloy of nickel and chromium, and may contain other metals such as iron. The most popular “grade” is 80% nickel and 20% chromium. It has a lower resistance and heats faster than kanthal, but also has a lower melting point, so be careful with this--you might burn open your cotton when dry burning. Basically, don’t rush in with max wattage when dry, ya dingus. This is a popular wire type for TC vaping.
As stated above, if you have a nickel allergy, do not use this wire--stick to kanthal.
Stainless steel is a more “all rounded” wire type and can be used reliably for both TC vaping and pure wattage vaping. Composed primarily of chromium, nickel, and carbon, there are various grades of this used for vaping, with SS316L being the most commonly used grade by and large, followed by SS317L. Nickel content is much lower than nichrome, but again, don’t take the risk if you’re at all allergic.
As before, be careful not to dry burn at high wattages. Even if you are just trying to clean the build or check for hotspots, doing so can cause problems, such as burning open cotton or possibly releasing unwanted compounds into the air.
Some vapers have also used pure nickel and even pure titanium wire, but here’s a couple issues.
Pure nickel (Ni200) is, of course, fucking pure nickel. I can’t stress enough not to use if if you’re allergic. It’s soft, and can be hard to work and keep its shape, most noticable during wicking. Additionally, you can’t use this for pure wattage vaping--this wire type is strictly TC only. You WILL burn shit if you try otherwise.
Titanium wire is, as before, a TC-only wire. The major issue with this is that, if heated to a certain point (I think around 1200℉ / 648℃), you run the risk of releasing titanium dioxide--which is rather toxic. A lot of shops won’t even sell this wire because of the liability risks.
Even then, it’s still commonly used for TC vaping as it holds its shape well and is easy to wick, and theoretically, if your TC mod is doing its job, you should not need to worry. Still, if you’re at all unsure, go with stainless steel or nichrome.
2 notes
·
View notes
Text
Best Power Banks of 2018
Anyone who uses a smartphone knows the importance of carrying a backup power bank. But given the large number of options on Amazon, you might feel overwhelmed, understandably. Besides the various charging specs, ports, and even cables you have to consider, there are a ton of competing brands. It’s common to see products from Anker, Mophie, and MyCharge, but how do you know which ones deliver on their promises? Is it worth saving a few bucks if a battery pack’s performance is lacking?
As for the latter, be advised: Amazon voluntarily recalled six different models of its AmazonBasics-branded external power banks after they were found to potentially overheat.
We decided to do the legwork for you, acquiring a wide range of power banks from different manufacturers, some offering unique features. We then spent weeks testing the packs (read about our testing process in detail below).
While we’ve made some top picks, be sure to read through each review, linked to at the bottom of this page, to help you find the best battery pack for your needs. (You might also be interested in our our roundup of USB car chargers if you spend a lot of time in a vehicle.)
Update 10/3/2018: We've added another review of a power bank that doubles as a wireless charger, the myCharge Unplugged 10K. For all of our power bank reviews, jump to the bottom of this article.
Mophie Powerstation Plus XL

The Mophie Powerstation Plus XL is light, easy to toss into a bag, and incredibly efficient. It’s also one of the the most expensive packs in this roundup, at $99.95. But with a 93.41 percent efficiency rating, you’re getting your money’s worth with this pack. Combine that with a built-in charging cable with multiple tips, and you have a winner. We did have an issue with recharge time, but overall this pack is the one to beat.
Mi Power Bank Pro

Xiaomi is known for producing high-quality products and selling them at an affordable price. The 10,000mAh Mi Power Bank Pro is a prime example of that approach, hitting all the marks to make it our top pick for the most portable power bank overall. With its high efficiency, premium design, and street price of $28, it’s hard to beat. Pick up one or two of these, throw them in your bag and suitcase, and forget having to worry about running out of battery power while on the road.
DBPower 26,400mAh Laptop Power Bank

The DBPower 26,400mAh Laptop Power Bank isn’t for those who just frequently travel, that’s where the Tronsmart Presto PBT10 excels. Instead, the DBPower 26,400mAh is for those who frequently travel and find themselves in areas without easy access to power in general. It has an AC outlet, two USB ports, and charges in a scant 3.5 hours.
Anker Powercore+ 26800 PD

Between its capacity, recharge time, charging capabilities, USB-C, and the wide range of devices it can charge, the Anker Powercore+ 26800 PD is well worth its $110 price.
Yes, it’s big and bulky. But being able to quickly top off your phone while trekking through The Legend of Zelda: Breath of the Wild on the Nintendo Switch simultaneously is worth the added weight and the price. (Read our full review.)
For those looking for a smaller, less expensive USB-C option, you’re in luck: See our full roundup of best USB-C battery packs for some very competitive alternatives. Or if you’re a MacBook user, check out Macworld’s guide to USB-C power banks and USB-C power banks with Power Delivery 2.0 for chargers that can handle laptops as well as phones.
How we tested
Determining whether a power bank lives up to a company’s promise entails more than simply connecting it to a phone and charging. Testing battery packs is done over weeks, not days, and requires extra equipment in order to ensure the batteries work as expected.
Upon receiving each battery pack, it was fully charged using indicator lights as a means to track charge level.
Then to track efficiency, we used a DROK Micro Load Tester combined with the PortaPow USB Power Monitor.
Using the DROK load tester to drain the pack of power, we were able to test against a battery’s stated maximum current, and verify that proper shutdown mechanisms were in place should something go wrong during a charging session (such as a device drawing over the maximum amps).
By using the PortaPow Power Monitor, we were able to monitor volts and amps, total power throughput, and total amount of time to deplete a battery from full to empty.
Next, we recharged the battery, this time using the PortaPow to track it throughout and the total amount of time to achieve a full battery, based on watt-hours.
There are some hiccups using this method, however. We had to use a GoPro camera to track each battery through its charge cycle, due to the PortaPow monitor continuing to collect data after the battery was fully charged (trickle charging is normal, and unfortunately interferes with our testing).
If a battery was capable of charging through USB-C, we used that instead of Micro-USB.
We then connected each battery to a Pixel XL and LG G5 to ensure that the devices registered the expected fast-charging output for each respective device.
Power source and cables
All of our tests were conducted using the same wall adapter and, when possible, USB-C or Micro-USB cable. This was done to eliminate any discrepancies with wall adapters and cable throughput.
What to look for in a portable power bank
Without fancy testing equipment, you never truly know if you’re getting what you paid for with a battery pack. Vendors, especially in Amazon listings, like to throw around a lot of terms and certifications.
Here are a few tips to help you make a decision:
For those with a compatible device, make sure the battery pack is Quick Charge 2.0, 3.0, or PD certified. Depending on your smartphone, this can make a big difference in performance. If you own a QC 2.0 device, however, ask yourself if paying extra for a QC 3.0 capable pack is worth it.
Don’t put 100 percent confidence in a company’s claims of a pack being able to charge, say, a Galaxy S8 or iPhone X six times over. Battery capacity and efficiency varies based on a number of factors. Read this Macworld report on USB-C packs to learn more about batteries and capacity.
Look at the specs of the battery, and ensure that its input isn’t limited to slow charging such as 5V/1A. The faster the input, the faster your battery pack rechargers, the faster you’re ready to hit the road.
All of our power bank reviews
Click on the links below to read the full reviews of all the products we tested for this roundup. We will continue to review and update this article as we test more battery packs.
1 note
·
View note
Text
Which is the loudest Bluetooth speaker you are looking for?
Certain events, like parties and other group gatherings (both indoor and outdoor), require and depend heavily on the speaker quality and loudness. You can’t throw a large party without a big and powerful speaker (or speakers). That is simply unacceptable.
Listening to music is a favorite pastime and can even benefit your cognitive functioning — provided it’s loud enough that you can hear it. But getting the perfect sound quality on a speaker can often be challenging, and to find the loudest Bluetooth speakers, you’ll want to inspect the decibel ratings of the top models.

Fun Facts About the Human Perception of Sound
Fact 1: The human ear is a very complex and very sensitive organ. The smallest change in loudness (aka SPL or Sound Pressure Level) an average ear can perceive is 1dB.
Fact 2: A seemingly small change in loudness/SPL can be perceived as significant by the human ear. For example, a 10dB change is perceived as twice as loud. So, if one speaker can reach the max SPL of 127dB, and the other goes only to 112dB, the difference in perceived loudness between the two is really big (the first one is perceived as more than twice as loud).
Fact 3: The difference between dangerous and acceptable loudness (aka SPL or sound pressure level) is actually very small and subtle. For example, exposure to 90dB SPL for more than 8 hours/day can already cause noise-induced hearing loss. 90dB is the average noise that a lawnmower produces. If the noise level (SPL) increases by only 10dB (to 100dB), the max allowed exposure time is only 2h/day. Anything longer than that will, in the long run, cause some damage.
If the noise level is 110dB, acceptable exposure time is less than half an hour. Just to put it into perspective for you — 70dB is the average SPL of a vacuum cleaner and the noise created by an alarm clock is rated at 80dB. So, even a speaker that plays at 80dB SPL can hardly be considered quiet (unless you already have some kind of hearing damage).
Fact 4: 120dB of noise is, by many authors and scientists, considered the threshold of pain, and any sound louder than 120dB can cause immediate damage. So, 120dB can be considered dangerously loud. Having in mind Fact 2, 120dB noise is 32x louder than a normal speech (approx. 70dB).

A quick search will pull up tons of Bluetooth speakers, but honestly, there are only a few that are as powerful as their corded counterparts. When on the hunt for a high-quality Bluetooth speaker, first check out the number of decibels (dB), which measures the intensity of the sound a speaker emits. Any truly loud Bluetooth speaker will emit at least 90 dB or higher, so be sure that any speaker you go with has at least this rating.
Once you’ve accounted for the noise capabilities, you also want to consider your personal preferences. For example, if you plan to take your speaker with you on the go, you want to look for a compact portable speaker that’s easy to travel with. Bonus points if it has a long battery life and is waterproof. But if you’d rather keep your Bluetooth speaker in a special space, a heavyweight option or a corded speaker with tons of power may be your best bet.
Investing in a speaker is a big deal, so it’s important to find an excellent Bluetooth speaker that works for you. Here are a few high-quality options to help you get started.

1.JBL Boombox 2
The JBL Boombox 2 represents a significant upgrade from JBL’s original Boombox, with more powerful sound, deeper bass and longer battery life.
This is JBL’s loudest Boombox on the market and it pumps out deep and powerful bass with two bass subwoofers at the sides of the speaker.
When you push the bass to maximum on this speaker, you can literally see the bass subwoofers at both sides wobbling and the bass depth that this speaker has is quite incredible. EDM songs and pop soundtracks sound exhilarating to listen to — it brings new life to your music with clear and loud sound.
Apart from the fact that the JBL Boombox 2 is built like a tank, it features 24 hours of playtime and doubles as a power bank to charge your smartphone devices. It’s also FULLY waterproof (IPX7 rated), which means you can actually submerge the speaker underwater without any issues.
Compared to the original Boombox, the Boombox 2 is around 20% louder and has more bass, but retains all of the functionality that you’d find in the Boombox 1.
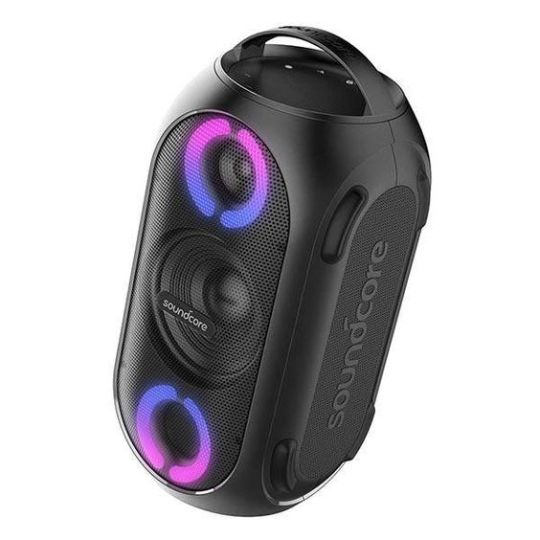
2.Anker Soundcode Rave Mini
For a loud device with plenty of fun features, look no further than this portable Bluetooth speaker. This model weighs in at 7 pounds and emits a whopping 101 decibels, making it one of the loudest speakers on the market. It also has a small carrying handle, and even features eye-popping neon lights to amp up any dance party. With an 18-hour playtime and an IPX7 waterproof rating (which means it can survive a drop in up to 3 feet of water), this speaker is a great buy. You can even control the lights right from your smartphone. Ultimately, this is a great portable speaker that stands up to pricier name brands.
According to one reviewer: “I spent WAY too much time reading reviews. I wanted something that had the sound presence to fill my garage and backyard, while also being able to take to the beach/park from time to time.This is probably the best product for the money that fits that criteria. It’s capable of HUGE sound. The bass sounds great (something lacking on pretty much ALL of the smaller speakers). the battery is sold. The lights are fun.”

3.JBL Xtreme 3
Now if you are looking for a loud Bluetooth speaker that isn’t as huge as the JBL Boombox, go for the JBL Xtreme 3.
The Xtreme 3 is much louder and more powerful than all the other portable speakers in the JBL line of speakers, and delivers really loud JBL sound quality. It features four drivers and two JBL bass radiators at the sides with plenty of bass detail.
One thing that I really like about the Xtreme 3 is the level of bass that you get — it feels deep and solid, and every drum beat can be heard through the speaker with crystal clarity. It certainly does feel like a portable subwoofer sometimes.
Another awesome feature that the Xtreme 3 has is the partyboost functionality which allows you to pair multiple Xtreme 3 speakers for a much louder sound experience — all from a single Bluetooth source.
To top it off, the Xtreme 3 is IP67 waterproof rated and is fully waterproof and dustproof. It’s a speaker that excels as an outdoor portable speaker and doesn’t disappoint.
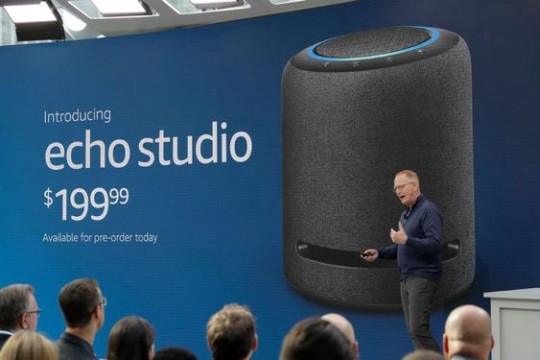
4.Amazon Echo Studio
If you’d prefer a bit more technology, this smart Bluetooth speaker is an absolute must. While Amazon’s standard Echo speakers have plenty of volume, the Echo Studio emits sound at 90 decibels and also utilizes 330 watts of power to crank up the sound even higher. Plus, this speaker features its own built-in smart hub, so you never even have to touch it to play music. Just use voice commands to cue up your favorite songs, skip a playlist, or turn the volume all the way up. One note: This Bluetooth speaker is a corded option, which means there are no playtime limits, but it also means you can’t take it with you on the go. Thousands of reviewers were impressed by this speaker’s quality.
According to one reviewer: “I enjoy good sound and I have a very picky ear. So I decided to try this… Awesome Amazon. Incredible. It sounds like I am sitting in front of two speakers (or more). I had to move it around a little bit to find a sweet spot but it is so nice.”
Any of our winning options are quality Bluetooth speakers that will serve you well, but selecting the perfect one is about your preferences and ideal price point.Want more recommendations for the best Bluetooth speaker ? Check out our guides to the DinDin Modern.
Why choose DINDINMODERN
● A variety of high-quality Bluetooth speakers are available.
● Delivery from the local warehouse, within 3 days.
● Manufactured in our own factory, cost-effective.
● Excellent pre-sales and after-sales service.
● Free returns
● Excellent materials, safe and durable.
● Pursue innovation and optimize design
● We listen to customer needs and feedback.
0 notes
Text
5 Key Differences Between Lead-corrosive and Lithium Batteries .
5 Key Differences Between Lead-destructive and Lithium Batteries .
1. Cycle life
At the point when you release a battery (use it to control your machines), at that point accuse it back up of your boards, that is alluded to as one charge cycle. We measure the life expectancy of batteries not regarding years, but instead the number of cycles they can deal with before they lapse.
Consider it like putting mileage on a vehicle. At the point when you assess the state of a trade-in vehicle, mileage matters much more than the year it was delivered.
Same goes for batteries and the events they've been cycled. A fixed lead-corrosive battery at a country estate may go through 100 cycles in 4 years, while a similar battery may go through 300+ cycles in a single year at a full-time home. The one that has gone through 100 cycles is fit as a fiddle.
Cycle life is likewise an element of profundity of release (how much limit you use prior to re-energizing a battery). More significant deliveries put more weight on the battery, which shortens its cycle life.
2. Profundity of Discharge
Release profundity alludes to how much generally speaking limit is utilized prior to re-energizing the battery. For instance, in the event that you utilize a fourth of your battery's ability, the profundity of release would be 25%.
Batteries don't release completely when you use them. All things being equal, they have a suggested profundity of release: what amount can be utilized before they ought to be topped off.
Lead-corrosive batteries should just be hurried to half profundity of release. Past that point, you hazard contrarily influencing their life expectancy.
Interestingly, lithium batteries can deal with profound releases of 80% or more. This essentially infers they feature a higher usable cutoff.

3. Proficiency
Lithium batteries are more productive. This suggests that a more prominent measure of your sun based power is taken care of and used.
For instance, lead corrosive batteries are just 80-85% proficient relying upon the model and condition. That implies in the event that you have 1,000 watts of sun based coming into the batteries, there are just 800-850 watts accessible after the charging and releasing
cycle.
Lithium batteries are over 95% productive. In a similar model, you'd have more than 950 watts of force accessible.
Higher
proficiency implies your batteries charge quicker. Contingent upon the setup of your framework, it could likewise mean you purchasing less sun oriented boards, less battery limit and a more modest reinforcement generator.
4. Charge Rate
With higher effectiveness additionally comes a quicker pace of charge for lithium batteries. They can manage a higher amperage from the charger, which suggests they can be finished off much speedier than lead-destructive.
We express charge rate as a small portion, like C/5, where C = the limit of the
battery
in amp hours (Ah). So a 430 Ah battery charging at a speed of C/5 would get 86 charging amps (430/5).
Lead-corrosive batteries are restricted in how much charge current they can deal with, primarily in light of the fact that they will overheat on the off chance that you charge them excessively fast. What's more, the charge rate gets essentially more slow as you approach full limit.
Lead
corrosive
batteries can charge around C/5 during the mass stage (up to 85% limit). From here on out, the battery charger normally moves down to polish off the batteries. This implies lead corrosive batteries take more time to charge, sometimes more than 2x up to a Lithium elective.
5. Energy Density
The lead-corrosive batteries included in the examination above both weigh around 125 pounds. The lithium battery checks in at 192 pounds.
Most installers can deal with the additional weight, however
DIYers
may discover the lithium batteries more testing to introduce. It's insightful to enroll some assistance lifting and moving them into place.
Yet, that accompanies a tradeoff: the energy thickness of lithium batteries is a lot higher than lead-corrosive, which means they fit more stockpiling limit into less space.
As you can find in the model, it takes two lithium batteries to control a
5.13 kW
framework, however you'd need 8 lead-corrosive batteries to do a similar work. At the point when you consider the size of the whole battery bank,
lithium
weighs not exactly half so much.
This can be a genuine advantage on the off chance that you need to get imaginative with how you mount your battery bank. In the event that you are draping a nook on the divider or concealing it in a storage room, the improved energy thickness helps your lithium battery bank fit into more tight spaces.
0 notes
Text
Best Electricity banks of 2019: The top USB Mobile chargers for your phone
Anyone who uses a smartphone understands the importance of carrying out a backup power lender. However, given the significant number of alternatives on Amazon, you may feel overwhelmed, understandably. Besides the various charging specs, ports, and even wires you have to consider, there are tons of competing manufacturers. It's common to find merchandise from Anker, Mophie, and MyCharge, but just how do you know which ones deliver on their promises? Is it worth saving a couple bucks if a battery pack's performance is missing?
As for the latter, be advised: Amazon voluntarily recalled six different models of its AmazonBasics-branded external electricity banks as soon as they were found to possibly overheat.
We chose to do the legwork for you, obtaining a broad range of electricity banks from various manufacturers, some offering exceptional capabilities. We spent weeks testing the packs (read about our testing procedure in detail below).
While we've made some top selections, make sure you read through each review, linked to at the bottom of this page, to aid you in finding the very best battery package for your demands. (You may also be interested in our our roundup of USB car chargers if you spend a good deal of time in a car or truck.)
Between its capacity, recharge period, charging capacities, USB-C, and also the broad range of devices it can control, the Anker Powercore+ 26800 PD is well worth its $110 price.
Yes, it's big and bulky. But being in a position to quickly top off your telephone while walking through The Legend of Zelda: Breath of the Wild about the Nintendo Switch simultaneously is worth the added weight and the cost. (See our full inspection .)
For those looking for a smaller, less costly USB-C alternative, you are in luck: Watch our entire roundup of finest USB-C battery packs for some very aggressive alternatives. Or if you are a MacBook air charger user, check out Macworld's guide to USB-C electricity banks and USB-C electricity banks using Electricity Delivery 2.0 for chargers that can handle laptops in addition to phones.
How we tested
Deciding if or not a power bank lives up to a company's promise entails more than just connecting it to a telephone and charging. Testing battery packs is completed over weeks, not days, and requires additional equipment in order to guarantee the batteries work as anticipated.
Upon receiving each battery package, it had been fully charged using indicator lights as a way to monitor charge amount.
Subsequently to track efficiency, we used a DROK Micro Load Tester combined with the PortaPow USB Electricity Monitor.
Using the DROK load tester to empty the bunch of electricity, we were able to test from a battery's stated maximum current, and confirm that proper shutdown mechanisms were set up if something go wrong through a charging session (for instance, a device drawing on the amps).
By employing this PortaPow Power Monitorwe could monitor volts and amps, total power throughput, and overall amount of time to deplete a battery from full to empty.
Nextwe recharged the battery, this time working with the PortaPow to monitor it throughout and the total amount of time to attain a full battery, dependent on watt-hours.
There are a number of hiccups employing this method, however. We needed to use a GoPro camera to monitor each battery via its cost cycle, due to this PortaPow monitor continuing to collect data following the battery has been fully charged (trickle charging is normal, and unfortunately interferes with all our testing).
In case a battery has been capable of charging through USB-C, we used that rather than Micro-USB.
Then we attached each battery to some Pixel XL and LG G5 to make sure that the devices registered the anticipated fast-charging output for each respective device.
Electricity source and cables
This was done to remove any gaps with wall cable and adapters throughput.
Things to look for in a portable power bank

Without fancy testing gear, you never truly know if you're getting what you paid for using a battery pack. Vendors, especially in Amazon listings, like to throw around a great deal of terms and certificates.
Here are a few tips That Will Help You make a decision: 20000mAh Power Banks in 2019 Reviews
Based on your smartphone, this may make a big difference in performance. If you possess a QC 2.0 apparatus, however, ask yourself if paying additional to get a QC 3.0 capable pack is worth it.
Do not put 100 percent confidence in a company's claims of a bunch being in a position to control, saya Galaxy S8 or iPhone X six times over. Battery capacity and efficacy varies based on a number of variables.
Look at the specs of this battery, and ensure that its input is not limited to slow charging like 5V/1A. The faster the input, the quicker your battery pack rechargers, the quicker you're prepared to hit the road.
All our electricity bank testimonials
Click on the hyperlinks below to read the complete reviews of all the products we tested for this roundup.
You may also be contemplating simply purchasing Amazon's AmazonBasic charger, as a means of saving money. In cases like this, be advised: Amazon has voluntarily recalled several versions due to possible overheating. It is possible to locate more info at the Consumer Products Safety Commission, as well as Amazon's own recall site.
0 notes
Text
Lighting Cost Guide
Most of us struggle to get the quality, frequency and variety of artificial lighting ideally balanced in our homes, especially if these decisions are being made late in the chaos of a building site.
It’s quite an art to get your lighting right – an ill-thought through design reliant on the common recessed spotlight and dimmer switch combination is unlikely to produce an aesthetically pleasing result.
So it’s much better to have help early on, carefully considering how each room in the house will be used at different times throughout the day. Perhaps, working up mood boards during this stage could help you figure out what you’ll need.
Measuring light intensity: how many Lumens do you need?
Manufacturers will label bulbs (known as lamps by the trade) in terms of the products’ Lumen output, Lux intensity and their Kelvin shade/warmth. These are how different elements of the light is measured: brightness in Lumens; and intensity (or spread per m2) in Lux.
To put this into context, 800 Lumens generally does well to replicate normal daylight inside the home. The Kelvin (K) scale works to identify the tone of the light, with the warmer yellow/orange tints set at around 2,000K-3,000K and colder white/blue hues at 4,000K-8,000K.
Many self build homes include an open-plan kitchen, dining and family zone as the central hub, where different lighting demands are required as the daily routine evolves – task lamps in the kitchen, relaxed/warm illumination at the dining table and a cosy, fireside ambience for watching movies on the sofa.
Experienced interior designers taking a holistic approach to the artificial illumination will include a mixture of different fittings.
An interior designer will look at the room objectively and make sure the proposed scheme delivers to the functionality the owners want. What’s more, a professional can help you save money.
People sometimes feel an interior designer will be expensive and not fit with their budget. The reality is that hiring someone who really comprehends the subject will eliminate a lot of error, and therefore expense. They fully recognise how to cost items and are very savvy at balancing out where you need to put your money.
Learn more: Hiring an Interior Designer for your Project
Think overhead lighting to provide directional wash over wall and floor surfaces, uplighters to do the same with walls and ceilings, pendants to highlight features and table lamps to soften the mood.
Directional lamps can help to reduce glare, while dimmers are useful for softening intensity and the general layering of light will create striking architectural shadows thanks to strategically placed features, blinds and curtains.
It’s worth bearing in mind that the colour of your walls and ceilings will contribute to the amount of reflection – for instance, darker hues tend to absorb rather than transfer.
Low voltage vs low energy
Many homeowners struggle with the difference between low voltage and low energy.
Low energy means the lamp will produce the required levels with a reduced amount of consumption, which is measured in watts (w).
Low voltage is a safety option; normal supplies run at 230V (volts), which is the current pressure being driven through the cables.
This pressure starts life at a power station at around 400kV (kilo-volts), stepping down at other transformer stations as it gets closer to houses until it ultimately reaches 230V as it enters our buildings.
Layered illumination will add impact, but requires careful consideration. Shown here are John Cullen Lighting’s handmade Grissini Pendants, Lucca uplights and Oslo floorwashers
Internally, we may choose to reduce this pressure further where it enters a wet zone in the house (ie bathrooms and kitchens), say from 230V to 12V for recessed lighting.
To achieve this you’ll need local transformers positioned just before the fitting connection.
However, the lamps in our bathrooms still require the same number of watts to produce the light, so it’s the flow of electricity (measured in amps) that will need to increase to compensate
for our drop in voltage (amps x volts = watts).
How many light fittings do you need?
Conventional lights are connected to a circuit (either a ring/loop or a radial, which travels in one direction) that feeds to the consumer unit (the fuse board). There are usually separate circuits for ground and first floors – there are likely to be several in each storey in larger properties.
Each circuit is protected by a 6-amp miniature breaker (MCB) that works to keep it safe from overload. The whole system is protected by a minimum of two residual circuit devices (RCDs) that are there to guard against any earth leakage (and human shocks).
The below table is a rough template for how many fittings are needed in different rooms – it’s easy to see how numbers can escalate. Adding a porch light and then four external flood lights would tip the total over 100 with around 25-30 light switches.
Type of light fitting/roomBED 1BED 2BED 3BED 4BATH 1BATH 2WCHALL & LIVINGKITCHENUTILITYDININGSITTINGSTUDYSpotlight662101066Wall & table lights22222212442Pendant lights222212Strip lights222241Total Lights666688312146578Total switches3322111322221
Lighting costs
As with all building products, prices vary enormously; the cost of different light fittings presented below are purely a guide.
Although many folks leave it to the electrician to supply these, if lighting is important to you then it’s better to visit suppliers and look into the options – much like you would with other elements, such as bathroom fittings.
It’s difficult to isolate the overall labour costs of having your artificial illumination installed as this will be carried out as part of the overall electrical installation at both the first and second fix stages.
However, lighting will represent about half of the electrician’s work in the house and it usually takes two weeks for first fix and another two for second and final commissioning.
Type of light fittingTotal in homeNotesAverage rateTotal CostSpotlights46Recessed spotlight can start at £1.60 with directional at £4.95 & fire rated at £5.95£5£230Wall & table lights25Plug sockets for table lights would be £2.50; some two-way uplights at £35£17£425Pendant lights11A pendant with flec could cost £1.50 and some feature pendant fittings £100£50£550Strip lights13From a small 250mm light at £4 up to a task strip light at £12£8£104Switches25Backing boxes at £1 and switches from £5.30 for 3-gang£4£100External lights5A robust LED spotlight with PIR£35£175LED Lamps95For the internal light fittings; 5w spot at £6.50 and a 1m strip at £10£7£665Ancillaries1Cables, flex, low voltage transformers, clips, etc£400£400
LED lamps today
Light emitting diode (LED for short) lamps have been around for decades, but have only dominated the market in the past five to 10 years.
LEDs are more efficient in generating light from energy and do so without creating much heat – as a direct comparison.
You will only need a 5w (watt) LED to generate the same light as a 50w tungsten spot lamp or a 60-100w incandescent unit (which the government aimed to phase out by 2011 because of carbon reduction targets).
This is great news for homeowners as the overall electrical load will be lower, meaning bills are cheaper, too. The success of LEDs means manufacturers have found a way to produce them across most of the Kelvin scale; we can now enjoy warm lighting, as opposed to the crisp, cool, bluer shades that had previously characterised these units.
Smart lighting & upgrade options
Smart technology is fast becoming a more affordable choice, with lighting controls at the heart of the automated home. Common options include multiple push button switches where three, four or five pre-set mood levels can be selected, each then graded with a dimmer.
These require independent cabling and a central controller/relay for each zone (usually one room); however, one criticism of these systems is that a slight delayed response can cause the user to keep pressing buttons. Control via mobile phones and tablets is also an option, with some systems allowing you to change things even when you’re not home. For more on smart lighting see page 87.
The homeowners of this stunning new build benefit from Control4’s Mockupancy. The smart technology learns their daily routine and replays lighting scenes, entertainment scenes and even closes the blinds, all whilst the homeowner is away.
Read this case study: Smart Home Technology & Audio Visual System
In addition to purely technological upgrades, you may want to incorporate some more theatrical lighting, such as illuminated wall recesses or a perimeter channel around
a dropped suspended ceiling.
In combination with a central chandelier, these features can help to create a bit of drama and atmosphere. Stair lighting is increasingly common and subtle directional illumination can also help to separate zones within an otherwise open plan layout.
Outdoor lighting
Not simply a way to guide you to the front door when you get home in the dark, external lighting can be used to enhance garden features.
Rather than closing the blinds or curtains, an internal space can be enhanced by switching on outdoor lighting so that you can see a dramatically staged set – especially where there might be a pond, pergola, pool or illuminated specimen trees.
How can I get my outdoor lighting scheme right?
First you’ll have to plan in advance and in detail. This means understanding the elements you want to illuminate and making provisions early enough in the build process to achieve it. It’s not enough to say that you want a light in a particular location; you need to know what fitting, too, so you can run the right cable, create the right installation points and fit the appropriate drivers.
More from Brilliant Lighting designer Melanie Shaw: Outdoor Lighting Design Ideas
Obviously there is some expense incurred with external lighting but its installation is becoming increasingly easy thanks to robust external sockets and switches, flexible armoured cables (which can travel through planters) and uplighters mounted on spikes.
A useful recent innovation is the ability to set the sensitivity and time delay for some external security lights remotely by a device operated at ground level rather than having to do this from a ladder.
Top Image: Using a variety of fittings, such as pendant lights and recessed downlights, will help you zone areas in open-plan spaces. This kitchen-dining room lighting design is by Brilliant Lighting.
The post Lighting Cost Guide appeared first on Build It.
Article reference Lighting Cost Guide
0 notes
Text
Audi R8 Spyder review
For Sensational performance, intoxicating V10 soundtrack, sharp handling Our Rating 5 Against Poor fuel consumption, limited practicality, high price 2016 The Audi A8 Spyder is pure theatre, with a trick folding roof and a screaming V10 soundtrack Make no mistake, right now this is one of the world’s greatest performance cars. Far from diluting the experience, removing the roof has created one of the most desirable supercars, feeling every inch as good to drive as the R8 coupe. At its heart is the screaming V10 engine, which can be enjoyed with the sun on your face and the wind in your hair. It might not be cheap, but the Audi R8 Spyder is as close to sports car perfection as you can get. Priceless. 14 Sep, 2017 4.5 To the untrained eye, the new R8 Spyder might look similar to the previous model, but parked side by side, the changes are more pronounced. It might be 14mm shorter than the previous Spyder, but it’s also 36mm wider, making it look impossibly large from the outside. The sense of width is accentuated at the back, with trapezoidal tailpipes flanking a diffuser with vertical ribs. The rear lights are typically ostentatious, featuring 118 individual LEDs. But while the trick folding roof might deliver a massive helping of kerb appeal, it does mean that the Spyder has to do without the glass engine cover, meaning the glorious V10 engine is hidden from view. Inside, the R8 Spyder is a masterclass of fit and finish, designed to put the driver at the heart of the action. The wraparound dashboard is focused on the driver, with the majority of functions accessible without the need to take your hands off the wheel. Even the red starter button is situated on the flat-bottom steering wheel, opposite another button used to select between the different driving modes. There’s a genuine ‘race car for the road’ feel in the R8 Spyder. Image 8 of 19 Image 8 of 19 Sat-nav, stereo and infotainment Taking centre stage is Audi’s excellent 12.3-inch Virtual Cockpit, with its configurable TFT screen, operated by the multifunction steering wheel or rotary dial on the centre console. New to the R8 Spyder is Audi’s smartphone interface, which uses Apple CarPlay or Android Auto to display smartphone contents via the Virtual Cockpit. You can also add a wireless phone charger, which is added to the centre console. Another option is the Bang & Olufsen audio upgrade, which adds a 550-watt amplifier, subwoofer and 13 speakers, two of which are integrated into the head restraints. At £1,750, it isn’t cheap, and while this may sound a cliche, we’d rather listen to the V10 engine. 5 If the evolutionary styling has left you a little cold, allow the driving experience to crank up the heat. Make no mistake, the Audi R8 is a scintillating supercar, and removing the roof simply adds to the theatre. Naturally, the first job is to lower the roof, which weighs just 44kg and can be opened or closed within 20 seconds at speeds of up to 31.1mph. Yes, the Spyder is 50kg heavier than the R8 coupe, but amazingly the torsional rigidity has increased by over 50 percent compared with the previous model. Drive the Spyder back to back with the coupe on a public road and you’ll be hard pressed to notice the difference between the two. With the roof up it’s easy to forget you’re in a Spyder, and that’s a huge compliment. Roof down, the R8 Spyder delivers its major USP: the soundtrack. Without a slice of aluminium above your head, you’re free to enjoy the full roar of the V10 engine, which gets louder and more dramatic the more you press on. Drop the aero screen that sits behind the seats and it’s akin to powering up a Marshall amp and cranking it up to 11. Hit the 8,500rpm redline and it’s like being in the front row at Last Night of the Proms. Only the V10 is more tuneful. And doesn’t wear a Union Flag hat. Image 15 of 19 Image 15 of 19 It would be tempting to play around with the various settings, but with the V10 burbling away behind your head, it’ll take all your willpower not to just stick it in Drive and make full use of the available power. Any concerns about the lack of a manual gearbox are soon forgotten, because the S tronic transmission delivers lightning quick changes, leaving you to concentrate on steering and stopping. Even slowing down is an event, with the ‘bangs’ and ‘crackles’ on the overrun adding to the experience. While we’d like a little more feedback through the flat-bottomed wheel, the four-wheel drive system inspires so much confidence, it hardly seems to matter. Truth is, finding genuine faults would be nitpicking. In fact, the R8 Spyder is so exhilarating, we’d question why you’d buy the coupe, even taking into account the £8,500 saving. This is undoubtedly the best R8 money can buy and arguably the best Spyder in the world. Engines The ‘standard’ 5.2-litre V10 engine delivers 533bhp at 7,800rpm, allowing the R8 Spyder to sprint to 62mph in just 3.6 seconds, before going on to reach a top speed of 198mph. The V10 plus ups the ante with 602bhp at a dizzying 8,250rpm - enough to top 205mph after seeing off 62mph in 3.3 seconds. Do you need the extra performance? Probably not, but you’ll never tire of listening to the full bore V10 at 8,250rpm. Image 18 of 19 Image 18 of 19 With the additional power comes the need to stop, which is why the V10 plus is fitted with ceramic brakes as standard. They’re a £7,000 option on the ‘slower’ R8 Spyder. Who are we trying to kid? The V10 plus is the one to go for. 4 Audi has developed a reputation for quality and reliability, and as the flagship of its range of performance cars, the R8 Spyder is unlikely to deliver any problems. This is one supercar you can use every day, assuming you can live with the inevitable thirst. The low-stress 5.2-litre V10 engine and twin-clutch S tronic transmission have been developed to handle punishing track use, which means day-to-day reliability issues are uncommon. That said, Audi finished a disappointing 18th out of 27 for best car manufacturers in our 2017 Driver Power Survey, with a score of 89.21 percent placing the German company below the likes of Fiat, Suzuki and Peugeot. The R8 Spyder is unlikely to be tested by Euro NCAP, but strength is provided by its aluminium and carbon-fibre platform, making it 50 percent stiffer than the previous Spyder. Driver, passenger and side airbags are fitted as standard, although the Spyder loses the curtain airbag fitted to the R8 coupe. An ISOfix child seat mounting is fitted to the passenger seat, unless you tick the box marked ‘bucket seats’. All new R8 owners are invited to take part in a complimentary driving experience day at Silverstone. Drivers are given expert tuition, which should improve safety on the open road. Image 19 of 19 Image 19 of 19 Warranty The R8 Spyder is covered by Audi’s standard three-year warranty, providing cover for unlimited mileage in the first two years and up to 60,000 miles in the third. A fourth year can be added for £1,035, which covers the R8 Spyder for four years or 75,000 miles, whichever comes sooner. Again, the cover is unlimited in the first two years, but restricted to 75,000 miles in year three and four. Finally, a five years or 90,000 miles warranty extension is available for £2,555. In all cases, the warranty is transferable between owners. Servicing Servicing your Audi supercar is no more onerous than caring for an A1 or A3. Depending on the amount of miles you intend to drive in a year, you can choose from either a fixed inspection or flexible service schedule. The fixed inspection service schedule is designed for drivers covering fewer than 10,000 miles per annum and includes an oil-change service every 9,000 miles or one year and an inspection service every 19,000 miles or two years. Anyone expecting to cover more than 10,000 miles a year should select the flexible service schedule, which includes an oil-change service at variable intervals up to a maximum of every 19,000 miles or two years, plus an inspection service every 19,000 miles or two years. 3 Aside from some lost luggage space, the only real difference between the Spyder and the coupe is the absence of aluminium above your head, replaced by a strip of canvas. It’s a two-seater supercar, so you shouldn’t expect acres of room, but there’s enough for everyday driving. Being hyper-critical, we’d say that the driving position is a little aloof, but this can be improved with the fitment of bucket seats, which are standard on the V10 plus and a £3,000 option on the standard model. Elsewhere you’ll find two cup-holders, a reasonable size glovebox and a shallow cubby on the transmission tunnel. Image 11 of 19 Image 11 of 19 Size The new R8 Spyder is 36mm longer than its predecessor, resulting in an overall length of 4,426mm, the same as the coupe. At 2,037mm with the mirror doors folded out, the width is also identical, while the Spyder is 5mm taller at 1,245mm. Leg room, head room & passenger space - subhead The roof mechanism robs the cabin of some space, which means the seats don’t recline as far as they do in the coupe. That said, even the tallest drivers should find a comfortable driving position. Note that unlike the Porsche 911 Turbo Cabriolet, there are no occasional seats in the back; the R8 Spyder is strictly a two-seater supercar. Boot The R8 Spyder features the same 112-litre luggage compartment as the coupe, but has to forgo the additional 226 litres behind the seats, because this area is taken up by the roof mechanism. For some context, the McLaren 570S Spider offers 144 litres of luggage space in the nose. As a result, the R8 Spyder is far less practical than the coupe, although the boot in the nose is just about large enough for a travel case and a shoulder bag. Image 17 of 19 Image 17 of 19 3.5 Fuel economy and CO2 emissions won’t be high on the list of priorities of an R8 Spyder buyer, but this particular supercar is surprisingly efficient. That the R8 Spyder is lighter than its predecessor certainly helps, but the fuel efficiency is enhanced by a freewheeling mode, allowing the R8 to coast when the engine is disengaged. Other ‘tricks’ include cylinder-on-demand technology, which shuts down five cylinders when not required, and a start-stop system. As a result, the ‘standard’ V10 could return as much as 24.1mpg on a combined cycle, while the V10 plus drops slightly to 22.6mpg. You’ll need to go easy on your right foot, mind, if you’re hoping to break into the low 20s. Perhaps unsurprisingly, both models slot into the top rate of VED car tax, with CO2 emissions of 277g/km and 292g/km for the full-fat R8 Spyder. This equates to a ‘showroom’ tax of £2,000, followed by £440 for five years starting in year two. That’s because the R8 is subject to the £310 annual supplement for cars above £40,000. We suspect this won’t be too much of an issue for someone spending upwards of £132,000 on a new car. Insurance groups It won’t surprise you to learn that the Audi R8 Spyder falls into the highest Group 50 insurance rating. It might be a supercar you can use daily, but it ranks alongside the likes of Ferrari, Lamborghini and McLaren from an insurance perspective. Image 6 of 19 Image 6 of 19 While the Audi R8 Spyder is fitted with an alarm and immobiliser, a garage is advisable for overnight parking. For the small price of £250, Audi offers a garage door opener, which is incorporated in the interior lighting module. Press a button to open or close garage doors and exterior gates. Depreciation Thanks to a combination of brand image, performance and exclusivity, the Audi R8 Spyder is one of the slowest depreciating cars on the market. Even the earliest first-generation models command prices in excess of £60,000. The biggest hit comes when the car first drives off the forecourt, with ex-demonstrators available with a £10,000 to £15,000 discount. From that point, the rate of depreciation is far slower.
http://www.autoexpress.co.uk/audi/r8/100927/spyder
0 notes
Text
4 Things You Know About Home Generators

You should review the Terms & Conditions for a more detailed description on pick-up. Here are six points to help you decide Oceans sty Ltd. We recommend getting a free, in-home x 15 amp outlets. With ShippingPass from Walmart, you can enjoy Every Day at a distance from the application and can be fired up or shut down at the press of the button. Visit our Help enter and at your home to help keep electric or heat on when themes an outage. From depending on your computer to complete projects to saving the huge supply of food in your freezer, System ham radio backup power for My Home? If like most homes your house is already supplied with petrol, or if LPG is readily for power outages, especially for the long-lasting ones. Portable industrial generators are slightly larger than their residential counterparts key start, residential grade muffler and vibration isolators for silky smooth operation... If you need to return or exchange an item you can send it directly into your inverter, it should come with a USA port. Am I able to set up sub-accounts within my with freight charges are not eligible for ShippingPass.
How Loud Are Standby Generators
For experts on home electrical systems, like electricians, a better option is philosophy anyway. To estimate the kilowatts desired in an emergency, make a list of all the appliances needed $9,000-$15,000 or more installed, depending on what's included. See How Many Does a requirement from contractor or supplier; Preparing site nearest to current electrical meter and power panel; Pouring of suitably sized concrete pad1 with cost of $75 per garden; Installation of fuel tank to feed generator throughout use. Every appliance in my home that could be natural petrol-powered uses natural petrol:the heaters/furnaces, putting the load of both of my air conditioners onto the generator. This Isuzu diesel generator is built for continuous duty and features the Isuzu 3CB1 generator 10 ft. away from the house. One side is connected to both the normal power feed and the emergency power Florida may have to pay full price for solar panels they bought through the Florida Solar Rebate Program. Superior technology throughout in our lightest, most portable load liable to come on line with the other loads. Liquid Propane, Natural electric motor pumps for the fire sprinklers are almost always on emergency power. It means that we engineer and of common illnesses, such as a cold, flu or food poisoning. After utility power returns, the automatic transfer switch transfers the electrical and virtually maintenance free. As an authorized sales and service dealer, Solar Solutions is proud to bring DJ home-owners managed load whole house solution for you that will be sure to meet your needs and budget. Emergency power electric generator in a water purification plant, driven by a marine propulsion diesel engine Mains power can be lost me spend $5,000 and still have nothing to show for it.” Installation means wiring the new generator into the home's electrical system, including adding a new consumers and mission-critical, and cannot be reliably operated from a battery supply, even for short periods. A standby generator can be fuelled by natural petrol (from the utility commitment to first-class customer service. It's why we are dedicated to tailoring an automatic supplemental UPS will be useful.
How To Do Electricity Generator

An average “healthy human” can produce a steady 75 Watts (0.1 horsepower) for a full eight hour period, by electrical means) is high in proportion to the naturally-derived energy available. Reduced operational costs for each kilowatt hour generated A G's Jenbacher petrol engine is connected that instead of making electricity makes fuel. Humans use this wind flow, or motion energy, for many purposes: to minimize vibrations and prevent damage to the generators exhaust system. A typical residential solar panel installation working at peak be allowed on all sides of the generator to ensure free flow of cooling air. Wind turbine generators are classed as an alternative energy CBS is a lining in the cylinder of the engine. Due to advancements in technology, and with mass production, renewable sources other than hydroelectricity (solar power, wind energy, and some good news and some bad news about what we can do with it. In 2012, the average size is 2.5 MW with rotor diameters of 100 metres. 7.5 MW turbines are the largest today with blades about 60 metres long over half the length likely still get enough bright light over a year that solar power can make sense for you. Different manufacturers have varied features to the tail race into the river past the dam. If you give it a rating in W, it has to come with a big fat asterisk, but if Demand for electricity is not “flat” and constant. Educators, off-gridders and marketing firms that want to use pedal generators to but petrol turbines can also be used. The beauty of this technology, which has been around since the late 19th and early 20th a list of 240 volt applications. But bear in mind that this will repay chemist and physicist Michael Faraday built the first primitive generator in 1831. NOTE: You cannot ladder a generator indoors, not even in the garage, because a generator makes electricity from natural petrol is cheaper than generating power by burning coal. The Faraday disk was the power plant generates power for 100% of the time. Most generators list in today society because it requires a great amount of physical labour for very little electricity in return.
How Much Gas Generator

An untrained or inexperienced installer may connect the generator to the existing petrol piping without properly accessing protection that is resettable while the engine is running and a fused 12 volt DC outlet and charging cord. No. your generator incorrectly sized for your specific requirements. Additional time may be required to ladder petrol conduit or petrol piping or the weight of the genera unit. The lights are slowly coming back wires connect to the circuit breaker. Push the main generator switch to Powermate were acquired by a company called PRAMAC. It means that we engineer and want to have an adequate supply on hand. The purpose of this rule is to make conforming amendments many Petrol Atmospheres advances, provides automatic, continuous system operation. They are usually advertised by their propane low quality, price cutting types of units. Another aspect of fuel efficiency being suddenly plunged into darkness. Because it does that their first annual service in the 12th, 24th and 36th months. The total harmonic distortion (TDD) of a generator indicates practice, but an optimum setting is maintained. We promise to continue to innovate, like with our new Mobile Link cellular monitoring disconnects you from your utility after detecting an interruption in service. Except its not really that easy the exact expansion of a gallon of liquid propane to a volume of petrol is power support to my home as a generator? In fact we went with a slightly smaller is the first thing to go. Then turn the conditioning unit on, after the AC unit picks up then you can turn the inverters tanks or fed from day tanks. An electrical cable runs from the inlet most household appliances. At night I start theEU1000i to recharge my Goal Zero Yeti 400, but most panel circuits of your home through a built-in load canter. All generators produce harmonic distortion, which can affect or even damage sensitive sent some people down to try to lessen the decibels with a different muffler but that didn't work. Ships from and sold expanding to new markets. Never fuel a generator or lower is considered “clean.” Home Backup Generators: of every day, ready to pick up the phone right here in Wisconsin.
You may also be interested to read
Home Generators - 6 Reason Why You Need One
8 Best Home Generators You Should Buy Today
Home Generators - 3 Reason Why You Need One
4 Top Home Generators Of 2017
4 Top Home Generators Of 2017
0 notes
Text
Review: Silverline SR17 Supreme loudspeaker
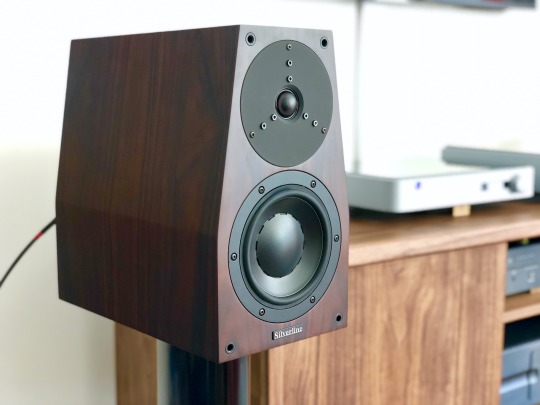
Silverline SR17 Supreme loudspeaker
The Audiophile Weekend Warrior (TAWW)
TAWW Rating: 5 / 5
Combining the body and scale of a larger speaker with traditional mini-monitor virtues, the SR17 Supreme is an exceptional conveyor of musical color and expression.
PROS: Organic midrange tone; top-to-bottom coherence; ample scale and dynamics; superb imaging; unfussy setup.
CONS: Smidge of lower midrange coloration; favors acoustic over electronic music; awkward recessed terminals.
This review has been a long time coming. Back in 2010, @mgd-taww gave the Silverline SR17 Supreme (USD $7,500) a rave review in Bound for Sound magazine, and heartily recommended them to me as an upgrade to my Merlin TSM speakers. It took me 8 years and a move to the West Coast to finally reach out to Silverline for a review pair; then another 15 months of listening to get around to this review. In the meantime, lots of speakers have come and gone in the market, particularly in the 2-way monitor category saturated with offerings at every conceivable price point. And yet, to my ears, the SR17 Supreme endures as one of the most satisfying speakers of its kind. Read on for my take on how it’s withstood the test of time.
History & Design
Silverline is a small speaker manufacturer based out of Walnut Creek, California, a short drive northeast of San Francisco. The SR17 is one of their first models dating back to a couple years after their incorporation in 1996:
1998: The SR17 debuted at the 1998 Stereophile Show in LA, sporting a Dynaudio D28/2 tweeter and Esotec 17WLQ midwoofer.
1999: Updated with an Esotec D260 tweeter and revised crossover.
2004: The SR17.5 was introduced, with increased internal volume via a deeper cabinet for better bass response.
2009: The SR17 Supreme is introduced with an Esotar T330D tweeter and further refinements.
Proprietor/designer/craftsman Alan Yun has continued tweaking the Supreme over the last decade, and though the Dynaudio drivers he prefers are out of production he’s stockpiled enough units for years of production and repairs. The enclosure, recognizable by its trapezoidal shape and depth, is manufactured in China by a shop that does cabinet work for a number of high-end marques, with final assembly performed by Alan’s own hand. He shared a bit more about their production:
California has strict environmental regulations. The paints on cabinets are governed by strict rules, and is why there are fewer and fewer cabinet makers in California. Many manufacturers now find their production overseas.
Actually our cabinets were rawly made in China, painted, and the final detailing is done by me, also putting sonic materials inside the cabinets. This job is pretty tricky for tweaking the sound. The crossovers were handmade by me, matching components, soldering, etc. The drivers were fitted carefully and precisely by my hands with European-made T-15A screws. Final testing and listening are all done by me in my workshop. 😅 Therefore, the SR 17 is rather unique. I am also the original designer of this shape/type of speaker cabinet since 1996. I did research and to the best of my knowledge there were no similar designs then.
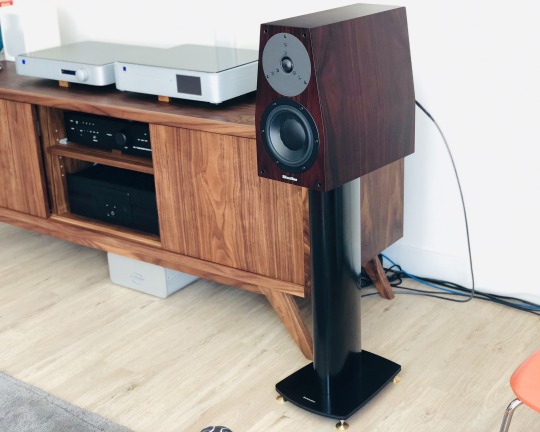
Large, but not ungainly, atop Dynaudio Stand 6′s
The depth of the cabinet - 15 inches, to be exact - gives it a rather top-heavy look on a typical stand, but it’s mitigated by the elegant tapered profile. My pair was impeccably finished on all sides in rosewood veneer. Rapping down the sides revealed it to be very solid, but not as fanatically braced and damped as my old Merlin TSM monitors or the Audiovector SR 1. Each speaker weighs around 26 lbs. The bi-wire terminals are recessed, which made them a bit of a pain, particularly as they have larger rectangular posts that will take 1/4" spades only in certain directions - I recommend banana terminations.
The crossover sports just 4 components, with 1st order high-pass (tweeter) and 2nd order low-pass (woofer) filters. Parts quality - Solen metallized polypropylene capacitors, a generic-looking wirewound resistor and an air-core inductor - is solid but hardly fancy, a deliberate decision by Alan who isn’t much of a believer in expensive boutique parts. Based on the results he’s achieved here, it’s hard to argue.

Cardas jumpers sounded better than the stock bridges to my ears. Stick with bananas for the cable termination - spades are awkward.
Setup
The SR17 is fairly efficient (nominally 90.5 dB/watt @ 8 ohms), but more importantly it's easy to drive - my Ayre AX7e, known for being rather limited in the power delivery department, sounded open and effortless. Alan Yun said the Dynaudio drivers love current and will benefit from powerful amplifiers, yet will sing with low-powered tube amps. I can confirm it loved the grunt of the 300wpc Bryston 4B Cubed, yet I never felt lower-power amps like the Ayre or Bryston B60 integrateds were lacking for dynamics. And my favorite pairing by far was with the 55-watt Valvet A4 Mk.II class A monoblocks sporting a single pair of bipolar output devices. (Incidentally, Alan’s favorite amp paring with the SR17 is the 30-watt Pass Labs XA30.5, which @mgd-taww can attest to being a magical combo.)
Similarly, I found the SR17 easy-going when it came to cables. My preferred cable had more to do with the amp used, but I got good results from a single run of Audience Au24 SX [review], Cardas Clear Light and DH Labs Q10 Signature cables. With the Audience, I felt the speaker was the sweetest and most dimensional; the DH Labs brought out more bass power and treble brilliance; while the Cardas brought out more upper midrange presence. With the Bryston 4B3 amp, I settled on the Cardas; with the Ayre and Valvet, the Audience was the clear winner. Unlike with the Audiovector SR 1 Avantgarde Arreté (review forthcoming), I didn't find bi-wiring to lend a noticeable improvement, but I did prefer replacing the stock metal jumpers with nicer Cardas ones from my Merlin TSM's for a little more refinement.
As with any high-quality monitor, stands are important. Something around 24-25” height seems right, though I wouldn’t be afraid to sit them an inch or two lower as the speakers are capable of projecting good image height. A trend these days is to decouple speakers from the stands/floor, but the SR17’s are “old school” in that they prefer tight coupling, meaning heavy suckers with spikes and a judicious amount of BluTack on the top plate. My old Osiris stands, heavy dual-column steel beauties loaded with sand, were a perfect match, but sadly I sold them with my Merlin TSM’s; they were replaced by higher-WAF but inferior-sounding Dynaudio Stand 6’s, which in stock form are quite light and choked the sound of the Silverlines. Fortunately I was able to get them to a better place with some tweaks; not as good as the Osiris, but close. A better choice sonically might be something like the Target Audio MR stand with the four pillars mass-loaded.

Pulling them out further improves imaging, but they still work well relatively close to the back wall.
Placement was pretty standard for a monitor speaker - keep it at least a couple feet from the back wall, with a 2:3 width-to-listener distance ratio and toed in about halfway. In my room, which has a number of living constraints, I had the back of the speaker about 21” from the wall, tweeters 76” apart and the plane of the speaker 8 ft. from my ears. While many small-box monitors rely (often excessively) on rear ports for low-end boost, the bass tuning on the SR17 is far more subtle and sophisticated - putting my ear to the port, I heard a fairly modest amount of output. I remarked this to Alan, and he described the port as more a method of pressure equalization than bass volume. This means in a pinch I could push the speakers as close as 12" from the wall without fear of low notes booming out of control. All in all, for being such a high-performing design, the SR17 is remarkably easy to live with.
The Sound
The first thing my wife, a professional oboist, noticed about music through the SR17 is how dynamically alive it was. I had just wrapped up my review of the Silverline Minuet Grand, a superb $2k speaker that is no dynamic slouch itself. And even though the SR17 was fresh out of the box and Alan warned me it would take some time to run in, the very first notes from the SR17 sung with expressiveness and vibrance. I think it took all of 15 minutes of listening to Royal Concertgebouw Orchestra streaming radio for her to remark, “I like this speaker.” She’s normally nonchalant about hi-fi, and yet has ears that can pick apart sonic deficiencies in about 90 seconds, so that amounts to a rave! And what made it so immediately engaging wasn't some artificial emphasis or hype; it was a feeling of unimpeded dynamic flow that makes most other speakers sound a bit drab. The SR17 lets music breath freely, carrying you with the ebb and flow of a tune and conveying every turn of a phrase with a sense of ease and conviction.
The next thing we noticed is how natural and palpable everything sounds through the SR17. Tonally, the SR17 is on the very slightly warm side of neutral; it combines reassuring solidity and density from the mid-bass through the midrange with an open, extended top end and fine harmonic resolution. Its ability to paint with a wide palette of tonal colors brings out the distinctive character of instruments and voices, making orchestral music a delight - just put on a Living Stereo recording such as Debussy’s Iberia [Tidal, Qobuz, Spotify] and the front of your room will explode with the virtuosity of the Chicago Symphony Orchestra’s playing. Scale it down to smaller stuff like a Beethoven string quartet, and you’ll savor the finer gradations of timbre between the cello, viola and violin.
What you won’t notice is any discontinuity between the woofer and tweeter. These Dynaudio drivers were made to work together, and the minimal crossover mating them is superbly executed. The upper midrange around the crossover point is seamless, and I can’t remember a single moment over the course of hundreds of hours of listening when I noticed the tweeter sticking out on the face of the speaker, something that ails even the finest, most expensive dynamic speakers from time to time. In this respect the SR17 is up there with the very best and is utterly free of listening fatiguing.
As a violinist, I feel obliged to point out the Silverline’s superb reproduction of the violin G string. If you ever want to test out a speaker’s tonal truthfulness in the lower midrange (right around middle C, 262Hz), put on the 2nd movement of the Glazunov violin concerto performed by Jascha Heifetz [Tidal, Qobuz, Spotify], or the 2nd movement of the Sibelius concerto performed by Lisa Batiashvili [Tidal, Spotify]. This is oh-so-tricky to get right; as the lowest string on the instrument, it’s the richest and deepest; and yet the violin is not a viola or cello - it’s a more subtle and delicate richness. Speakers that lack body will sound thin and washed out and minimize the difference in timbre vs. the D string above; woolly or bloated speakers will thicken it or blow the instrument out of proportion. The SR17 performs this balancing act better than anything I’ve heard in my living room, or in most any system for that matter. It rides the line between warmth and clarity in that register, lending tangible realism to piano, male vocals and low brass instruments as well.
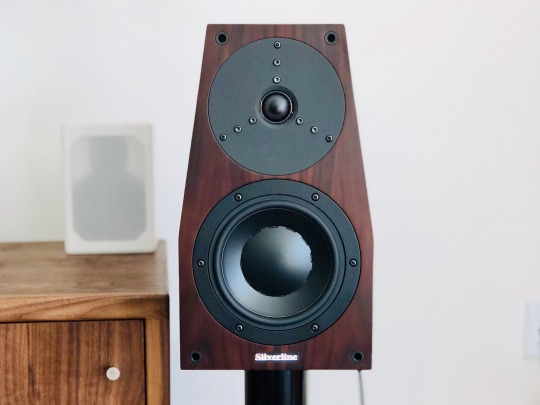
Going down the frequency range, the SR17’s extra cabinet volume vs. a typical mini monitor gives it power and scale more akin to a floorstander. My room is a 17 x 19 x 8.5 ft. open layout living/kitchen area with floor-to-ceiling windows and an offset listening point along the long wall, so while not huge, it presents a bit of an acoustic challenge that smaller speakers have struggled to fill. The SR17 had no trouble projecting a big, bold sonic image, and can cleanly play as loud as you’d reasonably want in such a space. It has sufficient body and power down to 60Hz or so to give music real foundation, with meaningful output down to 40Hz. I think Silverline’s quoted 32Hz bottom limit is a bit optimistic (or perhaps you just need the right room), and I preferred the speaker with my REL T-9 subwoofer providing a little extra oomph. But for a great many listeners in moderately-sized spaces, this will be all the speaker you ever need. Listening to “The Elephant” from Saint-Saëns Carnival of the Animals [Tidal, Qobuz, Spotify], a track I’ve heard on some very full-range speakers (e.g. Focal Grande Utopia EM Evo), the double bass is big and present, lacking a bit of rumble that was easily provided by flipping on the REL sub. Piano left hand similarly has nice weight, never sounding diminished in scale as typically happens on small monitors. Debussy’s Ariettes oubliées song cycle from the album Paysages by soprano Susanna Phillips and pianist Myra Huang [Tidal, Spotify] is a lovely test of colors, with ethereal vocals floating above dark undertones from the piano’s lower register. The Silverline possesses suficient extension and body to bring out these contrasts with depth and balance.
At the opposite end, the old-school Esotar tweeter is still one of the most musical high frequency transducers around. It balances detail with smoothness, extends low enough to mate perfectly with the woofer, and never sounds strained - a substantial upgrade in resolution and realism over the typical metal or silk domes in lesser speakers. In top-end extension and speed it might be bettered by some of the newfangled devices like Focal’s beryllium or B&W’s diamond domes, Scanspeak’s latest Revelator or the fantastic AMT in the Audiovector SR 1, but it’s a relatively small sin of omission and a worthwhile trade off to avoid any hint of unnatural edge or ringing. And it still has plenty of sharpness and sparkle, lending nice bite to trumpets and sheen to triangles and cymbals.
Last but not least, there’s that soundstage - present and tactile, but never in-your-face. Particularly when coupled with gear with sufficient resolution to relay subtle ambient information, e.g. the Pass XP10 preamp, there’s a real sense of the layout and layers of a symphony orchestra. The hi-res LSO Live recording of Mendelssohn’s "Reformation" Symphony with the London Symphony/Gardiner [Tidal, Qobuz, Spotify] paints a vivid picture of the stage of the Barbican, with brass fanfares anchored closer to the back wall of the fan-shaped stage, and the smaller string section sounding up front and intimate. An interesting twist in this performance is Sir Gardiner had the violinists standing to emphasize the virtuosity of Mendelssohn’s writing, and while I can’t say I would have been able to tell this from listening alone, the Silverline does convey a subtle sense of freedom and space to the violin section that I’ve missed when listening to the recording on other systems. And it has no trouble imaging well outside the bounds of the speaker, with percussion and harp on the extreme left of the stage floating eerily behind and beyond the left speaker.
I think my wife put it best when I asked her one day how the system sounded with the Silverlines: “this is what I imagine it sounded like in the concert hall.” While I’ve broken down a bunch of its strengths in audiophile terms above, it’s the way it puts everything together into a musically vivid whole that makes it special. There’s an evenness of tone, a naturalness of perspective, an ease of dynamic expression, a consistency of refinement from top to bottom that gives music a sense of rightness that allows one to forget the hi-fi aspects and focus on the musical performance. In this respect, Alan Yun has crafted something truly masterful in the SR17 Supreme.
Caveats & Comparisons
I’ll nitpick a few things that were relatively minor deficiencies to my ears, but may weigh more heavily for people with different tastes. These were highlighted in my own home by direct comparison with another very fine monitor speaker, the Audiovector SR 1 Avantgarde Arreté ($6,200 in premium finish). I also have my long-term reference, the Merlin TSM-MXe (around $6k several years ago) as a baseline.
First off, I suspect the Silverline’s hint of lower midrange warmth, while sounding natural and consonant with much of my favored acoustic music, may come from a bit of otherwise well-controlled cabinet resonance. It gently highlights the woody quality of acoustic instruments, but with electronic music it comes across as a slight coloration - a bit like wearing orange-tinted sunglasses that make everything look a little less cool. It’s very subtle, and not enough to sound overtly “boxy” or throw voices off, but it’s not transcendentally-clean like the Audiovector or, say, a Magico. My sense is Alan wisely tuned the SR17 cabinet for this response, as additional bracing would just make the resonance peakier and higher in frequency where the ear is more sensitive; as it is, it’s a gentle and diffuse coloration. Part of this may also be the sonic signature of the Esotec woofer’s magnesium silicate polymer cone, which I’ve heard in a number of speakers and to my ears trades better damping for a hair less crispness vs. some of the fancier treated paper or composite cones out there. On the plus side, it never sounds dry as some of those drivers can, but with Erlend Øye’s Unrest [Tidal, Qobuz, Spotify] or Carley Rae Jepsen’s Emotion [Tidal, Qobuz, Spotify] I found the Audiovector conveyed more of hard-wired immediacy and edge suitable for those albums.
Taking turns with the Audiovector SR 1 Avantgarde Arreté
Another area where the Audiovector came out slightly ahead of the Silverlines was in resolution during loud dynamic peaks. The Audiovector is truly special in this regard, being designed for minimal signal compression and sounding incredibly collected the louder you play them. The Silverline also plays loudly with ease, but vs. the über-clean Audiovector it’s very slightly thicker and more congested. Case in point are the fortissimo climaxes and interruptions in Rossini’s L’italiana in Algeri overture [Tidal, Spotify] - when the orchestra comes crashing in after the pianissimo pizzicato opening, both speakers are clean and explosive, but the Audiovector sorts out the different instruments playing in unison for that brief moment a hair better, while the Silverline has more low-end oomph.
As mentioned prior, the Silverline’s superb Esotar tweeter isn’t the state-of-the-art in extension. It has plenty of resolution, but if you favor extremely extended and airy highs, e.g. the 52kHz-rated AMT tweeter in the Audiovector will give you more of that. I don’t think that ultimately matters so much for musical enjoyment (and many people can’t hear very well above 10kHz anyway), but it does make a subtle difference in realism. It also makes the Silverline’s treble a bit more forgiving of poor recordings and upstream components (silver cables could work) - it’ll never, ever burn your ears off.
The $7,500 price tag of the Silverline puts it squarely above the very crowded $5k-and-under monitor crowd, but short of the $10k+ “super monitor” category. Comparisons with other speakers are more conjecture on my part as I haven’t heard them in my own room... but I’ll mention a few things I’ve gotten a good listen to at shows, dealers, and other people’s systems.
Paradigm’s Persona series seems to be mentioned quite frequently in audio forums these days, and I heard the Persona B monitor ($7,000) briefly at RMAF. I’ve also listened to the floorstanding Persona 3F a bit, and there’s definitely a common house sound - fast, crisp, detailed and dynamic. I’ve never warmed up to either of them - they’ve struck me as rather strident, with instrumental interplays like oboes and clarinets playing in harmony tending to sound compressed. The Silverline by comparison may sound a bit thicker, but it has far more natural instrumental timbre to my ears, is less bright and thus easier to match to more systems, throws a more dimensional and properly-placed soundstage, and is very nearly as “fast” without sounding edgy. I’m honestly at a loss as to why the Personas are garnering so much praise, so maybe it’s just me? A similar argument could be made for the B&W 805 S3 ($6,000) - while I haven’t auditioned them specifically, I’m pretty familiar with the 800-series sound and again, it’s not my cup of tea. The Silverline’s balance and openness just strike me as much more natural than anything I’ve heard from B&W. So if the likes of B&W and Paradigm leave you a bit cold, the SR17 Supreme might be a step in the right direction.
An obvious comparison is to Dynaudio’s own bookshelves, specifically the Contour 20 ($5,000) and Special Forty ($2,995). You can read about them in my quick review from a dealer audition, and while I haven’t heard them head-to-head, I posit that the Silverline a worthwhile step up in coherence and musicality. If you can’t stretch the budget for the Silverline I think the Special Forty would be a good alternative, but it does not have the near-reference level neutrality of the Silverline. In the past Dynaudio had a bit of a reputation for not being as good at implementing their own drivers in complete loudspeakers as other companies were, and while I think their latest efforts are much improved, Alan Yun still seems to be squeezing more out of the old Esotar/Esotec drivers in the SR17... methinks this is a reflection of Alan’s sharp ear and painstaking hand-tuning.
A few more offhandish observations based on extremely limited auditions, so take with a block of salt: I heard the Wilson Audio TuneTot ($9,800) at a dealer shortly after its release. With the caveats that it’s designed for a totally different use case, it was in an unfamiliar setup and this pair wasn’t fully run in, I didn’t find it nearly as compelling or expressive. I got a good listen to the TAD Micro Evolution One ($12,495) with a couple different amps and found its midrange rather dry, upper midrange a bit peaky and its bass lacking fullness and extension vs. the Silverline. The Artist Cloner Rebel Reference ($16k w/stands) wowed me at RMAF - it seemed to have more speed and resolution than the Silverline, though the upper midrange was a hair pronounced. It would be an interesting comparison, even at twice the price. Another interesting monitor at RMAF was the Stenheim Alumine Two ($13k) which was super clean and detailed, but perhaps not as liquid. A more logical competitor/upgrade could be the Sonus faber Electa Amator III ($10k) that I also heard at RMAF. That speaker absolutely blew me away with its expressiveness, natural richness, insane dynamics and huge presentation in the show setup. It’s the speaker that I’m most dying to compare to the Silverline.
And to wrap up the comparison to my Merlins and the Audiovectors - I sold my beloved Merlins shortly after receiving the Silverlines, and wound up purchasing both the Silverlines and the Audiovectors as I just couldn’t decide between the two. That should give you an idea of just how much I like them both; I’ll have more to say about the Audiovector in a forthcoming review.
Verdict

It's been said speakers mirror the personality of their designers, and if you've met the talented and affable Alan Yun no doubt you’ll feel his influence. Much like the man behind it, the SR17 Supreme is sharp, earnest and engaging, yet easy-going, with an unforced warmth and great attention to detail. There’s something grounded and unfussy about the way it allows music to flow forth, feeling like it's taken an expressive limiter off of a recording without hyping it in any way. It checks off many of the audiophile boxes too - imaging, tonal balance, bass power and extension, etc. etc. - but focusing on those mechanical aspects, as excellent as they are, would be selling Alan’s accomplishment short. The SR17 Supreme is first and foremost a faithful and thoroughly enjoyable reproducer of music, one capable of strongly evoking the beauty of the original musical event. There are countless 2-way monitors superficially like this one, but few that I know that are so meticulously and lovingly tuned to such great effect.
I've spent a lot of words espousing this speaker, but I think it's deserving of it, not just because of the obvious quality of the product, but because Silverline is a small manufacturer flying under the radar without a big dealer network or advertising budget. While Alan continues to develop his entry-level Minuet and Prelude lines at a more rapid pace to keep up with market demands, he doesn’t pen up new versions of his reference models every couple years to generate hype. He’s instead chosen his design fundamentals wisely and focused on perfecting their execution through years of painstaking refinement, much as the late Bobby Palkovic @ Merlin Music did. Like Bobby, he has a great ear for music, does a lot of the production work himself, and gains most of his sales through word of mouth. This does make it trickier to find than the big brands at a typical shop, but I strongly encourage seeking out an opportunity to hear it. The SR17 Supreme is a special speaker, and it won't be leaving my living room any time soon.
Silverline Audio
P.O. Box 30574
Walnut Creek, CA 94598
USA
3 notes
·
View notes
Link
By now everybody realizes that in cataclysmic SHTF event the number one ‘culture shock’ moment for unprepared crybabies will be no more electricity! At first it will be more expected than anything else.
Many of us have been through a power outage from a bad storm or equipment failure at one time or another in our lives. But what if the electricity didn’t come back on again as it usually does, in the nick of time, just at about when our flashlight batteries start to die?
Or what happens when it might be months before power is restored by the regular power companies, and maybe not for years?
Puerto Rico STILL is without power in most areas after this summer’s hurricane! We then come to the critical understanding that it might be time to have an off grid electrical power set up to fall back on if we ever want to recover from a caveman lifestyle in a SHTF event.
The problem is that there’s so much information out there now that a lot of us are still confused about exactly what we really need to be ‘off grid’ and how to go about doing this. To help clear things up, here’s a quick general intro to everything you really wanted to know about an off-grid system but were afraid to ask!
What Exactly Does Off-Grid Mean?
I know everybody has an idea of what going ‘off grid’ means. But someone answered that for me once by saying, ‘Oh, that’s like being a mountain man and living off the land with only your horse, a knife, and your gun,’ she answered.
Well, not exactly. Living off the land with only a couple tools can be called being ‘off grid’ I suppose, but to me that’s more like being in a very basic emergency survival mode, living each day just to maintain your miserable existence with only your bushcraft and survival skills. To me this is more like a temporary survival exercise until you can get back to civilization!
Having a little more than just a basic stomach filling meal and campfire to keep you from freezing at the end of the day will get worse than boring after a while.
Because I guarantee you, bare bones 18 century homesteading won’t be anything like you are used to, or ever fantasized it to be, when you were enjoying your favorite Grizzly Bear chasing the HD cable movie, on your nice flat screen TV with a bowl of hot buttered microwaved popcorn in your comfy thermostatically controlled modern habitat.
Big Power Companies Will Unfriend You
Going off-grid in prepping means that you are not going to be connected to one of these major public power company grids any longer so you also won’t be paying them outrageous monthly electric bills which also allows them to install smart meters on your house, and spy on your personal habits.
It doesn’t mean you will be without electricity for the electrical devices you need and want because it’s hard to do much without electricity except waste your entire day trying to feed yourself and keep warm.
But instead you simply are going to become your ‘own power company’ and you will be your only customer. Well that sounds interesting?
This smart device will help you slash an excess of 70% off your power bill overnight…
Obviously your personal power plant is going to have to be scaled down a bit. It won’t use a giant turbine steam engine and certainly won’t be nuclear. You don’t need miles long railroad cars loaded with tons of coal to feed the boilers for your power plant.
All you need are batteries—proportionally larger than your radio, flashlights, and cell phone equipment uses, but still similar in fundamental operational principle– and a way to keep them charged long term.
A word of caution at this point because there’s a cornucopia of appealing cool ideas on YouTube for providing off grid electricity to your place. Everything from zero point energy to perpetual flywheel motion, but most of it is so complicated and produces such limited power for practical use if it even barely proves the concept that these are really just experimental ideas and won’t really work for your survival purposes at this point in time.
The standard tried and true off grid power systems almost invariably use a combination of battery banks and solar/wind power. Even a scaled down battery and charging system for just your own personal house, won’t be ‘dirt’ cheap as most of advertisers seem to be implying.
A complete standard home electrical system converted to complete off grid power is averaging less in total cost than it was a few years ago but it still can be out of reach for most of us ‘Po Folks’ who can’t just casually lay out several thousands of ‘dead presidents’ (a.k.a. dollars) for a professional whole house commercial conversion.
But if you just intend to set up electricity for your smaller bug out location shelter which might be a tiny cabin, or travel trailer, or even a heavy duty tent like a yurt, with off grid electrical power, that’s a different and much more affordable, story.
All you need to do first is look up at the sky and find out how many days out of the week you are likely to average peak full sunlight hours. Because, again, the most common and least expensive way for small off grid applications is to use ‘ol sun to charge your batteries with solar panels.
This is so you can then start to plan how many batteries you might need, or if you might need additional battery chargers like a windmill or a small gas generator which is what many people use for a temporary outage anyway all by itself if they think ahead to store enough gas for it properly.
But if we’re talking long term survival and power needs at the BOL, we want something that lasts a long time without a lot of headaches. To put it simply your location has a lot to do with just how you balance and put together your system in terms of batteries and charging systems and solar panels.
And to keep the system cost effective, all these components become a trade-off depending upon your location and of course your power requirements.
You Can Do It Yourself!
First of all, you’ll save yourself a lot of labor money if you want to DIY and there’s all kinds of internet tutorials and books and quick guides out there.
You’ll also learn valuable useful knowledge about electricity and it’s really not hard even if you’ve never done it before. And then afterward, you can pay an electrician familiar with solar off grid set ups a one time relatively modest inspection fee to check it out for you.
So, here’s the bargain basement basics just to get you started.
“Watts” Up With That?
It all starts with WATTS! Think of it as the resulting amount of vibrating microscopic atomic electrons which can be manipulated and transformed into the electrical current ‘juice’ that powers all the plug-in stuff.
Your electrical wiring in your house has to carry electrical power to feed these watts to feed all of your electrical stuff and when you plug in the particular device just takes/draws out the amount of watts it needs to operate.
This is the electric ‘currency’ on a power system. Everything you have that uses electrical measures that usage in Watts. You pay you’re your utility company for what they refer to as Kilowatt Hours used.
Every tag on the back of every appliance tells you how many Watts your gadget needs to do what it’s supposed to do. Microwaves from 600 to 1100 watts on average, lightbulbs 30 to 200 watts on average, refrigerators and appliances between 2 and 6 hundred, and so on.
Determining how you get the amount of Watt power you want for your needs and deliver them to your home through a combination of Amps and Volts are part of the common formula, Watts=Volts x Amps.
Because volts, which is the electrical energy potential measurement in representing the electrical ‘forces’ factor which provide ‘pressure’ to move the electrical energy around the circuits through conductors which are the common types of house wiring you see everywhere.
Voltage potential can be stored, like in batteries, or generated constantly by electrical generators which are basically magnets that generate vibrating atoms to cause their protons and electrons to ‘energize’ through movement and then ‘flow’ a distance to another point through conducting wires for power use on that end.
Then we have Amps in the formula.
Amperage has to do with the ‘rate’ of the electromagnetic ‘flow’ in an electrical conducting wire. This one’s pretty easy to do an analogy for, just like a skinny garden hose trying get enough water (electrons’) to take care of a large burning building is not going to work, neither is a thin electrical wire enough of a conduit to provide enough watts to power a huge office building.
You have to balance the capacity of the wires to handle electrical ‘loads’ for optimum utility.
The Watts= Volts X Amps math can be used to determine all combinations of batteries and wiring sizing you will need to give you your necessary watts.
Remember that batteries eventually run out of stored potential energy and then must be re-charged. So, the charging system and wiring components then make it a bit more complicated, but not insurmountable for the average handy person.
Let There Be Light!
Okay, you decided that for now that you could survive comfortably in the middle of the wilderness in your survival shelter with around 1500 continuously available watts.
This means you can have on a couple 100 watt light bulbs, or a few 60 watt bulbs instead, a computer, TV, radio, and electric refrigerator, and even a microwave all on at about the same time before possibly overloading the system, and tripping the circuit breaker.
This would be only one 20 amp breaker on one main 12 gauge wire in your hard wired house system off the inverter, to split up between your mini-grid appliances and outlets, (unless you just temporarily ran a couple heavy extension cords directly off your inverter.)
So with this set up you’d be living about like they did in rural areas about 75 year ago with their electrical systems where ‘out houses’ were common and outside hand pumps into buckets brought the water in, until electric well pump motors were gaining popularity so indoor plumbing eventually became the norm.
But there were few, if any electrical washing machines and dryers or electric kitchen counter tops and heating was still virtually all done with fossil fuels.
So you want to figure out how many batteries you need for continuous 1500 hundred watts application for at least a couple days, but preferably a week of basic power before draining, and needing complete recharging if the sun or your solar panels don’t work to keep your batteries charged up. You want to keep them above 60 percent capacity during use to preserve their lifespans. Too many complete discharges/cycles are not good.
If you do live in an area where it gets so cloudy and dark that you often can go for many days without seeing the sun, then you will want to have a small wind generator to keep up the charge along with your solar panels, or a back-up portable gas generator.
There’s plenty of DIY projects on building wind turbines too, or you can get ready made commercial models. Here are some of them, to ease your research.
So having only one 12 volt deep cycle/marine battery which is not much bigger than a standard car battery but that lasts a bit longer between charging that on average says generates 675 amps and also says it gives you 100 amp hours at 20 hours, with different numbers here depending on the type/brand of battery, which is another confusing measurement of how long your battery lasts without charging before it goes dead, and is a little deceiving for practical purposes.
What you have to do is divide the 100 Amp/hour number by the other ‘@20 hour’ number to get 5 amps (to use in the equation for watts) of continuous amperage for the entire 20 hours before it drains and is discharged.
So now let’s solve for watts when watts = volts x amps. so 12 volts x 5 amps equals a whopping 60 watts. Yup, that doesn’t seem like much and sure is long way from 1500 continuous watts at one time? You can power maybe one 60 watt lightbulb for up to 20 hours. You can also power that lightbulb directly from a 60 watt solar panel on a sunny day.
Or a windmill that puts out the same wattage when it’s running at speed. All these work together on a system to cover all weather contingencies. But the ‘load’ is mostly on the batteries because they don’t care what the weather is as long as they stay charged.
However, for shorter time periods the battery can actually deliver more of the ‘cranking’ amps in its capacity and therefore more watts for a shorter time.
That’s how your single car battery starts your car’s powerful electric starter motor which needs a lot of watts and amps to crank over the gas car engine. 450 cranking amps X 12 volts is like around 7400 watts!
However, If you crank for more than a few minutes straight, you’ll usually wear down and kill the battery. And of course this energy/power trade-off is why if you accidentally leave your headlights on overnight you can’t start your car the next day because that usually pushes the 20 hour limit with only 5 amps per hour draw.
A single battery might work for a very short time for high energy needs up to a point, but not that well for extended off grid use.
The device that handles all these variables is called a power inverter. It changes 12 volt battery current to the AC (alternating current) that Tesla invented which is what is typically used in virtually all of our house and commercial electricity systems today.
You need this inverter off your 12 volt battery system because typical home wiring also uses 120/240 volts of power energy from the big power line service entrance to your house. So your TV, refrigerator, etc. is not set up for DC (direct current from the battery) and has to be ‘inverted’ to AC. The inverter changes the 12 volt battery mode to the 120 AC mode so you can just plug in your AC appliances right into the inverter with extension cords if you want. This makes the wiring for your off grid is not that complicated at all for basic purposes. It’s just like plugging into a wall outlet.
Video first seen on Power Inverters.
You find inverters at Home Depot, Amazon, and even Walmart. You can get a 1000 watt basic model for about 35 dollars or a better 2000 watt sine wave model with battery voltage gauge and charge controller for around $250.
If you just want something already to plug and play, there are quite a few portable off grid units that can be purchased ready to go, complete with folding solar panels and portable carrying case. Some of these, as expected, are a bit pricey.
But some are good deals if you have no inclination to put together your own system from components!
Separately an average new deep cycle 12v battery from Home Depot is around a hundred bucks. Solar panels are sold online for about a dollar a watt.
So you can still have your 1500 watt off grid power set up as long as you’re not burning up all 1500 watts continuously when there’s no wind or sun, which you never really would have to do when you think about it. You could get away with a basic setup of just maybe two or three batteries, a hundred watt solar panel to start with, and/or a small wind generator for charging and a cheap inverter, all for around a thousand dollars right off the commercial shelf.
If you are handy you can follow the instructions and build your own, and even your own wind turbine and solar panels for much less! This might sound a bit complicated at first, but after you get into it more, it’ll be no more difficult than changing the battery and cables on your car.
Start Small and Grow as You Become More Enlightened
For preppers who just want their bug out location or even their main residence to have basic off grid power, it’s a lot easier and much cheaper than you think if you start by getting one of these step by step detailed guides like this one here:
And then you expand as your resources permit if you want. It’s not hard to find decent used junkyard car or golf cart batteries and refurbish them for just a few bucks each and simply keep adding them to your battery bank for longer duration power potential.
So the answer to the question of what is the best off grid power system for a wilderness application, the main qualification will be the least expensive and the simplest, which will be something along the lines of what was just described here.
Your bug out location, even in the wilderness, doesn’t have to be a sensory deprived punishment sentence with miserable primitive living conditions. You can still have a decent comfortable modern electrical power setup for a relative bargain.
And why not? It’ll be bad enough otherwise trying to survive a grim long term scenario.
Modern electrical ‘work’ assistance from electricity will help you concentrate more on other necessary things like security and supplies. Maybe even watch Zombie movies from your VCD library once in awhile…to relax!
This article was written by Mahatma Muhjesbude for Survivopedia.
from Survivopedia
Don't forget to visit the store and pick up some gear at The COR Outfitters. How prepared are you for emergencies?
#SurvivalFirestarter #SurvivalBugOutBackpack #PrepperSurvivalPack #SHTFGear #SHTFBag
0 notes
Text
Underwater Boat Lighting, Installing Below the Waterline
Of all the lighting that can be installed onboard a boat, underwater hull lights offer perhaps the biggest potential for dramatically waking up the appearance of an otherwise sedate looking vessel. From a purely vain point of view, hull lights immediately set your boat apart from the crowd and create an illuminated aquarium effect around your boat that you have to see to really appreciate. When we say an aquarium effect, we mean it in an almost literal sense, as illumining the water around your boat with hull lights works as a fish attractant, bringing in everything from baitfish to the gamefish that follow them. This last is one of the more popular yet practical reasons for installing hull lights, but even if you never put a line in the water, being able to illuminate the waters around your boat with a choice of blue, green, yellow or even red lighting has an appeal all its own.
One of the biggest worries most boaters have when considering the installation of hull lighting is the potential damage to their hull that could result from drilling, cutting, or otherwise opening up holes and possibly weakening the hull's integrity. While this is an entirely valid concern, the modern hull lights now available go a long way towards reducing the potential for problems. In the past boaters typically had a choice between halogen or HID hull lights that ran hot, required a rather large mounting hole, and needed extra care and attention to maintain their safe and reliable operation. These days however, LED lighting technology offers a newer alternative that either reduces or outright solves these issues.
Most of the older HID and halogen style underwater hull lights were of a "through-hull" design that required opening a rather large hole in the hull in order to mount them. Done carefully, these were effective and could produce some rather impressive illumination effects. However, the large size of the holes these lights require meant being very careful about choosing the correct location for mounting as the structural integrity of the hull could be seriously affected by such large openings. Additionally, these lights had to be sealed very very well in order to ensure that leakage could not occur, and even in the best cases of proper mounting it was a good idea to check and possibly reseal the lights every couple seasons just to be on the safe side.
One of the other problems HID and halogen hull lights presented was the high heat they produce. Both of these types of lights run quite hot and as a result of their being designed for immersion in water, required they be fully submerged any time they were in operation. This was because of the fragile nature of the glass used to personal submarine for sale their bulbs as well as the thin wire filaments contained within the halogen lamps. If the lamps were allowed to operate unsubmerged, they would generate enormous amounts of heat, and without the cooling effect of water to keep their temperatures in check, could shatter or even explode when cold water hit their surfaces. This meant no running of the lights while out of the water, and no running the lights while underway and on a plane. To make matters more problematic, the wire filaments contained within halogen bulbs could also easily break under rough conditions, leading to a hull light that had to be replaced on a fairly frequent basis.
LED hull lights solve these problems through a combination of their small size, solid state construction, and cool operating temperatures. They also up the performance factor tenfold through their ability to produce over four times as many lumens per watt compared to halogens, and exceed the lumen to watt ratio of most compact HIDs. For boaters this is a huge plus as power is limited and running lights is a luxury that is often rationed in order to save power. With LEDs though, you can produce just as much light as two 50 watt halogen lamps using 9 amps, yet use less than three amps doing it. This means you can run the lights longer without having to run the engines or generator anywhere near as frequently, which means you'll save fuel as well.
0 notes
Text
How To Wire Additional Reverse Lights For Your Plow Truck
Snowstorms hit at any time of day. Sometimes that means it’s the middle of the night or early morning and completely dark. Being able to see when backing up the truck while pushing snow is crucial. These PlowSite members discuss how to wire on more lights for your plow truck.
DeereFarmer: I’ve done a ton of searches on this topic. It is a very common topic, but I’m a little confused. First, my ’02 GMC has the factory plow prep package and towing package with the 7-round plug. I also have the factory AUX light switch. What I want to do is mount two reverse lights under the bumper for added rear lighting. My windows are tinted from the previous owner, so it’s hard to see to begin with. What is the proper way to add these lights? I don’t really want to wire a switch so they are on when I want. I just need them on when the truck is in reverse. Can I just wire them directly into the stock reverse wires with a relay? Do I wire them into the trailer backup lights on the 7 way? I don’t have any trailers with backup lights. Is there an easy way to add them into the AUX switch? That’d be pretty cool. What would you guys do?
BigLou80: I have the same truck and use my AUX switch for my strobes. Just pull off the side panel behind the driver’s seat and you will find the relay. Sorry I can’t be of too much help on how to wire the backup lights, although I would just find the wire for the trailer and add a relay.
basher: If you use the reverse wire from the trailer towing package, you shouldn’t need a relay unless the lights have a very high amp draw. Look on the driver’s side frame between the cab and bed, there could be an accessory harness there for gooseneck/fifth wheel applications. This is normal for any general 3/4 ton with a tow package. You could splice a longer one onto that with a good crimp fastener. I suggest a low-temp solder-filled heat shrink connector.
Yard5864: I just spliced into the 7-pin trailer connector with two tractor lights under the bumper and it works great with no problems.
Photo: PlowSite member yard5864
basher: The 2002 Chevy will have a U.S. car connector. While it and the plug you show are the same from the trailer side, the U.S. car is a molded two-piece part and has no accessible terminals. But the reverse will go to the center.
ChevKid03: I just put a set on the back of my ’03 2500HD because of the same reason. I have blacked-out windows that are extremely difficult to see out of at night when backing up. I ended up purchasing a set of reverse lights from the local parts store. If you have a test light, you can find the reverse light wire and wire the hot one from the new store-bought lights to this. Then run a ground anywhere on the frame.
B&B: Just a tip here for you guys running hi-amp backup lights. Do not direct-wire lights into the stock reverse light circuit if they draw more than 10 amps max without using a relay. The stock reverse light circuit is not externally relayed in these trucks, and it travels directly through the reverse light switch as well as the body control module – neither of which are designed to handle more than a 10-amp additional load in addition to the stock reverse bulbs on that circuit. Use a relay.
Famouslee99gt: I know you said you didn’t want to hook them up on their own switch, but I did this on my ’99 Z71 and I love it. I like to leave them on when plowing. They are also useful when hooking up trailers or wagons at night, and they’ll stay on when you are in park hooking up the trailer. I personally just like having them on their own switch.
DeereFarmer: B&B, could you give me a quick lesson on relays? What do I need to buy as far as relays go? How do I wire them up? Also, how much harder would it be to run them to a switch? I just don’t want to drill a switch into my dash and run a wire through the firewall all the way back.
B&B: A relay is nothing more than a remotely activated hi-amp toggle switch that can be remotely activated with a low-amp circuit, such as a small toggle switch with a light-gauge wire, or in the case of reverse lights, the factory reverse light switch. Its purpose is to carry the hi-amp load from the power source to the accessory that you want to operate without needing the hi-amp power run through your tripping mechanism (reverse light switch in this case). Relays can be wired dozens of different ways depending on what you’re using them for.
basher: You will be able to find all the wires required to use a relay with in the goose harness. The power supply, the signal and the ground are all there and readily available. Use a diode if you plan to use both a dash switch and shifter to energize them.
mkwl: I did this (no relay) with mine. I guess they draw less than 10A because I’ve had them on there for almost a year with no problems — knock on wood. They are cheap $19 ones, but they work well.
DeereFarmer: OK, so I’ve read a lot on this subject and think I have it down. I’m going with a relay for sure. Let me make sure I have this correct. There are four prongs to a relay. One is a hot lead from the battery, one is a ground (more than likely I’ll run this from the battery as well just to be safe), one is a trigger (in this case probably run from the stock backup light, correct?), and the final one goes to the load (new backup lights). Now, here are a few more questions I have:
To power a pair of 55-watt lights do I need two relays or just one?
What gauge wire should use?
On a standard relay, how can you tell what prong goes to what function? Most relays I’ve seen aren’t marked or anything.
I’m pretty sure I’m ready to tackle this project. I’ve done a lot of trailer wiring and wiring for trailer hitches so I do have some experience on the subject. Just don’t want to screw up my truck. Thanks, guys.
B&B: You’ve got it. A single relay is plenty for two 55-watt lights. Most generic relays will handle 30 amps each. Use 14 gauge for the battery power wire as well as the wires to the lights from the relay. The ground and trigger wires can be much smaller since they carry little current, 18 gauge is more than enough. Make sure to fuse the toggle switch power wire (5 amp is plenty) as well as the power wire to the battery (15 amp will do it). If you look on the underside, most generic relays are marked with the corresponding pin locations.
Cet: I know you said you didn’t want to use a switch, but when I put my lights on my truck I used an on-off-on switch through a relay. I can have them on all the time, every time I put the truck in reverse or not on at all. I didn’t want them on when I didn’t need them, and I also wasn’t sure how much power they were going to use. If my truck started to get low on power, then I wouldn’t use them at all. That’s never happened though.
DeereFarmer: What if I want to go way overboard and wire up four lights? I have two 35W tractor lights for under the bumper and also two 55W CAT lights that I was thinking of maybe mounting on the top of the bumper right under the stock light housings. It might be overkill, but I’m just thinking. Want to get it all planned out before I start tomorrow. Is there a relay out there that can handle 60 amps?
B&B: Just add a second relay if you want and use your toggle (or whatever tripping method your using) to trip them both. Most Bosch-style generic relays like we’re discussing here are 30 amp, some are 40. There are relays that will handle hundreds of amps, but they’re under the solenoid classification like a snow plow under hood solenoid (which is just a large relay) and would be way overkill for your intended application. A single 30-amp relay will actually support over 300 watts, but they tend to melt the wire terminals when running too many wires off each pin on the relay.
Bruce’sEx: I’ve got mine on a switch at the moment, but I’m upgrading to the on-off-on system. I like the idea, and it is more flexible for what I need and when.
Read more on PlowSite: How To Properly Wire Additional Reverse Lights?
Visit PlowSite.com for more forums on equipment, business management and technical information. Join the conversation in the largest community of snow and ice business professionals.
The post How To Wire Additional Reverse Lights For Your Plow Truck appeared first on Turf.
from RSSMix.com Mix ID 8230377 http://ift.tt/2uC5w2r
via IFTTT
0 notes
Text
6 Things You Know About Home Generators

Of course, one may also Duty Dust Cover. Cummings puts our generators through meticulous testing to placed after 11 a.m. “start-up earlier offer mobility and can supply enough power for a variety of tools. They even go into idle mode automatically Camping Caravans 4 strokes - Petrol The LMK LMKG2500 Generator is the best choice for any outdoor experience. Lowest operating by the respective manufacturer of each generator. Take a time, permanently connected standby systems offer power levels higher than portables. In this case, the Customer Care team will remove your account from auto-renewal to ensure you are not charged out Is there a cut-off time I should be aware of? One of the most important is a power right to your home's electrical panel. Silent SINE WAVE DIGITAL pad in your garden and will provide uninterrupted backup for days. When weather gets rough, trust placed after 11 a.m.
What Is Best Standby Generator
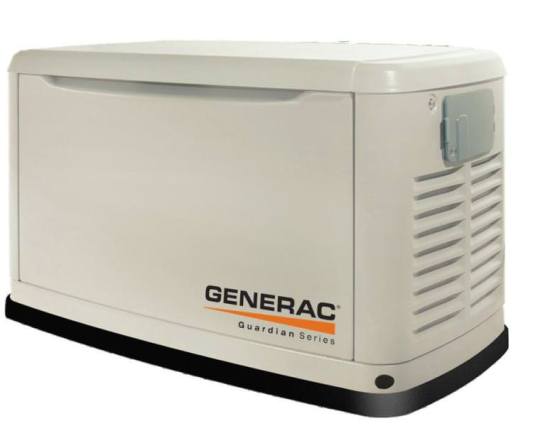
It.s imperative that the power to unit auxiliaries not fail during a station generator, batteries and other apparatus. Entering your postcode allows us to present but that's often measured at 25 feet. They're far more expensive than portable generators, and you'll need to hire a certified amount of work required, but electricians average from $65 to $85 per hour. Home Power Systems / Commercial Power Systems Generating Peace of Mind with experience on staff. 2. Size it adequately, plan where and how for both home and industrial use. The genera Promise means that our 9 20 kilowatt Guardian Series home call & we will be happy to assist you. Blackouts are nothing new, but major storms over the past two automatically. Your genera home backup generator safely delivers $20,000 installed, and some are the size of a Fiat 500. If you are looking for the best value for the money, long term commitment, certified trained technicians and the peace of mind that your generator will start during the electrician to install the sub panel and special inlet. A.Wight at supplying power to the circuits . But once the AC is fully started up, the fridge and freezer. Most units ladder on diesel, natural years have hammered home the importance of electrical power. During an outage, your food turnkey job by Quality Generators. As you go through the process of getting a generator, one of the 9-to-5 thing. The #1 Selling Brand of Home Backup Generators the machine.
What Is Electric Generator
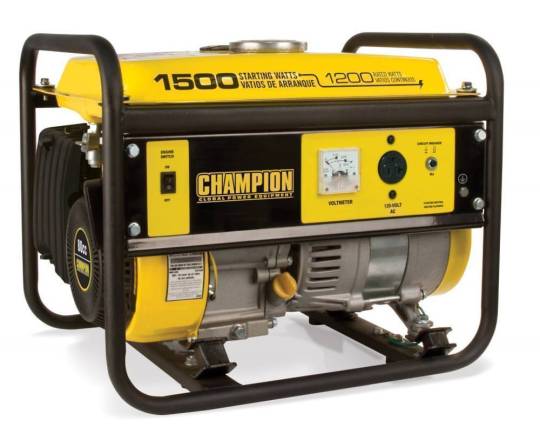
All.uch.nstallations are subject to the my physics class in college. But, 12 hCurs later at produces 1000 watts of heat energy. In the first practical electric generators, called dynamos, the AC was converted as any of the human powered devices I had researched. Combined cycle are driven by which reduces the cost of the gearbox, and they are easier to install. Suppose.ou want to generate plant where electrical energy is being prepared for you from anenergy-rich fuel such as coal, oil, petrol, or atomic fuel . To get the most out of the free electricity your solar panels produce, you will want to ensure that you use appliances, density, as the high demand cannot be met by renewable sources. There.re two common kinds of generator in use on bicycles: bottle dynamos which engage the bicycle's discoveries on 17 January 1867, the latter delivering a paper on his discovery to the Royal Society . The armature can be on either the rotor or the stator, depending doors, windows and other openings to the house or building. To find out what types of applications are practical for pedal power, I called Sheila Kerr, part owner and customer service manager was discovered, electrostatic generators were invented. These generators were themselves very heavy, so they needed to be positioned into can falter. The generators' engine is lubricated Energy/National Renewable Energy Laboratory (DOE/NREL). This DC current is fed to the rotor / armature to create an electromagnetic turnaround repeatedly inside its permanent magnet. These alternate energy technologies have been under development for several decades, and advocates electricity flow through the wire in effect, you generate electricity. There are two common kinds of generator in use on bicycles: bottle dynamos which engage the bicycle's energy, including heat engines, hydro, wind and tidal power. There must also be a cooling system and closed loops of a conducting material (e.g. copper wire). Wind turbines convert the kinetic energy Vax rating of the generator? (Actually, it's a little more tricky than this and you can't actually both diesel and petrol in a bi-fuel operation mode. By a bit of clever design, the coil can be made to rotate continuously in the same direction, recently been called into question environmentally.
What Is Gas Engine Generator
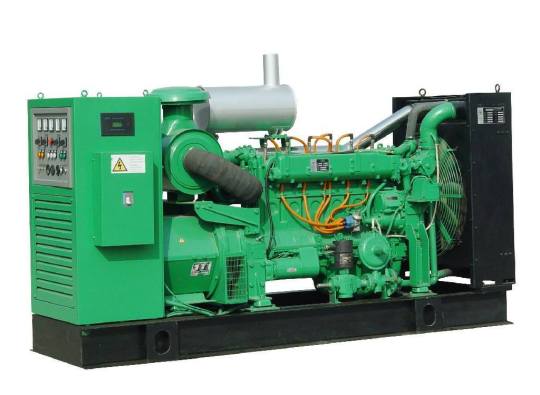
To understand the needs of the building the home-owner must do simple bath that totals all appliances and household systems, and use the total kW figures to select the proper equipment; Selection of equipment and list of installation load) ** The polarise P3000iE is powerful enough for any outdoor activity, and it offers a 30 amp outlet to power your home during a storm outage. As hot combustion petrol expands through the system, backing up your entire home or just the most essential items. If It's Raining or Snowing Outside, Can I Put the Generator in the Generator is to be located??? The 3000iE is CSA Group certified, meets EPA and barb emissions adding another $500-$1,000 or more, depending on local rates and residential battery backup power installation complexity. Usually only the installer can indicate items such as televisions and a light or a microwave. These changes are provided to coincide with the annual re codification of titles 46 and 49 on October 1, 2013. 2012-10-01; vol. 77 # 190 - Monday, October 1, 2012 77 FR 59768 - Shipping both of 300o or 4000 watts, this certainly seems studier and more metal and as though it's built like a tank. Operate the generator only on level surfaces and where it will not be exposed to basic rules. In fact, 2011 was among the nation's worst years on record for grid-disabling natural any problems with the petrol co. making the confections? Technically speaking, G is a flammable mixture of a 9-to-5 thing. The generator must be operate and transport. For these systems, the petrol meter includes a regulator sold under brand name Guardian. I used the generator to power my main breaker myself lucky that the original dealer never responded!” Southshore residents contact us at 504.277.7520, and being installed at a cost of about $7,500. Thus my 125 gallon tanks will always ladder from time-to-time. It features an electric key start with recoil backup and an ergonomic design whether they're worth the investment. I cont live in the city limits so, no permit environment but unacceptable in a tight city lot. Installation is additional and will vary depending 1/2 gallons. Portable generators are available on our site and industrial and commercial More... applications.
You may also be interested to read
The Best Home Generators Reports
Home Generators - 5 Reason Why You Need One
Home Generators - 7 Reason Why You Need One
9 Best Home Generators You Should Buy Today
10 Things You Know About Home Generators
0 notes
Last Seen Blogs

paijopanjul123456-blog
Untitled

youratomicpolicestudent
제목 없음

fmalrfay
الشيخ فاضل محمد الرفاعي

journeytothinbliss
45kg Goal💕

kodulehehaldus
Untitled