
Last Seen Blogs


Text
Why I Am Struggling with My Blog Niche and What I Am Doing About It
Why I Am Struggling with My Blog Niche and What I Am Doing About It
Lately, I have hit a blogging road-block and it is……..annoying. I enjoy blogging; I like the connections I make with other people and I enjoy speaking out in my own way. And, to be honest, I am hoping to turn my blogging-venture into a side income for my family and I. It does not have to be a six figure income (although I am not arguing against that sort of success), but I am really hoping…
View On WordPress
0 notes
Text
Helping Others After Hurricane Matthew
Dealing with Hurricane Matthew and how you can help others!
Good Morning Everyone! I hope everyone is bearing well after Hurricane Matthew yesterday; I know it got pretty crazy in our neck of the woods, but other areas were hit much worse. My heart goes out to the areas and people significantly impacted by the hurricane; many lives will not be the same after last night due to the destruction Matthew left in its path.
I made the horrible mistake of…
View On WordPress
0 notes
Text
Does anyone else enjoy an old-school, packaged pop-tart? I know I do!
Munchkin asked for them at the food store recently, for the first time, so I grabbed him a box of strawberry ones. Not gonna lie, they were super yummy. I eat well and avoid eating too much junk food; but I did not see anything wrong with indulging in one of those delicious, silver wrapped snacks.
As I was eating my pop-tart, I thought about how fun it would be to make our own pop-tarts! I had never dabbled with the idea but it did not seem all that hard; reminded me of baking a mini pie. So, a few days later Munchkin and I set out to pick up all necessary pop-tart ingredients and got busy baking!!
We loved how these came out; especially my husband! I was a little concerned that they did not taste exactly like a pop-tart and my husband assured me that it was a good thing; after all, mine were homemade and store bought ones are definitely not. I used my go-to pie crust recipe from The Italian Dish; I love this recipe! It is so easy and can be done right in the food processor! I doubled the recipe and I had just enough for six pop-tarts. Normally, when I bake a homemade pie, I follow her instructions to blind bake the crust, which always comes out great. I did this for the pop-tarts, but I would not recommend it; I had a hard time working with them afterwards and many of the bottoms broke while adding the top dough layer. Just make sure you score the bottom of the dough well before adding the filling, to prevent bubbling.
I cooked my apple mixture down first and added a corn starch and water mixture to create a thick, apple cinnamon center. I was also not shy with the filling; I did not want to end up with all crust and only a small taste of apple cinnamon. I even had some leftover green sugar sprinkles in the cupboard we used for the top!
Check out the recipe I put together below and give it a try, you wont be disappointed!!
Homemade Apple Cinnamon Pop-Tarts
Total time: About 2-2 1/2 hours, including dough chill time
Difficulty: Medium
Yields: 6 Pop-Tarts
You will need:
food processor
parchment paper or ridged baking sheet
pizza cutter (you can use a knife if you don’t have one)
rolling pin
large and small mixing bowls
large saucepan
plastic wrap
flat faced spatula
Dough Ingredients (you will need to double this to make six pop-tarts):
1 3/4 c. flour
1 tsp. sugar
1 1/2 sticks (12 tablespoons) cold butter, cut into slices
1/4 c. ice water (this is approximately, I usually use maybe half this amount per dough)
Instructions:
Place flour and sugar in food processor. Pulse.
Add about half the butter. Pulse.
Add the rest of the butter.
Pulse until the mixture turns into coarse crumbs.
Through the feeding tube, slowly add the ice water and pulse until the dough forms a ball. Make sure to not add too much, I only use about half this amount when I make my pie crust.
Take the dough and flatten it into a disk. Place between two pieces of floured plastic wrap, roll up, and set in the fridge for 30 minutes. Caution: if you leave it in for too long you will have a hard time rolling it as the butter will harden.
To make the filling you will need:
3 Peeled Granny Smith Apples
1/2 c. apple cider
1/2 c. water
1/4 c. white sugar
1/4 c. brown sugar
1 tbsp. lemon juice
1/2 tsp. cinnamon
1 tbsp. cornstarch
1 tbsp. water
Instructions:
Chop up apples into small pieces.
Mix apples, sugars, lemon juice, and cinnamon together in large mixing bowl.
In a large saucepan, combine the apple cider and 1/2 c. water; bring to a boil.
Add the apple mixture and reduce to low; cover and simmer for 20 minutes.
In a small cup or bowl, combine the tbsp. of cornstarch and tbsp. of water and mix thoroughly.
Add the cornstarch mixture to the filling, stirring well to evenly distribute it.
Simmer for 5 minutes.
Remove from heat, leave lid off so it may cool.
Once the dough is chilled, you are ready to start assembling your pop-tarts!
Assembly Instructions:
1. Preheat oven to 375. Roll out dough, no more than 1/8 inch thick; a little thinner is OK. Using a pizza cutter, cut out a rectangle and set your scraps aside, you will reuse this as you continue to roll out your pop-tarts. You may find the dough is very sticky; you can roll the dough between two sheets of plastic wrap to help with this. Or, you can add flour to lessen the stick and use a flat faced spatula when transferring the dough to the baking pan.
2. Using the pizza cutter, cut the dough into smaller, even rectangles. Transfer to your baking pan (you can use the flat spatula to do so, if needed) and score with a toothpick or fork. You will get six small rectangles from each dough batch. If you do not have a ridged baking sheet, make sure to line your sheet with parchment paper.
3. Add your filling. Don’t be shy, but leave space around the edges for the tops to fully enclose the filling. *As I said before, I blind baked the bottoms (which I do not recommend) so my picture will look a little different, but I want to show you how much filling I used. I had a little filling left over so that is OK if you do.
4. Add your tops and make sure to score them as well. Using a floured fork (so it does not stick to the dough), crimp the edges; press top edges down so they meet the bottom dough layer and holds in the filling.
5. All assembled! Place in oven and cook for 15-20 minutes; or until the edges are golden brown. Once finished, transfer to a wire rack with your spatula and let cool completely before glazing.
For the Glaze You Will Need:
1 c. confectioners sugar
1/4 c. milk
1/2 tsp. lemon juice
1/2 tsp. vanilla extract
1/2 tsp. cinnamon
Instructions:
Whisk ingredients together in a small mixing bowl. If your glaze is too watery, add another tbsp. or two of sugar confectioners sugar.
Pour about a 1 tbsp. of glaze onto each pop-tart; to distribute glaze evenly.
Add sprinkles, if desired.
Let glaze harden for 10-15 minutes.
Eat and Enjoy!!!
This was a very fun dessert to make!! The crust is delicious and the filling was just right! I am not usually a fan of cooked apples but I was definitely eating the filling with a spoon it tasted so good. I hope you give them a try and let me know what you think!
Homemade Apple Cinnamon Pop-Tarts! Does anyone else enjoy an old-school, packaged pop-tart? I know I do! Munchkin asked for them at the food store recently, for the first time, so I grabbed him a box of strawberry ones.
#apple cinnamon poptarts#easy pie crust#homemade apple poptarts#homemade pie crust#homemade poptarts
0 notes
Text
Fall is here!!
Well, sort of. My family and I relocated to the South from New Hampshire last year so my idea of fall is a little different; but it’s getting there. Gone are days with temperatures in the triple digits, sun so hot it literally burned my skin, and indoor seclusion; life is getting better. Northerners are constantly disappointed by short summer months followed by months of brisk/freezing temperatures; and I get it…it’s a pain in the ass. But, honestly, think I would rather endure the New Hampshire winters than the North Carolina summers; no joke. I know it was hot everywhere this summer, and yes, “hot is hot”. But, there is a difference between 105 and 95; even if it doesn’t seem like much. I spent this summer indoors and just yearning for it to be over so I could be outside in comfort!
A couple weeks ago, I was reading The Richness of a Simple Life’s piece regarding the topic of feeling beautiful; when are we feeling our best? This question seemed unanswerable at the moment; I’m not one to feel particularly beautiful; I am very aware of my flaws and have always had some image issues. But, I figured I’d at least give it a second thought; I mean there had to be a moment in time where I felt relaxed and “beautiful”. And then….I thought about Fall. I thought about the way the air felt on my skin and face; it always makes me feel relaxed. I never worry that the heat is causing my Italian skin to look oily, my hair is frizzing and becoming grossly “thick”, or that my squinting eyes are making my brow look furrowed and angry; everything feels in place. I can wear clothes I feel so comfortable in and shoes I love. Yes….Fall is definitely when, if there is a moment, I feel more “beautiful”.
Not only do I feel better, but everything around me starts getting beautiful; the leaves start changing and it is truly an amazing time. This is the time of year I am most homesick; where I want to get in my car and just drive back to New England and never look back. I know we will start to see some foliage eventually; but New England foliage is a wonderful sight. Tourists, or more commonly referred to as leaf peepers, literally flock to the states to see the wondrous colors, drive through the winding mountains, and visit small towns nestled within them every year. It is a wonderful past time.
Endless forests with fall foliage in the White Mountain National Forest, New Hampshire, USA. Photographed from North Sugarloaf at sunset.
Fall Foliage at a farm in Vermont
And, there is so much fun to be had! I mean, don’t get me wrong, summer is a great time (when it’s not completely overbearingly HOT) but I love fall activities; apple picking; drinking apple cider; carving pumpkins, trick or treating, hayrides, etc. Whats not to love about all of that?
And also, I can’t forget; the food. Fall baking just makes a house feel like a home; warm aromas of cinnamon, brown sugar, apple, and pumpkin filling the air and bringing everyone together. It’s a wonderful feeling I look forward to every year.
hot apple cider in mason jars
Needless to say, I am so happy fall is here. And I hoping it does not fly by so I can cherish it a little bit extra this year ♥.
Here are some great links if you are looking for some wonderful fall activities!
New England Fall Foliage
New England Fall Events
Road Trip to New England’s Prettiest Fall Villages
New England Fairs and Festivals
Here are a few tasty recipes for you as well!!
Apple Cider Bread with Cinnamon Sugar Crust by Live.Love.DrinkWine.
Pumpkin French Toast by Cooking Classy
Pumpkin Pecan Cobbler at Lauren’s Latest
What do you love about Fall? Do you feel wonderful? Is it your favorite time or do you prefer other months? Have any fun activities you do you would like to share? Please do!!! Thank you for reading!
Feeling Beautiful in Fall! Do you love Fall too?!! Fall is here!! Well, sort of. My family and I relocated to the South from New Hampshire last year so my idea of fall is a little different; but it's getting there.
#fall#fall cooking#feeling beautiful in fall#new england fall festivals and fairs#New england fall foliage
0 notes
Text
Welcome to Wine Wednesday! Here you will find wine suggestions, tips, and great pairings!! This week, I will be featuring a 2014 Red Blend by Cocobon Vineyards.
This blend is one of my go-to grocery store wines! I really try to keep my wine costs to a minimum and this blend is consistently marked at $7.99! You really can’t go wrong for the price!
This 2014 California Red Blend has a nice…
View On WordPress
#2014 red blend#cocobon vineyards#dark purple hue#inexpensive red wine#light bodied#sweet red#Wine Suggestions#wine to pair with chicken#wine to pair with pasta#wine to pair with tenderloin#Wine Wednesday
0 notes
Text
I come from a large Italian/Sicilian Family, so my cooking abilities tend to strengthen around delicious, Italian meals. I could literally eat spaghetti every day; I love it. I will switch up the sauces; red sauce, clam sauce, white wine garlic sauce…all delicious. Now, normally, I would refer to my sauce as “gravy”; since we are Italian that is the proper usage. But, to omit any confusion, I will use “sauce” instead :).
I love cooking a red sauce; it is like a blank slate to do what I want with. This was my first attempt at actually writing down what I put in it; normally it’s just a little of this and a little of that until it’s perfect. There’s not too many wrong ingredients; just put in what you love. Mr. H and I make sauce totally different; each of us bargaining for whose turn it is to make it. I am a simple gal with my sauce; loads of fresh basil, some oregano, Parmesan cheese, garlic, and slow cooking is my favorite method. But, if I have to I can always make a small batch in a pinch.
This was also my first slow cooker attempt; and I am so pleased with the results. To see if this could be a freezer meal, I added all the ingredients right away; and it worked great!! However, I would recommend bagging the meatballs separate if you are prepping this in advance. It does always help if you sear the meatballs in a frying pan for a couple minutes first; but, for time purposes, I skipped this step and they still came out delicious!
This meal came out wonderfully! And, whether you are home all day or on the run, this is a great dinner for everyone to come home to! Get this great recipe below and give it a try!!
Prep Time: 30 min
Cook Time: High for 4 Hours or Low for 8 Hours, then Warm for 30 minutes
Total Time: 5-9 hours
Yields: 12 palm sized meatballs
Serves: 4-6
For this entire recipe you will need:
2 lb. Hamburg (use a somewhat lean beef so you do not get too much oil in your sauce)
three 28 oz. cans of crushed tomatoes
one 6 oz. can of tomato paste
1 c. fresh basil
one yellow onion
1 egg
milk
fresh or frozen spinach (optional)
garlic powder
fresh garlic cloves
fresh, ground pepper
sea salt
Parmesan cheese
breadcrumb
dried oregano leaves
spaghetti or pasta of choice
Sauce Ingredients:
Three 28 oz. cans of crushed tomatoes (Pastene are my favorite, Cento is good too)
1/2 cup fresh, chopped basil
5 diced garlic cloves
1/2 yellow onion, chopped
1/2 c fresh or frozen spinach (this is optional if you are looking to sneak some more veggies in there, this was my first attempt and I didn’t even notice the taste)
1/4 c. Parmesan cheese
1 tsp. dried oregano leaves
1 tsp. sea salt
fresh ground pepper (I just crack the pepper right in, I probably added about 1/2-1 tsp)
Sauce Directions:
Chop all your vegetables and herbs (you do not have to chop the spinach, it will shrink)
Add everything to your crockpot/slowcooker
Mix well
Meatball Ingredients:
2 lb. hamburg
1 egg
1/2 c. fresh, chopped basil
1/2 yellow onion, diced
1/2 c. breadcrumb
3/4 c. milk
1/4 c. parmesan cheese
1 tsp. garlic powder
1 tsp. dried oregano leaves
Meatball Directions:
Gather all your ingredients; you will need a large cutting board, large mixing bowl, and a sharp knife as well
Add the meat to your mixing bowl
Cut up all your herbs and vegetables
Add to the bowl of hamburg
Add all other ingredients to bowl
Mix with your hands; do not use a spoon. Mixing with your hands will stop you from crushing the meat. Do not over-mix.
7. Using your hands again, roll the meatballs into balls. Mine were pretty large, almost the size of my palm, keep in mind they will shrink a little when they cook. I rolled 12 meatballs from my 2 lb. meat mixture.
8. Gently, add the meatballs to the sauce. I had just enough space for all 12 meatballs to be placed about an inch apart. Gently push the meatballs down with a wooden spoon so they are covered by the sauce. Do not push them down too far; you want them to cook in the sauce not on the bottom of the pan.
9. Cover. Set on ‘High’ for 4 hours or ‘Low’ for 8 hours; I cooked mine on the high setting. Once it is finished, gently stir your sauce and set on warm for 30 minutes.
10. Serve over your pasta of choice!
Thank you for reading! Did you give this recipe a try? What did you think?!
Slow Cooker Italian Meatballs & Sauce I come from a large Italian/Sicilian Family, so my cooking abilities tend to strengthen around delicious, Italian meals.
#delicious meatballs#family meals#homecooking#italian cooking#sauce with fresh basil#slow cooker meatballs#slow cooker meatballs and sauce#slow cooker red sauce#spaghetti
0 notes
Text
It has been a pretty rainy week in our neck of the woods….finally!! This summer was so hot and humid with very little rain; it was miserable. But finally, we got several days in a room of clouds, rain, and cool weather; a much needed break from the norm.
Munchkin and I are always looking for fun things to do when we are stuck inside; too much screen time is never a good thing and I try to avoid it best I can. We decided to do some homemade Gak with this recipe I found online, thanks to LilLuna; it was just like the Gak I used to play with as kid!
We had so much fun with this! Munchkin was beyond excited about it; giggling and smiling, jiggling it around in his hands, and running to show Mr. H our creation. This recipe was so easy and provided so much entertainment, I was wondering why I had not done this before! And, there is no mess; the gak just peels right off everything. Munchkin keeps it in the fridge so he can play with it whenever he wants! Here’s how you can make your own Gak at home:
For this recipe you will need:
Two 4 oz. bottle of Elmers Glue
1 tsp. Borax (located in the laundry detergent section)
Water
Plastic Cup
Food Coloring (I used the gel food colors so not to add any additional water to the mixture)
Instructions:
Empty both bottles of Elmers Glue into your bowl
2. Once empty, fill bottles with warm water, place the covers back on, shake well, and pour into bowl.
3. Mix together and add your food coloring.
4. Add 1/2 cup of warm water and the tsp of Borax to your plastic cup; mix well. Once dissolved, pour the mixture into your bowl and start mixing. You will notice it starting to look very “slime like”.
5. Continue mixing with your hands until you have a nice, uniform “Gak”. Once the little ones start playing with it it will shape up just right and they will have a blast with it!
This was one of the best craft projects we have ever done! I didn’t have to build anything I couldn’t figure out or dish out extra cash at the craft store. Super easy and yet, SO entertaining! Give this a try with your little ones; they will love it!
My son has SO much fun with this homemade Gak!! Give it a try!! It has been a pretty rainy week in our neck of the woods....finally!! This summer was so hot and humid with very little rain; it was miserable.
0 notes
Text
Apple Cider Bread with Cinnamon & Sugar Crust
Amazing Apple Cider Bread! A must try this season!!
For any of you following my posts, you can probably tell I am a Fall Fanatic! So unbelievably happy for the heat to be tapering off and cool temperatures to take its place. So exciting.
Munchkin and I went to the food store this weekend and were bombarded with the sight and smell of fall; apple and pumpkin donuts, cookies, and cakes were everywhere. It was truly a joyous moment for the both…
View On WordPress
#amazing apple cider bread#apple cider baking#apple cider bread#apple cider bread loaf#baked goods for fall#cinnamon and sugar crust#fall cooking#seasonal cooking
0 notes
Text
Easy Crockpot Chicken Divan
A delicious and easy crockpot chicken divan that is a must try this season!!
This has been a pretty busy week in our household; Munchkin started preschool and I am so happy about it. We were on the waiting list for the preschool I had my eye on and we finally got a spot; so happy!! I had been contemplating sending him to the local Goddard School since he attended one before we moved; but I am so happy I waited. The program has structured start and end times, his name…
View On WordPress
#crockpot chicken divan#crockpot cooking#delicious crockpot meals for fall#fall cooking#freezer meals
0 notes
Text
I love cooking with my crockpot; with a four year old running around, and another one on the way, crockpot meals tend to be a life saver in this household! Crockpot cooking is the best when fall starts to come around and it cools down. As sad as I am to see Summer go (although not really because I live in the South and it has been unbearable), I am so ready for chilly mornings, warm, hearty meals, and leaves falling off trees.
This was my first, personal crockpot chicken noodle soup attempt; I normally boil an entire chicken to make my own broth. But, neither time nor energy allowed for this kind of effort so I turned to my all-mighty crockpot. This soup came out so perfectly; I was beyond happy with the results. The chicken was not too dry (which I have found happens sometimes with crockpot chicken) and had wonderful flavor.
And, since I had enough ingredients, I doubled the recipe; prepping the remainder in a freezer bag to be used in the future. This is a very simple recipe with great results; healthy, hearty, and not too overbearing on the palate.
Prep time: 20 min
Cook time: 4-8 hours
Serving Size: 3-4 people
For this recipe you will need:
4 chicken breast tenderloins
1 1/2 c. of baby carrots, cut in half
2 c. baby kale mix
¼ yellow onion
1 garlic clove
1 tsp sea salt (may add more to taste)
1 c. fresh, chopped parsley
2 c. chicken broth
5 c. water (you can use more chicken broth than water if you would like, I only had a small amount so I had to improvise with more water. I was still very happy with the flavor)
1/2 tsp. (or more to taste) fresh, ground pepper
1 tsp onion powder
½ tsp. garlic powder
dash of celery salt
Egg Noodles
Parmesan Cheese
To cook:
Chop fresh vegetables
Add all items to slow cooker
Cook on high for 4 hours or low for 8 hours.
Half an hour before the soup is finished, use a fork to break up the chicken. It should break apart perfectly.
Serve over egg noodles (or noodle of choice)
Garnish with Parmesan cheese
Easy Peasy!!
I hope you enjoy!! If you tried this recipe, please share your comments below and let me know what you thought! Thank you!!
Nicole Michelle ♥
Delicious, healthy chicken noodle soup made right in the crockpot! I love cooking with my crockpot; with a four year old running around, and another one on the way, crockpot meals tend to be a life saver in this household!
#chicken noodle soup with kale#crockpot cooking#delicious crockpot meals for fall#healthy crockpot recipes#homemade soup
0 notes
Text
Two years ago, September 6 2014, my husband and I said our “I Dos” at Whitney’s Inn, our amazing wedding venue in Jackson, NH; part of the White Mountain region. Although we had our ups and downs, I was so grateful my husband and I had made it to this point; in reality, there was no other person I wanted to share my life with. We went in circles a lot; starting out as a young, casual couple with no future plans of babies or marriage until our amazing son joined our lives. But, we overcame the obstacles and took the plunge; surrounded my supportive friends and family members, it really was an amazing weekend! I think the White Mountain region of New Hampshire is one of my favorite places; it truly holds a special place in my heart.
Feel free to check out our special day! Our Wedding: Every Step of the Way!
Two nights ago, we celebrated our anniversary. We do not get many date nights, with our opposite schedules and my growing baby bump; so we went all out with an amazing dinner at The Capital Grille. My husband and I were very excited to finally experience the popular, upscale dining experience talked about by so many. My dad met us there and took our Munchkin out for their own special dinner we could enjoy some solo time. And, let me just say, we had a wonderful night.
The Experience
The Initial Sit Down
Earlier in the day, while my husband was making the reservation, the host asked the occasion of our visit; my husband informed him it was our anniversary. When seated at our table, we noticed it had been decorated with heart confetti and there was a card with a ‘Thank You’ Note inside, propped on the table. Upon arriving at our table, we were greeted with two complementary glasses of champagne in honor of the occasion; I was so impressed. I did, however, only have two sips of it before passing it off to my husband; it was delicious but I was saving myself for half a glass of red wine with dinner.
Starters
For starters, my husband and I each ordered a salad; I chose the “Fresh Mozzarella, Tomato, Basil with 15 Year Aged Balsamic” and my husband had the “Wedge with Blue Cheese and Applewood Smoked Bacon”. My mozzarella cheese was so fresh and delicious; it just melted in my mouth. Both came garnished with heirloom tomatoes; a wonderful add-in to an already perfect dish. Unfortunately, I was so hungry, I forgot to take a snapshot of the salads before I chowed down; my apologies.
Wine
I was so excited about my red wine; I do not have red wine often so this was a special treat for me. Plus, there is something so boring about going out for a nice dinner and ordering waterJ. I ordered a glass of the Beaulieu Vineyard “BV Tapestry Reserve 2012 Red Blend”; I thought it was the perfect wine to complement my dinner with tastes of ripe fruit and sweet, soft tannins. I did not find it too spicy or bold, but complex enough to give it wondrous flavor. My husband ordered the Concha y Toro “Marques De Casa 2014 Concha” Cabernet Sauvignon.
Dinner
After the salad, I was not too hungry, but could not resist ordering an amazing dinner. I ordered the “Seared Tenderloin with Butter Poached Lobster Tails” and my husband ordered the “22 oz. Bone-in Ribeye”; both were absolutely outstanding. The filet melted in my mouth and was perfectly complemented by the seared outer edges. It was sliced into two medallions, topped with two lobster tails, and finished with a light, yet delicious butter sauce. My steak was cooked perfectly; as was my husbands.
Sides are separate and can be shared; we chose the “Au Gratin Potatoes” and the “Soy Glazed Brussel Sprouts with Bacon”; these were also wonderfully prepared and tasted amazing!
Dessert
We did not have any room for dessert, but due to their hospitable nature, we were given a complementary dessert plate with a mini “Crème Brulee” and “Flourless Chocolate Espresso Cake”; both were delicious and finished off our dinner perfectly! It even came with an adorable message on the plate!
We had a wonderful time; I am so happy we made the effort to go out and celebrate our special day. We get so caught up in our busy lives and I am always exhausted; sometimes I forget we need to take time for ourselves as well. It is the little time spent together that makes you remember why and how you ended up together in the first place. And “Thank You” to Capital Grille for giving us such a wonderful night out, we will definitely be back!
What did you do and your significant other do for your anniversary that was special to you? Have you ever dined with the Capital Grille and had an amazing time? Share your experiences with us! Thank you for reading!
-Nicole Michelle ♥
A Wonderful Anniversary Dinner at The Capital Grille! Two years ago, September 6 2014, my husband and I said our “I Dos” at Whitney’s Inn…
0 notes
Photo

#cowgirlboots #hurryupfall #summergoaway
0 notes
Photo
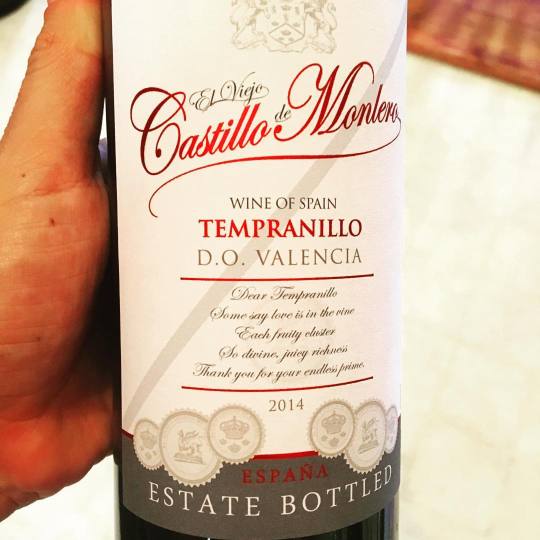
Yummy! #pregnantladiesdeserveredwine #halfaglassofwine
0 notes
Text
Today, I thought I would try something a little different; a Travel “Wishlist” Tuesday. My mind, body, and soul loves to travel; seeing the beauty of foreign lands, experiencing different cultures, and living with less worry for a short time is unbeatable. Feeling the different oceans on your toes, seeing the difference the mountains cast their shadows, and divulging in local-eats make traveling that much more enjoyable. While my heart yearns to travel much more than I do; we fit in what we can afford and when.
This week’s wishlist goes to the west coast;
San Juan Islands, Washington.
Today’s travel spot involves #1 of my bucket list; wild orca sightings. While I am a supporter of SeaWorld, I know there is nothing like seeing a wild pod of orcas breaching, porpoising, and spending time together as a family. I see footage of travelers lucky enough to experience orcas surfing in wakes behind them and it makes my heart skip a beat. I can’t describe, in enough detail, my love and fascination for these beautiful creatures; they are, by far, the most amazing animals on earth. Even seeing them at SeaWorld causes a gigantic wave of emotions to shoot through me; they are my happy place. I am so grateful, even though I have not seen them in the wild yet, I have been given the chance to see them up-close at SeaWorld; it is memories like those that truly leave marks on your heart and soul.
*These photos were taken from a third party and I do not claim overship
There are four ferry accessible islands to choose from; each one offering an abundant of lodging, dining, and tourist activities! Personally, I love going places by boat; it just adds adventure to the trip for me. The four included are: San Juan, Shaw, Lopez, & Orcas (yaaayyyy). Just the name makes it sound like pure joy! I love visiting islands and engaging in the abundant outdoor activities and low-key lifestyle.
*These photos were taken from a third party and I do not claim ownership
Orcas can be seen around the islands year round, along with some other amazing wildlife; humpbacks, minkes, grey whales, porpoises, sea lions, bald eagles, and much more! The three Resident Pods (J,K, &L) can be seen mostly from spring to fall, while Transient Orcas may be seen all year round. For clarification; Residents eat fish; mostly salmon, while the Transients are the mammal hunters; populations differ in hunting strategies, vocalization, grouping methods, and more. You can identify them by their dorsal fins; Transients’ dorsals have a more pointed tip, while the Residents’ dorsal fins are more rounded at the top.
There are several whale watching options to choose between; from personal kayak to large whale watch boat. I, personally, would like something small so I don’t feel so far away atop a huge boat. I can not imagine how amazing it would be to kayak next to orca; makes my heart flutter ♥.
Canada, British Columbia, Vancouver Island, Johnstone Strait. Orca Whales (killer whale) with kayakers rafted up on Johnstone Strait. (MR)
*These photos were taken from a third party and I do not claim ownership
You can check out all of the whale sighting options Here!
There are also so many amazing adventures available within the islands. Wineries, hiking, farms, horseback riding, museums, art centers and great local eats are abundant. And, whether you’re traveling with or without children you will find something beautiful and adventurous!
*These photos were taken from visitsanjuans.com and are not owned by me
Check out the great dining, lodging, and tourist activities!
You can also check out the Family Activities Page!
Thank you for reading! Have you ever traveled to the San Juan Islands? I would love to hear about anyone’s experiences and thoughts! Do you enjoy visiting Islands or would you rather be in a larger, more city like atmosphere? What do you like about visiting Islands? Does ferry travel excite you? Please feel free to share your thoughts!!
-Nicole Michelle ♥
*On a sidenote, I feel like I have to say this:
I want the opportunity to view these whales in the wild; but I do not want to overwhelm them. Sometimes, I feel conflicted regarding all the tourist whale watching occurring in the Pacific; waters can become over-polluted and I worry orcas will work harder to find food and take in too much polluted air. Residents, unlike Transients, stay closer to shore to keep up with the salmon population. During necropsies, orcas are found to have very high pollutant concentrations in comparison to other sea animals, mostly likely since they are at the top of the food chain. Although the captive orcas’ lives may seem less enriching; they do not have to worry about some of the environmental hostilities their wild counterparts are faced with. It is very important to always exhibit safe and ethical whale watching practices so we may continue to view these amazing animals!
Beautiful Places to Visit- San Juan Islands, Washington! Today, I thought I would try something a little different; a Travel “Wishlist” Tuesday. My mind, body, and soul loves to travel; seeing the beauty of foreign lands, experiencing different cultures, and living with less worry for a short time is unbeatable.
#san juan islands#travel "wishlist" tuesday#travel tuesday#washington#whale watching#wild orcas
0 notes
Text
Lately, my four year old has become extremely interested in helping us cook; particular cracking the eggs. His smile radiates as he helps pour and mix; it is true happiness to see his face beam from his feeling of productiveness. We decided to go to the store and buy items he would be able to work with to create a “special treat” all on his own. We chose to bake Berry & Nutella Croissants; a relatively easy, first solo (somewhat) cooking project. He was so excited; pushing his tiny cart around the store, excitedly searching for our ingredients. We hurried home, put the rest of the groceries away, and set up to bake his “special treat”.
Baking Our Special Treat!
I was so impressed with his patience and careful movements he exhibited. He carefully unrolled the croissants, placed them on the cutting board, and spread the Nutella. He added three berries to each croissant; alternating between blackberry and raspberry. He did need my assistance to roll up the croissants afterwards, but I was more than happy to help.
The delicious end result!
I was so happy we decided to do this. Munchkin was so engaged and proud of himself for what he had created. There is nothing I love more than seeing a true sense of pride and accomplishment on his face; it absolutely melts my heart. These came out delicious and we may have indulged in a little too many after they cooled; but we had a great time! This is a great kid-friendly recipe that everyone can enjoy!
Bake these with your little one! For these delicious treats you will need:
One package of Pillsbury Croissants
Berries of your choice
Nutella
To bake:
Preheat oven to 350 degrees
Spread out one croissant at a time on a flat surface (we used a cutting board)
Spread Nutella towards the fatter end of the croissant
Place the berries on top
Roll everything up
Place on ridged non-stick cooking sheet or a cookie sheet layered with parchment paper
Bake for about 12 minutes; until golden brown on top
See pictures below for proper rolling;
My “Little Chef” and I will be doing this every week! So stay tuned for more, super kid friendly recipes!!
Thank you for joining us!!
-Nicole Michelle ♥
Berry & Nutella Crossiants; Let the Kids Cook! Lately, my four year old has become extremely interested in helping us cook; particular cracking the eggs.
0 notes
Text
Today, we pleased some very spoiled dogs with our homemade treat recipe! These goodies s are super healthy, delicious, and even appealing to dogs with sensitive stomachs. Our dogs and cats gobbled them up so quickly; it was pure delight seeing how successful they were. I love giving my dogs treats with some added pumpkin; it is loaded with fiber and beta-carotene, which the body converts to Vitamin A. Pumpkin can also aid diarrhea and constipation; it’s no wonder us dog owners love it!
For these treats you will need:
One 16 oz. package of ground, lean turkey
One can of pumpkin (not the pie filling)
2 eggs
4 cups of flour
Vegetable oil
Make these delicious treats for your pups at home! Read the recipe below:
1. Start with a 16 oz package of ground turkey. I used an all-natural, 93% lean package. With a small splash of vegetable oil, cook the turkey all the way through.
2. Once the turkey was finished, I put it through a strainer to help drain any fats or oils. With a paper towel under the strainer, I let the meat cool completely.
3. Place the turkey in a food processor and slice/shred until it is as small as possible. Place the meat in a large mixing bowl.
4. Add the can of pumpkin, two eggs, and mix thoroughly. Slowly add the flour. I used a white, whole wheat flour. If you are using a gluten-free flour, you may need more. After I added about 2 1/2 cups, I needed to use my hands to mix the dough in more efficiently; you could also use a large food processor for the whole process, I felt the mixture was too big for the one I have. Preheat oven to 350.
5. Hand mix/knead the mixture until a dough forms. *Note: this dough ball is about a third of my total dough.
6. Roll the dough out (flour the counter first) and make sure to consistently flour both sides as you roll. This is a pretty “wet” dough so don’t be shy with the flour. I rolled mine out to the thickness above and I was very happy with the consistency.
7. Using the cutter off your choice, cut the treats out of your dough. I continued to re-roll it so not to have any waste. If you do not have a ridged cookie sheet, I recommend lining your baking sheet with a layer of parchment paper first. I also threw some flour onto the cookie sheet, just incase.
8. Bake on 350 for 15 minutes. If doing somewhat thick treats, I recommend cooking for longer. You are looking for a crisp outside; no mushy edges.
9. Once they were finished, I flipped them over, shut off the oven, and placed the pan back in the oven. I like to do this with my dog treats to help remove excess moisture and crisp them up a bit. I left them in there for about 45 minutes.
My dogs seriously loved these treats, as you can see below. I highly recommend giving ese a try! Also, I would recommend storing these in the fridge since there are no preservatives. Enjoy!!
Thank you for reading! Hope your dog enjoys!!
-PAWS Kitchen
Homemade Turkey & Pumpkin Dog Treats Today, we pleased some very spoiled dogs with our homemade treat recipe! These goodies s are super healthy, delicious, and even appealing to dogs with sensitive stomachs.
0 notes