#3d applique
Text

8 notes
·
View notes
Text
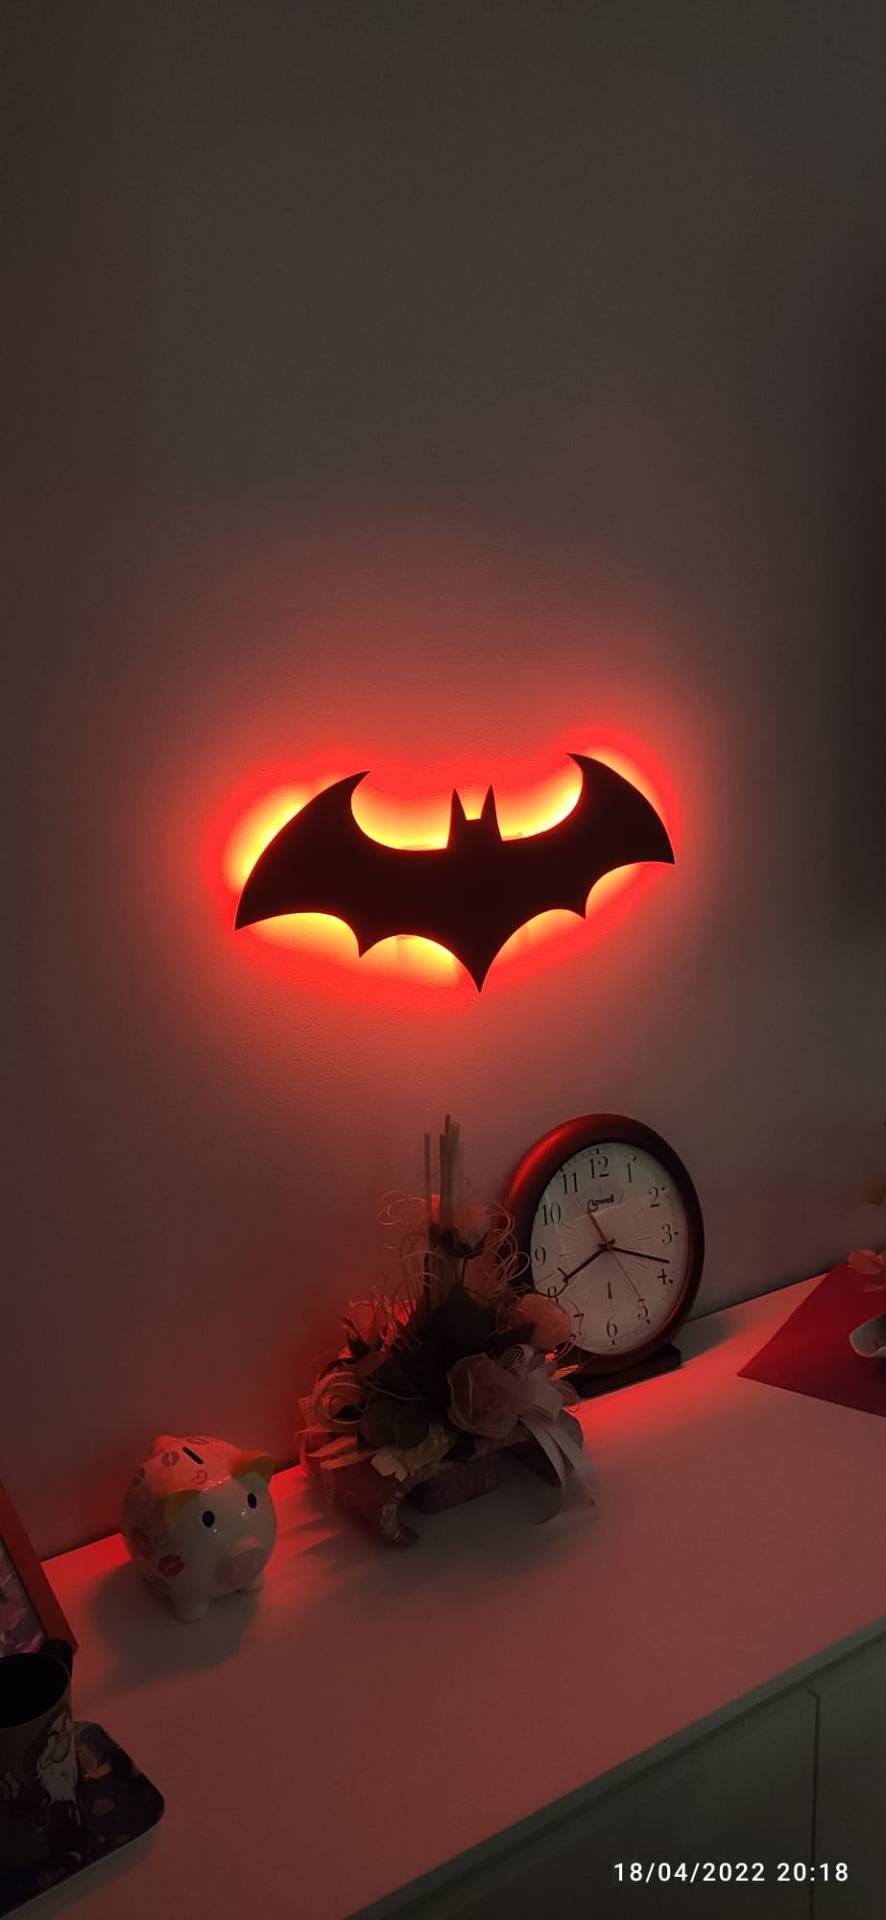
Applique da Parete: Batman
Condivido con voi la mia creazione, aspetto vostre impressioni in merito
Ho deciso come tante persone che hanno la stampante a casa di stamparsi qualche applique, in questo caso ho preso i file 3D da questo sito web thingiverse e scaricato il modello ricercato modificando qualche dettaglio. Se volete il file, lo trovate QUI ricordandovi di lasciare un Like al creatore.
Bisogna fare due considerazioni prima di dare via alla stampa:
Con che stampante Che tipo di…
View On WordPress
2 notes
·
View notes
Text

Embroidery has been an integral part of branding and customization in various industries for decades. With advancements in technology, left chest digitizing and jacket back digitizing have become essential processes in the garment and promotional product sectors. These techniques allow for the transformation of digital designs into intricate embroidered logos or artwork, providing a professional and personalized touch to garments and accessories.
0 notes
Text
Jasa Perbaikan Alat Fitness BerBaransi / Service Treadmill di JaBoDeTaBeK - Jakarta, Bogor, Bekasi
#college life#3d modeling#design#shoes#applique#dark horse comics#captain america#versace#valentino#bujo spread
0 notes
Text

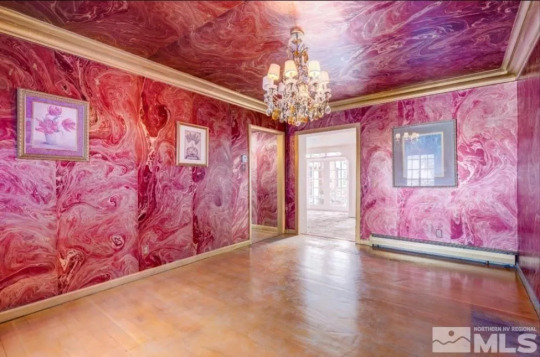
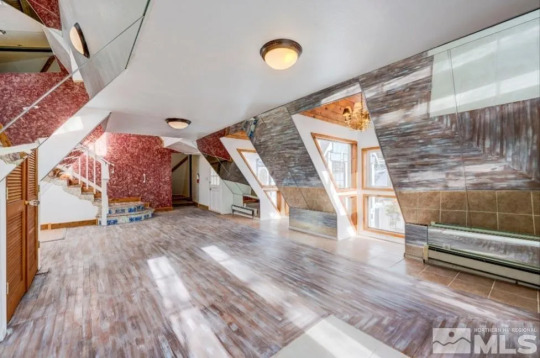
Here's a 1930 home in Reno, Nevada that looks like a beautiful French chalet. So, why hasn't the 5bd, 4.5ba $1.1M home sold? Perhaps it's the decor?
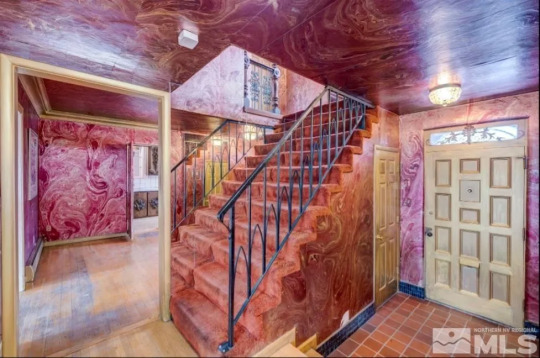
But, who wouldn't want to come home to magical pink swirling walls & ceilings?
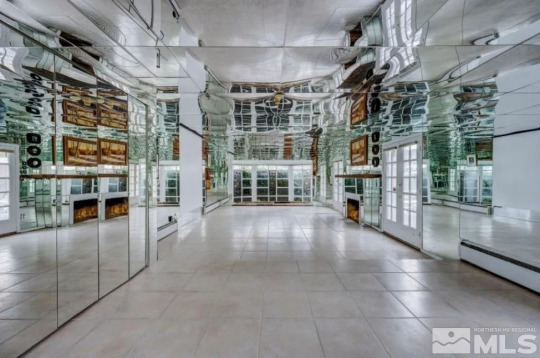

Or to relax in front of the fireplace in the huge, distorted-funhouse-mirrored living room.

And, if you're not dizzy yet, don't go in the bathroom. The mirrors in here look coppery. I do like the pink fixtures, though. Isn't this bathroom gigantic?

Is this the dining room? I don't know, I'm so disoriented. (Is that a trap door in the floor?) Maybe this is a dining/family room combo.

I thought that this was a bath, but it's the kitchen. Wow, look at the cabinetry. It looks like they attached big 3D appliques to cheap doors.
Don't think you've escaped the swirls, b/c they're in the bedroom, too. Shouldn't they have matched the wallpaper pattern, so it looks seamless, though?

This could be the primary bedroom with the draped ceiling and shelves.


The en-suite is nice. I mean, in comparison to everything else.
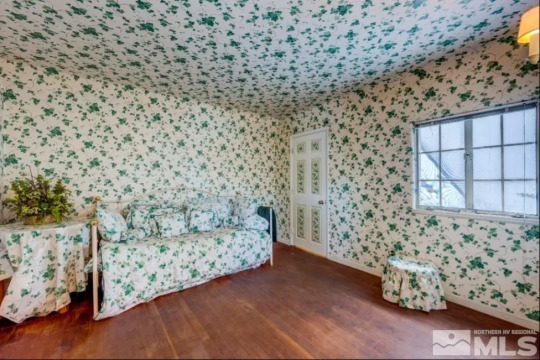
Wow. Well, it's a bedroom, but the daybed suggests it's a guest room.
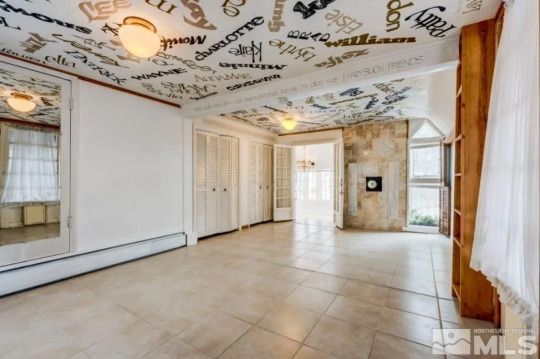
Here's an idea I never thought of. Names all over the ceiling.

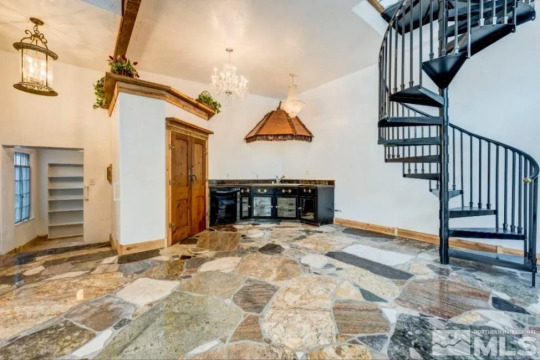
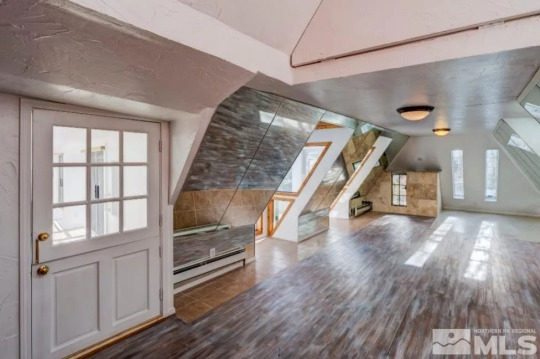
We're in the new addition to the house and it has a nice floor and stone. There's a kitchenette in the corner, so it must be an entertaining space.

Up the spiral stairs, there's another open room.

Now, we're in the newest addition.


Could this be another primary suite? A grand piano in the corner of a huge room with an open bath nook. I have no idea, but surely there's plenty of room to enclose this.
Is that a bar in the corner? Maybe this is a rec room.

A room with 2 steps down and an alcove. I don't think it could be a bedroom, but who knows?
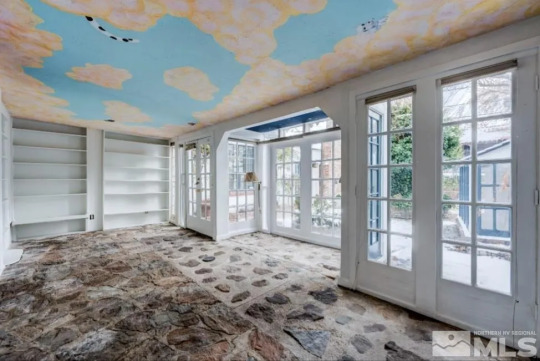
By the look of the stone floor, which seems to be a bit of a rough terrain, this may be a sun room. I can't tell if it's clouds or a map on the ceiling.

There's a day bed in here off the sun room, so maybe it's a lounge or a guest room.

I think that this is a guest powder room, but the mirrors throw me off.

The original part of the house.

Here's a pond with a walkway.

And, the newer part each have courtyards.

The newest addition. I'm not sure, but the gate is probably the entrance to the property, which measures a total of .25 acre.
https://www.zillow.com/homedetails/720-California-Ave-Reno-NV-89509/7262661_zpid/?
279 notes
·
View notes
Text
dress MC would wear to a gala or ball with the brothers & datables I Leviathan, Satan & Asmodeus
Request from anonymous: What dress would you wear to a gala or ball with the obey me characters?
A/N: Hellew I'm back with another post! Super sorry this one took so long. This one needed a bit of tweaking since I didn't really feel like it captured the brothers enough. On another note, THANK YOU GUYS SO MUCH FOR 1.1K! THAT'S ABSOLUTELY INSANE LIKE WHAT?! Thanks so much for all the support and I cant wait to see what else I'm able to give you guys :> Once again, bye luvs~~
📜 𝙼𝙰𝚂𝚃𝙴𝚁𝙻𝙸𝚂𝚃!! 📜
Buy me a coffee?
Lucifer & Mammon

Leviathan
- He really likes this one because you apparently look like an anime protagonist who lost hope in the kingdom they once served…he was very specific about which one he was talking about.
- During the ball, his eyes would never leave you, why would he when you look so entrancing? And just like him, as soon as the attendees have a glimpse of you, they are unable to look away, all feeling as if they were mere flies caught in your web.
- He’d get a nosebleed when he first sees you in the dress and expect his face to be absolutely flushed.
“W-would you like me to slip on your feet? I mean!- sweep your feet? Gah! One more time. Will you do me the honor of letting me sweep you off your feet? Nailed it!"
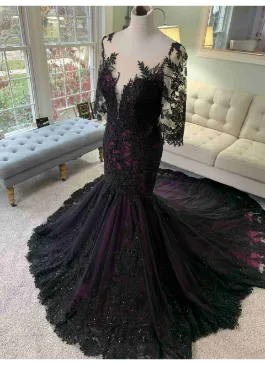
Source: https://bridesandtailor.com/product/custom-black-and-purple-wedding-dress-with-illusion-sleeves-black-wedding-dress-trumpet-black-dress-illusion-back-wedding-dress/

Satan
- You were radiant, Satan seeing you as if you were a mythical being pulled from the pages of a fairytale. Everyone knew you were human, but right now you truly looked as if you were from another world.
- He was transfixed by you, taking your hand softly and guiding you to the middle of the dance floor. He’d lean to your ear and softly whisper words of praise, seemingly unable to hold back his awe.
- By the end of the dance, he would excuse himself for a moment and run to a more hidden spot. Once there, his composure drops, screaming into the night “WHY ARE THEY SO GORGEOUS” and quickly run back inside to you.
"A fair creature such as yourself should not be kept waiting. As long as we've got the chance, I hope you’d grace me with a bit more of your time”
“Cut the act, I heard you outside”
“...Damn it”
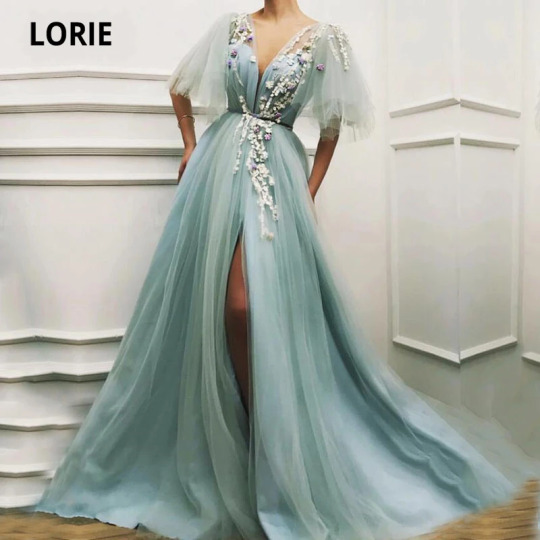
Source: https://ae01.alicdn.com/kf/H571dba9a08ac4a32a62d83bbd5707e29N/LORIE-Light-Green-Fairy-Prom-Dresses-Appliques-3D-Flowers-Short-Sleeves-Tulle-Evening-Gown-Side-Split.jpg_Q90.jpg_.webp

Asmodeus
- Two goals:
1. All eyes on both of you
2. Look good doing it
- You both decided to match with each other and looked through hundreds of shops to look for the perfect one. You eventually found one you loved but of course, he wants only the best. So he had someone make some "simple" adjustments to the dress that he made sure you approved of as well.
- You can forget about what the ball was actually about cause now you and Asmo are the main event. He’d be parading you around the other guests as if to show them he won and you were the prize. You’d both be getting compliments left and right as well as some underlying jealousy from the other attendees.
“OMG!” he exclaims. You didn't know it was possible but there are literal stars in his eyes.
“Gimme a twirl babe. Yas slay! You're leaving absolutely no crumbs and I’m living for it <;3”
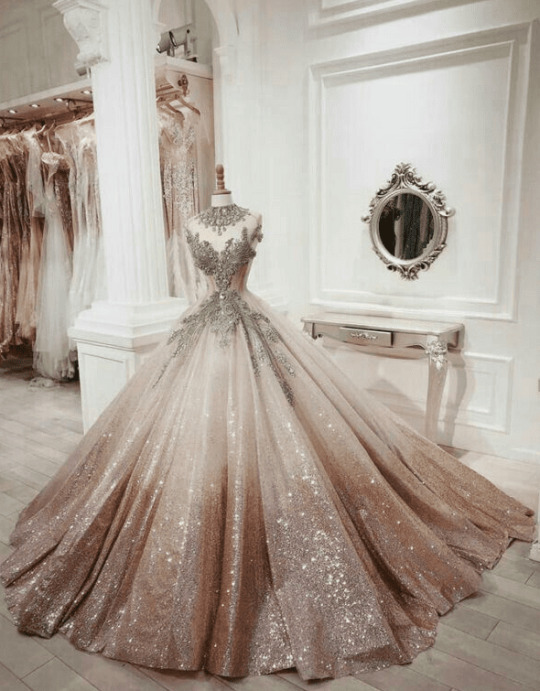
Source: https://i.pinimg.com/736x/d4/51/33/d451333ccc5c0765b04ca4ad8be7582a.jpg
#obey me x reader#obey me angst#obey me fluff#obey me imagines#obey me#obey me headcanons#obey me hc#obey me x mc#levi x reader#satan x reader#asmo x reader#levi x mc#satan x mc#asmo x mc#levi obey me#satan obey me#asmo obey me#leviathan obey me#obey me leviathan#obey me satan#obey me asmodeus#shall we date satan#shall we date leviathan#shall we date asmodeus#obey me shall we date#obey me brothers#obey me levi#obey me asmo#obey me mc#asmodeus obey me
184 notes
·
View notes
Text
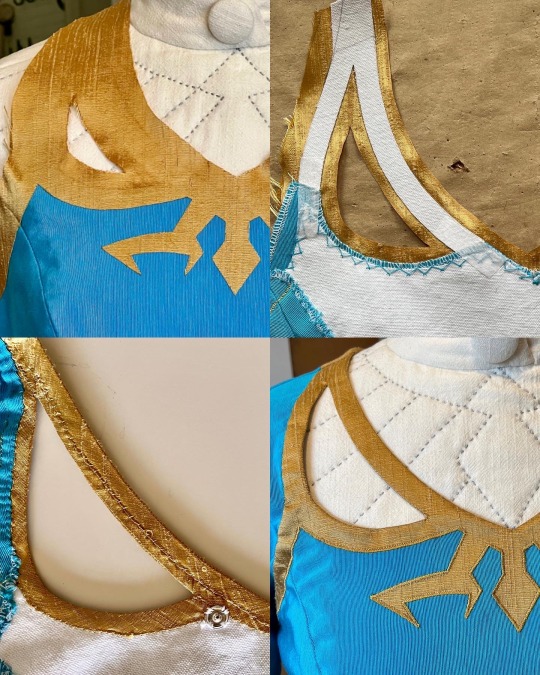
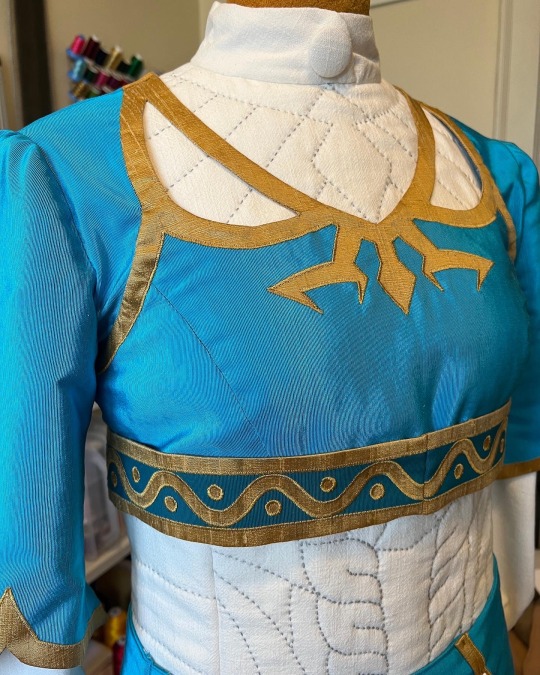
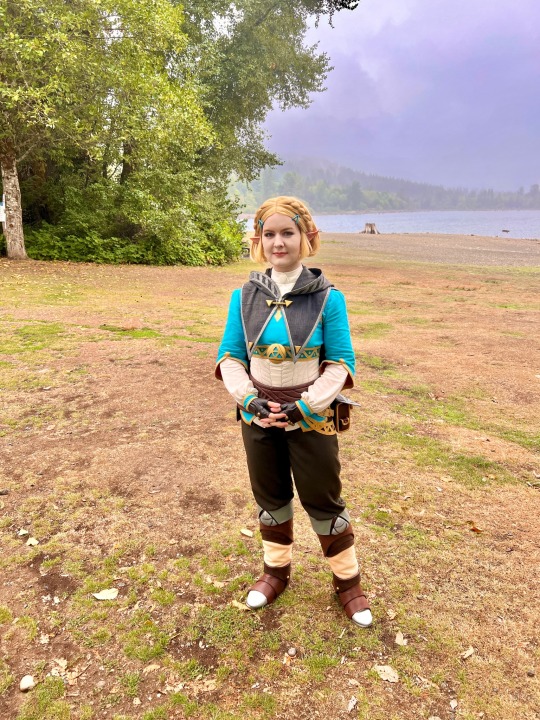

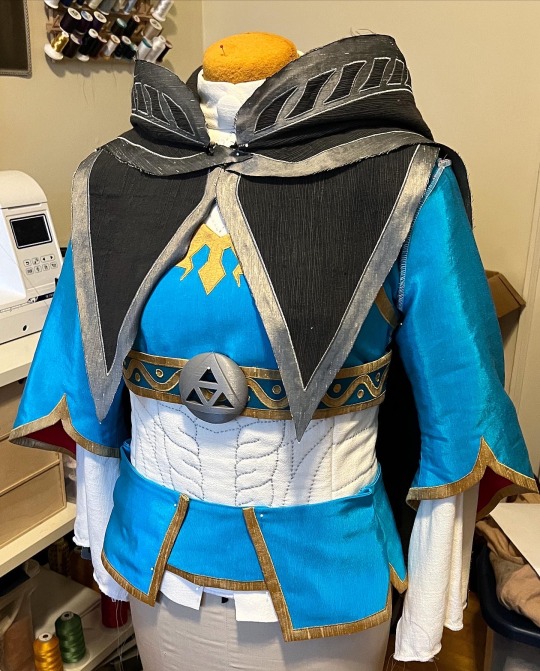
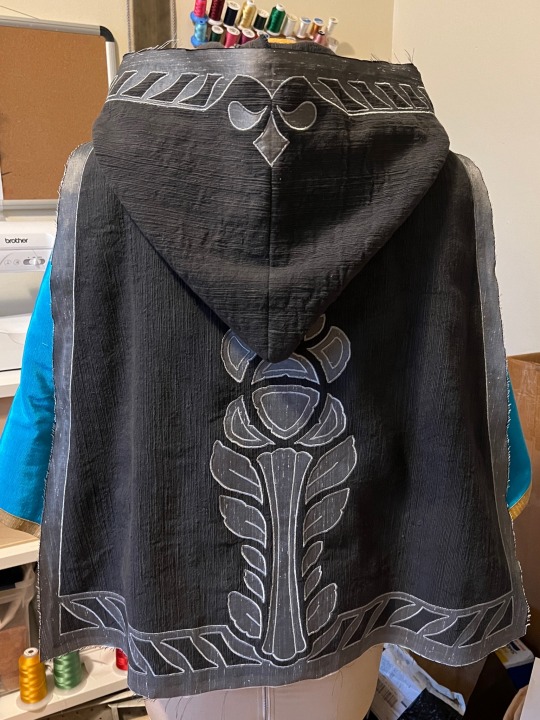
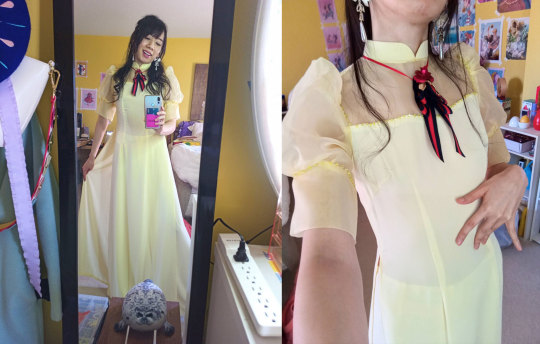
Here are some work in progress pictures of Zelda! The neckline was honestly one of the most annoying things that I have sewn 😅
More WIP info after the break!
I decided I wanted the gold to look seamless and wasn't sure the silk dupioni would hold up to intricate turned inside-out corners on the bird design anyway. So I opted to do the design as one continuous satin stitched appliqué piece. I had to finish each edge with bias cut strips, fray check the clipped corners and hand stitch all the turnovers on the backside. The bodice and neckline are flat lined and reinforced with duck canvas, which helps it maintain its shape and hold up to wear.
I drafted most of my Zelda patterns in CLO 3D! I've used this program enough that I now feel confident going straight from my patterns in the program to final fabric - I didn't do a mockup for Zelda. The bodice needed some small fit adjustments during construction, but nothing unmanageable. It saved me so much time and allowed me to perfect the applique designs and positioning them which was crucial especially for the cape.
I took a ton of WIP photos while working on Zelda, so I plan on posting more breakdowns in the future!
#tears of the kingdom#totk zelda#tears of the kingdom cosplay#botw zelda#totk cosplay#princess zelda#princess zelda cosplay#botw#botw cosplay#cosplay#costume#cosplaywip
30 notes
·
View notes
Text
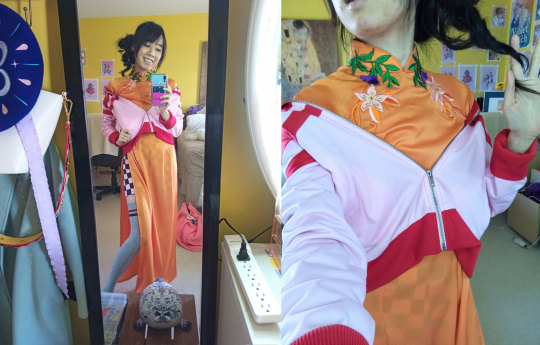
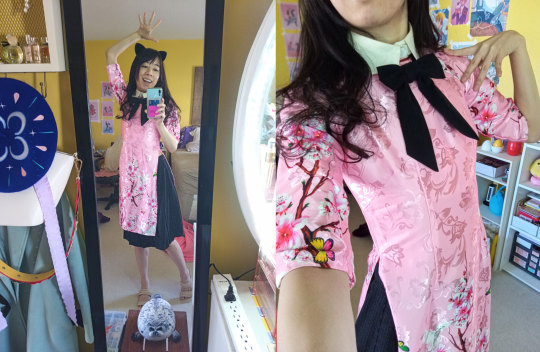
áo dài month - week 1

day 1
no raglan sleeve!
cool piping!
looks kinda masc imo!
embroidered and 3d flowers!
sequin bird! cool tassel!
the headpiece (khăn đóng) is a type of turban! it was a gift from my mom's coworker! she wore it on her wedding day!
day 2
the iconic raglan sleeve! like a baseball tee!
first made their debut in the 1950s apparently!
floral appliques!
short sleeve!
my parents got this from a nice local!
day 3
ditched the raglan sleeve for a trendy puff sleeve!
but still kept the iconic high collar!
crystal beading along neckline and sleeves!
double layered chiffon!
looks regency romance imo!

day 4
embroidered flowers!
iconic raglan sleeve!
iconic high collar!
iconic long panels!
cropped blazer and denim.. probably less iconic!
many vintage áo dài use snap fastener buttons in the front! now more áo dài use a back zipper for ease and convenience!

day 5
floral print!
sheer raglan sleeve!
taffeta long panels!
the headband (khăn vấn) is another type of turban! i think..
my mom said she thinks it resembles more of the northern style!

day 6
embroidered flowers along sleeves, bust and panel!
thrifted lace duster!
my mom wore one over her áo dài for her wedding!
áo dài can be worn whenever! work, school, casually, formally- by men, women, kids- everyone!
day 7
knee-length panels!
round collar!
jacquard!
sakura, butterfly and dove print!
2023 is the year of the cat! meo! this year’s element is water!
anyway the vietnamese zodiac uses cat! the chinese zodiac uses rabbit!
44 notes
·
View notes
Note
The window dress rly is so slay, it makes me actually want to wear dresses again but as a boydyke this time… but at the same time I want it as a regular shirt or a hoodie 😂
there is a tank version.. its pretty pricy but i think the dress is really well worth it tbh its super well made and comfortable
7 notes
·
View notes
Photo
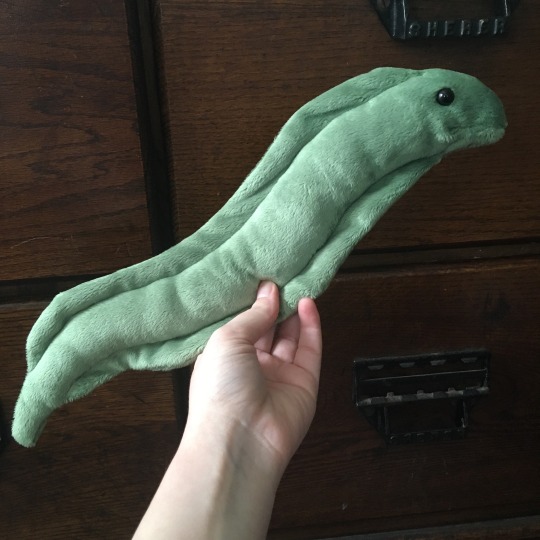

Hey y’all! I got a request for help creating an eel pattern, so below the read more I’ll be talking about how I created this eel pattern and offering suggestions for how to possibly size it up and create your own eel pattern. This explanation kind of assumes you have already made at least one plushie and have at least passing familiarity with things like seam allowances, darts, and basting.
This eel pattern was kind of an exercise in how simple I could make a pattern and have it still work. It’s really just a drawing of an eel with a 1/4″ seam allowance added around the outside.
To sew it, I cut out two of the pattern (one mirrored), with the stretch of the fabric going across the eel and not down the length. I sewed them together around the outside, left an opening for turning near the tail, and flipped the eel right side out. Then I topstitched the length of the top and bottom to define the, oh, what are they called? Flippers? Fins? The parts of the eel plushie that make it distinct from a snake plushie. I then cut the mouth open. In this pattern, the mouth serves as a dart that makes the face more 3D, so I flipped the plushie back inside out and sewed the mouth closed like it was a double-ended dart. The mouth dart is sewn perpendicularly to the rest of the seams of the eel. Idk how else to word that, but looking at the finished eel you can probably see what I mean. (I’ll be honest, I can’t remember if I sewed the mouth first or did the topstitching first. It should work either way, but I’ll make another eel in the next few days and I’ll update the post)
So, some tips for making your own much larger eel plushie pattern:
- you’re probably going to need some darts to make the shape 3D. I tend to avoid darts when drafting my own patterns and use the stretch of the minky fabric to make the shape 3D, but the stretch of the fabric can only do so much and if you go much bigger you’d probably need more darts. I *think* with a shape like this you’d be okay with a dart at the tail end and a dart at the head end, but it will depend on how large a circumference you want the eel to have and if you’re using stretch fabric or non-stretch fabric (non-stretch needs more darts than stretchy fabric).
- you can make the fins and body one pattern piece, like I did, and delineate between them with topstitching, or you can make the fins separate pieces. Totally up to you. If you make the fins separately, you’d sew the fins, leaving the body side of the fins open, flip them right side out, and baste them to one side of the body before you sew the body seams. If you end up needing darts along the body to increase the circumference, you’ll probably need to have the fins as separate pattern pieces
- for the face, you can use safety eyes and a dart as the mouth, or you can use applique for one or the other or both. I usually applique with felt, but have also used minky for applique; if you are new to applique, I would recommend not using stretchy fabric. With new patterns, I usually add the face after I’ve done almost all the sewing so that I can experiment with applique placement and see how it will look on the fully stuffed plushie. With patterns I’ve made before, I might add the appliques at the beginning so that I can machine applique them instead of hand sewing them.
Some tips for plushie pattern designing in general:
- have a tool to help you add a seam allowance to your pattern. I have a compass (the kind used to draw circles) set to 1/4″ diameter that I use sometimes, but I also found out that if you tape two Zebra brand mini mechanical pencils together, the points are 1/4″ apart. I usually used the taped mechanical pencils, and just trace along the outer edges of the pattern pieces to add a seam allowance. Whatever works, whatever seam allowance works for you, it’s just WAY easier to have a tool than to try to use a ruler.
- I use a brush pen when drawing the base of pattern pieces. When I add the seam allowance, I kind of eyeball it and put one edge of the tool in the middle of the brush pen line, but I also use the opportunity to smooth out curves/straighten out lines by moving away from the lines with my seam allowance tool when necessary (you can kind of see what I mean when you compare the brush pen drawing of an eel on the pattern to the actual edges of the pattern; it’s not evenly 1/4″ around because I was smoothing it out as I went)
- make sure you leave enough space for your opening for turning. This eel pattern is a pain to turn right side out because the only place for an opening for turning is the last inch or so of the tail
- if you have to match a curve to a straight line, like if you’re using a circle as the bottom of a leg and the sides of the leg are rectangles, you can use pipe cleaners or yarn to measure the curve and then straighten them to get the length of the straight line that will match that curve
- I don’t usually do this, both because I primarily make fairly small plushies and because I am experienced at fixing mistakes in the pattern as I sew the plushie together, but if you are new to pattern design/not sure how a pattern piece will work/want a prototype, you can usually make a pretty good prototype of a minky plushie with fleece for a lot cheaper. It won’t look exactly the same in minky as it will in fleece, but it’s usually pretty comparable
- I use scrap paper from stamp albums for pattern drafting because my neighbor gave me a bunch, but if you have parchment paper or cardboard or other paper, you can use pretty much anything for you pattern designing as long as you can make marks on it and cut it down to size. Scaling up the pattern makes finding a big enough piece of paper tricky, but heck, you could use wrapping paper if you want to. Don’t get stuck thinking you have to tape together regular printer paper (I’ve been there lol)
#eel plushie#the person behind the yarn#sewing#long post#how to make your own eel plushie pattern#I forgot to ask the person who asked me about this if they were okay being tagged in the post#so I'm not tagging them but if they want me to I will
111 notes
·
View notes
Text
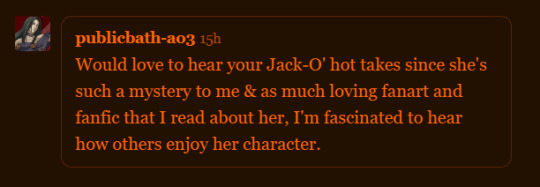
RE: @publicbath-ao3
Sorry for not replying right away, I wanted to wait until my brain switched to Jack-O' mode so you could get pure concentrated tumblr user solradguy thoughts on this.
My biggest hot take uhhh actually I thought on this for a while and I can't really think of any "hot" takes, just takes people seem to generally agree with, like how some parts of her story are written poorly and don't give her enough time to shine as her own independent character.
But I can talk about nice Jack-O' takes :^)
I like that she's a bit like Faust where she has really silly/comedic relief moments but her lore and her character are still taken seriously. She's not there JUST to be goofy and even though her lore isn't always written the best, it still does enough to make her interesting as a character, imo, with scenes showing figuring out who she is and the scenes with Raven in Xrd.
Her animations are great too I love them so much. You can really tell ArcSys had fun working on them with how creative some of them are. The way they animated her hair is cool too. It's definitely a 3D model but they made it so fluid. Sol, Testament, and Zato have good hair animations too but this post isn't about them haha
Jack-O's crouch isn't her best pose, it just took off because it's exploitable.
So the 1990s had a bit of a 1960s aesthetic throw back thing with tiedye, bead curtains, flared jeans, and long hair on men coming back into style and Jack-O' has some pretty direct 1960s-70s influences in her design and it's really easy to imagine her as an early '90s kid that never quite got over the '60s throwback stuff. Like it's really easy to imagine her getting excited about stuff like tiedye kits or rainbow flower appliques lol Actually wait they made a mug for one of the popup events that had a date on it that could be maybe Aria's or something
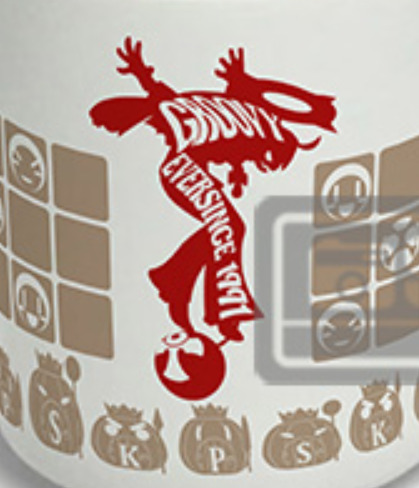
ArcSys was founded in 1988 and Daisuke is definitely older than 1991 so idk what else this year could mean!!
Anyway I just think Jack-O' is neat. I would still love her even if she was a worm
54 notes
·
View notes
Text
Left Chest Digitizing and Jacket Back Digitizing
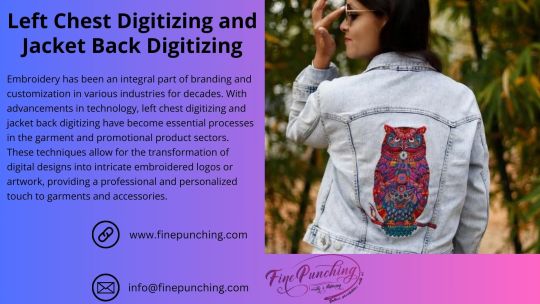
Embroidery has been an integral part of branding and customization in various industries for decades. With advancements in technology, left chest digitizing and jacket back digitizing have become essential processes in the garment and promotional product sectors. These techniques allow for the transformation of digital designs into intricate embroidered logos or artwork, providing a professional and personalized touch to garments and accessories.
Introduction to Left Chest Digitizing
Left chest digitizing refers to the process of converting digital artwork into a format that embroidery machines can understand and replicate onto the left side of a garment, typically around the chest area. This technique is widely used for adding logos, emblems, or text onto apparel such as polo shirts, jackets, and uniforms. Left chest embroidery is favored for its subtlety and sophistication, making it a popular choice for corporate branding and promotional merchandise.
Understanding Left Chest Digitizing
The process of left chest digitizing begins with the selection of a high-quality digital image or artwork. This design is then translated into a stitch file using specialized software that determines the placement, stitch type, density, and color sequence for the embroidery machine to follow. Factors such as design complexity, fabric type, and intended use of the garment are carefully considered during the digitizing process to ensure optimal results.
Benefits of Left Chest Digitizing
Left chest digitizing offers several advantages, including precise replication of intricate designs, cost-effectiveness for bulk orders, and the ability to customize artwork according to specific branding requirements. Additionally, left chest embroidery provides a professional and polished appearance, enhancing the perceived value of the garment or product.
Factors to Consider in Left Chest Digitizing
When digitizing for left chest embroidery, it is crucial to consider the complexity of the design, the type and texture of the fabric, as well as the desired stitch count and density. These factors can significantly impact the quality and clarity of the final embroidered output, emphasizing the importance of meticulous planning and execution.
Techniques for Effective Left Chest Digitizing
To achieve optimal results in left chest digitizing, it is essential to use specialized digitizing software that offers advanced features for design manipulation and customization. Additionally, attention to detail in selecting appropriate file formats, stitch types, and densities is paramount for achieving crisp and durable embroidery on a variety of fabrics.
Common Mistakes to Avoid in Left Chest Digitizing
Some common pitfalls in left chest digitizing include overlooking design scalability, neglecting underlay and pull compensation, and failing to pay attention to small details such as letter spacing and line thickness. By avoiding these mistakes and focusing on precision and accuracy, embroiderers can ensure professional-quality results that meet or exceed client expectations.
Introduction to Jacket Back Digitizing
In contrast to left chest digitizing, jacket back digitizing involves the replication of larger designs or artwork onto the back of garments, such as jackets, hoodies, or vests. This technique allows for more prominent branding opportunities and creative expression, making it a popular choice for sports teams, corporate uniforms, and promotional merchandise.
Understanding Jacket Back Digitizing
The process of jacket back digitizing follows a similar workflow to left chest digitizing but with considerations for larger design dimensions and placement on the garment. Jacket back embroidery often requires specialized techniques for handling intricate details, color blending, and texture replication to achieve visually striking results on larger surfaces.
Benefits of Jacket Back Digitizing
Jacket back digitizing offers several benefits, including the ability to showcase elaborate artwork or logos on a larger scale, increased visibility for branding purposes, and enhanced garment aesthetics. Whether used for corporate branding or personalization, jacket back embroidery adds a touch of professionalism and style to any garment or accessory.
Factors to Consider in Jacket Back Digitizing
When digitizing for jacket back embroidery, factors such as design dimensions, placement on the garment, fabric compatibility, and color blending techniques must be carefully considered. Attention to detail in these areas ensures that the final embroidered output is visually appealing, durable, and aligned with the client's branding objectives.
Techniques for Effective Jacket Back Digitizing
To achieve optimal results in jacket back digitizing, embroiderers can utilize specialized techniques such as appliqué, 3D embroidery, and gradient effects to add depth and dimension to the design. Additionally, proper placement of the design on the garment and attention to stitch direction are crucial for achieving a polished and professional finish.
Common Mistakes to Avoid in Jacket Back Digitizing
Common pitfalls in jacket back digitizing include neglecting design proportionality, overlooking stitch direction on curved surfaces, and disregarding limitations imposed by garment construction or fabric texture. By avoiding these mistakes and focusing on precision and craftsmanship, embroiderers can ensure that jacket back embroidery enhances the overall quality and appeal of the garment.
Conclusion
Left chest digitizing and jacket back digitizing are essential techniques in the realm of embroidery, offering versatile solutions for branding, customization, and personalization. By understanding the intricacies of these processes and employing effective digitizing techniques, embroiderers can consistently deliver high-quality results that meet the demands of clients across various industries.
0 notes
Photo
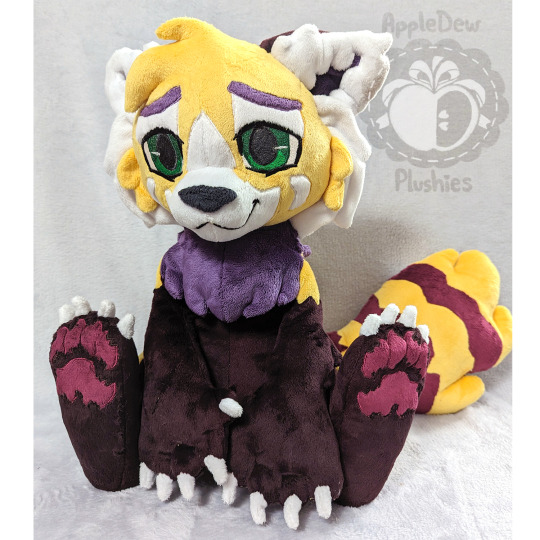
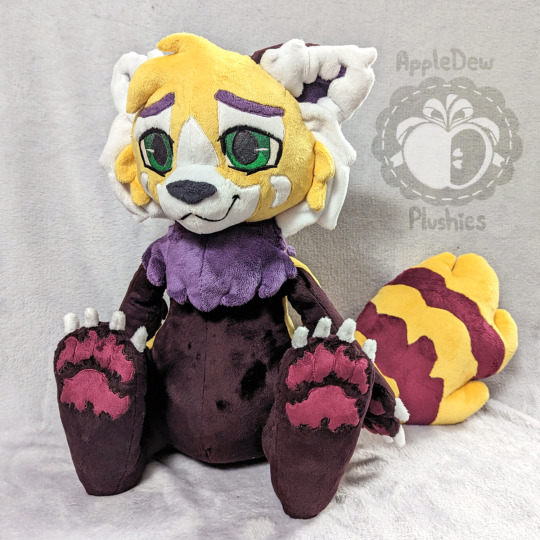

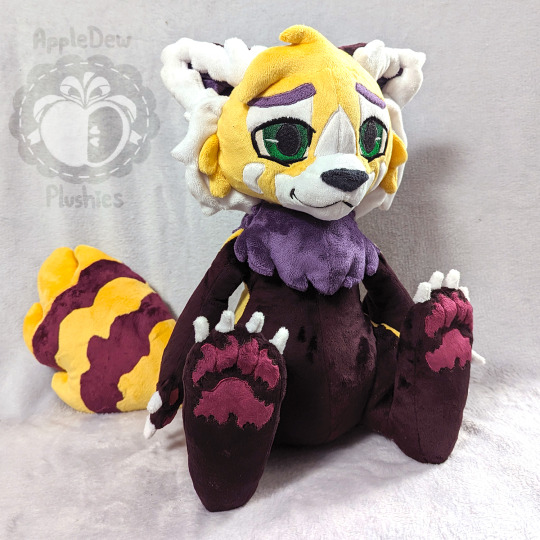

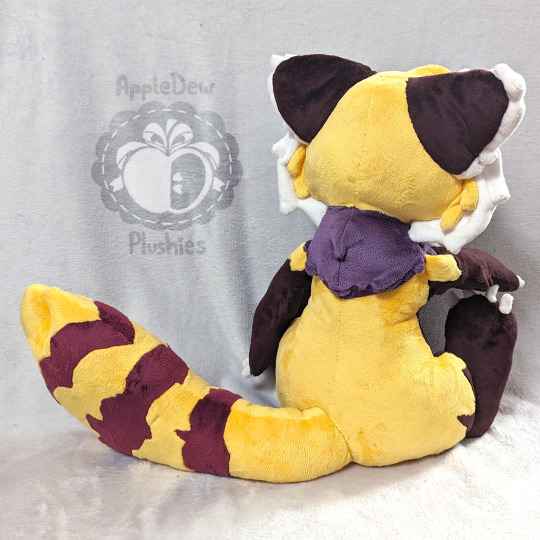

Sven is all set!
Made for SodiumKoza on Twitter!
This plush is made with minky and custom dyed minky. They sit at about 16 inches from the top of the head to the bottom of the rump. The details on this plush are machine embroidered and appliqued. Other details are color blocked.
Fun facts!
The color on the arms and belly was custom dyed with black dye! Originally I was going to go with Berry but tested myself to try to achieve something similar to the reference color. It was a success!
The lovely dark magenta color was also custom dyed with black dye!
The ears are partially 3D-- the ear is a basic ear pattern with an extra patterned piece to go around the outer edge.
This little one was made with the same pattern as Koza made in 2022, down to the muzzle pattern!
I did my best to emulate fluffy paws by embroidering fluff detail around the paw pads. At first I wasn’t too happy with it, but with some intense clean up, I was over the moon! :)
_______________
Ko-fi: https://ko-fi.com/appledew
Trello queue: https://trello.com/b/FZKSnMo7/plushie-commission-to-do-list
Twitter: https://twitter.com/AppleDew_
Instagram: https://www.instagram.com/apple.dew
Tumblr: http://appledew.tumblr.com/
Furaffinity: http://www.furaffinity.net/user/appledew
deviantArt: https://www.deviantart.com/appledew
22 notes
·
View notes
Text
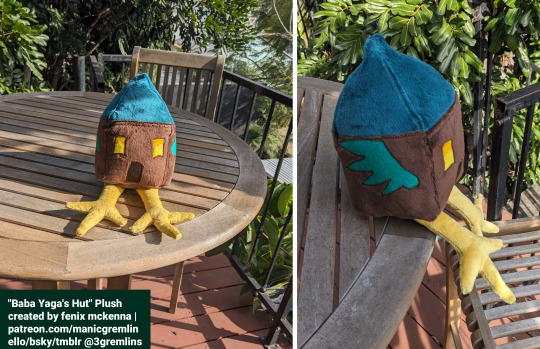
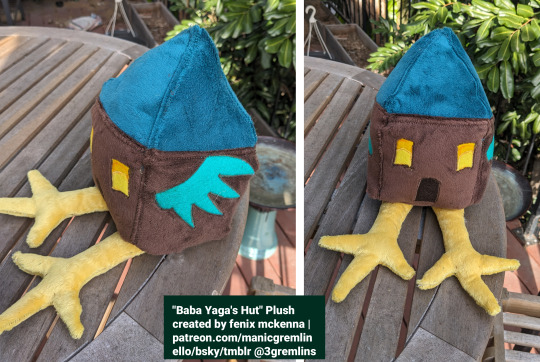
So as I've mentioned previously, my nibling loves baba yaga/her hut, so I wanted to make him some baba yaga stuff! I did the paintings but I wanted to do something more tangible, so I decided to make him a plush version!
this is my original sketch to compare (it initially had a few more features but i nixed them for this version. currently working on a slightly more complex version too)
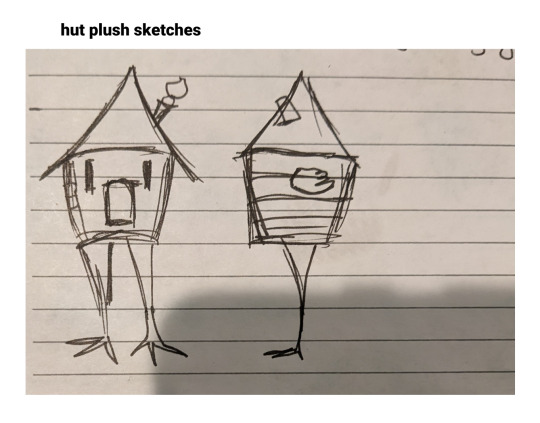
I used choly knight's square sheba plush pattern as a base to just figure out the cube (and having something already measured/sized as a base was really helpful/time saving) and did the rest of the patterning myself. I wanted it to be pretty simple since it was for a younger kid (i also made it out of baby safe and hypoallergenic materials).
The legs/feet took the most time to pattern, i went through a bunch of different iterations before i came up with a version that was both simple and "chicken-y" enough. I decided on floppy legs b/c you can't put anything hard like wire in kids toys, plus engineering for standing stuff is a lot more annoying lol. The bottom of the house is reinforced with canvas to support the legs a little better (all the seams are reinforced a bit in case of heavy playing)
The legs are floppy and can either dangle or sit straight out and all the applique is wool felt (i get my wool felt from this shop and can't rec them enough). I don't have an embroidery machine, so i used a satin stitch with my regular sewing machine to applique the eye pieces together for the highlights (and then to attach it to the minky).
any way this was a super fun project to do! as mentioned, i think i'm going to make a slightly more complex version (maybe with a chimney/3d wings) but i honestly also really like the simple version so i might make another just to have lol (maybe experiment with different colors or eye/window shapes idk)
i still have a ton of materials left over, so i could def make a few more (tho i once again have the "make plushes" bug i get every few years and might work on something else for a bit). if you're interested in more in depth wips, you can see them over on my patreon
#my art#plushes#plushies#plush toy#baba yaga#baba yaga's hut#russian folklore#q#folklore#the hut with chicken legs
3 notes
·
View notes
Note
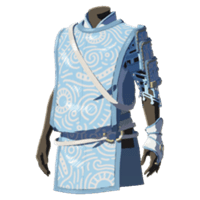
Awesome that you´re open for cosplay advice! This might help others or others might have other solutions so no need to answer privatly.
I´m currently working on the Mystic Armor set from Tears of the Kingdom and I have almost everything figured out but one sleeve which is giving me headaches. Specifically the one on his upper left arm underneath the shoulder armor. It’s connecting to something underneath the undershirt or the undershirt itself and is a cutout with 3D elements. I thought about doing a stretch mesh base and adding embroidery or beading to it but that probably wouldn’t work bc that doesn’t stretch and doing it probably wouldn’t feel great bc it goes over the armpit too. Doing stretch applique wouldn’t give me the 3D effect and I’m generally not a big fan of it. So maybe you have any other ideas I could look into?
Hello there!
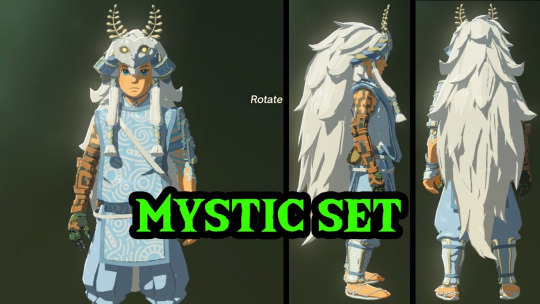
I know you don't want to do applique but I would personally do it as stretch applique on mesh and pad it out for the 3D effect. Cord elastic underneath the applique would create the effect of the lines quite nicely. I would then cut the mesh so the little dangly bits can actually dangle and not be backed by mesh.
If you went with embroidery, it would be tough, but you might be able to do it with a stretch thread.
You can also get away with having it not as stretchy by making the fit looser -- it doesn't seem to conform to Link's arm, so having it loose at least around the bicep would open up a LOT of options. You can also fudge it a little by using mesh and stretch fabrics for the body of the shirt, and then having it loose and covering another material (like cording, EVA foam, plastics, etc.) with your stretch fabric for the part below the armor strap on the bicep. That would prevent the discomfort issues, and the part that is most visible would be the technique you REALLY want and the rest that is stretch applique or whatever else for comfort is mostly hidden.
Another option: make the shirt out of pleather and just have actual cutouts. Depending on the type of pleather you use you might need to stabilize the backside to prevent it from stretching out from the weight, but since it doesn't fray, you can just. Cut out the shapes. and not have to worry about it. It would also be flexible enough to wear over areas like your shoulder that see a lot of movement. You can even combine this with some padding for dimension.
Yet another option since you mentioned beading: Do whatever fabric underneath, and bead with clear stretch thread. This would allow for the garment to stretch, and would still get your beaded look. It won't stretch a LOT and you'll need to be careful to use stitches that stretch a bit, but it would stretch between the beads and give you that beaded look still. Use a fabric of the same color as the beads underneath so when it does stretch, you don't notice the gaps as much.
Cursed option: make the fit loose and do macramé
I know that's a lot of options and not really a solid answer, but since that's all up to your taste, I hope it still helps! I would personally do either padded stretch applique on skin tone mesh or the pleather look, or even a combination.
#bodyguard-of-the-galaxy#link#the legend of zelda#tears of the kingdom#mystic armor#fabrickind gives solicited advice#helpful things#sorry this took a while#i was busy having migraines
8 notes
·
View notes
Text

Hear me out - on the back of a levi jacket for a cool, wearable and comfortable Hawks cosplay.
It would be more disability friendly, while also having a cool 3d effect.
2 notes
·
View notes
Last Seen Blogs

jungleboysweed
Sans titre

michellesbohh
You guys are losers...

easydrawings101
Easy Drawings

some-alt-hoe
jus me

nobilis-nri-taxation-austra-blog
Nobilis-NRI-Taxation-Australia