#i want it cut about 1 1/2 cm thick
Text
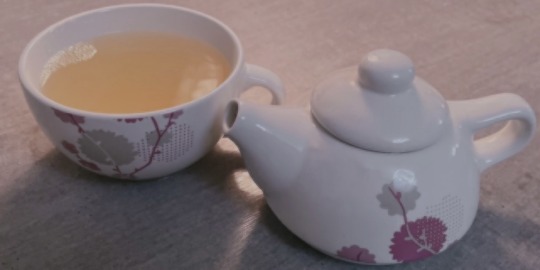
Making Hayden Christensen's tea 🫖 | Recipe


After seeing the gifset above (from this interview), I could not stop thinking about Hayden's ginger tea. So I did what any normal person would do and bought all the ingredients required to make this tea. I did some research before doing this and used all the tea knowledge I possess (I basically just winged it). This recipe is for a single serving, but I'm sure you could eyeball it to make a full pot.
Obviously, I don't know if this is how Hayden does it. Ya'll who'll be meeting him at cons this year can maybe ask him lol
Recipe and directions below the cut 💜
Hayden's mean cup of ginger tea
Ingredients
I won't give exact measurements because I pretty much eyeballed this, but it's pretty straightforward. Feel free to add more or less of something if you want!
Water (fill the cup you'll be drinking from + add a splash)
Ginger
Mint
Lemon
Cinnamon sticks
Directions
Wash the ginger, mint and lemon.
Fill the cup you'll be drinking from with water, place in a saucepan and bring it to boil on the stove.
While the water comes to a boil, smash and chop the ginger (I used a piece the size of my thumb, feel free to use more or less). Slice the lemon (I used one slice about a 1/2 cm thick). You don't have to peel the ginger and lemon since we washed them first (also who has the energy to peel stuff — not me). Pick a few mint leaves, I think I used about six, but I'd use more next time since I didn't really taste the mint that much.
Throw everything in the saucepan, add a stick or two of cinnamon. Cover and let it boil for about 10 minutes or longer depending on how strong you want the tea to be.
Pour the tea into a cup (strain it of course) and add some sweetener if you like. I'm vegetarian so I use agave syrup, but you could also use honey or plain sugar. Or since Hayden's canadian, I guess maple syrup could work too? Feel free to try whatever you want—it's your tea, not mine!
Photos
For the peeps that find pictures helpful!
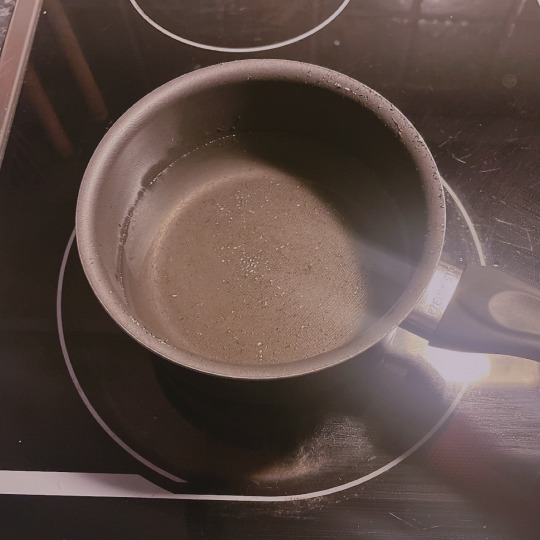

Water added to a small saucepan. As it boiled, I washed the ingredients (except the cinnamon)
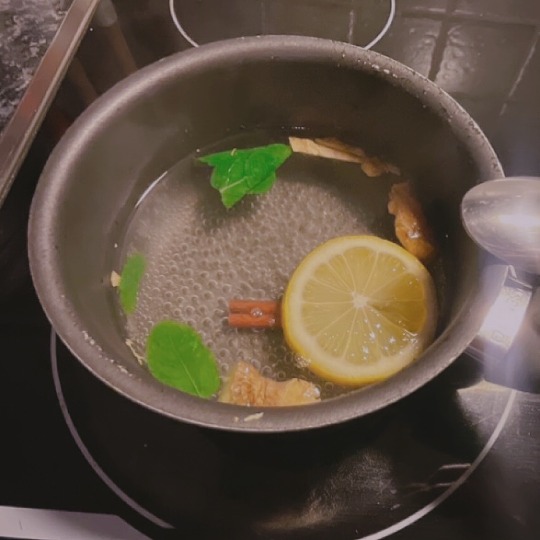
When the water was boiling, I added everything to the saucepan, put a lid on it and set a timer for 10 minutes.
Done! How adorable is this little teapot T_T
To conclude, I thought the tea was pretty delicious. It's very warm and cozy, a really nice drink for winter, I think! I hope you try this out! Let me know if it was any good! 💜
#hayden christensen#tea#tea recipe#foodblr#teablr#ginger tea#mine#recipes#hayden the adorable man that u are#this was actually so delicious T_T#thank you space dad for the recipe 😭🙏#asvdghfb
37 notes
·
View notes
Text
SR Idia Shroud Chef Apprentice Personal Story: Part 1
"Master Chef"
Part 1 (Part 2)
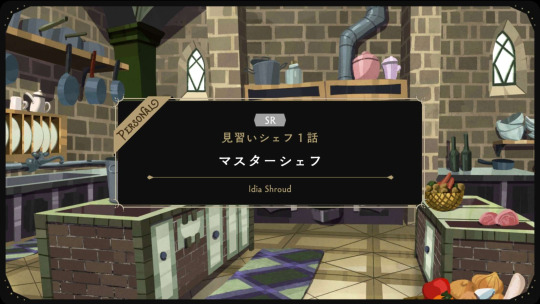
[Kitchen]
Master Chef ― Idia Version
~Let’s Make Stuffed Peppers 1~
Ghost Chef: Alright, well, I'll have you start by making the Stuffed Peppers… Idia-kun, have you ever cooked anything before?
Idia: Eh….........Ah…......Ah…...I haven’t.
Ghost Chef: Oh my, are you nervous? Don't worry, this program is aimed towards amateurs like you. You don't have to tense up like that!
Idia: N-No, this is my default setting…
Idia: Ugh, actually… It's a pain to try to explain it, so I'll just let him think whatever.
Ghost Chef: Idia-kun? Are you alright to continue?
Idia: …Kk.
Ghost Chef: First, prep the sweet bell peppers. Cut off the stem and use your fingers to take out all the seeds and the white bits from inside.
Ghost Chef: It might be a bit hard to remove, but it won't be as tasty if they're left on. Make sure to take them all off.
Idia: What, they want me to cut a round object on a flat surface…? Urrgh, it's not sitting still.
Idia: I don't wanna get hurt in an elective like this. Gotta hold it firmly… Carefully… Carefully…
[chop]
Idia: …Whew, that was scary. K, next is to take out the insides with my fingers, I guess. Urgh… This squishiness suuucks…
Ghost Chef: Take your time and be gentle so as to not damage the produce. However, there is still much more left to do, so don't take too much time.
Idia: Wh-Which is it…!? Do you want me to take my time or hurry up!? Eek, the seeds are stuck to my fingers… This is the worst…
Ghost Chef: Once you've taken out all the seeds, cut the pepper into round slices, 2 cm thick.
Ghost Chef: Make sure to cut them evenly, keep an eye on the thickness of each slice.
Idia: …If you're gonna be that adamant, shouldn't you should pick something other than a knife for this!? A newbie'll definitely make mistakes!?
Ghost Chef: You don't have to put that much thought into it. It's just something to keep in mind.
Idia: Oh, so it's just gotta be close enough? Then say that from the get go…

Ghost Chef: ―Next, you need to make the stuffing that'll go inside. We'll measure out each ingredient as per the recipe and put them in a bowl.
Idia: The stuff I need to measure out are… 1/4 cup of breadcrumbs, 2 tablespoons of milk, an egg… "a pinch" of salt and pepper?
Idia: There it is… "a pinch." Instructions that leave it to the experience and tastes of the one making it that has no repeatability…
Idia: That so frustrating. Let's say I was a pepper aficionado, wouldn't that change the size of that "pinch"???
Ghost Chef: Hmmm. For this recipe, maybe just three shakes of the pepper is enough. All it needs is a "pap, pap, pap" with a quick flick of your wrist.
Idia: Now you're just using sounds to describe it!? Huh, but there's so many ways that could introduce error into the equation, just by the way you snap your wrist; how much force you put into it, your physique, and whatever else.
Ghost Chef: I-I never thought there'd be this many questions about something like this.
Idia: …Haah, whatever. It'll be annoying if I have to stay here longer than I need to, so I'll just shake it however…
Ghost Chef: Still, you sure do notice the smallest things. Are you starting to gain more interest in cooking?
Idia: Uh, no…? Eh? Where'd you get that idea…?
Idia: Uh… I don't really think about food to begin with. Honestly, I tend to forget to eat…
Ghost Chef: Ehh!? I'm sure that would worry your family.
Idia: Well… Yeah, I guess. My kid brother's always trying to push those nutritional health apps…
Idia: When I decided to take this class, I think he said something like, "I hope this'll get you more interested in cooking~"
Ghost Chef: That's a nice brother to have. And? What do you think, now that you're taking the class?
Idia: I get it now, after actually standing here and doing this. It's so inefficient to cook for yourself.
Idia: Just eating's a chore, so cooking on top of that's just a waste of time. Yup, nothing can stand up to those pre-packaged complete nutrition meals.
Ghost Chef: Oh no, did this Master Chef course just backfire!? Oh but, hey look, there's been a ton of recent advances in cookware, you know!
Ghost Chef: There are even pots that'll finish cooking for you if you throw in the necessary ingredients and seasonings!
Idia: Eh… If a pot that useful exists, then why's it necessary to learn how to cook from scratch?
Ghost Chef: No, no, you still need to cut the ingredients, or measure the seasonings yourself, obviously.
Idia: Why's that the only thing that's still gotta be done by hand, then? We can rely on those cooking appliances even more, I'm sure!
Ghost Chef: Do you think so? I think it's already pretty amazing.
Idia: If we're going to have "automated cooking," then it's be great if it'd at least also prepped the ingredients and measured the seasonings.
Idia: Like, just throw everything in the pot, cover it with the lid, wait a bit, and then ta-da, all you gotta do is put it on the plate, that'd be great.
Ghost Chef: If there ever is such a pot, then that might put me out of a job.
Idia: If I were to create an Idia Shroud Cooking Appliance (name pending)… First, I'd make sure to spell out what a "pinch" of something is.
Idia: And to do that, I'll need to collect more data on the actual cooking process.
Idia: And if I'm going to make something to collect that, I'd rather have a pro craft it for me…
Idia: Chef, I'm going to collect the necessary data in order to put together my own cooking appliance, so can I have you finish up the dish?
Ghost Chef: Of course not! I'm pleased that you're starting to get fired up, but you need to finish what you started!
Part 1 (Part 2)

Requested by @rotattooill.
89 notes
·
View notes
Text
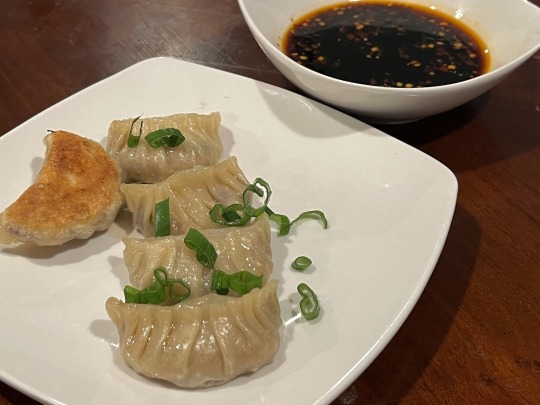
[ID: Five gyoza, each with ten small inward-facing pleats, sit on a plate garnished with green onion. One of the gyoza is upside-down to show a golden brown bottom. A bowl of dark brown dipping sauce is visible in the background. End ID.]
Tofu and vegetable gyoza / 豆腐餃子
Japanese gyoza are similar to Chinese potstickers, but they are usually smaller, with a thinner wrapper. These gyoza consist of a tender wrapper and a juicy, umami vegetable and tofu filling, pan-fried and steamed to produce a crisp bottom and served with a tangy, slightly spicy dipping sauce. I like to make a big batch of these and freeze some to add to a quick meal throughout the next few weeks.
Recipe under the cut!
Patreon | Tip jar
Makes about 45.
INGREDIENTS:
For the wrappers:
2 cups (240g) all-purpose flour
½ tsp salt
3 tbsp vegetable oil
About ½ cup (120mL) water
For the filling:
3/4 cup (75g) green cabbage, minced
1 medium carrot (50g), minced
1 small stalk celery (30g), minced
5 shiitake mushrooms, minced
2 stalks green onion, thinly sliced
7oz (1/2 package) firm or extra firm tofu
1 clove garlic, minced or grated
1/2-inch chunk (5g) ginger, minced or grated
2 Tbsp cornstarch
2 Tbsp soy sauce
1 Tbsp red miso paste
2 tsp toasted sesame oil
1 tsp salt
1/4 tsp white peppercorns, toasted and ground
Also try other vegetables and herbs such as daikon (Japanese radish), chives, &c.
For the dipping sauce:
1 Tbsp rice vinegar
1 Tbsp soy sauce
1 tsp sesame oil
1/4 tsp chili oil (optional)
INSTRUCTIONS:
For the wrappers:
1. If measuring by volume, measure flour by spooning into a dry cup measure and levelling off. Combine flour and salt in a large bowl. Add vegetable oil and stir.
2. Add water slowly until a soft, non-sticky dough forms. You may need more or less than 1/2 cup. Add more water, 1 Tbsp at a time, if dry flour remains in the bottom of the bowl. Cover and allow to rest for 10 minutes.
3. Knead dough on a lightly floured surface for about 10 minutes until very smooth. Cover with a damp kitchen towel and allow to rest for half an hour to make rolling out easier.
4. Divide dough in half, leaving the half you're not using covered (this makes it easier to achieve a thinner wrapper). Roll out each dough half on a lightly floured surface into a large rectangle of about 1.5mm thickness. Allow to rest, covered with a kitchen towel, for another 30 minutes.
5. Use a 3" (7 1/2 cm) cookie cutter or cup to cut out circular gyoza wrappers. Lightly dust each wrapper with cornstarch and set them aside on a covered plate. Allow scraps to rest in plastic or under a damp kitchen towel before rolling them out again.
For the filling:
1. Drain tofu. Press by wrapping in a clean kitchen towel and placing on a clean surface or cutting board, then placing a plate or other flat surface over the tofu and weighing it down with a heavy object. Press for about an hour to remove excess water.
2. Meanwhile, shred cabbage by slicing in half lengthwise (through the root) and cutting out the stem, then placing cut-side down and slicing thinly lengthwise to achieve thin strips. Finally, cut strips into a fine mince.
3. Peel carrot and mince; mince celery and mushrooms. Alternately, prepare all vegetables in a food processor.
4. Cover vegetables with about 1/2 inch table salt and allow to sit for 5-10 minutes to release moisture. Rinse briefly to remove excess salt and then squeeze firmly over a colander to get rid of moisture. A too-wet filling means a decrease in flavor and a higher likelihood of soggy gyoza!
5. Dice tofu. Mix tofu with mushrooms, cabbage, carrot, celery, green onions, garlic, and ginger in a large bowl.
6. Whisk soy sauce, miso paste, sesame oil, salt, white pepper, and cornstarch in a small bowl until well combined. Add to vegetable mixture and stir to combine.
To assemble:
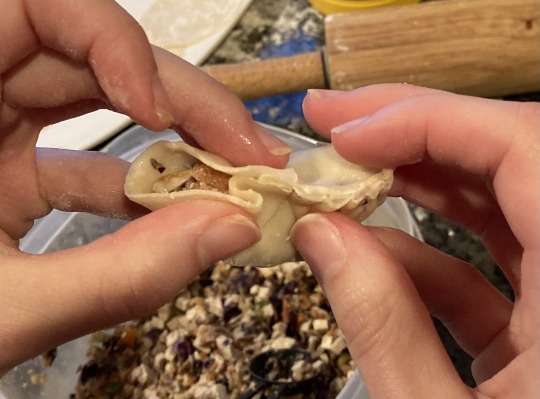
Assembling gyoza the way shown in the recipe photo takes a little bit of practice. You want to make 10-12 tiny, even folds along one edge of the gyoza--these can be facing the same direction for the length of the gyoza, or they can all face outwards from the center. These tiny folds help the dipping sauce to cling onto the gyoza (as well as looking quite nice), but if you don't want to do something so involved, you can simply fold the wrappers in half around the filling and press to seal, then fry the gyoza lying on one side. They'll still turn out delicious!
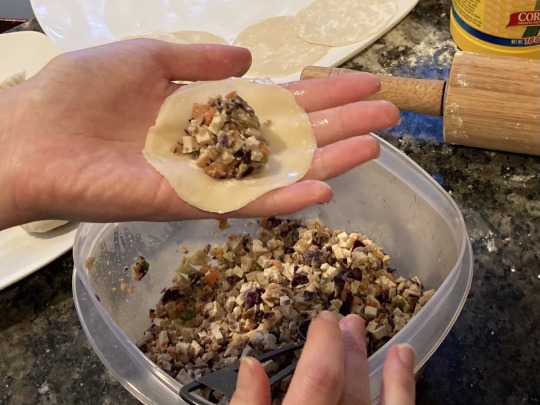
1. Take one wrapper in the palm of your non-dominant hand and place a spoonful of filling in the center. (Use less filling to give yourself more wrapper to work with if you're not experienced with shaping dumplings.) Use a finger dipped in some water to wet the edges of the wrapper--this will help to seal it closed around the filling.
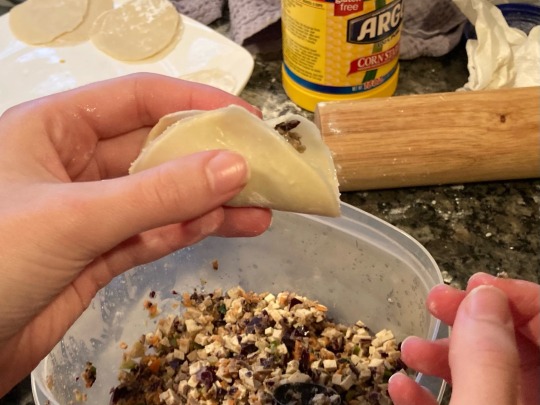
2. With your non-dominant hand, hold the gyoza so that it's roughly folded in half. To make gyoza with folds all facing the same direction: Using your dominant hand, pinch just the half of the dough closest to you into a small fold, then press it down against the half of wrapper furthest from you to seal. Continue making small folds in this manner, each one slightly overlapping the last, until the gyoza is completely sealed.
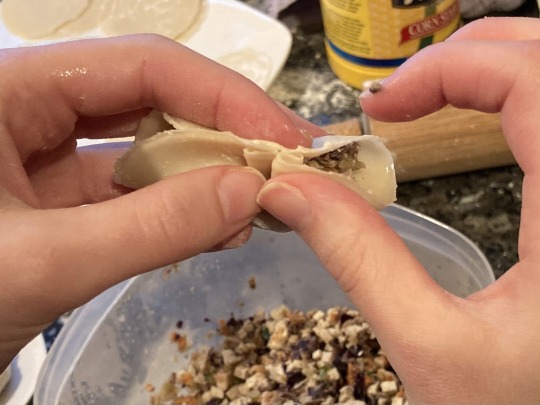
I like to make gyoza with folds facing outward from the center; to do this, first pinch the gyoza to seal it at the halfway point widthwise, then make folds as described above (pinching just the half of the dough closest to you into a small fold, then pressing it down against the half of wrapper furthest from you to seal) from the center to one edge of the semicircle Then, repeat the process from the center to the other edge, folding in the opposite direction this time.


3. Place the gyoza on a plate and cover with a kitchen towel to keep it from drying out. Continue in this way until you have formed all of the gyoza.
For the dipping sauce:
1. Combine all ingredients in a small bowl.
To cook:
1. Heat 2 tsp of a neutral oil on medium in a large skillet. Add gyoza in a single layer and allow to fry until their bottoms are lightly golden-brown.
2. Pour 2-3 Tbsp of water in the center of the pan (not over the gyoza). Immediately cover the pan to allow the gyoza to steam until slightly translucent, about 3 minutes.
3. Uncover the pan and cook until the water has completely evaporated out.
4. Drizzle toasted sesame oil over the gyoza to re-crisp the bottoms and add flavor. Cook until the bottoms of the gyoza are deeply golden brown.
Serve hot with dipping sauce.
Gyoza may be frozen and fried later. Form them and store them immediately (without frying or steaming them) with sheets of parchment paper between each layer; fry and steam them directly from frozen without thawing.
#gyoza#vegan cooking#vegan recipe#recipe#recipes#tofu#carrots#celery#mushrooms#green onions#Japanese#cooking#dumplings
148 notes
·
View notes
Text
Idia Shroud Apprentice Chef SR Personal Story [translate]

Cook stuffed bell peppers~ Part 1
Kitchen
Ghost Chef: Now I'm going to ask you to make Stuffed Peppers… Idiya-kun, have you ever cooked?
Idia: А….. That's… N-no.
Ghost Chef: Oh, are you nervous? This program is designed for newbies like you. It's okay if you fail at something!
Idia: Oh. That's the default value for me… No… it's too complicated to explain. Let's just leave it unexplained.
Ghost Chef: Idia-kun? Are you sure you want to keep this up?
Idia: …please.
Ghost Chef: First let's prepare the bell peppers. Take the biggest part. Cut it off and remove the seeds and the white part inside with your fingers. The seeds stick to the peppers and can be difficult to remove, but they are not tasty if they are left. Make sure you remove them carefully.
Idia: Rounded bell peppers on a flat cutting board. Slicing, for example… oh~, is not stable*. I'm not kidding about getting hurt over a lesson that doesn't matter. Hold it tight and… careful… careful… careful.
*cuts*
Idia: …Ugh, I was so nervous. So, next, I'm gonna remove the contents with my fingers, and… Ugh… that damp feeling, I hate it so much. ……
Ghost Chef: You have to be gentle and careful not to damage the vegetable. But there's a lot of work ahead, so don't drag it out.
Idia: What…? Which to choose, caution or swiftness! Eeek, the seeds are clinging to your hands… Ugh.
Ghost Chef: After removing the seeds, slice the bell peppers into 2 cm wide circles. Take care to cut the slices evenly so that the thickness does not vary.
Idia: … If you're so sure, why don't you consider using something other than a knife? I'm sure a beginner would make a mistake! I don't know…?
Ghost Chef: You don't have to think so hard. It's just a guide.
Idia: Oh, as long as it fits into the framework? Then say so at the beginning…
Ghost Chef: The first step is to prepare the seeds for the filling. The ingredients are placed in a bowl according to the recipe.
Idia: You will need to measure out: 1/4 cup breadcrumbs, 2 tablespoons milk, egg, salt and ground pepper… "Just a little". To your taste. A recipe that is impossible to replicate, as half the recipe is "to the taste of the cook". An incredibly vague recipe. If I really liked peppers, I think it would be a little different???
Ghost Chef: Hmmm… With this recipe, I'd say you need about 3 pinches. You just do a quick flick with your wrist 3 times on the jar and poof!
Idia: Poof! The way you flick your wrist, with what force. There are a lot of mistakes in how you flick your wrists, how much force you use, difference in physique and so on.
Ghost Chef: There are so many. I never thought I'd be asked about it.
Idia: …Ha, well, okay. If we have more free time. It's a hassle, let's just brush it off and decide as we go along…
Ghost Chef: But still, you're very inquisitive. You care a lot about details, don't you? Have you become a bit more interested in cooking?
Idia: No…? Yes, how did that happen…? It's… First of all, I'm not interested in food per se at all. In fact, I often forget to eat…
Ghost Chef: Yee!? Your family will be worried.
Idia: Well… I've tried a lot of nutrition apps. My brother does a lot more than these nutritional management apps… When I decided to take this course, I said I hoped it would spark an interest in cooking.
Ghost Chef: You're a very good brother. And what do you think of the course?
Idia: I'm really trying, but. Cooking for myself is a waste of time when eating is such a hassle. But in general, there's nothing better than a full meal.
Ghost Chef: Master-Chef fails! But look, kitchen appliances have come a long way lately! There are even pots and pans that you just put the necessary ingredients and seasonings in and they automatically cook the dish for you!
Idia: Ah… Why learn to cook from scratch when you have such a handy saucepan?
Ghost Chef: No, no, no, you still cut and measure the ingredients. You have to do all the work yourself.
Idia: Why do that? You could do more with appliances!
Ghost Chef: Really? I think cooking on your own is amazing.
Idia: If you're going to call it 'automatic cooking', at least start by preparing the ingredients and measuring out the seasonings. You put the ingredients in a saucepan, cover and wait for a while. Then all you have to do is transfer it to a plate ~ like this.
Ghost Chef: If a pot like this were actually made, we could lose our jobs.
Idia: If you want to create a kitchen appliance "Idia Incarnate"… First of all, we will definitely quantify the expression "a little". To do this, I need to collect data based on the actual cooking process. Chef, I will collect data for the production of a kitchen appliance. Can I leave the actual work to you?
Ghost Chef: That's impossible! I'm very glad you're motivated! But you have to do all the work yourself!
Cook stuffed bell peppers~ Part 2
Kitchen
Ghost Chef: Lightly sprinkle the inside of the bell peppers with flour and fill them with the seeds you have just mixed in. You can substitute other flour, but… Basically, follow the recipe as it will affect the finished product.
Idia: Ah, the same principle that interchangeable parts work well, but the original parts are better. I get it.
Ghost Chef: Original parts…? Phew, that's an expression I don't understand. Okay, now take the seeds. Make sure you put them densely and generously inside the bell peppers so there are no voids.
Idia: Hiii… The minced meat clings to my fingers oooh! Is this another pattern that can't be quantified? I have to adjust the number of seeds according to the inner diameter of the paprika. The only way to calculate the appropriate number of grams is to collect the data several times in the same operation?… haha, I have everything collected.
Ghost Chef: Then bake it. The important thing is to let the pan reach the right temperature before laying out the peppers. Don't forget to grease the pan with oil before heating. Keep the temperature on a medium level.
Idia: …What is the right temperature in the first place? How do I know if my pan has the right temperature?
Ghost Chef: Hold your hand over the frying pan. If it's warm, it's ready.
Idia: That's it, use your hands again! The boundary between warm and hot varies a lot from person to person… One thing after another. More and more data has to be collected…
Ghost Chef: I'll check it this time. Let's see… Yes, that's about the right temperature. Idia-kun, try to hold it.
Idia: How warm, how hot…? Yes, chef… I need to measure the temperature of the surface of the pan…
Ghost Chef: Hmmm, there are such devices, but… Not in our kitchen.
Idia: Well, that's to be expected… There's nothing I can do about it. Maybe I should just give up this time and get started.
*shhhh*
Idia: Hiya! Oil crackles and splatters… Eeek! Don't swoop down on me!
Ghost Chef: Idia-kun, stay with me! Put all the rest of the stuffing in the pan!
Idia: No, but there's no way I can get close when there's oil splattering around! I need protective clothing… or at least a shield! What you see there is… A lid for the pan, not for the pot! It's a starting device, but it's better than nothing! With one hand on the other, here we go!
*shhhhhh*
Idia: The mission of putting the stuffed peppers in the pan is complete. Now we can take a break…
Ghost Chef: Turn over the first one you put down or it'll burn! Get the spatula!
Idia: Hee, no time to rest!
Idia: Ha, ha… …I managed to finish…
Ghost Chef: Good job. The judges should be here by now, it's time to bring in the dish.
Cafeteria
Сater: Oh, so it was Idiah-kun who cooked for us. Kei-kun will act as your judge~♪
Idia: Eeek!
Cater: Trying food cooked by my classmates is a new experience for me. I can't wait to see the stuffed bell peppers you made, Idia!
Idia: A lot of pressure even before the food is served. Ah…・・ Here… This way, this way… That's it…
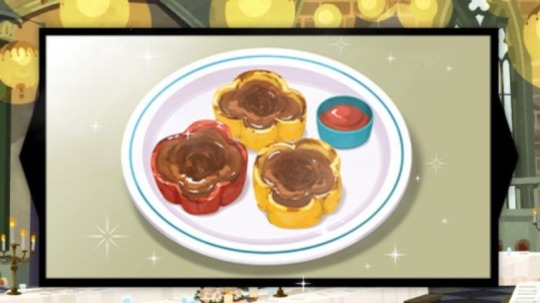
Cater: Thank you~ Wow! It looks great! Colourful and the shape is cute and floral! Can I take a quick picture before I eat it?
Idia: W-well… Uh… D-do whatever you want…
*click-click-click*
Idia: Is this, my cheesy streak spreading on the internet? It's not funny at all…
Cater: …I'm done taking pictures! Time to try it!
*chews*
Cater: …Delicious!
Idia: What? Eeek…n-not to deny that it's overcooked, and if anything, it's burnt in places, but… ?
Cater: Yes, there are some burnt areas. But all in all, it's better than an uncooked dish.
Idia: Is that a… a distraction? Or is it just that Kater-schi's taste buds have a wide area to hit…?
Ghost Chef: Good for you, Idia-kun. You have a passing grade.
Idia: Waa… At least it wasn't bad…. The course is over. It's hard not to say "Passed, program complete!"… I'll have to spend the rest of my time pondering the design of the "Idia Incarnate" cooking appliance*. Oh really, it's time to get on with it~!

*Idia means that the peppers may not stand straight. The knife may slip, or the pepper may turn the other way round, etc.
*Calambour with Idia's name and the word 'idea'
68 notes
·
View notes
Text
Master Chef SR Idia Edition “Apprentice Chef” / Personal Card Story Part 1
~Let's make stuffed peppers 1~
[WARNING: Mentions of skipping meals. I placed an * before the line in case you are uncomfortable with the topic, but still want to read the story.]
Kitchen

Chef Ghost: Well, I'll ask you to make stuffed peppers immediately, but... Idia-kun, have you ever cooked before?
Idia: Eh... I...... I... (whispering) I haven't..
Chef Ghost: Oho, are you nervous? This program contains stuff for beginners like you. No need to have your guard up!
Idia: Th-this is my default.....
(whispering) No, it's a bother to explain, so I'll just leave it as a misunderstanding.
Chef Ghost: Idia-kun? Would it be fine to continue on like this?
Idia: .....Yeah.
Chef Ghost: First, let's prep the bell peppers. Cut off the ends, then using your fingers, remove the seeds and the white part.
It's really sticky and difficult to remove, but if you leave it there, it will taste bad. Make sure you remove them properly.
Idia: Slicing a round bell pepper on a flat cutting board... Ughhh, it's not steady.
It isn't funny that I might get an injury because of a class I don't care about. I have to hold it tightly... And, carefully.... Carefully...
TAP!
Idia: Phew... That was nerve-wracking. So, next is removing the insides using my fingers... Ughh, I really don't like this soggy feeling...
Chef Ghost: Be gentle and careful to not damage the bell pepper. But, there's still a lot of work to do, so don't spend too long on it
Idia: Wh-which one.....!? Do I be careful or quick!? These seeds sticking to my hands... is the worst..
Chef Ghost: After removing the seeds, slice the bell peppers into 2 cm wide, round slices.
Make sure the pieces are cut evenly so that the thicknesses are not inconsistent.
Idia: If you're going to keep on pushing me like that, shouldn't you consider using a method that doesn't involve a kitchen knife!?
Chef Ghost: You don't have to think too hard about this. It's just for reference.
Idia: Ah, so it's fine as long as it's within the default range? Then, you should've said so in the first place.

Chef Ghost: Next is to make the seeds that will be stuffed inside. And then, you put the ingredients in the bowl according to the amount written on the recipe.
Idia: The items that need to be measured are... 1/4 cup of breadcrumbs, 2 tablespoons of milk, eggs, salt, and powdered pepper... “A little”?
There it is... “A little”. That unreproducible instruction that was left by the creator based on their knowledge and preferences.
It's seriously confusing. For example, if I liked pepper, I would've probably changed my mind about “a little” seasoning???
Chef Ghost: That's right~ With this recipe, I'd say to use about three shakes of the small bottle. Lightly shake your wrist, then pa-pa-pa it around.
Idia: Onomatopoeic sounds!? Eh, but with the amount of force applied when you snap it with the wrist, the differences in physique, and more would cause tons of calculation errors.
Chef Ghost: I-I never thought I would be asked so many questions.
Idia: ...Haa, well, never mind. It would be a hassle to deal with this any longer, so I'll just shake it to whatever I like.
Chef Ghost: But still, you sure pay attention to even the smallest details. Are you getting a little more interested in cooking?
* Idia: No......? Eh, how did that happened...?
In.... In the first place, I really have no interest in food itself. In fact, I often forget to eat.....
Chef Ghost: Ehhh!? But your family will be worried!
Idia: Well.... What's done is done, yes.. My younger brother somehow packs way stronger stuff than those nutritional management apps.
When I decided to take this class, he told me: “I hope this would be a chance for you to get interested in cooking.”
Chef Ghost: You have a good younger brother, huh. So, how was the experience with this course?
Idia: I understood even more stuff again after actually working here. Cooking for myself is super inefficient.
It's already a lot of pain to just eat, but if you cook for yourself, you won't have enough time to do it, and nothing beats a completely nutritional diet.

Chef Ghost: M-Master Chef is backfiring!? But, you see, cooking appliances have evolved quite a lot these days!
There are even pots that automatically cook the food for you if you put the necessary ingredients and seasonings in it!
Idia: Eh..... With a convenient pot like that, wouldn't it be unnecessary to learn how to cook from scratch?
Chef Ghost: No, no, you would still have to do the work of cutting the ingredients and measuring the seasoning by yourself.
Idia: Why is that part still an analog!? You can do better with home appliances!
Chef Ghost: Really? I think it's pretty amazing.
Idia: If it's called “automatic cooking”, I'd like it to at least do the food prep and measurements of the seasoning.
Something like just putting the ingredients in the pot, covering it with a lid, waiting for a while, then serving it on a plate.
Chef Ghost: If such a pot really existed, we might lose our jobs.
Idia: If I were to hypothetically make an “Idia Shroud-style cooking machine”..... I'll definitely quantify the “a little” term first.
And to do that, we would need to collect data based on the actual cooking process.
If I'm going to make it, I want to replicate a taste made by a pro.
Chef, I'm going to collect data for the production of the cooking machine, can I leave the actual work to you?
Chef Ghost: No, of course not! It's fine that you're motivated now, but make sure you finish it properly by yourself until the end!
TO BE CONTINUED...
translation note:
i used 'bell peppers' instead of 'paprika', which is written in the original text, because it パプリカ is used for both the fruit and the spice. here, they are using the fruit instead.
67 notes
·
View notes
Text
OC Recipe Tag
Oh wow, this is the best tag ever. Thank you @pheita (tag here)💜 I'll tag: @i-can-even-burn-salad (fully aware of the irony) @acertainmoshke @winterandwords @talesofsorrowandofruin @kittensartswriting @flock-from-the-void @cee-grice and leave an open tag.
Rules: share a recipe your OC would make, either one passed down to them or one they found all by themselves. Bonus if you have an actual recipe to link! Some OCs can't cook to save their lives, but let's talk about the ones who can! :D
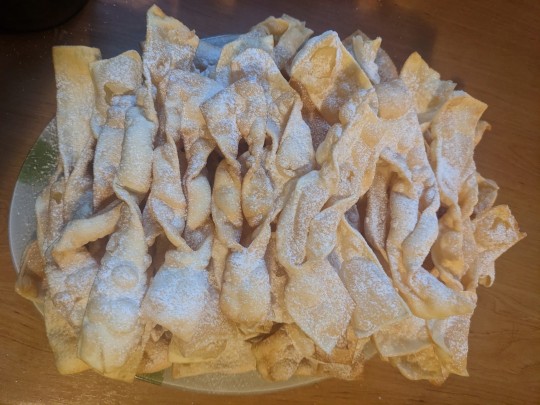
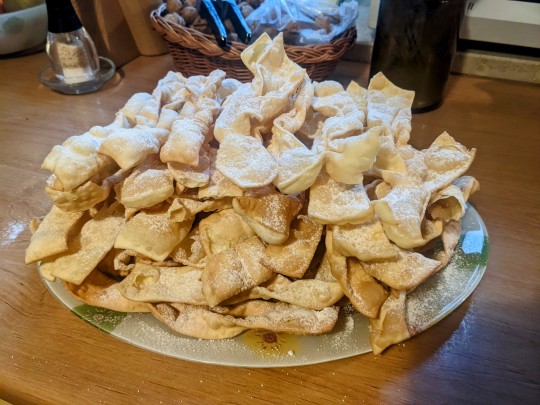
Ok, ok. Lissan can cook, and he'd probably make a simple apple pie. Gullin can't so his recipe would be a hardboiled egg (burnt). However, I really want to share a recipe for the cakes Ianim's cooks prepared. I call them brushwood cakes, but I think they're sometimes known as angel wings.
Here's the description from Gifts of Fate:
Ianim had, however, brought them a box of brushwood cakes to lift their spirits — something they didn’t have a chance to dig into last night. The cakes were delicious, so much finer than the ones offered at the winter fairs back in Aritia, and much, much sweeter, but not as aromatic. Ianim noticed Lissan’s confusion, and quickly explained that they were sweetened with beet sugar, not honey. Lissan gulped at how offhandedly he’d said it.
Ingredients:
5 egg yolks
340g extra fine flour
2 tablespoons sour cream
1 tablespoon 95-97% spirit (as pure alcohol as you can get)
1 tablespoon white caster sugar
1 pinch salt
lard for frying
icing sugar for dusting
Method:
Sift the flour, mix with sugar and salt. Add the wet ingredients and knead until combined.
Roll out the dough, fold in thirds, beat with the rolling pin, roll, fold again, for 45 minutes or so. You want to repeat the process about 20 times, and the dough will be hard to roll. If you have a pasta roller, it speeds things up a lot. Finally roll it out to be about 1 mm thick - the thinner the better.
Cut into strips 12 x 4 cm, and cut a slit in the middle. Fold through the slit.
Melt the lard in a large, shallow pan, to be 2 cm deep. When dropped in, the cakes should puff up and turn golden, but not brown. It takes less than a minute on each side. Fish them out with a metal skimmer and put on a tea towel to soak up the excess oil.
Dust with icing sugar.
13 notes
·
View notes
Text
🎀 lolita sales post 🎀
A little mix of styles, I'll post below the cut. I'm open to offers and whatever doesn't sell I'll probably list to lacemarket? Prices in usd, I will provide photos to anyone interested! I just didn't want to go through the hassle of photographing everything. I'll state the condition and notes I have on each piece~ everything has been purchased secondhand.
I've linked lolibrary entries for sizing and release info. Feel free to make offers!!! I based my prices from quick searches on other sites, but I'm flexible. Depending on the item and country I would estimate 20-40$ shipping (im in canada)
I dont really have formal feedback for selling clothes anymore since I haven't in forever, but I do have an online shop where I sell art prints, so I have experience selling things online and whatnot.


Metamorphose Sailor Short Sleeve OP in ivory (2011) - $100
Missing bow (left photo), but still has the tie (like right photo) this dress is so lightweight and perfect for summer, I just don't like how the sleeves fit on my arms. No noticeable damage. I washed it but i havent worn it out!


Btssb Tartan Check Jacket in green (2005) - $180
No damage, only tried on by me. Another wonderful piece but too tight in the arms for me. It's soft, but polyester. I'm honestly so sad about letting this piece go I adore it, but I need to stop holding onto things I won't wear!


Btssb Ribbon Sherbet Skirt in pink (2010) - $40
Really adorable skirt, it's shorter and perfect for casual wear. You can't tell in the stock photos, but the fabric is woven with glitter! Again, washed but I haven't worn it besides trying on.


Aatp Sylvester vest (2011 or 2013) - $80
I think its the women's size, as there is so spider tag. I had forgotten and then realized upon inspecting while writing this that one of the back panel buttons had come off and I must have stored it somewhere to keep safe. I'll look for it (I know I have it somewhere lol) on the offchance I can't find it though I will discount accordingly. Worn by me and washed, there is no other noticeable damage.


Aatp Justin pants in red (2018) - $100
Only tried on by me- I'm going to keep it real with you I'm just too bottom heavy. The waist is full of room but the leg measurement (in average clothing sizing proportion) is really small. I don't understand why they would add so much extra room in the waist and not make the thighs adjustable at all. The sizing doesn't match up with the lolibrary entry, the waist can stretch up to 90cm, and is about 76cm not stretched... the inside measurement of the leg cuff is maybe 46 cm (the fabric is thick so measures 50 on the outside if that makes sense) when wearing this, the top of the waistband was floating around but made a sharp ^ down the back, these shorts will not be flattering if you have wider hips. All of that said they are really beautiful, I adore the fabric, but the lolibrary entry is very misleading!
---
I've run out room for photos in this post and need to locate the second blouse, but I have 2 white bodyline blouses and the strawberry gingham skirt I might bundle all together for idk 50$? I'll have to find them all first, but in case anyone is interested.
---
Other pieces I've been going back and forth on selling are:
victorian maiden velveteen frill bustier in wine (2002)
Metamorphose velveteen high waist ribbon jsk in red (2004) (missing detachable bust panel)
But tbh I can't come up with a reasonable price I'd be willing to sell them at. On the off chance they are someone's #1 dream items and you'd like to make an offer I am open for it but I might turn it down. I would be open to trades for similar items too though! Such as another vm bustier or old meta velveteen op/jsk of the era.
21 notes
·
View notes
Text
Castys Ref Sheet
As a bitch who can’t draw more than stick figures and has to rely on picrews to make my characters, I thought it would be nice to have a place that will at least tell people exactly what my characters look like. Really I just want to talk about Castys because I have A Disease but whatever. I’ll do ones for my other characters at some point, and feel free to use the template if you want idc
Race: Fantasy Latino, specifically Venezuelan, I think
Height: 5′8″ (173 cm) and a little sensitive about it
Skin: Brown. I’ll have more about the exact shade down with the picrew shit. Since he’s stuck being 19 forever, he’s always dealing with acne and usually has at least a few pimples at any given time. He never moisturizes or anything, so the skin on his hands and feet is calloused, rough, and often dry.
Eyes: Dark brown, almost black. No flecks of gold or anything, just very plain. They’re usually half-lidded unless he’s really excited about something (or in a lot of pain)
Hair: Dark brown and thick in texture. It has a bit of curl to it and will stick up on its own if he doesn’t pat it down, which he doesn’t always do. He likes it pretty short, partially covering his ears and a little down the back of his neck, and if it gets too long he’ll become very annoyed with it. It always looks sort of messy, partially because it’s Like That and partially because he prefers it look like that. His arms and legs are hairy, and he has a tiny bit of hair on his chest as well.
Birthmarks/Scars: No birthmarks, but his body is littered with various smaller scars. He has 3 larger ones that are of note: a gash on his right cheek, a gnarled slash across his stomach, and the remnants of a clean stab wound directly above his heart. He stopped getting new scars after he received those. The scar on his cheek makes it so he can’t smile all the way on the right, so his grins always end up lopsided. They pulse with pain from time to time, his stomach being the worst, but if he’s currently dealing with some other torture as I am inclined to show him, he doesn’t pay it much mind.
Clothes: I don’t have anything too specific here, but he generally prefers comfortable clothes that are durable and easy to move around in. He prefers to wear sturdy boots since he does a lot of walking and whatnot, and when he’s pirating he wears a long brown or red coat. He often wears a red bandana on his head. Unless it’s particularly cold, he sleeps in his underwear.
Hygiene: No. Well, actually, he at least takes care of his teeth, if only because if he doesn’t it fucking hurts. He runs his hands through his hair often enough that it doesn’t get matted, but he never explicitly brushes it (and if he’s being forced to grow his hair out by a whumper, he tries his best to make it a tangled mess so they’ll want to cut it off (so you’d just need to brush it for him ❤️)). He doesn’t bathe unless someone tells him to or he’s covered in blood, and normally smells like Sweaty Guy with a dash of dirt or saltwater depending on where he is. In modern AUs he at least showers a socially acceptable amount so there’s that.
Piercings/Tattoos: Only thing is he sometimes has a black stud in his right earlobe. It has a magnet attached to it, which he can use to retrieve a needle from under his skin to pick locks with (don’t @ me about how realistic this is I just think it’s fun ty💕). He could have tattoos if he wanted, since dying wouldn’t get rid of the ink under his skin, but that’s just not his vibe.
Picrews for some visuals (1) (2)

I think this is the best one in a lot of ways. The hair style and color are perfect, and the skintone is right, too. The only problem is the scar is on the wrong side :( it’s on his right, so it’s on the left if you’re looking at him

Very good as far as clothes. That is the exact way he wears his bandana and those are great boots for him. The general vibes of the other clothes are good too. And the face scar is correct!
Mmkay that’s all I can think of so conga rats if you made it this far 🐀🐀🐀🐀🐀
#castys#excuse to just ramble about castys and all the things no one ever wanted to know about him#my stupid man#always be having Thoughts about him#i just now realized i never said anything about his nose but i have no clue man#whatever latino noses look like he has that#now you can have a perfect mental image of...this thing#idk i just wanted to make this so here you go enjoy or something
25 notes
·
View notes
Photo
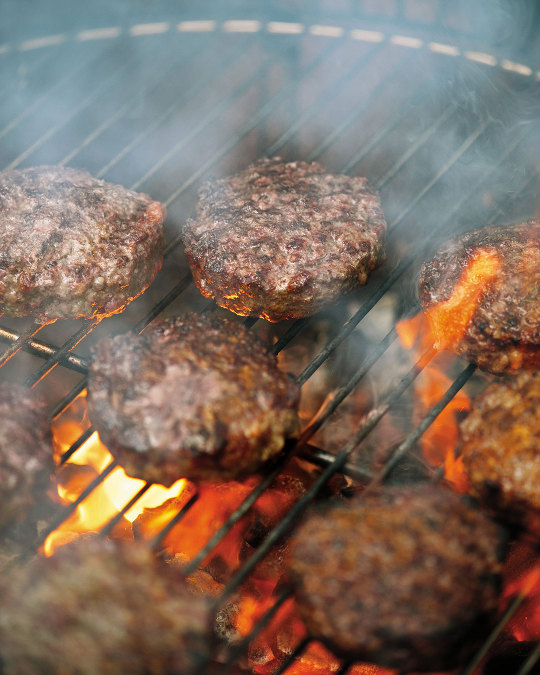
RECIPE: The Flame-Grilled Burger (from The Great American Burger Book (Updated and Expanded Edition))
Cooking over direct flame is one of the most difficult ways to make a hamburger. One of the reasons so many of the hamburgers made a hundred years ago were cooked on flat tops was simply because the results were predictably good. Squash a ball of beef on a skillet and reap the rewards of the path of least resistance. I also would imagine that way back then, lighting a big charcoal grill and flame cooking at small burger stands and joints throughout America would have been pretty dangerous. But we all know that a burger cooked on a flame grill is a very different burger.
It’s easy to master the skillet-cooked burger. Grilling a burger on open flame requires more dedication to the craft, more time, more equipment, and a willingness to fail. That’s because cooking on an outdoor grill can be very unpredictable. The grill master is at the mercy of uneven temperatures, depending on the type of coals used and where those coals are in relation to the grilling grate. Even the weather can be a factor. The outdoor propane grill solves a few of these issues, but if you really want to experience a flame-cooked burger, super-hot charcoal is the only way to go.
There’s something fundamental and primal in our desire to harness fire and grill. “The greatest advantage to cooking over flame is the grilled flavor,” Michael Ollier, corporate chef at Certified Angus Beef®, told me once, adding with a smile, “I crave that.” It’s a flavor that you cannot ever achieve cooking on a flat top or by any other method. Chef Ollier explained the science behind this perfectly: “The fat that drips onto the coals becomes airborne, flavoring your burgers.”
The keys to grilling success are high heat and confidence. Get your coals super hot and your tools, patties, and condiments ready to go, and you’ll be all set up to grill like a pro. When family and friends are hovering around you at the grill, waiting for magic, it may feel like there’s a lot at stake. Just follow the recipe below for the classic grilled cheeseburger—and remember, practice makes perfect.
Makes 8 burgers
Equipment
A 3½-inch (9-cm) food ring or round cutter
Parchment paper
A charcoal chimney
Charcoal briquettes or lump charcoal
A charcoal kettle grill, hibachi, or similar
A stiff spatula (with a long handle)
The Burger
2½ pounds (about 1 kg) fresh-ground 80/20 chuck
Salt and coarse black pepper, for seasoning
8 soft white buns
The Toppings
8 thick slices American, cheddar, or any other good melting cheese
Green-leaf lettuce
1 or 2 red beefsteak tomatoes, sliced
1 medium Vidalia or Walla Walla onion, sliced
Divide the beef into 8 equal portions (5 ounces/140 g each).
Place the food ring on a cutting board or clean surface lined with parchment paper and add a portion of beef. Gently press the beef into the ring to create a perfectly round patty. (I use the ring for consistent thickness, but you can eyeball the size if you prefer. Both methods work fine. Just be sure not to over-press the meat—you want it to maintain a somewhat loose grind.)
Return the patties to the fridge to chill until you’re ready to grill (hey, that rhymes).
Using the chimney starter, light the charcoal. When coals are ready, transfer them to the grill, making sure that the bottom vent is open. Spread the coals out, leaving a small space on one side (as a rest spot in case things get too hot in there).
Place the grate over the coals and, using a grill brush, scrape off any residual buildup from your last grilling adventure. Cover the grill and make sure that the top vent is wide open. Give your grill grate a chance to heat up—you don’t want to plop raw burger patties onto a lukewarm grill. That grate should be ridiculously hot!
At this point, and not before, season both sides of your patties with a liberal amount of salt and pepper. Salting too early will bind the muscle fibers together and make your burgers tough (yuck).
Place the patties on the hot grill grate, cover the grill, and leave them alone. Allow the patties to cook for about 5 minutes. The cooking time can vary depending on environmental and equipment factors, so you’ll have to use your best judgment here. Chef Michael Ollier from Certified Angus Beef put it best when he told me, “Let the burger speak to you.” If you understand this statement, you’re probably drinking too much at the grill. But seriously, with experience comes wisdom—the burger will actually tell you when it’s time to flip. One good visual cue is when you see red liquid start to form on the uncooked surface of the burger. Go ahead and take a peek just shy of 5 minutes.
This would be a good time to toast your buns. Toast them indoors using a skillet on your stovetop, or toast them with butter in a small cast-iron skillet, directly on the colder side of the grill.
Cook the second side (again, untouched and covered) for an additional 4 minutes. With about 1 minute to go, top each patty with a slice of cheese and cover the grill. As the burgers finish cooking, slide them to the cooler rest spot section of the grill, away from the hot coals. Once all your burgers are done, remove them from the heat and allow them to rest for 1½ minutes. The internal temperature of the burgers should be about 143°F (62°C) for medium-rare.
Top the toasted buns with the lettuce, tomato, and onion slices, or your condiments of choice. (I love a good, crisp slice of onion on my grilled burgers, as well as mustard, pickle, and sometimes mayonnaise.) Transfer the patties to the toasted buns and serve.
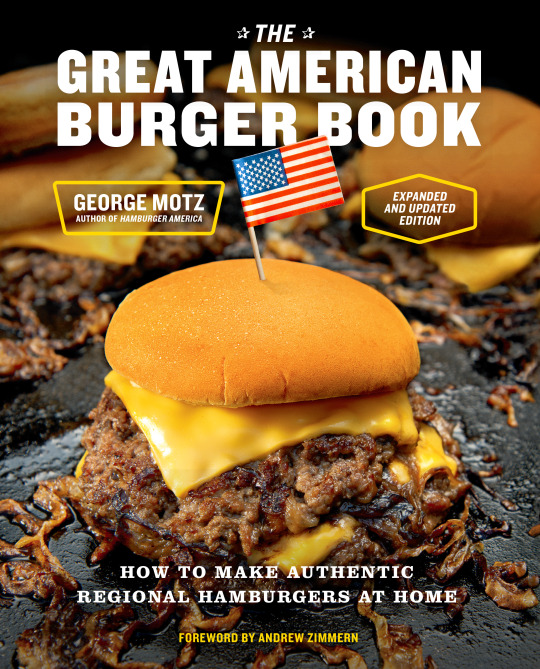
The definitive guide to creating the most mouthwatering hamburgers by America’s leading burger expert—expanded and updated with new and improved recipes
The Great American Burger Book was the first book to showcase a wide range of regional burger styles and cooking methods. In this new, expanded edition, author and burger expert George Motz covers traditional grilling techniques as well as how to smoke, steam, poach, smash, and deep-fry burgers based on signature recipes from around the country.
Each chapter is dedicated to a specific regional burger, and includes the history of the method and details on how to create your own piece of American food history right at home. Written by Motz, the author of Hamburger America and hailed by the New York Times as a “leading authority” on hamburgers, The Great American Burger Book is a regional tour of America’s best burgers.
Recipes feature regional burgers from California, Connecticut, Florida, Hawaii, Illinois, Indiana, Iowa, Kansas, Massachusetts, Michigan, Minnesota, Mississippi, Missouri, Montana, Nebraska, New Jersey, New Mexico, New York, North Carolina, Ohio, Oklahoma, Pennsylvania, South Carolina, Tennessee, Texas, Utah, and Wisconsin. International locations include: Australia, Brazil, Denmark, Malaysia, and Turkey.
These mouthwatering recipes include Connecticut’s Steamed Cheeseburger, The Tortilla Burger of New Mexico, Iowa’s Loosemeat Sandwich, Houston’s Smoked Burger, Pennsylvania’s The Fluff Screamer, and Sheboygan's Brat Burger.
This is a book for anyone who loves a great burger, unique or classic. And who doesn’t love a great burger?
For more information, click here.
#abramsbooks#abrams books#the great american burger book#great american burger book#american burger book#george motz#motz burger#burger#burgers#burger recipe#grilling season#summer grilling#flame grilled burger
21 notes
·
View notes
Text
Everytime I come across nsfw Scout content, I just can't stop wishing it were me doing him ( > 〰 < )・°☆ I love the fact that he's predominantly taking a submissive role in a lot of them, it fills my domme soul with so much joy (❀´ ˘ `❀)✨
Including the sfw Scout stuff where he's being all lovey dovey <3 There's been several times where I've audibly shouted at characters to move out of the way 'cause I wanted to be them so badly (ᗒᗜᗕ)՛̵̖
And there's this one gif I stumbled upon where Scout's getting milked by his Robo-self and it gave me such a good smut idea!
For once in my life, I'm jealous of a bot (・_・、)
🍓 Rambles about the current smutshots I'm working on below cut 🐰
Right now, I'm writing between two different fics.
One where Scout has a small and thick dick and the reader has a preference for it (very self indulgent because I love small penises so much, they're so perfect to me ♡⋆˙), and by small, I'm thinking of him being 8 cm when flaccid and 11.5 cm when erect?
Another one which includes some penis-to-vagina scissioring and a relatively bratty Scout.
I think the former would be easier to write, but there's some dialogue before the sex itself that might take a while since I'm trying to 1) get Scout's characterization and accent right, and 2) make the conversation flow naturally. Because I have a pet peeve for sentences that don't sound right, and I'm trying to work on fixing my wordiness!
Technically, the same goes for the latter but we get into the sex much earlier in that. Sooo, we'll see which one I end up finishing!
Also, I'm getting a little busier again so I might take a while (ㅠ﹏ㅠ)
16 notes
·
View notes
Text
Eccles Cakes Recipe
According to Nina, who runs the café "Give me Coffee or Give Me Death" from "Good Omens" (season 2), Eccles cakes are good to calm someone down.
On Wikipedia, you can read:
"The Eccles cake is named after the English town of Eccles, which is in the historic county of Lancashire."
On the website of the BBC, I found the recipe quoted down below and I want to try that soon, in a vegan version.
Vegan option for this recipe:
1. buy vegan puff pastry (or make it yourself, if you have a recipe)
2. Instead of butter, use a vegan substitute, for instance margerine
3. Instead of milk, use oat milk or another plant-based drink
https://www.bbc.co.uk/food/recipes/eccles_cakes_72475
Eccles Cake Recipe
Ingredients
For the filling
75g/3oz unsalted butter
150g/5oz soft brown sugar
150g/5oz currants
1 tsp ground cinnamon
½ tsp freshly ground nutmeg
1 orange, juice and finely grated zest
50g/2oz candied peel
For the pastry
25-50g/1-2oz margarine, for greasing
1 block ready-made puff pastry
flour, for dusting
2-3 tbsp milk, for glazing
caster sugar, for dusting
icing sugar, for dusting
Method
For the filling, melt the butter over a low heat in a small saucepan. Once melted, remove from the heat and stir in all of the remaining filling ingredients until well combined. Set aside to cool.
Preheat the oven to 220C/425F/Gas 7. Grease a baking tray with the margarine.
For the pastry, roll out the pastry on a lightly floured work surface to a thickness of about 3mm/⅛in. Using a 6cm/2½in cutter, cut the pastry into rounds.
Place a teaspoon of the filling in the middle of each round, then brush the edges of half the pastry with milk. Bring the other half of the pastry over and seal. Bring the corners of the pastry up into the middle and pinch to seal.
Turn thr sealed pastry parcel over, so that the seam is underneath, then gently roll out until it is about ½cm/¼in thick. Gently pat back into a round shape and place onto the greased baking tray.
Slash each cake across three times using the tip of a sharp knife. Brush the cakes with milk and sprinkle with caster sugar.
Bake for 15 minutes, or until the pastry is golden-brown and puffed up. Transfer the cakes to a wire rack to cool.
Dust the eccles cakes with icing sugar before serving.
6 notes
·
View notes
Text
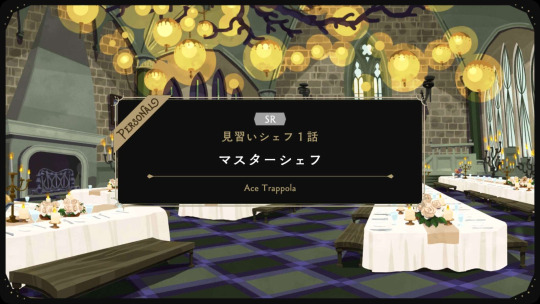
SR Ace Trappola Apprentice Chef Personal Story: Part 1
"Master Chef"
Part 1 (Part 2)
[Cafeteria – Judging Venue]
Master Chef ― Ace Version
~ Let’s Make Minestrone 1~
―A little while before cooking starts.
Ace: Welp, here goes Master Chef. It's a bit of a pain, but I'll just bang out this class as fast as I can.
Idia: Sheesh, he was all smiles during the greetings, but now he's completely changed… I can't understand these kinds of folk with their absurd communication skills…
Ace: Hm? Did you say something? Why the long face, Idia-senpai?
Idia: Eeek!? N-N-N-No, uh… N-Nothing… It's just…
Idia: J-Just that you look real confident… But does anything in the world really go that smoothly, I wonder?
Ace: It'll be fine. It's a program aimed towards amateurs, so it's not gonna be anything too difficult!
Ghost Chef: Alright, you two, we're about to start. Ace-kun, Idia-kun, start heading towards the kitchen.
Ace: Okaaay! Thanks for taking us under your wing!

[Kitchen]
Ghost Chef: Now, we're going to have you make a Minestrone, Ace-kun.
Ghost Chef: We have in stock some thick and tasty looking bell peppers today, so let's try to put more in the soup than normal.
Ace: A minestrone, huh… Sure, sure, that's that tomato-flavored soup that we sometimes get on our lunch plates.
Ace: That's got a ton of ingredients, sounds like it'll be a hassle. Is this really something a beginner like me should be doing?
Ghost Chef: Hahah, no need to act up. All you'll have to do is cut up the ingredients and let them simmer.
Ace: Really? That's it? Whaaaat, that's so easy!
Ghost Chef: But, like you said, there are a ton of ingredients, so you'll need to put in a little bit of effort.
Ghost Chef: Alright, let's start with cutting this bell pepper in half lengthwise. Once you've taken out all the seeds, cut it up into smaller pieces.
Ace: Okaaay. How small are you wanting it?
Ghost Chef: For this dish, we want the bell pepper to be the main ingredient, so it should be a bit bigger than the other ingredients… Maybe about 2cm squares.
Ace: 2 cm squares, huh. Gotcha.
[chop, chop, chop, chop, chop…]
Ghost Chef: Good, good, not bad. They're all really close in sizes, and you're handling that knife well.
Ace: Heheh, thaaaanks. I haven't really used knives that much, but I've watched the upperclassmen use them back in the dorm all the time.
Ghost Chef: Ah, right, you're a Heartslabyul student. Do you often help out with making their pastries?
Ace: Yeah, sometimes I get stuck with that duty. But usually I'm just helping out the upperclassmen, so I don't know how to do anything too difficult.
Ghost Chef: I see, so you learned this from watching them. You must have been really skilled to be able to pick these abilities just by watching.
Ace: Thanks! But hey, this is pretty easy, so.
Ghost Chef: Haha, well, that's promising to hear. Then, I'll bring over the other ingredients, so go ahead and chop up the remaining bell peppers for me.
Ace: Okaaaay ♪
Ace: …Whew. Just like I thought, it's not that hard at all.
Ace: Doo-doo ♪ Master Chef is the bestest~ ♪
Ghost Chef: Oh my, aren't you in a good mood? Have you finished cutting up the bell peppers?
Ace: Ah, I'm almost done…
Ace: EH!!?
[THUD]
Ace: Ch-Chef… What's with this crateful of veggies…? You're not saying that I'm gonna be using all of these now―
Ghost Chef: Ahahah, well, of course there isn't a pot out there in the universe that can hold this much.
Ace: Ahahah, riiiight! Whew, that scared me…
Ghost Chef: Well, in the end, I'll have you go through everything here. But for now, I think you only need this many onions, and…
[THUD]
Ghost Chef: This should be enough for one dish.
Ace: JUST ONE DISH!? AND YOU'RE TELLING ME I'M GONNA BE CHOPPING UP THE REST OF THE VEGGIES AFTER THIS, TOO?!
Ghost Chef: That's right~ Soup is a popular dish, both by itself, and as part of a set, so we'll need a lot of ingredients.
Ghost Chef: We're not only going to be making the minestrone in this pot, but in a few others as well, so we'll have you prepare it all!
Ace: You serious…? Sure, it's just cutting up veggies, but still, this amount is just…
Ghost Chef: Oh come now, you're so skilled, Ace-kun, so I'm sure it will end swiftly! Now here, start peeling these onions!
Ace: Yessir…
Ace: ...I take back what I said earlier. SURE IT AIN'T DIFFICULT, BUT THERE'S JUST WAY TOO MUCH TO DO!!!!!
Part 1 (Part 2)
Requested by Anonymous.
#twisted wonderland#twst#ace trappola#idia shroud#twst ace#twst idia#twst translation#twst masterchef
71 notes
·
View notes
Text

Bought pasta attachments for my mixer out of a birthday gift card from my brother. Decided to give them their first try today.
Originally I'd thawed out some ground pork with the tentative idea of making some sort of ravioli or dumpling or little pies. But as I started making the filling (sauted the pork with rosemary, thyme, and garlic) I decided I should probably be a touch less ambitious for a first project, and just make plain noodles. So I made fettuccine instead. It was about equal parts annoying (even after much flattening with a rolling pin the dough quarters didn't want to make their first pass through the rollers easily), and satisfying (the dough got so long and thin - and cut into noodles so nicely). The dough strips ended up a couple feet long, so the noodles did as well.
Added some canned diced tomatoes to the ground pork and let it cook down for a meat sauce, and had the noodles topped with that and some chopped green onion and parmesan. Since I only cooked half the noodles I made, the other half has gone into the freezer for a future meal.
Dough recipe below cut.
The dough recipe I used called for 3 1/2 cups sifted all purpose flour, 1/2 teaspoon salt, 4 large eggs (beaten), and 2 tablespoons of water. Mix first with the flat paddle for a couple of minutes, then with the dough hook for same. If it's a little too dry to adhere to itself properly, add some more water by the 1/2 tablespoon (I had to do so). Knead briefly and form into a smooth ball. Cover and let rest for half an hour, then cut in quarters, form into rounds, flatten the rounds until 1/4" (0.5 cm) thick, run them through the roller attachments 3-4 times each on the widest setting, then again on about half that thickness (and again on a smaller setting if you want extra thin noodles), then run through the cutter attachment to make your noodles. At which point you can either hang them on a pasta drying rack (which I neglected to buy) or form them into nests, and let dry for a bit before cooking them. I just put the four mounds of noodles on a cooling rack to allow air to circulate around them. Depending on the thickness and shape of the noodles it'll need 3 to 7 minutes of boiling to cook.

5 notes
·
View notes
Text
Root Celery Schnitzel
You need:
1 root celery
2-4 eggs, depending on their size and the size of the celery
Breadcrumbs
Some cooking oil or butter schmalz/ghee
Salt, pepper, smoked paprika, ground garlic (or literally any kind of spice you expect to pair well with celery. Mum swears on ras el hanout for example)
How to proceed:
Gently scrub the celery and peel it. You can keep the peels and collect them to make stock later if you want.
Cut it into thin slices. I have the benefit of an old-fashioned, crank-powered bread cutting machine so I could get very even slices of around 4 mm thickness. You can cut them thicker but I recommend trying to stay below 1 cm/thumb thickness because that would take lots longer to cook through.
Next step is to throw the slices into a large pot with boiling water (if you have a kettle heat it there to speed up the process), and cook them for about 5-10 minutes until the slices are soft.
Take out and spread on some kitchen cloth to dry and cool them. The celery boiling water can be used for making stock with the peels from step 1, or you let it cool down and water your plants with it.
While the slices cool down, beat the eggs and mix them with the spices on a wide, flat plate. Pour breadcrumbs on a second large plate.
Once the slices have cooled down, heat some fat in a frying pan and take the slices one by one, cover them with the seasoned egg mix, let the egg drip off a bit and bread the slice evenly from both sides, then put the slices in the pan and flip once they are golden brown, brown from the other side and you're done.
Tip:
If you don't feel like breading and frying all celery slices at once, you can store them in an airtight container in the fridge for a few days. I haven't tried freezing them though.^^
You can also cut the slices are bit thicker, cut a pocket into them and shove some cheese inside for cordon bleu-style celery.
16 notes
·
View notes
Note
hi! i love your aftg hardcovers and was wondering how you made them? thank you <3
Hey! Thank you! Sorry for answering so late but I was away and then a bit busy.
So about the hardcovers! Did I have the skills to do that? No. But I'm a gay and I believed I could and so can you. I also tried it out first on my copy of 50 Shades bc I didn't care. I also used whatever I had on hand, so it ended up being relatively cheap. It takes time but it's worth it.

So here's how I went about it:
1. Watch these tiktoks, they're the basis of the whole thing:
https://vm.tiktok.com/ZMLtrgU3D/
https://vm.tiktok.com/ZMLtrXue5/
2. Find supplies:
some hard cardboard (I used the back of sketching notebooks but you don't have to be as cheap as me. It justs needs to be thick enough to not bend or break easily)
Thick but bendable paper
cloth in 3 colours (or 1 if that's easier or you want them to look more alike. I'm not your boss. I used cotton for most of them but 3 things matter: the cloth shouldn't absorb the paint too much (test it! Including how it reacts with the tape you'll use for the stencil), it should be easy to glue to your cardboard pieces and when you fold it on itself (for the corners) it shouldn't be too thick.)
Paint (I used fabric paint for the white but otherwise 2 coats of acrylic should work fine)
For the stencil: some masking tape and an exacto knife.
Glue
3. The first step is exactly like the first tiktok. They explain it pretty well. I also had to deal with a severely bent spine for TRK and TKM but I was able to fix the paperbacks first. But if you follow that step for the three books, you should end up with the core of the cover.
4. You can follow the second tiktok if you wish (cloth/faux leather and thick paper on which you could potentially print the design) but I prefer the look of cloth. Cut the piece of cloth about 2 cm around the book cover.
5. Glue the cloth to the spine. Wait for it to dry a bit, then glue the rest. Make sure it's flat with no air bubbles. Wait for it to dry.
6. Cut the corner of the excess cloth and leave about 2mm so you don't have a gap in the coverage. Glue the up and down excess fabric on the inside of the cover. Make sure it's flat. Let dry.
7. Tuck in the little excess on the side. The video explains it for paper but it's the same thing. Then glue the borders. As always, make sure it's flat and let dry. I had to use pegs for some of them but not all, it helps make sure it stays flat while it dries.
8. The border. I protected the cloth with masking tape and, after delimitating an outline (1.5 cm from the top and bottom and 9 mm from the sides for the covers, 1cm top and bottom and 2-3 cm sides for the covers) delicately cut out a 2mm line all around.
9. Paint your line. Sponge and paint. Make sure your tape is properly stuck to the cloth or it will bleed under. It might still bleed under and you may have to fix it.
10. Now we gotta make the stencil for the cover design and that's the hardest part I guess. Like I said, you can simply print it out on thick paper and follow the tiktok guidelines. I used masking tape, and exacto knife and paint because I like you make my life hard. (https://vm.tiktok.com/ZMLqcKnb2/ here is me doing it for the aftg shirt I made a while back). A mat to cut things on is best, idk what it's called, but you can use any surface that's hard enough as to not cut through it, but from which you can peel off the tape. Three layers of tape are pretty good (one top to bottom, side to side then top to bottom again). Print the design, making sure it's the right size (I used 19.4cm x 12.2). Cut out the pattern: you need to cut out the place that will be painted, so if you want a raven on their, cut out the raven. Here are the patterns I designed:
Covers: here
Spines: 1, 2, 3
Please credit me if you use them.
(I tried to keep what was on the original cover and add something else. And the inspiration was quite obviously the penguin Classics).
For the back, you can just cut out a little square with the design and place it where you want it.
11. Stuck your stencil within the outline you previously painted and paint that too. Once again, make sure it's properly stuck. Sponge works well, but don't put too much paint on it. It's better to go over than too have an excess.
12. Take off the stencils. Try your best to fix if anything bleed.
13. As for the lettering, titles, quotes and author, I used one of these:
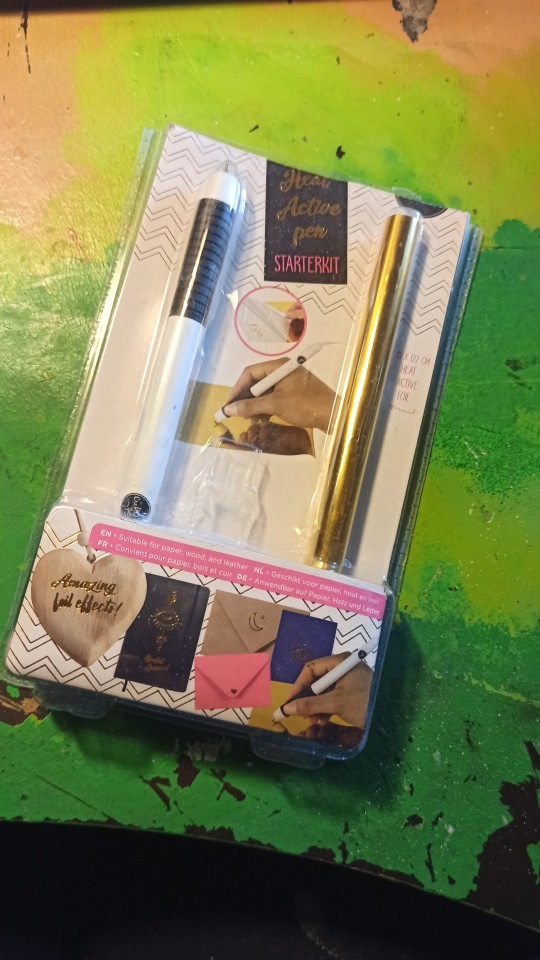
It's gold foil that's applied with heat. I got it for pretty cheap in Action. It works well when having a piece of paper with the writing to trace on top of the foil.
Okay now you should have your cover. Leave it on the side for the moment and take your book. This tiktok helps:
14. It's gonna hurt a bit but that's part of the process. I guess you could turn the cover into some sort of sleeve in which to put the book but by virtue of being stiff, I'm not sure how well that would go. So you have to carefully cut out the original cover of the book. Keep the glue on the spine.
15. Take a paper the size of twice the pages' size in length (here about 12.2 cmx2) and the height of the page (19.4 cm). Fold it length wise so that it's the size of the page. Do it twice.
The paper can be whatever colour you want. I did the colours of the cover (so for instance TRK's papers are red and black.)
16. Put a tiny bit of glue on about 4mm on the side of the page near the spine and glue the fold there. Repeat on the other side of the book.
17. Once that's dry, glue the spine of the book to the spine of the cover. Make sure it's centered. Wait for it to dry. If you need to, put the book between other books, spine down so that it doesn't move while it dries.
18. Put some glue on the first folded page and carefully glue it to the inner cover. Make sure it covers all the cardboard and hopefully a bit of the cloth. Don't put too much glue or it might bleed to the pages. Make sure you can easily open the book, put a piece of parchment paper in between the folded pages so the rest of the book stays mostly dry. Wait for it to dry.
19. Repeat for the other side.
20. Congrats. You've got a hardcover book!
Idk if that was really clear so don't hesitate to ask me any question you need answered! Keep in mind that I'm absolutely not an expert on the subject. But there you go. Tag me if you try it out! And thanks for all the love on the hardcovers 😌🥰
47 notes
·
View notes
Text
1-2-3 cookies (1-2-3 kakor)
1100g (3.5 oz) sugar
200g (7 oz) salted butter
300g (10.5 oz) flour
1. Mix everything together.
2. Add in anything you want.
3. Bake at 200°C (390°F) for 8-10 minutes
Variations
1-2-3 cookies (1-2-3 kakor)
1. Roll out the dough into balls about 2 cm (≈1 inch)
2. Use a fork and flatten the balls, then use it to make a crisscross pattern by flattening the balls perpendicularly
3. Bake them

Jam cookies (syltkakor)
1. Roll out the dough into balls about 2 cm ( ≈1 inch)
2. Press down in the middle with your finger to make a dent
3. Fill the dent with jam
4. Bake them

Finnish fingers (Finska pinnar)
1. Roll out the dough into small 5 cm (2 inch) snakes
2. Roll them in pearl sugar (pärlsocker). You may also use things like coconut flakes, nuts (if you can eat them obv) because pärlsocker is hard to find outside of Scandinavia. You might be able to find it in Ikea.
3. Bake them

Chess squares (Schackrutor)
1. Halve the dough and put cocoa powder in one of the halves.
2. Roll out four long snakes - two from the cocoa dough and two from the normal dough
3. Put one cocoa snake and one normal snake next to each other and press and do the same with the other two
4. Put one pair on top of the other, making sure that the normal snake is on top of the cocoa snake and vice versa.
5. Press it into a nice (really long) cuboid and cut cookies out of the dough
To get more info about this recipe and any substitutes, press keep reading.
You can also get a google doc of this post.
Substitutes:
Flour - Almond flour (1:1), chickpea flour(1:1/2), gluten-free flour (1:1 but read instructions first), coconut flour (1:1/4 + egg or liquid), rice flour (needs to be used along with another or it will get crumbly), millet flour (1:1) gram flour/besan (1:1/2). Check package if looking for gluten-free flour, not all alternative flours are gluten-free. Ratios are wheat : substitute.
Sugar - Honey (1:3/4 and reduce amount of liquid in recipe if there is any), maple syrup (1:1 minus 1/4 of liquid if there is any), brown rice syrup (1:1/2), other syrups. Ratios are sugar : substitute.
Butter - baking margarine (1:1), olive oil (1:3/4), coconut oil (1:3/4), other oils (1:3/4). Ratios are butter : substitute.
Jam - Jelly, thick fruit preserves, cut fruit.
Pärlsocker (pearl sugar) - Coconut flakes, sprinkles. I wouldn’t recommend caster or powdered sugar because it doesn’t give the same kind of crunch to the cookies (it is crunchy, just not in the right way??).
Cocoa - Black/brown food colouring, instant coffee, chocolate (if you can eat it obv).
Information
This recipe is a Swedish recipe. I have no idea what time it’s from, but it’s a recipe that I’ve had in the family for a long time and I’m sure other Swedish families have, too. The variations are Swedish cookies that usually need a separate dough, but the point of the 1-2-3 cookie dough is to make all cookie recipes easy. If you would like the original recipes for the variations I have them here:
https://swedishspoon.com/schackrutor/
https://swedishspoon.com/finnish-sticks/
https://swedishspoon.com/hallongrottor/
#recipes#allergy recipe#allergies#food allergy#food allergies#food intolerance#substitute#not eating with the reaper thx
5 notes
·
View notes
Last Seen Blogs

chitradraws
STAINS ON PAPER

sniperilly
Dweeb

wazzappp
I've gotta get weirder

titimonoosito
Sin título

maddhatterreviews
We're all mad here