#they also have little sheets of butter in the dough that you want to keep Whole so you are desperately trying not to melt the butter
Text
pointless trivia of the day: I get annoyed when people refer to cats kneading on something as "making biscuits" because biscuits aren't like breads, and should under No Circumstances Be Kneaded
#it makes me wonder if 'biscuit' used to be used to refer to bread rolls because otherwise. why would this be.#that cat's about to make some fucked up tough and chewy biscuits in that case!! this cat's restaurant is going under.#''what are biscuits then'' they're pastry and pastry absolutely hates to be Touched#they also have little sheets of butter in the dough that you want to keep Whole so you are desperately trying not to melt the butter#w the body heat coming from your hands#they eat like a bread but they aren't yeasted and they aren't kneaded
216 notes
·
View notes
Text
Happy Holidays - Have Some Cookies
I feel like sharing this recipe with everyone since I've gotten really positive feedback on them.
Oatmeal Craisin Cookies
Yes, "craisins" as in "dried cranberries." My partner and I aren't big raisin fans, but we do love craisins. If you're the opposite, you can easily swap them out, obviously.
I don't remember exactly how I cobbled this recipe together, I just know that I used at least two different sources.
Ingredients
1 cup salted butter, softened (you can use unsalted butter, but you may need to up the added salt content)
1 cup dark brown sugar, packed (light brown sugar will also work, but I think the lower molasses content will affect the texture and flavor)
1/2 cup white granulated sugar
2 large eggs
2 tsp vanilla extract
1 tsp ground cinnamon
2 cups old-fashioned oats (I don't recommend steel-cut or quick oats, but you do you)
2 cups (240 g) all-purpose flour (I've not tried this with any other type of flour, nor do I necessarily recommend using any non-glutenous or non-glutenous-like flour, as it will at the very least make the batter much looser than intended)
1 tsp baking soda
1 tsp salt
1 cup craisins
Directions
In separate bowl, whisk together eggs and vanilla extract, then add craisins. Let sit to soften craisins.
In mixing bowl (stand mixer is HIGHLY recommended as this dough is very thick), mix butter and sugars.
Add egg mixture to mixing bowl and mix.
Add the rest of the ingredients and mix.
Let dough chill in fridge for at least 30 minutes (this keeps them from spreading too much once in the oven; if you want to chill the dough for more than an hour, I recommend rolling it into balls beforehand as the colder the dough gets, the tougher it is to work with, though you can also take the dough out of the fridge and let it warm up on the counter for 30 minutes before trying to work with it).
Preheat oven to 375°F.
Roll dough into balls by hand (this helps pack the oats and craisins into the cookies so they're not jutting out all over the place once baked; I use a 1" cookie ball scoop just to keep the sizes more or less consistent, then properly roll them before placing them on a cookie sheet; also I recommend wearing gloves for this part, as the dough is VERY sticky and I can't guarantee your hands won't feel like they're coated in butter for hours afterwards no matter how well you wash them).
Bake 10-12 minutes (I usually put them in for 11 minutes or a little over, but the exact time depends on your oven; if the dough balls are straight from the fridge, they may need a bit longer; on the upside, there's so much sugar in these that it doesn't hurt if they get a little dark on the edges!).
Notes:
These come out of the oven VERY SOFT, and you might mistake them for not being done - trust me, they're most likely perfectly done, and any longer will result in an unpleasantly crunchy (if not outright burnt) cookie. If you're really unsure about how long your oven needs to bake these, start off doing small batches and let your "test" batch cool down before trying to move them off the parchment paper. If they're still gooey after 5~10 minutes, add another 30-60 seconds to your baking time, but most likely they'll have firmed up enough to at least pick up without them falling apart on you.
I use these "air bake" cookie sheets, which work wonderfully well for these cookies, plus baking parchment; I've not tried making them on regular baking sheets or without parchment, so cooking times may need to be adjusted for that.
Even with chilling the dough , the cookies do still spread out, so make sure to leave a good amount of space between each ball. This recipe makes quite a lot of cookies (about 69 if using a 1" cookie scoop), so depending on your setup, you'll have to work in batches. I try to get all the dough rolled out into balls before I even start baking them, so it's quick and easy to swap them out. We keep our house on the cooler side, so it's not usually a problem, but if your house (or your kitchen) is on the warmer side, you may want to keep the balls refrigerated while they await their turn in the oven.
Lastly, I highly recommend stacked cooling racks for these. Because of how soft they are fresh out of the oven, I'll slide the parchment paper off the cookie sheets and onto a cooling rack with a finer mesh, then transfer the cookies to the stacked cooling racks once they've firmed up a bit (about 2~3 minutes) leaving the finer mesh rack available for the next batch. The reason why I recommend the stacked racks is that, again, this recipe makes a LOT of cookies, so the stacked racks are a good space-saver! Especially since these take a while to cool down completely at room temp (I've not tried chilling them directly post-bake - I think that might affect the texture), and they do need to be COMPLETELY cooled before they can be packed away (otherwise they warp and smoosh into each other - even when completely cooled, they'll stick to each other a bit, but they come back apart easily enough).
Have fun baking cookies! They may not really be "holiday" cookies, but this recipe is my gift to the internet void, so merry happy and all that jazz~
#recipe#cookies#cookie recipe#oatmeal cookies#oatmeal craisin cookies#oatmeal raisin cookies#recipes#baking#food#tag me if you make these!#I wanna know what other people think#or if I need to specify anything else in my directions
20 notes
·
View notes
Text
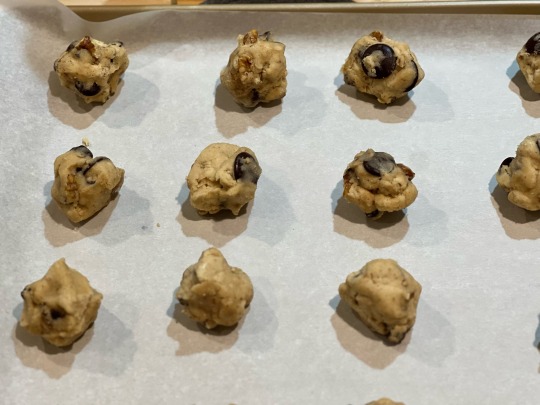
a damned good chocolate chip cookie
ingredients:
12 oz all purpose flour
1/2 tsp baking powder
1/2 tsp baking soda
1 tsp kosher salt (not table, that’s all wrong for this)
cinnamon to taste
dash of nutmeg
1 cup light brown sugar
1/4 cup white sugar
1 cup brown butter, softened to room temperature
2 eggs, room temperature
1 cup toasted walnuts
1 cup chopped chocolate
the method (which is BY FAR worth the effort):
first, toast the walnuts and let them cool. how much walnuts? measure with your heart. my heart says one cup. chop them up big and small and set aside. (don't know how to toast walnuts? put them on a baking tray, stick them in the oven at 400F for three minutes. take them out and give them a good toss and put them back in for three more minutes. that's it. keep an eye on them in case your oven runs too hot. nobody wants burned walnuts)
second, chop up some good 60-70% chocolate bars. splurge on guittard or ghiradelli. don't do nestle. fuck nestle. they're bad. i mean, the chocolate tastes fine, but the people behind the company are terrible. so fuck nestle. chop about a cup of hopefully morally superior chocolate into little slivers and big chunks, the variety is good. want more chocolate? do it. (sometimes I’ll also use chocolate discs or chips to vary the final look of the cookie because why not?)
next!
get onto the brown butter. don't know how to do it? watch and learn
okay, got that? cool. brown the butter. let it resolidify before you keep going. sometimes i prep it a day or so in advance.
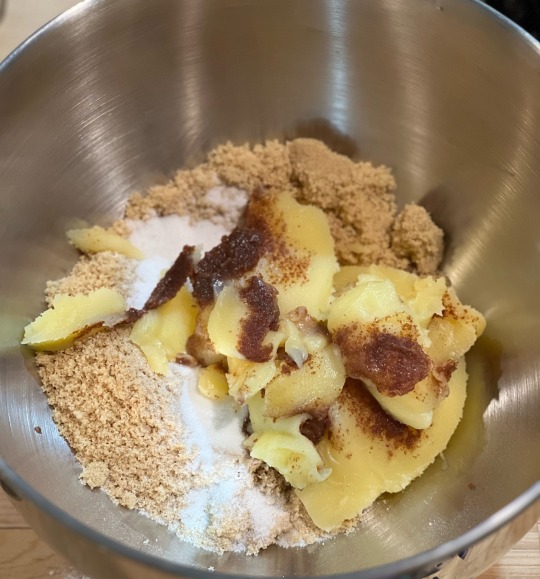
blend the butter and sugar until that stuff is whipped. turn it pale and fluffy and gorgeous with little brown specks. takes you more than 5 minutes to get there? awesome. makes it even better.
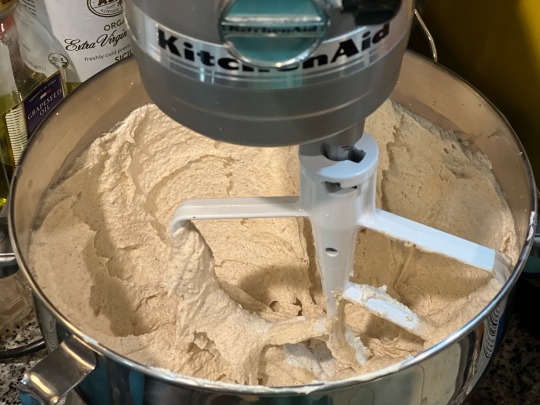
Look at how fluffy!
(if you use melted brown butter at this step, i don't know what will become of you, because i only did that once with messy results. go with god if you choose to make that decision, but i won't take any responsibility for it. also, having a stand mixer would help here, but handheld won't hurt you)
is it fluffy and beautiful? excellent.
add the two eggs one at a time, whip it really well. great, that part is done.
dry ingredients:
whisk them together. that’s pretty much it.
the dough:
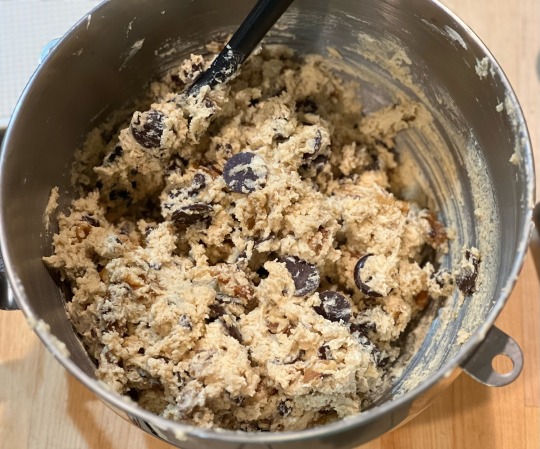
add the dry ingredients to the wet. in two or three separate batches, mixing slowly, that's a good approach.
add your mix ins. i hope you toasted the walnuts. infinitely better that way. my apologies to those with nut allergies.
once it barely comes together (even if it's a little crumbly), stop.
the next important bit, the really, really important bit, is:
rest.
the.
dough.
some will say for an hour in the fridge, i say overnight. at least 6-8 hours. i've eaten stuff just after mixing the dough or waiting the single hour and it's just not the same.
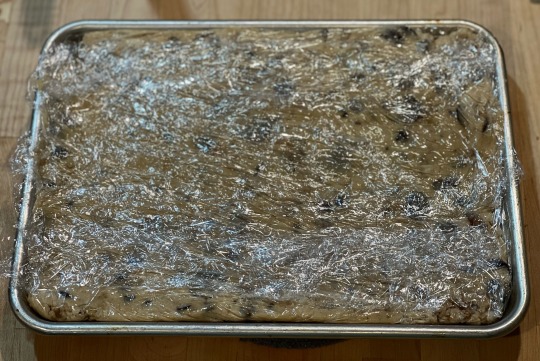
(little tip: i smush the dough into a quarter sheet baking tray and wrap it with plastic before putting it in the fridge; this step takes care of the crumbly bits and then i just cut it into little squares when i'm ready to bake. round off the squares between your palms and it comes out pretty well)
(Like this!)
bake at 350F for 14-16 minutes, depending on your preference of doneness
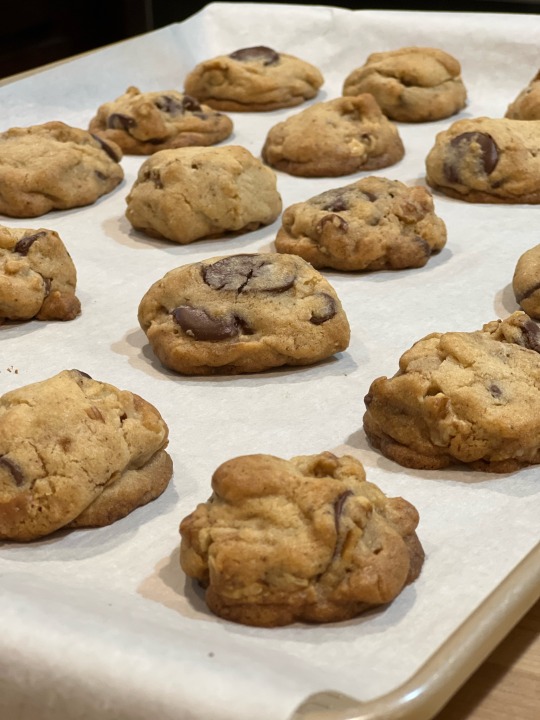
there you have it. the best chocolate chip (walnut) cookies i've ever made.
#chocolate chip cookie recipe#mine#it's gone through years of tweaking#it used to have two whole cups of sugar before someone told me to rein in my rampant american overindulgence and they were completely right#please share if you tried the recipe out because i'm so proud of what i came up with and it makes me so happy to see others enjoy it too#got tweaks to add?#i'm all ears!#if i'm wrong about the melted butter i'm willing to hear it#tumblr just informed me that i broke 100 posts with this one#this feels right for my life#these are good choices
15 notes
·
View notes
Text

baguettes! 👩🏻🍳🥖🇫🇷
250 grams of bread flour (plus extra for dusting), 5 grams of salt, 5 grams of dry yeast, 180 milliliters of cool water, and 2 tablespoons of vegetable/olive oil
the flour is put in a mixing bowl with an electric mixer with the dough hook, the salt and yeast are poured in on either side of the bowl, and then the mixer is switched in low at first. yes, use a mixer with wet doughs like this.
water and oil are gradually poured in and alternated—the key is to activate the yeast when it’s in the flour by pouring the water on and keeping the salt away from it. you want the yeast to do its thing with the flour while proving, and it’ll taste better, imo.
bump up the mixer to medium for about 5 minutes, or until the dough is a ball stuck to the dough hook. the dough will be smooth and very stretchy.
transfer the dough to a lightly oiled glass bowl and cover with plastic wrap or a towel, and then tuck away in a warm place for 2 hours or until the dough has doubled in size.
cover the work space (in my case, a clean countertop) with flour and bring out the dough—cover your hands with flour, it’s going to be sticky, just trust me on this. “knock” the air out of the dough: you do this by pushing on one side with the base of your palm and tugging back with your knuckles (you don’t want to do it too much with baguettes because they need those signature holes within).
slice the dough in half and begin shaping the halves into long little loaves: keep the lengthwise side towards you and fold the side furthest from you into the center and push down. fold the side closest to you underneath, and then elongate the loaves into that signature shape: the way i did it was i picked them up by the ends and just let them slack a bit. they should be taut, smooth on top and with a seam underneath: they should also fit the baking sheet 😅
i like to line said baking sheet with silicone mats and a dusting of flour (you can also use a nonstick baking sheet with the flour if you don’t have mats), and then carefully place the loaves on the sheet. carefully tuck the sheet into a big plastic bag and let them rise again, or prove, for 1 hour.
preheat the oven to 395° f (~200° c for our international friends) and place a roasting pan filled with 4 cups (1 liter) of water at the bottom rack: this will create steam that will leave a crust on the baguettes. lightly dust the loaves with flour and carefully make 3 diagonal slits with a sharp knife on the tops.
bake for 25 minutes, and then bump the heat down to 355° f (~180° c) and let them bake for another 10 minutes, or until they’re golden and sound hollow when knocking on the surface.
let cool on a rack and enjoy with some butter, honey, or brie cheese and prosciutto 😋
#bread#french bread#baguette#amateur baking#baking#baked goods#bakers gonna bake#recipe#paul hollywood recipe#bakers of tumblr#mine
3 notes
·
View notes
Text
Fastelavnsboller! 🧑🍳🧑🍳🧑🍳🧑🍳🧑🍳
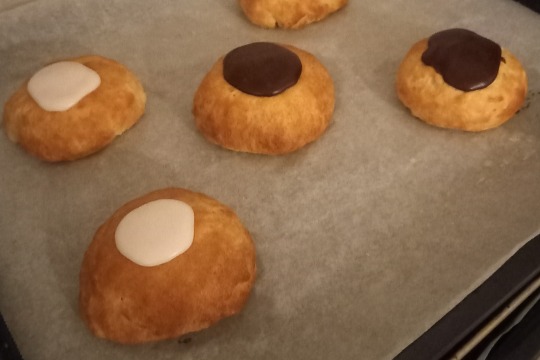
Carnival buns! They are needlessly complicated, but soooooo good. Recipe yields 25
Ingredients:
650 g flour
50 g sugar
50 g fresh yeast
50 g butter
13 g fiber* (i use a potato fiber from semper)
2 eggs
8 g salt
150 mL milk
100 mL sour milk product without flavor
50 g vanilla skyr/yoghurt
200 g butter to laminate with. If you can get the one they use for croissants, do that. Otherwise use normal butter and pray
1 packet of vanilla custard powder + 4 dL milk
Optional other fillings like jam or chocolate chips
Powdered sugar, cocoa powder, and boiled water for icing. Maybe fun food coloring?
* if you can't find it just add some more flour
How to:
Picture guide to laminating and filling and closing under cut
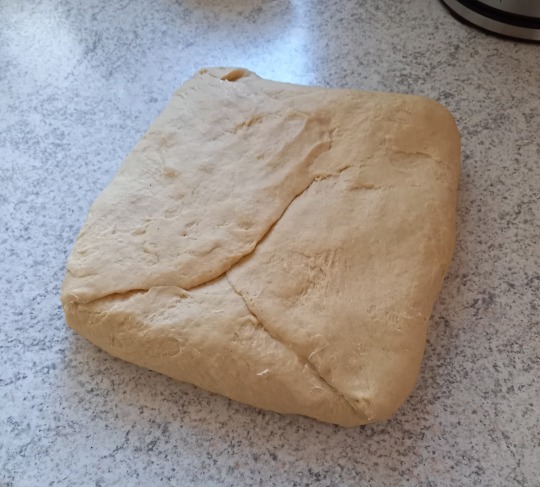
Everything in a mixing bowl and knead until combined and soft but not fully formed gluten
Somehow shape the lamination butter into a square and keep cool
On a floured surface shape your dough to a ball and cut it open
Place butter in the middle, press in, and wrap it up. Try to have no butter peaking out of seams or corners
Roll it as thin and long as you feel like you can get away with and fold to 3 layers. Fridge for roughly 15 minutes. Should butter break through the dough, try to hide it away by folding strategically so it is inside the folds, not outside.
Repeat step 5 two more times and then place in freezer for 30 minutes. If all this is too difficult just knead the extra butter into the dough.
Whisk the custard like the packet says for "baking safe" custard. The one from Dr Oetker has that at 4 dL milk
If you want to make them all at once roll the thing out to 55x55 cm and cut squares of 11x11 cm. Otherwise: roll the thing out to a size that is easily divided by 5 (I rolled to 30 cm) and then just cut it into 5 strips of equal width. Wrap and freeze the ones you don't need now
Brush edges of squares with water and place a small tablespoon full custard in the middle. (1 teaspoon jam or chocolate chips go in now, too)
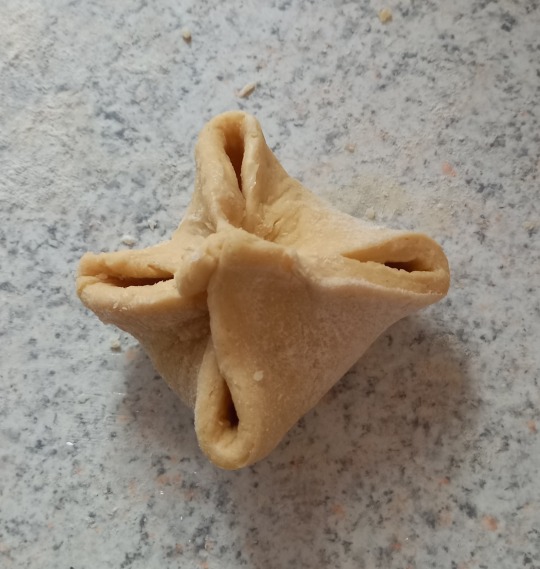
Fold corners into the middle and press them together. Fold new corners in as well. Form to a bun shape and place on baking sheet
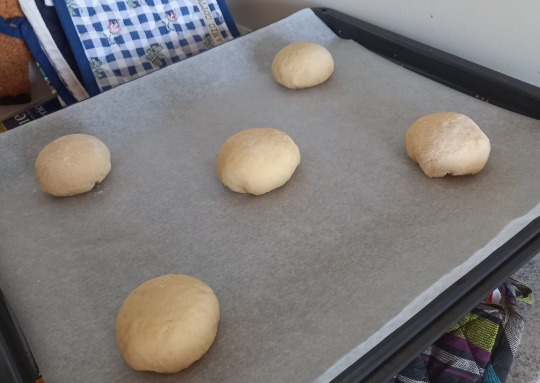
Rise until almost doubled in size. If you use a warm and moist environment (oven at 35 C and a little bath of freshly boiled water under) you go 15 minutes instead of the usual 20-25
Preheat oven to 210 C convection
Brush with water or milk or eggwash before baking
Bake at 180 Celsius for 10 minutes switch places and turn the baking sheets 180 degrees and give another 3-5 minutes
When completely cooled add a teaspoon icing to the top and spread it a little. You want it to be a very not runny icing, so be wary of the amount of water you use
Enjoy when icing has set. Also, correct way (imo) of eating these are edge first and then the custard and icing last :b
Lamination!
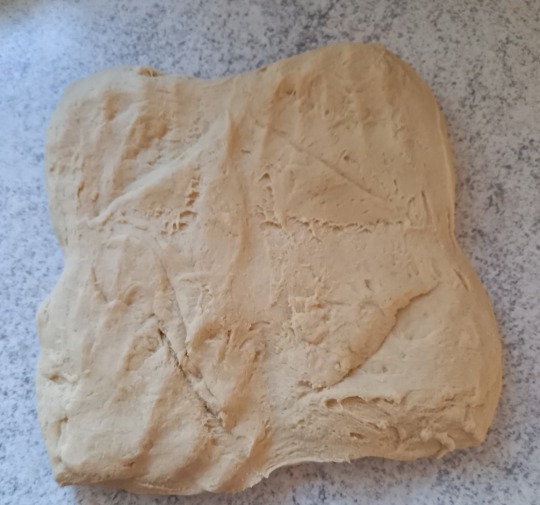
Ball of dough has been cut up into a square-ish shape

Square butter had been placed on dough
Dough has been folded over the edges of the butter square
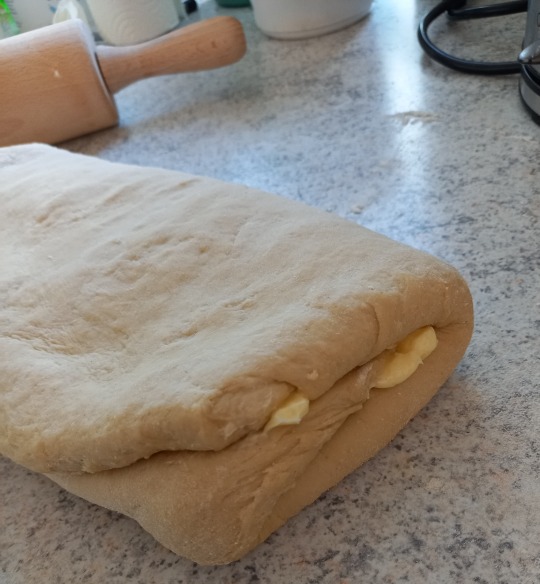
Rolled long and thin and folded "3". Butter has squeezed out because I didn't do the corners good enough. And maybe my butter was too soft.
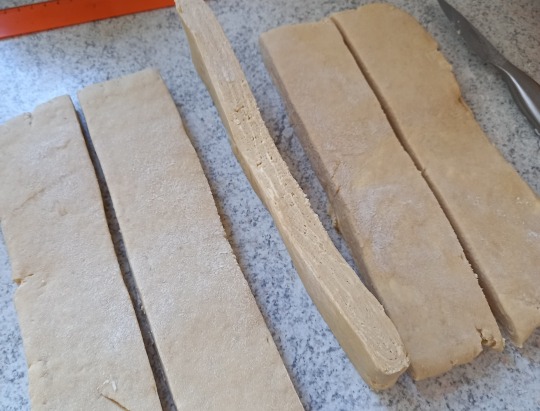
Cut of the lamination
Filling and closing!
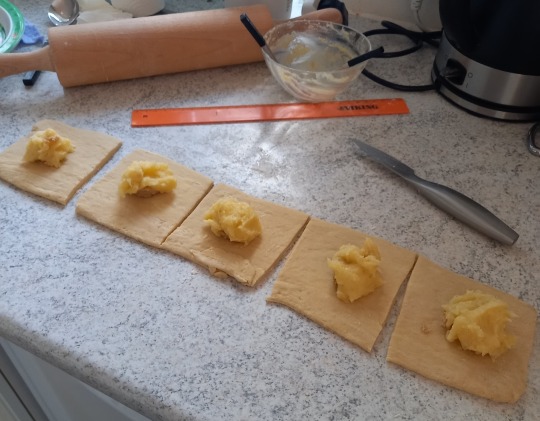
Brushed and filled
Corners folded in and pressed together

And again. Now just to flip it and form it to an actual bun
Ready to rise
#Fastelavnsboller#Recipe#Custard filled buns#Carnival#Laminated buns#Please reblog so more people can enjoy
3 notes
·
View notes
Text

Adorable Woodland Soft-Sugar Cookies Recipe
Some tips for when making the cookies:
Keep these cookies thick, we recommend rolling to a thickness of around 1/2 an inch, never thinner as they will dry out when baking.
Never overcook, unlike normal cookies, you do not want the edges to turn golden. They will continue cooking a little when you take them out the oven so you want them to be just set when you take them out.
Once your cookies have been out of the oven for a few minutes seal them up in a container, this will keep in their moisture.
Recipe
Serves 12-18 cookies
Cookies:
¼ cup Unsalted Butter, room temperature
½ cup Coconut Palm Sugar
1 Large Egg
1 teaspoon Vanilla
1½ cups Almond Flour
¾ cup Tapioca Starch
½ teaspoon Baking Powder
½ teaspoon Salt
Royal Icing:
3 tablespoons Meringue Powder.
4 cups Confectioners’ Sugar
5 tablespoons warm water
Food colouring as choice
Instructions
Place the butter and coconut sugar in a mixing bowl. Beat with an electric mixer for 2-3 minutes until light and fluffy. Beat in the egg and vanilla.
Add the almond flour, tapioca starch, baking powder, and salt to the mixture and beat in until well combined. Dough should be thick. If dough is too sticky, stir in another tablespoon or two of almond flour.
Place the dough on a strip of plastic wrap. Flatten into a disc and wrap up with the plastic. Refrigerate for one hour.
Preheat the oven to 325 degrees. Line a baking sheet with parchment paper.
Unwrap the dough and place it between two sheets of parchment paper. Roll to a thickness of ½”. Do not roll any thinner, if you roll the dough too thin it will dry out quickly.
Cut shapes out of the dough and place on the parchment lined baking sheet. We love these woodland cookie cutters from Etsy, view here.
Bake in the preheated oven for 8-10 minutes. Watch closely – you want the cookies to be only just cooked. Don’t cook them to the point of browning. They should be just set and pale in colour. This will also ensure that your cookies are super soft.
Remove from the oven and let cool for 2 minutes. Place cookies in a large covered container – Placing them in a sealed environment before they have cooled will help with the soft factor.
Once the cookies are cool you can begin frosting!
Frosting:
Beat all ingredients together in a mixer until icing forms peaks, do this for around 7-10 minutes.
Separate the icing into individual dishes depending on how many colours of icing you want to decorate with.
Begin piping and filling until your cookies are beautifully decorated to your liking!
41 notes
·
View notes
Text
My dear friend @thievinghippo requested my methods for baking bread, and I will so happily oblige! I jumped on the sourdough wagon in 2020, and honestly it's WAY harder to work with than just regular yeasted dough. If you've struggled with sourdough, try a non-sourdough recipe before getting discouraged. That being said, I love my sourdough starter for a ton of stuff outside of loaves. (Loaves too, but only when I'm in the mood for a big project.)
I do recommend using a stand mixer. You can knead by hand, people have done it for thousands of years, but I personally hate getting sticky dough on my hands, and it's soooo much easier in a mixer. A good one is a bit pricey, but I've had my KitchenAid for over 20 years and it's still as good as new.
In a large bowl mix together 1 tbsp active dry yeast, 1 tbsp sugar, 1 tbsp salt, and 2 cups barely-warm water. Let this stand until the yeast is dissolved, just a few minutes.
Gradually add 5 to 6 cups of all purpose flour a half cup at a time to the liquid, while mixing thoroughly. Stop adding flour when the dough is still pliable but becomes less sticky. This is the hardest part I think, it takes some trial and error. Worst case scenario the dough will be a little wet and harder to work with, or a little tough and dense. Still edible! All flours have different hydration levels, and I think yeasted dough in general is a little haunted, so it varies a bit every time.
Knead (using a dough hook if you have a stand mixer) for 5 minutes. Let it rest for a few minutes, then knead again for 5 more minutes. Form the dough into a ball, put it back in the bowl, and cover it with a slightly damp towel and keep it warm (I put mine in the oven with the light on) until it doubles in bulk, about 1 to 2 hours.
Punch down the dough and briefly knead out any air bubbles. Cut the dough in half and shape it into two oblong loaves on a lightly oiled cookie sheet. Alternately, I've also made this in loaf pans (also oiled). It comes out with less of a crust and can be a little dense, but it makes the shape more of a sure thing if you're worried about that. Either way, let the loaves rest and rise for 45 minutes.
Place an oven-safe pan on the bottom of the oven, and fill it a couple inches deep with water. Preheat the oven to 500 degrees. Lightly slash the tops of the loaves a few times diagonally, and put them in the oven for 10 minutes. Lower the temperature to 400 and bake for another 10 minutes.
BOOM! You now have delicious fresh bread. But... sometimes I want something bready with a meal and don't want to plan 4 hours ahead. Good news! This is a great time to pull out the sourdough starter, and you won't even need a mixer. Super easy to do fully by hand, and you'll have bread for two or three folks within 15 minutes. This recipe is straight from the King Arthur website, with a couple small adjustments.
Mix 1 cup unfed sourdough starter, 1 teaspoon granulated sugar, 1/2 teaspoon salt, and 1/2 teaspoon baking soda.
Heat a pan or griddle to about 300 degrees F, or medium low on your average stovetop. If you have a set of rings like you'd use to make English muffins, you can grease them up and use them, but you can also just do these freeform.
If you use rings, place a small pat of butter (like 1/2 tablespoon) in each. Otherwise, just dot the butter spaced out on your pan/griddle. When it's melted, spoon out a few tablespoons of batter into each ring/spot.
When the tops begin bubbling, usually just a few minutes, remove the rings (if using) and flip. Cook for a couple minutes more.
Astonishingly tasty crumpets. Every time I make these it feels like magic. Chomp right into them or split them to admire the nooks and crannies. Never want for carbs again!
2 notes
·
View notes
Text
With all this food discourse happening I’d like to remind everyone that Indiana’s state pie is the Sugar Cream Pie and even people WHO LIVE IN INDIANA don’t know what it is and I think that’s hilarious as hell. Anyway, here’s a poll.
(Chess pie is not the same, it has butter, eggs, & an acid in it, plus you guys have the wherewithal to put vanilla and other flavorings in it. Sugar cream pie is literally that: sugar, milk, heavy cream depending on the recipe, a little bit of flour for thickening. THATS IT. No salt, no vanilla, no cinnamon, nothing. It’s BORING AS SHIT but it is SO FUCKING GOOD)
Recipe under the cut if you’d like to try making this in your own home! (And its MY recipe, not the boring official one that tastes like sugary milk. You will have vanilla & cinnamon & nutmeg. But leave those out for the Real Hoosier Experience™️)
Ingredience:
One pie crust, or enough pie crust dough for one shell (if you’re a masochist, feel free to make your own! But I will not shame you if you just buy frozen shells from the grocery store.)
1 cup sugar
1/2 cup AP flour (preferably unbleached, but whatever you have will work)
1 cup half-and-half*
1 cup heavy cream*
A pinch of salt
1 tsp vanilla extract (do yourself a favor and get the real stuff, not the imitation garbage. trust me.)
2 tsp (or whatever your soul tells you) ground cinnamon
1 tsp nutmeg for in the filling, some more to dust the top (another Pro Tip from Ya Boy: get whole nutmeg and a zester or spice grinder. Fresh nutmeg is MUCH better than the pre-ground stuff.)
*Here's a hot tip with this: half and half is half heavy cream, half milk. So, you can use 1.5 cups heavy cream and a half cup of milk (I Am Begging You To Use Whole Milk)
Now, here's what you do WITH all of those Ingredients™️
Step 1: Blind bake your pie crust based on the instructions on the package, or the instructions for your favorite recipe. Chances are you'll prick the bottom of the pie crust a whole bunch, then if this is fresh/homemade dough you'll chill it for about a half an hour. You'll probably preheat your oven to 375°F, line your pie crust with a sheet of parchment paper (or foil if you're in a pinch, but do NOT use wax paper), then fill the crust with pie weights, dried beans, or uncooked rice you do not intend to cook. You'll bake it until the crust starts to get brown around the edges, probably about 15 minutes. Once that's GBD, take it out of the oven, put it on a rack, and remove the parchment paper and weights.
Step 2: the filling! In a bowl (hot tip: get a bowl bigger than you think you'll need. You always need a bigger bowl) you want to combine the flour, sugar, salt, cinnamon, and nutmeg first, then add in the half-and-half, cream, and vanilla. Once that's combined and nice n smooth, pour that bad boy right into your pie crust.
Step 3: Cook the thing! Yeah, already. Bake it in that same 375°F oven until the filling is juuuuuuust set, but still jiggles when you tap it on the side. This will probably take about 1 hour and 30 minutes, but keep an eye on things! Take it out and put it on a cooling rack. I personally recommend sprinkling some more nutmeg on top while it's still a little bit jiggly and hot so it'll stick, but you can also wait until it's cool and sprinkle it on right before you eat it. Or you can skip the nutmeg entirely, it’s up to you, I’m not the nutmeg cops.
Let that cool completely before you cut into it, then enjoy! I recommend keeping it in the fridge, but while you're cooling it, leave it on the counter or the filling'II get weird. You don't want it to cool TOO fast.
12 notes
·
View notes
Photo

Foods of Thedas: Dishes, Sauces, and Sides
There are multiple food lists for Dragon Age out there, some current, some not. I put this together mostly for my own personal reference and keep updated because I need to clear out my google sheets.
From gravy, desserts, main courses, sides, soups, and stews. The foods are both mundane or share some medicinal uses. But they had to be things that would reasonably be eaten as a food item. So something like powdered tusket horn which is purely supplemental isn’t included. But something like a sauce that also helps with impotence is included since it is implied to be used as a food item and medicinal. So every dish here is canonically mentioned and shown through the games and additional media tie-ins.
This list doesn't include individual ingredients. Those are all in separate posts. Given the size of these lists, I had to split everything up. They were far too long for my tastes, so all links for the additional posts are below and above the cut, so you don’t have to endlessly scroll if you just want to see all the items in one post (the master post) or the wiki page. (Which got put up first because Tumblr really doesn’t seem to like the lengths of my posts.)
For Additional Food Posts
Drinks
Raw Ingredients
Prepared Ingredients
Cannonically Possible Foods and Drinks
Master Post

Breads and Desserts
Breads
Biscuit
Whole Grain Biscuit - Commonly made in Chantry cloisters. A staple in their simple diets.
Black Bread
Braided Honey and Date Bread
Brown Bread
Buns
Butter Puff - This is bread where butter is folded into the dough allowing it to become puffy and softer than usual bread. (Orlesian)
Crumpet
Dark Bread
Dried Bread
Honey Loaf
Lichen Bread - Bread that is made using lichen. (Orzammar)
Peasant Bread - A hearty type of bread that is made with a variety of grains.
Raider Queen's Bread of Many Tongues - Created by the Raider Queen, this bread calls for flour, baking powder, salt, butter, brown sugar, molasses, eggs, bananas. The creator calls for Par Vollen bananas but another version of the recipe says Rivaini bananas are an acceptable replacement. (Rivain)
Ryott Bread - Made of a protein rich grain that is valued throughout Ferelden.
Sweet Bread
Sweet Rolls
Thin Bread - A thin bread used to make wraps in Seheron.
Whole Grain Bread - Another staple made in Chantry cloisters.
Desserts
Cake
Cake with Apples
Chocolate Cake
Cupcakes
The Exquisite Misery - A little cake topped with a dusting of anise, deep mushrooms, and gold dust. (Orlesian)
Hearth Cake - A pan-made Dalish cake; made of flour, hardwood ash or baking powder, halla butter, sugar, mixed dried fruit (currants, cranberries, etc), egg, milk.
Honey Cake
Lemon Cake
Petit Fours (Orlesian)
Pound Cake
Round Cake - Often topped with poppyseed and honey. In Serault, they will sometimes have the antlers baked into the crust.
Sugar Cake - Made with strawberries and sugar-cream icing on a pound cake.
Sugar-drizzled Lemon Cake - A type of lemon cake that was used in Antivan Crow history to assassinate templars.
Sugarcake - A dense cake usually topped with powdered sugar.
Sweet Cake
Candy
Black Licorice Candy - Can be salted.
Bon-bons
Candied Almonds
Candied Dates
Candied Fruit
Candy Cane
Candy Apple
Carastian Candy - A candied chocolate. (Tevinter)
Peppermints
Spun Sugar (Fereldan)
Sweetmeat - A confectionery treat, sometimes candy coated fruit.
Toffee
Unnamed Candied Nuts with Spice - A candy that is sweet until swallowed, then they leave a spicy aftertaste. (Orlesian)
Cookies
Biscuit - A hard, flat, and unleavened baked treat that can be sweet or savory.
Butter and Sugar Cookie - This cookie isn’t specified as it is only described by these ingredients.
Raisin Cookies
Shortbread
Tea Biscuits
Wafers
Donuts
Ice Cream
Orlesian Guimauves - Another name for marshmallows.
Pastries
Apple Pie
The Blessed Apple - A pie made by a small cloister of Chantry sisters tending to the orchard, they use the windfall apples and share the pies freely; as well as the apples. The ingredients are flour, salt, butter, water, apples (golden apples from Lady's Orchard preferred but others are acceptable substitutions), brown sugar, salt, cinnamon, nutmeg, and cloves. (Orlesian)
Cinnamon Rolls
Croissant
Honey and Nut Pastry (Tevinter)
Macaroon
Marie du Lac Erre's Sweet Ruin - One version of this pastry with a dramatic history, the recipe contains; butter, powdered sugar, chocolate, vanilla extract, flour, orange or mint extract, baking powder, and milk. (Orlesian)
Minced Pie - filled with finely chopped fruit and sweet things.
Tarts
Unnamed Blueberry Pastry - A light, sticky pastry with blueberries. (Possibly Nevarran)
Pudding
Caramel Pudding
Dessert Pudding
Sticky Jellies (Orlesian)
Gravy and Sauces
Ale Cooked Mushroom (Dwarven)
Apples Stewed in Brandy Sauce
Applesauce
Cream Sauce
Deep Mushroom Flavored Cream Sauce (Orzammar)
Dragon’s Blood Sauce (Nevarran)
Gravy
Honey-glaze - A sauce used to glaze various foods, particularly meats.
Hot Sauce
Llomerryn Red Sauce - A sauce that goes on almost everything, contains pulped tomatoes, onions, red pepper, brown sugar, apple cider vinegar, mustard powder, hot pepper powder, salt, cinnamon stick, allspice, cloves, fennel seeds, dill seeds, mustard seeds, black peppercorns, bay, garlic. (Rivain)
Nesting Roast Gravy - Gravy made from the pan juices of a nesting roast. Meant to be served with the roast. (Orlesian)
Plum Sauce
Red Wine Marinade
River-herring Gravy - a gravy as white as apple blossoms. (Orlesian)
Special Sauce - A sauce infused with the essence of fifty-two herbs, prized for the ability to help with “inadequacy”. (Kirkwall)
Wild Flower Glaze - A honeyed glaze made of wild flowers, it is recommended to use flowers plucked at dawn and the lowest blossoms.
Main Dishes
Beans and Bread
Boiled Roots
Braised Nug with Elfroot (Dwarven)
Braised Ram with all the Trimmings
Bread and Cheese
Broiled Boar Head (Fereldan)
Cacio e pepe - A dish of three ingredients; spaghetti, pepper, and pecorino romano. (Antivan)
Canapé - a type of hors d'œuvre.
Chicken Wings - Sold in The Rusted Horn as 'Wyvern Wings.'
Dalish Deep Forest Comfort - String squashes, halla butter, garlic, mushrooms, elfroot or spinach, diced tomatoes or beetles, hot red pepper, rock salt, halla cheese or goat cheese, edible wildflowers (borage, chicory, etc), pine nuts. (Dalish of Southern Orlais)
Dried Bread and Fruit
Eggs à la Val Foret - An egg dish served with a cream sauce. (Orlesian)
First Day Chicken - a dish served during First Day in some parts of Orlais.
Fried Mush (Orzammar)
Gilded Swan with River-herring Gravy - An eastern spice, flour, gold leaf, river herring, swan, yolk. (Orlaisian)
Gnocchi (Antivan)
Goat Custard - A broiled goat head (Fereldan)
Ham
Anderfels Smoked Ham - It tastes of despair
Avvar Ham
Ham Stuck with Cloves
The Jade Ham - Honeyed with wild flowers (especially those picked at dawn), masterfully seasoned, and spiral-cut.
Orlesian Ham
Smoked Ham
Herbed Chicken and Biscuits
Jellied Meats
Jellied Eels
Jellied Pigs Feet - A delicacy in the Free Marches and originally a popular commoner food that has risen to the tables of nobility. Pigs feet and/or pork hocks, salt, onions, garlic, allspice, peppercorns, bay. (Free Marcher)
Veal Galentine (Orlesian)
Liver
Mad Burnard's Gift of Flesh - A nesting roast unlike any other, involving a whole wyvern, stuffed with a whole gurn, stuffed with a horse, stuffed with a large halla (horns and all), stuffed with a swan, stuffed with a duck, stuffed with a quail, stuffed with a bunting that choked on a gold piece. (Orlesian)
Meat Pies
Dove Pie - A pie made with live doves, for the theater of the meal. (Orlesian)
Pigeon Pie
Pork Pie
Turnip and Mutton Pie (Fereldan)
Unmentionable Pie - It is a meat pie that uses the typically undesirable parts of an animal. (Fereldan)
Venison Pasty - A hand pie filled with venison. In Serault, it is served with curls of goat cheese. (Orlesian)
Nesting Roast - This dish is classically made with a quail stuffed in a pheasant stuffed in a swan. Served with gravy made from the pan juices. (Orlesian)
Nug Steak (Orzammar)
Nug-gets (Orzammar)
Nug-loaf (Orzammar)
Nug-Nug - A dish meant to resemble a nug peeking from its burrow; made of ground meat (beef preferred), parsley, egg, salt, crushed cumin or mustard seeds, black pepper, cooked rice, tomatoes, onions, chives (Orlesian)
Pancake - The breakfast food and savory dishes.
Crepes - A very thin pancake that can be filled with sweet or savory ingredients.
Nug Pancakes - A savory pancake made with nug. A favorite among dwarven children. (Orzammar)
Porridge
Bland Porridge
Deer Porridge - A savory porridge.
Pig Oat Mash - A constant dish on The Hanged Man menu, a popular hangover cure if washed down with brandy spiked cider. This warming porridge contains apples, dried salt pork or smoked bacon, dried rolled oats, berries, ale or water (Kirkwall)
Porridge with Raisins
Savory Porridge
Pudding - A sweet or savory, steamed dish that can be topped with gravy or chocolate.
Rack of Ribs (Fereldan)
Ram Chops
Ram Cutlet
Rice and Boiled Vegetables
Roast
Roast Boar - On cooking method involves the boar being stuffed with apples
Roast Chicken
Roast Duck
Roast Hog
Roast Lamb
Roast Turkey
Roast Wyvern
Roasted Cave Beetle (Dwarven)
Roasted Giant Spider (Dwarven)
Roasted Nug (Orzammar)
Roasted Phoenix - One of the most infamous meals in Thedas, it is served with sweet red wine.
Roasted Rabbit
Roasted Venison with Wild Greens
Spit-roasted Deepstalker (Dwarven)
Spit-roasted Nug with Hot Sauce (Orzammar)
Sandwich
Ham Sandwich
Sausage - There are about twelve different kinds of sausage unnamed mentioned in Last Court.
Black Pudding - A type of blood sausage made from pork or beef blood, pork fat or beef sue, and a type of cereal. (Orlesian)
Smoked Sausage
Spiced Sausage
Seared Nug - Usually served with a deep mushroom cream sauce. (Orzammar)
Sera's Yummy Corn
Shredded Dried Meat and Cheese - A dish that is commonly used as a spread by the dwarves. (Orzammar)
Simmering Partridge - Cooked with sweet onions and pale beans (Orlesian)
Smoked Meat
Smoked Boar
Smoked Rabbit
Smoked Venison
Spiced Nug
Sticky Figs Rolled in Nuts
Venison with Apples Stewed in Brandy Sauce
Wandering Hills - A delicacy made from large creatures of the same name. (Anderfels)
Wyvern Steak
Seafood
Alamarri Pickled Krone - Krone, Brine, (Optional) pine pitch and druffalo dung.
Baked Fish - An Avvar cooking method where they wrap fish in pungent leaves and clay before cooking it in banked coals.
Baked Krone with Honey - The honey is typically used as a side sauce for dipping. (Fereldan)
Fish Wrap - Fish wrapped in thin bread (Seheron)
Fluffy Mackerel Pudding - Celery, pepper, mackerel, diced onion, mustard, salt, Antivan pepper, ground mace, cardamom seed, eggs (Fereldan)
Fresh Oyster
Fried Fish
Glazed Krone (Fereldan)
Lutefisk
Smoked Fish
Starkhaven Fish and Egg Pie - Fish from the Minanter River (carp, trout, or others), wine, onion, carrot, thyme, bay, sea salt, dried currants, sliced almonds, boiled sliced eggs, butter, flour, fish broth, milk, salt, pepper, nutmeg, cream, fried whitebait or other small fish. (Starkhaven)
Soups and Stews
Barley Soup
Butter Soup - A simple, inexpensive, and easy soup. Made as midmorning meals or midday refresher for field workers. It is commonly fed to children and convalescents due to its nutritious nature. Ingredients include water, potatoes, cinnamon, star anise, clove, bay, peppercorns, salt, noodles, cream, butter (Orlesian)
Cabbage Stew
Deepstalker Stew - A stew of deepstalker is made when rations run low. (Legion of the Dead)
Enchantment Soup - Made by Sandal, edibility unknown.
Fereldan Turnip and Barley Stew - White beans, oil, onion, carrots, celery, garlic, stock, turnips, turnip greens, sausage, barley, cumin, dried basil, oregano, salt, pepper, herbed wine vinegar
First Day Festival Stew (Orzammar)
Fish Chowder (Antivan)
Fish Stew
The Hanged Man Stew - The tavern’s featured dish, made with a different mystery meat every morning. (Kirkwall)
Lamb and Pea Stew (Fereldan)
Norbotten Fruit Stew - This dish is used to rehydrate dried fruits: dried apricots, pitted prunes, raisins, mixed dried fruits (cherries, apples, cranberries, etc), lemon or orange, cinnamon, cloves, water, sugar or honey, brandy. (Anderfels)
Pea Soup
Ram Stew
Turnip Stew
Turnip-Goat Stew (Fereldan)
Wild Rabbit Stew
Sides
Antivan Olives - Soaked in vinegar and stuffed with capers.
Brandy Soaked Cherries
Beer Nuts
Dried Fruit
Dried Meats
Jerky
Jerky Ball
Fried Potatoes
Hard-boiled Egg
Jarred Olives (Tevinter)
Meat Skewers (Orlais)
Peeled Grapes (Tevinter)
Picked Foods
Pickled Apples
The Pickled Apples of Arlathan - Apples said to be from the time of Arlathan. The taste is described to be one of fresh apples, with the same crispness.
Pickled Eggs - Eggs, sugar, salt, vinegar. Favored in Ferelden.
Pickled Fish
Pickled Lamprey
Pickled Nug
Pickled Ox Tongue
Pickled Vegetables
Pickles
Roasted Chestnuts (Nevarran)
Roasted Potatoes
Smoked Bacon
Steamed Beans
Toast
Wine Soaked Fruit
Miscellaneous
Hardtack
Provisions
Rations -Typically consist of dried meat, nuts, and a variety of other simple foodstuffs.
Dry Ration
Qunari Ration
Sources:
( If you want to find direct links or page numbers check out the wiki’s Food and Ingredients page.)
Dragon Age: Origins (Base and DLCs)
Dragon Age: Awakening
Dragon Age 2 (Base and DLCs)
Dragon Age: The Last Court
Dragon Age: Inquisition (DLCs + Multiplayer)
Dragon Age: The Stolen Throne
Dragon Age: The Calling
Dragon Age: The Masked Empire
Dragon Age: Asunder
Dragon Age: Last Flight
Dragon Age: Tevinter Nights
Dragon Age Tabletop RPG Core Rulebook
Dragon Age Tabletop RPG: Blood in Ferelden
Dragon Age Tabletop RPG: Game Master’s Kit: Buried Pasts
World of Thedas Vol. 1
World of Thedas Vol. 2
Dragon Age Comic: Magekiller
Dragon Age Comic: Deception
Short Story: Paying the Ferryman
Codex Entry: The Ben-Hassrath
Codex Entry: Blackwall the Last Few Years
Codex Entry: A Compendium of Orlesian Theater
Codex Entry: Feast Day Fish
Codex Entry: The Diary of Triolus Hertubise
Codex Entry: The History of Soldier’s Peak: Chapter 3
Codex Entry: A Letter to Harding
Codex Entry: A Magister’s Needs
Codex Entry: The Noladar Anthology of Dwarven Poetry
Codex Entry: On Avvar Cuisine
Codex Entry: The Pickled Apples of Arlathan
Codex Entry: In Praise of the Humble Nug
Codex Entry: Ram
Codex Entry: Redcliffe (Inquisition)
Codex Entry: A Scholar’s Journal
Codex Entry: A Supply List
Codex Entry: A Tattered Shopping List
Codex Entry: Waterlogged Diary
Letter: Feeling Inadequate?
Note: Cook’s Note
Note: Instructions for the Maid
Note: The Rusted Horn’s Menu
Note: Short Note
Item: Found Cake
Item: Sugar Cake
Item: Lamb Bone
Junk: Stale Biscuit
Junk: Qunari Rations
Armor: Wade’s Superior Dragonbone Plate Boots
Weapon: The Jade Ham
War Table Mission: Abernache over Under
War Table Mission: Disaster in the Deep Roads
War Table Mission: Inspire
War Table Mission: The Tevinter Resistance
The Last Court Cards:
A Tumbledown Shack
An Unofficial Meeting
Decide the Archoress’s Fate
Flames of Freedom
The Fields
Go Hunting
Good Neighbors
Graffiti
The Next Course
Outlaw Councils
The Whispering Woods
Your Bailiff is Attacked
Like this stuff? Wanna support the blog? You can check out my ko-fi.
#dragon age#dragon age meta#food meta#food of thedas#Thedosian foods#Thedosian cuisine#Thedosian Dishes#Foods of The Dragon Age Setting#Anderfel Cuisine#Antivan Cuisine#Avvar Cuisine#Dalish Cuisine#Ferelden Cuisine#Free Marcher Cuisine#Kirkwall Cuisine#Nevarran Cuisine#Orlesian Cuisine#Orzammar Cuisine#Qunari Cuisine#Seheron Cuisine#Starkhaven Cuisine#Tevinter Cuisine#Dwarf Cuisine#Elf Cuisine#Human Cuisine#long post#my meta#Archi is Archiving
12 notes
·
View notes
Text
morning witches!!
made lavender lemon cookies from components harvested in my yard and wanted to share the process!!
this is a fun witchy activity. lavender helps promote relaxation, happiness, cleansing, peace, protection, and purification. lemon helps promote mental clairty, joy, and is also good for cleaning. together, these are very spritely, joyful cookies!
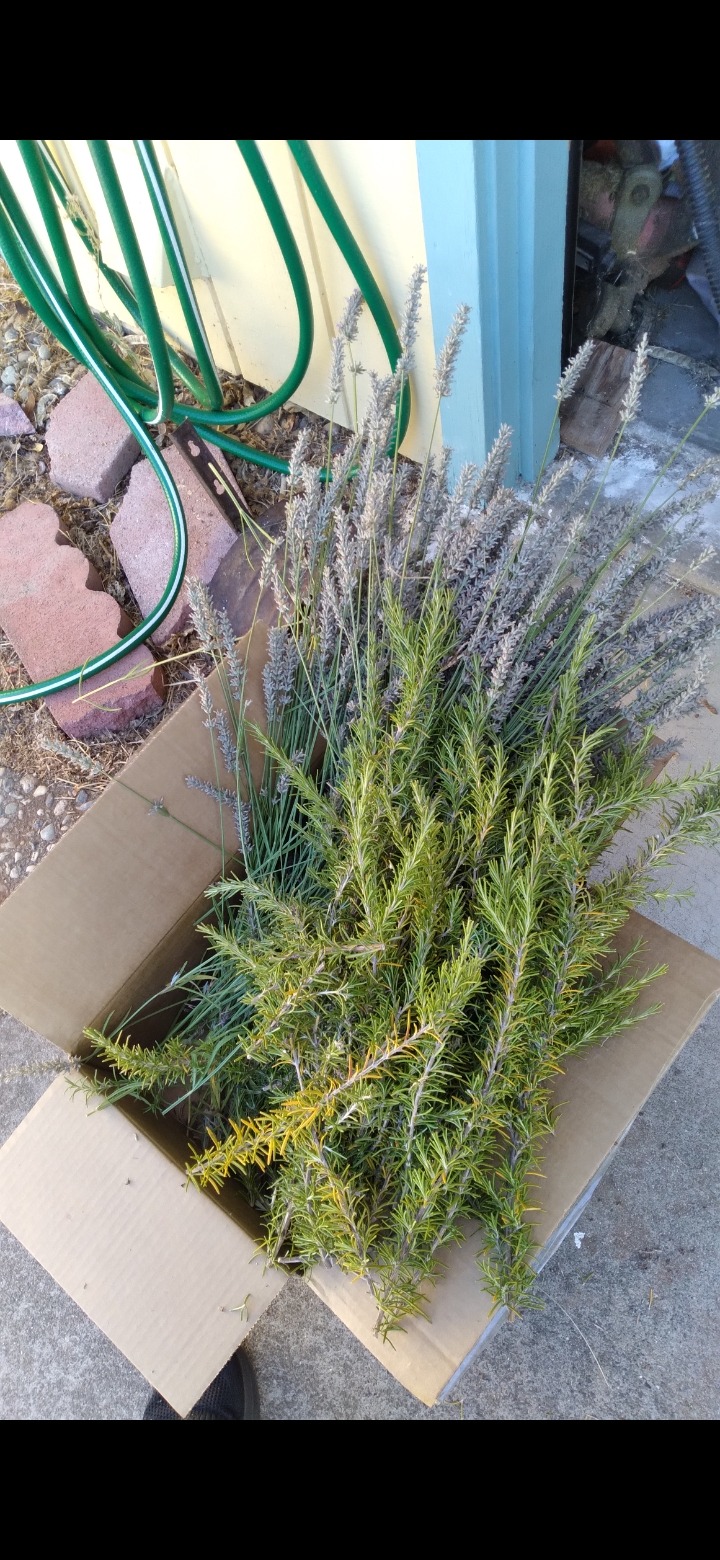
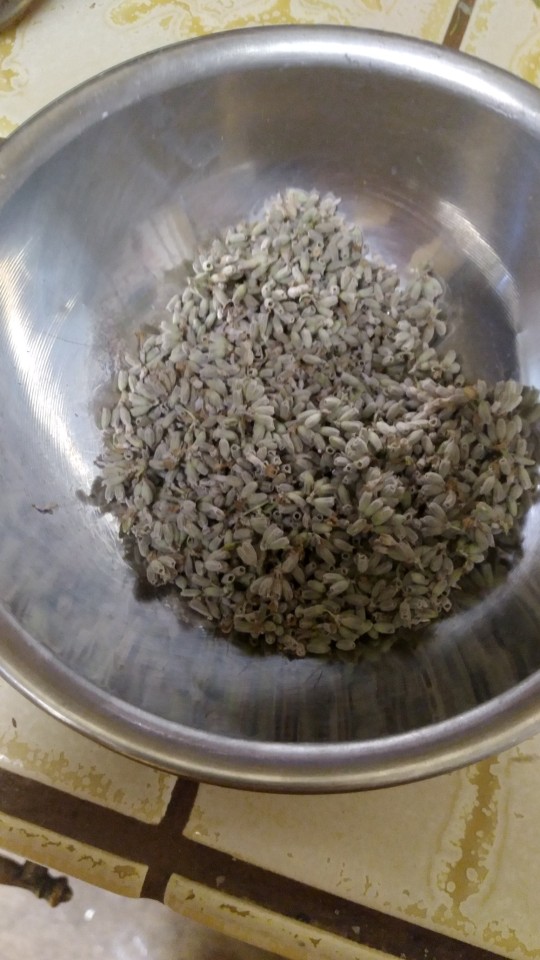
so, heres the box of lavender and rosemary I harvested yesterday.
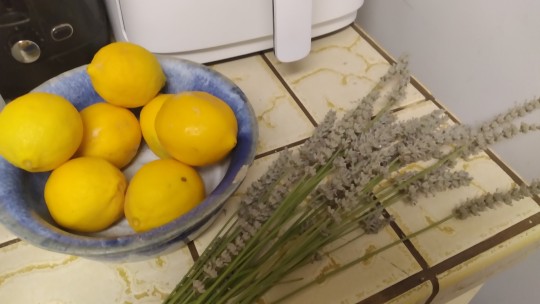
then i remembered we have a lemon tree! so i grabbed some of those too and took down a bundle of lavender i had been drying to make cookies :)
then of course you have to zest the lemons and squeeze a lil lemon juice (for later, its not required for this recipe.)
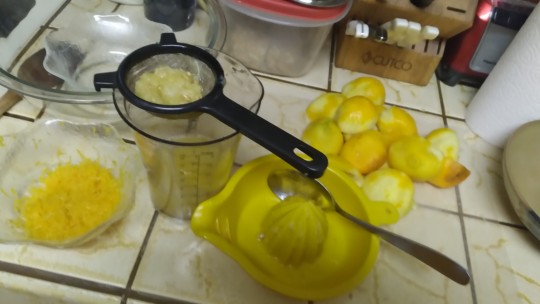
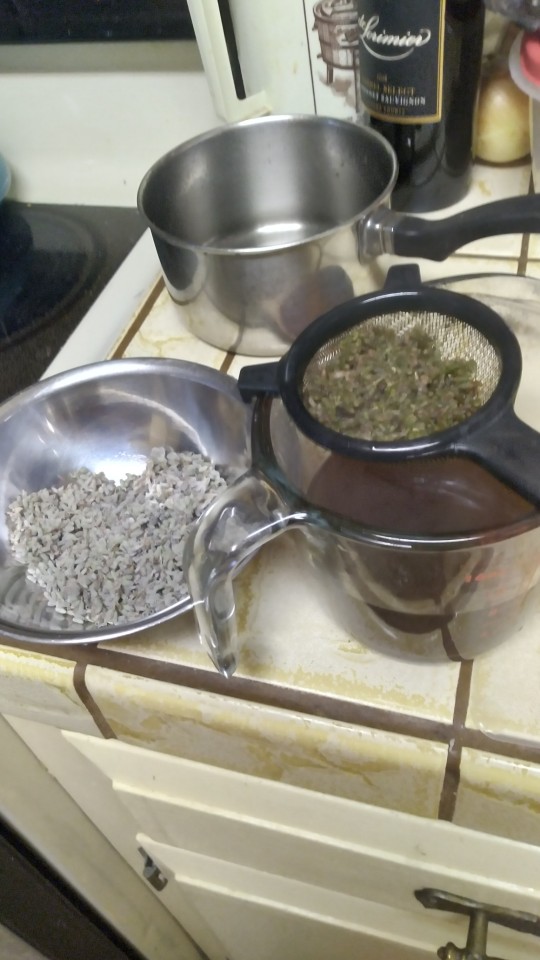
next, you get the dried lavender off the stalk, boil a little with sugar and strain to make simple syrup, and set the rest aside for later!
after that you can get down to the making of the dough, you will need:
1. 1/2 cup white or brown sugar
2.1/2 cup butter
3. 2 eggs
4. 2 1/2- 2 3/4 cups of baking flower (i used gluten free, ill talk about the Consequences of that later)
5. 2 tsp double acting baking powder
6. 1 (or more ;0 ) teaspoons of vanilla extract
7. 3 tbsp lavender buds
8. 2 lemons worth of zest
instructions:
1. cream the butter and the sugar. to cream, you can use a pastry cutter, potato masher, stand or hand mixer, or just be really aggressive with a spoon. combine them untill there a fluffy homogenous mass.
2. beat in the eggs, flour, baking soda, lavender, lemon zest, and vanilla.
4. make the dough into a ball and wrap in saran wrap. put it all in the fridge for 3-4 hours to chill.
5. after its chilled, get a clean cutting board, hopefully a larger one without those little rims to catch juice.
6. preheat the oven to 375° Fahrenheit, or about 190° Celsius
7. flour the surface you are working on, your hands, and your rolling pin lightly. then begin the process of flattening the dough with the pin.
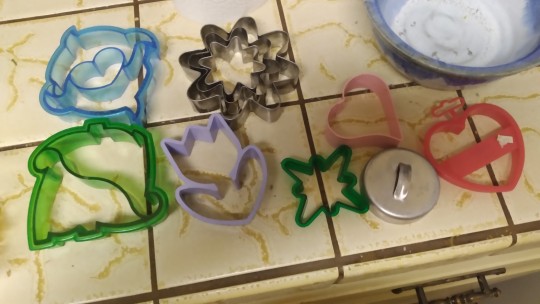
8. once dough is nice and flat, descend upon the dough with FUN SHAPE COOKIE CUTTERS!!! yay!!!
9. keep collecting the little dough bits that dont quite make it into thr cookies, ball them and roll em out more. do this till u have very little dough left, which you can shape into a little circle and add to the baking sheet (or just eat it, hehe.)
10. either add parcment to or grease and flour a cookie baking sheet. then place the cookies on the sheet and pop em in the oven for 7 - 12 minutes.
unfortunately, i did not get a picture of the dough as i am a goon and a fool :( but i took a pic of the cookie cutters!
Now, its time to make the icing! I made boiled icing and due to a unfortunately sized saucepan, covered my entire kitchen in sugar. SO PLEASE USE A MID SIZE SAUCE PAN, NOT A TEENY ONE LIKE I DID.
the process goes as follows:
you will need:
1. 2 cups sugar
2. 1 cup water
3. 2 egg whites
4. 1 tbsp lavender simple syrup
5. 1 tsp vanilla extract
6. (a little zest and lavender buds, if desired)
instructions:
1. combine water, sugar, and syrup in the MEDIUM (i cannot stress that enough) saucepan. cover on a medium heat for approx. 3 minutes, till all sugar crystals dissolve.
2. uncover and grab a candy thermometer. bring the sugar to a boil and keep an eye on the temperature, stirring often. the temp you are looking for is BETWEEN 238-240 DEGREES. the sugar should create long, delicate spindly strings when you take spoon outta the water.
3. turn the heat off. take the egg whites and beat UNTIL FOAMY.
4. this is where you must use an exceeding amount of caution unless you want chunks of cooked eggwhite in your glaze: pour the hot sugar mixture into the egg in a THIN STREAM, STIRRING CONSTANTLY.
5. once thats all mixed, add vanilla, and lemon + lavender if desired.
glaze pic:
when the cookies are done, put a little glaze on each one of them to create a tasty clear coating. additionally, if you make the cookies with GF flour: PUT ON THE GLAZE BEFORE MOVING COOKIES OFF THE PAN. the GF flour is a little less able to keep its shape and will fall apart on you if you dont put thr glaze on to keep it together. put the glaze on. let it set. theres a reason so few of my cookies are in this picture of the finished product:

HOPE YOU ALL ENJOY!! hope this helps,
Blessed Be!!!
#green witch#witchcraft#hedge witch#pagan#witchcore#witchcraft 101#witchery#witchy#baby witch tips#kitchen witch#kitchen witchcraft#recipes#witchy recipes#lemon#lavender#roll cookies#gluten free baking#baking#cookies#harvesting#homegrown#book of shadows#grimoire
12 notes
·
View notes
Text
The Secret to Perfectly Baked Goods? Silicone Mats!

Are you tired of your baked goods sticking to the pan or coming out unevenly cooked? Look no further than silicone mats! These magical baking companions provide a non-stick surface and even heat distribution, resulting in perfectly baked cookies, cakes, and more. Say goodbye to parchment paper and cooking spray – discover the secret to flawless baked goods with silicone mats.
Introduction to Silicone Mats
Baking is an exact science. Too much or too little of an ingredient can result in a disaster. The same goes for baking temperature and time. But with silicone mats, you can achieve perfect results every time.
Silicone mats are made of food-grade silicone, which is a heat-resistant material that can withstand temperatures up to 450 degrees Fahrenheit. They are also non-stick, so your baked goods will never stick to the mat. And because they are flexible, you can easily remove your perfectly baked goods from the mat.
So if you want to achieve perfect results with your baking, be sure to use a silicone mat. Your baked goods will thank you!
Benefits of Using Silicone Mats
When it comes to baking, there are a few key things that you need in order to produce perfectly cooked goods every time. One of those things is a good quality silicone mat. Here are some of the benefits of using silicone mats when baking:
They help to distribute heat evenly. This means that your food will cook evenly and won't be burnt on the outside while still being raw in the middle.
They're non-stick, so there's no need to use any extra oil or butter when cooking which can save on calories.
They're easy to clean - simply wipe them down with a damp cloth after use.
They're reusable so you don't have to keep buying new parchment paper or foil every time you bake.
They're made from food-grade silicone so they're safe to use in the oven or microwave.
Types of Silicone Mats and Their Uses
There are two types of silicone mats: baking mats and pastry mats. Baking mats are made of food-grade silicone and have a smooth surface. They are used to line baking pans and prevent sticking. Pastry mats are made of textured silicone and have a rougher surface. They are used to roll out dough, as the texture prevents the dough from sticking.
Baking mats come in a variety of sizes to fit standard baking pans. They can also be cut to fit custom pans. Pastry mats also come in a variety of sizes, but they are typically larger than baking mats so that they can accommodate rolling out dough.
Both baking mats and pastry mats can be used multiple times. They should be washed by hand with warm soapy water after each use. Baking mats and pastry mats can be stored rolled up or flat.
Tips for Baking with Silicone Mats
Baking with silicone mats is a great way to get perfectly baked goods every time. Here are some tips for using silicone mats:
Make sure your silicone mat is clean before use. Any dirt or grease on the mat will transfer to your food.
Preheat your oven before placing the silicone mat on a baking sheet. This will help the mat grip the baking sheet and prevent it from sliding around.
Use parchment paper or a non-stick spray on the silicone mat to prevent sticking.
When removing baked goods from the silicone mat, use a spatula to loosen them from the edges first. Then lift the whole piece off of the mat.
Recipes for Delicious Baked Goods Using Silicone Mats
If you're looking for perfectly baked goods, silicone mats are the way to go! Here are some recipes for delicious baked goods using silicone mats:
- Silicone Mat Chocolate Chip Cookies: These cookies are soft and chewy on the inside, with a slight crunch on the outside. The perfect texture is achieved thanks to the use of a silicone mat.
- Silicone Mat Brownies: These brownies are ultra fudgy and delicious. Again, the silicone mat ensures that they come out perfectly every time.
- Silicone Mat Pancakes: Make light and fluffy pancakes using a silicone mat. They'll be sure to come out perfectly each time!
So there you have it: recipes for delicious baked goods using silicone mats. Give them a try and see for yourself how amazing they turn out!
Conclusion
Silicone mats are a great tool for any baker to have in their kitchen. Not only do they provide an even heat distribution for perfect baking results, but they also make clean up a breeze! With so many benefits of silicone mats, it's no wonder why bakers everywhere are turning to them as their go-to baking accessory. Whether you are just starting out with your baking journey or you're a seasoned pro, investing in a silicone mat is sure to take your baked goods to the next level!
2 notes
·
View notes
Text
blessed samhain
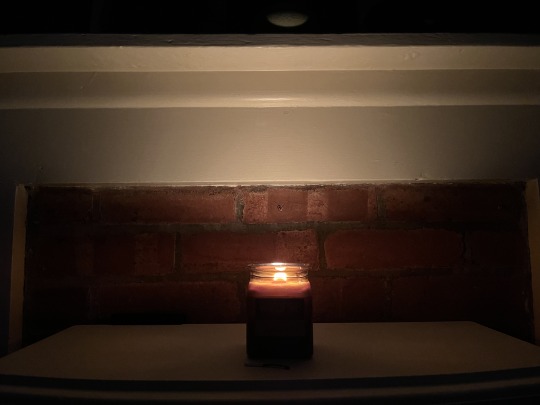
this year has been... not great in a lot of ways. Full of loss and struggle and without much to indicate that the future might bring relief from them. If anything, the future’s looking pretty effing grim. So i went a little more solemn for Samhain, with a candle and a smooth stone and quiet reflection on what’s gone that i still miss but also on what’s here that i treasure.
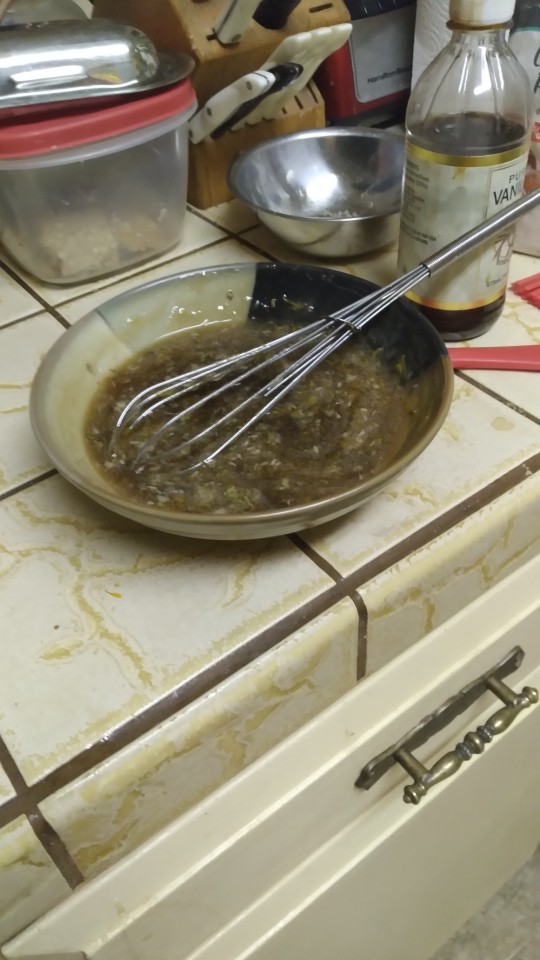
i also made a few tweaks to my soul cakes recipe. While i like the saffron and don’t want to omit it, it does tend to be such a dominant flavour and difficult to balance that i decided to brown my butter and infuse a few saffron threads in it while it cooled. This makes the overall flavour richer and softens the saffron to a lovely background note that doesn’t overwhelm. Also, as i halved the recipe and didn’t want to try to grapple with half an egg yolk, i substituted a tablespoon of applesauce for the yolk. The result was a nice tartness and less richness, which definitely suited my mood this year.
my original recipe can be found here. Modified recipe is as follows:
ingredients:
1/2 c (115 g) butter
small pinch saffron
1/2 c (115 g) granulated sugar
pinch of salt
1 large egg
1 T applesauce
1 1/2 c flour (200 g)
1/2 t baking soda
1/2 t baking powder
2 T cinnamon
1/2 t nutmeg
cinnamon sugar for rolling
directions:
brown the butter (heat slowly in a saucepan. Once it’s melted keep an eye on it, swirling/stirring regularly, until it stops foaming and the solids begin to turn a toasty brown. Be careful not to let it burn!)
set the browned butter aside to cool. Add the pinch of saffron. Saffron can be crushed/chopped first, which is fiddly but helps avoid random saffron strings in your cakes. Once butter is at room temperature, refrigerate it until it’s time to bake.
when you’re ready to make the dough, soften the butter then mix it with the sugar. Beat for at least 2 minutes or until the mixture is very light and fluffy. Add the egg and applesauce and the pinch of salt. Mix thoroughly.
sift the flour with the baking powder, baking soda, cinnamon, and nutmeg. Add to the wet ingredients and mix thoroughly. Dough will be soft and sticky.
Gather the dough and put it on the centre of a piece of clingfilm (plastic wrap). Wrap it, then form it into the rough shape of a log, twisting the edges of the film and rolling the dough out until it is a smooth cylinder.
Refrigerate for at least 30 mins, up to overnight.
at baking time, preheat the oven to 375F/190C. Line a baking sheet with parchment paper and have it ready. Remove the dough from the fridge and unwrap it. Roll it in cinnamon sugar until the sides are well coated. Slice it with a sharp knife into rounds about 1/4 inch (6mm) thick. Place these on the parchment-lined sheet. If necessary, pinch and press them until they are a nice round shape. Press a cross into each one using a dull knife (you may need to wet it in between each one, as the dough will stick).
bake for 10-12 minutes or until the edges are just starting to brown and the bottoms are dry. They should still be soft in the middle. Let cool on the baking sheet before removing to a plate.
good with any kind of tea or hot drink of your choice, apple butter, jelly, or just on their own.

Samhain blessings on you all 🕯
3 notes
·
View notes
Text
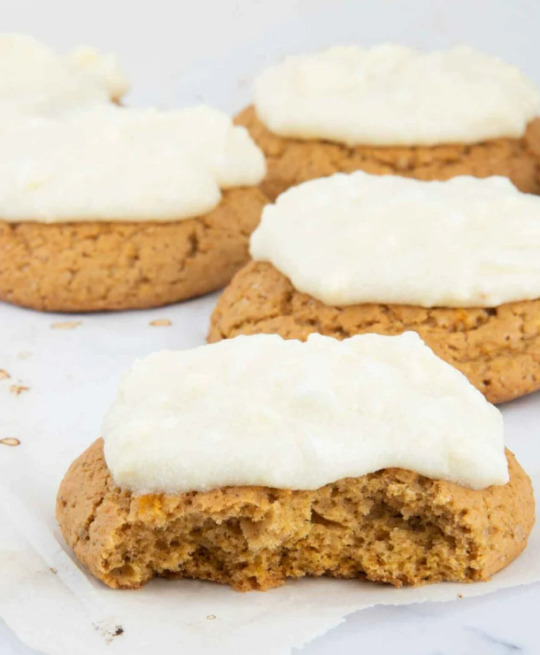
Vegan Pumpkin Cookies

Vegan pumpkin cookies, tender and full of flavor. They are ready in just 30 minutes and are so delicious that you will not be able to stop eating.
This recipe is the best vegan pumpkin cookie recipe I've ever had. They are very soft, but best of all, they are incredibly tasty.
They are ready in just 30 minutes and they smell great as they bake. They are perfect for fall and winter, although you could eat them all year long. You will be a hit every time you make them because everyone, your family and even your friends and co-workers will love them!

Ingredients
Vegan Butter – I suggest making your own version of vegan butter at home because it's healthier, but you can also buy ready-made.
White sugar and brown sugar – You can use any type of sugar. Make sure the sugar you use is vegan.
Vanilla essence – I always use homemade vanilla essence because it is cheaper and very easy to make, but store-bought is also a good option.
Pumpkin Puree – Make your own puree following my recipe or use store-bought.
Wheat Flour – I have only made this recipe using wheat flour, but you may be able to use a different type of flour. You will still need to adjust the amount. For a gluten-free version, you can use our gluten-free flour recipe.
Pumpkin pie spice: super easy to make! But if you want you can use the one you find in the supermarket.
Vegan Cream Cheese Frosting: This ingredient is optional, the cookies themselves are delicious!
variations
To make it gluten-free: Use a gluten-free flour blend for a gluten-free version of this recipe. Keep in mind that you may have to adjust the amount you are going to use.
To make it soy free: use vegan soy free butter.
How to make vegan pumpkin cookies
- Add the vegan butter, white sugar, brown sugar, and vanilla to the bowl of an electric mixer and beat until combined. You can also use a large bowl and a stick mixer.
- Add the pumpkin puree and beat until well combined.
- Add the rest of the ingredients (except the frosting) and mix until well integrated.
- I used an ice cream scoop to make the cookies, but you can also use a regular spoon or even your hands. Fill the scoop with cookie dough and simply press and drop onto the parchment lined cookie sheet. Leave a distance of about 5 cm between biscuit and biscuit (about 2 inches).
- Bake for 12-15 minutes or until lightly golden.
- Remove the cookies from the oven and allow them to cool on the cookie sheet for 5 minutes before transferring to a wire rack to cool completely.
- Once they have cooled, pour a little frosting (you have the recipe in the box below) on top of each cookie and sprinkle a little cinnamon or nutmeg (optional).
How to store them
- In the fridge: store them in an airtight container in the fridge for 1 week.
- In the Freezer: To freeze vegan pumpkin cookies, transfer to an airtight container and store in a freezer for up to 3 months. After baking, let them cool completely, then place them in a single layer on a parchment-lined cookie sheet to freeze, and finally place them in a freezer-safe bag. Squeeze all the air out of the bag and place them flat in the freezer. Most cookies thaw just fine if left out.
- How to reheat them: If you want to enjoy these cookies warm, you can reheat them in the oven at 325ºF (160ºC) for about 5-10 minutes.
Check out: 5 minute vegan cookies
Read the full article
0 notes
Link
0 notes
Text
The Mini Brioche Bun
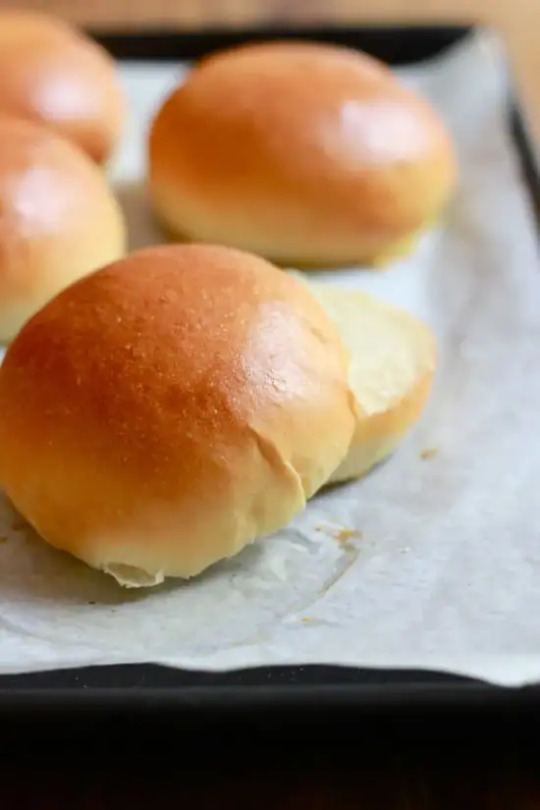
The Mini Brioche Bun is a perfect bread for your brunch menu, and makes a great alternative to typical French toast. You can also use this bread to make burger buns, and toast the brioche for a quick and delicious snack.
Make brioche dough
You can make mini brioche buns using just a few simple ingredients. They are a great treat that’s easy to make. These sweet little treats will be the perfect addition to any meal.
The basic ingredients for homemade brioche are flour, yeast, and butter. If you are using fresh yeast, you must proof the yeast first. After this step, you should be able to proceed with the rest of the recipe.
You can also use instant yeast instead of fresh yeast. However, the results will be less than spectacular.
To ensure that your brioche dough turns out well, you should follow the following steps. Before you begin, you will need to make sure you have all the required ingredients. This includes yeast, flour, butter, and milk.
You will also need a large egg, which should be weighed without the shell. Use a kitchen scale to measure out the soft dough.
Once you have your ingredients, you can mix the dough. When mixing, you want to scrape down the sides of the bowl. Add the butter in bit by bit. Overmixing the dough can lead to a dense, tough dough.
Bake brioche burger buns
If you are looking for an easy way to make homemade hamburger buns, you might want to try baking brioche buns. These buns have a soft, chewy texture and are delicious toasted or eaten on their own.
To make brioche buns, you will need flour, milk, eggs, butter, and sugar. Start by mixing the dry ingredients in a mixer. Make sure the mixer is equipped with a dough hook.
After the yeast has been activated, add the melted butter to the mix. The mixture will be very soft and sticky. Afterward, the dough is flattened into round shapes and placed on a parchment paper lined baking tray.
Allow the brioche buns to rise for 30 minutes. Place a cloth on top of them to prevent them from drying out.
Bake the brioche buns for 25–30 minutes at 350 degrees F. They should be golden brown on the outside and have a nice crust. This can be done using a digital thermometer.
Toast brioche buns
Brioche buns can be toasted in the oven, on the grill, or on a pan. They are soft and buttery and delicious. Besides being perfect for a sandwich, they can also be used as dinner rolls or as a breakfast accompaniment.
To toast brioche buns, you first need to make the dough. You can start with a recipe that uses whole wheat flour, which is high in fiber and helps you lose weight. Or, you can try making a naturally sweetened recipe with cane sugar.
Before starting, you should make sure that the eggs are at room temperature. If the eggs are not at room temperature, they will not rise properly. This means that the brioche dough will not be sticky and will not be able to hold its shape.
Once the dough is ready, you should divide it into eight portions. Each portion should be about one and a half inches in diameter. After shaping each ball of dough, you can place them on a lightly floured baking sheet. Do not forget to cover them with a damp towel before baking them.
Store brioche dough
If you’re making homemade brioche buns, you may be wondering how to store them once you’ve made them. The answer is very simple: the key is to keep them at room temperature.
They can be stored for up to six weeks in an airtight container. When you’re ready to eat them, reheat them in a low oven for a few minutes until they are warm.
Alternatively, you can toast them in a toaster oven. You can also freeze them. However, you’ll need to slice them horizontally before freezing.
Using a standing mixer helps you to make brioche dough more easily. For best results, you should use a kitchen scale to measure the softness of the dough before rolling it into balls.
You’ll need five eggs, plus some fresh yeast. You’ll need to proof the yeast for at least a few hours before you use it.
Then, you’ll need to mix the ingredients in a stand mixer, or on a mixing board, or even by hand. After the initial mixing, you’ll need to leave the dough to rise for a few hours, or overnight.
0 notes
Note
Can I have something super soft and sweet with Andrea? I need some content from my cottagecore husband. You can decide whatever you want to do with it!

The Perfect Day [Andrea Marowski x fem!Reader]
Word count: 2.3k
Warnings: fluff
A/N: thank you for making me write this lifesaver <3
The soft chirping of the birds woke you up. You stirred lightly, a smile coming across your lips as you felt the soft lavender scent over your young husband skin. You slept holding hands, your forehead against his chest as your eyes got used to the bright light outside the window.
The soft cotton sheets clung around your naked bodies along with some heavier quilted duvet, legs tangled as he breathed slowly still deep into his slumber.
You observed him into his simplest nature, he looked so much younger when asleep, his features perfect as kissed by the gentle morning light.
You slowly moved your hand away, he frowned but with time you mastered the art of leaving the bed without awakening him. He huffed, face buried into the pillows as he rolled onto his stomach covering the warm spot you left. Your hand gently onto his soft hair caressing them away from his face. The time seemed to be something unknown to you.
After adjusting the covers over his shoulder you shivered into your nakedness, your hands grasping onto your white nightdress pulling it over you to cover your frame before adding up a burgundy cardigan belonging to Andrea to protect you against the goosebumps your body suffered for leaving the warm comfort of his presence.
You stepped into the kitchen quietly, breathing in the soft smell of a new day. Your hands went immediately to unveil the dough that was covered by a cloth and you left to raise during the night, it was now ready to be baked and you’ll have your warm bread for the day. Andrea spent the day before picking up the mature fruits from your trees, so it was easy to wash them and cut them while you put on the pot for your morning tea.
You hummed softly a song that Andrea was rehearsing with his violin for few days, now helplessly stuck with you, your hands unveiling the pie you prepared the day before cutting some slices.
Before anything else you moved away going to your garden standing barefoot onto the cold stone of the steps, you hugged yourself enjoying the view before slipping on some comfortable shoes and settling the table. The summer day was amazing and the morning breeze made the heat unnoticeable. A white table cloth with fresh flowers and then your started going back and forth from the kitchen to the garden bringing dishes and plates
You blinked surprised as little Anthony, the 14 years old son of the local baker, passed by with his bike waving at you. He blushed as you just looked so calm and relaxed.
“Got the mail and the newspaper Mrs Marowski” he said as he hopped off his bike to hand it to you. You picked one of the peaches you got into a basket nearby handing it to him I return “Thank you Anthony, have a good day”
He smiled and nodded vehemently as he rushed off back to his duties.
You looked down onto the mails: an invite to a concert in London, something from your parents, something in polish coming from Andrea’s family and a voluminous yellow envelope that was coming from Andrea's favourite music shop in London and by the weight you could tell it was some new music sheets. Also a note from your seamstress telling you that the new winter coats need the last fittings.
You were about to check the first page of the newspaper as a loud meowing made you jump.
Andrea was standing in front of you, soft khaki pants with a loose white shirt, your cat draped onto him, a beautiful grey British short hair who was staring at you.
“Did Laszlo woke you up?”
“Did you doubt it?” Andrea asked with a chuckle as he leaned closer to you, a kiss resting onto your lips as the cat jumped off his arm.
“I hate to wake up on an empty bed, even if your table setting is the best” he assured as he smiled at you tangling you into another kiss.
“Mh, the tea” you just reminded yourself as he chuckled
“One more, one more” he begged between chuckles stealing another kiss before letting you go inside and he proceeded to give the annoying boss of your cat the food he deserved and demanded.
He sat on the chair enjoying the soft breeze as you brought a small tray with the tea to complete the set up.
He hummed softly opening the package coming from London gleefully as he admired his new music sheets.
“Your presence is required to see a new concert, I think they want to show off to have you as solo violin” you said showing him the invitation while sitting with him. He admired you, he stared at you with a soft smile “I will have to hear my agent first” he said as he meant you. You always had a good gut feelings and often kept him from taking random impulsive decisions.
“There’s something from your family too” you added and he smirked
“You read it first” he said as he was helping you with polish and you sighed softly using one of your butter knives to open the letter. His hand quickly went to your cookies taking one happy bite as he still stared at the music on paper.
His eyes darting up only to look at you focused onto the paper scribbled by his parents and you nodded explaining to him a letter that was mostly about every day updates
“This word” you signalled as he leaned in lightly in to read it as there was only one point you didn’t seem to grasp not even by the words before or after it.
He chuckled loudly almost chocking onto the crumbles covering his mouth with the back of his hand.
“What?”
You asked as he blushed deeply.
“Oh no, they hated my knit work? Is it that?”
He shook his head as you frowned at him waving that letter expecting an answer before your mind went onto the worried train of thoughts.
“It means” he licked his lips, eyes shining “It means pregnancy, not literally it is a more discreet way to say it, more like expecting something, but they mean that, my mum wants to know when she can call herself grandmother”
You blushed deeply as you looked down, you are such a young couple and you’re actually enjoying this phase, now it is not like every little delay of your period didn’t make your heart do the backflips, but to be asked so directly felt weird.
“Don’t worry about it, she means it in a good way, they adore you and they keep saying how you brought some sense into me”
He smiled taking your hand gently kissing the back of it.
“We have Laszlo for now it is more than enough” he joked to light you up and you giggled “Indeed” you said as you looked around finding the cat running after some butterflies. Andrea always complained that Laszlo hated him, Laszlo was your cat even before the polish man came into your life, but truth to be told they were best buddies: the cat would always check where he was and Andrea was the first to always feed him.
“I was thinking we could go to town today, I promised Ursula to play for her tea party with some friends coming all the way from Edinburgh and maybe we can go past the bookshop and buy some flour and whatever else. I could plant some pumpkin seeds, I love your velvety pumpkin cream for autumn”
You smiled as he really can’t wait for the colder season even if that meant to see you more dressed and clothed he also loved to nuzzle with you in front of the fire.
“Agreed” you said and he smiled proudly as you handed him the letter from your family and he sighed softly but proceeded to read it like you did with his.
He was way better at English, but mostly spoken English, he still hated to read and you picked books for him too even if he always puppy eyed you into reading for him.
He read quietly the letter as you ate some pie. He frowned lightly as he spelled out loud some words, sometimes he did it to learn the difference from a word that he knows and how it was written.
When you both drank your tea and he finally indulged into the local news he hushed you to get dressed “You take the longest to get ready, I’ll clean up” he said winking at you making you huff and roll your eyes playfully.
So you did, you went to wash yourself and braided your hair into an updo hairstyle, a light white dressy shirt and a long pleaded skirt for you as you also prepared the clothes for him.
As you redid your bed and he walked inside after clearing up the kitchen you couldn’t help but adore him into his little routines, the way he shaved and got prepared, the way he wore the clothes you figured out for him with happy delight. He loved how you looked after him, he felt loved, the small attentions like that one put him at rest, he relaxed and he felt babied and he loved it.
He picked the case of his violin handing it to you using it to pull you closer and steal another kiss. You chuckled as he leaned in to kiss you again, and again, and once more.
“Andrea” you whispered as he chuckled softly kissing you once again, he smelled so good, his skin soft and perfumed thanks to his aftershave oil.
How could you resist him?
“Two minutes” you whispered leaning back down the violin over your vanity to be able to wrap your arms around his neck letting out a soft yelp as he fell over you on the bed.
Useless to say that it wasn’t two minutes and not even twenty, your trembling legs around him and the way you guided him to give you just what you wanted from him always drove him crazy.
After a short nap you really had to begin to get going, he helped you to dress up slowly zipping up your skirt and you had a new rush of pleasure just by buttoning up his shirt covering his chest peppered with hickeys.
You locked the house and he pulled out his black bike putting the violin box in the basket on the front along with your white one “I prefer when we go with one” he complained but you chuckled “yes, but if we buy few things we will have to go by walking” you made him notice and he sighed nodding.
He waited for you as you pedalled your way to the town centre, he was swaying in front of you and you raced a bit against each other until the stone bridge that welcomed you there.
“See you at Ursula’s” you said and he nodded leaning in to kiss you one more time, he indulged into that kiss a littlest as he opened his eyes slowly, a smile playing over his lips.
“My wife” he said, sometimes he repeated it like he had to remind himself. You chuckled as you kissed his cheek and you go parted.
You knew Ursula liked to pared Andrea off, you let her do it, she came with time to like you, she saw how much good you did to Andrea, how much balance you gave to him, his behaviour was stable, he settled down.
You stopped to the local grocery store taking up some spices, some cinnamon in particular as you knew how much Andrea loved it on sweets, few little cooking and baking items you missed and then off to the bookstore.
“Hello hello” you said as the old man there greeted you “The books you ordered arrived” he said as he moved his shaky legs into the back of the shop bringing you the easy books in polish you ordered to practice some reading. You smiled looking at them as Andrea gave you the titles of books that made his youth and also few new ones for him. You added to that stock a new cooking book and few novels for Andrea and his English. The old man was the sweetest, he kept the booster open no matter the weather and politics and he always made sure to find anything you might be looking for.
He helped you tie all your buyings together onto the bike so after paying you just pushed it walking through the town, just enjoying a good time around giving yourself time until you made it to Ursula’s home.
Well, you called Ursula’s but Janet as always there even if her presence was always quieter you teamed up with her most of the time letting Ursula enjoy her time with Andrea.
You smiled stopping in your track as you heard the soft sound of the violin, you closed your eyes breathing in, like you could enjoy the music through the air.
You adjusted your dress and smiling to yourself, the moment sinking in slowly.
Your husband, your life, the idea of coming back home together, cuddle on the couch, listen to his words, having his honey eyes on you.
A natural smiled appeared on your lips.
After few moments you decided to keep going, you pulled your bike letting it rest against the fence, Janet appearing at the doorstep to welcome you in.
Your perfect day.
Tagged @cazzyimagines @lieutenantn @handmaiden-of-mischief @thesunflowersutra @zemomybeloved @fictionlandslanddreams@charistory @greeneyedblondie44 @apparrio @hb8301 @whatawildone @rhymerhymerhyme @thehuiabird @lilith-blackrose @unbeatablecurlgirl @obsidianlaszlo @alindeluce @zemosimp05 @baronesszemo-blackwood @nocapesdahling @everythingbeginsineternity-blog
#andrea marowski#andrea marowski fanfiction#andrea marowski x reader#andrea marowski x you#andrea marowski headcanons#cottegecore Andrea Marowski#daniel bruhl#daniel bruehl
178 notes
·
View notes
Last Seen Blogs

what-happens-in-venice
What Happens In Venice...
mangoh8rmin
Big Mango Fan, Personally

kindadontlikeit
i don't know nothing

youngpimp-kayy
Kourtney Dee

cartelessud
Carteles Sud