#add padding to google sheets cells
Text
apartment stuff from howtogrowthefuckup
not all of it, but stuff i find particularly useful/want to remember. RIP this blog. the gimmick wears off after a while but it was genuinely useful information.
BUDGETING
suggested monthly budget for groceries for a two-person household is $553. estimated weekly budget is around $100.
find a pad of paper and a pen and keep it with you for the next 24 hours. Write down every single fucking thing you use or even touch in your house. Tomorrow I want you to look at that list and figure out the cost of everything.
keep track of how much you spend on gas monthly.
add in your estimated utilities. You can fucking google that on your own, because it’s going to be different for wherever you want to live. Absolutely do this if you plan on moving to a different town or state.
divide your total monthly income by three. Hey, look at that, it’s my good friend Math again. Funny how he keeps showing up. Make sure the number of your expenses is less than the other 2/3rds, if it is, you can continue.
FINDING APARTMENTS
apartments.com
Focus on your top 10. Then your top 5. Then your top 3. Don’t go any farther than that (and don’t get rid of the research for the other 7 just yet). Create crazy complicated rating systems. Make an excel sheet or start putting stuff on your wall and connecting them with strings. Go full-on serial killer. Dedicate yourself.
You should also make note of how big the room is so you know if you can even fit what little you own. The same goes for the hallways or stairs or whatever exists outside the apartment on the way from your car. Could you get your mattress through all that shit?
PACKING
Figure out what you want to donate and what you want to put in the trash before you start packing.
Do not go grocery shopping right before moving... Just wait til you’re in the new place to make that trip.
Change your address. Like a week before you move. While you’re doing this, make a list of everywhere you’ve entered your address and need to change. Keep that list. Your future self will thank you someday.
Start in one room and pack all that before moving to a different part of the house. This is a good way to keep all your stuff together and it’s also a good way to find out that you own five decks of cards or one too many furbys.
Put everything into piles: keep, donate, and ditch.
Label the boxes with what room they belong to so you know exactly where it needs to go. Some people like to also mark this with a color coded sticker.
Also label what’s in the boxes. For example: Kitchen - silverware; cooking utensils; hot pads; magnet collection. You don’t need to label every item individually, but have some idea of what’s in there. Label it on more than one side. Don’t label it on the top, because you’ll just end up stacking boxes on top of each other.
Distribute the weight of your stuff. Mix heavy books with stuffed animals.
Alternately, pack by weight. Heavy stuff goes in small boxes, light stuff goes in big boxes. Basically what I’m saying is don’t pack a massive box with too much weight that it’s too heavy to carry or will break the box.
Use all of your suitcases and bags for packing!
For toiletries - take off the top, place plastic wrap over the opening, replace the top. This way you don’t end up with lotion all over your towels or something.
Know what you’ll need immediately and make sure those boxes are the last thing on the truck, first thing unloaded at the new place. Maybe keep those things in a clear container so you can see exactly what’s in there. Hint: three of the things you’ll need immediately are your toolbox, cleaning supplies, and toilet paper.
note to self: get toolbox and first aid kit.
Take pictures of the new apartment. Before anything goes in it. This way if there are any scratches on the wall or stains on the carpet, the new landlord can’t say it happened during the move.
ASKING QUESTIONS
Apartments.com and My First Apartment both have lists of questions to ask.
questions directly from the blog:
Is the apartment available and is it still listed at the same price or are they trying to swindle you/are they completely incompetent at updating their listings?
Will it be ready when you need it? It’s gonna totally suck if you find the right place and find out it’s not available when you’re ready to move
Are there appliances? Are they included? Do they even work?
How old is the apartment? This is important to ask because it will tell you how much trouble you’re going to have. Like, if it’s Civil War era, you might have issues with foundation cracks or old wiring or ghosts of soldiers waking you up in the middle of the night.
Have there been any issues with insects, rodents, mold, or mildew? You have to ask this. No good self-respecting property manager would tell you this of their own free will.
What kind of security is there? Did you have to go through a gate when you came in? Do you need a key to get into your building before you get into your door? Or does your door face out cheap motel style? Are there electronic pass codes? Is there any kind of security force on site?
If you ever find someone willing to hang out with you, is there a special place they need to park? Do you need to let the office know if they plan on staying the night?
Where do you park? Is parking included? Is in indoor or outdoor?
Do you need a city sticker to park on the street? [Note: I asked this when I moved to Missouri and everyone thought I was batshit crazy. This is normal in places like Chicago, not so normal elsewhere. See if you can determine that before you ask a crazy question.]
Can you paint the walls? Can you put holes in the walls? Can you do whatever it is you do to walls, so long as they look the same when you move out?
What exactly is the maintenance policy, beyond walls? What is covered, what’s not? And who do you contact when there’s an issue? Is there a maintenance person on staff, or do they call out to someone in the area? Do they have a 24-hour emergency maintenance line
Is there heat and air conditioning? What kind? If it’s a window unit, will it be included in the apartment? Are the costs of heating and cooling included
Do you have control over the temperature or is it a building thing?Are any utilities included?
Who are the cable and internet providers in the area? What are their rates? Does the apartment complex have an exclusive contract with one of the companies?
What kind of people live here? Do they have children? Are they all ancient? Do they have, as I suspect my last neighbors did, a bowling alley in their apartment?
Just how much are you going to hear from your neighbors? On a scale of Ernest Hemingway to Les Mis, how thick are the walls?
When is rent due and how do they want it? Are checks required? Can you pay with a credit card? Do they want it all in cash? Also, how is rent submitted? Can you pay electronically or do you drop it in a mailbox?
Do you need renter’s insurance? About how much does it cost? Are there any weird things that need to be included that might not be everywhere? Like, are earthquakes an issue?
What is the process for applying to the apartment, should you choose to rent it? Are there credit checks?
What’s the pet policy? Is there pet rent?
Are there quiet hours or other weird rules about volume or people or places or things?
Are there public areas like pools or parks or gyms? What are the rules regarding those?
If you have a roommate, will both of your names be on the lease, or will one person be designated as the responsible party (you better pray it isn’t you)?
What about trash? Is there pick up or dumpsters? Recycling?
Is there a storage unit included? Where is it? What kind of security does it have?
What happens with deliveries? Do they all go through the front office or are they left on your doorstep? Are you able to pick stuff up at any time? Do you need certain ID for it?
Is there a dishwasher? Is it louder than the bowling alley next door?
If you’re in an area that gets snow, do they plow or shovel? Will they totally bury your car if you don’t move it when the plow comes by?Is there public transportation anywhere?
not questions, but things to pay attention to:
Where are the outlets? Take note of prongs.
Are there permanent light sources or do you need to go to Ikea?
How big are the rooms? What shape are they? Are you going to be able to fit all your shit in here? [Note: you should already have a floor plan online, but ask for a paper copy if they have one.]
Do the people in the office seem at all competent? Are they going to make your life a living hell?
Can you get your stuff up/down the stairs or through the doors when you move in?
Are the appliances/apartment gas or electric?
Bathtub or shower?
Can you open the oven and fridge and still walk through the room? Will opening any doors block off other areas or hit something else?
Can you get a cell signal in the apartment? Seriously.
EDIT: waybackmachine links:
1 • 2 • 3 • 4
48 notes
·
View notes
Text
Here To Change It All...
Hey Guys -
So hmmm… What can I say? Ok, well I have been working on this Business Plan for the past 13 years.
I took the past 13 years and developed a final plan to solve Homelessness, Poverty, and Sexual Exploitation. It took me around 3 years just to get an idea about and to learn how Crypto Currency can fund the entire business. Unfortunately due to Crypto Currency Mining the video cards I need for it are about $4,500.00ea. And I need 20 of them to complete one Build.
On another note I invented a game app and the other night I invented another App idea too. It will be cool to get them made for real. Right now I’m kind of in an obsession with this Pastel Goth look and I want to create my own look by taking some Bell Bottoms from this company called Gypsy Rose and a cool Hoodie and then order Bulk Boxes of the same color Boas and a Hemp Back Pack and some clothing LED Lights and to sew them on to the clothing really carefully to get an amazing look and to buy some books on Cosplay Makeup, Glam Makeup, and Tutorials on Makeup for Black People and create my own Glam Goth look. I want to produce the images into products for my new store when I open it.
I have worked for over a decade on my plan to rescue the homeless, people in need, exploited kids and adults and it took me three years of researching Ethereum Mining to0 figure out how I would fund my company. One NVIDIA.com Video card will cost me around $4,500.00 to get the best one they have and the most profitable of them and my build that I designed takes 20 Video Cards and brings in around $10K/mo. So I’ll make Hundreds of Thousands of them and fill every business location I gets basement with as many Builds as will fit and warehouses full of them too.
Once I get going a lot of people will want for little anymore. I told my fiancé that I would set him up with another personal place of his own, like a loft or something and have several Ethereum Miners there just for him and I’ll show him how to use them and make money with them so that we’ll be on more equal footing and I’ll have legal documents setup that will supply him with his own place and no matter what our relationship turns out to be that I can’t cut him off or affect him in any way to upset his stability and financials. I hope to have it setup before we get married.
I plan on having several locations to live over time but one of the very first locations that I get and setup is going to be a three bedroom apartment that I’ll setup to be displayed on my company’s home page in the same way that a 365 degree display of Real Estate Property is displayed except that I hope to use the help of Ad Agents to have special products setup, like displays from Coca Cola, and other Brands and to get the Companies displayed to provide donations for the advertisements.
I hope to land contracts that are with like laundry soap and cleaning supplies and brands of Pre-Paid Credit and Gift Cards, and Electronics, etc. To use only their brands at my locations for special discounts or with some kind of residual donations from them, so things like Bed Bath and beyond and Companies that sell bedding and so on. I hope to get special accounts or even to open Hundreds of Reseller Accounts and purchase from my own accounts.
I’ll have fractureme.com High Def Glass Photos hanging on the walls that display images of homelessness and people living in poverty, etc. As the artwork and otherward the location will be setup with Height of Technology in i9t and Luxury and excellent decorations and renovations with new smart appliances and if possible in home laundry too.
The entire apartment will be setup to look as if a family lives there that has two kids, a boy and girl and the rooms will be fully setup and stocked with clothing and desks and school supplies, software, text books, reading books, game stations and games, CDs, DVDs, Anime, and Desktop and Laptop on the bed with MP3 Player and cell phone on its charger and even a few pieces of trash in the trash cans and so on, even the adults rooms will be setup the same with a Home Office and files in the living room, etc.
Every room will come with their own safes and have finger print and key pad locking doors and in the safes will c0ome an envelope full of cash and several types of pre-paid cards. The computers will be top of the line and Extreme types, totally maxed out, with extensive external Hard Drives and full of useful software that is fully paid for and more.
Once the 365 degree walkthrough Video is made than everything will be packed into specially positioned glass cases for display, so like the laptop, cell phones, digital cameras, camcorders, Gift Cards, and some other things will go into displays so that when there are walk trough's to help gain donors less can be stolen easily.
I will spend a lot of time setting up the location with a simply safe security system and register everything in the apartment with renters insurance and register them with their own individual companies. I’ll have the entire place setup with services and each room with smaller Ethereum Miners that work and are actively earning money and have monitors on the walls that display the earnings and exchanges pricing in each room. But the apartment will be maintained by my financial Company that I get.
Every Account would be active, the lease, the cable, the Home Phone, mobile phones, Internet, and all the individual emails, and all the software will be registered to those emails and even Turn-Key online businesses and so on setup as examples and displays for the apartment and newsletters, and more with ads for the Turn-Key Businesses.
The files in the Offices and kids rooms will hold the Hard Copy files of all the Accounts and Registration Info and Gamer Info. Emails and Advertisement info and more, including the online versions, Browser favorite links, and profile saves, address books filled out and more. It seems like a lot but every tiny detail will be through of from every item being photographed and filed with their own insurance, registrations, and receipts, to even unique personally searched out and handpicked USB Drives that are installed with PortableApps.com software and paid versions of the software on those apps and all of it filed and registered both digitally and in Hard Copy.
And there will be a personalized welcome Manual for each person and all their accounts and how the apartment works, the Wi-Fi locks, the smart TV Accounts, their personal safe’s codes, and every computer log-in, how and where to find all their Hard Copy and Digital Account info and if something comes up missing or breaks how to file for renters insurance to replace it and police reports and how to contact their financial Agent for financial Aid and for when they want to go to college or to file a new bill or account for them to manage and also how their personal Ethereum Miner earns them their own money so that they are not tied to their financial allowance’s leash.
There will be so much attention to detail because it will be the display house/apartment used for fund raising. It will be decorated and setup with extra details like Artist’s Piggy Banks around the rooms to collect donations and drop safes for people to donate Pre-Paid Cards and Checks and Cash, cell phones and I’ll have a Turn-Key Business in the home that people can buy and donate gift cards and cell phones, clothing cards, and tablets, laptops and to donate money by credit cards too.
I’ll even setup cat climbing towers in all the corners and High End cat walks and rests on the walls and toy holders, etc. even Automatic cat boxes that clean and wash their own litter and cat supplies and dog products if the apartment allows dogs and more considerations that are suited for hosting gatherings and even just ease of today’s technological society like a moveable arm under a cabinet in the kitchen that holds a water proof tablet that is dedicated solely to cooking sites, and Home Food Delivery services.
There will be cool little personal touches too from unique USB Drives to interesting lamps like this collectors Yoda Lamp and displays of air plants and even like on the desks will be pencils and pens with my company’s custom website on them and possibly even Antique Typewriter on a typing desk with several boxes of extra ribbon and Company Letterhead Quality Paper stacked next to it, possibly with a sheet in the type writer with the beginning page of one of my novels on it or a letter addressed to my First Business Location.
And a typed and stamped addressed envelope next to it. I’ll do things like add magazines to the coffee table and things like expensive items will get locked inside display cubes or fastened to where they are. But most of the place will be meant to be fully interactive and the greeters and Hosts of the Donor Parties will be able to show the guests the fully interactive features of the apartment and all of its services, etc.
From Posters on the kid’s walls and little Anime and Action Figurines to online Gamer Merchandise of in-game-content from the most popular games like Fortnight and stuff and most of the Books and movies will be excellent Sci-fi Hard Copy Novels of the Greats and books I’ve Loved.
The Anime will be Deluxe Full Seasons with all the extra content and really cool 0ones and really good DVD Collections that are kid appropriate and in the parents room they will have more Adult titles like the complete Silence of the Lambs and Hannibal TV Series and Dexter Series, and John Wick Series and other Good Ones and in the kids room will be Ultimate Gamer Setups in a relaxation area away from sight of the desk so the kids won’t game and watch TV while they do homework and out of the bed area so they can have a shut down time and not game and stuff while they are supposed to shut down and sleep and they’ll have an Xbox, Play Station and Gamer Computer with all the VR and Bells and Whistles and even google Home Video Slate Devices on their Desk and By their Beds.
The home will have several of them by each sitting area and then the Dot versions mounted on walls around the halls and a water proofed one in the bathroom so that there is whole home connectivity along with all the Tablets and Laptops and PCs connected to the Norton Secured Network as well as smart lights and even security cameras and a Door Peep Hole Device that Projects a large Video of who is at the door and takes photos of who comes to the door and sends it to the owners phone and that also allows for smart lock activation.
The apartment will be the epitome of Beauty, Luxury, and Comfort and people that come to the home will be able to view installed manikins that are wearing company uniforms for all around seasons and types, the most expensive being the Winter ne that comes with heated gloves and socks and shoe insoles and Extreme Cold Military Boots and heat shell Jackets and full snow outfits.
The outfits will come with their own pedestals that will have fliers on them that explain what the services that they go to are and the equipment needed for each one, like the House Keeping one, the Personal Assistant, the Odd Job, and snow removal, the Food Delivery one and like how much it will cost for the work vans and trucks and snow blowers and shovels and painting/cleaning supplies and the storage unit rentals for the equipment and cost of the uniforms that will each have my company Logo Embroidered on them and on each will be an employee Tag just like all employees will have.
Another presentation will be video presentations played on loops on the screens in the living room that explain how my company will hire students fresh out of colleges that are entering the fields of nursing, psychology, and social work, legal aid, and about the services that will come with my company that will help any homeless person with absolutely nothing and addiction issues fully recover their lives with personally adapted services and complete financial support so that even if they are dealing with drug issues that they won’t need to sell their new property or prostitute for funding and that they will receive full support while they attend to their rehab needs as well as fully paid trade and college schooling and financial investments that are everything from timed trust payouts at major age milestones, to retirement and regular funds for travel around the world.
There will be full employment programs inside my company and in the mainstream markets and my company will pay companies to keep employees hired and to hire people in need as well as options for customers that do things like use our yard service as incentives to keep my employees hired like getting major yard work done, in ground lawn sprinklers installed and landscaping, home repairs, and other improvements and upgrades to their utilities and home like the best water heaters, Hot Tubs, new Fences and so on to keep my company on contract for lawn care and snow removal and housekeeping and food delivery and so on.
It will all be done by professionals in the fields when done and then my clients will up keep it with a flawless and no questions asked insurance and replacement process in case something is ever broken or stolen and there will be tons of other services since everyone in the world suffers from some state of poverty and need, that my company will collect even my customers into my fold and provide them with financial aids, paid schooling, debt payment, and doing things like picking up car and home payments and medical needs.
Some families that have Autistic Children or Severally Handicapped family members or people with major medical needs or who are getting too old to take care of those family members, my company will search out and supply them with things like 24/7 live in Aids and money for uncovered medicines or experimental Treatments that their HMOs won’t cover and cosmetic Treatments and more.
My company will do more than just that. I’ll use schools of Architecture to create fortified locations of Housing for over 100 Ethereum Miners that will bring in over $1 Million per month and have them built into schools so that teachers will be able to receive Top Pay and the schools will have more than enough for the best in school supplies and equipment and teaching Aids and like an example would be that the limited language learning classes would have a full computer network setup with every language that Rosetta Stone’s Language software offers and every student will have the ability to choose what language to learn.
There will be funds for every extracurricular activity and my plans are to adopt the Chinese and Japanese attendance unit where kids swipe in and out of classes except I’ll make it so that kids will actually get paid cash to attend classes and to do homework and extra credit and science fairs and if they aren’t doing well to get tutors and to help others and that it will do things like give economics classes real money and be able to do real things with the money and learn firsthand and school papers and news how to do very real publications and run ads and more.
My company will invest in local Mom & Pop shops and the community and get them to keep selling at rock bottom prices but selling High End Products so that the struggling community that uses them will suddenly be able to afford things like really good toilet paper, and snacks for their kids and eat well every day and even though I won’t be able to reach everyone and help the whole city, by proxy the community will become happier and their mood change will make the community better as a whole.
I’ll do the same for places that serve food and coffee shops too so that they can drop their prices and use better quality foods and cleaning supplies and decorations and pay better because than the community will be able to come out and eat more and have more family experiences to build a healthier family around and memories and the community will become stronger for it.
I’ll do things like take a Digital Camera and GoPro and go to every run-a-way shelter, and battered woman’s shelter and Underground Railro0ad project and Drop-In Center and Teen Challenge Center and photograph the entire area and interview everyone and find out what they need and what needs fixing and what they wish they could provide and install the best beds and most comfortable sheets and fluffiest comforters and turn them into wonder locations and expand their services and get all the kids and people new clothing and school supplies and make it rain and put them on above comfortable expense accounts.
I’ll do the same for Orphanages and Un-Adopted kids that are too old, all the while setting up Luxury Apartments and Auction Houses and emptying out every shelter and soup kitchen and giving these Betrayed Souls what society should have done for them from day one.
There are a million tiny things that I’ll be doing and I’ll write you all about them in upcoming letters.
It took me 9 years to figure out how to do all this and it will take major Donors and Corporate Donors for me to afford to build enough Ethereum Miners to afford to do it quickly. But I’m going to dedicate the rest of my life to thi9s. Mommy Anne is giving me a $10,000.00 Trust and I’ll put it into my first beginner Ethereum Miner and it will only earn me about $2K/mo. And I’ll have to save and buy more of the best NVIDIA Video Cards and add to it. My build will hold 20 Cards and cost me around $88.505.70 to complete and make me around $10K/mo. when done. My goal is to reach 100 builds as fast as possible using Kickstarters.com and every crowd funding site on the internet and every social media network from around the globe.
My work won’t just start and stop in Minnesota or even the USA. Once I am at a point where I have enough Ethereum Miners I’ll be able to expand them at a rate of 50-100 or more at a time creating $1 Million/mo. Jumps in income and higher with more donors and my work will jump boarders and I’ll hire kids and young adults from ar0und the world to locate and rescue their needy and sexually exploited and Brothel Children and people living in Poverty.
I just hope I can do it fast enough to see it all happen before I die.
I would start gofundme.com and kickstarter.com and dozens of other crowd funding sites and spread them across every social media and network possible but I need a cell phone. I’d also write to several Ad Agencies and give them a rundown of my plans and what I want them to do and have them create the Crowd Funding Ads for me because each site is different, has different formats, options for photos and Banners, and voice and the amount of words for each site and burn them onto disc for me and label them so that when I get out all I have to do is cut and paste and upload image 1,2,3 into spot 1,2,3 and know that there’s no grammar errors and I don’t come off sounding like a scam artist but I have no money for that.
I’d also like to get Uncle Steve to help me setup my Business Financials so it’s fully tax exempt and so I can do angel giving like write random checks or give out cash or life time paid phones and more and write it off but he refuses to acknowledge me.
Anyways…
I haven’t written or spoken too many of you in over a couple decades and I wanted to tell you about my new life. Oh I’m an ordained Minister now too.
There are several fun things that I want to do that are just to do because they are fun and good for the kid at heart and things that all kids wish they could do. I want to invest a lot into kid’s lives and their fun factor so I want to do things like get big into street fashion from around the world and to create an opportunity for kids to dress in amazing outfits from Japan and that are High Fashion and Cosplay styles and totally awesome so that going to school and dressing up crazy and amazing just becomes a daily part of life.
In schools I want to start Drone Racing Programs with Regulation Drones and awesome courses. I want to get schools into robotics and nautical robotics and aerial Drones and to inspire kids to create water cleaners and air cleaners and alternate fuel and to program the most popular Virtual Reality World Communities as classes and to setup classes that have real life work training to them like how to use complicated office copiers and corporate email systems and multi-line phone setups and digital faxes and to change toners and create orders and write and produce proposals for meetings and run projectors and make digital presentations transfer from your personal office to the proper conference room on time and run flawlessly and to be able to do it using multiple types of software and types of the leading tools found in companies today.
I want to create several Safe Zone Houses in Drug Zones that were “Trap Houses” where people use drugs or sell drugs out of and clean them out and fix them up really well and set them up to be locations that street kids can come and Game and to get Hot meals and Great sandwiches at any time Day or Night and that people can come and get Hot Showers and wash their clothing and get Hygiene Products and fresh underwear and new clothing and shoes and Back Packs and school supplies and can get medical care from the nursing staff and have emergency beds
Sometimes prostitutes and Drug Addicts need a hot shower, some good food to eat and a place that is safe to sleep at night behind a door that locks where they can feel safe for a moment in the Hell they are experiencing and a locker and safe to lock their property in so that they know that they can actually fall completely asleep without fear that someone will go through their pockets or demand sex.
I want to setup each room with as much luxury and comfort as I dare with addicts coming and going and kids without safe homes. I want the beds to be super comfy and to even have weighted blankets and body pillows because weighted blankets give people a sensory feeling of safety and comfort and body pillows allow people to cuddle with someone who takes nothing in return. That is important.
The bed must be super comfy and cozy, with too many pillows with a sitting chair that has a throw on it and book case filled with great novels and Manga Books and Built in Computers with a wide variety of Downloaded music and complimentary MP3 Player and paper for writing and an Antique Typewriter with Letterhead typing paper and Envelopes with a sign that says “free mail service down stairs.” I’ll have a laser printer attached to the computer and scanner and hookups for phones available.
There will be a decent sound system and gaming counsel with downloaded and installed games on it and Xbox Live Account Active and setup, all secured so it can’t be stolen. There will be an intercom system and by the bed sweets and pamphlets for my Life Recovery Services.
The rooms will not be meant for long term stays, usually just one-three days unless there are special and extreme cases.
In the common areas will be ultimate gaming setups and multiple mounted TVs that have the ability to connect to wireless headphones so people won’t have to compete for sound if they are watching multiple TVs at once.
In the back area will be a full computer lab and education center setup for kids and I’ll have staff that can help anyone with school work they need to get done.
Like I said there are a million little things that I plan on doing with my Business. I found a vending company that allows for digital pricing and for an extra $900.00 I can add a credit card processer to it so I’m going to set several types up in different locations. I’m going to use retro ones that take coins and place them in apartment complexes that dispense single serve laundry detergent boxes and fabric softener packs and snack machine pop machine mixes.
Than in some locations I’m going to use sources of pre-painted and sculpted fingernails that you can buy off line like on Etsy.com, Tumblr.com, and other sites and put them in machines that are at like malls and possibly schools and arcades and places kids go and have them wired to process credit cards and then put in random packs Pre-Paid Credit Cards with High Balances and advertise the chance to win one.
I plan to run donation funding campaigns so that I can afford to supply them free and laptops with paid wireless PCI Cards for free to the kids at St. Jude’s Cancer Research Hospital and other Hospitals and Mental Health Programs that can’t afford to provide them for their patients but who’s patients need a distraction from their extreme illnesses and to do something with their families when they come to visit and for patients to be entertained by with their families.
Something that happens to every person with a mental health issue that goes into the mental health system is that they end up losing every possession that they own and their entire apartments full of their lives get tossed in the trash. It’s happened to me 13 times and when I was young and pretty I ended up prostituting to replace over $26,000.00 of property some times. And so do many others. So one thing I’ll do is setup an apartment and property cleaning and packing service that washes all the dirty clothing and sheets and dishes and surfaces and professionally packs everything properly in bubble wraps and garment bo0xes and move and packs the entire apartment, moving it to self-storage units that the patients social security will pay for and for the paranoid patients photos and videos of the process will be taken and delivered on DVDs and the entire apartment will be cleaned and painted back to white with fire resistant paint so that their deposit will get returned to them.
Because the mental health system never slows down from sending people back to mental hospitals the business will be a stable service from the start.
I want to do some really cool things for kids in schools and all around on buying they super amazing clothing from Japan and China and other fashionable street looks that they normally couldn’t get or are too expensive for them and their families. There was this young boy that actually did it for his school but he got suits and proper fashion and I think it’s really important for kids not to lose that childhood part too soon so instead of suits I want to buy them awesome clothing that fits their aesthetic and that is beyond their reach financially and make it really fund and cool to be able to dress in their own uniqueness and not the regular jeans and T-Shirts.
I am also going to download countless tutorials on how to do Beauty Tips like nails crafting, Hair and Makeup techniques from the simple to the extremely complex and to create DVD Collections of all of them and put them in special DVD Cases that hold 10 and 20 DVDs and maybe over 100 Tutorials and then sell them in Genre collections in magazines like Teen Beat and 17 and Girl Magazines.
I’ll also do the same for people that are into crafting from the easy to really technical and some from landscaping to building computers and smart mirrors and more and collections of clothing patters and fashion techniques and cosplay techniques and more and sell those in collections in their genre of magazines too. I’ll do the same with cooking tutorials and recipe collections that are all both video and photos and print .pdf formats.
I’ll do genres of Home Design and Projects from hanging pictures to making gardens to extreme projects like building underground Prepper Bunkers.
Most of these collections I’ll build up over time I spend surfing the internet. I do a lot of Data Mining and read and learn a lot because I'm curious but now I’ll have focused products to create. Something else that I’ll do is assemble teaching tools for classrooms by using paid accounts on sites like curiosity stream and locating lectures and explanations on sciences and other subjects from simple math to high level theoretical math, sciences, biology, space science, robotics and AI, Virtual Worlds.
I’ll even put together sex education presentations of different types and present them to multiple schools for review. Some schools don’t allow real sex education, some teach abstinence, others only teach STDs and so on. It will be a balancing act. Some might want diagrams and some might actually allow real images of sex organs and then there are practices of different cultures to consider and explanations of circumcisions and the Muslim culture that clip or burn off female baby’s clitoris and the explanations of their shawls.
There are the full stories behind puberty and when females go through maturity and what they need to do when that happens. The changes in Boys and Girls the ages they change at, Birth Control, options of rape pregnancy pill options and the ways that people can give up a child if it’s too much for them instead of killing it. How adoptions work, the options of sperm donations, egg donations, and surrogacy, the birth process, C sections, and vaginal bi9rths, the drugs (epidermal) the effect of drugs and alcohol that will go through breast milk into the baby and HIV and how HIV is inside Breast milk. Types of parenting same sex parenting and relationships and even same sex rapes and domestic violence and more. The healthy beauty behind same sex relationships not just straight ones.
Also things like medical issues, Handicaps, Autism, and more and pre born and medical dangers that can happen and what to do, ways to prepare for if your baby has a disability and more. It may take a ton of work to do but once a school accepts the educational program the work will be worth it.
I want to create Job skill development programs and more. I want to actually change the entire education system. And the Prison Reform system. I’ll write more about those things in another letter.
I (have a ton of personal experiences that give an insight into the world that most people don’t have and motivations that people don’t understand why someone would spend a fortune only to give it all away again. The thing is that money and wealth mean nothing to me. It’s just an annoyance and an obstacle and a social retardant.
My Business will solely be about making people and their lives and futures and not about making profits and products. My entire life has consisted of setting up stages and being an advertisement so that I could make money and void of friendships, love, or connections, not even to my own family which has been my greatest sadness. Mommy Anne has been my only connection to hearing about my family’s lives and what’s going on with them my whole life and Aunt Barbie writes me about her farm life but that is about it. Rarely do I get a letter from Julia or Aunt Beverly.
Once I went 5 whole years without coming into physical contact with another person or speaking to anyone and I think it really freaked mommy Anne out that I’m not talkative or Haggier but I’ve been conditioned as a child and again since the age of 11yo. When I entered the mental Hospital Systems and group homes never to touch or hug anyone because it’s not supposed to happen in hospitals and group homes which is where I was raised for 89% of my life. I’ve maybe spent 10 hours with my own Brother during my entire life and maybe spoken with him about half that without having actually any meaningful exchanges other than casual polite conversations not counting just being in the same location at the same time. And dramatically less with the rest of my family. I mainly just dressed nice and sat around waiting to be talked to or asked questions.
I faced Addiction, Mental illness, multiple sexual assaults, rape that left me with HIV, Contracting HIV, Homelessness twice, forced prostitution, Two Attempted murders on me, a Home invasion and six suicide attempts and child abuse and a laundry list a mile long including starvation and eating out of dumpsters because I refused to prostitute alone without even a card from my family like “Hey sorry you got HIV” or “Too bad you ended up with a mental illness for 30 years” or “Hey heard you are struggling with addiction, that’s rough.” or “hey your homeless, it’s not much but here’s $20 get some dollar burgers at McDonalds.” or “hmmm… raped! Rough.” or “Hay when you are going to bring a boyfriend to X-Mass?” or “Suicide, wish you wouldn’t do that we like having you around.”
Once I went into the Hospital after a suicide attempt that involved 3 cop cars pulling me off a ledge on the side of a parking ramp and I weighed 118lbs. I usually weigh 175-180lbs and that is skinny for myself.
I know things like friendships and Love from a boyfriend and happi9ness because of the absolute void of it in my life. I know it perfectly and intimately on a deep level because I have never experienced it. It’s an odd kind of knowledge to have. I use to watch YouTube videos and Troll peoples feeds, not so much as to observe their lives as much as to see what they had on their bedroom walls and what they wear and what was around them and try to figure out what it was that gave them all the feelings and excitements and joys in life that I never knew.
All my life I never had a single poster on my wall or anything that wasn’t a tool for survival, no plants, no color paint on my walls, nothing that would display warmth or comfort or personality or a Home. And it was all trappings of a stage set that I occupied but never truly lived in. The only thing that had decoration or meaning of any kind was inside my Computers and Hard Drives and my Data Mining Collections of Music, .pdf files, photos, and social media and blogs and modeling photos. Outside of the digital world I had nothing but pain and suffering, rage, and sadness, and isolation, and complete loneness and mental and emotional damage that eventually became so vast and so deep that I had to use as much drugs as possible not just to fight it back and numb myself to it but to even remove myself from the equation, for many years I just stayed alive out of spite of it all.
It was one thing that broke me out of my inner bondage and that was a homeless man that I’d passed over a dozen times and he always sat in his spot and I saw him that morning while going to a client’s house and then that night after dancing into exhaustion at a club. It was late and the snow had started to fall but in a ring around his body was a bare circle from his body heat and he hadn’t moved all day. Across the street was a Target and the man had nothing, no food containers around him, nothing. People had walked by him all day and shopping at Target and no one thought once to go across the street and give him a pop or can of soup and I had been a prostitute for years helping dozens of homeless kids and minors with a safe free place to stay, even pulling tricks to pay other people’s rent and maxed out two credit cards buying a fellow meth addict food and toiletries and that one man sat there all day, every day and no one helped him and Target Managers never gave him a job.
Shortly after that I came to this Center and for the last 13 years here in this long term treatment program, every single day for hours a day and deep into the night I have written thousands of pages in Journals, collected every magazine and catalog I could find, filled over 45 journals with notes and resources and links and scrap booked and spent my Dad’s entire $4,800,00 inheritance money from when he died on Business Manuals and researched Crypto Currency for 3 years, read 5 books on it and spent years going to every site in the books and checking them out, watching YouTube videos, going onto bulletin boards and blogs until I learned what I needed to learn to design the most powerful Ethereum Miner possible all the while with a goal to end Homelessness, Unemployment, sexual exploitation and to improve the world and fought for years just to have the right to use my free time to write and study.
And I solved it. I figured out a social service Business that will fully recover almost anyone's life and it has finally given me an ounce of peace.
Now I just need the people here to give me the chance I need to get out and do it and to live a better life than the one that was quickly killing me.
I’ve spent 13 years working on my plans and there are a lot of them and I hear repeatedly to focus on one thing but what people don’t understand is that it is all one thing. I’m not helping one or two people. I’m helping over 30,000 homeless people and exploited kids and people living in poverty. One thing can’t solve that. An entire population of people not only need money but a place to live, jobs to support themselves, and other help and those helpers need to get paid and other communities need fortifications to help the rest of the population that is in need and it’s not for one summer or one year or even 30 years.
Every year hundreds of kids become exploited, thousands become homeless and more live in poverty and the cycle will continue long after I’m dead. I have to start building the strongest foundation possible that will last and support generations of people now and long after I’m dead and that won’t happen with me getting a pizza delivery job or a lawn mowing business going. I have to start something so revolutionary that those that pick up where I leave will one day be able to change the lives of Millions of people in need and people in need around the world and it will take Huge Donors and Crowd Funding and rewriting of policies and dismantling of antiquated industries and building new ones.
2 notes
·
View notes
Text
The way to Round Numbers online Sheets
Sometimes when you need your data to be able to look uniform throughout Google Sheets, you need to round your amounts.
Having all your own numbers rounded to be able to the equivalent quebrado places can make your current spreadsheet much easier to read.
Learning how to round numbers is usually an important skill for all Google Sheets users, and there are a couple of different ways in order to do this within the program.
In this kind of tutorial, I is going to cover all you need to be able to know about how to round quantities in Google Linens.
Table of Articles [hide]
one Using the Raise or Decrease Fracción Places Tool
a couple of Rounding Using Personalized Format
3 Typically the Different Round Functions Google Linens
three or more. 1 How to Circular Using the Rounded Function
3. a couple of How to Circular Up with ROUNDUP
3. 3 Precisely how to Round Down with ROUNDDOWN
several. 4 How to be able to Round to typically the Nearest Whole Amount with MROUND
4 Closing Ideas
Making use of the Increase or Decrease Decimal Areas Tool
The most effective way to rounded your numbers inside Google Sheets is usually to use the increase or decrease decimal places device in the top toolbar menu.
In this article? s how this is done:
Select the particular cells that a person want to round
To round upward pick the Decrease fracción places option. When you want to be able to increase decimal locations, select that choice
Decimal Places
Working with this method can be a fast way to get all your own numbers to check even, but you put on? t have as many options if you? re trying rounded a particular way. With regard to more control over that your sheet will be rounded, you will have to make use of one of the round fucntions beneath
Rounding Using Custom Format
Another approach to round is by changing the format of your info.
Here? s how this is done:
Pick the cells a person want to rounded
In the top menu select Format
Next select Number in the drop-down menus
If you desire to round to two decimal areas, you can choose the Number alternative
Number Formatting
In case you want to round to more than two quebrado places, instead involving selecting the amount option in coordination 4, you have in order to select More Types, Custom number structure.
custom formatting
Coming from here you will enter in this is a new custom number structure: #, ##0. 1000. To help keep more decimal places in your rounded number, you would add even more zeroes at the end and after that just click the Apply switch.
custom formatting-2
The various Round Functions Google and yahoo Sheets
In Yahoo Sheets, there are 4 round capabilities that you ought to learn.
Using these kinds of round functions can provide you together with greater flexibility on how you rounded numbers.
The 5 round functions are really them:
ROUND: Common rounding rules
ROUNDUP: Rounds a number up
ROUNDDOWN: Rounds down many
MROUND: Rounds a number upwards to the closest integer
Below We will show you how to use every of these round functions in Google Sheets.
How to be able to Round Utilizing the Round Function
The Circle function takes a couple of arguments: the very first is what number you need to circular, the second will be the amount of decimal places to round.
=ROUND(value,[decimal places])
Here? s just how to use this formula
Firstly, to get started on the function, decide on a cell and kind the equals sign on your keyboard (=)
Then type? circular? and press hook on your keyboard
Find the cell of which contains the phone number that you want in order to round and next press a comma on your key pad (, )
Next, you will kind the amount of decimal places you want to round in order to. 1 for one particular decimal place, 2 for 2 decimal areas, 3 for a few decimal places plus so on.
Rule out your formula having an ending parenthesis? )? and https://projectbink.com/how-to-extract-numbers-or-text-from-a-string-in-google-sheets/ on your keyboard
You are able to copy and paste your method down if a person want to circle for additional rows involving data
Circular
Typically the second argument within your function tells Google Sheets how many decimal places to round your quantity to.
Positive quantities mean rounding to the right associated with the decimal stage, negative numbers suggest rounding to typically the left of the quebrado point.
Check out the round numbers within the image below to determine exactly how changing your amount will affect typically the number decimal places you are rounding to be able to.
youtube
Round-1
The GAME function using normal rounding rules exactly where anything greater compared to equal to or perhaps greater than your five rounds up, and anything less as compared to 5 rounds down.
How to Gather with ROUNDUP
If you need to force Google Sheets to always round up, the ROUNDUP operate is a wonderful option.
The format for this function is the same as ROUND. Typically the formula takes 2 arguments: the benefit you that you might want to be able to round, and how many places you want this to round to.
=ROUNDUP(value,[decimal places])
Check out the image below to see how changing the 2nd price affects the round value.
Roundup
Precisely how to Round Down with ROUNDDOWN
If you need to always round decrease in Google Linens, you can utilize the ROUNDDOWN function. This performs very similarly to the previous performance we covered.
youtube
The formula syntax would be the same as the particular other functionality
=ROUNDDOWN(value,[decimal places])
Check out the example below in order to see how transforming the second parameter of the purpose changes the amount of decimal locations that the formula is rounding to be able to.
Rounddown
How in order to Round to the Closest Whole Number with MROUND
Making use of the MROUND function will help you to rounded to the closest integer multiple of any value.
The syntax for MROUND is comparable to the other rounded functions
=MROUND(value, factor)
The worth is the range that you might want to circular, and the factor is definitely the multiple of which the value is going to be rounded to.
A single important thing to be able to note is that with MROUND your second unbekannte cannot be damaging unless the first parameter is negative.
It is different through the other ROUNDED functions.
Here will be some examples of how changing the 2nd parameter affects your current MROUND calculations:
MROUND
So that you can see in the examples above, the second parameter of the functionality controls what number Google Sheets is rounding to. That is rounding to multiples of the second of all parameter with MROUND.
To round to the nearest a variety of of 5: =MROUND(value, 5)
To rounded to the nearest multiple of 10: =MROUND(value, 10)
To round to typically the nearest multiple of 100: =MROUND(value, 100)
Whichever number an individual want to circular to, you would set that like the second parameter in your formulation.
Closing Thoughts
In the event that you? ve long gone through this whole tutorial, you ought to now have a reasonable understanding of the way to round numbers online Spreadsheets.
You could quickly limit the particular number of quebrado places with the particular tools inside the alexa plugin, use a custom number format, or use one associated with the four ROUNDED functions.
Which one you end up employing will ultimately hinge on what you are attempting to accomplish.
#how to count unique values in google sheets#format function google sheets so 2 rounded digits#formula parse error#does not equal google sheets#why is google sheets rounding my numbers#formula parse error google sheets#how to sort google sheets by date#google sheets not equal#sheets formula to calculate age#google sheets check if value exists in range#get last n numbers google sheets#index match google sheets#google sheets if date is weekday function#remove blank cells in a column google sheets#how to enter nee line in excel google sheet#how to find slope on google sheets#how to randomize a list in google sheets#google sheets if cell starts with#google sheet unique count#absolute value google sheets#change permission for a sheet#google sheets conditional formatting based on another cell#google sheets count unique words#count unique google sheets#google spreadsheet pivot chart#add padding to google sheets cells#sheets unique multiple columns#scientific notation google sheets#is not equal to google sheets#google sheets insert current date
0 notes
Text
Implementation of dark mode in reaction devices
One of the apps features most requested is the dark mode (or night mode, as others call it). In the apps which we use every day, we see dark mode. From smartphones to web applications, the dark mode has become important to businesses wishing to look after their users' eyes.The dark mode is an add-on feature that often shows dark surfaces in the UI. Most big corporations (such as YouTube, Twitter, and Netflix) have brought their smartphone and web applications into dark mode.Although we are not going to go into React and styled-components in detail, a simple knowledge of React, CSS, and styled-components would be useful.
A few days before this article was written, StackOverflow announced its release of dark mode, offering users the opportunity to switch between the two modes.Dark mode eliminates eye pressure and aids when operating on a device or cell phone for a long period of time. What Is Dark Mode?The dark mode is the color scheme of any device showing light text and device elements on a dark backdrop, making it a little easier for the user to view cell phones, tablets, and computers. Dark mode decreases the light produced by the screen while preserving the minimum color-contrast ratios that are appropriate for reading. Why Should You Care About Dark Mode?Dark mode improves visual ergonomics by reducing eye strain, adapting the screen to current light conditions, and ensuring ease of use in dark environments or at night.Let's look at its benefits before we introduce dark mode in our app.
BATTERY SAVINGDark mode in Web and mobile apps will extend a device's battery life. Google stated that dark mode on OLED screens has been a tremendous help to battery life.For example, the dark mode in the YouTube app saves about 15 percent more screen energy than a flat white background at 50 percent brightness. The dark GUI saves a whopping 60 percent of screen energy at 100 percent screen brightness. DARK MODE IS BEAUTIFULThe dark mode is stunning, and can greatly enhance the screen's appeal.Although most products go for the same bland white look, the dark mode offers something else that looks both mysterious and fresh.It also offers great opportunities for a fresh presentation of graphic material, such as dashboards, videos, and images.
Now that you know why you should implement dark mode in your next web app, let's dive deep into style-components, which in this tutorial's defining resources.The dark mode is the color scheme of any interface that displays light text and interface elements on a dark background, making viewing on mobile phones, tablets, and computers a little easier.
What Are Styled-Components?We will be using the styled-components library very much in this post. There have always been a lot of ways to design a modern web application. A document-level there is the conventional styling approach which involves creating an index.css file and linking it to the HTML or styling within the HTML file.A lot has changed in the way web apps are recently designed after CSS-in-JS was introduced.CSS-in-JS refers to a pattern where JavaScript is used to compose the Html. To style components in a JavaScript file, it uses tagged template literals. The styled component is a CSS-in-JS library that allows you to use all the
CSS
features you need, including media queries, pseudo-selectors, and nesting.
Why Styled-Components?For the following reasons styled-components were created:
No hell class name Instead of scratching your head to find an item class name, styled-components can create unique class names for your types. You will never have to think about misrepresentations, or using class names that have no meaning.
The use of designed component props allows one to expand the styling properties using the props parameter widely used in React — thereby dynamically influencing the component's feeling through the state of the application. Supports Sass syntax
Writing Sass syntax out of the box without having to set up any preprocessors or extra build tools is possible with styled-components. In your style definitions, you can use the & character to target the current component, use pseudo-selectors, and experiment with nesting.
• Theming modeled components have full thematic support through the export of a ThemeProvider wrapper. This framework provides a theme for all components of React within itself via the Context API. All styled-components will have access to the given theme in the rendering tree, even though they are deeply multi-level. As we continue this tutorial, we will investigate the thematic features of modeled components more deeply SETTING UP
1. CREATE THE FILE STRUCTURECreating a folder and inserting within it three empty text files: one with.html, one with.css, and one with.js. Also, create a folder of images for the photos you wish to view on the website.JQuery also makes use of our "dark mode in CSS" demo. In the example, we are going to add the script right from the Cloudflare CDN to the HTML file so that it is always up to date. If you like, however, you can download and add the jQuery library as a local.js file as well.Here's how the file structure will look before coding begins:
- dark-mode-css/ - images/ - cake.jpg - index.html - script.js - style.css
2. MARK UP THE HTMLAdd the dark-mode switch to the top of the page in the HTML. Then create a < h1 > title tag, and a semantic < article > tag for the page's content. Finally, just before the < /body > tag closes add the two < script > tags.Please note that before the custom script you are adding the jQuery library so it can use its functionalities. The style.css file will go into the page's < head > section.
<!DOCTYPE html> <html lang="en"> <head> <meta charset="UTF-8"> <meta name="viewport" content="width=device-width, initial-scale=1.0"> <meta http-equiv="X-UA-Compatible" content="ie=edge"> <title>Demo | Dark Mode in CSS</title> <link rel="stylesheet" href="style.css"> </head> <body> <div class="switch">Dark mode: <span class="inner-switch">OFF</span> </div> <h1 class="title">The Best Recipes of All Time</h1> <article> <h1>Raspberry Cake</h1> <p><small>Created with Cupcake Ipsum</small></p> <p>...</p> <img src="images/cake.jpg"> <p>...</p> </article> <script src="https://cdnjs.cloudflare.com/ajax/libs/jquery/3.4.0/jquery.min.js"></script> <script src="script.js"></script> </body> </html>
3. CREATE THE CSS FOR THE LIGHT MODEFirst, let's build the CSS for light mode, since this is the page's default state. The following CSS makes use of a column-based flexbox style that allows you to easily place elements on the page, specifically the.switch class that handles the dark mode toggle wrapper and the < img > elements.
body { font-family: sans-serif; font-size: 1.125rem; display: flex; flex-direction: column; max-width: 50rem; margin: 0 auto; padding: 0 0.9375rem; } small { font-style: italic; } article { display: flex; flex-direction: column; } img { max-width: 100%; display: block; align-self: center; } .switch { align-self: flex-end; margin: 0.9375rem; } .inner-switch { display: inline-block; cursor: pointer; border: 1px solid #555; border-radius: 1.25rem; width: 3.125rem; text-align: center; font-size: 1rem; padding: 0.1875rem; margin-left: 0.3125rem; }
The display: flex; rule applied to the tag allows the align-self to be used: flex-end; rule over the dark mode turn. The align-self CSS property aligns individual flex elements along the cross-axis (which is the left-to-right axis when a column is set to flex-direction).In this way, the move is located automatically to the top right corner of the flex container — for all viewport sizes. .switch is a full-width layout row due to the flexbox, and its height does not fall at smaller screen sizes either.Similarly, the display: flex; and flex-direction: column; rules added to the < article > tag allow align-self to be used: center; rule on all images inside the post. As a result, all the images can be conveniently focused without adding extra elements to the HTML, only for positioning purposes. 4. ADD THE SWITCH FUNCTIONALITY WITH JQUERYThe.js script file provides the toggle switch feature. Therefore, the dark mode is activated when the user clicks the toggle and the mark on the switch switches to "ON." And if, when the page is in dark mode, the user clicks the toggle, the light mode is added and the mark switches to "OFF."
$( ".inner-switch" ).on("click", function() { if( $( "body" ).hasClass( "dark" )) { $( "body" ).removeClass( "dark" ); $( ".inner-switch" ).text( "OFF" ); } else { $( "body" ).addClass( "dark" ); $( ".inner-switch" ).text( "ON" ); } });
The script above makes use of the following jQuery functions:·
on(“click”, function() {…})
is an event handler that triggers the action inside the function when the user clicks the .inner-switch element,·
hasClass()
checks if the .dark class is assigned to the .inner-switch element or not (this is based on the state of the toggle),·
removeClass()
removes the .dark class from the HTML when the user switches to light mode,·
addClass()
adds the .dark class to the HTML when the user switches to dark mode,·
text()
sets the text of the label on the switch — it’s either “OFF” or “ON”.· 5. ADD THE CSS FOR THE DARK MODEThe last thing you need to do is to define those styles for the.dark class that the jQuery script above added to the HTML when dark mode is turned on. In addition to the.dark class, apply the dark mode theme to both its direct and indirect children using the.dark * universal CSS selector.
.dark, .dark * { background-color: #222; color: #e6e6e6; border-color: #e6e6e6; }
The CSS belonging to the.dark class goes to the file ending with style.css. This is because CSS (= Cascading Style Sheets) is cascading in nature. The cascade may thus bypass the colors all over the page without bumping into specificity or other probelms.You can also create a separate dark.css file for the dark mode styles if you are creating a more complex website. In this case, be careful that you always add the unique dark.css in the < head > section of the HTML after the generic style.css file, so that the cascade will work properly.
CREATING THEME-TOGGLING FUNCTIONALITY1. Add HTML:Using any item that should store the content for which you want the interface toggle. In our case, for simplicity we'll use < body >:
Example
<body>
Add CSS:Design the item < body > and build a toggle class in.dark-mode:
Example
body { padding: 25px; background-color: white; color: black; font-size: 25px; } .dark-mode { background-color: black; color: white; }
3) Add JavaScript:Get the < body > item and switch between the class of dark-mode:
Example
function myFunction() { var element = document.body; element.classList.toggle("dark-mode"); }
ConclusionDark mode is increasingly becoming a choice for the consumer, and it is much easier to integrate it into a web app by using the Theme Provider theme wrapper in styled components. Go ahead and play with styled-components as you implement dark mode; you could add icons instead of a button.
As a reputed Software Solutions Developer we have expertise in providing dedicated remote and outsourced technical resources for software services at very nominal cost. Besides experts in full stacks We also build web solutions, mobile apps and work on system integration, performance enhancement, cloud migrations and big data analytics. Don’t hesitate to
get in touch with us!
#b2b ecommerce
#b2b content marketing
#b2b market research companies
#b2b seo
#Ecommerce
0 notes
Text
Implementation of Dark Mode in React Devices
One of the apps features most requested is the dark mode (or night mode, as others call it). In the apps which we use every day, we see dark mode. From smartphones to web applications, the dark mode has become important to businesses wishing to look after their users' eyes.The dark mode is an add-on feature that often shows dark surfaces in the UI. Most big corporations (such as YouTube, Twitter, and Netflix) have brought their smartphone and web applications into dark mode.Although we are not going to go into React and styled-components in detail, a simple knowledge of React, CSS, and styled-components would be useful.
A few days before this article was written,
StackOverflow
announced its release of dark mode, offering users the opportunity to switch between the two modes.Dark mode eliminates eye pressure and aids when operating on a device or cell phone for a long period of time. What Is Dark Mode?The dark mode is the color scheme of any device showing light text and device elements on a dark backdrop, making it a little easier for the user to view cell phones, tablets, and computers. Dark mode decreases the light produced by the screen while preserving the minimum color-contrast ratios that are appropriate for reading. Why Should You Care About Dark Mode?Dark mode improves visual ergonomics by reducing eye strain, adapting the screen to current light conditions, and ensuring ease of use in dark environments or at night.Let's look at its benefits before we introduce dark mode in our app.
BATTERY SAVINGDark mode in Web and mobile apps will extend a device's battery life. Google stated that dark mode on OLED screens has been a tremendous help to battery life.For example, the dark mode in the YouTube app saves about 15 percent more screen energy than a flat white background at 50 percent brightness. The dark GUI saves a whopping 60 percent of screen energy at 100 percent screen brightness. DARK MODE IS BEAUTIFULThe dark mode is stunning, and can greatly enhance the screen's appeal.Although most products go for the same bland white look, the dark mode offers something else that looks both mysterious and fresh.It also offers great opportunities for a fresh presentation of graphic material, such as dashboards, videos, and images.
Now that you know why you should implement dark mode in your next web app, let's dive deep into style-components, which in this tutorial's defining resources.The dark mode is the color scheme of any interface that displays light text and interface elements on a dark background, making viewing on mobile phones, tablets, and computers a little easier.
What Are Styled-Components?We will be using the styled-components library very much in this post. There have always been a lot of ways to design a modern web application. A document-level there is the conventional styling approach which involves creating an index.css file and linking it to the HTML or styling within the HTML file.
A lot has changed in the way web apps are recently designed after CSS-in-JS was introduced.
CSS-in-JS refers to a pattern where JavaScript is used to compose the Html. To style components in a JavaScript file, it uses tagged template literals. The styled component is a CSS-in-JS library that allows you to use all the CSS features you need, including media queries, pseudo-selectors, and nesting.
Why Styled-Components?For the following reasons styled-components were created:
No hell class name Instead of scratching your head to find an item class name, styled-components can create unique class names for your types. You will never have to think about misrepresentations, or using class names that have no meaning.
The use of designed component props allows one to expand the styling properties using the props parameter widely used in React — thereby dynamically influencing the component's feeling through the state of the application. Supports Sass syntax
Writing Sass syntax out of the box without having to set up any preprocessors or extra build tools is possible with styled-components. In your style definitions, you can use the & character to target the current component, use pseudo-selectors, and experiment with nesting.
• Theming modeled components have full thematic support through the export of a ThemeProvider wrapper. This framework provides a theme for all components of React within itself via the Context API. All styled-components will have access to the given theme in the rendering tree, even though they are deeply multi-level. As we continue this tutorial, we will investigate the thematic features of modeled components more deeply SETTING UP1. CREATE THE FILE STRUCTURECreating a folder and inserting within it three empty text files: one with.html, one with.css, and one with.js. Also, create a folder of images for the photos you wish to view on the website.JQuery also makes use of our "dark mode in CSS" demo. In the example, we are going to add the script right from the Cloudflare CDN to the HTML file so that it is always up to date. If you like, however, you can download and add the jQuery library as a local.js file as well.Here's how the file structure will look before coding begins:
- dark-mode-css/ - images/ - cake.jpg - index.html - script.js - style.css
2. MARK UP THE HTMLAdd the dark-mode switch to the top of the page in the HTML. Then create a < h1 > title tag, and a semantic < article > tag for the page's content. Finally, just before the < /body > tag closes add the two < script > tags.Please note that before the custom script you are adding the jQuery library so it can use its functionalities. The style.css file will go into the page's < head > section.
<!DOCTYPE html> <html lang="en"> <head> <meta charset="UTF-8"> <meta name="viewport" content="width=device-width, initial-scale=1.0"> <meta http-equiv="X-UA-Compatible" content="ie=edge"> <title>Demo | Dark Mode in CSS</title> <link rel="stylesheet" href="style.css"> </head> <body> <div class="switch">Dark mode: <span class="inner-switch">OFF</span> </div> <h1 class="title">The Best Recipes of All Time</h1> <article> <h1>Raspberry Cake</h1> <p><small>Created with Cupcake Ipsum</small></p> <p>...</p> <img src="images/cake.jpg"> <p>...</p> </article> <script src="https://cdnjs.cloudflare.com/ajax/libs/jquery/3.4.0/jquery.min.js"></script> <script src="script.js"></script> </body> </html>
3. CREATE THE CSS FOR THE LIGHT MODEFirst, let's build the CSS for light mode, since this is the page's default state. The following CSS makes use of a column-based flexbox style that allows you to easily place elements on the page, specifically the.switch class that handles the dark mode toggle wrapper and the < img > elements.
body { font-family: sans-serif; font-size: 1.125rem; display: flex; flex-direction: column; max-width: 50rem; margin: 0 auto; padding: 0 0.9375rem; } small { font-style: italic; } article { display: flex; flex-direction: column; } img { max-width: 100%; display: block; align-self: center; } .switch { align-self: flex-end; margin: 0.9375rem; } .inner-switch { display: inline-block; cursor: pointer; border: 1px solid #555; border-radius: 1.25rem; width: 3.125rem; text-align: center; font-size: 1rem; padding: 0.1875rem; margin-left: 0.3125rem; }
The display: flex; rule applied to the tag allows the align-self to be used: flex-end; rule over the dark mode turn. The align-self CSS property aligns individual flex elements along the cross-axis (which is the left-to-right axis when a column is set to flex-direction).In this way, the move is located automatically to the top right corner of the flex container — for all viewport sizes. .switch is a full-width layout row due to the flexbox, and its height does not fall at smaller screen sizes either.Similarly, the display: flex; and flex-direction: column; rules added to the < article > tag allow align-self to be used: center; rule on all images inside the post. As a result, all the images can be conveniently focused without adding extra elements to the HTML, only for positioning purposes. 4. ADD THE SWITCH FUNCTIONALITY WITH JQUERYThe.js script file provides the toggle switch feature. Therefore, the dark mode is activated when the user clicks the toggle and the mark on the switch switches to "ON." And if, when the page is in dark mode, the user clicks the toggle, the light mode is added and the mark switches to "OFF."
$( ".inner-switch" ).on("click", function() { if( $( "body" ).hasClass( "dark" )) { $( "body" ).removeClass( "dark" ); $( ".inner-switch" ).text( "OFF" ); } else { $( "body" ).addClass( "dark" ); $( ".inner-switch" ).text( "ON" ); } });
The script above makes use of the following jQuery functions:·
on(“click”, function() {…})
is an event handler that triggers the action inside the function when the user clicks the .inner-switch element,·
hasClass()
checks if the .dark class is assigned to the .inner-switch element or not (this is based on the state of the toggle),·
removeClass()
removes the .dark class from the HTML when the user switches to light mode,·
addClass()
adds the .dark class to the HTML when the user switches to dark mode,·
text()
sets the text of the label on the switch — it’s either “OFF” or “ON”.· 5. ADD THE CSS FOR THE DARK MODEThe last thing you need to do is to define those styles for the.dark class that the jQuery script above added to the HTML when dark mode is turned on. In addition to the.dark class, apply the dark mode theme to both its direct and indirect children using the.dark * universal CSS selector.
.dark, .dark * { background-color: #222; color: #e6e6e6; border-color: #e6e6e6; }
The CSS belonging to the.dark class goes to the file ending with style.css. This is because CSS (= Cascading Style Sheets) is cascading in nature. The cascade may thus bypass the colors all over the page without bumping into specificity or other probelms.You can also create a separate dark.css file for the dark mode styles if you are creating a more complex website. In this case, be careful that you always add the unique dark.css in the < head > section of the HTML after the generic style.css file, so that the cascade will work properly.CREATING THEME-TOGGLING FUNCTIONALITY1. Add HTML:Using any item that should store the content for which you want the interface toggle. In our case, for simplicity we'll use < body >:Example<body> Add CSS:Design the item < body > and build a toggle class in.dark-mode:Example
body { padding: 25px; background-color: white; color: black; font-size: 25px; } .dark-mode { background-color: black; color: white; }
3) Add JavaScript:Get the < body > item and switch between the class of dark-mode:Example
function myFunction() { var element = document.body; element.classList.toggle("dark-mode"); }
ConclusionDark mode is increasingly becoming a choice for the consumer, and it is much easier to integrate it into a web app by using the ThemeProvider theme wrapper in styled components. Go ahead and play with styled-components as you implement dark mode; you could add icons instead of a button.
As a reputed Software Solutions Developer we have expertise in providing dedicated remote and outsourced technical resources for software services at very nominal cost. Besides experts in full stacks We also build web solutions, mobile apps and work on system integration, performance enhancement, cloud migrations and big data analytics. Don’t hesitate to
get in touch with us!
0 notes
Text
Implementation of dark mode in reaction devices
One of the apps features most requested is the dark mode (or night mode, as others call it). In the apps which we use every day, we see dark mode. From smartphones to web applications, the dark mode has become important to businesses wishing to look after their users' eyes.The dark mode is an add-on feature that often shows dark surfaces in the UI. Most big corporations (such as YouTube, Twitter, and Netflix) have brought their smartphone and web applications into dark mode.Although we are not going to go into React and styled-components in detail, a simple knowledge of React, CSS, and styled-components would be useful.
A few days before this article was written, StackOverflow announced its release of dark mode, offering users the opportunity to switch between the two modes.Dark mode eliminates eye pressure and aids when operating on a device or cell phone for a long period of time. What Is Dark Mode?The dark mode is the color scheme of any device showing light text and device elements on a dark backdrop, making it a little easier for the user to view cell phones, tablets, and computers. Dark mode decreases the light produced by the screen while preserving the minimum color-contrast ratios that are appropriate for reading. Why Should You Care About Dark Mode?Dark mode improves visual ergonomics by reducing eye strain, adapting the screen to current light conditions, and ensuring ease of use in dark environments or at night.Let's look at its benefits before we introduce dark mode in our app.
BATTERY SAVINGDark mode in Web and mobile apps will extend a device's battery life. Google stated that dark mode on OLED screens has been a tremendous help to battery life.For example, the dark mode in the YouTube app saves about 15 percent more screen energy than a flat white background at 50 percent brightness. The dark GUI saves a whopping 60 percent of screen energy at 100 percent screen brightness. DARK MODE IS BEAUTIFULThe dark mode is stunning, and can greatly enhance the screen's appeal.Although most products go for the same bland white look, the dark mode offers something else that looks both mysterious and fresh.It also offers great opportunities for a fresh presentation of graphic material, such as dashboards, videos, and images.
Now that you know why you should implement dark mode in your next web app, let's dive deep into style-components, which in this tutorial's defining resources.The dark mode is the color scheme of any interface that displays light text and interface elements on a dark background, making viewing on mobile phones, tablets, and computers a little easier.
What Are Styled-Components?We will be using the styled-components library very much in this post. There have always been a lot of ways to design a modern web application. A document-level there is the conventional styling approach which involves creating an index.css file and linking it to the HTML or styling within the HTML file.A lot has changed in the way web apps are recently designed after CSS-in-JS was introduced.CSS-in-JS refers to a pattern where JavaScript is used to compose the Html. To style components in a JavaScript file, it uses tagged template literals. The styled component is a CSS-in-JS library that allows you to use all the
CSS
features you need, including media queries, pseudo-selectors, and nesting.
Why Styled-Components?For the following reasons styled-components were created:
No hell class name Instead of scratching your head to find an item class name, styled-components can create unique class names for your types. You will never have to think about misrepresentations, or using class names that have no meaning.
The use of designed component props allows one to expand the styling properties using the props parameter widely used in React — thereby dynamically influencing the component's feeling through the state of the application. Supports Sass syntax
Writing Sass syntax out of the box without having to set up any preprocessors or extra build tools is possible with styled-components. In your style definitions, you can use the & character to target the current component, use pseudo-selectors, and experiment with nesting.
• Theming modeled components have full thematic support through the export of a ThemeProvider wrapper. This framework provides a theme for all components of React within itself via the Context API. All styled-components will have access to the given theme in the rendering tree, even though they are deeply multi-level. As we continue this tutorial, we will investigate the thematic features of modeled components more deeply SETTING UP
1. CREATE THE FILE STRUCTURECreating a folder and inserting within it three empty text files: one with.html, one with.css, and one with.js. Also, create a folder of images for the photos you wish to view on the website.JQuery also makes use of our "dark mode in CSS" demo. In the example, we are going to add the script right from the Cloudflare CDN to the HTML file so that it is always up to date. If you like, however, you can download and add the jQuery library as a local.js file as well.Here's how the file structure will look before coding begins:
- dark-mode-css/ - images/ - cake.jpg - index.html - script.js - style.css
2. MARK UP THE HTMLAdd the dark-mode switch to the top of the page in the HTML. Then create a < h1 > title tag, and a semantic < article > tag for the page's content. Finally, just before the < /body > tag closes add the two < script > tags.Please note that before the custom script you are adding the jQuery library so it can use its functionalities. The style.css file will go into the page's < head > section.
<!DOCTYPE html> <html lang="en"> <head> <meta charset="UTF-8"> <meta name="viewport" content="width=device-width, initial-scale=1.0"> <meta http-equiv="X-UA-Compatible" content="ie=edge"> <title>Demo | Dark Mode in CSS</title> <link rel="stylesheet" href="style.css"> </head> <body> <div class="switch">Dark mode: <span class="inner-switch">OFF</span> </div> <h1 class="title">The Best Recipes of All Time</h1> <article> <h1>Raspberry Cake</h1> <p><small>Created with Cupcake Ipsum</small></p> <p>...</p> <img src="images/cake.jpg"> <p>...</p> </article> <script src="https://cdnjs.cloudflare.com/ajax/libs/jquery/3.4.0/jquery.min.js"></script> <script src="script.js"></script> </body> </html>
3. CREATE THE CSS FOR THE LIGHT MODEFirst, let's build the CSS for light mode, since this is the page's default state. The following CSS makes use of a column-based flexbox style that allows you to easily place elements on the page, specifically the.switch class that handles the dark mode toggle wrapper and the < img > elements.
body { font-family: sans-serif; font-size: 1.125rem; display: flex; flex-direction: column; max-width: 50rem; margin: 0 auto; padding: 0 0.9375rem; } small { font-style: italic; } article { display: flex; flex-direction: column; } img { max-width: 100%; display: block; align-self: center; } .switch { align-self: flex-end; margin: 0.9375rem; } .inner-switch { display: inline-block; cursor: pointer; border: 1px solid #555; border-radius: 1.25rem; width: 3.125rem; text-align: center; font-size: 1rem; padding: 0.1875rem; margin-left: 0.3125rem; }
The display: flex; rule applied to the tag allows the align-self to be used: flex-end; rule over the dark mode turn. The align-self CSS property aligns individual flex elements along the cross-axis (which is the left-to-right axis when a column is set to flex-direction).In this way, the move is located automatically to the top right corner of the flex container — for all viewport sizes. .switch is a full-width layout row due to the flexbox, and its height does not fall at smaller screen sizes either.Similarly, the display: flex; and flex-direction: column; rules added to the < article > tag allow align-self to be used: center; rule on all images inside the post. As a result, all the images can be conveniently focused without adding extra elements to the HTML, only for positioning purposes. 4. ADD THE SWITCH FUNCTIONALITY WITH JQUERYThe.js script file provides the toggle switch feature. Therefore, the dark mode is activated when the user clicks the toggle and the mark on the switch switches to "ON." And if, when the page is in dark mode, the user clicks the toggle, the light mode is added and the mark switches to "OFF."
$( ".inner-switch" ).on("click", function() { if( $( "body" ).hasClass( "dark" )) { $( "body" ).removeClass( "dark" ); $( ".inner-switch" ).text( "OFF" ); } else { $( "body" ).addClass( "dark" ); $( ".inner-switch" ).text( "ON" ); } });
The script above makes use of the following jQuery functions:·
on(“click”, function() {…})
is an event handler that triggers the action inside the function when the user clicks the .inner-switch element,·
hasClass()
checks if the .dark class is assigned to the .inner-switch element or not (this is based on the state of the toggle),·
removeClass()
removes the .dark class from the HTML when the user switches to light mode,·
addClass()
adds the .dark class to the HTML when the user switches to dark mode,·
text()
sets the text of the label on the switch — it’s either “OFF” or “ON”.· 5. ADD THE CSS FOR THE DARK MODEThe last thing you need to do is to define those styles for the.dark class that the jQuery script above added to the HTML when dark mode is turned on. In addition to the.dark class, apply the dark mode theme to both its direct and indirect children using the.dark * universal CSS selector.
.dark, .dark * { background-color: #222; color: #e6e6e6; border-color: #e6e6e6; }
The CSS belonging to the.dark class goes to the file ending with style.css. This is because CSS (= Cascading Style Sheets) is cascading in nature. The cascade may thus bypass the colors all over the page without bumping into specificity or other probelms.You can also create a separate dark.css file for the dark mode styles if you are creating a more complex website. In this case, be careful that you always add the unique dark.css in the < head > section of the HTML after the generic style.css file, so that the cascade will work properly.
CREATING THEME-TOGGLING FUNCTIONALITY1. Add HTML:Using any item that should store the content for which you want the interface toggle. In our case, for simplicity we'll use < body >:
Example
<body>
Add CSS:Design the item < body > and build a toggle class in.dark-mode:
Example
body { padding: 25px; background-color: white; color: black; font-size: 25px; } .dark-mode { background-color: black; color: white; }
3) Add JavaScript:Get the < body > item and switch between the class of dark-mode:
Example
function myFunction() { var element = document.body; element.classList.toggle("dark-mode"); }
ConclusionDark mode is increasingly becoming a choice for the consumer, and it is much easier to integrate it into a web app by using the Theme Provider theme wrapper in styled components. Go ahead and play with styled-components as you implement dark mode; you could add icons instead of a button.
As a reputed Software Solutions Developer we have expertise in providing dedicated remote and outsourced technical resources for software services at very nominal cost. Besides experts in full stacks We also build web solutions, mobile apps and work on system integration, performance enhancement, cloud migrations and big data analytics. Don’t hesitate to
get in touch with us!
0 notes
Text
Top 8 Must-Have Joomla Table Extension For Your Website in 2019

Present the content in a scientific and beautiful way with the Joomla Table Extension!
It is necessary for your site to have a data statistics tool as well as a display column tool that make your site become more attractive to the visitors. Today, we would like to provide a collection fo useful Joomla Table Extension. Let follow and check it now!
1. Tabulizer
Tabulizer is as very so many functions to fetch and display data. Using this Joomla Table Extension, you can reTabulize a current table in the case that you need to enhance it by applying another ruleset, or on the grounds that you need to include new information.
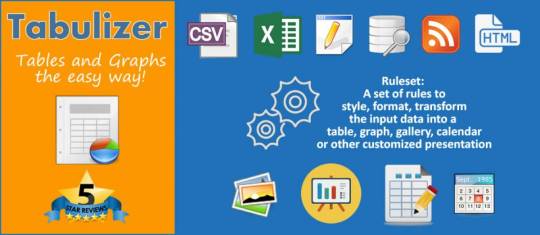
Features:
Choose to create a dynamic table
An external file (Excel, CSV, HTML, XML, text)
Import data directly from an Excel file
Table to Graph conversion
Download and Email graph image as file Likewise
and more.
Highlights:
Many features
Work amazing
Excellent component.
2. Droptables
Droptables is amazing and how simple it is to create a beautiful table. You can edit your tables as you do in Google Sheet and you are able to create a big price table. In addition, PDF documentation allows having a good idea of what is possible or not. It is a perfect option!

Features:
6 themes included
Create tables from database tables
Excel export with or without table style
Set multiple table lines height
Padding and border-radius background
and more.
Highlights:
Easy to use
Clear documentation
Reasonable price.
3. Responsive Pricing Table
Responsive Pricing Table is exactly Joomla Responsive Table what you are looking for. It will give you a lot of professional features that make it easy for you to create pricing tables. All you have to do is to select the textual styles, style and characterize your cost and content. This extension is good with all of the programs and furthermore perfect with all of the version of Joomla.

Features:
Compatible with all smartphones
Unlimited possibilities to style the tables
Change color and fonts
Come with pre-built 5 tables
and more.
Highlights:
Great module
Friendly support.
4. VJ Responsive Table
VJ Responsive Table supports you to create a CSV file and upload it to the website. In VJ module, you can put the path to the CSV file and got a beautiful responsive table. Moreover, the tables function and degrade extremely well. Custom breakpoints can be also configured.

Features:
Sorting, filtering, pagination
Tables can be created from SQL query
Possible to use custom CSS
Hide certain columns at different sizes
Javascript powered, fast and smooth
and more.
Highlights:
Beautiful responsive table
Work well
Look good.
5. Easy Pricing Table
Easy Pricing Table is another Joomla Table Extensionwe want to mention in this list. This module is very responsive and flexible that can fit any layout such as mobile, tab, desktop or any size monitor. Furthermore, there is an option to define Google Fonts, the Header color, and text color as well.

Features:
Option to choose different/same colors
Unlimited tables, unlimited colors, unlimited labels
Add any number of a comparison table
Link and the link title can be managed
Option to define the Header color
and more.
Highlights:
Easy to use
Work great.
6. JE Responsive Price Table
JE Responsive Price Table encourages you to make a dynamic, 100% responsive and fully customizable pricing table in a minute for your Joomla site. It has an extraordinary and versatile continuous manager, which can make impeccable value tables to coordinate any current Joomla layouts.

Features:
Display One to Six Column
Custom Grid Layout Options
Ability to edit the content on the price tables
Fully Responsive Pricing Tables for mobile viewing
and more.
Highlights:
Quick support
Simple and Easy.
7. Multi Style Responsive Pricing Table
Multi Style Responsive Pricing Table is also one of the best Joomla Responsive Table that is chosen to use on many websites. This extension is an incredible method to show estimating and packages of your administrations on your Joomla site. Multiple Web 2.0 Google Fonts is also supported.

Features:
Support Responsive Layout
Comes with tooltip on/off option
content font, color, size ability
Unlimited rows can be added
and more.
Highlights:
Perform exactly.
8. Magic Price Table
Magic Price Table is easy to manage and requires some work to configure all the table, but the advantage is that you can personalize every cell, and so you can get a nice result. Besides, you are able to custom both writing multi-line each row, column, and the cell. This Joomla Table Extension is an absolute option for structure wonderful tables and framework diagram.

Features:
Supports images (JPG, PNG, GIF) and SWF
The select percentage for Hover Effect
write a text for each row
Choose the dimension for each image
and more.
Highlights:
Works great
Good product
Easy to manage.
Conclusion
In conclusion, we wish you can choose the best Joomla Table Extension to use. If you find it helpful, remember to share this blog with your friends and take more free Joomla templates!
Thank you for reading! You can leave a comment below, we will reply as soon as possible.
Read the full article
0 notes
Text
10 Excellent Tools for Testing Your Site on Mobile Devices
Together with the jelqing earnings of smartphones and the burgeoning tablet current market beginning to skyrocket, coupled together with far increased access to more robust mobile data systems, the net is currently being obtained by our customers at a variety of new methods.
The substantial selection of mobile devices used to browse the internet currently means you really must think about producing your web site mobile-compatible when creating your reactive site.
But how can you go about doing it? Testing your website onto cellular apparatus might be time-consuming and costly due to the vast variety of various mobile devices.
Stress not, since there are a few convenient tools available in the disposal to make sure that your site leaves appropriately about the cell Internet Site.
This short article discusses and shares 10 for example tools.
1. iPhoney
An excellent complimentary iPhone tester, iPhoney is not specifically an emulator, however, allows developers to generate 320x480px websites for utilization on the iPhone. It permits one to analyze images and code at a Pixel perfect Apple-Safari-powered environment, together with most of the standard features such as Portrait and Landscape modes, full screen, zoom, and plugins.
2. W3C mobileOK Checker
This checker is a web-based automated validation tool which checks to see exactly how mobile-device-friendly your website is. The evaluations have been assessed from the W3C mobileOK Basic Tests Structure developed by W3C.

3. IPad Peek
This handy online tool gives you the ability to observe how your sites appear when left over the I pad. It truly is encouraged that you simply work with a WebKit-based internet browser such as Apple Safari or Google-Chrome to have as accurate a simulation as possible -- or in the lowest, a CSS3-capable internet browser that supports transformation qualities (like Opera) since it makes use of them to leave the page in Portrait mode. You can also find best mobile test companies via various online resources.
4. Modify Headers Add-on to get Firefox
You can find additional ones such as Firefox that may control the data shipped to servers to allow it to appear as in the event the consumer representative is browsing on a mobile device, even if they're not. To do it, you definitely require an add-on called Modify Headers (for Firefox).
To emulate searching over a mobile system, you need to find the User Agent Profile (UAProf) value of your mobile apparatus, which is available with a fast look on Google for “consumer agent" accompanied by the version of the mobile (e.g. view Google results for “user broker I pad"). Alternatively, check out this list of UAProf values.
When you've found the UA account value for the device you wish, enter it to the Modify Header dialog package, also bingo you may see the way that it prefers to navigate from that gadget.
To Google-Chrome, you can try out that the User Agent Switcher extension.
To get a browser-independent desktop program that works on just about any Internet-enabled program, decide to try out Fiddler Internet Debugger that allows you to change HTTP requests, along with other things.

5. Adobe Unit Central CS5
As a portion of this hottest Adobe Creative Suite, system Central simplifies the functioning of mobile devices on your desktop computer allowing you to examine HTML and Flash in the contentment of one's desktop.
To open a page or blog, decide on Device Profiles > Browse units, then click and select increase Evaluation products. Now that you've included a device, simply go to File > Open (for local testing) or File > Open URL (for remote testing).
Though far from being liberated, in case you are a professional programmer or programmer, you will have a high likelihood of being able to access Adobe's creative suite of software.
6. Google Mobilizer
Google Mobilizer is an easy internet tool which enables you to input an internet page address after which creates the page mobile-web-friendly by trimming the content down into its bare necessities. This really is a great tool for viewing through which you are able to make operation optimizations on your site.
7. Gomez
Gomez cell openness evaluation gives you a rating in between 5 and 1 predicated on an analysis of more than 30 established cellular web development strategies, which range from style sheet use (e.g. media inquiries) into ca-Ching processes and standards-compliant signal. The outcomes are displayed within an impracticable record that delivers information on what steps to take to best to earn your web site easier.
Regrettably, to be able to test your website, you need to input a lot of details including your current email address, state, zip code, and phone number.
8. Mobi Ready
In an identical vein like Gomez, Mobi Ready is another online testing website which lets you enter a URL so it might execute set of evaluations, including webpage examination, Markup Test and Site Evaluation of this internet page. This can be a marginally more thorough edition of Gomez above and provides a comprehensive test outcome page including dotMobi compliance, W3C mobileOk evaluations, apparatus emulators, step by step error studies, HTTP evaluations and also a code checker.
However, the results aren't just as concise as Gomez's consequences, a drawback when it has to do with introducing your information into a less technically astute clients/employers.

9.DotMobi Emulator
The dotMobi emulator provides you a live preview of the website out of the (relatively smaller, to be honest) variety of different mobile phones. This mobile analyzing device is excellent in case you have to test your page to older mobile devices.
What is frustrating to possible users with the tool is the fact that it requires the Java web browser plugin for this to get the job done with.
10. Opera Mini Simulator
With more than 120 million mobiles sold that has Opera pre-installed [1] and an edition designed for nearly every OS, creating sure that your website functions on Opera Mini (the mobile variant of the Opera browser) can be quite a fantastic custom to put in your testing workflow.
Happily, Opera has obliged us offering a completely free online emulator for testing mobile applications and analyzing your internet design on a cell device which employs Opera Mini.
This application demands that the Java web browser plug into function.
With many businesses today having the vast majority of their traffic coming from mobile apparatus in place of the desktop computer, you also need to have a mobile-friendly site. Think about a college campus such as. The vast majority, though perhaps not all students possess a cell phone and are seeing the campus's internet site on such cellphone probably lots of the time. This really is a key to bear in mind when developing a college's internet site. When it is not mobile friendly, it is going to leave for lousy user experience.
#testing mobile applications#web application security testing#qa software testing#software qa services#mobile test companies#quality assurance testing
0 notes
Text
Why Your Organisation Ought To Update to a Responsive Web Design Sooner Rather Than Later On
Why should my company have a receptive web design?
Receptive web design has ended up being the best service for services that want a user friendly user interface and higher consumer retention. If your company has actually come this much without benefiting from all the benefits it needs to provide, you may have already begun to see reduced visitor numbers and a frustrating conversion rate.
As a responsible company owner, you'll most likely need convincing prior to paying to upgrade your internet visibility to one that includes receptive design. Nonetheless, by choosing in you'll soon see a return on investment that will make it worthwhile. In short, responsive design is just far better than what has preceded and also in order to stay up to date with the competition, you'll require it as well.
Receptive web design is vital for the majority of companies since it allows your users to attain their objectives quickly and also efficiently. The important components of your site can be pulled up on a cellular phone and also appear as a fully useful variation of the initial, complete with all the utility you 'd use to clients on a laptop or computer. If you fail to give a mobile-friendly experience such as this for your site visitors they will not spend time, they'll simply click away as well as complete the activity or purchase on a rival website.
Dissatisfied consumers are not good for business and neither is facing a major internet search engine. Google have actually just recently validated what lots of insiders have believed for a long time - websites that are not optimised for several users will certainly slip down their search positions. Google bases their positions on exactly how useful a web page is for the inquiry a customer has entered, plus the utility of the website - for example, can a customer complete the action they would love to?
Your web page may be totally relevant to their search, however if site visitors can not access the content quickly across a variety of tools, your website might get a less than positive testimonial and be placed lower in the search results page. If your firm is lowered to a 2nd or third web page entrance you'll shed a significant quantity of website traffic, as individuals naturally choose web links from the initial page.
Google have likewise mentioned that business which have a single receptive web site - rather than one standard and one mobile variation - are far much easier for their crawlers to find, due to the fact that there is simply one URL.
If your website is receptive as well as prepared to solution mobile consumers, you can benefit from numerous devices and practical apps like the click-to-call switch, this makes it possible for a web individual to make a voice phone call to your firm promptly. Potential consumers can additionally review reviews concerning your service or even discover you in an active place making use of Google Maps, both acutely relevant to the requirements of mobile customers.
Branding is among the methods which we build a relationship of trust with a customer and also keep them returning for even more of the very same. This concerns receptive layout for two factors, firstly, individuals do not feel confident in a website they can not quickly navigate and second, in order to create a consistent brand name you'll require responsive style to generate a constant internet appearance; nevertheless your customers reach you.
In today's market there are only a handful of reasons why a company may select to stick with fixed layout on their web page. Those that do not depend in any significant method on internet website traffic to drive sales, or those who have couple of competitors, or those who have already checked out receptive style as well as discovered it was wrong for them. For everyone else, if you wish to remain ahead of the contour, receptive style is the only method forward for your web site.
Responsive website design features
Till lately internet developers developed various pages depending on where they would certainly be seen, a tablet for instance has a various display resolution to a laptop computer, therefore the content would be optimized for watching on that particular specific device.
Nevertheless, responsive web design has revolutionised the way in which customers consider the internet, it has developed an across the board experience permitting us to view pages on a COMPUTER, smart phone or note pad in exactly similarly. When they build a site, developers use the very same coding on any kind of variety of resolutions, giving every device the very same level of performance.
Responsive internet designers think that their customers' websites ought to be accessible to every visitor, providing an optimal experience, regardless of the device they utilizing. This sort of intelligent action to a web individual's actions keeps your company appropriate in an ever before altering on the internet market location; it boosts your e-commerce figures and makes visiting your site a delightful experience.
In technological terms there are three crucial functions of responsive website design, the secret ingredient is normally thought about to be media queries. These are filters added on to the CSS or Cascading Style Sheets, influencing the feel and look of any individual page. CSS is an extremely beneficial tool for internet designers, yet by tagging on a media questions adaption, the procedure of resizing, rendering as well as orienting a page comes to be much simpler.
An additional linchpin of receptive style is the versatile format, this is based upon a grid development, ideal for formatting margins, placing the key elements of a page as well as getting the spacing just right. This indicates a developer is not limited to a certain variety of columns, they can select as lots of or as couple of as is appropriate for the page. An adaptable format likewise removes the demand to exercise the formats and message dimension based on pixels.
Rather, developers utilize percents which allow them to embrace a far more fluid strategy to producing each web page. Pixels work well in photo pictures, however are an awkward device to make use of over a number of tools. One pixel may be expressed as three dots on a phone, however ten dots on a desktop computer, changing the quality of an image significantly in between tools.
The 3rd part of responsive design includes the use of CSS or a dynamic resizing function to produce versatile images, videos as well as other material. Text can flow fairly easily as the including area resizes, however in order to spread this across even more complex sectors, internet developers require to utilize different strategies. Dynamic resizing offers a web designer greater control over just how a web page acts and also enables them to add or get rid of parts as needed.
Taken a whole, these several innovations imply site visitors can take pleasure in the sensation of experience, regardless of what tool they occur to be making use of, or will be using in the future.
When a mobile customer changes from landscape to picture mode, the intuitive design will make sure the page gets bigger or smaller. In addition, each element, be it a picture, textbox or video clip will likewise resize itself to refer the various dimensions.
If you have ever tried to access a website and also found that it was nearly impossible to navigate about without shrinking and increasing the size of the text or switches, you'll recognize why responsive layout is considered good method for most of internet site proprietors.
Receptive web design Vs Mobile web design
Till rather just recently, mobile website design was taken into consideration much more appropriate to modern customers than it's receptive equivalent, this approach sees developers using mobile phones as a starting point as well as upgrading the innovation considerably, with to notepads, home computer as well as past. This method implied that firms needed two websites, one for their mobile pages and one for PC individuals.
In the very early gold years of mobile web design, there were a variety of reasons professionals assumed that web applications should constantly be developed initially for usage on a mobile phone. Essential of these was the frequency of mobile phones and the reality that their appeal was remaining to increase. By developing a platform that favoured these countless customers, firms might promote their service or product to what was viewed as the future generation of calculating customers.
Second of all, mobile layout was said to promote a cleaner idea without space for peripheral components or unneeded web page mess. In a screen the size of that on a cellphone, there merely is inadequate space to crowbar in extra buttons and widgets - rather, a style group had to focus on what was in fact required. By giving individuals a clear route to what they desire, it was presumed that their experience would be much better, much faster, leave them extra inclined to return or convert them into a paying client.
Mobile applications were thought to have even more utility than COMPUTER based software program, what users anticipated from their laptop faded in comparison to the abilities used on cell phones. From an electronic compass, to gyroscopic results, touch display inputs and voice control, developers intended to build on these devices to generate contemporary website design that was not limited by the restrictions of a COMPUTER.
Although there are pros and cons for the fostering of a mobile site to run alongside a main website, responsively made pages are ideal for merchants that desire a durable, identical website with a lot of energy for every user. A solitary site additionally streamlines advertising and marketing campaigns; there is just a need to take care of one site and one SEO approach. As a result, a web site which includes responsive design can conserve companies money and time, yet additionally offer a seamless, practical means for customers to go shopping.
Receptive website design data
When a group of developers develop you a responsive web site you know it will adjust without effort to whatever tool it is accessed from, but where is the evidence that confirms this is a factor in commercial success?
The material advertising company, Brand Point, found that over 90% of customers acquiring decisions are influenced by visual aspects. In other words, if individuals arrive on your site as well as like the look of the place, they are most likely to stay as well as get.
Display resolutions are transforming regularly as brand-new tools get to the market, internet programmers Spyderweb found that in 2010 there were simply 97 unique display resolution sizes, yet by 2013 that number had actually leapt to 232. The only way of tackling this boost is to have a receptive internet site that is optimized for every consumer, whatever gadget they favour.
Clients are repelled by high wait times and also web pages that take also lengthy to show up; also back in 2009, 47% of individuals expected a lots time of simply 2 seconds on a website. In a study performed by cloud company, Akamai, it was also found that 40% of web users clicked away if they had not gained access to a page within 3 seconds. That is a pretty slim window of chance, and it's fair to presume that people's expectations have actually raised since this research study was assembled.
Although external variables like a lack of Wi-Fi or 4G can additionally influence wait times, the value of speed for service websites can not be taken too lightly. Joined developers can create code for your receptive website that makes it uniquely load the components required, and even generate graphics at a later stage.
Design matters since it can have a significant impact on the number of brand-new visitors to your pages, these are individuals that have reached you via typing in a certain search standards and determined to click the link to your site. Web developers, Domain7, have reported that in the case of their customer Regent College, there was a leap of 99% in distinct visitors after a revamp of their responsive web design.
If your mobile pages leave an unpleasant preference in the mouth of your visitors, they are far less likely to see your entire organisation positively, and they'll inform their pals. Market specialists at the Search Engine Journal discovered that 57% of people would certainly never recommend a business that had poorly designed web pages, enhancing the instance for a regular internet strategy that does the method your clients want it to - any place they take place to be. have a peek at this web-site
web design company in dubai
Address- Dubai, Sheikh Zayed Road,
Al Attar Tower, Floor 7th, Office 701
Sun - Thu, 9 am - 6 pm (GMT +4)
M : +971 55 5515 475
T : +971 50 569 8733
E : [email protected]
0 notes
Text
Why Your Organisation Ought To Update to a Responsive Web Design Sooner Rather Than Later On
Why should my company have a receptive web design?
Receptive web design has ended up being the best service for services that want a user friendly user interface and higher consumer retention. If your company has actually come this much without benefiting from all the benefits it needs to provide, you may have already begun to see reduced visitor numbers and a frustrating conversion rate.
As a responsible company owner, you'll most likely need convincing prior to paying to upgrade your internet visibility to one that includes receptive design. Nonetheless, by choosing in you'll soon see a return on investment that will make it worthwhile. In short, responsive design is just far better than what has preceded and also in order to stay up to date with the competition, you'll require it as well.
Receptive web design is vital for the majority of companies since it allows your users to attain their objectives quickly and also efficiently. The important components of your site can be pulled up on a cellular phone and also appear as a fully useful variation of the initial, complete with all the utility you 'd use to clients on a laptop or computer. If you fail to give a mobile-friendly experience such as this for your site visitors they will not spend time, they'll simply click away as well as complete the activity or purchase on a rival website.
Dissatisfied consumers are not good for business and neither is facing a major internet search engine. Google have actually just recently validated what lots of insiders have believed for a long time - websites that are not optimised for several users will certainly slip down their search positions. Google bases their positions on exactly how useful a web page is for the inquiry a customer has entered, plus the utility of the website - for example, can a customer complete the action they would love to?
Your web page may be totally relevant to their search, however if site visitors can not access the content quickly across a variety of tools, your website might get a less than positive testimonial and be placed lower in the search results page. If your firm is lowered to a 2nd or third web page entrance you'll shed a significant quantity of website traffic, as individuals naturally choose web links from the initial page.
Google have likewise mentioned that business which have a single receptive web site - rather than one standard and one mobile variation - are far much easier for their crawlers to find, due to the fact that there is simply one URL.
If your website is receptive as well as prepared to solution mobile consumers, you can benefit from numerous devices and practical apps like the click-to-call switch, this makes it possible for a web individual to make a voice phone call to your firm promptly. Potential consumers can additionally review reviews concerning your service or even discover you in an active place making use of Google Maps, both acutely relevant to the requirements of mobile customers.
Branding is among the methods which we build a relationship of trust with a customer and also keep them returning for even more of the very same. This concerns receptive layout for two factors, firstly, individuals do not feel confident in a website they can not quickly navigate and second, in order to create a consistent brand name you'll require responsive style to generate a constant internet appearance; nevertheless your customers reach you.
In today's market there are only a handful of reasons why a company may select to stick with fixed layout on their web page. Those that do not depend in any significant method on internet website traffic to drive sales, or those who have couple of competitors, or those who have already checked out receptive style as well as discovered it was wrong for them. For everyone else, if you wish to remain ahead of the contour, receptive style is the only method forward for your web site.
Responsive website design features
Till lately internet developers developed various pages depending on where they would certainly be seen, a tablet for instance has a various display resolution to a laptop computer, therefore the content would be optimized for watching on that particular specific device.
Nevertheless, responsive web design has revolutionised the way in which customers consider the internet, it has developed an across the board experience permitting us to view pages on a COMPUTER, smart phone or note pad in exactly similarly. When they build a site, developers use the very same coding on any kind of variety of resolutions, giving every device the very same level of performance.
Responsive internet designers think that their customers' websites ought to be accessible to every visitor, providing an optimal experience, regardless of the device they utilizing. This sort of intelligent action to a web individual's actions keeps your company appropriate in an ever before altering on the internet market location; it boosts your e-commerce figures and makes visiting your site a delightful experience.
In technological terms there are three crucial functions of responsive website design, the secret ingredient is normally thought about to be media queries. These are filters added on to the CSS or Cascading Style Sheets, influencing the feel and look of any individual page. CSS is an extremely beneficial tool for internet designers, yet by tagging on a media questions adaption, the procedure of resizing, rendering as well as orienting a page comes to be much simpler.
An additional linchpin of receptive style is the versatile format, this is based upon a grid development, ideal for formatting margins, placing the key elements of a page as well as getting the spacing just right. This indicates a developer is not limited to a certain variety of columns, they can select as lots of or as couple of as is appropriate for the page. An adaptable format likewise removes the demand to exercise the formats and message dimension based on pixels.
Rather, developers utilize percents which allow them to embrace a far more fluid strategy to producing each web page. Pixels work well in photo pictures, however are an awkward device to make use of over a number of tools. One pixel may be expressed as three dots on a phone, however ten dots on a desktop computer, changing the quality of an image significantly in between tools.
The 3rd part of responsive design includes the use of CSS or a dynamic resizing function to produce versatile images, videos as well as other material. Text can flow fairly easily as the including area resizes, however in order to spread this across even more complex sectors, internet developers require to utilize different strategies. Dynamic resizing offers a web designer greater control over just how a web page acts and also enables them to add or get rid of parts as needed.
Taken a whole, these several innovations imply site visitors can take pleasure in the sensation of experience, regardless of what tool they occur to be making use of, or will be using in the future.
When a mobile customer changes from landscape to picture mode, the intuitive design will make sure the page gets bigger or smaller. In addition, each element, be it a picture, textbox or video clip will likewise resize itself to refer the various dimensions.
If you have ever tried to access a website and also found that it was nearly impossible to navigate about without shrinking and increasing the size of the text or switches, you'll recognize why responsive layout is considered good method for most of internet site proprietors.
Receptive web design Vs Mobile web design
Till rather just recently, mobile website design was taken into consideration much more appropriate to modern customers than it's receptive equivalent, this approach sees developers using mobile phones as a starting point as well as upgrading the innovation considerably, with to notepads, home computer as well as past. This method implied that firms needed two websites, one for their mobile pages and one for PC individuals.
In the very early gold years of mobile web design, there were a variety of reasons professionals assumed that web applications should constantly be developed initially for usage on a mobile phone. Essential of these was the frequency of mobile phones and the reality that their appeal was remaining to increase. By developing a platform that favoured these countless customers, firms might promote their service or product to what was viewed as the future generation of calculating customers.
Second of all, mobile layout was said to promote a cleaner idea without space for peripheral components or unneeded web page mess. In a screen the size of that on a cellphone, there merely is inadequate space to crowbar in extra buttons and widgets - rather, a style group had to focus on what was in fact required. By giving individuals a clear route to what they desire, it was presumed that their experience would be much better, much faster, leave them extra inclined to return or convert them into a paying client.
Mobile applications were thought to have even more utility than COMPUTER based software program, what users anticipated from their laptop faded in comparison to the abilities used on cell phones. From an electronic compass, to gyroscopic results, touch display inputs and voice control, developers intended to build on these devices to generate contemporary website design that was not limited by the restrictions of a COMPUTER.
Although there are pros and cons for the fostering of a mobile site to run alongside a main website, responsively made pages are ideal for merchants that desire a durable, identical website with a lot of energy for every user. A solitary site additionally streamlines advertising and marketing campaigns; there is just a need to take care of one site and one SEO approach. As a result, a web site which includes responsive design can conserve companies money and time, yet additionally offer a seamless, practical means for customers to go shopping.
Receptive website design data
When a group of developers develop you a responsive web site you know it will adjust without effort to whatever tool it is accessed from, but where is the evidence that confirms this is a factor in commercial success?
The material advertising company, Brand Point, found that over 90% of customers acquiring decisions are influenced by visual aspects. In other words, if individuals arrive on your site as well as like the look of the place, they are most likely to stay as well as get.
Display resolutions are transforming regularly as brand-new tools get to the market, internet programmers Spyderweb found that in 2010 there were simply 97 unique display resolution sizes, yet by 2013 that number had actually leapt to 232. The only way of tackling this boost is to have a receptive internet site that is optimized for every consumer, whatever gadget they favour.
Clients are repelled by high wait times and also web pages that take also lengthy to show up; also back in 2009, 47% of individuals expected a lots time of simply 2 seconds on a website. In a study performed by cloud company, Akamai, it was also found that 40% of web users clicked away if they had not gained access to a page within 3 seconds. That is a pretty slim window of chance, and it's fair to presume that people's expectations have actually raised since this research study was assembled.
Although external variables like a lack of Wi-Fi or 4G can additionally influence wait times, the value of speed for service websites can not be taken too lightly. Joined developers can create code for your receptive website that makes it uniquely load the components required, and even generate graphics at a later stage.
Design matters since it can have a significant impact on the number of brand-new visitors to your pages, these are individuals that have reached you via typing in a certain search standards and determined to click the link to your site. Web developers, Domain7, have reported that in the case of their customer Regent College, there was a leap of 99% in distinct visitors after a revamp of their responsive web design.
If your mobile pages leave an unpleasant preference in the mouth of your visitors, they are far less likely to see your entire organisation positively, and they'll inform their pals. Market specialists at the Search Engine Journal discovered that 57% of people would certainly never recommend a business that had poorly designed web pages, enhancing the instance for a regular internet strategy that does the method your clients want it to - any place they take place to be. have a peek here
web design company in dubai
Address- Dubai, Sheikh Zayed Road,
Al Attar Tower, Floor 7th, Office 701
Sun - Thu, 9 am - 6 pm (GMT +4)
M : +971 55 5515 475
T : +971 50 569 8733
E : [email protected]
0 notes
Text
Prepping 2020 – 41 Tips and Tricks for New and Old Preppers Alike!
Prepping
If you’ve been prepping for any length of time then these may be a refresher or they may be brand new. If you’re just starting in the prepping/preparedness world, then these will most likely be new to you. Either way, there’s something for everyone in this list of prepping tips.
What are the best prepping tips that everyone should know? The best prepping tips are:
Always be ready to learn
Bug out only as a last resort
Even if you live in an apartment, you can still be prepared
Water is the most important thing to store
Don’t get overwhelmed as a new prepper
Understand the threats you’re likely to encounter
Learn to grow your own food
[wc_toggle title=“Table of Contents” padding=“” border_width=“” class=“” layout=“box”]
Prepping
41 Prepping Tips Everyone Can Use
Conclusion
[/wc_toggle]
Prepping Tips Everyone Can Use
As a new prepper, it’s easy to get overwhelmed.
Sit down and write out a quick list of things you need when you first start prepping.
Water, food, and defense should top your list but you don’t have to rush out and get everything today. Prepping can get expensive. Break your list down by priority and add a little each week to your stores.
If you live somewhere with plenty of water available, maybe you just need to buy a Big Berky water filter the first week to meet all of your water needs. Add a few cans of food for the next couple of weeks until you have some food put away.
Your situation will change depending on where you live and how much you can afford each week. Just take it slow and do it in manageable chunks. Before you know it, you’ll have the secure feeling that comes from being prepared!
Prepping means you should always be ready to learn.
It’s often said that knowledge is power, and that is especially true in the world of readiness. Keep an open mind and try to learn more every day. Just because someone has a view that opposes yours does not mean that there is nothing you can learn from them! In fact, I find that I often learn the most from people with different viewpoints than me.
Even if a disaster does strike, you can (and should) continue to learn from your successes and especially from your failures.
Bugging out should not be your first option in a disaster.
If you are planning to bug out at the first sign of a collapse, then you are probably living in the wrong area.
Make plans to move to an area that is likely to be a good place to bug in. This doesn’t mean drop everything and move into the middle of the woods. It does mean that if prepping is something that is going to be a big part of your life, then you need to get to an area that is safe for you and your family.
Even moving out of the city and into the suburbs is a huge improvement on your prepping situation. In the end, it’s up to each of us to decide when to bug in or bug out.
Just because you live in a city or an apartment doesn’t mean that you can’t be prepared.
Not everyone can simply pack up and move to a rural community. If you’re stuck in a situation like this, then you need to begin to learn the vulnerabilities of that area. Then, start to counter each of those vulnerabilities as best as you can.
Remember, no one is 100% prepared for everything. Your job is to be as prepared as you can be in the situation that you are in. As long as you are improving your situation, you’re on the right track.
If you can’t move away from the city, we suggest that you put together a bug out bag.
Learn to use the space that you have available.
This is especially important if you live in an apartment or a small home. You can buy or build sliding storage racks or totes that will allow you to store food, water, and supplies under your bed.
The normal queen size bed can store around 43 sq/ft of goods. A king-size bed can keep around 60 sq/ft under it. This is assuming 1 ½ feet of clearance under the bed.
The back of the closet often goes unused. Build or buy shelving for that area. You can stack boxes or canned food and cover them with a sheet then use them as end tables or nightstands. Small racks on the inside of closet doors can be a great place to store canned foods.
Get creative and look around for those spaces that aren’t being used. Creativity is one of the keys to prepping in less than ideal situations.
Use modern apps and web-based programs.
Google maps is a great planning tool for anyone who is a prepper. Having a satellite view of your surroundings gives you a solid place to begin your planning.
Printing out these maps and incorporating them into your defensive plans is a good idea so you have them available when you need them.
There are a lot of good mobile apps as well. Apps like Golf GPS for the iPhone can give you the range of objects relative to your location. Other apps like BulletDrop can be used to figure out, you guessed it, the drop of a bullet based on its weight and muzzle velocity.
By browsing the app stores, you can probably come up with more apps that would be useful for prepping.
There are many areas of your home that can provide you with water following a disaster.
Water in the tank of your toilet can hold around 3 gallons of drinkable water. Your water heater is also a great source of water. By draining your water heater you can get up to 40 gallons of water. Another possibility is draining the pipes in your house. By opening a faucet on the top floor then collecting the water from a faucet on the ground floor, you could end up with another couple gallons of water.
A water BOB is another great idea. As long as you can fill them before a disaster strikes, they make a great way to store water for almost anyone.
Learn to use the Emergency Response Guide (ERG).
The ERG is a book that allows first responders to identify hazardous materials, their labels, containers, hazards and appropriate protective equipment.
In a post-collapse environment, factories, pipelines, and chemical plants will still be a part of the landscape. Having access to an ERG will allow you to identify hazards if you are looking for supplies in these areas. It would also make a great addition to your prepping library in order to help treat accidental exposure to these chemicals.
A PDF of the ERG makes a great addition to a prepping library and can be located here for free. There is an Android and iPhone App available there as well.
You can’t only focus on your strengths.
We all have a tendency to like to do the things that we’re good at.
You should take an honest look at yourself and see where you need to get better. Once you’ve identified those things, don’t shy away from them. Attack them and learn everything you can about the areas where you’re the weakest.
If you’re really good with a rifle but have no idea how to grow a garden, guess what? You’re a gardener until you know what you’re doing. Gaining survival skills is just as important (if not more important) as gathering food, water, and other prepping gear. Plus, they’re easier to carry around.
Mountain bikes make a great post-collapse vehicle.
A bike could be a lifesaver after a collapse or even in a short-term breakdown.
When fuel cannot be delivered, a bike of some kind will provide the ability to travel distances at speed. Add in a trailer and your ability to carry gear will increase by about 100 lbs.
A mountain bike will give you more travel options if you should decide to bug out. Riding along train tracks or cuts made for power lines could keep you off the roads when everyone else is stuck in traffic. Check out our article on mountain bikes as post-collapse vehicles.
Have a plan to get your family together in one place if an event occurs when you’re separated.
This plan should be something that you and your family can implement without the need to communicate in case cell phones don’t work.
As an example, your plan may be that if something occurs while you’re at work, then your wife or husband will go get the kids from school and you will work your way back to the house. You could also have each parent get one child and then you both head home.
Your plan will vary depending on your specific situation, but it should be something that everyone knows. As with any plan, it helps to practice it.
The internet contains a wealth of knowledge.
You can find entire libraries worth of prepping books to download for free by just using Google. Take advantage of that while you can! Following a disaster, you may not have access to the internet for a long time (if ever).
Print the resources you need most and keep them in three-ring binders for when you need them. Add these binders to your prepping library.
You can also store all those books on a thumb drive or external hard drive. Keep it in a safe place and you could potentially have access to them even after a disaster. As long as you have some way to charge a laptop, you should be able to access a computer following most disasters.
Purchase a firearm to protect you and your family.
Guns aren’t the most important thing to have, but you need to be able to protect yourself and your family from potential criminals and thieves.
What you buy will depend on your budget. For those with a lower budget, I would suggest a pistol if you can conceal carry in the area that you live.
If you can only have a firearm in your home, then I’d say to get a 12-gauge shotgun. If you happen to have a higher budget then I’d suggest an AR-15 for home defense and a pistol. This is always a topic that spurs a debate.
Ultimately, whatever you can afford is better than nothing. If you live in a country that doesn’t allow you to have firearms then you’ll have to be creative when looking for weapons for self-defense.
Hand to hand weapons have been used forever. Baseball bats, knives, machetes, axes, and tomahawks are all viable options for self-defense if you are prepping and cannot buy a firearm.
Get in shape now!
Prepping itself isn’t normally hard work, but the strain of a post-collapse life is.
If all of the modern conveniences we take for granted are gone, then something as simple as getting drinking water could become a backbreaking ordeal.
A lack of strength and flexibility also means that you are more likely to get injured. Being overweight increases the chances of heart disease, diabetes (which could be a death sentence in a grid down situation), and many other negative health effects.
If you needed to walk 20 miles a day could you do it? Could you wake up the next day after a couple hours of sleep and do it again? These are questions that you honestly need to ask yourself.
Starting a basic exercise program will make all aspects of your life better.
Expensive solar panels aren’t the only way to get power from the sun.
There are a bunch of portable solar charging options available now for right around $75. These solar chargers are typically aimed at charging cell phones but they can also charge batteries or battery packs. I’ve used Goal Zero products a lot and I’ve never had a problem with them. There are other brands on the market but I don’t have much experience with them.
More extensive solar power options are available. Prepping to power your entire home after a collapse is possible if you’re willing to put the time, money and effort into it.
Storing water should be your first priority.
We can only live a for a couple of days without water. You should plan around a gallon of water, per day, per family member. For a family of three or four that can add up quickly.
Water also take up a lot of space and is very heavy making it one of the more difficult items to store. There is a wide variety of prepping water storage containers available for sale. They can get expensive but they also have the added benefit of being stackable.
A less expensive way to store water when you’re first starting out prepping is by rinsing out old soda bottles and filling them from the tap or just buying cases of bottled water. These containers are not as strong as purpose build water storage containers, so be careful when stacking them.
You can help improve the taste of water that has been stored for a long time by pouring it back and forth between two containers.
Get to know your neighbors before a disaster strikes!
Following a collapse, we will all have to work together. You can start by simply learning your neighbors’ names or waving as you drive past them. You don’t have to become best friends with them, but at least being familiar with them can go a long way when you may need their help.
Even if you live in the middle of nowhere, getting to know your closest neighbors is a good idea. The lone prepper or prepper family is not the best idea and the crazy homicidal prepper certainly isn’t going to work.
You will need help to do everything that is needed in the event of a long-term collapse.
Dealing with bodies in an SHTF world is something that we will need to become accustomed to.
If you come across a corpse, it may smell bad, but the likelihood of it transmitting diseases to you is low. This is especially true if they died of starvation, dehydration or trauma (such as a gunshot wound or falling debris).
A corpse will contaminate water, so they should be moved away from bodies of water or groundwater. They will also bring vermin to the area, that will transmit diseases.
Burying or burning bodies is the best way to keep vermin away. Just make sure you bury them deep enough that scavengers won’t dig them back up and far enough from water sources that they will not contaminate your water supply as they decompose.
Keep a get home bag in your vehicle if you work or spend a lot of time away from home.
When you’re prepping this bag, remember that you’re only trying to get home from where you would most likely get stranded.
I would plan on moving no more than 15-20 miles a day on foot, so pack with those distances in mind. If you work 17 miles from your house then pack food and water for one or two days.
Pack some light food items (such as protein bars), several bottles of water, some kind of light shelter (space blanket or small tarp), a first aid kit, a pistol or light rifle with a couple magazines, sneakers or hiking boots and a change of socks and t-shirt would round out any get home bag I would build.
Keep it light and get home as fast as you can.
Know how to disinfect water, and know several methods to do so.
Prior to starting to disinfect your water, you should do your best to filter out solid particulates or let them settle and scoop out the clean water into another container.
Water purification tablets are an easy and inexpensive way to disinfect water. Boiling is another method, heat the water to a rolling boil for one minute (three minutes if above 5000 ft), then let it cool.
You can also use household bleach to disinfect water. Use unscented bleach that is less than a year old, add 2 drops to one liter of water or six drops to a gallon of water. Let it stand for 30 minutes and make sure it has a slight chlorine scent. For cloudy, cold or discolored water, double the amount of bleach.
Make sure you’re prepping items so you can also filter water. Buying a quality survival water filtration system should be one of your priorities when you first start prepping.
It’s good to know how to build a few basic defensive fortifications.
A couple of useful fortifications are the abatis and defensive fighting position (DFP).
An abatis is useful for diverting or stopping traffic on roadways. You can build one by felling or dragging trees onto the road and interlacing them together to form a continuous barrier that a vehicle would not be able to pass.
The DFP is nothing more than a hole in its most basic form. It should be two rifles long, one rifle wide and roughly deep enough to allow the tallest person to be covered up to their armpits. To improve the DFP add frontal and overhead protection and conceal it as best as you can.
Prepping basic fortifications ahead of time will greatly increase your survivability during a no-notice collapse.
Be aware of the threats that you are likely to encounter and try to avoid them.
When prepping, the best way to defend against any given threat is to avoid the places that those threats are likely to occur.
The threats we face today are most likely related to Islamic extremism. With this in mind, prepping for a vehicle-borne attack, bombing, shooting or stabbing are all likely. Avoiding crowds, especially those around protests and political/religious events is the best way to stay away from these threats.
If you do need to be around large crowds, be aware of your surroundings, keep an eye out for suspicious people and move away from any possible confrontations. In a post-collapse environment, areas like FEMA camps, food & water distribution areas and markets could all be potential areas for violence.
Do not let your pride overcome common sense. Walking away from a confrontation is almost always the better idea.
Not disposing of trash in the correct way is guaranteed to attract vermin, scavengers and spread disease.
Prepping to handle the garbage that you’re going to be creating is something many people overlook.
Today, we are used to just dropping our trash off at the curb, going to work and coming home to an empty trashcan. Most people are in for a rude awakening if those services ever come to an end.
At our current rate, each person makes about 6 pounds of trash per day. Limiting the amount of trash that you produce is going to be your best bet. What you do produce can be burned or buried away from your home.
If you live in an apartment, you will have to make sure that people do not pile trash up against the building. This could be used as fuel for a fire to burn the building down, on top of the threat of disease and animals.
Basics like smoke alarms and fire extinguishers can save lives.
This is an everyday prep. Fires kill around 2,500 people annually in the U.S. and injure another 12,000.
Have a working smoke alarm outside of each bedroom. Check them monthly!
Make sure your every family member knows where to meet in the case of a fire in your home. Practicing the evacuation is a good idea, especially if you have small children. More ideas and further information about fire extinguishers can be found in our article about prepping for a home fire.
After a collapse, fire is going to be a common weapon used by looters and marauders! Having extra fire extinguishers is a good idea.
Carry a firearm with you whenever you can.
This topic is another one that always causes several debates, pistol or revolver, what caliber, do you need night sights, etc. I say carry whatever you are comfortable with.
In the end, the most important thing is that you’re armed. This is another everyday prepping item. If your state allows for concealed carry, then I would suggest applying now if you haven’t already. You are the only one that can protect yourself or your family. The police are not going to be there until it’s too late.
Weapons like retention knives, kubotans, and tactical pens make great back-ups when you’re carrying a firearm.
They’re also better than nothing if you’re prepping in areas where you cannot carry a firearm.
Knives like the Ka-Bar TDI can be hidden along the beltline on the weak side. If you are struggling with an attacker, this allows you to draw the blade while maintaining control of your firearm with your strong hand.
Kubotans (like the Cold Steel Mini Koga) are blunt weapons that can be used to apply pressure to pressure points or used in a closed fist to strike at soft areas like the temples, throat, and eyes. So-called tactical pens normally fall somewhere between a pen and kubotan. You can use them in a similar manner to a kubotan.
If you’re carrying any of these as a primary means of defense then you should carry them on your strong side.
Just because you live in the city doesn’t mean that you cannot grow some of your own food.
As long as you have windows that get a few hours of sunlight a day or can get access to the roof, you’re in business. Container gardens are a great way to supplement your food storage.
Lettuce, cabbage, greens, tomatoes, beans, peppers, carrots, radishes and potatoes are all good options for a container garden. In shady areas, plant lettuce, cabbage, and greens. For sunny areas, tomatoes, beans, peppers, carrots, radishes, and potatoes work well. Cucumbers, squash, and pumpkins can also be grown in pots as long as they have something to grow on. Planting them near a fence or railing would give them the staking they need.
Come up with a plan to dispose of human waste.
In the very short term, or if you’re just traveling through an area, you can dig a hole, go to the bathroom, then cover it back up. This can’t be your plan for the long term. Holes full of human waste all over your yard will breed disease and shouldn’t be part of your prepping 2019 plan. In fact, many of the most dangerous diseases you will encounter in a post-collapse environment are transmitted through contact with human feces.
Proper hygiene is necessary for long term survival.
There are many sustainable methods of waste disposal available to you. The cheapest medium-term solution is something like the Luggable Loo or SereneLife Outdoor Toilet. These still leave you with the problem of dealing with the waste, but they are certainly more comfortable than digging a hole.
A composting toilet is great if you’re looking for a more permanent solution. The cheapest, long-term fix is the use of an outhouse. They’ve worked for centuries and there’s no reason why they won’t work again.
Learn how to stop severe bleeding.
Prepping to control bleeding is one of the most important parts of first aid.
For minor bleeding, apply pressure and elevate the wound above the heart. If you’re trying to treat heavy bleeding, don’t be afraid to use a tourniquet if the wound is on an appendage. For large, gaping wounds, you should pack the wound with gauze or a bandage impregnated with a hemostatic agent.
Our article on how to stop bleeding goes much deer into the subject.
Find several places that you can get water around the area that you live.
Lakes, streams, and ponds are all great places to start. Don’t overlook man-made bodies of water like pools and water hazards on golf courses.
Take a look at the horizon, chances are you’ll notice a few water towers in the area. Gathering water from them will not always be very straightforward. Getting a basic understanding of how they work before a disaster occurs is a good idea.
Examining the maps available at Water Resources of the United States is another place you can look to try to find water in your area. Make note of these water sources and mark them on a map in case you need them in the future.
Regardless of where your water comes from, learning where to get it and how to make sure it’s drinkable is one of the core prepping skills.
Build a bug out bag.
Building a bug out bag is often seen as a right of passage when you start prepping. Build it with YOUR needs in mind and it won’t let you down when you need it most.
What really needs to get discussed is realistic weights. I’ve seen some ridiculous weights quoted in different areas. Most people shouldn’t pack more than 45 lbs (probably closer to 35 lbs) in a bug out bag. If you’re just going to throw it in your Jeep and drive off, then put as much crap in there as you want. If you’re going to actually walk away from your house with it, keep it light.
Focusing on gear that has multiple uses will help you keep the weight in check a little better. Adding items that will let you filter water and capture food will last longer than carrying food and water in your bag.
Make sure you read about why a bug out bag is necessary.
Know how to use your food storage items.
Things like red wheat berries can seem completely foreign to you when you first start prepping if you don’t familiarize yourself with them.
Wheat berries can be ground down into regular flour with a hand grinder. White wheat is engineered from red wheat. Red wheat can have a bitter taste so it is normally mixed with more sugar than white wheat. Grinding red wheat into flour is good for making hard bread and white wheat flour is better for softer bread. You can also boil wheat berries and eat them whole.
Powdered milk can be used to make everything from yogurt to hot chocolate to cottage cheese.
Beans and rice a kind of self-explanatory but there are tons of creative ways to use them.
You don’t need to plan out complete meals, but I suggest printing out some basic recipes as well as some more in-depth ones to keep your food interesting. Food can be a great way to relax and provide a much-needed distraction and some comfort in really horrible situations.
Get hard copies of local maps.
They can be difficult to find these days with GPS and cell phones everywhere, but you should have hard copy maps available and know how to use them.
I like to have detailed maps of my local area and any areas I may stop along the way to a possible bug out location. Then slightly less detailed maps of the areas surrounding that. Finally, I keep a current American road atlas available as a good overall map of the country.
Consider keeping the materials for a homemade greenhouse on hand.
PVC pipes, PVC fittings, and heavy gauge plastic are all you need to make a basic greenhouse. This type of construction can be flimsy and won’t stand up to strong winds. Stronger materials will be needed if you live in an area that experiences high winds.
The ideal temperature for a greenhouse is 80-85 degrees. Make sure you can regulate and monitor the temperatures in your DIY greenhouse.
In the springtime, you can start your plants from seeds. Keep them in the greenhouse until there is no more threat of frost. In the winter, plant cold-resistant vegetables like lettuce. For long-term use, I’d suggest something along the lines of the DIY greenhouse kits that Bootstrap Farmer offers.
Collect rainwater can make water collection easier.
Something as simple as draping a tarp or large trash bag between two lawn chairs can be used to collect rainwater. A more advanced, permanent option, comes in the form of rain barrels. You can buy everything from aesthetically pleasing barrels that would fit naturally into your backyard, all the way to 100-gallon or 250-gallon barrels.
I like the portable rain barrels since they can be collapsed and stored until you decide that you need it. Ultimately, all you need is a container that can hold water and some way to catch or divert the rain into that container. Make sure the container doesn’t allow sunlight in if you plan on storing water in it for an extended period of time. This will help keep the growth of algae to a minimum.
There are tons of DIY projects out there for when you first get started prepping. Just search on Google for rain barrels.
Get it through your head that you cannot defend your home from the front door.
If you’re in a position where your home is, or could be in danger, from gangs, looter, marauders, etc. then you need to have security set up away from your house. This is one of the key things that a community provides.
Block access to your neighborhood with vehicles, concrete barriers, abatis or other barriers that can stop traffic from entering. Have only one way in and out and set up a checkpoint. Interview everyone that you don’t recognize. You’re asking to get burned out of your house if you think you can hide and wait for them to come to you. Defending your family is one of the main reasons that we get involved with prepping.
Keep your home and the surrounding area clear of dead trees and flammable debris.
In a post-collapse environment, I believe fires will be a source of many injuries and deaths.
Trees, leaves, and debris need to kept at a manageable level. Wood piles should be at least 30 feet from your living area. Make sure trees and branches aren’t touching your chimney. This may not be that much of a problem as you will likely be burning wood for heat/cooking. Use common sense when you are looking at your surroundings. Move flammable materials away from your living area if they could catch it on fire.
It’s really that simple but it’s also something that can be easily overlooked when there’s a lot going on.
Consider storing some modern adhesives and sealants.
Everyone loves duct tape and talks about how you can use it for everything. It’s an excellent product and you should definitely have some on hand but there are other things out there that you preppers should consider.
One thing I don’t hear a lot about is storing items like Flex Seal, expanding two-part foam and epoxy. There is any number of prepping situations that I can think of when these would come in handy. Be sure to check shelf lives as most of these products only have a shelf life of 1 or 2 years. The short shelf life definitely doesn’t lend itself to extended storage. I’d be interested to hear from someone who has used these products after that shelf life and see if they still hold up. I have personally used a two-part epoxy that was around 5 years past its advertised shelf life and had no problems.
Be aware of the threats posed by a flood.
How many times have you watched the news and wondered how can those people be so stupid? Why would they drive through that water? I see it all the time, so I wanted to touch on some guidelines for prepping to deal with floods and crossing flooded areas.
If there is a flood warning near your home, move valuables and furniture to the highest floors of the house. Disconnect appliances and do not touch wet electronics. While the electricity in your house normally only causes a painful shock, electronics can have capacitors which allow them to store enough electricity to cause a deadly shock.
Floodwater is often contaminated with human waste which is the leading cause of deadly waterborne diseases. You should only move across flooded areas if it’s absolutely necessary. Six inches of moving water can knock you down, one foot of moving water is enough to sweep away a vehicle.
Eyecare is very important during times with limited or no professional medical treatment.
Make sure you have several pairs of glasses available with your current prescription and never wear contacts in a post-collapse environment.
Try to keep your hands away from your eyes. Touching your eyes when your hands are dirty can lead to many different diseases. Some of them are easily treated with modern medicines, but with limited access to these medications, they could eventually lead to vision impairment or complete blindness.
If you don’t wear glasses, consider buying a pair of safety glasses. Adding safety glasses to your prepping supplies should be one of the first things you do when you get started prepping.
Conclusion
Prepping isn’t always easy. This is especially true when you first start prepping! Some of our readers have prepped for decades and have a lot of great ideas when it comes to prepping. If you have questions, put them in the comments.
Do you have any prepping tips you’d like to share? Let us know in the comments.
The article Prepping 2020 – 41 Tips and Tricks for New and Old Preppers Alike! is courtesy of: ready lifestyle
Prepping 2020 – 41 Tips and Tricks for New and Old Preppers Alike! published first on https://readylifesytle.tumblr.com
0 notes
Text
Websites for Hour of Code by Grade
This December will again host the Hour of Code, a one-hour introduction to programming designed to demystify the subject and show that anyone can be a maker, a creator, and an innovator. Last year, almost 300,000 students (age 4-104) participated from over 180 countries and wrote almost 20 billion lines of code. The 200,000+ teachers involved came away believing that, of all their education tools, coding was the best at teaching children to think. It’s easy to see why when you look at fundamental programming concepts:
abstraction and symbolism – variables are common in math, but also in education. Tools, toolbars, icons, images all represent something bigger
creativity – think outside the box
if-then thinking – actions have consequences
debugging – write-edit-rewrite; try, fail, try again. When you make a mistake, don’t give up or call an expert. Look at what happened and fix where it went wrong.
logic – go through a problem from A to Z
sequencing – know what happens when
If you’re planning to participate in Hour of Code, here are a series of activities — broken down by grade — that will kickstart your effort. They can be done individually or in small groups.
Introduce each of these activities by watching “I Like Programming“, a video that discusses why the great programmers of our time fell in love with this activity.
**Grade-levels below are guidelines. Feel free to use whichever project fits your students.
Kindergarten — Human Robot
Start young programmers by teaching sequencing. Show images of stages in, say, their morning preparations. Ask them to organize the list in the order completed as they get ready for school. Call it “sequencing” and expect them to use this domain-specific word.
Next, pick an activity from the sequence — say, walking into the classroom and sitting down. Use yourself as a model of how to perform that activity and ask students for specific directions on how you would complete this task. For example:
Move right foot, then left, 4 times.
Turn right; walk 4 steps.
Turn around (left and left again).
Drop backpack to floor (or place under chair).
Sit
Only do what they tell you. For example, if they say “walk to the chair”, look confused. They haven’t provided enough direction. They must “debug” the “script” and try again.
First Grade — Follow one of the free online Hour of Code activities
Using activities offered on websites like Code.org, Kodable, or Tynker is the easiest way to get involved as the site does the planning for you. Before starting, review the digital citizenship associated with visiting an online site (such as privacy, staying on the assigned website, and not talking to strangers).
Instead of following a pre-planned activity, try one of these sites that introduce age-appropriate programming:
Scratch Jr.
Tinkercad
If you use iPads, here are some great options:
Cargo-Bot
Daisy the Dinosaur
For more suggestions, here’s a list of coding websites. Scroll to the section for first grade.
Second Grade — Animation
Use a free program like Pivot Stick Figure Animator or Stickman to program a stick figure. Both are simple to use, but offer different options. Preview them first to pick the one best suited to your student group.
Pivot Stick Figure is a download. Students program a stick figure to do pretty much anything they want by adjusting the “joints” in his body
Draw a Stickman is a web-based tool or app that turns a simple drawing into a story by asking questions of the creator. Students draw an image; the site animates it and then asks questions as the figure moves, requiring students to add detail to the Stickman’s adventure. They can pick from several story themes in creating their finished story.
If you use iPads, try Stick Nodes or Stickman.
Third Grade — Pixel Art
Pixel Art is the blocky drawing that is most famous for appearing in Minecraft. For this project, students will use a spreadsheet program.
Open the spreadsheet program you use in your school (Google Sheets, Excel, or another). Show students how to turn the cells into squares rather than rectangles by doing the following (or watch this video):
Select all cells by grabbing the box that sits at the intersection of the rows and columns
Drag a column header’s edge to resize the column width to match the row height.
Students now write directions for which color is poured into what squares to create their drawing. For example:
Blue: A1, B1, C1, D1, G1, H1, I1, J1, A2, B2, I2, J2, A3, J3, A5, A6, A7, A8, A9, A10,
When done, students have a neighbor test the directions to see if they can create the intended drawing.
Fourth Grade — Shortkeys
By fourth grade, students appreciate technology for how it can speed up their classwork and will seek out ways to use it for that purpose. Creating a shortkey is a quick and easy way to complete repetitive activities and will become a favorite with students. If necessary, adapt the following Windows/iPad directions to the device used in your school:
Go to Start
Right click on the desired program (either a program or a tool is fine)
Select “properties”
Click in “shortcut”
Push key combination you want to use, say, Ctrl+Alt+S
Save
On iPads, these are called “hotkeys”:
Go to Settings > General Settings > Keyboard Settings.
Scroll down and click “add new shortcut.”
Popular shortkeys are to open programs, activate tools, and take screenshots using the digital device’s native tool.
Fifth Grade — Macros
Creating macros gives students an easy way to add a standards-based heading or any other repetitive task required for their schoolwork without having to retype it each time. Adapt these MS Word directions to your digital device:
Click View – Macros– Record Macros.
Specify a name for the macro.
Choose whether it should be a keyboard shortcut or a button.
Once you click OK, notice your mouse looks like a cassette tape, indicating that anything you click will be part of the macro. Click all elements you would like to be part of your macro.
Stop recording by clicking View – Stop Recording.
Click for a video on how to create macros.
Sixth-Seventh Grade — Code a Widget
Widgets are free, personalized mini-apps that do almost anything the user can program, from calculating the calories in a recipe to solving complex problems. Students can browse Wolfram/Alpha’s gallery for a widget that fits their need and embed the code into their personal website, or build their own widget from scratch using Wolfram Alpha’s Builder tool. The level of difficulty will determine how long it takes.
Click to view slideshow.
Eighth Grade — Alice
Alice is a free downloadable programming tool for 8th grade and above that shows students how to create interactive stories, animations, and games. Besides Math Standards, Alice supports these Common Core writing skills:
8.3a Engage and orient the Alice world viewer by establishing a context and point of view and introducing a narrator and/or characters; organize an event sequence that unfolds naturally and logically.
8.3b Use narrative techniques in the Alice World, such as dialogue, pacing, description, and reflection, to develop experiences, events, and/or characters.
8.3c In Alice world dialogue and action, use a variety of transitions to convey sequence, signal shifts from one time frame or setting to another, and show relationships among experiences and events.
8.3d Use precision and appropriate tools throughout to convey events.
8.3e Provide a conclusion to the Alice world story that follows events.
Divide the class into groups. Have each group pick one of the following resources, preview it, and be prepared to share their thoughts and take questions from classmates:
basic Alice programming instructions
overview of Alice by Middle School students
Duke University’s Alice “Getting Started” videos are here
Next, groups open Alice and go through the tutorial by clicking “Start Tutorial” in the Welcome to Alice dialogue box. When done, create an animated avatar as follows:
Choose “room” template, then “Setup Scene.”
Choose “class Biped,” “class Person,” then child, female, light and avatar that is shown.
Push OK until avatar appears in the room.
Using circle at avatar’s feet, turn him/her until s/he faces right, and then press “edit code.”
In tab that says “this child/person,” click on heavy black arrow facing down. Then click arrow facing right to reach individual body parts. Choose a body part and give it direction. Run program to see results. Debug program if it doesn’t work.
If students get stuck, they can go through Alice online documentation, Help files, or ask for assistance from classmates. Remind them not to give up. Keep making changes. It will work.
If you have time: In groups, students watch movie trailer of Despicable Me (or similar). Analyze how avatars move their limbs, mouths, and how they walk. Compare this to humans. For example, which leg moves first? How do joints move? How do arms and legs move in relation to each other? Does body bob up-down or side-to-side as avatar moves? List the movements and then construct a walking avatar in Alice world.
Click to view slideshow.
***
Here’s a collection that goes across grade levels:
It’s designed to show that anyone can learn the basics to be a maker, a creator, and an innovator. Here are unusual projects (each, about one hour in length) you can use in your classroom to participate in this wildly popular event:
Alt Codes
IFTTT
QR codes
Wolfram Alpha widgets
Alt Codes
Grade level: 4-12
Alt codes are those symbols that are created by holding down the Alt key and pushing a series of numbers, like these for copyright and the Spanish question mark:
Alt + 0169 = ©
Alt+0191 = ¿
There are hundreds of them for PCs, Macs, and Chromebooks. Click the link for your digital device.
Tip: Press the ALT key. While it is pressed, put in the numbers from your NUMBER PAD. It doesn’t work using the numbers at the top of the keyboard. Make sure the NUM LOCK is on.
Wolfram/Alpha Widget
Grade level: 7-12
Widgets are free personalized mini-apps that can do almost anything the user can program, from calculating the calories in a recipe to solving complex problems. You can either browse Wolfram/Alpha’s gallery for a widget that fits your need and embed the code into your personal website, or you can build your own widget from scratch using their Builder tool. The level of difficulty will determine how long it takes so start simple during Hour of Code.
IFTTT
Grade level: 9-12
IFTTT allows users to create ‘recipes’ to automate functions, such as being notified when the weather changes or the arrival of an event. It uses a simple statement—IF THIS THEN THAT. Users create a recipe by choosing a trigger channel from IFTTT’s library, then a trigger, and finally an action channel. For example:
IF they post a photo on Instagram THEN share it on Twitter
IF it’s going to rain tomorrow THEN send me a text message
IF my children are near home THEN turn on the lights
Click for more on IFTTT.
QR Codes
This is so simple, you’re going to love it:
Open the QR Code reader on your phone or mobile device.
Center the QR Code within the provided frame.
Once the code is read (which happens within seconds), it will automatically activate the data.
QR Codes can include data for almost anything. The tool you select will offer a list. You’ll check what you want to do and get started. Here are some of the options:
Website URL: Scanning this QR code will give you a prompt to open the website.
Telephone Number: Scanning this QR code will give you a prompt to call the number.
Plain Text: Scanning this QR code will give you a prompt to search the web using your default search provider in Safari.
SMS Message: Scanning this QR code will give you a prompt to compose the specified message to the specified number.
Email Address: Scanning this QR code will give you a prompt to compose an email to the specified email address.
Calendar Event: Scanning this QR code will give you a prompt to add the specified event to your calendar.
Location of event: Provide a large QR Code at the entrance to the school or event location with a map and directions to the room where it is located. Attendees merely scan the QR Code and follow the line that leads to the event.
There are dozens of ways to incorporate QR Codes into your classroom. Here are a few, starting with introducing it during Hour of Code:
Introduce QR Codes during Hour of Code to show students the basics of building a code and then using it.
Record voice instructions for a project; save it as an MP3 and turn it into a QR code.
Have new students follow a QR Code scavenger hunt to find all the important places in the school (with their parents if you do it for Back to School Night). That makes all of that information available on their phones for later use.
Add QR codes to homework sheets that link to help. For example, if the student forgets how to solve a math problem, the QR code will take them to help.
Embed concert programs, directions for station activities, and parent contact information as QR Codes instead of printing
For high school students: Create their resume with a QR Code. They can easily share it with everyone, include it on a business card, or send it in an email. The recipient will automatically have it on their mobile device–no worries about losing it.
For a school art display: Include all data on the student artist in a QR Code. It is small and doesn’t distract from the glorious artwork being presented.
Record students reading a short story and embed it into a QR Code. Post these on a gallery in your classroom where students can stop and visit anytime for a quick story read by their classmates.
Have students draw a picture of themselves with a QR code over their belly. On the QR Code, they’ll type about themselves with at least one fascinating fact most classmates wouldn’t know. Let students scan these with their iPads or another digital device to find out more about their new classmates.
***
What are you doing for Hour of Code? Share your projects in the comments.
More on Hour of Code:
Lesson plan bundle for Hour of Code
Hour of Code: Scratch Jr.
Hour of Code–Why Not
Jacqui Murray has been teaching K-18 technology for 30 years. She is the editor/author of over a hundred tech ed resources including a K-12 technology curriculum, K-8 keyboard curriculum, K-8 Digital Citizenship curriculum. She is an adjunct professor in tech ed, Master Teacher, webmaster for four blogs, an Amazon Vine Voice, CSTA presentation reviewer, freelance journalist on tech ed topics, contributor to NEA Today and author of the tech thrillers, To Hunt a Sub and Twenty-four Days. You can find her resources at Structured Learning.
Websites for Hour of Code by Grade published first on https://medium.com/@DLBusinessNow
0 notes
Text
Websites for Hour of Code by Grade
This December will again host the Hour of Code, a one-hour introduction to programming designed to demystify the subject and show that anyone can be a maker, a creator, and an innovator. Last year, almost 300,000 students (age 4-104) participated from over 180 countries and wrote almost 20 billion lines of code. The 200,000+ teachers involved came away believing that, of all their education tools, coding was the best at teaching children to think. It’s easy to see why when you look at fundamental programming concepts:
abstraction and symbolism – variables are common in math, but also in education. Tools, toolbars, icons, images all represent something bigger
creativity – think outside the box
if-then thinking – actions have consequences
debugging – write-edit-rewrite; try, fail, try again. When you make a mistake, don’t give up or call an expert. Look at what happened and fix where it went wrong.
logic – go through a problem from A to Z
sequencing – know what happens when
If you’re planning to participate in Hour of Code, here are a series of activities — broken down by grade — that will kickstart your effort. They can be done individually or in small groups.
Introduce each of these activities by watching “I Like Programming“, a video that discusses why the great programmers of our time fell in love with this activity.
**Grade-levels below are guidelines. Feel free to use whichever project fits your students.
Kindergarten — Human Robot
Start young programmers by teaching sequencing. Show images of stages in, say, their morning preparations. Ask them to organize the list in the order completed as they get ready for school. Call it “sequencing” and expect them to use this domain-specific word.
Next, pick an activity from the sequence — say, walking into the classroom and sitting down. Use yourself as a model of how to perform that activity and ask students for specific directions on how you would complete this task. For example:
Move right foot, then left, 4 times.
Turn right; walk 4 steps.
Turn around (left and left again).
Drop backpack to floor (or place under chair).
Sit
Only do what they tell you. For example, if they say “walk to the chair”, look confused. They haven’t provided enough direction. They must “debug” the “script” and try again.
First Grade — Follow one of the free online Hour of Code activities
Using activities offered on websites like Code.org, Kodable, or Tynker is the easiest way to get involved as the site does the planning for you. Before starting, review the digital citizenship associated with visiting an online site (such as privacy, staying on the assigned website, and not talking to strangers).
Instead of following a pre-planned activity, try one of these sites that introduce age-appropriate programming:
Scratch Jr.
Tinkercad
If you use iPads, here are some great options:
Cargo-Bot
Daisy the Dinosaur
For more suggestions, here’s a list of coding websites. Scroll to the section for first grade.
Second Grade — Animation
Use a free program like Pivot Stick Figure Animator or Stickman to program a stick figure. Both are simple to use, but offer different options. Preview them first to pick the one best suited to your student group.
Pivot Stick Figure is a download. Students program a stick figure to do pretty much anything they want by adjusting the “joints” in his body
Draw a Stickman is a web-based tool or app that turns a simple drawing into a story by asking questions of the creator. Students draw an image; the site animates it and then asks questions as the figure moves, requiring students to add detail to the Stickman’s adventure. They can pick from several story themes in creating their finished story.
If you use iPads, try Stick Nodes or Stickman.
Third Grade — Pixel Art
Pixel Art is the blocky drawing that is most famous for appearing in Minecraft. For this project, students will use a spreadsheet program.
Open the spreadsheet program you use in your school (Google Sheets, Excel, or another). Show students how to turn the cells into squares rather than rectangles by doing the following (or watch this video):
Select all cells by grabbing the box that sits at the intersection of the rows and columns
Drag a column header’s edge to resize the column width to match the row height.
Students now write directions for which color is poured into what squares to create their drawing. For example:
Blue: A1, B1, C1, D1, G1, H1, I1, J1, A2, B2, I2, J2, A3, J3, A5, A6, A7, A8, A9, A10,
When done, students have a neighbor test the directions to see if they can create the intended drawing.
Fourth Grade — Shortkeys
By fourth grade, students appreciate technology for how it can speed up their classwork and will seek out ways to use it for that purpose. Creating a shortkey is a quick and easy way to complete repetitive activities and will become a favorite with students. If necessary, adapt the following Windows/iPad directions to the device used in your school:
Go to Start
Right click on the desired program (either a program or a tool is fine)
Select “properties”
Click in “shortcut”
Push key combination you want to use, say, Ctrl+Alt+S
Save
On iPads, these are called “hotkeys”:
Go to Settings > General Settings > Keyboard Settings.
Scroll down and click “add new shortcut.”
Popular shortkeys are to open programs, activate tools, and take screenshots using the digital device’s native tool.
Fifth Grade — Macros
Creating macros gives students an easy way to add a standards-based heading or any other repetitive task required for their schoolwork without having to retype it each time. Adapt these MS Word directions to your digital device:
Click View – Macros– Record Macros.
Specify a name for the macro.
Choose whether it should be a keyboard shortcut or a button.
Once you click OK, notice your mouse looks like a cassette tape, indicating that anything you click will be part of the macro. Click all elements you would like to be part of your macro.
Stop recording by clicking View – Stop Recording.
Click for a video on how to create macros.
Sixth-Seventh Grade — Code a Widget
Widgets are free, personalized mini-apps that do almost anything the user can program, from calculating the calories in a recipe to solving complex problems. Students can browse Wolfram/Alpha’s gallery for a widget that fits their need and embed the code into their personal website, or build their own widget from scratch using Wolfram Alpha’s Builder tool. The level of difficulty will determine how long it takes.
Click to view slideshow.
Eighth Grade — Alice
Alice is a free downloadable programming tool for 8th grade and above that shows students how to create interactive stories, animations, and games. Besides Math Standards, Alice supports these Common Core writing skills:
8.3a Engage and orient the Alice world viewer by establishing a context and point of view and introducing a narrator and/or characters; organize an event sequence that unfolds naturally and logically.
8.3b Use narrative techniques in the Alice World, such as dialogue, pacing, description, and reflection, to develop experiences, events, and/or characters.
8.3c In Alice world dialogue and action, use a variety of transitions to convey sequence, signal shifts from one time frame or setting to another, and show relationships among experiences and events.
8.3d Use precision and appropriate tools throughout to convey events.
8.3e Provide a conclusion to the Alice world story that follows events.
Divide the class into groups. Have each group pick one of the following resources, preview it, and be prepared to share their thoughts and take questions from classmates:
basic Alice programming instructions
overview of Alice by Middle School students
Duke University’s Alice “Getting Started” videos are here
Next, groups open Alice and go through the tutorial by clicking “Start Tutorial” in the Welcome to Alice dialogue box. When done, create an animated avatar as follows:
Choose “room” template, then “Setup Scene.”
Choose “class Biped,” “class Person,” then child, female, light and avatar that is shown.
Push OK until avatar appears in the room.
Using circle at avatar’s feet, turn him/her until s/he faces right, and then press “edit code.”
In tab that says “this child/person,” click on heavy black arrow facing down. Then click arrow facing right to reach individual body parts. Choose a body part and give it direction. Run program to see results. Debug program if it doesn’t work.
If students get stuck, they can go through Alice online documentation, Help files, or ask for assistance from classmates. Remind them not to give up. Keep making changes. It will work.
If you have time: In groups, students watch movie trailer of Despicable Me (or similar). Analyze how avatars move their limbs, mouths, and how they walk. Compare this to humans. For example, which leg moves first? How do joints move? How do arms and legs move in relation to each other? Does body bob up-down or side-to-side as avatar moves? List the movements and then construct a walking avatar in Alice world.
Click to view slideshow.
***
Here’s a collection that goes across grade levels:
It’s designed to show that anyone can learn the basics to be a maker, a creator, and an innovator. Here are unusual projects (each, about one hour in length) you can use in your classroom to participate in this wildly popular event:
Alt Codes
IFTTT
QR codes
Wolfram Alpha widgets
Alt Codes
Grade level: 4-12
Alt codes are those symbols that are created by holding down the Alt key and pushing a series of numbers, like these for copyright and the Spanish question mark:
Alt + 0169 = ©
Alt+0191 = ¿
There are hundreds of them for PCs, Macs, and Chromebooks. Click the link for your digital device.
Tip: Press the ALT key. While it is pressed, put in the numbers from your NUMBER PAD. It doesn’t work using the numbers at the top of the keyboard. Make sure the NUM LOCK is on.
Wolfram/Alpha Widget
Grade level: 7-12
Widgets are free personalized mini-apps that can do almost anything the user can program, from calculating the calories in a recipe to solving complex problems. You can either browse Wolfram/Alpha’s gallery for a widget that fits your need and embed the code into your personal website, or you can build your own widget from scratch using their Builder tool. The level of difficulty will determine how long it takes so start simple during Hour of Code.
IFTTT
Grade level: 9-12
IFTTT allows users to create ‘recipes’ to automate functions, such as being notified when the weather changes or the arrival of an event. It uses a simple statement—IF THIS THEN THAT. Users create a recipe by choosing a trigger channel from IFTTT’s library, then a trigger, and finally an action channel. For example:
IF they post a photo on Instagram THEN share it on Twitter
IF it’s going to rain tomorrow THEN send me a text message
IF my children are near home THEN turn on the lights
Click for more on IFTTT.
QR Codes
This is so simple, you’re going to love it:
Open the QR Code reader on your phone or mobile device.
Center the QR Code within the provided frame.
Once the code is read (which happens within seconds), it will automatically activate the data.
QR Codes can include data for almost anything. The tool you select will offer a list. You’ll check what you want to do and get started. Here are some of the options:
Website URL: Scanning this QR code will give you a prompt to open the website.
Telephone Number: Scanning this QR code will give you a prompt to call the number.
Plain Text: Scanning this QR code will give you a prompt to search the web using your default search provider in Safari.
SMS Message: Scanning this QR code will give you a prompt to compose the specified message to the specified number.
Email Address: Scanning this QR code will give you a prompt to compose an email to the specified email address.
Calendar Event: Scanning this QR code will give you a prompt to add the specified event to your calendar.
Location of event: Provide a large QR Code at the entrance to the school or event location with a map and directions to the room where it is located. Attendees merely scan the QR Code and follow the line that leads to the event.
There are dozens of ways to incorporate QR Codes into your classroom. Here are a few, starting with introducing it during Hour of Code:
Introduce QR Codes during Hour of Code to show students the basics of building a code and then using it.
Record voice instructions for a project; save it as an MP3 and turn it into a QR code.
Have new students follow a QR Code scavenger hunt to find all the important places in the school (with their parents if you do it for Back to School Night). That makes all of that information available on their phones for later use.
Add QR codes to homework sheets that link to help. For example, if the student forgets how to solve a math problem, the QR code will take them to help.
Embed concert programs, directions for station activities, and parent contact information as QR Codes instead of printing
For high school students: Create their resume with a QR Code. They can easily share it with everyone, include it on a business card, or send it in an email. The recipient will automatically have it on their mobile device–no worries about losing it.
For a school art display: Include all data on the student artist in a QR Code. It is small and doesn’t distract from the glorious artwork being presented.
Record students reading a short story and embed it into a QR Code. Post these on a gallery in your classroom where students can stop and visit anytime for a quick story read by their classmates.
Have students draw a picture of themselves with a QR code over their belly. On the QR Code, they’ll type about themselves with at least one fascinating fact most classmates wouldn’t know. Let students scan these with their iPads or another digital device to find out more about their new classmates.
***
What are you doing for Hour of Code? Share your projects in the comments.
More on Hour of Code:
Lesson plan bundle for Hour of Code
Hour of Code: Scratch Jr.
Hour of Code–Why Not
Jacqui Murray has been teaching K-18 technology for 30 years. She is the editor/author of over a hundred tech ed resources including a K-12 technology curriculum, K-8 keyboard curriculum, K-8 Digital Citizenship curriculum. She is an adjunct professor in tech ed, Master Teacher, webmaster for four blogs, an Amazon Vine Voice, CSTA presentation reviewer, freelance journalist on tech ed topics, contributor to NEA Today and author of the tech thrillers, To Hunt a Sub and Twenty-four Days. You can find her resources at Structured Learning.
Websites for Hour of Code by Grade published first on https://medium.com/@DigitalDLCourse
0 notes
Link
Dust Mites | How To Get Rid Of Dust Mites | Best Way To Remove Bed Bugs From A Mattress | Bed Bugs How to Remove Dust Mites From A Mattress Fast Have you ever heard the expression sleeping with the enemy?î Well, we actually do sleep with the enemy, and most of the time we don’t even know it. Mites are extremely small bugs that live in our mattresses, pillows, and bed sheets. Even though they are tiny, mites can cause immeasurable damage to people’s health. They attack your respiratory system and cause extreme allergic reactions. Since they feed on dead skin cells, they live in places close to a food source, like our mattresses, pillows, curtains, stuffed animals, and as well as other places. In order to avoid mites and keep them from multiplying, here are some steps you can take: – Always air out your house; – Put your mattresses and pillows in the sun; – Wash the clothes that you haven’t worn in a while; – Change your sheets every week; – Use a mattress pad and pillow case at all times. Another easy way to get rid of mites is by using this easy to make home remedy. It will clean your mattress and make it smell nice, as well as removing all stains and mites. Ingredients – 250 milliliters of hydrogen peroxide (10% solution); – 3 teaspoons of baking soda; – A few drops of liquid soap or dish detergent. Instructions Mix the peroxide with the baking soda until the baking soda is completely dissolved. Next, add 2 or 3 drops of liquid soap or dish detergent and mix again. Pour the liquid in an empty spray bottle. Shake it gently and spray it on your mattress. If there are stains, saturate those areas. When the foam dries (air dries or with a fan), remove the excess product with a brush or vacuum cleaner. It is important to use the mixture as soon as you make it, so it doesn't lose its cleaning integrity. If You Enjoyed This Video Please Like, Comment, Share & Don't Forget To Subscribe My Channel As Well As Share Your Review And Suggestion In The Comment Section Below. Tell Us Your Choice And What You Want To Watch, We Will Make That Videos For You! Thanks For Watching This Videos...... CONNECT WITH ME ANYWHERE: Facebook Page : http://bit.ly/2KDg2zg SUBSCRIBE MY CHANNEL: Natural Medication: http://bit.ly/2IR0Rxk CHANNEL DISCLAIMER: The materials and the information contained on the Natural Medication channel are provided for general and educational purposes only and do not constitute any legal, medical or other professional advice on any subject matter. These statements have not been evaluated by the FDA and are not intended to diagnose, treat or cure any disease. Always seek the advice of your physician or other qualified health providers prior to starting any new diet or treatment and with any questions you may have regarding a medical condition. If you have or suspect that you have a medical problem, promptly contact your health-care provider. Source(s): http://bit.ly/2I32g8i Images licensed under Creative Commons: https://www.pexels.com https://pixabay.com https://www.google.com I am hereby declaring that all Images use to make this video is from Google Search COPYRIGHT DISCLAIMER: Copyright Disclaimer Under Section 107 of the Copyright Act 1976, allowance is made for "fair use" for purposes such as criticism, comment, news reporting, teaching, scholarship, and research. Fair use is a use permitted by copyright statute that might otherwise be infringing. THIS VIDEO IS JUST FOR FUN. No copyright infringement intended. All rights to clips and music belong to their respective owners. #RemoveDust #Mites #natural
0 notes
Text
How To Customize The Style Of Contact Form 7 To Match Your Website
With over a million active installs, Contact Form 7 is by far one of the most popular WordPress plugins ever. It’s popularity probably has a lot to do with the truth behind its description: “Simple but flexible.”
Contact Form 7 allows you to create multiple contact forms using nothing but simple HTML markup (which it generates for you). Once created, each form can be quickly deployed by placing its corresponding shortcode where you’d like the form to appear; in page, post, or widget area. Messages submitted via the forms are sent to the email address provided in the plugin settings and spam is combatted via support for CAPTCHA and Akismet.
Contact Form 7 is so simple that it seems literally anyone can use it effectively. Styling too, is intended to be simple. But perhaps too simple for some. By default the Contact Form 7 plugin does not style its forms. Any styling they do have is a result of default stylings present in a WordPress theme’s style sheet.
Usually resulting in something quite basic, like this:
Unfortunately this kind of form, while indeed simple and flexible, may not be as beautifully designed as the other elements on one’s website. Leaving many otherwise happy users looking for alternatives to Contact Form 7 with more styling options. Thankfully though, with just a bit of CSS, no plugin alternative is necessary.
In today’s post I’m going to share a series of tips that will open up a wide variety of Contact Form 7 styling possibilities for anyone, using any theme.
How To Customize The Style Of Contact Form 7 To Match Your Website
youtube
Subscribe To Our Youtube Channel
Where to Edit Your Contact Form 7 CSS (and Why)
It’s important that when adding custom CSS you do not add it to the style sheet of either Contact Form 7 or your parent theme. Any changes or additions you make there will be overwritten as soon as the theme and/or plugin are updated.
Instead, you will want to add the CSS below to your child theme’s CSS. You can also use the custom CSS feature on Jetpack, or if your theme provides a section in its admin panel for custom CSS you can use that too.
Ok, now that we know where to place the styles we’ll be going over below, let’s get started!
How to Create Site Wide Form Styles
Let’s start by making some general edits that will apply themselves to the whole form. We can do this by using the class selector .wpcf7 and then adding styles beneath it.
(I’d also like to highly suggest that you place the commented out heading I’ve written below within your style sheet to denote where your Contact Form 7 styles begin.)
/* Contact Form 7 Styles ---------------------------------*/ .wpcf7 { background-color: #F0F0F0; border: 5px solid #666666; }
After adding the above code to your style sheet, every form you create with Contact Form 7 will have the background and border styles you’ve just defined. Below is an example.
As you can see, there are some spacing issues. To fix this you’ll want to adjust the margins between the border and the inner form elements. You can do this with the code below.
.wpcf7-form { margin-left: 25px; margin-right: 25px; margin-top: 25px;
On my test site, this resulted in the following:
Note: these styles may affect your forms in slightly different ways due to the fact that we’re most likely working with different themes. That doesn’t mean that this code won’t work for you, only that you may have to tweak the numbers a bit to get things just right for your site.
How to Create Site Wide Form Field Styles
One of the more common requests people have when it comes to styling Contact Form 7 is how they can adjust the width of the fields. Particularly the message area which does not extend very far.
The code below will extend the message area to your desired width (when adjusted). I have set mine in the example for 95% as that is what looked best in my imagined use case. You can set it to suit your needs as well–using a percentage or a fixed pixel count.
.wpcf7-textarea { width: 85%; }
You can adjust the width of the other fields as well by adjusting the input class selector.
.wpcf7 input { width: 50%; }
If you do not want to adjust all of your input fields with the same criteria you can drill down a bit by selecting just those you are interested in. In the example below I’ve opted to just change my text fields so that my submit button is not also affected.
.wpcf7-text { width: 50%; }
After all of the above changes, I was able to style the form you see below.
I personally didn’t want to change my button color, but I think that is most likely another common desire. So if you’d like to alter your button color you can use the CSS below to experiment.
.wpcf7-submit { background: #555555; color: #ffffff; }
With these bits of CSS in place, every form created with Contact Form 7 will look like the final image above. But what happens when you want one form in particular to look different from all of the others?
How to Style a Specific Form
Getting the specific CSS ID required to make style edits to a specific form can be a bit of a bother, but it is possible with a little tinkering.
The first thing you’ll want to do is actually add the form shortcode into your site and preview it. (You’ll notice that within that shortcode there is a number for the ID–but that is not actually the full ID you will need.)
Then, using either Google Chrome’s inspect element feature or something similar in another browser, take a look at the code for the form. Using this you will find the full form ID.
In my case, the ID number in my shortcode was 4407. The full ID turned out to be wpcf7-f4407-p4405-o1. Which meant that I could make further edits, just to that specific form, by using the code below with various criteria that differed from my site-wide settings.
#wpcf7-f4407-p4405-o1 { background-color: #333333; border: 5px solid #0074A2; }
How to Style Specific Fields
You can do the same thing with specific fields. Instead of tracking down a specific CSS class or ID in your browser all you have to do is add it in the form builder.
When you are generating a tag to place in the form builder you will notice that there are two options for creating an ID, a Class, or both.
In this example I chose to create a class called customized-field. If you do the same (or something similar) you will then be able to style just that field using your new id (or class) as I have below.
#customized-field { color: #ffffff; border: 2px solid #333333; }
How to Create Custom Form Layouts for Checkboxes and Radial Buttons
By default, checkboxes and radiuses display from left to right.
But because of personal preference or a specific use case in which displaying them top to bottom might be preferable, you can use one of the two options below.
To display your checkboxes or radial buttons top to bottom and on the left, use this.
.wpcf7-list-item { display: block; }
To display your checkboxes and radial buttons top to bottom and on the right, use this. Also be sure that when you generate the tag for this option that you choose the “label first” checkbox.
.wpcf7-list-item { display: table-row; } .wpcf7-list-item * { display: table-cell; }
Bonus Tip: How to Remove Field Titles & Use Placeholder Text Instead
This tip does not require use of CSS like the others above, but rather a simple tweak to the markup used in the Contact Form 7 form builder.
Sometimes it isn’t necessary to have field titles, especially when you can put placeholder text within the fields themselves that explain what information belongs there.
If that’s the case on your site, then all you have to do is delete the titles in the form builder and add placeholding text like I have done in the example below.
<p></p> <p>[email* your-email placeholder "Email Address"]</p> <p></p> <p>[textarea your-message placeholder "Talk to me"]</p>
The result is a cleaner form with less clutter.
In Conclusion
I hope I’ve shown in the examples above that the Contact Form 7 plugin is highly customizable. True, it does require a bit of tinkering but for a free plugin that might be expected.
I think the lack of styling options by default is a big part of why the plugin works so well for so many. So it’s only fair that anyone getting a lot of value from it who wants more style to commit a few minutes to dropping in a version of one of the code example above.
Do you have any Contact Form 7 style tips of your own? Any favorites you’ve used that you’d like to share? Drop us a line in the comments below!
Article Thumbnail via Dmitry Lemon5ky // shutterstock.com
.divi_cta{background-color: #8f43ee; color: #fff; font-size: 20px; font-weight: bold; padding: 20px; text-align: center; display: block; text-decoration: none; border-radius: 4px;}.divi_cta:hover{text-decoration:none;background-color:#7d37d6;}.divi_cta_red{background-color:#db1c1c;}.divi_cta_red:hover{background-color:#c51a1a;}
The post How To Customize The Style Of Contact Form 7 To Match Your Website appeared first on Elegant Themes Blog.
😉SiliconWeb Dev. | 🌐ElegantThemes
0 notes
Text
Implementation of dark mode in reaction devices
One of the apps features most requested is the dark mode (or night mode, as others call it). In the apps which we use every day, we see dark mode. From smartphones to web applications, the dark mode has become important to businesses wishing to look after their users' eyes.
The dark mode is an add-on feature that often shows dark surfaces in the UI. Most big corporations (such as YouTube, Twitter, and Netflix) have brought their smartphone and web applications into dark mode.
Although we are not going to go into React and styled-components in detail, a simple knowledge of React,
CSS
, and styled-components would be useful.
A few days before this article was written,
StackOverflow
announced its release of dark mode, offering users the opportunity to switch between the two modes.
Dark mode eliminates eye pressure and aids when operating on a device or cell phone for a long period of time.
What Is Dark Mode?
The dark mode is the color scheme of any device showing light text and device elements on a dark backdrop, making it a little easier for the user to view cell phones, tablets, and computers. Dark mode decreases the light produced by the screen while preserving the minimum color-contrast ratios that are appropriate for reading.
Why Should You Care About Dark Mode?
Dark mode improves visual ergonomics by reducing eye strain, adapting the screen to current light conditions, and ensuring ease of use in dark environments or at night.Let's look at its benefits before we introduce dark mode in our app.
BATTERY SAVING
Dark mode in Web and mobile apps will extend a device's battery life. Google stated that dark mode on OLED screens has been a tremendous help to battery life.
For example, the dark mode in the YouTube app saves about 15 percent more screen energy than a flat white background at 50 percent brightness. The dark GUI saves a whopping 60 percent of screen energy at 100 percent screen brightness.
DARK MODE IS BEAUTIFUL
The dark mode is stunning, and can greatly enhance the screen's appeal.
Although most products go for the same bland white look, the dark mode offers something else that looks both mysterious and fresh.
It also offers great opportunities for a fresh presentation of graphic material, such as dashboards, videos, and images.
Now that you know why you should implement dark mode in your next web app, let's dive deep into style-components, which in this tutorial's defining resources.
The dark mode is the color scheme of any interface that displays light text and interface elements on a dark background, making viewing on mobile phones, tablets, and computers a little easier.
What Are Styled-Components?
We will be using the styled-components library very much in this post. There have always been a lot of ways to design a modern web application. A document-level there is the conventional styling approach which involves creating an index.css file and linking it to the HTML or styling within the HTML file.
A lot has changed in the way web apps are recently designed after CSS-in-JS was introduced.
CSS-in-JS refers to a pattern where JavaScript is used to compose the Html. To style components in a JavaScript file, it uses tagged template literals. The styled component is a CSS-in-JS library that allows you to use all the CSS features you need, including media queries, pseudo-selectors, and nesting.
Why Styled-Components?
For the following reasons styled-components were created:
No hell class name Instead of scratching your head to find an item class name, styled-components can create unique class names for your types. You will never have to think about misrepresentations, or using class names that have no meaning.
The use of designed component props allows one to expand the styling properties using the props parameter widely used in React — thereby dynamically influencing the component's feeling through the state of the application. Supports Sass syntax
Writing Sass syntax out of the box without having to set up any preprocessors or extra build tools is possible with styled-components. In your style definitions, you can use the & character to target the current component, use pseudo-selectors, and experiment with nesting.
• Theming modeled components have full thematic support through the export of a ThemeProvider wrapper. This framework provides a theme for all components of React within itself via the Context API. All styled-components will have access to the given theme in the rendering tree, even though they are deeply multi-level. As we continue this tutorial, we will investigate the thematic features of modeled components more deeply
SETTING UP
1. CREATE THE FILE STRUCTURE
Creating a folder and inserting within it three empty text files: one with.html, one with.css, and one with.js. Also, create a folder of images for the photos you wish to view on the website.
JQuery also makes use of our "dark mode in CSS" demo. In the example, we are going to add the script right from the Cloudflare CDN to the HTML file so that it is always up to date. If you like, however, you can download and add the jQuery library as a local.js file as well.
Here's how the file structure will look before coding begins:
- dark-mode-css/ - images/ - cake.jpg - index.html - script.js - style.css
2. MARK UP THE HTML
Add the dark-mode switch to the top of the page in the HTML. Then create a < h1 > title tag, and a semantic < article > tag for the page's content. Finally, just before the < /body > tag closes add the two < script > tags.
Please note that before the custom script you are adding the jQuery library so it can use its functionalities. The style.css file will go into the page's < head > section.
<!DOCTYPE html> <html lang="en"> <head> <meta charset="UTF-8"> <meta name="viewport" content="width=device-width, initial-scale=1.0"> <meta http-equiv="X-UA-Compatible" content="ie=edge"> <title>Demo | Dark Mode in CSS</title> <link rel="stylesheet" href="style.css"> </head> <body> <div class="switch">Dark mode: <span class="inner-switch">OFF</span> </div> <h1 class="title">The Best Recipes of All Time</h1> <article> <h1>Raspberry Cake</h1> <p><small>Created with Cupcake Ipsum</small></p> <p>...</p> <img src="images/cake.jpg"> <p>...</p> </article> <script src="https://cdnjs.cloudflare.com/ajax/libs/jquery/3.4.0/jquery.min.js"></script> <script src="script.js"></script> </body> </html>
3. CREATE THE CSS FOR THE LIGHT MODE
First, let's build the CSS for light mode, since this is the page's default state. The following CSS makes use of a column-based flexbox style that allows you to easily place elements on the page, specifically the.switch class that handles the dark mode toggle wrapper and the < img > elements.
body { font-family: sans-serif; font-size: 1.125rem; display: flex; flex-direction: column; max-width: 50rem; margin: 0 auto; padding: 0 0.9375rem; } small { font-style: italic; } article { display: flex; flex-direction: column; } img { max-width: 100%; display: block; align-self: center; } .switch { align-self: flex-end; margin: 0.9375rem; } .inner-switch { display: inline-block; cursor: pointer; border: 1px solid #555; border-radius: 1.25rem; width: 3.125rem; text-align: center; font-size: 1rem; padding: 0.1875rem; margin-left: 0.3125rem; }
The display: flex; rule applied to the tag allows the align-self to be used: flex-end; rule over the dark mode turn. The align-self CSS property aligns individual flex elements along the cross-axis (which is the left-to-right axis when a column is set to flex-direction).
In this way, the move is located automatically to the top right corner of the flex container — for all viewport sizes. .switch is a full-width layout row due to the flexbox, and its height does not fall at smaller screen sizes either.
Similarly, the display: flex; and flex-direction: column; rules added to the < article > tag allow align-self to be used: center; rule on all images inside the post. As a result, all the images can be conveniently focused without adding extra elements to the HTML, only for positioning purposes.
4. ADD THE SWITCH FUNCTIONALITY WITH JQUERY
The.js script file provides the toggle switch feature. Therefore, the dark mode is activated when the user clicks the toggle and the mark on the switch switches to "ON." And if, when the page is in dark mode, the user clicks the toggle, the light mode is added and the mark switches to "OFF."
$( ".inner-switch" ).on("click", function() { if( $( "body" ).hasClass( "dark" )) { $( "body" ).removeClass( "dark" ); $( ".inner-switch" ).text( "OFF" ); } else { $( "body" ).addClass( "dark" ); $( ".inner-switch" ).text( "ON" ); } });
The script above makes use of the following jQuery functions:
·
on(“click”, function() {…})
is an event handler that triggers the action inside the function when the user clicks the .inner-switch element,
·
hasClass()
checks if the .dark class is assigned to the .inner-switch element or not (this is based on the state of the toggle),
·
removeClass()
removes the .dark class from the HTML when the user switches to light mode,
·
addClass()
adds the .dark class to the HTML when the user switches to dark mode,
·
text()
sets the text of the label on the switch — it’s either “OFF” or “ON”.
· 5. ADD THE CSS FOR THE DARK MODE
The last thing you need to do is to define those styles for the.dark class that the jQuery script above added to the HTML when dark mode is turned on. In addition to the.dark class, apply the dark mode theme to both its direct and indirect children using the.dark * universal CSS selector.
.dark, .dark * { background-color: #222; color: #e6e6e6; border-color: #e6e6e6; }
The CSS belonging to the.dark class goes to the file ending with style.css. This is because CSS (= Cascading Style Sheets) is cascading in nature. The cascade may thus bypass the colors all over the page without bumping into specificity or other probelms.
You can also create a separate dark.css file for the dark mode styles if you are creating a more complex website. In this case, be careful that you always add the unique dark.css in the < head > section of the HTML after the generic style.css file, so that the cascade will work properly.
CREATING THEME-TOGGLING FUNCTIONALITY
1. Add HTML:
Using any item that should store the content for which you want the interface toggle. In our case, for simplicity we'll use < body >:
Example
<body>
Add CSS:
Design the item < body > and build a toggle class in.dark-mode:
Example
body { padding: 25px; background-color: white; color: black; font-size: 25px; } .dark-mode { background-color: black; color: white; }
3) Add JavaScript:
Get the < body > item and switch between the class of dark-mode:
Example
function myFunction() { var element = document.body; element.classList.toggle("dark-mode"); }
Conclusion
Dark mode is increasingly becoming a choice for the consumer, and it is much easier to integrate it into a web app by using the ThemeProvider theme wrapper in styled components. Go ahead and play with styled-components as you implement dark mode; you could add icons instead of a button.
As a reputed Software Solutions Developer we have expertise in providing dedicated remote and outsourced technical resources for software services at very nominal cost. Besides experts in full stacks We also build web solutions, mobile apps and work on system integration, performance enhancement, cloud migrations and big data analytics. Don’t hesitate to
get in touch with us!
#b2b website#b2b ecommerce b2b content marketing b2b seo b2b market research companies b2bservices Ecommerce#ecommerce
0 notes
Last Seen Blogs

loversapparition
I made a wish and you came true!

perorezaporsiacaso
Anti Todo

offurandfangs
I Want To Be A Forester

impikachan
алиса

asalianaellealvarez
Curious as a Cat