#dslr tutorial for beginners
Text
Digital Photography Terms Every Aspiring Photographer Should Know
Digital Photography Terms Every Aspiring Photographer Should Know
As an amateur photographer, it is essential that you understand common photography terms so that you can further develop your photography skills.
From A to Z, here’s the digital photography terms glossary to help you dive more deeply into the creative field of photography.
How DSLR Cameras Work
Aperture
Aperture is the opening between the lenses (similar to the pupil of our eye) that lets the…
View On WordPress
#a photographer#digital photography tutorials#dslr tutorial for beginners#free online photography tutorials#free photography tutorials#glossary of digital photography terms#learn photography#Photography#photography for beginners#photography lessons#photography tutorials#photography tutorials for beginners#photography tutorials online#photography website
3 notes
·
View notes
Text
Capture Stunning Photos: The Ultimate Guide to Buying a Nikon DSLR in the UK
For photography enthusiasts in the UK, Nikon DSLRs (Digital Single-Lens Reflex) have long been a trusted companion. Renowned for their exceptional image quality, durability, and vast lens selection, these cameras empower you to take your creativity to the next level. But with so many models and online retailers, navigating the world of Nikon DSLRs can feel overwhelming.
Worry not! This comprehensive guide will equip you with the knowledge to confidently buy a Nikon DSLR in the UK, whether you're a seasoned photographer or just starting your journey.
Why a Nikon DSLR?
While mirrorless cameras are gaining traction, Nikon DSLRs remain a fantastic choice for several reasons:
Superb Image Quality: Nikon's advanced sensor technology delivers sharp, detailed photos, even in low-light conditions.
Optical Viewfinder: Unlike mirrorless cameras, DSLRs offer a true optical viewfinder, giving you a natural, uninterrupted view of the scene.
Extensive Lens System: Nikon boasts a comprehensive lens system, allowing you to explore various photographic styles, from wide-angle landscapes to detailed portraits.
Ergonomics and Battery Life: DSLRs are known for their comfortable grip and extended battery life, ideal for long shooting sessions.
Choosing the Right Nikon DSLR for You:
Nikon offers a range of DSLRs catering to different skill levels and budgets. Here's a breakdown of some popular options:
Entry-Level: Ideal for beginners, the Nikon D3500 or D5600 are budget-friendly options with user-friendly features and helpful shooting modes.
Mid-Range: For aspiring enthusiasts, the Nikon D7500 is a sweet spot, offering excellent image quality, fast autofocus, and tilting touchscreen displays.
Full-Frame: Professional photographers or enthusiasts seeking the best image quality may consider full-frame models like the Nikon D850 or D780. These cameras excel in low-light situations and produce stunningly detailed photographs.
Finding the Best Online Price:
Once you've chosen your ideal model, it's time to explore online retailers. Here are some reputable UK stores offering competitive prices on Nikon DSLRs:
Nikon Official UK Store: Offers Nikon warranties and potential bundle deals
Amazon UK: Wide selection, but be wary of third-party sellers
Jessops: Established camera store with frequent promotions
Grandy's Camera: Specializes in camera equipment and often has clearance sales
Beyond the Camera Body:
Remember, a camera body is just part of the equation. Consider these additional factors:
Lenses: Start with a versatile zoom lens like the Nikon AF-S DX NIKKOR 18-55mm f/3.5-5.6G VR for beginners. Later, explore prime lenses for specific applications or wider zoom ranges for greater versatility.
Accessories: Invest in a camera bag, spare batteries, and a memory card with sufficient storage capacity.
Learning Resources: Take advantage of Nikon's online tutorials or photography courses to maximize your camera's potential.
Final Tips:
Read Reviews: Before purchasing, research user reviews and professional critiques to understand the camera's strengths and weaknesses.
Consider Used Gear: Reputable stores often offer used DSLRs. This is a fantastic way to save money on quality equipment.
Try Before You Buy: If possible, visit a physical store to hold the camera and test its ergonomics.
By following these steps and considering your needs and budget, you'll be well on your way to capturing stunning photos with your new Nikon DSLR in the UK. Happy shooting!
#photography#follow the blog i reblogged this from#nikon dslr camera#online camera store#nikon dslr in uk#buy nikon dslr camera in uk#nature photography#nikon dslr
0 notes
Text
Photography Masterclass
Photography Masterclass
New! From Creator Of #1 Photography Product On CB - Video Tutorials For Beginner And Hobbyist Photographers. Anyone With A Dslr Camera Will Want To Get Their Hands On This! Earn 60% Per Sale! Extremely Low Refund Rate! See /affiliates.html Page. http://dlvr.it/T0qTfb
0 notes
Text
The Power of Visuals: YouTube Photography Tutorial for Engaging Content
YouTube has become an invaluable resource for photographers looking to improve their skills and learn new techniques. In this section, I will explore the best YouTube channels that offer comprehensive photography tutorials, covering camera settings for YouTube videos and lighting techniques for photography tutorials. These tutorials are designed to help you master your camera skills and elevate your photography prowess.
Whether you're a beginner or an experienced photographer, these tutorials provide valuable insights and practical tips to enhance your photography. From understanding camera settings for YouTube videos to mastering lighting techniques, these tutorials will empower you to create professional-quality images and captivating tutorial videos.
Best YouTube Photography Tutorials
When it comes to photography tutorials, YouTube serves as a goldmine of knowledge and inspiration. With countless channels dedicated to teaching the art of photography, it can be overwhelming to find the best ones. To help you navigate through the vast sea of content, I have curated a list of the top YouTube tutorial channels that are a must-watch for photography enthusiasts.
1. PHLEARN: With over 2.44 million subscribers, PHLEARN offers an extensive library of photography tutorials. From beginner-friendly content to advanced techniques, this channel covers a wide range of topics such as photo editing, retouching, and composition. The step-by-step approach of their tutorials makes it easy for viewers to follow along and implement the techniques in their own work.
2. PiXimperfect: With over 1.82 million subscribers, PiXimperfect is a go-to channel for learning advanced editing techniques. Unmesh Dinda, the host of the channel, breaks down complex editing processes into simple and easy-to-understand steps. Whether you want to learn how to create stunning composites or master retouching, PiXimperfect has got you covered.
Top YouTube Photography Tutorial Channels
Channel
Subscribers
PHLEARN
2.44 million
PiXimperfect
1.82 million
3. The Photoshop Training Channel: As the name suggests, this channel focuses primarily on teaching Photoshop techniques for photographers. With over 508k subscribers, the channel covers a wide range of topics, including photo editing, retouching, and manipulation. Whether you are a beginner or an advanced user, you will find valuable tips and tricks to enhance your Photoshop skills.
4. Mango Street: Known for its visually stunning content, Mango Street provides photography tutorials that are both informative and aesthetically pleasing. With over 1.72 million subscribers, Rachel and Daniel, the hosts of the channel, share their expertise on various topics, including composition, lighting, and storytelling. Their engaging and cinematic style of videography makes learning a delightful experience.
These YouTube tutorial channels offer a wealth of knowledge and inspiration for photographers of all levels. Whether you are looking to improve your editing skills, learn new techniques, or gain insights into the art of photography, these channels are a treasure trove of valuable content. Dive into their tutorials, practice your skills, and watch your photography soar to new heights.
Learn Camera Settings for YouTube Videos
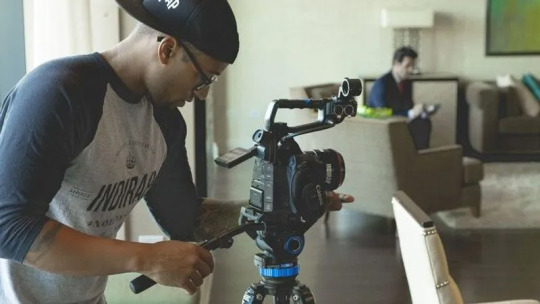
When it comes to creating high-quality YouTube videos, having the right camera settings is essential. Whether you're shooting vlogs, tutorials, or other types of content, understanding how to optimize your camera settings can significantly impact the quality of your videos. In this section, I will explore the key camera settings for YouTube videos, including shooting in manual mode, DSLR photography tips, and techniques for achieving professional-looking videos.
Shooting in Manual Mode for YouTube Tutorials
Shooting in manual mode gives you full control over your camera settings, allowing you to customize the exposure, focus, and other important parameters. This level of control is crucial for achieving consistent and high-quality footage for your YouTube tutorials. By shooting in manual mode, you can adjust the aperture, shutter speed, and ISO to suit the lighting conditions and create the desired visual effects. Additionally, shooting in manual mode ensures that your videos have a consistent exposure level throughout, resulting in a more professional and polished look.
DSLR Photography Tips for YouTube Videos
If you're using a DSLR camera for your YouTube videos, there are several tips that can help you optimize the image quality. Firstly, make sure to choose the appropriate lens for your shooting style and subject matter. Wide-angle lenses are great for capturing landscapes or showcasing your surroundings, while telephoto lenses are ideal for portraits or detailed shots. Secondly, consider using a tripod to stabilize your camera and minimize any shaky footage. This is especially important when shooting tutorials that require steady and smooth camera movements. Lastly, don't forget to clean your camera sensor regularly to avoid dust spots or smudges that could affect the overall image quality.
By implementing these camera settings and tips, you will be able to create visually appealing YouTube videos that captivate your audience and showcase your photography skills. Experiment with different settings, techniques, and camera gear to find the optimal configuration for your unique style and content. Remember, practice makes perfect, so don't be afraid to try new things and learn from your experiences.
Camera Setting
Description
Aperture
The aperture determines the depth of field, controlling how much of the image is in focus. A wider aperture (lower f-stop value) creates a shallow depth of field, blurring the background and emphasizing the subject.
Shutter Speed
The shutter speed controls the duration of the exposure, affecting how motion is captured in the video. Faster shutter speeds freeze the action, while slower shutter speeds create motion blur.
ISO
The ISO setting determines the sensitivity of the camera's image sensor to light. Lower ISO values result in less noise but require more light, while higher ISO values increase sensitivity but may introduce graininess to the footage.
White Balance
White balance adjusts the color temperature of the video to accurately represent the colors in the scene. It ensures that white objects appear white and that the overall color balance is correct.
Exposure Compensation
Exposure compensation allows you to adjust the overall exposure of the video, compensating for overly bright or dark scenes. It helps to avoid overexposure or underexposure and maintain optimal brightness.
https://www.youtube.com/watch?v=ixRUpmmjmRo
Lighting Techniques for Photography Tutorials
Lighting is a fundamental aspect of photography that greatly impacts the outcome of tutorial videos. By understanding and implementing various lighting techniques, you can enhance the quality and visual appeal of your photography tutorials. In this section, we will explore different lighting methods that are commonly used in photography tutorials, including natural light, artificial lighting, and smartphone photography tips.
Natural Light
Natural light is one of the most accessible and versatile lighting sources for photography tutorials. It can create a soft and flattering illumination that beautifully highlights the subject. When shooting outdoors, utilize the golden hours, which are the hour after sunrise and the hour before sunset, for warm and golden tones. Avoid harsh midday sunlight, as it can create unflattering shadows. Experiment with different angles and positions in relation to the light source to achieve the desired effect.
Artificial Lighting
Artificial lighting is commonly used in indoor photography tutorials, where controlling the light becomes essential. Studio lights, such as strobes or continuous lights, provide consistent and customizable illumination. Use softboxes, umbrellas, or diffusers to soften the light and reduce harsh shadows. Additionally, consider using reflectors or bounce boards to redirect and manipulate light. Experiment with different lighting setups to achieve the desired mood and effect for your tutorials.
Smartphone Photography Tips
With the advancement of smartphone technology, capturing high-quality images and videos for tutorials has become more accessible than ever. When shooting with a smartphone, make use of the available light sources, such as natural light or indoor lighting. Avoid using the phone's built-in flash, as it can create harsh and unnatural lighting. Instead, try using third-party smartphone lighting accessories, such as clip-on LED lights or portable ring lights, to enhance the lighting in your tutorial videos. Experiment with different lighting techniques to find the most suitable and visually appealing approach for your smartphone photography tutorials.
By incorporating these lighting techniques into your photography tutorials, you can create visually stunning and engaging content that effectively conveys your message and captures the attention of your audience.
Composition Tips for YouTube Tutorials
When creating tutorial videos for YouTube, composition is a key aspect that can greatly enhance the visual appeal and effectiveness of your content. Composition refers to how elements are arranged within the frame of your video, and it plays a crucial role in capturing the viewer's attention and conveying your message effectively. In this section, I will share some composition tips for YouTube tutorials that will help you create engaging and visually pleasing videos.
1. Rule of Thirds: The rule of thirds is a fundamental principle in photography and videography. It involves dividing the frame into nine equal sections using two horizontal and two vertical lines. By placing your subject or key elements along these lines or at the intersections, you can create a visually balanced and interesting composition.
2. Leading Lines: Leading lines are lines within your frame that guide the viewer's eye towards the subject or focal point of your video. These lines can be actual lines such as roads or paths, or they can be implied lines created by elements in the scene. Utilizing leading lines can add depth and visual interest to your videos.
3. Framing: Framing involves using objects or elements within the scene to frame your subject. This technique can draw attention to the subject and create a sense of context and depth. Experiment with natural frames such as archways, windows, or trees, or use objects within your environment to create interesting framing elements.
Composition Techniques
Technique
Description
Rule of Thirds
Divide your frame into nine equal sections and place your subject along the lines or intersections for a balanced composition.
Leading Lines
Use lines within your frame to guide the viewer's eye towards the subject or focal point.
Framing
Employ objects or elements within the scene to frame your subject and add depth and context.
By applying these composition techniques in your YouTube tutorials, you can create visually appealing and engaging videos that effectively convey your message. Remember to experiment and have fun with composition, as it can greatly enhance the overall quality of your tutorial content.
https://www.youtube.com/watch?v=N-HyTRGtdSA
Editing Software for YouTube Photography Tutorials
When it comes to creating captivating and professional YouTube photography tutorials, having the right editing software can make all the difference. In this section, we will explore some of the top editing software options that will help you enhance your tutorial videos and showcase your photography skills.
Adobe Lightroom
Adobe Lightroom is a popular choice among photographers for its robust editing capabilities and user-friendly interface. With Lightroom, you can easily organize and edit your photos, apply presets, adjust exposure and white balance, and fine-tune colors. It also offers powerful features like non-destructive editing and batch processing, making it a valuable tool for editing multiple images efficiently.
Photoshop
Adobe Photoshop is a versatile editing software that provides photographers with endless possibilities for creating stunning imagery. With Photoshop, you can retouch photos, remove unwanted objects, and apply sophisticated adjustments and effects. It also offers advanced features like layers and masks, allowing for precise control over every aspect of your image.
GIMP
GIMP, which stands for GNU Image Manipulation Program, is a free and open-source editing software that provides users with a wide range of editing tools and features. While it may not have all the bells and whistles of commercial software, GIMP is a powerful alternative that can help you achieve professional-looking results. It offers tools for image retouching, color correction, and photo manipulation, making it a great option for photographers on a budget.
Whether you choose Adobe Lightroom, Photoshop, or GIMP, having a reliable editing software is essential for creating polished and visually appealing YouTube photography tutorials. Each of these programs offers unique features and capabilities, so it's worth exploring and experimenting to find the one that best suits your needs and style.
Feature
Adobe Lightroom
Photoshop
GIMP
Organize and manage photos
✔️
✔️
✔️
Non-destructive editing
✔️
✔️
-
Batch processing
✔️
✔️
-
Advanced retouching
-
✔️
✔️
Layers and masks
-
✔️
✔️
Free and open-source
-
-
✔️
Conclusion
Throughout this article, I have discussed the importance of YouTube as a platform for photographers to enhance their skills and learn new techniques. Whether you are a beginner or an experienced photographer, there are valuable resources available on YouTube to help you improve your photography prowess.
By following the advice and techniques presented in beginner photography tutorials, you can develop a solid foundation of photography techniques. These tutorials cover a range of topics, including camera settings, lighting techniques, composition tips, and editing software.
Moreover, YouTube is home to a variety of photography tutorial channels that cater to different levels of expertise. Whether you are just starting out or looking to refine your techniques, these channels offer a wealth of knowledge and inspiration.
So, if you're looking to expand your photography skills and techniques, I highly recommend exploring the photography tutorial channels on YouTube. With their guidance and your dedication, you can elevate your photography to new heights and create stunning images to share with the world. Happy shooting!
FAQ
Are these YouTube photography tutorials suitable for all levels of photographers?
Yes, these tutorials cater to both beginners and experienced photographers, offering valuable resources for all skill levels.
What topics do these YouTube photography tutorials cover?
These tutorials cover a wide range of topics, including photo editing, composition, camera settings, lighting techniques, and more.
Which YouTube channels are recommended for photography tutorials?
Some recommended YouTube channels include PHLEARN, PiXimperfect, The Photoshop Training Channel, and Mango Street.
Can I learn about camera settings for YouTube videos from these tutorials?
Absolutely, these tutorials provide insights into shooting in manual mode, DSLR photography tips, and techniques for achieving professional-looking videos.
How can I improve the lighting in my photography tutorials?
The tutorials explore various lighting techniques, including natural light, artificial lighting, and smartphone photography tips.
What composition tips are covered in the YouTube tutorials?
The tutorials discuss composition techniques such as the rule of thirds, leading lines, and framing to help you create visually appealing tutorial videos.
Which editing software is recommended for YouTube photography tutorials?
Adobe Lightroom, Photoshop, and GIMP are among the recommended editing software programs covered in these tutorials.
Read the full article
0 notes
Text
In the vast world of YouTube, content creators have mastered the art of capturing their audience's attention with engaging videos. From lifestyle vlogs to tutorials and gaming streams, YouTubers rely on high-quality cameras to bring their ideas to life.
If you've ever wondered what cameras your favorite YouTubers use to create such captivating content, you've come to the right place. In this blog post, we'll explore the world of YouTube cameras, delving into the diverse range of options available to content creators today. So, let's dive in and uncover the secrets behind their video production.
Understanding the Basics:
Before we jump into specific camera models, it's essential to grasp some basic concepts that YouTubers consider when choosing their cameras. These factors can greatly impact the overall quality and aesthetics of their videos. Let's take a look at the most important considerations:
a. Sensor Size:
The sensor size affects image quality, low-light performance, and depth of field. Larger sensors generally offer better image quality and more control over background blurring.
b. Resolution:
Higher resolutions, such as 4K or even 8K, provide sharper and more detailed videos. However, keep in mind that higher resolutions also require more processing power and storage space.
c. Autofocus:
Fast and accurate autofocus is crucial for maintaining sharpness, especially when shooting moving subjects or when using shallow depth of field.
d. Low-Light Performance:
The ability to capture high-quality footage in low-light conditions is a significant consideration, as many YouTubers film in a variety of environments.
e. Optical Image Stabilization (OIS):
This feature reduces camera shake, resulting in smoother, more professional-looking footage, particularly when shooting handheld.
READ ALSO: Best Camcorders For YouTube - Beginners and Expert friendly
Popular Camera Choices:
Now that we understand the key factors, let's explore the cameras favored by YouTubers across different genres:
a. DSLR and Mirrorless Cameras:
DSLRs (Digital Single-Lens Reflex) and mirrorless cameras are two popular options among YouTubers due to their versatility, interchangeable lenses, and excellent image quality. Some popular choices include the Canon EOS 90D, Sony Alpha a7 III, and Fujifilm X-T4.
b. Action Cameras:
Action cameras, known for their compact size and durability, are frequently used by vloggers and outdoor enthusiasts. The GoPro Hero series and DJI Osmo Action are renowned for their ruggedness, image stabilization, and wide-angle lenses.
c. Point-and-Shoot Cameras:
Point-and-shoot cameras offer a balance between simplicity and functionality. They are compact, easy to use, and often feature built-in lenses with a broad zoom range. Popular models include the Sony RX100 VII and Canon PowerShot G7 X Mark III.
d. Smartphone Cameras:
With advancements in smartphone technology, many YouTubers opt to shoot their videos using smartphones. Modern smartphones, such as the iPhone 13 Pro and Samsung Galaxy S21 Ultra, offer remarkable image quality and advanced video capabilities.
Additional Gear and Accessories:
Apart from the camera itself, YouTubers often use additional gear and accessories to enhance the quality of their videos:
a. Microphones:
Good audio is as essential as clear visuals. External microphones, such as the Rode VideoMic Pro and Audio-Technica AT2020, can significantly improve sound quality, reducing background noise and enhancing voice clarity.
b. Lighting:
Proper lighting helps YouTubers achieve a more professional and well-lit appearance in their videos. Softbox lights, ring lights, and LED panels, like the Neewer 660 LED Video Light, are popular choices to enhance lighting conditions.
c. Tripods and Stabilizers:
To keep their shots steady and prevent shaky footage, YouTubers often use tripods and stabilizers. Options range from compact tabletop tripods to larger, more robust options like the Manfrotto 504X.
Conclusion:
As you can see, the world of YouTube cameras is vast and varied, catering to the diverse needs and preferences of content creators. The camera you choose ultimately depends on your specific requirements, budget, and the type of content you aim to create.
Remember, while the camera plays a crucial role, it's your creativity, storytelling, and personality that truly captivate your audience. So, whether you opt for a DSLR, an action camera, or a smartphone, the key is to leverage the tools at your disposal to share your unique perspective with the world. Now, armed with this knowledge, it's time to embark on your YouTube journey and start creating amazing content.
0 notes
Text
Another popular method to generate income from Microsoft Excel is to create and sell video courses on online learning platforms. Aside from your in-dept knowledge of Microsoft Excel, you will need pricy logistics including a DSLR camera, high-spec laptop, HD screen recorder, high-quality microphone, premium video editor, and extra gigs of hard drive storage to set off. The video and content quality should be, by far, superior than thousands of available free-of-cost YouTube tutorials.
The key success factor in creating video courses is to organize your sheer knowledge of Microsoft Excel into multiple, focused courses with each course capped at 10 hours tops. For instance, designing exclusive courses for charts, pivot tables, dashboards, formulas and functions, VBA, analytics, financial modelling, shortcuts, etc. It is also worth having a general, all-in-one course for beginner to advance users where skin-deep knowledge about an array of functions of Microsoft Excel is covered.
Further to above, each course should be divided into scores of modules which are ordered into a progressive and logical sequence that complements each other to ease learning. Duration of each module should ideally range between 5-10 minutes.
After creating a course, the next step would be to choose a platform to upload it. There are many online learning platforms, but the following are recommended due to high volume of student enrolments:
Aside from selling courses on third-party marketplaces, creating your own website and delivering courses through it is also a viable option. In this method, the instructors will have full control over pricing, marketing and promotion of training content in their targeted regions.
Pros
A passive income method
Flexibility in terms of location and working hours
Build global recognition and following
No coding skills required
No or low advertisement cost
No threat of financial scam
Low operating cost
Growing demand
Cons
Only for advance-level users
Strong English verbal and writing skills
Threat of low ratings and negative feedback
Highly saturated market
Skill Level: Expert
Average Income Range: $12,000 to $120,000 p.a.
Prospect: Growing market demand @microsoft @excel
0 notes
Text
Snapseed tutorial 2020

SNAPSEED TUTORIAL 2020 FOR FREE
SNAPSEED TUTORIAL 2020 ANDROID
SNAPSEED TUTORIAL 2020 FOR FREE
Snapseed is a freeware software so it is available for free to download and use. One can even edit the RAW images from the DSLR and mirrorless cameras. When it comes to dealing with RAW images both the apps follow a different process and Lightroom is better as compared to Snapseed especially in editing the highlights. But Lightroom is a winner in this field as it provides support for desktop use also.
SNAPSEED TUTORIAL 2020 ANDROID
Users can download the image according to the specific requirement of the size and image quality whereas in Snapseed the user is limited to output the edited image is JPG.Īs far as the platforms are concerned, initially both Snapseed and Lightroom worked for the mobile environment for both android and iOS. In terms of the Image Output, Lightroom can output the image in various formats like jpg, png, PFM, PPM, TIFF, etc. It has a comparatively less interactive UI which is at times difficult for beginners to start with. ‘Style’, ‘Export’ and ‘Tools’ will be displayed to the user whereas in Lightroom, users can import the image to the application by clicking on the ‘add picture’ button present at the bottom floating bar. As soon as the image is uploaded the 3 tabs, i.e. The user just needs to click on ‘+’ icon on the screen to import the image. Snapseed has a minimal interface so it is comparatively easy to use for beginners and experts as well. Talking about the interface, both the Snapseed and Lightroom have completely different User Interface as the Snapseed has separate sections for the tools, style, and export available at the bottom whereas Lightroom comes in the dark theme with all the tools present at the bottom. Some of the key differences between Snapseed and Lightroom photo editors are given below:įeatures like Crop, rotate, flip, etc are available separately in the Snapseed in the tools tab whereas these features are available all together as a single tool in Lightroom. Lightroom also has a lot of tutorials on the main website and the new tutorials are uploaded regularly on the websites for the users. In terms of Learning, Snapseed has more than 20 tutorials uploaded on the internet explaining each tool and filter for editing the application. In terms of the availability of tools and filters, Snapseed provides around 29 filters and tools including the basics like contrast, brightness, etc.Įven under non- non-destructive environment, Lightroom provides more tools and filters than Snapseed with the advantage of easy-to-use sliders to make editing more quick. Lightroom can deliver the output image to the user in various formats apart from the just. When it comes to the final edited image, one can output the image in Snapseed in. Though Lightroom also provides a nice set of features to the users for editing the pictures less than that of Snapseed. In terms of features, Snapseed provides a lot of amazing and excellent features to the users which are comparatively better than Lightroom. But to use its advanced features like Selective Masking, Healing, Geometry, etc users need to pay for it. Snapseed is free to use as it has been acquired by Google.īasic features of Lightroom are also available for free to the people. Lightroom on the other hand lacks the feature of a layer as they want the users to use it as a photoshop. Users can edit the specific layer according to the requirements. Snapseed has an amazing feature for its users like one can view all the edits in terms of layers. If not familiar to Adobe, one needs to struggle sometimes to find where to start. Lightroom has a comparatively less interactive UI which is somewhat difficult to use for the beginner. In terms of User Interface (UI), Snapseed is easy to use and has minimal UI so even a beginner can start using it without any confusion. 3D animation, modelling, simulation, game development & others Head to Head Comparison between Snapseed vs Lightroom (Infographics)īelow are the top 7 comparisons between Snapseed vs Lightroom:Ĭomparison Table of Snapseed vs Lightroomīelow given is the comparison table showing the head to head comparison between Snapseed and Lightroom:
0 notes
Text
Logitech hd 720p drivers


Product information, with a p sensor, the microsoft lifecam hd is capable of recording 16, 9 hd videos at up to 30fps.
However if you want to adjust resolution and frame rates you need to install Open Broadcaster Studio which is also free.Oct 08, To use at full screen Splitcamera is an excellent free alternative. Logitech HD Pro Webcam C Driver Download | Device Drivers Regretfully the Logitech capture software cannot be run at full screen. Contact us at Logitech India Customer Care Toll free Number 18(am to pm -Monday to Friday) (only works with Windows 7 and above) Full HD glass lens and premium autofocus deliver razor-sharp, clear video in consistent high Definition while two Built-in mics capture your voice in rich Stereo Audio Logitech C HD. HD P Webcam - Driver Download * Vendor: * Product: HD P Webcam Windows 7 Bit Driver.
To find the latest driver for your computer we recommend running our Free Driver Scan.
HD p video calling and HD video recording, GigaHertz Intel Core2 Duo, 2 GB RAM, MB hard drive space Video capture: Upto x pixels, Logitech fluid crystal. Stereo microphones are available.Make sure this fits by entering your model number. The performance is superlative, controls are intuitive. While the description is Logitech C Pro Stream Webcamit really is Cx Pro, it has the tripod and a 3 month Premium licence for XSplit broadcasting software which is also available as a free feature limited download. For MAC users like me: You will not able to use the Auto background removal feature, you will not able to use Logitech's software to handle this camera because both software are not for MAC users : but only for windows. My first experience was not good but later I set a few lights and it looks perfect. You need good lighting to get perfect output from this webcam like any other webcams. Winsows must buy some other expensive webcam or camera so that you can show your product details clearly. Never expect very sharp videos, it will downllad always like webcam video but the good thing is it's x Ud you are a professional YouTuber and want to show you and your products on the full screen then it will be not for you.

But this is PERFECT for video calls, video in video screen records your cam video inside bottom cornerand if you are starting a new youtube channel. Means, My iPhone6 is recording more sharp videos than this. I am a youtuber and brought this webcam for recording tutorial videos. DRIVER VX LIFECAM FOR WINDOWS 10 DOWNLOAD First of all thanks Logitech for this product. You need some external audio setup as you cant rely on it. Apart from picture quality, the audio is just the dullest and crappy. If you want to live stream, go for DSLR or camcorder, do not compromise with such webcams. I had purchased this cam especially for live streaming through OBS on YouTube and FB after reading its specifications and good reviews. Logitech Webcam Software a Download | TechSpot There was a problem filtering reviews right now. It also analyses reviews to verify trustworthiness. How are ratings calculated? Instead, our system considers things like how recent a review is and if the reviewer bought the item on Amazon.
Logitech HD Pro Webcam C Driver Download | Device Drivers.
DRIVER VX LIFECAM FOR WINDOWS 10 DOWNLOAD.
Logitech Webcam Software a Download | TechSpot.
The reason behind this No is that manually updating the driver requires choosing the right driver following the operating system and device you are using. If you are a beginner or lack technical knowledge, you should not update the driver manually. Want to enjoy auto light correction, contrasted images, High definition p picture quality, long-range mic, and more? Logitech webcam software C can be updated both manually drivet automatically.
0 notes
Text
2017 best youtube video editing software

#2017 BEST YOUTUBE VIDEO EDITING SOFTWARE FOR FREE#
#2017 BEST YOUTUBE VIDEO EDITING SOFTWARE MP4#
#2017 BEST YOUTUBE VIDEO EDITING SOFTWARE FULL#
Its video rendering speed is not extremely amazing in comparison with other tools in this list. Recently, ActivePresenter was updated to version 7 which comes with a new user interface and lots of enhancements.
#2017 BEST YOUTUBE VIDEO EDITING SOFTWARE FOR FREE#
There are also advanced features you can use for free such as Chroma key, Blur effect, Zoom-n-pan, Text-to-speech, Picture in picture and lots more.
#2017 BEST YOUTUBE VIDEO EDITING SOFTWARE FULL#
This program comes with a full hd screen recorder which you can use to record any thing from your computer’s screen and edit it with cut, trim, crop, merge and split video and more. Whether you want to create how-to videos, product demos or training videos, ActivePresenter can help. It provides all necessary tools for making stunning videos with minimum effort. ActivePresenter – Best free and simple to use video editing software for editing YouTube videos.ĪctivePresenter is one of the most powerful and professional free video editor for YouTube you can’t overlook. Part 1: Top 5 Best Free Video Editing Software For Making YouTube Videos 1.
Possible to add text title and annotations to videos quickly.
Has a high quality built-in screen recorder for recording video or taking screenshot.
#2017 BEST YOUTUBE VIDEO EDITING SOFTWARE MP4#
Possible to capture various format and render video into MP4 or AVI in full HD resolution.Simple to use with intuitive interface face.Free and safe to download without watermark or feature limitation.If you want something more professional? Read this article: Best under $100 professional video editing software to buy in 2018!īefore diving in the detail, let’s figure out what are must-have features of a good video editing software for making YouTube videos. That’s what free video editor for YouTube comes in. However, they are often too pricey for personal use and beginners. Most of them are powerful enough to use for creating YouTube videos. There are dozen of professional video editing programs on the market right now. If you are thinking of starting your own YouTube channel to earn money, here is the right place to start.Ĭhoosing the right video editing program for making YouTube videos is the first thing you have to do before thinking of creating attractive content. The most famous YouTubers can earn thousands of dollar every months depending on the number of views on their channel. You can either create a tutorial video from recording your computer screen to teach people about a product or edit a raw footage captured by your smartphone, your action Camera or a professional DSLR. There are many ways to make YouTube videos nowadays. Top 5 Best Free Video Editors For YouTube in this article! These programs are my best picks for those of you who are thinking of starting your own YouTube channel in 2019. This article covers top 8 best video editing software for new YouTubers – free and paid programs.
0 notes
Text
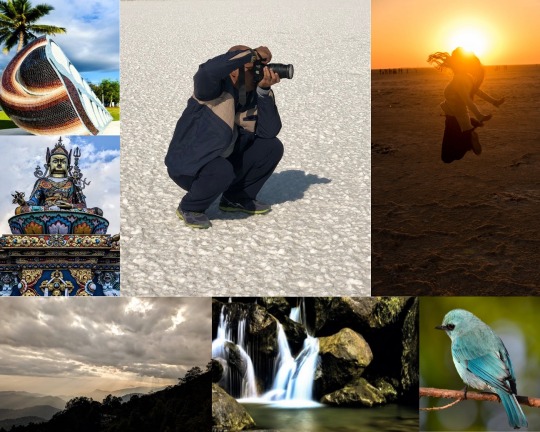
9 Qualities of an Inspiring Photographer
9 Qualities of an Inspiring Photographer
Bought a camera? While you explore your camera, master the camera settings and learn how to use it to its fullest potential, it is also essential to develop certain qualities that will reward you with a fun and fulfilling photography journey!
Let’s take a look at the Qualities of an Inspiring Photographer
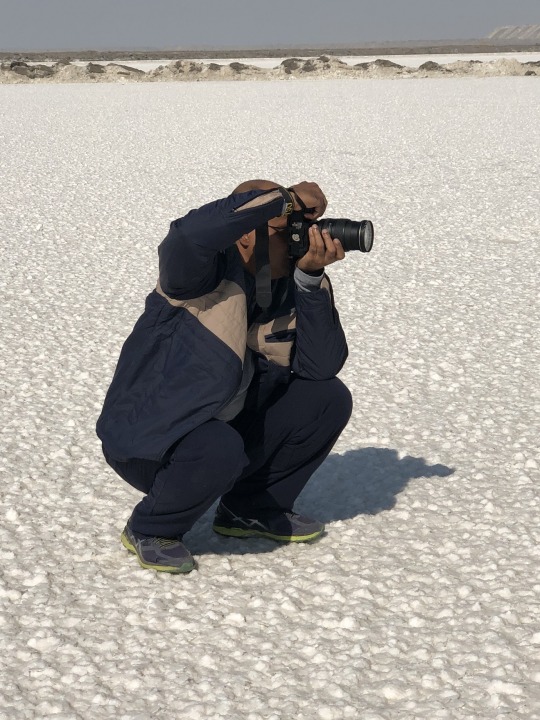
Sukesh Rai, an Inspiring Photographer
Image Courtesy: Anuradha Zingade
Passion
Passion…
View On WordPress
#a photographer#digital photography tutorials#dslr tutorial for beginners#free online photography tutorials#free photography tutorials#learn photography#Photography#photography for beginners#photography lessons#photography tutorials#photography tutorials for beginners#photography tutorials online#photography website
0 notes
Text
BOYA BY-M1 Review: Low-Cost best Microphone

I wanted an inexpensive microphone to try podcasting, something easy to use and portable. We also wanted to record some video tutorials and needed a mic that could move effortlessly with the speaker.
The recommendations from podcasting and video editing pros were to spend as much as we could afford. However, we are very risk averse ladies, and we went with this clip-on mic instead.
We are so glad we did! The BOYA omni-directional condenser microphone gives us decent quality sound with low handling noise while we learn how to do podcasting and video and audio editing, and it definitely didn’t break the bank.

Where Would you use it?
Almost anywhere. The mic is very light and the cable that plugs into your recording equipment is 6 meters long, which is plenty of space to move about if you need the mic to be plugged into a laptop or a camera/camcorder some distance away.
You could also use it as an interview mic, like we did in our podcasts, by placing it on the table between the speakers – it picks up sound equally from all directions. The sound quality is surprisingly good, but as it has narrow range and isn’t directionally adjustable, there will be some noise.
What type of set-up does it suit?
This mic can be used with smartphones, DSLR cameras (both Nikon and Canon) camcorders, audio recorders, PC/laptops etc. BY-M1 is an omni-directional condenser microphone with 6m cable, standard 1/8 inch 4-pole gold plug and includes ¼ inch adapter so it can be plugged into most equipment with audio input option.
What are the pros and cons?
Pros:
Small, portable, cheap, convenient, easy to use, simple set up.
Cons:
Requires LR44 battery, the cable can be a trip hazard. Not ideal for multi-person recording, sound quality is not on par with higher end podcasting microphones

who Might Want to buy this?
The BOYA omni-directional condenser is such a versatile little microphone. It’s easy to set up and use, and records pretty decent quality audio. It is really useful for recording single person podcasts, as well as additional audio to go with video content, but it also stretches to multi-speaker input and is an excellent starter kit for beginner podcasters with a limited budget. You can buy it here.
1 note
·
View note
Link
#PhotoPadActivationKey#PhotoPadCrack#PhotoPadFreeDownload#PhotoPadKeygen#PhotoPadLicenseKey#PhotoPadPatch#PhotoPadProductKey#PhotoPadRegistrationCode#PhotoPadRegistrationKey#PhotoPadSerialKey#PhotoPadSerialNumber#PhotoPadWithCrack
0 notes
Text
Photography Masterclass
Photography Masterclass
New! From Creator Of #1 Photography Product On CB - Video Tutorials For Beginner And Hobbyist Photographers. Anyone With A Dslr Camera Will Want To Get Their Hands On This! Earn 60% Per Sale! Extremely Low Refund Rate! See /affiliates.html Page. http://dlvr.it/SgCPL4
0 notes
Text
Free Photography Tutorials to Learn New Tips and Tricks
Free Photography Tutorials to Learn New Tips and Tricks
From advice for shooting still life and lifestyle photography to editing techniques, improve your skills with these top tutorials for beginners
Whether you’re a phone photographer or you use a DSLR camera, learning simple photography techniques can take your pictures to the next level.
In this list of tutorials, professional photographers share their quick tricks and step-by-step explainers to…

View On WordPress
0 notes
Text
Photography and Video Courses on Udemy, From Beginner to Advanced
Taking photos is a fun way to show how creative you are. We’ve all taken pictures at some point, whether it was with a DSLR or just a phone. But if you know how to do it right, it can be fun and lead to many different kinds of jobs.
We’ve put together a list of some online photography and video editing courses that can help you improve your skills or even start a business, whether you’re a beginner or an intermediate photographer.
1. Video Production Masterclass

You can make great videos no matter how fancy your camera is or what kind of gear you use. Even if you only have a smartphone, you can make better and more interesting videos if you know the basics of what makes a good video. The goal of this course is to help all aspiring filmmakers around the world, whether they have never made a movie before or know a little bit about how to make one.
In the advanced sections, you’ll learn everything you need to know to make wedding films and documentaries like a pro. This course will teach you everything you need to know to make great videos, whether you want to make YouTube videos, short films, or long movies for Netflix.
Features of the course:
Make amazing videos from beginning to end.
Make sure you use the right tools to make your video.
Beautiful videos can be made with any camera.
You can record professional sound with a number of different microphones.
You can make your video look more professional by adding lighting.
Use new and clean ways to edit videos that are interesting.
2. The Complete Video Production Bootcamp

This online video production class will teach you how to make great videos with a smartphone, webcam, DSLR, mirrorless, or professional camera. This course will teach you how to make professional videos, whether you are a YouTuber, blogger, vlogger, business owner, aspiring filmmaker, or someone who just wants to make videos. If you really want to become a professional video editor, this is the best course on Udemy that you can take.
There are a lot of tutorials and courses that focus on specific cameras or styles, but it’s hard to find a comprehensive course like this one, which covers everything from how to come up with great video ideas to how to make videos, edit them, and share them with a large online audience.
Features of the course:
For your first video, you’ll know what gear we recommend.
You’ll know how to pick the best story for the video you want to make.
You’ll know how to make great videos with any camera.
You’ll know how to record better sound with different microphones.
You already have the tools you need to make professional videos.
You’ll know how to set up basic video lights, such as using natural light.
3. iPhone Photography
This online photography class will teach you everything you need to know to become a professional digital photographer with just an iPhone or a similar smartphone. It’s meant to keep you interested and help you improve your photography skills so you can move on to the next level.
The person who made the course said that the most important rule in photography is “10% gear, 90% knowledge.” So, you can take great pictures of almost anything if you know HOW to be a good photographer and what to look for. This course is for people who have little or no experience with photography but want to learn how to take good photos without buying a lot of expensive equipment.
Features of the course:
How to properly light your subjects by using the light around them
How to edit photos on your iPhone like a pro with the free Lightroom app.
How to take beautiful photos by using shot composition.
How to change your iPhone camera’s settings so you can take the best pictures.
How to give your photos more depth
How and why the best photographers tell stories with pictures.
4. Cinematography Masterclass: The Complete Videography Guide
This course is probably the place to go if you want your videos to look better, be easy to share, be interesting to watch, and be impressive. You’ll start by going with the instructor to a high-end client shoot to see how the video production process really works. This is probably the best videography class for you out of all the ones that are out there. This course’s lessons are full of important basics and ideas about making movies that will be built on in the rest of the course.
The teachers will show you how to set up and choose the best way to shoot your video. You will also learn the main things you need to do to make a project look more cinematic and cool.
Features of the course:
Learn the basic rules of video that you can use in all of your future projects.
Get the confidence you need to make videos from scratch for social media, for clients, or for your own projects.
You’ll have a step-by-step plan for making videos that look and sound great.
Find out how to get people to share, like, comment on, and interact with your videos.
Learn as well as you would in film school how to make a shot list, light, frame, shoot, and record audio.
5. Photography Masterclass: A Guide to Photography from A to Z
Even if you don’t know much about photography, this class will teach you everything you need to know. This will help you make pictures that will make you stand out. There are a lot of digital photography courses that teach specific styles or how to use equipment, but it’s hard to find one like this one, which is for both beginners and more experienced photographers.
This course is for photographers of all skill levels who want to get better, take better pictures, and make money with their photos. People who use DSLR or mirrorless cameras will like it the most. This course will give you everything you need to take your photography skills to the next level, no matter how much you already know or what kind of camera you use.
Features of the course:
Find out how cameras work and what you need in order to use one.
Learn how to use your camera and how to shoot in manual mode.
No matter how much money you have, you should know what you should buy.
Follow our examples of how we shoot in the real world to see how we do it.
You can take better photos if you use the right settings, composition, and lighting.
Read More: Photography and Video Courses on Udemy.
0 notes
Text
Learn Photography for Beginners and Build a Strong Foundation
If you've just purchased your first DSLR and want to learn the basics or want to learn photography for beginners. Visit ProEdu; we offer multiple tutorials that will help you update your existing photography skills and also help you build a strong foundation. Both amateur and established photographers can enhance their skills with our courses.

1 note
·
View note
Last Seen Blogs

glory-bell-farm
Y'all Playing With Grown Ups Now

bzr35
Root Beer Addict

starwrighter
Starwrighter

keepcallingforme
Chaos Walking