#its half unfinished sewing and half hot glue
Text
in this episode of "zoe is so fucking extra" I made my own rainbow wings
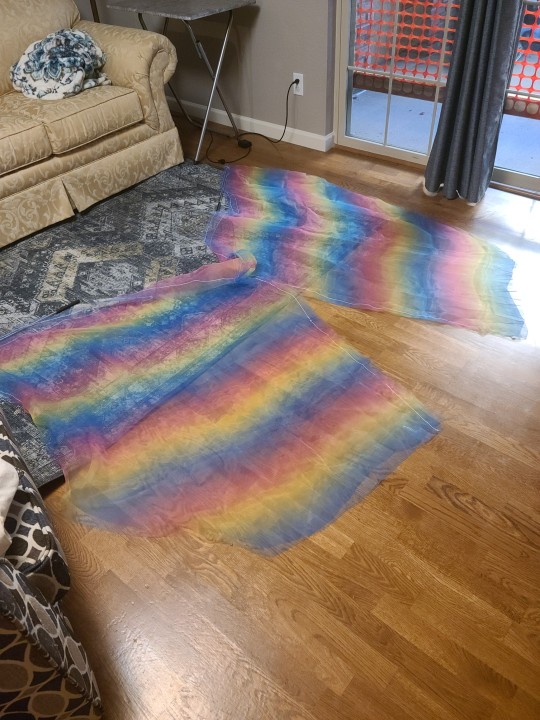
#theyre so messy#i dont even care#its half unfinished sewing and half hot glue#but itll be awesome at my bbq tomorrow and at pride
9 notes
·
View notes
Text
pyrrha nikos update 7/8
this costume has been a journey, but i’m super happy with the results so far (ღ˘⌣˘)
i started with the skirt & sash, because i figured those would be an easy start to this soon-to-be shitshow. i used this pattern from jalie (i wanted a skort instead of a skirt because skorts are basically the real world counterpart to monty oum anti-upskirt technology). i altered the pattern to take out the side panels & overall shortened it. for the sash, i used a pattern i came up with a few months back to get that wave/fold that pyrrha’s has. i like the end results, but the sash isn’t quite as long or full as i hoped it would be, so i might remake this.
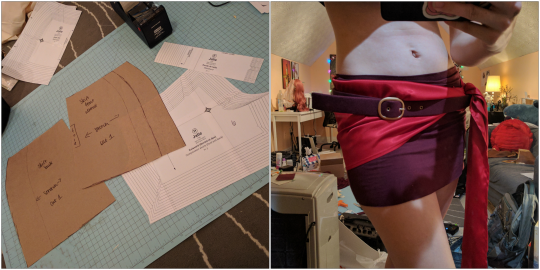
i’m ridiculously proud of the belt, mostly because after a few days of staring at my corset, wondering how i’d fix the binding (more on that later), i finally had something go right. i based this belt off something i saw on labinnak’s instagram story, with a little help from this video from zonbi. i hotglued a bunch of 1 1/4″ strips of craft foam together (two strips to give the belt some sturdiness), sewed a long tube of fabric (using the same fabric as my skirt, shoes, & gloves so everything matches!), then pulled the tube over the foam. i then added a buckle i picked up from the the craft store that i spray painted a while back with the same spray paint as my armor & punched in some grommets. it’s not super sturdy since it’s just craft foam & hot glue, but i don’t plan on this belt actually holding anything up, so i think (hope) it’ll be okay.
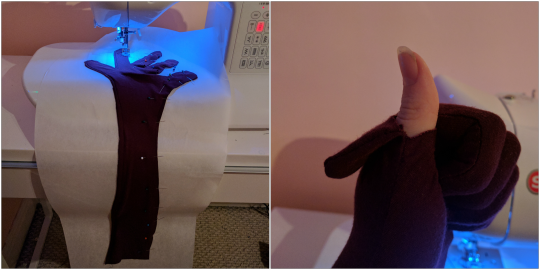
the gloves are just cheaters gloves, with an added flap on the thumbs so i can use my phone while wearing these

the boots are......not my proudest accomplishment. i’m quite pleased with the (currently unfinished) boot cuffs, but the boot covers.....yikes. i’ve never made boot covers before, so let’s blame it on that. luckily, these are just shoes from goodwill, so i’m not upset over ruining them (& they’re actually half a size too small, so i might just get another pair & redo these before dragoncon). the red paint on the soles is also a hot mess, because the plastidip i bought to seal it didn’t actually seal it. tbh, i wouldn’t be upset if these shoes met a horrible fate & had to be replaced.
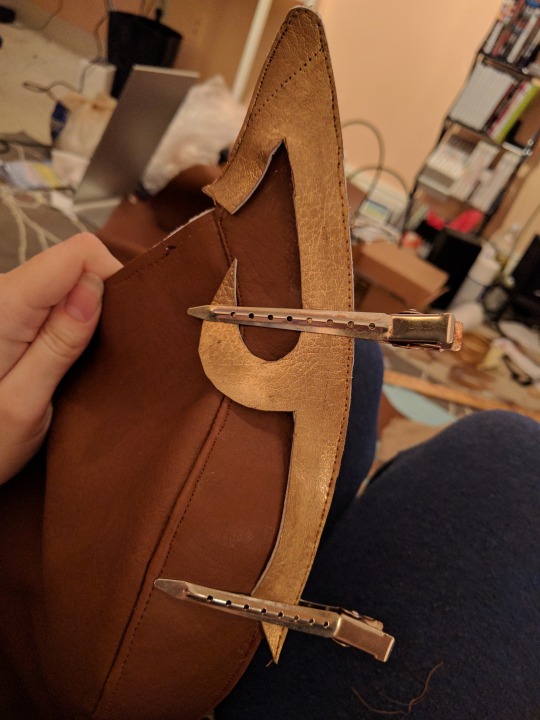
now the corset. holy shit, the corset. pyrrha has such a distinctive top & i’m a perfectionist asshole when it comes to costumes, so i’m going all in on this. one thing i noticed while planning this out is that pyrrha’s corset is probably made out of metal & the 3 panel design of it doesn’t translate well to fabric. i wanted something fitted & supportive, so i started looking for commercial corset patterns (i actually tried to make a custom corset pattern first, but that was its own separate disaster). i finally decided on simplicity pattern 8201, which i think is supposed to be.....a star wars thing? i dunno, but this pattern has a few features i was looking for, including being a generally basic but fitted pattern, having a seam straight up the middle, & being designed for ridiculous fabric. i picked it up at the craft store with some muslin & got to work.

i first made a mockup of the original, unaltered pattern in my size to get an idea of the shape & look, then i started figuring out what should be altered to get to pyrrha’s corset. i don’t have a dress form, so i found it easiest to (badly) draw on myself what i was going for.
then i transferred the pattern onto paper, added my alterations, & made a mockup of that. my alterations included cutting the center front pattern piece on the fabric fold so i get one piece instead of two, extending the top line of the front & side front pieces for the tabs, extending the side back pieces so the corset can lace up (the original pattern calls for a zipper in the center back), & adding a modesty panel. (pyrrha sticker on my phone is from @binch-queen‘s redbubble!)

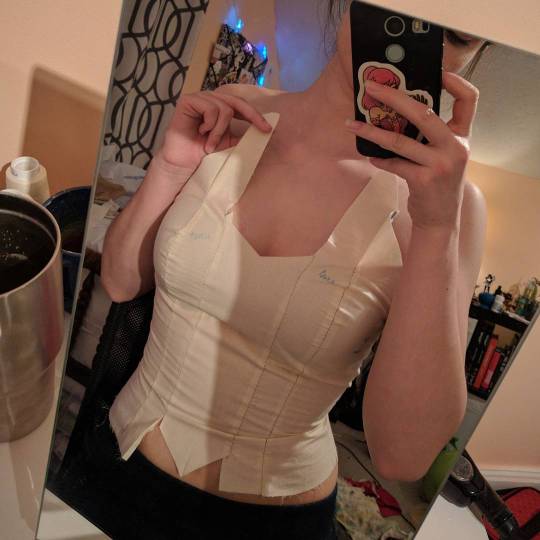
it took a few tries to get the tabs to lay right, but i finally managed to get something i liked.
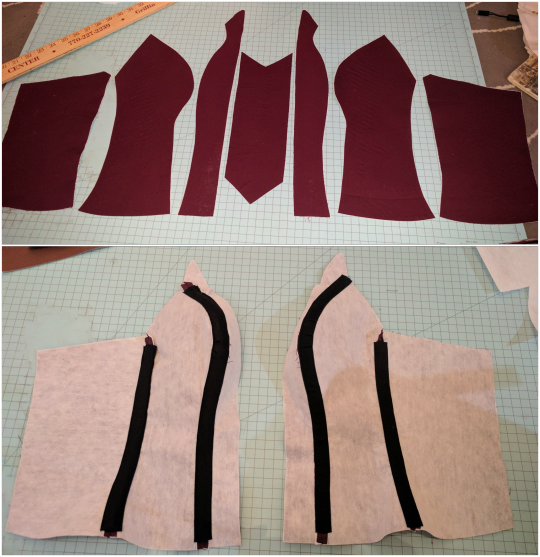
i finally started on the actual corset, but because i’m a baby, i started with my inexpensive lining fabric instead of my pricier outer fabric. i fused the fabric, a woven fabric i found at the craft store that happened to match my knit fabric for the skirt perfectly, to heavy weight fusible interfacing, then sewed the pieces right sides together. i wasn’t sure how exactly i wanted to do the center gold panel, so i didn’t sew that lining piece to the rest. i then sewed my boning channels onto the lining seams.
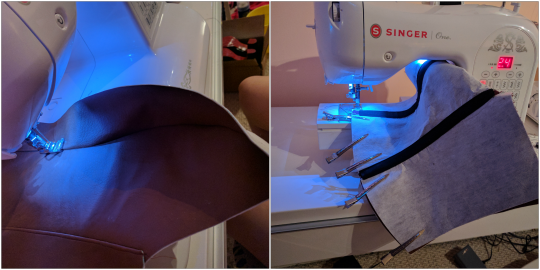
the lining went well, so i finally started on my outer fabric. i looked around online for some faux leather fabric, but couldn’t find anything i really liked. however, when i went to joann to get fabric for another project, i found some upholstery vinyl that had the perfect faux leather look & color & i knew it was meant to be (ღ˘⌣˘) (side note: while looking up that link, i noticed the fabric is flame retardant, so if any cinder cosplayers try to fuck with me, i’ve got that going for me) i did the same to the outer fabric as i did the lining, fusing the heavyweight interfacing & sewing right sides together, then topstitching along the seams to get everything to lay flat. then i placed the outer & lining right sides together, sewed along the bottom & the lower 2/3 of the center, flipped it right side out, then topstitched again to get everything to lay flat.
i added a lining for a few different reason, the first being that the inside of the corset will (probably?) be visible with the tabs, so i didn’t want the ugly wrong side of upholstery vinyl to be on display. i also didn’t want the boning channel stitches visible on the outside, plus the additional layer of interfacing makes the whole thing a lot sturdier. sewing the whole thing together was a nightmare & i’m pretty sure my sewing machine was screaming at me at more than one point, but it looks much neater & more professional.
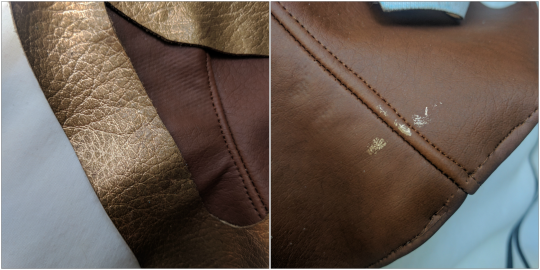
i was on a roll with the corset at this point, but the gold panel & binding quickly derailed me. my original plan was to spray paint the same vinyl fabric gold, fold the binding over the top edge, & sew it down, but i ran into a few different problems. the first was that vinyl doesn’t just fold over like normal fabric, the only way you can get it to lay flat is to topstitch it, which i was planning on doing after folding it onto the fabric. i also couldn’t pin the fabric down without putting in a bunch of permanent holes, so i started to tacky glue the binding onto the corset to hold it in place while i sewed, then discovered when i removed my clamps that the paint pulls up & transfers onto pretty much anything it comes in contact with. my shiny gold accents were now looking quite worn. i tried a clear polyurethane to seal the color, but it also had a sticky surface, so it had the exact same problem as the unsealed paint. i kept gluing & clamping out of denial, but the binding just looked bad. i put my corset aside for a week & started on armor while i tried to figure out how to fix this.
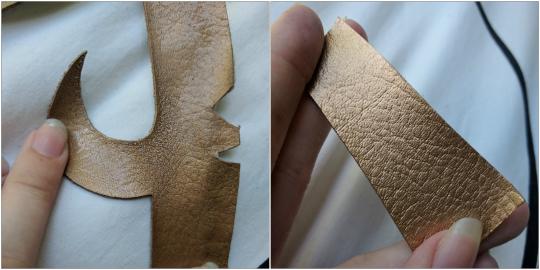
i eventually started looking up sealing spray paint on vinyl (apparently pinterest moms love to upcycle vinyl chairs), but most blogs didn’t give any detail on how they sealed the paint, & the only blog that did mention it used an expensive wax that you can only get from specialty retailers. i tried another clear spray paint, one specifically designed for sealing, & got......whatever those bumps are, plus a really ugly color (although to be fair, that’s the same vinyl binding that was currently being painted for the 4th & 5th time). i shared my dilemmas on reddit, got some tips for helping the color actually stick to the fabric, & discovered that the clear plastidip that betrayed me on the soles of my shoes actually sealed the color without discoloration, weird bumps, or stickiness. i still haven’t stress tested it, but this process is looking much better now than it did yesterday morning.
another thing i disliked about my original binding was how it looked on the inside, which would be somewhat visible. the only way i could get the binding to lay flat on the opposite side would be to cut slits in the fabric, which would be visible. i ended up digging up a vinyl binding tutorial from december wynn that i considered when i was first patterning the binding, but decided against because i thought i wouldn’t like it. i tried it out on some scrap gold fabric, & holy shit, it’s infinitely better than my original plan. don’t do my original plan, it’s terrible & will cause you nothing but pain.
i’ve also been working on armor the past few weeks, but this word vomit is long enough so i’ll save that process for another update. i’ll be starting on a commission for amon & a hylian hood this week, so those updates will start soon. thanks for reading! if you found this useful or just enjoyed it, please consider buying me a coffee (ღ˘⌣˘)
3 notes
·
View notes
Text
The Elsa Dress - Part 2
The Skirt
This was the easy bit - straight forward sewing with decently cooperative fabrics.
I didn’t cut a mock-up. I rarely do for personal projects, since I left school - unless I’m working on something particularly tricky or I’ve drafted the pattern fully from scratch, I don’t find it worth the money or the fabric. I keep waiting for this strategy to come back to bite me, but so far, I’ve not had any trouble.
I used the skirt pattern from the McCall M7000 and cut the pieces in both the sateen and the glitter organza.
I overlaid them and sewed, leaving a slit to the knee in the right side seam that wasn’t mentioned in the pattern. Because the pattern called for the skirt to attached to the bodice, I left the top unfinished for a good long while with every intention to piece the two together at the end. Ultimately, the bodice was just stiff enough that it would have been unnecessarily difficult to try and get it on with the skirt attached and I had to devise my own waistband fishing. I decided on an elastic waist band with a snap. I finished with a basic rolled hem and have since gone back and cleaned up the seams with my overlock.
The Bodice
Like the skirt, I used the McCall pattern for the bodice base and cut it in muslin. I’m sure I went wrong somewhere, though I’m still not 100% sure where, because it ended up being surprisingly large. To fix this, I removed a whole panel from the back and added in two gussets in scrap fabric to either side of the zipper so I could zip the bodice closed when I had the thing on.
It wasn’t pretty and it wasn’t the most beautifully tailored creation, but it didn’t matter, since the whole thing was going to be covered in foamies. I finished off the bottom hem with scrap skirt fabric, since there was a chance it might be seen and based both the top portion and bottom with a teal fabric paint, in case any of the muslin base might peek out from under the foamies. It turned out that the teal fabric paint was actually a glow in the dark paint and I startled myself on more than one occasion walking past the darkened living room to see the bodice glowing eerily on the dress form. I left the top hem unfinshed so that I would have something for the chiffon top to attach to and I left the zipper long, with the thought that I would attach the skirt.
Then it was time for foamies.
I cut a lot, I mean a lot of foamies. I even enlisted the help of my family to cut foamies, I needed so many. I had cut several different shape options - a mid-size rectangle, a longer, thin rectangle, a square, and a tiny rectangle - which we used as templates. We ultimately cut two full teal 12”x18” sheets of foam and one sheet of white. I can’t even being to estimate how many we finally cut, but I was very happy with the effect.
I was fairly confident that regular E6000, despite its longer tacking time, was going to be the most flexible, toughest, and yield the cleanest finish just from experience and research, but I ran a couple of tests just to be sure. Sewing the foamies left obvious nicks in the foam and hot glue was not only too stiff, but not tough enough to hold up over time.
Initially, I left the bodice on my dress form to try and hold the shape of the bodice, but the tacking time of the E6000 made the process of affixing foamies torturously slow, as each piece needed to be held onto the bodice by hand until the glue tacked up. I was a little concerned about how the the bodice shape would turn out if I laid it flat, but I decided to risk it for sake of efficiency and my own sanity. That’s when the bodice came off the dress form and I was able to speed the process up by allowing the foamies to lay flat with a weight while I kept gluing.
The E6000 was fortunately flexible enough that the flat foamie application didn’t matter - once the bodice was totally covered and back on the dress form, the foamies laid beautifully. They did look rather unfinished and flat on their own, however and that’s where the Gel Medium came in.
I had originally purchased it to experiment as an ice detail option for the shoes, but the Gel Medium gave a nice icy-looking finish, so I used it for the bodice too. I mixed in a little extra fine glitter to add a little bit of shimmer and applied the gel medium with pallet knife. In total, I put down three thin coats (a jar and a half in total, including both the bodice and the shoe detail). Ultimately, it wasn't as flexible as I would have preferred, but it was still light and I was super happy with the overall look of the texture.
Next Time: The Train, Sleeves, and Shoes
0 notes
Last Seen Blogs

legendsliveon
Legends Live On

raghavinternational
Natural Gemstone

carlosrat-iron
Iron RaT.

hotnoielya-05
Noielya