#pls forgive my piddly Paint skills
Text
Rosa’s Most-Basic-of-Basic Gpose Tutorial
Hello, I’m Rosa! And I’m here to attempt to help those out there who are either new to using gpose, are confused/intimidated by it, or simply don’t know what gpose is.
To put it simply: gpose is short for Group Pose, a feature in FFXIV mainly used to change how your in-game screenshots look in various ways.
I’ve lost count how many times I’ve seen people either struggle with learning how to utilize gpose for nice screenshots, or even just straight-up never realize it’s a thing that exists in FFXIV to begin with. And it results in so much ‘I suck at this’, ‘I can’t take pretty pictures like you guys’, etc.
And I’m here like, ‘YES. Yes you can!’
I know there are bigger and better tutorials out there, but I want to offer what I can in the easiest-to-understand way possible, since gpose is incredibly fun to tinker and experiment with once you get the basics down.
For the record, I will not be using any Reshade filters or mods for this. This is all 100% FFXIV gpose.
This tutorial also only contains PC keybinds, since I’m a PC player. If you’re a PS4 player, I recommend searching up the appropriate binds for your needs!
So without further ado, let’s start at the beginning! Pretty pictures abound!
1. Open gpose.
Simply go to your chatbox, and type /gpose in there. Like so:

When you hit Enter, you’re now in what’s known as Camera Mode. This gives you more freedom to move the position of your camera than in regular game mode, and lets you access a handy-dandy control panel to fiddle with various settings. We’ll get to that in a moment.
(You can also access gpose in your Actions & Traits menu, found under Extras.)
If you used an emote, expression, or combat action before opening gpose, it will now be cycling over and over. The easiest way to reset this is to exit gpose, have your character /sit and then hop back up, and re-enter gpose.
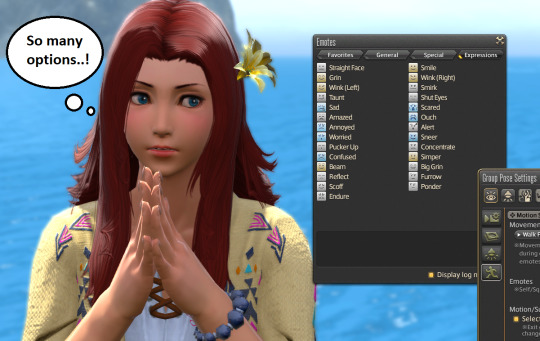
If there is a certain emote/expression you want your character to be doing for your screenshot, you can do it before entering gpose OR access the list of emotes from the gpose control panel. Note that combat actions can only be performed before entering gpose.
2. Move the camera!
As mentioned, you can access a lot more camera angles now! Try using your W and S keys, for instance, and pull the camera way up..

Or down low!

Your A and D keys can also move the camera horizontally (left/right)!
First person also works in gpose, so hit your Home key to try it out!
3. The control panel, also known as Group Pose Settings.
It’s not visible when you open gpose, but it’s the key to using the feature to its fullest. Usually the default keybind to bring it up is R, but if that does nothing, hit the key/button that your Auto-Run is bound to. It’s bound to the same key.
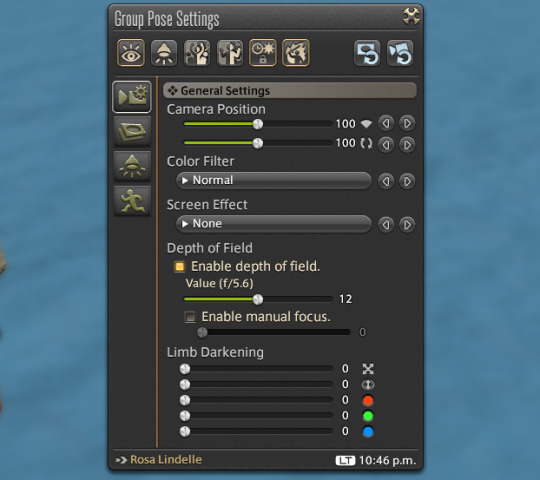
There’s a lot of stuff here, I know. But it’s really not as scary and convoluted as it looks, and all the settings are labeled to give you an idea of what they do. I won’t go into every single setting; experimenting is half the fun, so don’t be afraid to press buttons and try things out! But I will point out the ones that will solve a lot of the ‘I don’t know how to do this’.
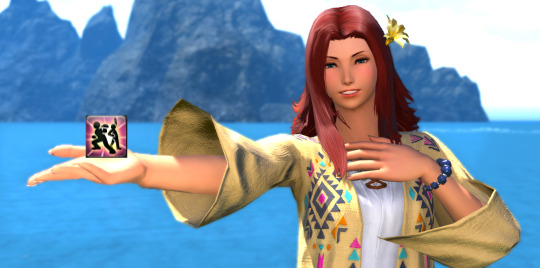
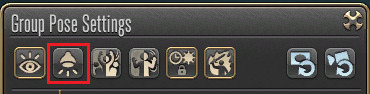
4. The Face Camera button.
This utilizes your character’s head-tracking; meaning that wherever you position your camera and toggle the button on (you’ll know it’s on by the border around the button), they will look at you!

You can also turn this on/off easily with the spacebar.
This toggle can be used in many ways to make your character look in a certain direction. Depending on what you have them doing, their whole body may turn during an emote/ability, or sometimes it’s just their eyes that move. It varies between emotes/actions.
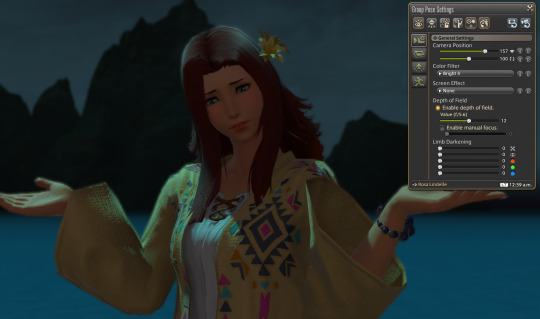
5. Camera Position and Color Filter make a ton of difference alone.
The first slider for Camera Position allows you to zoom in and out a lot further than you normally can. (Try using your scroll function after adjusting the slider too!) This is how people get those nice close-ups!

The second slider is used to turn your view clockwise or counter-clockwise. This can also be done with the Q and E keys on your keyboard.

This slider is largely useful for artistic angles, and makes taking full-body shots a breeze!

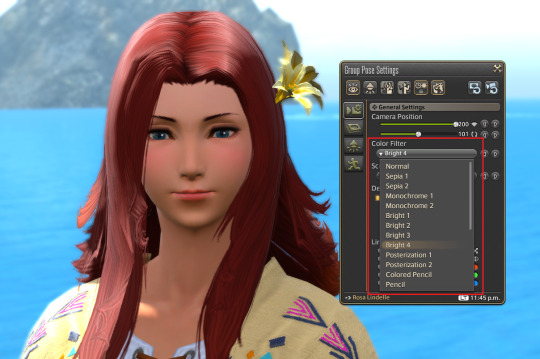
Color Filter is just what it says! It’s a drop-down list, and there are many to choose from, so try ‘em out and see what you like! One I tend to favor is Bright 4, since it makes the colors far more vibrant.
6. Emotes and Expressions time!
Note the little running man icon on the left side of the controls, and click on it.

This will bring you to the Motion Settings panel. Here, you can:
Toggle your character walking/running/sprinting in place.
Access your emote window.
Toggle whether gpose picks up combat actions, or makes your character face someone you’re currently targetting outside gpose when the Face Camera button is off.
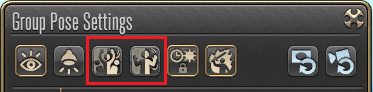
When you apply an emote, you can:
Pause/unpause your character’s animations using the Disable/Enable All Motion button up top (bound to your 1 key). This also applies to the animations of others around you if they’re on your Friends List/in your FC or Party. This is HIGHLY useful for easy rapidfire pauses to get that pose just right.
You can also use the button beside it, Disable/Enable Target Motion (bound to your 2 key) to adjust ONLY your character, or whoever you are currently controlling. If you have a friend with you, you can click on their character (or use the Tab key) and switch to their perspective!
But keep in mind, you cannot change someone else’s emotes/expressions.
Note that emotes and expressions can be applied at the same time! Try mixing and matching different ones together and see what kinds of poses you can create!
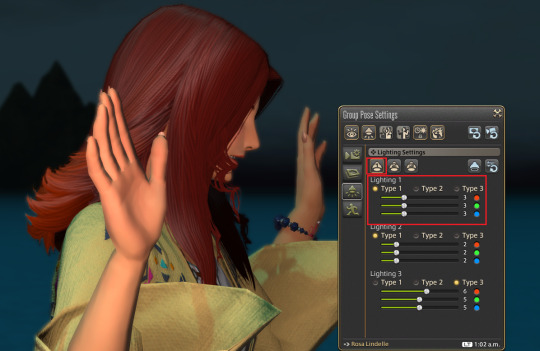
7. Light ‘er up!
The last thing I will touch on is lighting, which can be accessed by clicking on the lamp icon on the left.

Here we have Lighting Settings. And wouldn’t you know it, it turned to night-time when I briefly left gpose!
Moonlight is nice and all, but using gpose, we can use a maximum of 3 extra light sources to brighten things up a bit.

These buttons toggle each light source, which can be adjusted with the sliders below.

(Note that Lighting 1 can also be toggled with the lamp icon up top.)
The Types under each Lighting simply determine how big/bright that light’s radius is.
Type 1 is the smallest/dimmest and Type 3 is the largest/brightest.
Type 1 is ideal for lighting up just a small area, like around your character, and the other two will cover more of your character’s surroundings.
Each set of 3 sliders are simply the Red-Green-Blue values.
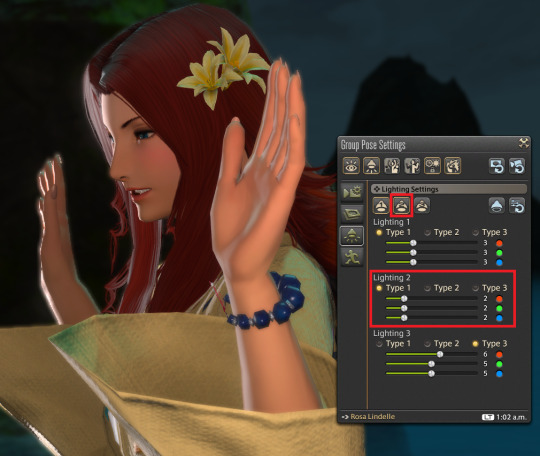
You can also choose where to put down your light sources, as well as how close or far they are by zooming in/out. So if we place one down on one side of Rosa..
And a slightly dimmer one on the other side..
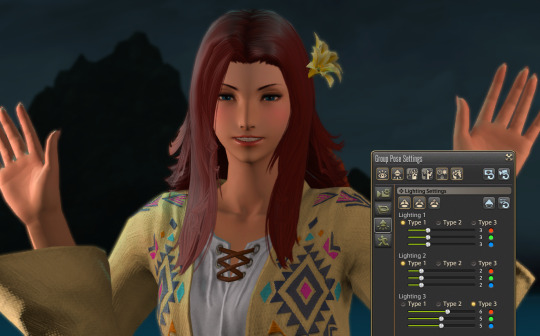
Now we can see her lovely face again!
You can do a lot of neat things with lighting, and the effect will differ depending on things like your selected filter, location, weather, and time of day/night as well. It can completely change the mood of your environment, so experiment!
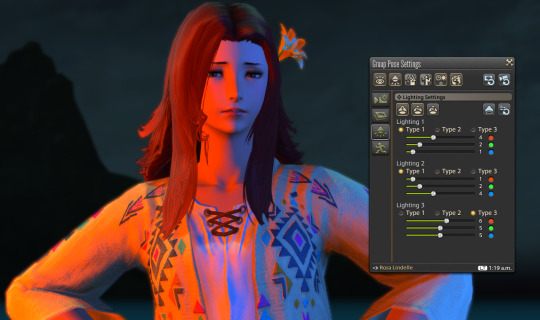
Or you can just torment your victim subject like me.
The possibilities are endless.
And those are what I consider the basics of gpose knowledge! There are other things to play with as well, but the majority of them are simply extras for personal preference. There’s no such thing as a ‘perfect’ way to do it, just play with things and see what strikes your fancy!
As another beloved redheaded lady says: Take chances, get messy, make mistakes!
And most importantly..
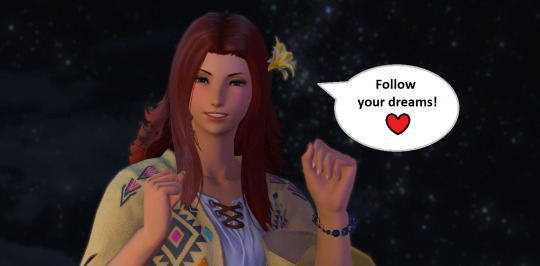
I hope this tutorial helps some of you in your screenshotting endeavors! Thank you for taking the time to read it! ❤
#ffxiv#gpose shenanigans#gpose tutorial#gpose guide#long post#screenshot tool#this was actually kinda fun to do#i really hope it helps some people!#pls forgive my piddly Paint skills
594 notes
·
View notes
Last Seen Blogs

2000orso
Sans titre
yanderes-galore
💜Read Pinned Post🐈⬛
yanderes-galore
💜Read Pinned Post🐈⬛

paulmand3l
Senselessness

ilana-sod
ILANA SOD