
whitmanswoodworks-blog
Whitman's Woodworks
Sustainably crafted handmade wooden goods
4 posts
Don't wanna be here? Send us removal request.
Last Seen Blogs

dccomicsbracket
@lylethewaterguy

justmesitinginthecournerofmyroom
Whatever Comes to Mind, and it Shall be Said

kashiwa-hikikomorisoudan
柏ひきこもり相談ネット

nico14
Unbetitelt

semattravel
Semat Travel Indonesia
Photo
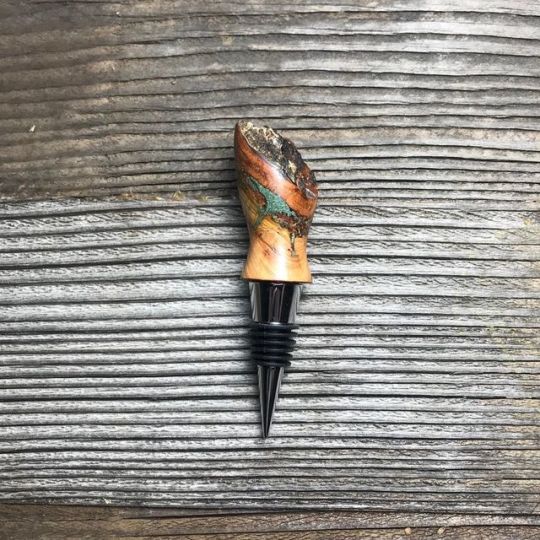
Here’s a closer look at one of the live edge cherry burl bottle stoppers I posted awhile back. I guess this qualifies for #throwbackthursday. Anyways, this ones a little different because if you look closely at the bottom edge it’s a little darker. This is because somehow when sanding I burned that edge, I think with the final sanding with 0000 steel wool. I thought it looked good so I called it a #happylittleacident and left it. I think I might try incorporating biting into more of my works in the future. Let me know what you think in the comments. ————————————————— This is available DM me if interested or find it on the Etsy shop soon (link in bio). (at Lynden, Washington) https://www.instagram.com/p/B07XrBog62p/?igshid=zz2prxhi9yhe
0 notes
Photo
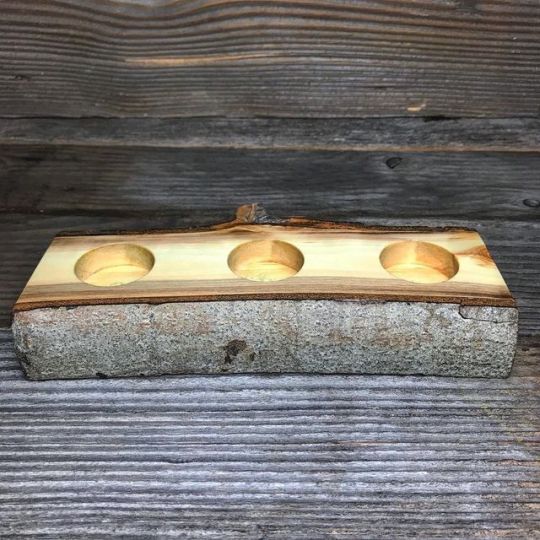
Finished up this little candle holder out of some Quaking Aspen the other day. The color in this wood totally surprised me, you never know what you going to find under the bark. This was a fun project and I think this style of candle holder will be a new staple in my Etsy shop. This one measures approx. 10”x3.5”x1.5” and is finishe with @minwaxusa satin wipe on polyurethane. Let me know what you think. ————————————————— This piece is available DM if interested or find it on the Etsy shop soon (link in bio). https://www.instagram.com/p/B0zrDTHg-Kk/?igshid=1bhjsjmdz6a8p
0 notes
Photo

I haven’t been finishing a lot and projects lately just starting a lot and kinda jumping around. So #throwbackthursday is a good excuse for me to repost something like this walnut honey jar and dipper. Still one of my most challenging but also rewarding projects of the year so far. (at Lynden, Washington)
https://www.instagram.com/p/B0pm9eEgFni/?igshid=15i3nb3c1vrfd
#throwbackthursday#walnut#honeyjar#honeydipper#handmade#hand turner#copper#honeypot#woodturning#woodturner#honey#kitchen#woodart#functionalart#woodporn
0 notes
Photo

Finished up this little bottle stopper the other day. For this one I used @starbondadhesives super fast thin CA glue. This was the first time I’ve used CA glue for a finish and man am I impressed with it. Being that it was my first time using this as a finish I utilized some of the tutorials on the starbond website to get me pointed in the right direction. I originally started like I normally would with any curing finish. Put a coat on then sand, working up the grits with each coat starting at 600 grit (final sanding grit on the piece). This wasn’t working as well as I liked so like many of the tutorials said I decided to put all my coats on and then work my way through the grits. This worked great. The best thing was that I was able to put 7 or 8 coats on (I would have done more but I ran out of glue) in like 10-15 minutes. This was awesome because with most finishes this would have taken multiple days and by the time finishing comes around I have very little patience left. I then flattened out the finish with 600 grit and work my way up to 3000 and then polished using U-beaut EEE-Ultra Shine. The end result is amazing. It feels super smooth, like glass, and has very nice high gloss mirror like shine. Let me know what you think?————————————————— Use the code Whitman10 to save yourself 10% on your next order from Starbond Adhesives. (at Lynden, Washington) https://www.instagram.com/p/B0kAIioABZ1/?igshid=syse123fp7tr
#woodturning#cherryburl#wine#winestopper#bottlestopper#whiskey#wino#vino#woodporn#woodart#woodturner#lathe#caglue#starbondadhesives#finishing#woodfinishing#functionalart#kitchen#bar#barware#winestyle#drink#winecountry#woodworking#woodworker#maker
1 note
·
View note