#hiking tripod dslr
Text
Production Processes (Supporting Post)
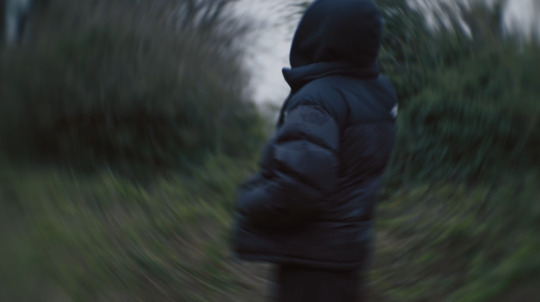
For the rural scenes there were physical challenges and risks mainly with equipment moving. For the entire piece my main camera was a BlackMagic design, Pocket Cinema Camera 6k Pro. Whilst being a compact form-factor camera, hiking equipment up rural hills became physically difficult due to weight distribution when combined with lenses and a tripod. The weight and size of the kit caused challenge and risk with getting up and down the locations I wanted during daylight hours as to prevent any risks associated with limited light. These risks were thankfully further mitigated where I was able to get help to securely transport myself and kit by car to these locations which always ensured safety of myself and the kit.
For the urban scenes I used London as my backdrop due to its ease of access from Kent and Leeds as well as for its stark iconography. For the first 2 filming days in London, I used a compact rig of the 6k Pro, taking minimal equipment, with no tripod and fewer lenses. This was to mitigate risk associated with equipment safety like theft as well as weight risks. This meant that I had to be careful in my lens choice and limited the type of shots I could get from the lack of a tripod. I ended up opting for a 58mm Petzval Lomography lens which provided the rounded depth of field bokeh control in the two shots below that made the final cut. Secondarily I used a 24-105mm zoom lens which provided greater versatility and produced most of the footage from those dates. On the third London filming date I only took a DSLR camera with no video function which is where I took all the ‘frame by frame’ sequences of the final project using 100s of photos. These three days were well planned and involved exact routes and lists of the types of edits I wanted. This helped time factors and made the production workflow more efficient.

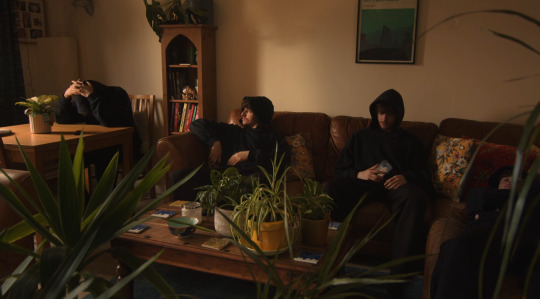
The shoots at home in Kent filled in all the gaps of footage I needed and provided many of the more conventionally narrative sequences of the project. I used my living room as the backdrop for the shots below, which proved to be smooth filming sessions with minimal risks and complications where I had a controlled and private location. For these scenes I had unlimited amounts of time to experiment with the angles, lens choices, mise-en scene and lighting. For the ‘Sofa Shot’ I framed the shot with as many plants I could find which created a delicately, natural contrasted mise-en-scene. I was also able to film this scene with only natural light by positioning the curtains in a specific way to shape the way the light entered the scene.
0 notes
Link
Check out this listing I just added to my Poshmark closet: New Backpack Camera Lens Storage bag Padded Compartment lenses Flash Batteries.
0 notes
Text
Essential Travel Accessories: Elevate Your Journey with Must-Have Gear
Traveling is a transformative experience that opens our minds to new cultures, landscapes, and adventures. Whether you're a seasoned globetrotter or a novice explorer, having the right travel accessories can significantly enhance your journey. From practical gear to stylish essentials, this comprehensive guide will introduce you to a curated selection of must-have travel accessories, promising to elevate every aspect of your travel experience.
The Versatile Backpack: Your Travel Companion
No travel adventure is complete without a reliable backpack. Choosing the right one can make all the difference in terms of convenience and comfort. Opt for a backpack with multiple compartments, durable materials, and comfortable straps. This allows you to organize your essentials efficiently, from a camera and water bottle to a compact umbrella and snacks. Whether you're exploring bustling city streets or navigating remote hiking trails, a well-organized backpack becomes your trusted travel companion.
Tech Savvy: Power Banks and Adapters
In the digital age, staying connected is crucial. Imagine capturing breathtaking moments with your camera or navigating foreign cities with your smartphone only to realize your devices are running out of battery. Invest in a high-capacity power bank to keep your devices charged on the go. Additionally, a universal adapter ensures that you can plug in and power up, regardless of your location. These tech-savvy accessories are essential for modern travelers, providing the convenience and reassurance needed to document and share their adventures.
Comfort in Transit: Neck Pillows and Blankets
Long flights, bus rides, or train journeys can take a toll on your comfort. However, with the right travel accessories, you can arrive at your destination feeling refreshed. A memory foam neck pillow provides essential support for your head and neck during transit, reducing the strain caused by long hours of sitting. Pair it with a compact travel blanket for an extra layer of comfort, ensuring you can rest and relax on the go. Comfortable transit accessories make a significant difference, turning exhausting journeys into opportunities for rest and relaxation.
Secure Your Valuables: RFID Blocking Wallets
In unfamiliar environments, it's crucial to keep your credit cards, passport, and other important documents secure. Enter RFID blocking wallets, an essential travel accessory for protecting your identity and financial information. With the increasing prevalence of electronic theft, these wallets use advanced technology to prevent unauthorized access to your sensitive information. Investing in an RFID blocking wallet offers peace of mind, allowing you to explore new destinations without worrying about the safety of your personal data.
Capture the Moment: Quality Camera Gear
Preserving travel memories is a priority for many, and having the right camera gear is essential for this purpose. Whether you prefer a compact point-and-shoot camera for its portability or a professional DSLR for its versatility, choose a camera that suits your preferences and needs. Don't forget to include additional memory cards, a sturdy camera bag, and a versatile tripod for those perfect shots. Quality camera gear ensures that you can capture the beauty of your surroundings and relive your travel experiences through stunning photographs.
Stay Hydrated: Collapsible Water Bottles
Staying hydrated is vital while traveling, but carrying a bulky water bottle can be inconvenient. Opt for a collapsible water bottle that can be easily packed and filled up on the go. These innovative accessories save space in your luggage and provide a sustainable solution to staying hydrated during your adventures. Some models even come with built-in filters, ensuring you have access to clean and refreshing water wherever your travels take you. Stay refreshed and energized throughout your journey with a collapsible water bottle by your side.
Stylish and Secure: Luggage Locks
The security of your belongings is a top priority, especially when navigating through bustling airports or crowded tourist spots. Luggage locks are small yet essential travel accessories that provide an extra layer of protection for your valuables. Opt for TSA-approved locks to facilitate hassle-free security checks at airports. With luggage locks, you can explore with confidence, knowing that your belongings are secure, whether they're in your suitcase or left in your accommodation.
Organized Packing: Compression Cubes and Travel Organizers
Efficient packing is an art, and the right accessories can make this task a breeze. Compression cubes and travel organizers are essential for maximizing luggage space and keeping your belongings in order. These accessories help separate and compress your clothes, making it easier to find items and minimizing wrinkles. Whether you're embarking on a short weekend getaway or a longer journey with varied climates, organized packing ensures that you have everything you need at your fingertips.
Health and Wellness: First Aid Kit and Travel-Sized Toiletries
Prioritizing your well-being while traveling is crucial. A compact first aid kit containing essential medical supplies is a must-have for unexpected situations. Additionally, invest in travel-sized toiletries to save space in your luggage and comply with airline regulations. Having these items on hand ensures you're prepared for minor emergencies and allows you to maintain your hygiene routines while on the road. Health and wellness travel accessories contribute to a worry-free journey, allowing you to focus on enjoying your adventures.
Fashionable Protection: Stylish Sunglasses and Hats
Completing your travel ensemble with stylish accessories not only adds flair to your look but also provides essential protection. Invest in quality sunglasses with UV protection to shield your eyes from the sun's harmful rays. Pair them with a comfortable hat that offers shade, ensuring you can explore under the sun without compromising your style or well-being. Stylish accessories not only enhance your overall look but also contribute to your comfort and protection during your travels.
Conclusion: Elevate Your Journey with Thoughtful Travel Accessories
As you embark on your next adventure, equip yourself with these essential travel accessories to enhance every aspect of your journey. From staying connected and comfortable to securing your valuables and capturing unforgettable moments, these carefully selected accessories are the key to a seamless and enjoyable travel experience. Pack smart, travel confidently, and create lasting memories with the right gear by your side. Safe travels!
1 note
·
View note
Text
Hiking and Photography: Capturing the Beauty of Nature
Hiking and photography are two passions that beautifully complement each other. When you combine the thrill of exploring the great outdoors with the art of capturing stunning images, you embark on a journey of creativity and adventure like no other. In this article, we will delve into the world of hiking and photography, exploring how these two pursuits can blend harmoniously to help you capture the breathtaking beauty of nature.
The Perfect Duo: Hiking and Photography
Hiking and photography share a profound connection, as both celebrate nature's wonders in their own unique ways. Hikers are drawn to the pristine landscapes, the serene tranquility, and the raw, untamed beauty that the great outdoors offer. Photographers, on the other hand, are driven by the desire to freeze these fleeting moments in time and share them with the world. When combined, these two passions can create a powerful synergy.
Choosing the right gear
Before embarking on a hiking and photography expedition, it's essential to assemble the right gear. For hiking, make sure you have suitable footwear, weather-appropriate clothing, a comfortable backpack, and essentials like water, snacks, and a first-aid kit. When it comes to photography gear, a good-quality camera is crucial. While a high-end DSLR can offer unparalleled image quality, even a smartphone with a good camera can yield impressive results. Don't forget a sturdy tripod, extra batteries, and sufficient storage space for your photos.
Planning your hike
To capture the beauty of nature through your lens, careful planning is essential. Research potential hiking trails in your area or the region you intend to explore. Consider the level of difficulty, the length of the trail, and the specific features you want to photograph, such as waterfalls, mountain vistas, or wildlife. Timing is crucial; many photographers prefer the golden hours of sunrise and sunset for their enchanting light. Additionally, check the weather forecast to ensure a safe and enjoyable hike.
Techniques for Capturing Nature's Beauty
Now that you're well-prepared and have chosen your hiking trail, it's time to explore techniques for capturing the beauty of nature through photography.
Composition: Pay attention to composition principles like the rule of thirds, leading lines, and framing. These techniques can add depth and interest to your photos.
Lighting: As mentioned earlier, the golden hours of sunrise and sunset provide soft, warm light that enhances the beauty of landscapes. Experiment with different angles and perspectives to make the most of the available light.
Depth of Field: Adjust your camera settings to control the depth of field. A shallow depth of field can isolate your subject and create a beautiful background blur, while a deep depth of field can capture intricate details throughout the frame.
Tripod Use: A sturdy tripod is invaluable for landscape photography, especially in low-light conditions. It allows you to use longer exposure times without the risk of camera shake.
Filters: Consider using filters like polarizers to reduce glare and enhance colors or ND (neutral density) filters to control exposure in bright conditions.
Patience and observation: Nature can be unpredictable. Spend time observing your surroundings, waiting for the perfect moment when the elements align to create a compelling photograph.
Respecting nature and leaving no trace
While capturing the beauty of nature is a rewarding pursuit, it's crucial to do so responsibly. Always adhere to the Leave No Trace principles, which emphasize minimizing your impact on the environment. Stay on designated trails, avoid trampling on fragile vegetation, and pack out all your trash. Respect wildlife by observing from a distance and not disturbing their natural behaviors. Your photographs should celebrate nature's beauty without harming it.
Sharing your captured moments
In today's digital age, sharing your hiking and photography adventures has never been easier. Social media platforms, photography websites, and online communities provide a platform to showcase your work and connect with fellow nature enthusiasts. Use relevant hashtags like #hikingphotography, #naturelovers, or #landscapephotography to reach a wider audience and connect with like-minded individuals.
Hiking and photography destinations
To get you started on your journey to capture the beauty of nature, here are a few iconic hiking and photography destinations from around the world:
Banff National Park, Canada: With its stunning mountain scenery, turquoise lakes, and abundant wildlife, Banff offers endless photographic opportunities.
Torres del Paine National Park, Chile: This Patagonian wonderland boasts dramatic landscapes, including rugged peaks, glaciers, and pristine lakes.
Zion National Park, USA: Known for its towering red rock formations and deep canyons, Zion is a paradise for landscape photographers.
Machu Picchu, Peru: Combine hiking the Inca Trail with photographing one of the world's most famous archaeological sites.
Iceland: With its otherworldly landscapes, waterfalls, and geothermal features, Iceland is a photographer's dream.
Santorini, Greece: Capture the beauty of white-washed buildings against the backdrop of the Aegean Sea's brilliant blue waters.
Hiking and photography are a harmonious pair that allows you to immerse yourself in the wonders of the natural world while creating lasting visual memories. By carefully planning your hikes, mastering photography techniques, and respecting the environment, you can capture the beauty of nature and share it with the world. So, grab your gear, hit the trails, and let your camera be your passport to the breathtaking landscapes waiting to be discovered and immortalized through your lens.
0 notes
Text
Capturing the Majesty of the Mountains: A Guide to Mountain Photography

The allure of mountains has captivated humans for centuries. Their towering peaks, dramatic landscapes, and ever-changing weather make them a source of endless fascination and inspiration for photographers. Mountain photography is a unique and challenging genre that offers unparalleled opportunities to capture the raw beauty of nature. In this article, we will explore the art and techniques of mountain photography, from choosing the right gear to capturing the perfect shot in challenging conditions.
Understanding the Appeal of Mountain Photography
Mountains have an undeniable magnetic pull that draws photographers from around the world. Here are a few reasons why mountain photography is so popular:
Epic Landscapes: Mountains provide some of the most epic and dramatic landscapes on Earth. From rugged peaks to serene alpine lakes, the variety of compositions is endless.
Ever-Changing Conditions: Mountains are known for their unpredictable weather. This presents photographers with unique challenges and opportunities. Storms and changing light create dynamic and captivating scenes.
Solitude and Serenity: Mountains often offer a peaceful escape from the hustle and bustle of daily life. This solitude allows for a deeper connection with nature and the subject.
Essential Gear for Mountain Photography
Before embarking on a mountain photography expedition, it's crucial to have the right gear. The choice of equipment can significantly impact the quality of your shots. Here are some essential items:
Camera: A DSLR or mirrorless camera with manual settings is ideal for mountain photography. These cameras offer full creative control over exposure and composition.
Lenses: Wide-angle lenses are a must for capturing the vastness of mountain landscapes. A telephoto lens can also be valuable for capturing distant peaks and wildlife.
Tripod: A sturdy tripod is essential for capturing sharp, long-exposure shots and for stabilizing your camera in windy conditions.
Filters: Graduated neutral density filters help balance the exposure between the bright sky and dark mountains. Polarizing filters can enhance the contrast and reduce glare.
Backpack: A comfortable and functional camera backpack is crucial for carrying your gear safely while hiking in mountainous terrain.
Weather Protection: Invest in weather-resistant camera gear or use rain covers and dry bags to protect your equipment from harsh mountain conditions.
Planning Your Mountain Photography Expedition
Mountain photography requires thorough planning to ensure a successful and safe outing. Here are some key considerations:
Location: Research the mountain range and specific location you want to photograph. Each mountain range has its unique character and features.
Time of Day: The golden hours around sunrise and sunset offer the best lighting conditions. Plan your hikes and setups accordingly.
Weather Forecast: Stay informed about the weather forecast and be prepared for sudden changes. Clouds, mist, and storms can create dramatic photos.
Safety: Safety should be a top priority. Inform someone of your plans, carry essential survival gear, and be aware of the potential risks, such as altitude sickness and wildlife encounters.
Season: The best time for mountain photography can vary depending on the location. Winter landscapes offer a unique charm, while summer provides lush, vibrant scenes.
Composition and Techniques
Great mountain photography is not just about having the right gear; it's also about composition and technique. Here are some tips to help you create stunning mountain shots:
Foreground Interest: Include a compelling foreground element, such as rocks, flowers, or a winding trail, to add depth and interest to your photos.
Leading Lines: Use natural lines like streams, ridges, or trails to guide the viewer's eye through the image towards the mountains.
Rule of Thirds: Apply the rule of thirds to your composition. Place the horizon on one of the horizontal lines and the main subject at an intersection of the lines.
Framing: Frame your mountain subjects with natural elements like trees or rock formations to create a sense of depth and focus.
Long Exposures: Experiment with long exposures to capture the movement of clouds or the smooth flow of water in mountain streams.
Bracketing: Use exposure bracketing to capture a range of exposures, which can be merged into a high dynamic range (HDR) image in post-processing.
Use a Telephoto Lens: A telephoto lens can compress the scene and make distant mountains appear closer, providing a different perspective.
Silhouettes: Silhouettes can create striking images, especially during sunrise or sunset. Position your subject between your camera and the colorful sky.
Post-Processing and Editing
Post-processing is an essential part of mountain photography. Here are some editing techniques to enhance your mountain photos:
Correct Exposure: Adjust exposure to bring out details in shadows and highlights. Use tools like levels, curves, and exposure adjustments.
Enhance Colors: Mountainscapes often benefit from color adjustments to make the landscape pop. Adjust saturation, vibrance, and contrast.
Crop and Straighten: Use cropping and rotation tools to align the horizon and remove distractions.
Remove Distractions: Use cloning or healing tools to remove unwanted elements from the frame, such as litter or people.
Sharpening: Apply sharpening to enhance the details of the mountains. Be cautious not to over-sharpen and introduce noise.
Export and Share: When exporting your final images, consider the platform where you will share them. Resize and format accordingly.
Ethical Considerations
Mountain environments are delicate and vulnerable to human impact. As a responsible mountain photographer, it's crucial to be aware of your ethical responsibilities:
Leave No Trace: Practice Leave No Trace principles by minimizing your impact on the environment. Stay on established trails, pack out all waste, and avoid damaging vegetation.
Respect Wildlife: Keep a safe distance from wildlife and never disturb or approach them for the sake of a photo. Use long lenses for wildlife shots.
Respect Local Communities: Be mindful of the local culture and communities. Seek permissions when necessary, respect private property, and support local businesses.
Conclusion
Mountain photography is a rewarding and awe-inspiring endeavor. It allows photographers to connect with nature's grandeur and capture its beauty in unique ways. With the right gear, careful planning, and a focus on composition and post-processing, you can create stunning mountain photographs that evoke the same sense of wonder and majesty that these natural wonders inspire in us. Remember to do so responsibly, respecting the environment and the people who call these mountains home. In the end, the beauty of mountain photography lies not just in the images you capture but also in the experiences and connections you build along the way.
Source URL:
0 notes
Text
Top-rated camera bags for outdoor photography enthusiasts

Introduction
As a passionate outdoor photographer, you know that having the right gear is crucial to capture those stunning landscape shots. One of the most important pieces of equipment you'll need is a camera bag that can protect your camera and lenses from the elements while keeping them within reach. In this article, we'll introduce you to some top-rated camera bags for outdoor photography enthusiasts, so you can choose the best one for your needs.
The Importance of a Good Camera Bag
When it comes to protecting your camera equipment, a high-quality camera bag is a must. Not only does it keep your gear safe from scratches, dust, and water, but it also makes it easier to carry everything you need for a successful outdoor photography trip. A good camera bag should have adjustable dividers to accommodate different lenses and accessories, as well as sturdy straps and handles for comfortable carrying.
Moreover, investing in a good camera bag is a smart financial decision, as it can save you money in the long run by avoiding costly repairs or replacements.
According to Digital Photography School, a leading online photography community, the best camera bags on the market offer excellent protection, access, comfort, and versatility.
Types of Camera Bags
There are several types of camera bags to choose from, each with its own pros and cons:
Backpacks: These are the most popular type of camera bags for outdoor photographers. They offer plenty of space for multiple lenses and accessories, and they distribute the weight evenly across your back for maximum comfort. They're also easy to carry on hikes or long walks.
Messenger Bags: These are a good alternative to backpacks if you prefer carrying your camera gear on one shoulder. They usually have a wide flap that makes it easy to access your equipment, but they offer less storage and protection than backpacks.
Sling Bags: These are a hybrid between backpacks and messenger bags, with a single strap that goes across your chest and a quick-access zipper for your camera. They're lightweight and easy to carry, but they can be uncomfortable if you need to wear them for long periods of time.
Rolling Bags: These are ideal if you have a lot of heavy gear that you can't carry on your back. They have wheels and a retractable handle, so you can roll them around like a suitcase. However, they're not as suitable for rough terrain or narrow paths.
Top-rated Camera Bags
Now that you know the different types of camera bags, let's take a look at some of the top-rated options according to Digital Photography School:
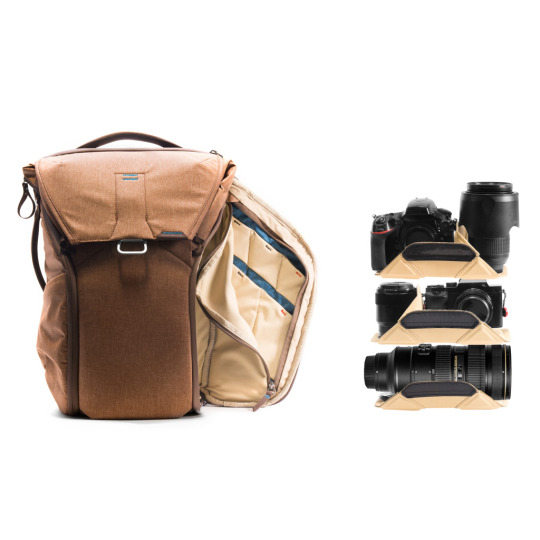
1. Peak Design Everyday Backpack
This backpack is a favorite among photographers for its sleek design, customizable compartments, and weather-resistant construction. It can hold a DSLR or mirrorless camera, up to 3 lenses, and a 15-inch laptop. It also has external straps for carrying a tripod or other accessories.
2. Think Tank Photo StreetWalker Pro
This backpack is designed for serious photographers who need to carry a lot of gear on long expeditions. It can hold a large telephoto lens, up to 4 other lenses, a camera body, and accessories. It also has a tripod holder and a rain cover.
3. Tenba Solstice 20L
This backpack is great for day trips or short hikes, as it can accommodate a mirrorless camera with 3-5 lenses, a 10-inch tablet, and personal items. It has a removable camera insert, side pockets, and a front tripod holder.
4. Lowepro Protactic 450 AW II
This backpack is perfect for adventurous photographers who need to carry a lot of equipment in rugged environments. It can hold 2 DSLRs, up to 8 lenses, a laptop, and accessories. It also has a built-in all-weather cover and a modular accessory system for attaching extra gear.
Conclusion
Choosing the right camera bag is essential to protect your equipment and make your outdoor photography journey as comfortable as possible. Whether you prefer a backpack, messenger bag, sling bag, or rolling bag, make sure to choose one that offers excellent protection, access, comfort, and versatility. Brands such as Peak Design, Think Tank Photo, Tenba, and Lowepro offer some of the best camera bags on the market, but there are many other options out there to suit your individual needs and preferences. Happy shooting!
Article source: None camera bag
0 notes
Text
Hiking Photography: How to Capture Stunning Landscape Shots on the Trail
Hiking and photography go hand in hand, allowing us to capture the awe-inspiring beauty of nature and preserve our outdoor adventures. However, capturing stunning landscape shots while hiking can be challenging without the right techniques and preparation. In this blog post, we will delve into the world of hiking photography and provide you with practical tips and advice to help you capture breathtaking landscape shots on the trail. From composition to equipment choices, let's explore how to elevate your hiking photography skills to the next level.
Plan and Research: Before embarking on a hiking photography excursion, it's crucial to plan and research your destination. Study the area's topography, weather conditions, and best times for optimal lighting. Familiarize yourself with potential viewpoints, trails, and points of interest that offer picturesque landscapes. This preparation will help you make the most of your time on the trail and increase your chances of capturing stunning shots.
Pack Light and Smart: Hiking photography requires careful consideration of the equipment you carry. Opt for a lightweight and versatile camera setup that won't weigh you down during long hikes. A mirrorless camera or a compact DSLR with interchangeable lenses is ideal for balancing image quality and portability. Pack essentials such as extra batteries, memory cards, a tripod, and lens filters to enhance your shots.
Master Composition Techniques: Composition is the backbone of any great photograph. Apply the rule of thirds, leading lines, and foreground interest to create visually compelling images. Experiment with different perspectives and angles, such as shooting from low or high vantage points, to add depth and dimension to your shots. Remember to include elements that convey a sense of scale and emphasize the grandeur of the landscape.
Utilize Golden Hour Lighting: Golden hour, the period shortly after sunrise and before sunset, offers the most magical lighting conditions for landscape photography. The soft, warm hues cast by the sun during this time create a captivating atmosphere. Plan your hikes accordingly, ensuring you're on the trail during these golden hours to capture the ethereal beauty of nature. Experiment with backlit shots, silhouettes, and long shadows for added drama.
Pay Attention to Weather and Clouds: Weather and cloud formations can significantly impact the mood and visual impact of your landscape shots. Keep an eye on the weather forecast and look for dynamic cloud patterns, dramatic skies, or stormy atmospheres that can add interest and drama to your photographs. Be patient and wait for those fleeting moments when the weather conditions align with your vision.
Incorporate Human Elements: Including human elements in your hiking photography can add a sense of scale, adventure, and storytelling to your shots. Capture fellow hikers in the frame, showcasing their interaction with the environment and highlighting the joy of exploration. Be mindful of the composition, ensuring that the human element complements and enhances the overall image.
Experiment with Long Exposure: Mastering long exposure techniques can elevate your hiking photography to new heights. With the help of a tripod and neutral density (ND) filters, you can capture the movement of waterfalls, streams, or clouds in a mesmerizing way. Long exposures add a sense of tranquility and ethereal beauty to your images, creating a unique visual experience for viewers.
Post-processing and Editing: Post-processing is an essential step in bringing out the full potential of your hiking photographs. Use editing software like Adobe Lightroom or Capture One to fine-tune exposure, colors, and contrast. Enhance details, correct lens distortions, and remove any distractions. However, strive for a balance between enhancing your images and maintaining their natural beauty.
Respect Nature and Leave No Trace: Lastly, as hiking photographers, it's our responsibility to respect and preserve the natural environment while capturing our stunning landscape shots. Adhere to the principles of Leave No Trace, which include minimizing your impact on the environment, staying on designated trails, and packing out all your trash. Avoid trampling vegetation or disturbing wildlife for the sake of a photograph. Remember, the preservation of nature is just as important as capturing its beauty.
Practice Patience and Persistence: Capturing breathtaking landscape shots on the trail requires patience and persistence. Nature is unpredictable, and the perfect shot may require multiple attempts or return visits. Be willing to wake up early, stay late, and wait for the right moment. Embrace the serendipity of hiking photography and be open to unexpected opportunities that may arise along the way.
Develop Your Unique Style: While it's inspiring to learn from other photographers, it's essential to develop your own unique style and vision. Experiment with different techniques, compositions, and perspectives to find what resonates with you. Use hiking photography as a means of self-expression and storytelling. Let your passion for nature shine through your images.
Share and Connect: Finally, don't forget to share your hiking photography with others. Share your work on social media platforms, create an online portfolio, or even participate in local exhibitions or contests. Engage with the hiking and photography communities, both online and offline, to connect with like-minded individuals and gain inspiration from their work.

0 notes
Text
Premium Photography Equipment for Swiss Excursions
Capturing the Beauty of Switzerland
Switzerland boasts some of the most stunning scenery in the world. From the snow-capped Alps to the serene lakes and charming towns, there is no shortage of breathtaking landscapes to capture. For photographers looking to capture the beauty of Switzerland, having the right equipment is essential.
The Camera
The camera is the most important piece of equipment for any photographer. When it comes to capturing the beauty of Switzerland, a high-quality DSLR camera is recommended. A camera with a full-frame sensor, such as the Canon EOS 5D Mark IV or the Nikon D850, will give you the best image quality and allow you to capture more detail in your shots. A wide-angle lens is also a great investment for landscape photography. The Canon EF 16-35mm f/2.8L III USM or the Nikon AF-S NIKKOR 16-35mm f/4G ED VR are both excellent choices.
The Tripod
When photographing landscapes, a tripod is essential for keeping your camera steady and getting sharp images. The Manfrotto MT055CXPRO4 or the Gitzo GT1545T Series 1 Traveler are both sturdy and lightweight options that are ideal for travel photography.
The Filters
Filters are another important piece of equipment for landscape photography. A polarizing filter can help reduce glare and make colors more vibrant, while a graduated neutral density filter can help balance the exposure between the sky and the foreground. The Lee Filters Landscape Pro Kit or the Hoya 77mm Digital Filter Kit are both great options.
With the right equipment, you can capture the beauty of Switzerland and create stunning images that will last a lifetime. Don't forget to pack extra batteries and memory cards, and always carry your equipment in a sturdy camera bag to protect it from the elements.
Cameras for the Ultimate Swiss Experience
1. DSLR Cameras
DSLR cameras are an excellent option for capturing stunning landscapes and cityscapes in Switzerland. They allow you to change lenses depending on your need and capture detailed and high-quality images. Some popular options include the Nikon D850 and the Canon EOS 5D Mark IV.
2. Mirrorless Cameras
Mirrorless cameras are a more compact and portable option, yet still offer excellent image quality. They are perfect for hiking and outdoor activities due to their lightweight build. The Sony Alpha a7 III and the Fujifilm X-T4 are popular mirrorless camera options.
3. Action Cameras
Action cameras are perfect for capturing the adrenaline-fueled activities Switzerland has to offer. They are compact, lightweight, and can withstand extreme weather conditions. The GoPro HERO9 Black and DJI Osmo Action are popular action cameras.
4. Smartphone Cameras
Don't underestimate the power of your smartphone camera. With the latest smartphones, you can capture high-quality images with ease. The iPhone 12 Pro Max and Samsung Galaxy S21 Ultra offer exceptional camera quality and features like night mode and 8K video recording.
5. Instant Cameras
For a more retro and fun experience, consider bringing an instant camera to capture your Swiss adventure. The Fujifilm Instax Mini 90 and the Polaroid Now are popular instant cameras that allow you to capture and print your memories instantly.
Regardless of which camera type you choose, remember to pack extra batteries, memory cards, and a tripod for stable shots. With the right equipment, you can capture stunning photos of Switzerland's natural beauty and vibrant cities.
Lenses for Every Scenic Shot
When it comes to capturing the beauty of Swiss landscapes, having the right lenses is essential. Here are some of the best lenses to bring on your Swiss excursion:
Wide-angle Lens
A wide-angle lens is perfect for capturing sweeping vistas of the Swiss Alps and the countryside. Look for a lens with a focal length of 10-24mm, such as the Canon EF-S 10-22mm or the Nikon AF-P DX NIKKOR 10-20mm. These lenses are great for group shots and landscape photography.
Telephoto Lens
If you want to get up close and personal with the wildlife, a telephoto lens is the way to go. Look for a lens with a focal length of 70-200mm, such as the Sony FE 70-200mm f/4 G OSS or the Canon EF 70-200mm f/4L IS II USM. These lenses are perfect for capturing detailed photos of the Swiss Alps and the wildlife that call them home.
Macro Lens
If you're interested in capturing the intricate details of Swiss flora and fauna, a macro lens is a must-have. Look for a lens with a focal length of 60-105mm, such as the Nikon AF-S VR Micro-Nikkor 105mm f/2.8G IF-ED or the Canon EF 100mm f/2.8L Macro IS USM. These lenses are perfect for capturing close-up shots of flowers, insects, and other small details.
Standard Zoom Lens
A standard zoom lens is a versatile option that can be used in a variety of situations. Look for a lens with a focal length of 24-70mm, such as the Tamron SP 24-70mm f/2.8 Di VC USD G2 or the Nikon AF-S NIKKOR 24-70mm f/2.8E ED VR. These lenses are great for everything from landscape photography to portraits.
By investing in the right lenses, you can capture stunning photos of the Swiss scenery and wildlife. Whether you're a professional photographer or just starting out, these lenses are a must-have for anyone looking to capture the beauty of Switzerland.
Tripods for Stable and Clear Shots
To achieve the sharpest and most stable shots, a tripod is necessary for any photographer. A tripod ensures that your camera is kept still, minimizing camera shake and allowing you to maximize image quality.
Features to Look for in a Tripod
When selecting a tripod, there are a few key features to consider. The first is weight. You want a tripod that is sturdy enough to handle your camera and lenses, but not so heavy that it's cumbersome to carry around. Another important feature is height – look for a tripod that is tall enough to suit your needs. Finally, consider the materials – aluminum is lightweight but not as stable as carbon fiber, while wood tripods offer a unique look but are heavier than other options.
Advantages of a Tripod
Using a tripod has several advantages beyond just stability. It allows for precise composition, as you can make small adjustments without having to move the camera. It also forces you to slow down and think more intentionally about your shots, leading to higher quality images. Additionally, a tripod can help you achieve longer exposures, which can produce stunning nighttime or motion blur images.
Overall, investing in a quality tripod is essential for any serious photographer looking to capture sharp, clear shots.
Filters to Enhance Your Images
Capturing stunning photographs while on a Swiss excursion requires the right equipment, including filters that can enhance your images. Here are some filters you should consider:
Polarizing Filter
A polarizing filter reduces glare and eliminates reflections from non-metallic surfaces, such as water, glass, and foliage. This filter helps to saturate colors and deepen blue skies, making landscapes appear more vivid and crisp.
Neutral Density Filter
A neutral density filter reduces the amount of light entering the lens, allowing for longer exposures and creative effects, such as blurred motion. This filter is useful in bright daylight situations when you want to create a shallow depth of field or capture a flowing waterfall with a blurred effect.
Graduated Neutral Density Filter
A graduated neutral density filter helps to balance exposure between the sky and foreground in landscape photography. This filter has a darkened portion at the top and a clear portion at the bottom, creating a gradual transition to balance the exposure.
Infrared Filter
An infrared filter blocks visible light and allows only infrared light to pass through the lens. This filter creates a unique and surreal effect, turning green foliage white and the sky into a deep blue or black.
Using the right filter can significantly enhance your images and help you capture the beauty of Switzerland. Don't forget to research and test filters before your trip to ensure that you have the right filter for the type of photography you want to capture.
Accessories to Elevate Your Photography
While a high-quality camera and lens are important for capturing stunning photos, accessories can also elevate your photography and enhance the overall experience. Here are some essential accessories to consider bringing on your Swiss excursion:
Tripods
A tripod is a must-have for capturing sharp and well-composed photos. It can also help you stabilize your camera in low-light situations, allowing you to use a slower shutter speed without introducing camera shake. Look for a lightweight and sturdy tripod that can handle the weight of your camera and lens.
Filters
Filters can help you achieve specific effects while shooting, such as reducing glare or enhancing colors. Polarizing filters can help you capture clearer images of water and skies, while neutral density filters can allow you to use a slower shutter speed in bright light.
Battery Pack or Extra Batteries
Don't let a dead battery ruin your photography adventure. Bring along a spare battery or a battery pack to ensure that you have enough power to last throughout the day.
Remote Shutter Release
A remote shutter release can help you avoid camera shake when taking long-exposure shots or self-portraits. It can also be useful for capturing wildlife or other subjects without disturbing them.
Lens Cleaning Kit
Clean lenses are essential for capturing sharp and clear photos. A lens cleaning kit can help you remove dust and fingerprints from your lenses, ensuring that your images are free of blurry spots and smudges.
Camera Bag
A good camera bag can protect your gear from bumps and scratches while also making it easy to carry. Look for a bag that is comfortable to wear and has enough room to fit your camera, lenses, and accessories.
By investing in these essential accessories, you can elevate your photography and capture stunning images during your Swiss excursion.
Conclusion: Investing in Quality Equipment Pays Off
As we conclude this article, one thing is clear – investing in quality photography equipment pays off, especially when traveling to scenic destinations like Switzerland. Not only does premium gear allow you to take exceptional photos that showcase the beauty of your surroundings, but it also ensures durability and longevity, saving you money in the long run.
Benefits of investing in quality equipment
Aside from producing high-quality images, investing in quality equipment also offers other benefits. For one, it provides better ergonomics and comfort, allowing you to take photographs for extended periods without experiencing fatigue or discomfort. Additionally, quality gear ensures better autofocus, image stabilization, and low-light performance, which are all crucial factors when taking pictures in challenging environments.
Choosing the right equipment
When investing in premium photography gear, it's essential to consider your needs and preferences carefully. Ensure you choose the right camera, lenses, and accessories that meet your requirements, budget, and photographic style. Also, remember to research the equipment thoroughly and read reviews before making a purchase decision.
Final thoughts
Switzerland is an excellent destination for photographers, and with the right equipment, you can capture stunning images that tell a story and leave a lasting impression. Investing in quality photography gear may seem like a hefty expense, but it's a worthwhile investment that pays dividends in the long run. So, whether you're a professional photographer or a hobbyist, consider upgrading your gear and taking your photography game to the next level!
If you're looking for inspiration for your luxury travel photography, check out Mykonos - An Ideal Destination for Luxury Travel Photography Enthusiasts.
Read the full article
0 notes
Text
Seascapes and Wildflowers in San Francisco
Join Chris Crosby and Bruce Getty, for a sunset workshop in San Francisco!
Learn how capture the best results in difficult lighting conditions at sunset through proper exposure, solid compositions, long exposure, exposure blending, use of filters and more. See more below
There are two sessions available. Choose one or take both!
April 15th at Marshall’s Beach (Seascape)
April 16th at Golden Gate Bridge (Wildflowers)
Overview
During this workshop, Bruce Getty and Chris Crosby will guide you to some of the most interesting areas surrounding the Golden Gate Bridge in San Francisco, some well known and some hidden gems. Beautiful wave action, blooming wildflowers and the Golden Gate Bridge are just a few of the incredible opportunities for translating emotion and vision through our photographic medium. We are dedicated to providing the best instruction on all aspects of the art of landscape photography. Whether you are just beginning or are a seasoned pro, we are ready to help you move forward with your photography.
Curriculum
Curriculum will be catered to each individual’s skill level and may vary from student to student. Below you’ll find some common topics based upon different skill levels.
BEGINNER-INTERMEDIATE
Fundamentals are essential in the development of any skill, photography is no different. Below you’ll find some sample topics to help you develop yours:
Shooting in Manual Mode
Understand The Exposure Triangle and how each affects the image (aperture, ISO, shutter speed)
How to Meter and Expose for best results
Using light for better captures
Compositions made simple and easy
Understanding and using camera settings and menu options
ND’s, Polarizer and Grads - Which to use and when to use it
Tips and Tricks for easier workflows and shooting experience in the field
INTERMEDIATE - ADVANCED
Those who have a greater understanding of their cameras will get some more advanced shooting techniques to focus on light, location and making good decisions to make the most of the variables. Some advanced topics are listed below:
Exposure bracketing and blending
Focus stacking for depth of field and sharpness
Creative blending to bring the vision to life
Composing for interest, depth and focus
Physical Requirements
Since this is an infield workshop, some walking will be involved. Most locations are not far from parking areas, however, students need to be ready to be able to walk/hike to get to shooting area and good compositions.
Things To Bring
Equipment:
DSLR / Mirrorless camera and lenses
Wide Angle Lens – 12-24mm
Mid to Long Range Zoom – 24-70, 70-200, 100-400
A sturdy Tripod for wave and wind stability
Filters - Neutral Density Filters and CPL
Remote / cable camera shutter
Several memory cards
Spare camera batteries
Head torch (for any night or low light walking and shooting)
Rain cover for camera and camera bag can come in handy in some rare cases of water splash, rain or high wind!
Small Camping Chair or Stool for comfort if standing for long periods is an issue
Clothing Items:
Many layers – As the afternoons wear on it can get quite chilly and a jacket is recommended
Comfortable walking shoes or Hiking Shoes/Boots are recommended for wildflowers
Water Shoes are recommended for seascape session. Be prepared to get your feet wet to get the shot.
Food:
Food, Water, and all other essentials. No Food or water will be provided before, during or after the workshop. Plan ahead and have water and snack on hand to keep your energy up.
Payment, Fees and Terms
COST: The cost of the workshop is $200 for each session and must be paid in full to reserve your spot in the workshop
PAYMENT: Payment(s) can be made using the Add To Cart button of this web page using a credit card via PayPal and Stripe. If you would like to pay by another method, please reach out to Chris.
CANCELLATIONS: Cancellations require us to re-open enrollment and/or to engage in additional promotional efforts to fill the workshop on a short notice, therefore, our policy is that there will be no refunds of the payment within 30 days of the workshop date. All refunds are subject to a 6% processing fee.
We highly recommend that you obtain travel/cancellation insurance for all workshops to protect yourself against unusual circumstances.
SUMMARY
Your satisfaction, enjoyment and educational experience is important to us. The goal of this workshop is to allow you to further understand your camera, composition and artistic expression while using the amazing landscapes around the Golden Gate Bridge. We want to ensure that everyone comes away with great instruction as well as a great experience in nature. Most importantly, we are going to have fun! Having fun is a critical part of any good photography adventure. When you have fun, your mind is free to expand and learn!
Transportation
No Transportation will be provided to, from or during the workshop. All attendees are responsible for arranging their own transportation to and from as well as any parking fees that might be required.
0 notes
Text
The Ultimate Guide To The Best Camera For Camping And Hiking
What do you know about best action camera under 100.
Hiking and camping are activities that many people enjoy. However, if you want to take your photography to the next level, you need a good camera. In this article, we will explore the best camera for camping and hiking. We will cover everything from what features to look for to how to choose the perfect camera for your needs. By the end of this guide, you will have everything you need to take great photographs on your next hike or camping trip.
How to choose the best Camera for Camping and Hiking?
When it comes to choosing the right camera for camping and hiking, there are a few things to take into account.
First, what kind of photography do you plan on doing? A point and shoot camera will work just fine for taking snapshots of your campsite or trails, but if you want to take professional-grade photographs, a DSLR is the way to go.
Second, how much money are you willing to spend? A good starter camera can be picked up for around $100, while a top-of-the-line model can cost upwards of $1,000. If you only plan on using your camera occasionally for camping trips and hikes, then a less expensive option may be best for you.
Third, what type of environment will you be using your camera in? Cameras that are designed for colder temperatures can take better pictures in winter weather than those that are not. Likewise, cameras that can handle more moisture (such as rain or snow) will perform better in environments with higher levels of humidity.
Now that you have all of the information you need to choose the perfect camera for your needs, it's time to get shopping!
What Accessories should you buy with your Camera for Camping and Hiking?
If you’re looking to take your photography skills outdoors, there are a few accessories you may want to consider purchasing.
First, get a tripod. A camera on a tripod is steadier and will give you more accurate shots. Make sure to find one that can support your camera weight and length.
Next, get some extra batteries. Even if you only plan on taking pictures of the scenery, it’s important to have enough power in your camera so that you can snap away without feeling constrained by battery life.
Finally, consider buying a lens protector or filter. These will help protect your lens from bumps and dirt while out in the wild.
Conclusion
Whether you're a beginner camping or hiking enthusiast, it's important to have the right camera for the job. In this article, we've outlined some of the best cameras for both activities and provided tips on how to choose the perfect one for you. Whether you're looking to capture those memories of a lifetime by capturing nature in all its splendour or just want to snap some photos of your food while camping, a good camera is essential. So whether you're shopping for your first DSLR or upgrading to a more advanced model, make sure to read our guide and find the perfect camera for your needs!
0 notes
Text
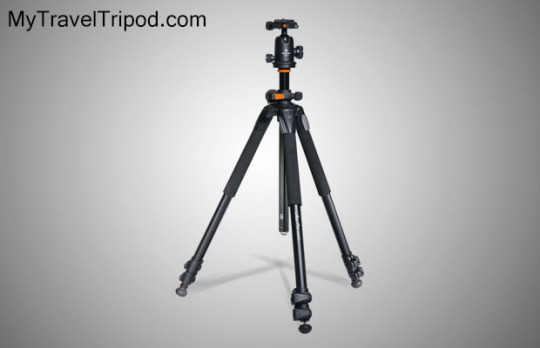
Carbon Fiber or Aluminum tripod/monopod?
If you've bought a monopod or a tripod, you probably feel a bit dizzy and confused, right? If you are, you
First, check these two points. To select a professional video tripod and select a tripod head. Then read the last time. After selecting the head type and lock mechanism, you must select the material in which it will be made. Currently, only two key materials are apparently produced: aluminium and carbon fibre plus basalt.
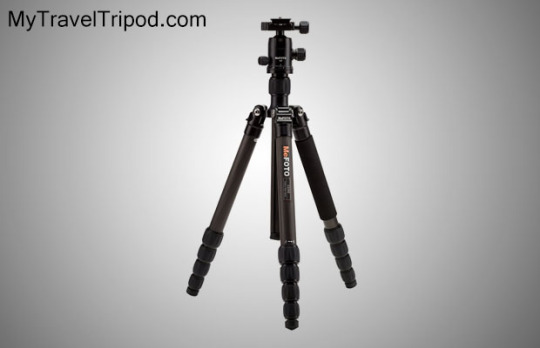
[Gitzo built a tank from a steel zomei tripod (?) That ALWAYS lasted, but it's not clear if he can buy it again.] What's the difference? At the moment, the high-end is made of carbon fibre, it's lighter, stiffer, and absorbs more vibration than the other two. Then comes the basalt (but it seems only Gitzo does it) and then there is aluminium. In other words, aluminium is the heaviest, the least stiff and the most vibrant of the other two. The only other difference is the price. Carbon fibre is the most expensive and aluminum the cheapest.
That means if you want to lose weight, do your homework! Sometimes carbon fibre gives no less unity when you compare apples to apples. For example, if you look at an aluminium monopod versus carbon fiber of the same size, you'll find that the weight difference is small. The price is, however, up to 5x higher. However, if you're considering a full carbon fiber vs aluminum tripod (5ft +), a carbon fiber version can be a lot lighter. This depends on the manufacturer, the head and other parts used, which may save you weight or not.
Basically, all photographers (except studio photographers) are concerned with the weight of how we or an assistant wear it, and who wants to carry more weight? But before you go on a carbon fiber tripod, you should consider it. The reason you need a tripod is stability. For example, you make a long exposure (night shot) or you use a very large lens of 1000 mm, etc. The problem with a aluminum vs carbon fiber tripod is that it is light.
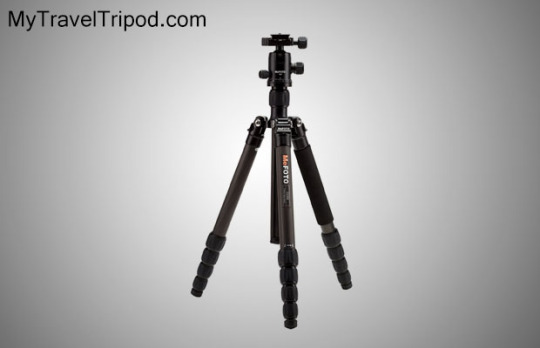
Carbon fibers are stronger than aluminum and absorb soil vibration better (all good). If they are not big and stable, they are likely to be overturned by you or a strong wind. Or just move because of the wind. This contradicts the purpose of a lightweight tripod. In the end, we think it's probably hard to know if you really save weight if you opt for carbon fiber. Sorry guys...
#best carbon fiber tripod under $200#hiking tripod dslr#hiking camera tripod#hiking camera tripods#lightweight camera tripod for hiking#best dslr tripod under 200#best tripods under $200#ultralight backpacking tripod#davis & sanford tr654c 36 review#lightweight tripod for backpacking#best tripods under 200#best tripod under 200 dollars#best tripod under 300#ultralight tripod for backpacking#backpacking tripod#best tripod under 500#best tripods for under 100#z818#zomei tripod#lightest tripod for backpacking
0 notes
Link
If you like games and photos of natural life or need a lighter option than a tripod but are strong enough to take clear pictures, you need a best monopod for sports photography. Our most recommended is the monopoly Sirui P-326. It is lightweight but can support up to 22 lbs, making it ideal for use with high zoom focus. The biggest difference is that a monopod has only one leg and cannot stand alone.
#best tripod under 500#z818#carbon fiber vs aluminum tripod#hiking tripod dslr#davis & sanford tr654c 36 review
0 notes
Link
Check out this listing I just added to my Poshmark closet: Ferndean Camera Padded Compartment Backpack Storage for lenses Flash Batteries.
0 notes
Text
Turns out I'm not just going out hiking in ranger gear on Friday for just pictures, I'm going to video the hike. I've been watching tips and tricks on YouTube from people who do hiking/backpacking channels, and editing tricks. I've already got the video editing software from doing pirate stuff, and just spent sometime outside just now playing with the DSLR settings.
With any luck itll be a success. It'll be my first time hiking alone, but it seems that's how most do their videos. Simply because of all the extra effort and time required to mess with camera settings and tripod stuff and so on, backtracking to go back and grab the camera etc. So, gonna pack a lunch and make a day of it, taking my time. The hike is normally about 2.5 hrs to do the loop, but I'm going out from 11 until 5ish.
But its a loop I've done about 10 times, people frequent it, and we've not seen any non-bird wildlife before. I should be fine. :)
8 notes
·
View notes
Text
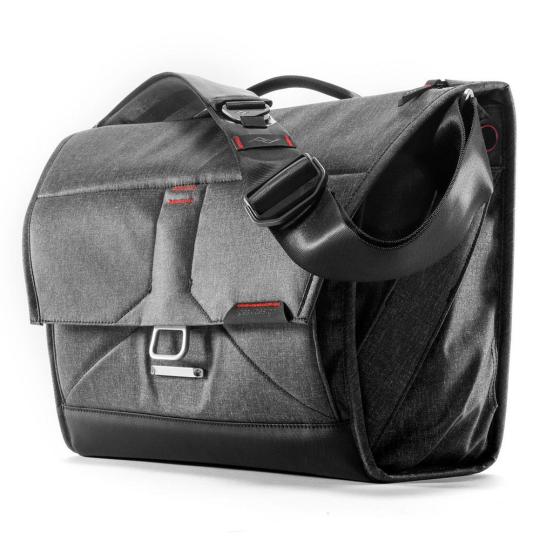
Peak Design Everyday Backpack 30L - The Review

So we’ve arrived. The culmination of years of fine-tuning and honing in what I look for in a bag. Years of tastes growing, becoming uber-specific and demanding. And 6 months of searching for a very good bag that won’t (totally) break the bank. Something that a frugal person can still say is worth every penny.
Behold, my EDC choice: The Peak Design Everyday Backpack in 30L, Charcoal.
Peak Design first caught my eye when they developed the Everyday Messenger Bag. I was thoroughly taken by how a bag could be so simple, yet powerful. It didn’t require very specific pockets for every possible item. What it had was a thoughtful and novel approach to organization that, while based on camera gear, worked exceedingly well for EDC. With thoughtful and useful pockets, the ability to expand, and those awesome gear dividers, I knew they had a winner. But I was already getting past the stage of messengers and looking at backpacks. if only they did a backpack...
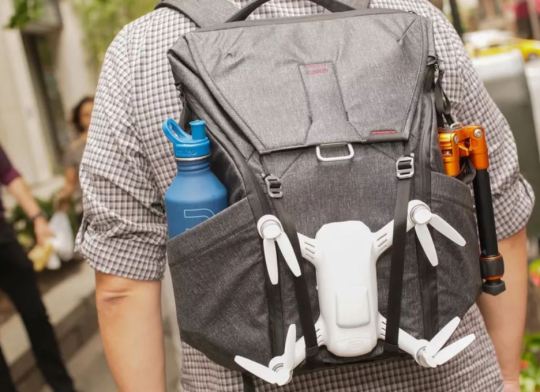
... And then they did. And what a backpack. It was very hard as a designer not to fall down the rabbit hole of videos on the features and uses of this bag. There really isn’t a whole lot you’d wanna do with this (as an EDC/typical travel bag) that you can’t do. True, it’s not submersible, and I don’t think it would do well with a hydration bladder, so it won’t really work as a hiking pack. But aside from that, this thing really can do it all. Drone carry? Check. Tripod? Check. Yoga mat? Check. Lots of giant water bottles? Check. Laptop and tablet? Check. Camera gear for days? Check. Room to grow? Check. Slinging a days worth of purchases from the Mahane Yehudah Market in Jerusalem? Check.
There’s no shortage of reviews and videos breaking down this bag, so I won’t get into all the nitty gritty of what makes it awesome. It’s pretty much unanimous that it is. So I’ll go through why it checks my particular boxes, and then run through how I think it could get even better.
1) Masterful Organization
Major pros here, a few cons. Overall, Peak addresses my biggest issue with backpacks, which was really the main sell for me. They employed a way for me to subdivide the giant big pocket into smaller chunks that are easy to reconfigure in both immediate ways (simply flipping a flap one way or another) or more semi-permanent ways (removing/adding a divider, or simply moving one). This is epic. This scratches my organization itch SO SATISFACTORILY. 2 side water bottle pockets (more on that below), handy soft-lined kinda hidden zipper pocket at the top of the laptop compartment, interior hidden passport pocket, and 2 side panels of smaller organization which expand to hold FREAKING ANYTHING. Seriously, I’ve never not been able to fit something in there, even things that obviously should not fit. And it’s got hidden loops and tethers all over the place for carrying literally any kind of weird thing strapped to the outside as well. It covers all the bases, some better than others, but certainly covers them all. I can store big stuff, little stuff, weird stuff, and more, and know it will all have a place, no matter the size or shape or fragility. Other than documents. More on that later. And it’ll grow to add more. YES.
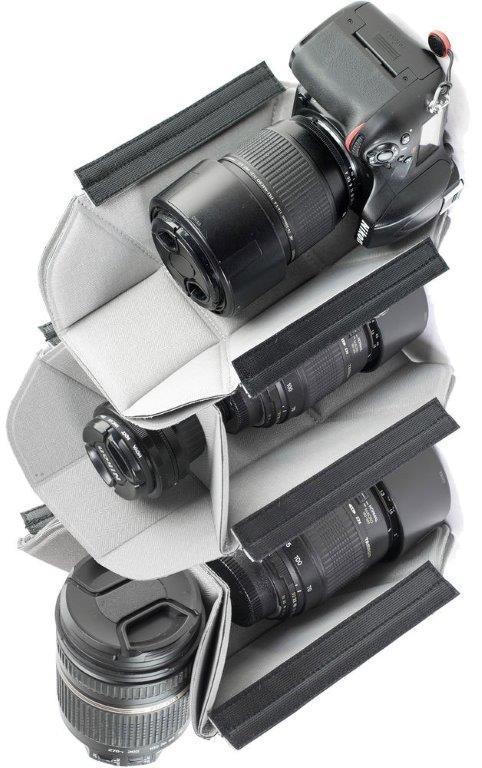
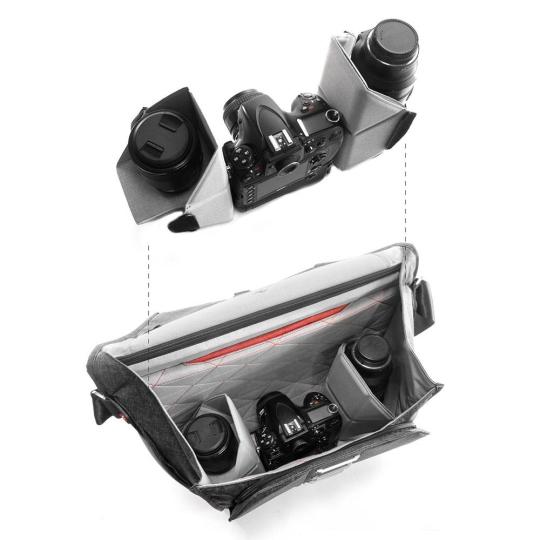
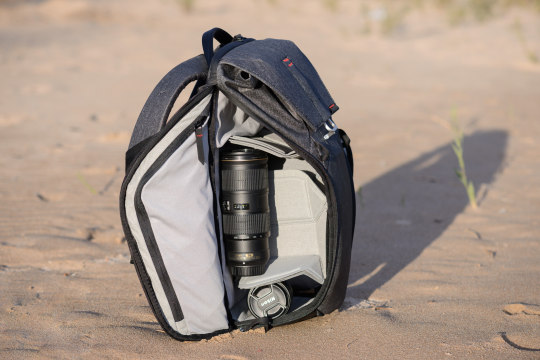
2) DSLR/Camera Carry
This is what Peak Design focuses on, and this is what they do exceedingly well. Taking cues from many other DSLR carry inserts, their origami style dividers have flaps that allow you to move a portion of these semi-rigid dividers to the side to make way for larger camera grips, or lay long lenses across. But that’s an understatement. These movable flaps give an excellent combination of structure, flexibility, protection, and modularity to allow for nearly any kind of setup you’d like. They pretty damn well near nailed this aspect of bags.

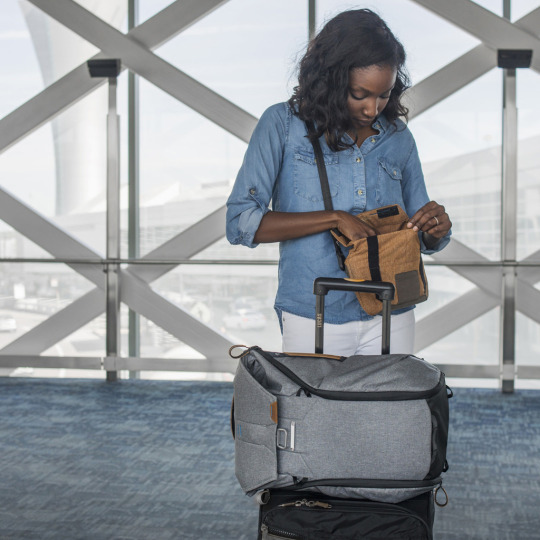
3) Travel Buddy/EDC Buddy
Yeah, it’s more or less a joy to use this bag for travel and EDC. It flexes nimbly between what I use everyday and the particular items I carry for travel. It grows to carry my extra gear for travel (prayer paraphernalia, books, cable pack, snacks), yet shrinks back to a reasonable size when all I’ve got is my lunch and collection of way-too-many EDC knives.

And no matter the kind of trip, it can tackle it. Overnight stay to get away from the kids? Done. 3 day work trip to North Carolina? No problem. 3 day winter break with the kids in Louisville? Got it. Week with the boys in Scotland? Yup. 10 days with the wife in Israel, along with day-pack use? Check. 2.5 day Design Show in Milan? Sure.

It’s a great airport companion, as the quick release strap adjusters and swing-to-the-side move make backpack carry almost as easy to access as messenger carry, and always stymies TSA just enough that they tend to give up on it quick and leave me alone. And I love being the only guy on the Metra in Chicago with this bag. Other than that one time I sat next to another dude with the same bag, and proceeded to make a new friend.
4) Backpack Carry
Now almost any backpack could theoretically satisfy this requirement, but Peak does it in a pretty special way. The straps are fairly comfortable, very ergonomically sculpted, and have a giant swiveling rivet at the top that allow it to fit my 6′2″ 230 pound frame, as well as my 5″4′ 120 pound wife, all without issue. It has a somewhat ventilated back panel, to ease comfort a little (but still doesn’t quite measure up to a serious hiking pack like an Osprey), though it will still yield a pretty sweaty back with prolonged wear. But for a bag that’s rigid, holds its shape well, stand on its own when you put it down, protects your gear, and has a water-resistant coating, it’s a pretty dang comfortable bag.
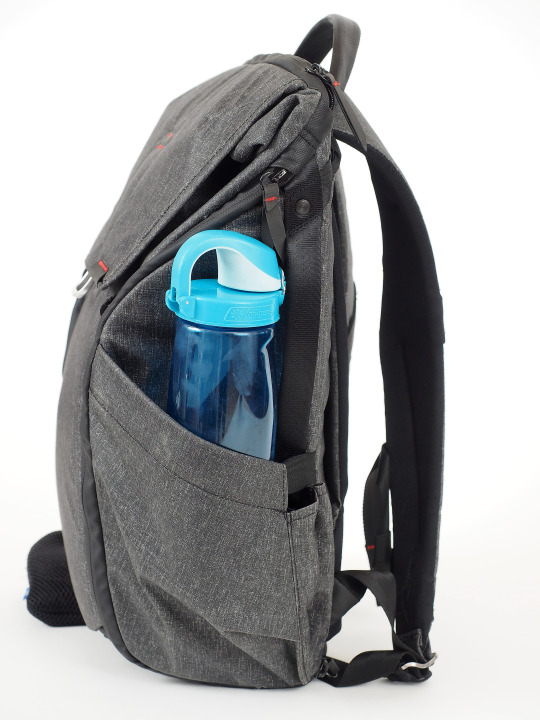
5) Water Bottle Carry
YES. This bag does this better than almost any I’ve seen. The side pockets are deep, fit even GIANT bottles, and somehow tuck flat back against the bag when not in use. It looks fitted empty, with my slim travel umbrella, or a 750ml bottle in it. And it has a pocket on BOTH sides.

6) Laptop Carry
Do you carry a giant 17″ CAD Mobile Workstation? Then you’re out of luck. Anything else, and you’re covered. It fits my 15″ Mobile Workstation just fine, and that’s massive. The 20L would fit a 15″ standard laptop as well. It’s got a soft protected pocket with top access, keeping it separate from the main compartment, and it expands to the inside of the bag when occupied, so the bag does not physically grow when you add a laptop. I find it nice that the bag always maintains the same profile. I don’t have to readjust on the train to avoid hitting people if all of a sudden my bag is really full. It also has a tablet sleeve, but I find it hard to keep one in there if I’m toting my beast laptop. Admittedly, this is a problem for very few people.

7) Svelte but Spacious
As I said above, I love the fact that the profile of this bag pretty much never changes. Yes, it gets slightly taller when it’s crammed, but front to back, side to side, it’s always the same, semi-rigid structure. It’ll always fit under the seat in front of me on the plane. I won’t accidentally hit people with it because I forgot I added a pair of shoes. Yet it looks sleek, and not gargantuan, even though it can hold up to a generous 30L. It’s more like 22L when not fully expanded. Granted, it looks on the larger side when my wife is carrying it, but on a, uh, fully grown male such as myself, it looks just fine. Not too large for EDC.

8) Generally Awesome
Designers like toys. We love novelty. Cool features. Little pleasant surprises. This bag is full of them, and they continue to provide joy on a daily basis. This is how products should be. From the unique magnetic latch and bar system, to the hidden magnets for the water bottle and hidden pockets (everyone loves magnets), various hidden tethers, stretchy expandable pockets, lovely detailed hardware, plethora of carry handles that don’t look like luggage handles, this bag just delights over and over. Even with it’s few frustrations.
Ok, so now I want to share my wishlist for the next Everyday Backpack. Nothing is perfect, and this bag is no exception. So here are the VERY FEW issues I have with this bag, after about 2 years of use for both EDC carry and frequent travel, both domestic and international.
1) I wish there was a small, quick access pocket. Not big, not deep, but a pocket on the outside of the bag that I can stick the boarding pass, earbuds, train ticket, spare change, passport, or whatever single random small thing I need to stick somewhere that's not in my pants pocket, but can quickly take it right back out without undoing 2 zippers or a flap. Like the Timbuk2 Napoleon pocket.
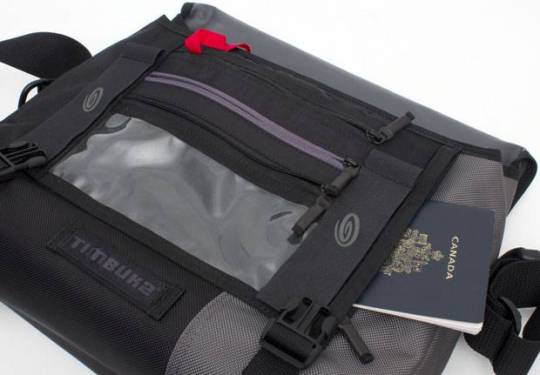
Maybe along the seam between the side and back panels. A little 6 inch zipper. I like the pocket in the laptop pocket, but can't access that with the quick sling to the side move. I would like to get at that pocket using that move.
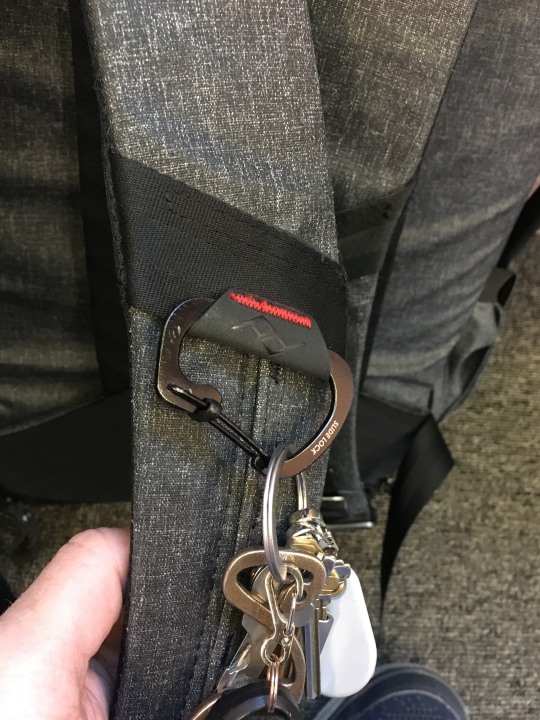
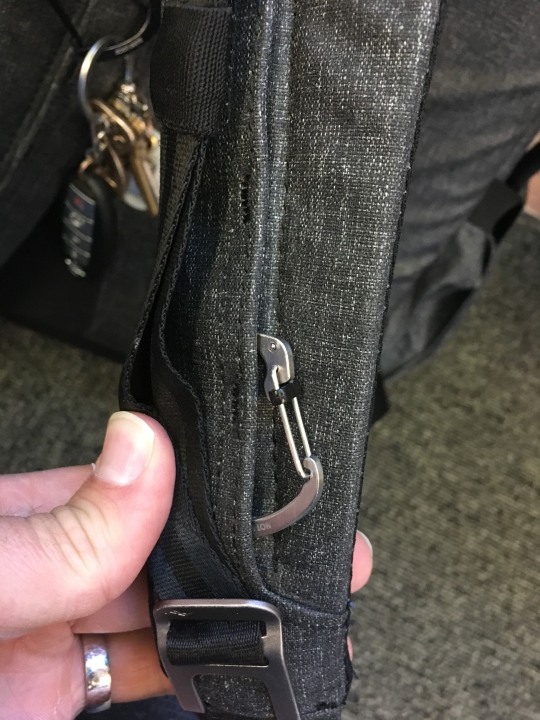
2) I wish there was a dedicated spot to clip a carabiner onto the shoulder strap. Gotta keep my keys somewhere quick. They include a tether for keys in the water bottle pocket (that uses the same clip as their strap system, oooOOOooo), and I like the tether, but it's not the fast access of a carabiner. This is a couple ways I've been doing it, but it took a while to figure out these solutions. I could use a couple loops on the strap to do it.
3) I wish I had a good document storage solution. I have a hulking laptop, so that pocket won't work if my laptop is in there. I need another thin vertical sleeve. I’ve seen a YouTube video with a workaround for that, but it’s inelegant, and renders a divider and a lot of space much less useful.

4) I wish I had better writing implement organization. Maybe 5 dedicated pen slots. I know I'm not most people, but as a Designer, I have a handful I need with me. Sharpie, pen, pencil, Xacto, felt tip, pocket scale. They scratch against each other in a shared pocket, and the material is too thick for the clips to clip onto for most of them, so they tend to slide too far down to reach quickly. I also don’t like that it’s not quick to pull out a pen. It’s swinging the bag to the front, opening a zipper, opening a flap, opening another zipper, pulling out the pen, then reverse. Nah.
5) Sweat. So. Much. Sweat. I’ve worn this for hikes, all day shopping in markets, at trade shows, in giant airports, and the back sweat is measurable in inches. Not as bad if there’s a coat and it’s cold, but if this is on the shirt on my back, I will be wetter than I care to be in normal attire.

6) While I like the little pocket at the top of the zippered laptop compartment, it grows into the main pocket, and right at the top. This pocket is the natural place for sunglasses, keys, etc, but as it grows, it greatly interferes with access into the main compartment, and can also crush stuff in that little pocket.
7) I’d love to see other kind of dividers or organization options that can attach to that velcro-ey interior of the bag. I wanna get their tech bag that fits nicely, but would love to have some more specific options available to mix and match with.
There's a part of me that hopes they never put these into play, because I don't wanna drop another $280 on a bag. But if they do, I happily will.

#edc#everyday carry#backpack#bag#messenger#camera#dslr#gear#travel#luggage#review#design#peak design#peak#industrial design#product design#product review
159 notes
·
View notes
Text
update on my life
i bought a used dslr ans they cancelled the order on me😭
so i ordered another used one, a bag, a tripod, a lens! im so EXCITED ans i cannot wait to mess around taking hiking photos, portraits WHATEVER just for fun!!
i also made an ig for all my sky pictures which im so excited about!!! so far it looks so great!
i cleaned my room for everything BESIDES old schoolwork and stuff to file!
i need to fill out my sub application and i have my physical soon!!! and i see queen next sunday and ahHhhh
and omg i leave my retail job in three weeks and man im just happy and livin life !!!
17 notes
·
View notes
Last Seen Blogs