
khloeskitchen-ffxiv
Khloe's Kitchen
FFXIV Inspired Recipes | Culinarians: Calypso Leroux and Miga Lhaqodh |
Primal - Behemoth
5 posts
Don't wanna be here? Send us removal request.
Last Seen Blogs

morton-vald
Things.

bluetrainers
“E gosto, à noite, de escutar as estrelas.”

batwandx-blog
Untitled

payalsinghal-designer-blog
Payal Singhal Designer

tryfallandlive
Stay Gold Forever
Text
Khloe’s Kitchen: Recipes #5 & #6 - Battered Fish and Lemonade
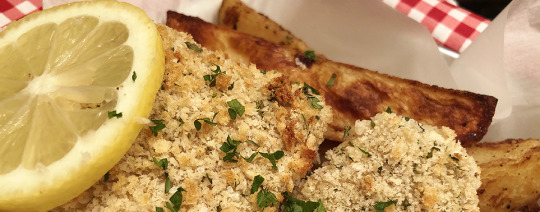
Hello, everyone! With the Moonfire Faire event on the horizon, we thought we’d share some delicious summer-inspired recipes - battered fish and lemonade! If you’re like us, the thought of fried food sounds great, but the whole process and aftermath (and let’s not forget the unhealthiness) leaves you less than excited to try frying anything at home. Fear not, warriors of darkness! For we’ve created some alternative recipes to help satisfy that craving. And, what better beverage to pair it with than some ice cold, citrus-infused lemonade!
Happy adventuring,
Caly and Miga
Recipe details:
- ★☆☆☆ ☆
- Makes approximately 8 servings of lemonade and 4 servings of battered fish and chips
- Lemonade prep time: 3~24 hours (depending on how good you are at waiting!)
- Fish+chips prep time: 25 minutes~8 hours (did we mention more waiting?)
- Fish+chips bake time: 40~45 minutes
Lemonade ingredients:
- ¾ cup white sugar
- ¼ cup honey
- 6 large lemons
- 2 oranges
- 1 ½ cups lemon juice
- 6 cups of water
- Optional: Extra lemon slices (for serving)
Battered fish (and chips) ingredients:
- ¼ cup milk + 2 teaspoons white vinegar or lemon juice (if you have buttermilk at home, use that instead!)
- 4 teaspoons cajun seasoning, divided
- 1 pound, or approximately 4 fillets, of cod or halibut (can sub any other non-flaky fish of your choice)
- 2 russet potatoes, washed and peeled
- 1 teaspoon salt
- 1 teaspoon pepper
- 1 tablespoon olive oil
- 2 minced garlic cloves
- ⅓ cup all-purpose white flour
- 1 large egg, lightly beaten
- 1 cup Panko breadcrumbs, seasoned
- Optional: Even more lemon wedges (for serving)
Lemonade directions:
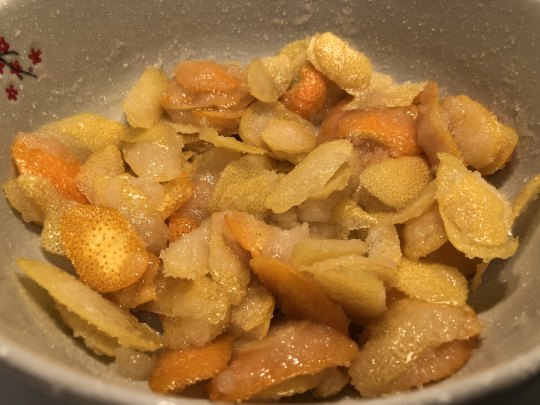
1. Up to 24 hours ahead of time, begin making your citrus-infused simple syrup. With the help of a vegetable peeler, peel off the rinds of 4 lemons and 2 oranges (put the remaining white-fleshed fruit in a container and back into your fridge until needed). In a large bowl, combine rinds, ¼ cup honey and ¾ cup white sugar; mix until the rinds are evenly coated.
2. Depending on your patience skill level, allow the lemon-orange rind mixture to sit out at room temperature between 3 and 24 hours. The later, the better (which allows for more complex flavors to develop!).
3. With the leftover rindless fruit (6 lemons), cut them in half and then squeeze out as much juice as possible, being careful to dispose of any seeds. Your goal is to have around 1 ½ cups of lemon juice.
4. Pour 6 cups of water into the large bowl containing the rind mixture, give it a nice mix to help dissolve any leftover crystallized sugar at the bottom. Using a fine mesh strainer, separate the liquid from the used rinds into a large pitcher for serving. Pour the lemon juice into the pitcher and stir. If the taste is still a bit too sweet, add the juice of an extra lemon.
Best served within a week. We recommend adding some ice cubes to the pitcher to keep your lemonade nice and cold! Optionally, add lemon wedges to your pitcher as well, or in the serving glasses, along with some extra ice...because Gods, it’s as hot as a heatwaves window in Southern Thanalan!
Battered fish and chips directions:
1. Line a large baking sheet with non-stick aluminum foil, or coat with nonstick spray.
2. If using the DIY buttermilk: mix together ¼ milk and 2 teaspoons white vinegar or lemon juice. Let the mixture sit around at room temperature for about 5 minutes, the milk will noticeably begin to curdle. Add your curdled milk mixture to a Ziploc bag, as well as seasonings: sprinkle of salt and pepper, and 1 teaspoon of cajun seasoning. Mix to combine. Leave bag in the refrigerator while you work on your fish. **Note: for better flavor, we recommend marinating your fish overnight, but it is completely optional!**
3. Preheat your oven to 400℉/204℃.

4. Cut your potatoes in half (lengthwise) and then each half into thirds (wedge-style). In a large bowl, combine your potato wedges, 1 tablespoon olive oil, 1 teaspoon salt salt and pepper, 2 teaspoons cajun seasoning, and 2 minced garlic cloves. Mix until potatoes are nicely coated. Spread potato wedges evenly on the baking sheet, and bake for 25 minutes. At the 15 minute mark, take the sheet out of the oven and flip your wedges onto a new side. Bake for the last 10 minutes. Once 25 minutes are up, remove from oven and push the wedges onto one half of the baking sheet.
5. Put ⅓ cup flour on a medium plate. In a small dish, lightly whisk one egg. In another plate, combine Panko breadcrumbs and remaining teaspoon of cajun seasoning. One by one, remove the fish from the marinade (shaking off the excess), then dip in the flour, being sure to coat on all sides. Shake off excess, then dip in the whisked egg, and then finally in the Panko. Make sure the Panko is pressed into the fish’s surface for better adhesion on all sides. Arrange the fish on the empty half of the baking sheet. Repeat with any remaining fillets.

6. Bake the fish and potatoes together for 15 minutes. The fish should be a nice golden brown color and flakes easily with a fork.

Best served the day of, but if you happen to be refrigerating extras, you can store remaining cooked fillets in a container for up to one day. Let the fish come to room-temperature and then bake for a few minutes in the oven at 350℉/177℃. To stay true to FFXIV, we recommend serving with lemon wedges and malt vinegar, or if you prefer, tartar sauce! Enjoy!
0 notes
Text
Khloe’s Kitchen: Recipe #4 - Honey Muffins
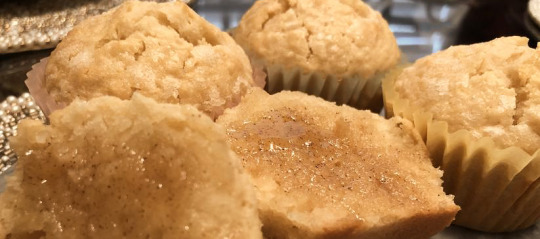
Hello again, everyone! We apologize for our disappearance, but the Khloe’s Kitchen staff is back! We wanted to give you all a simple and easy recipe in preparation for Shadowbringers early access, something that you can make days in advance as well as freeze and eat at your leisure. No more debating about whether to open up another bag of turkey jerky or box of cookies - here we’ve made for you today: honey muffins!
Happy adventuring,
Caly and Miga

Recipe details:
- Overall difficulty: ★☆☆☆☆
- Makes approximately a dozen muffins
- Muffin prep time: 15 minutes
- Muffin bake time: 15-18 minutes
- Butter prep time: 5 minutes
Honey muffin ingredients:
- 2 cups all-purpose flour
- 1 tablespoon baking powder
- ½ teaspoon salt
- ¼ cup of granulated sugar
- 1 large egg, room temperature
- 1 cup milk of choice (we used almond milk)
- ½ cup unsalted butter, melted
- ⅓ cup honey
- 1 teaspoon vanilla extract
- (optional) granulated or turbinado sugar for sprinkling
Whipped honey butter ingredients:
- ¼ cup butter, softened
- 2 tablespoons honey
- ¼ teaspoon cinnamon
Muffin directions:
1. Place muffin liners in a muffin tin and spray with any cooking spray (to reduce muffin-to-paper stickiness).
2. In a large bowl, add the flour, baking powder, and salt. Stir until well-combined.
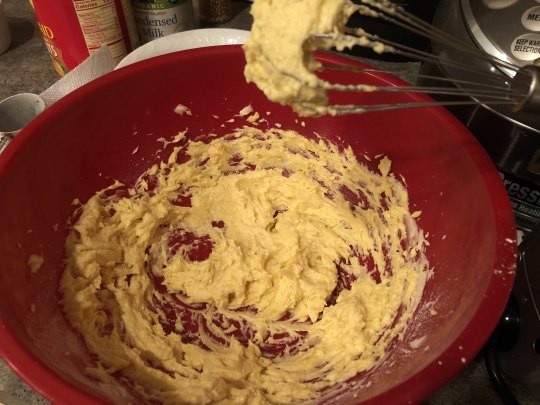
3. In a medium bowl, whisk together milk, honey, sugar, melted butter, egg, and vanilla extract.
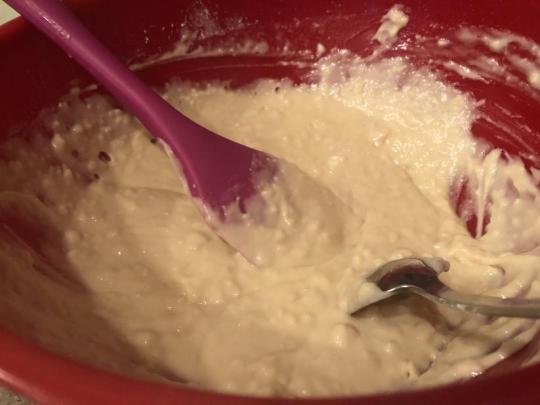
4. In two batches, add the wet ingredients into the dry ingredients. Stir until just combined and the dry ingredients are nicely moistened (lumps are expected). Be careful not to over-mix, which can cause the muffins to be less light and more tough.
5. Preheat oven to 400℉/204℃.

6. Begin spooning the batter three-quarters of the way full in the sprayed muffin tins. Sprinkle with granulated or turbinado sugar for a nice crunchiness on the outside.
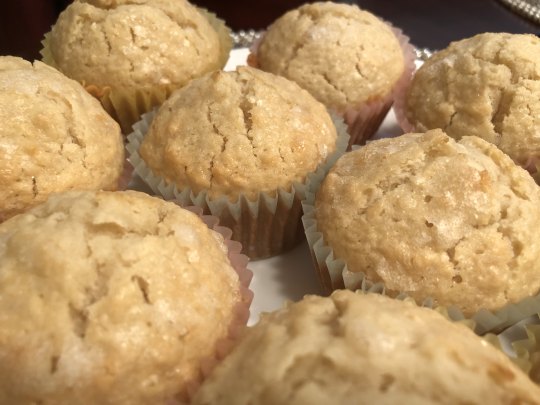
7. Bake for 15-18 minutes on the center rack. When testing for doneness, a toothpick placed in the center of the muffin should come out clean.
8. Cool for 5 minutes, then transfer to a wire rack.
9. Store in an air-tight container for up to 3 days. For longer storage, wrap the muffins in foil or freezer wrap, place in bags, then freeze. Muffins can be thawed at room temperature or heated up (microwave for approximately 25-35 seconds with a moistened paper towel on top; or baked at 350℉/177℃, while still wrapped up in tinfoil, for 10 minutes). Frozen muffins store well up to 3 months.
Whipped honey butter directions:
1. Using a mixer, whip softened butter, honey, and cinnamon together. Use immediately or store in an air-tight container and refrigerate.
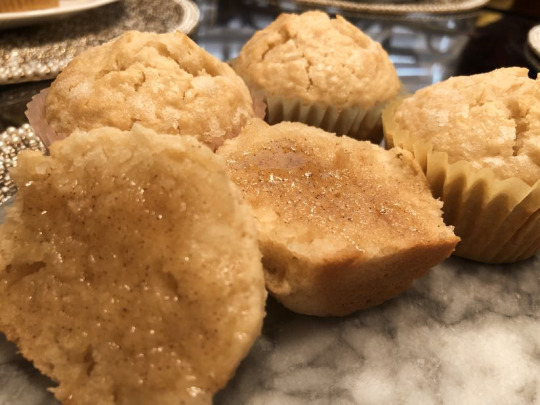
Honey muffins are best served warm with our whipped honey butter or a drizzling of extra honey. Enjoy!
9 notes
·
View notes
Text
Khloe’s Kitchen: Recipe #3 - Valentione Lobster Platter

Happy Valentione’s Day, everyone! Normally we should say something about the meaning/significance of the holiday, but really the best part of it is the food! Lovely lunches, delicious dinners, salivation-inducing sweets. (Oh, and delightful day-after discounts on chocolate!) We promised a savory dish, after our first two recipes were delightfully sweet, so here we are: tantalizingly juicy lobster, a light, crisp pizza, and sides both savory and sweet!
Researching how to prepare lobster was quite an interesting experience. We read all about various discussions on humane (food) handling - in the end, if we’re okay visiting a restaurant and eating something like lobster, we’ll actually develop a better appreciation for the creature by preparing and cooking it ourselves. (What I’m really saying here is that it puts into context the hours spent spearfishing for lobsters in the Ruby Sea - fond memories of churning out onigara-yaki for raid dinners!)
The pizza was also quite fun to learn about and work on, although as it turns out, kneading dough could possibly replace your workout for the day (depending on your typical exercise routine). Because of all the stove and oven time required for the various parts of this meal, we selected a cold-prepared pizza sauce that’s simple to mix together in a bowl and top your pizza before sliding it into the oven - the sauce has some lovely seasonings and a little kick of heat to it as well.
As always, thank you for reading along and joining us on our culinary adventures! For us, this blog is all about learning some kitchen skills, having some fun, and sharing our experiences with you. (Because unfortunately there is no real life equivalent to levequest powerleveling - one of you should get to work on fixing that, by the way!) So much love to all of you, on this day of delightful delectables and every other day - and don’t forget to do the in-game Valentione’s Day event before it ends! <3
Happy adventuring,
Caly and Miga

Recipe details:
- Overall difficulty: ★★★☆☆
- Makes approximately 3-4 ten-inch heart-shaped pizzas and 1 cooked lobster dish with (optional) sides [Extra pizza dough can be set aside and refrigerated or frozen]
- Dough prep time: 10-15 minutes (+4 hours for resting)
- Pizza bake time: 8-10 minutes
- Lobster prep time: 20 minutes
- Lobster cook time: 20-25 minutes
- Roasted broccoli prep time: 5-8 minutes
- Roasted broccoli bake time: 18-20 minutes
- Brown sugar glazed carrots prep time: 8-12 minutes
- Brown sugar glazed carrots cook time: 20-22 minutes
Pizza dough ingredients:
- 1 ⅜ cups warm water (may need slightly more water if using all-purpose flour, depending on brand, etc.)
- 1 teaspoon active dry yeast
- 3 ½ cups all-purpose or type “00” flour
- 1 teaspoon salt
- 1 teaspoon sugar
Pizza sauce ingredients:
- 1 can tomato paste (6 oz.)
- ¾ cup warm water
- 2 tablespoons grated Parmesan cheese
- 2 teaspoons minced garlic
- ½ teaspoon sugar
- ¼ teaspoon black pepper
- ½ teaspoon onion powder
- ¼ teaspoon dried oregano
- ½ teaspoon dried red pepper flakes
- 3 leaves fresh basil, chopped (or approximately 1 tablespoon dried basil)
- salt to taste
Recommended pizza toppings:
- Mozzarella
- Pepperoni
- Fresh Basil
Lobster dish ingredients:
- 1 approximately two pound lobster
- Stock pot filled with enough water to cover lobster, generously salted
- 2 wooden skewers
- Seafood cracking tools (optional)
Roasted broccoli with Parmesan ingredients:
- 1 head of broccoli
- Salt, pepper, and olive oil
- Shredded Parmesan cheese
Brown sugar glazed carrots ingredients:
- 1 pound of carrots
- Salt, pepper, and olive oil
- 1 tablespoon butter
- ⅛ cup brown sugar
- 1 teaspoon cinnamon
- ¼ teaspoon nutmeg
- Chopped parsley for garnish
Pizza directions:
1. In a small bowl, combine warm water and dry yeast. Continue mixing until yeast is dissolved, around 4-5 minutes.
2. In a medium bowl, mix together flour, salt, and sugar. Make a small well in middle of the flour mixture and carefully add the yeast water. Next, begin incorporating the flour into the water.
3. Knead the dough for about 10 minutes, until dough is stretchy and smooth. It’s recommended to move the dough from the bowl to a floured surface for a much easier kneading process!
4. In the same medium bowl, lightly drizzle some olive oil and put the dough back. Roll the dough around in the olive oil and cover the bowl. Set aside to rest for 4 hours (or longer, if desired or convenient).
5. Prepare the pizza sauce: combine and mix tomato paste, water, Parmesan cheese, garlic, and all spices in a bowl. Depending on your preference, you can optionally add more garlic, cheese, or red pepper flakes - we did all of these (Yum!). Add any extra salt to taste. Refrigerate the sauce while the dough is still resting.
6. Once the dough is finished resting, place it on a floured baking sheet (or pizza sheet) and divide in half. Squish each half of dough with your hands (turning around on the other side and doing the same motion), until it slowly makes more of a circular shape.

7. Optional heart design: Carefully roll out dough to make a rough circular shape that’s approximately 10 inches in diameter and ¼ of an inch in thickness. Fold dough in half, and trace the shape of half a heart. Once design has been finalized and perfected, use a sharp knife to cut the shape out. Delicately unfold heart. Save any leftover scrap dough to make more pizzas later.
8. Preheat your oven to 400°F/200°C.

9. Press your fingers into the dough, approximately 1 inch away from the edge, to help form the crust of the pizza. Lightly dress the surface of the pizza with sauce, drizzle a little olive oil, add some salt on top, and lastly grate some fresh Parmesan cheese. Depending on your topping preferences, add whatever you like for the finishing touches! For the photos, we decided to go with fresh mozzarella and basil, as well as some dried pepperoni.

10. Bake for approximately 10 minutes - the crust should be lightly colored and the cheese melted.
Lobster directions:
1. Prepare the lobster for cooking by chilling in a freezer for 10-15 minutes.
2. Fill a large pot with enough water for boiling (enough water to cover the lobster) or for steaming. Heat on the stove to reach a heavy boil; add a generous amount of salt.
3. Preheat the oven to 350°F/180°C.

4. Once lobster is chilled, remove it from the freezer and lay it flat on its legs on a large cutting board or other flat surface. Using a sharp, heavy knife, line the point of the knife at the nearest crack in the shell behind the eyes (pointing downward, but along the length of the lobster). Cut firmly and rapidly through the head, driving the knife down to cleanly pass through. (**note** This step is done to quickly kill the lobster and minimize movement/thrashing during cooking. Alternatively, some prefer to simply place the lobster head-first into the boiling water. Thanks to Serious Eats for some great instructions on handling and cooking lobster!)
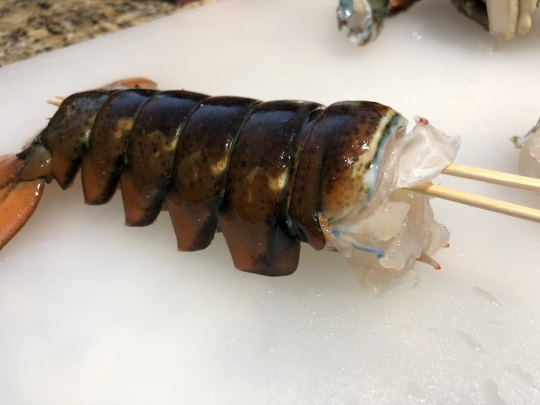
5. Hold the tail portion (the “half” of the lobster toward the rear) and the carapace (front “half”) firmly in each hand, making sure to keep your fingers away from the underside of the lobster. Twist and pull the tail away from the carapace, and set aside. (Tip: try using two wooden skewers, like in the picture above, to keep the tail straight and avoid curling during the cooking process!)
6. Hold the carapace firmly and twist the two claws off, one at a time. We should now have four pieces: carapace, tail, and two claws. Great work!
(**Note** If you’d like to save the carapace/head for making stock, they can be set aside here for immediate use or freezing.)
7. Steam or boil the lobster for 2 minutes. This helps release the meat from the shell, making for easy removal (and eating) later on!

8. Line a baking tray with foil, place the lobster pieces on the foil, and finish cooking by roasting the lobster for 15 minutes. The claws can be removed from the oven after 8-10 minutes. Cooking time may vary, depending on lobster size (ours was just under 2 pounds) - the goal is to reach an internal temperature of 135°F/57°C.
(**Note** If you’re serving/presenting the lobster in it shell/as-is, you’re good to go!)
9. Remove lobster from the oven and place on a clean surface for removing the meat. Hold the lobster tail and firmly press the sides of the shell towards each other. Make sure each segment of the shell is cracked - this will help split/peel the shell away from the tail meat. Now, pull the sides of the shell away from each other, being careful not to rip the meat. If necessary, a pair of kitchen scissors/shears can be used to cut along the membrane on the underside of the tail.
10. Break off the smaller pincer from each claw. Using a chopstick or similar utensil, you should be able to pull some meat from the pincer! With the remaining (bigger) part of the claw, firmly strike the flat side with the back of a knife, or use a seafood cracker to open the claws. Again, the kitchen scissors or shears can be useful here to cut open, being careful not to cut through the meat! Finally, twist off the knuckles, again using a chopstick or similar utensil to extract the meat.
11. The last part left is the carapace (with the head, legs, etc.). The legs have a little bit of meat in them too, so you can extract them in a similar way to the claws and knuckles (you may also be able to open the legs at one end and squeeze the meat out from the other end, almost like a tube of toothpaste). If you’re feeling adventurous you can eat the goodies in the body/head as well! We left that part in the oven for an extra five minutes just to be sure - there may be some of the delicious tail meat still attached!
Roasted broccoli with Parmesan directions:

(**Note** Both sides can be cooked in the oven simultaneously, so if you’re making the broccoli and the carrots, prepare both while the oven preheats!)
1. Prepare the roasted broccoli side: Preheat the oven to 375°F/190°C. Cut the broccoli head into small florets, discarding the stem. Place the pieces on a baking sheet, and then sprinkle with salt, pepper, and olive oil. Toss to coat evenly. Roast for about 16 minutes. After, remove sheet from the oven and grate some fresh Parmesan on top of the broccoli, let roast for another 2-4 minutes. Serve immediately when cheese is nice and melted, either in a separate bowl or around the lobster for a nice presentation.
Brown sugar glazed carrots directions:
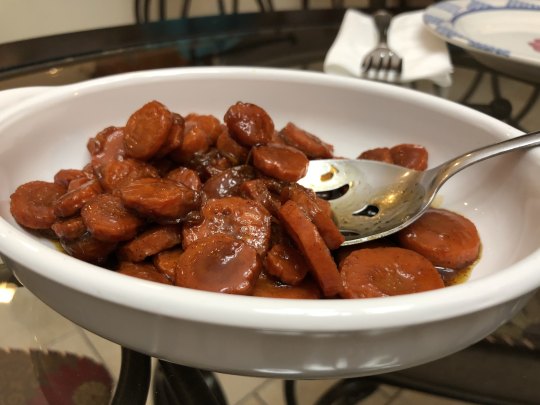
1. Prepare the glazed carrots side: Using the same temperature as the broccoli for roasting, cut across the width of the carrot to create circular shapes, approximately ¼ of an inch thick. Place evenly on another baking sheet, drizzle with olive oil, salt, and pepper, toss to combine. Bake for approximately 16-20 minutes, until carrots are just tender. In a small saucepan over medium heat, combine butter, brown sugar, cinnamon, and nutmeg. Stir constantly until sugar is melted and bubbling (be careful not to burn!), simmering for about 3-4 minutes. Reduce heat and add in the carrot slices, then cook for another 3-4 minutes. Serve in a separate bowl and top with chopped parsley if desired.

Serve everything together for a delicious dinner - enjoy!
0 notes
Text
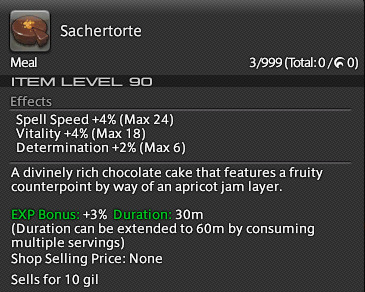
Khloe’s Kitchen: Recipe #2 - Sachertorte

Happy Friday, everyone! This week we’ve prepared another recipe, fit for the sweetest of the sweet (that’s you, fellow Eorzean dessert lovers!): the stunningly beautiful, intricately layered, and decadently rich Sachertorte. (Editor’s note: We promise that we will be aiming for equal representation among sweet and savory foods lovers, but purely by chance/coincidence, we’re back in sweets territory again this week. It is our sincere hope that you will excuse this seemingly partisan coverage.) We set out to make fun, mini-cakes that everyone can enjoy making and eating without the inevitable guilt of eating a full-sized cake within 24 hours, and we hope you’ll agree that we’ve found some success with that goal!
This one was a boatload of fun (truly, from starboard to larboard) and a real test of technical skills to boot - it rather reminded us of our time watching countless baking and cooking shows on TV/Netflix. Almost exactly like that, in fact, except those shows never show the decidedly lame afterparty of washing dishes and cleaning kitchens. Nevertheless, this is sure to be a dessert you can enjoy on your own and/or proudly show off to your friends! Keep in mind, though, that they will probably be busy looking at their own reflections in the cake’s beautiful mirror glaze - a party trick thoroughly tested by our two-year-old cat, Khloe, for whom this blog is lovingly named <3.
Thanks for reading, we hope you enjoy the recipe! And please let us know if you have any questions or if you’d like to share your own results - we’d love to hear from you!
Happy adventuring,
Caly and Miga
Recipe Details:
- Overall difficulty: ★★★★☆
- Makes approximately two to three 4-inch diameter mini-cakes (2 inches tall before layering), or one 8-inch diameter cake (smaller in height compared to the mini-cakes)
- Cake prep time: 20 minutes
- Simple syrup brush time: 5-10 minutes [+1 hour for chilling]
- Jam glaze time: 10-15 minutes [+2 hours for chilling]
- Bake time: 22 minutes for the 2 layered cake, 27-28 minutes for the 3 layered cake [+20 minutes for cooling]
- Chocolate mirror glaze time: 30-40 minutes [make sure to be patient]
Cake Ingredients:
- ¾ of a stick unsalted butter (3 ounces)
- A little less than 3 ounces chopped bittersweet chocolate (the higher quality the better)
- ¼ cup confectioner’s sugar
- ⅛ teaspoon cinnamon
- 1 teaspoon espresso powder (optional)
- 4 eggs (whites and yolks separated)
- 1 extra egg yolk
- ¼ cup + 1 tablespoon granulated sugar
- ¾ cup cake flour
Simple Syrup:
- ¼ cup water
- ¼ cup granulated sugar
Filling:
- 1 ½ cups smooth apricot jam, store-bought or homemade (we blended ours a day before)
Chocolate mirror glaze:
- 2 envelopes (or approximately 2 tablespoons) unflavored gelatin powder dissolved in ¼ cup water
- 1 cup water
- 2 cups chopped bittersweet or dark chocolate
- 1 ½ cup granulated sugar
- ⅔ cup sweetened condensed milk
Directions:
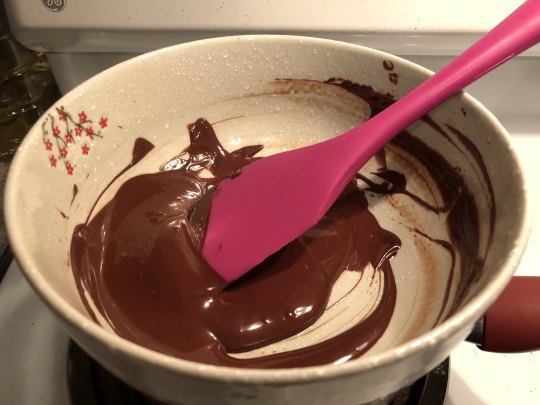
1. Melt your 3 ounces of bittersweet chocolate in a double boiler, or in a bowl over a pot of simmering water (microwave method: put chocolate in a microwave safe bowl, use lowest power setting, and set time for 10-20 second intervals, stirring in between to avoid burning your chocolate).
2. Meanwhile, beat your butter with a mixer or rubber spatula and carefully begin to incorporate confectioner’s sugar, cinnamon, and espresso powder until creamy. Once done, begin to add each egg yolk, one at a time, mixing well each time.
3. When melted chocolate is no longer warm to the touch, around 100℉/38℃, mix into your butter-sugar-egg yolk mixture.
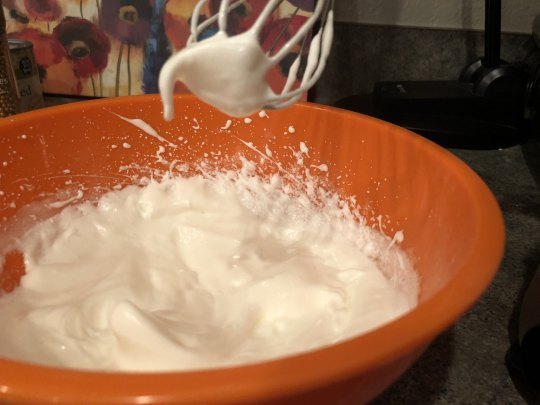
4. In a smaller bowl, beat your egg whites until foamy, then slowly begin to add in granulated sugar, while whisking, to obtain soft peaks.
5. Delicately add in ⅓ of your beaten egg whites to your butter-sugar-egg yolk-chocolate mixture, carefully folding it in and not over-working the batter. After, fold in the rest of the egg whites in thirds, repeating the same motion until evenly incorporated.
6. Slowly sieve and fold cake flour into mixture to avoid any little lumps.
7. Meanwhile, make sure cake tins are lightly buttered and dusted with flour and preheat oven to 325℉/160℃.

8. Spread cake batter into prepared tins, if using three 4-in tins (like we did), two tins will be ⅔-filled and one tin ½-filled. The smaller cake that is ½-filled should be done in about 22 minutes (use a clean sharp knife or toothpick to poke through the center and make sure it comes out clean), and the others that are ⅔-filled should be done in 27-28 minutes. Once done, let cool for 20 minutes in the tins.
9. While cake is baking, prepare simple syrup. Bring equal parts water and granulated sugar to a simmer, while constantly stirring. Take off heat when it begins to boil, leave to cool.
10. After cake is cooled, use a serrated knife to carefully trim the puffed up tops of your cakes to create a flat surface. The original “bottom” of the cake will be your new top. If using 4-in tins, trim each cake horizontally. Between all the cakes, you will have 5 layers (2 each from the ⅔ batter tins, and 1 from the ½ batter tin). To form a 3 layer cake, take 3 layers and stack them together. To form a 2 layer cake, take 2 layers and stack.

11. When all the cake layers are cut, liberally brush your simple syrup on each layer. Optionally, you can poke a toothpick or chopstick through the top layer to the bottom, and drizzle in the syrup through the hole as well. Cover each cake with plastic wrap, and chill for about 1 hour.
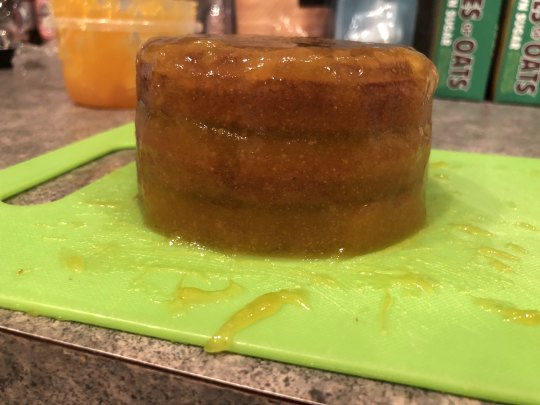
12. After syrup has had enough time to disperse throughout the cake, spread apricot jam over each layer of cake, stacking a new layer on top when done. For your top layer, spread the jam on top and then around the sides of the cake, trying to achieve as smooth a surface as possible (this will allow for a nicer chocolate glaze surface!). Refrigerate for 2 hours to set the jam.
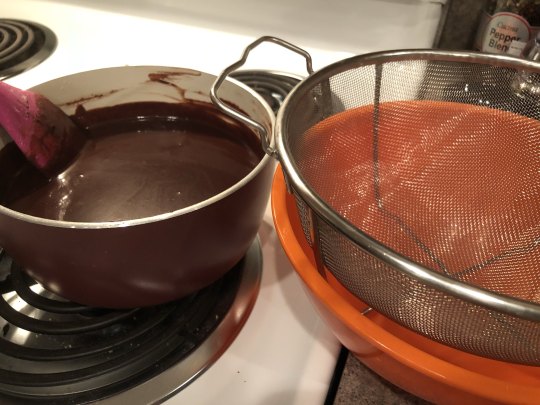
13. Slowly and carefully make your chocolate mirror glaze. We used THIS video for instructions, but used bittersweet chocolate chips instead. The optimal temperature to start pouring your glaze should be at about 90℉/32℃. You want the texture of your glaze to be slightly elastic, and definitely not thick. We highly recommend taking your time during this step. Because this was our first time trying to temper chocolate/mirror glaze, we learned some new things - do NOT overfold/agitate your chocolate. Instead, stir it slowly to avoid creating a ton of air bubbles like we did. And if you do notice bubbles, have some fun trying to pop them all, it will make passing the time a bit more enjoyable while you wait for your optimal temperature.

14. Prepare a baking tray, with two small cups placed on top (anything smaller in diameter than your cakes). Place your two chilled cakes on top of each cup. Once your chocolate has achieved the desired temperature and consistency, pour the mirror glaze over the cake, starting around the edges and working inward to get all the sides coated. After a few minutes, you can begin to clean the bottom layer edge by smoothing out the drips. Once finished, chill cake in the fridge for about 10 minutes and decorate with rehydrated dried apricots (or better yet, fresh) and golden-colored sprinkles around the center.

15. We recommend serving this cake as soon as possible, to keep the glaze’s glossy finish. When we refrigerated the cake overnight, it seemed to lose some of its luster, but the taste was still great! If kept covered and in the fridge, this cake will last around 3-4 days.

**Tip**: With your leftover mirror glaze, we recommend refrigerating the mixture overnight and then re-imagining them into faux-brigadeiro. (Shoutout to our fellow raid members and dessert lovers who introduced us to brigadeiro, Wendy and Anna!) Once the chocolate is cooled, sufficiently butter your hands and then take about one tablespoon of the chocolate and roll it into a ball. Rinse and repeat until all the chocolate is used up. We recommend rolling them in coconut or chopped chocolate or nuts! Chill in the fridge again to allow them to firm back up.
Major credits for the cake recipe and glaze: Schibboleth and Chelsweets
3 notes
·
View notes
Text
Khloe’s Kitchen: Recipe #1 - Ginger Cookies

Welcome to Khloe’s Kitchen, where we love cooking and baking as much as we love Final Fantasy XIV! We’ll be testing out our own interpretations of culinary recipes from the game so that we can bring you step-by-step instructions (including pictures!) for recreating these delightful dishes in your own kitchen.
Today, we have for you a lovely, crispy treat to spice up your snack time - ginger cookies! We’ve gone with a thin shortbread cookie to reproduce the cute black mage-shaped treats. Preparing the dough and baking these goodies is actually a reasonably quick process, so the total time required is all down to the level of detail you’d like in your design (and your patience for cutouts and patterning). Which is to say, once Caly finished meticulously preparing our picture-worthy cookies for presentation, I insisted on using the rest of the dough to crank out plain old circular cookies - a real life interpretation of Quick Synthesis, I suppose!
Anyhow, thanks for stopping by! We hope that you will feel inspired (or hungry, at the very least) by our recipes and stories. Please let us know if you have any questions, and when you do try recipes, please show us how they turn out - we’d love to share your pictures here for future visitors!
Happy adventuring,
Caly and Miga

Recipe Details :
- Overall difficulty: ★★☆☆☆ (not including detailing)
- Makes approximately 16-20 black mage cookies (3.5″ or 9 cm in length)
- Dough prep time: 10 minutes [+10 minutes for chilling]
- Design/patterning time: Varies based on complexity/level of detail
- Bake time: 10 + 2 minutes
Cookie ingredients:
2 cups flour
½ cup powdered sugar
1 tsp ground ginger
1 tsp ground cinnamon
⅛ tsp ground cloves
⅛ tsp salt
1 cup of chilled unsalted butter (two sticks), cut into cubes
¼ cup molasses
¼ cup candied ginger (finely chopped, as small as possible)
Glaze ingredients:
2 tablespoons maple syrup
4 tablespoons brown sugar
2 tablespoons water
Directions:
1. Combine flour, powdered sugar, spices, and salt in a large bowl.
2. Add in the chilled squares of butter and carefully mix into the dry ingredients using your hands or a fork. Our goal here is to keep the butter somewhat chunky and not melted, so the mixture should resemble crumbs. If you’ve over-mixed the butter, put your mixture in the fridge for a bit to harden back up.
3. Again, with your hands or a fork, incorporate the molasses and candied ginger. Keep kneading the mixture until you can form a ball (it will be sticky!). Divide the dough in half.
4. Lay out two pieces of plastic wrap and place each half of dough in the center. With the help of the plastic wrap, mold each piece of dough into a square; place in the refrigerator for at least 10 minutes. By chilling the dough, it will be easier to roll out.
5. Lay out a piece of parchment paper on your work surface (you will be utilizing this paper as a “transport system” between your counter and freezer), and then lightly dust your rolling pin and dough with flour. Sprinkle extra flour on your dough if it’s sticking too much to the rolling pin. Roll your dough to be approximately ⅛ of an inch thick. If your dough is too cold, let it sit out for a bit until it’s more malleable (or use your hands to warm it up). Using the BLM design [linked HERE] or regular cookie cutters, cut your dough into the desired shapes.
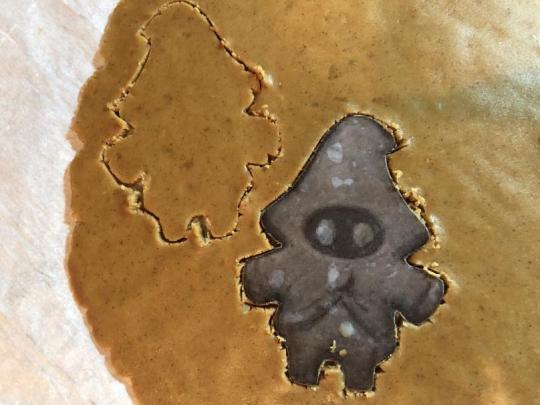
a. (If following the black mage design, continue reading…if not, skip to step 6): Using a thin knife, carefully trace out the BLM design onto your dough. Each cookie requires two layers, and for each pair you will need to flip the design over for one of the cookies. If you look at the photo, you’ll notice the BLM hat points to the left for one, and then to the right for the other.
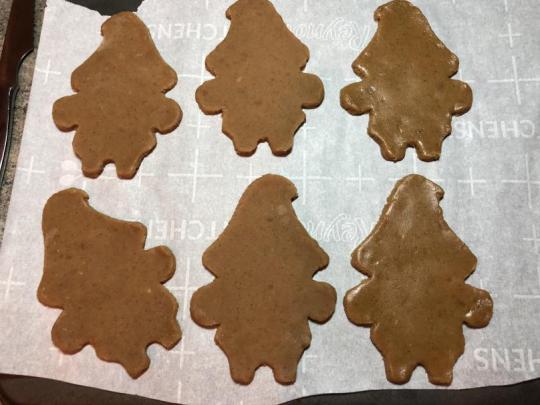
b. After tracing your designs, peel away the excess dough. Because the dough is warm, you can do any touch ups with a knife or carefully with your fingers. At this point, I recommend smoothing the outline of each BLM cookie and rounding out the arms and legs.
c. While still keeping your cookies on the parchment paper, transport them to the freezer so they can briefly chill. Leave them uncovered for about 10 minutes (you can work on your next batch of black mages while waiting).
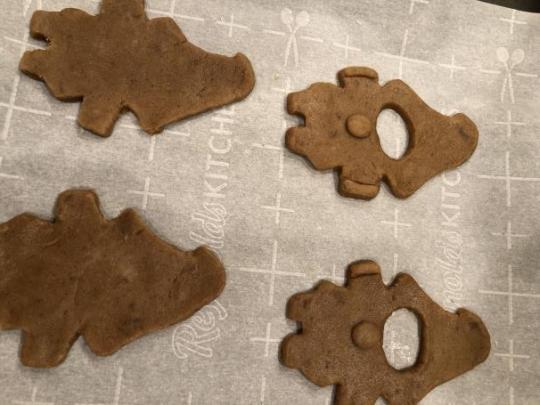
d. Once the cookies are firm enough to remove from the parchment paper (but you should still keep them on the paper), cut out a small oval for the eye opening with a knife. Only ONE cookie in each pair needs a hole, preferably the BLM with a hat whose point is on the right side. (Because the dough is chilled, it should be easy to pop out the dough from the hole. Again, smooth out the harsh cuts for a nice outline. **Note: The photo above is from the first attempt and we later corrected the direction of the BLM cutout for future photos!**
e. (This step will be for the cookie that has the eye hole): Using any leftover dough scraps, mold small ovals for the center jewels of the BLM coat. Next, roll out a very thin layer of dough, thinner than the ⅛ of an inch for the cookie. Cut out strips of dough to make the coat openings: one for each hand, and one for each side of the body. Smooth out any harsh lines. Make and put aside some tiny eyeballs as well, we’ll bake these after the cookies are done.
f. Optionally, chill your cookies again if you plan on changing parchment papers for your cookie sheet.
6. Preheat your oven to 325° F.
7. Place your cookies and parchment paper on a cookie sheet. Optionally, brush a light layer of egg whites on each “designed” cookie (the top layer).
8. With the cookie sheet on your oven’s center rack, bake for 10 minutes, until the cookies begin to brown around the edges and are crisp. After the cookies are done, place your little eyeball dough pieces on a piece of parchment and bake for 2 minutes, just until hard.
9. Let cool for 3-5 minutes, and then move to a rack. Keep track of your eye pieces. Prepare the glaze.
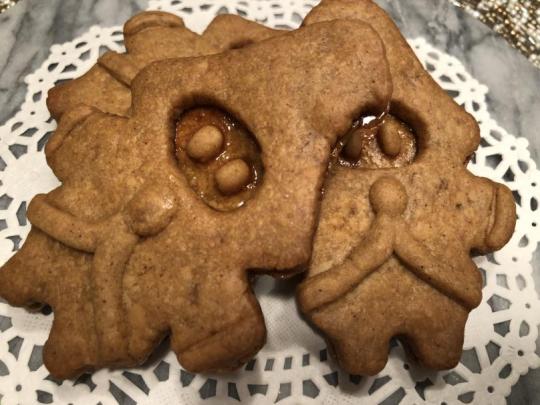
10. In a small saucepan, combine maple syrup, brown sugar, and water. Slowly bring to a light simmer, thickening until bubbles are retained at the surface. Remove from heat, swirling around the glaze with a spoon while it cools and begins to thicken a bit more.

11. Using the BOTTOM flat side of your untouched cookie (it should be the BOTTOM of the cookie with the left-point hat), carefully dip the smooth side into the glaze. You can manipulate the glaze with a fork to make sure all spots are coated. While the glaze is still warm and sticky, sandwich together your pair of cookies. Put your two eye pieces in the center hole. Adjust as necessary. Repeat for each pair of cookies.
12. Store your cookies in a airtight container for up to 5 days. If you don’t plan on making all the cookies at once, freeze the dough for future use.
14 notes
·
View notes