#Snip hotkey
Text
Snip hotkey

#Snip hotkey windows
Search on the internet for a screenshot app that suits you best. The screenshot will be saved to the Videos/Captures folder by default.Ĥ. In the top-left corner, navigate to the Capture area and select the Take screenshot option. Use the Xbox Game Bar to take screenshotsĢ. To make this image a real screenshot, open an image editing application, paste the screenshot into it, and save it. PrtSc will just grab the image and save it to the clipboard.
#Snip hotkey windows
Your complete Windows 11 screen will be captured. How to Customize the Lock Screen on Windows 11ġ. This will save the capture in your Pictures. To automatically save a screenshot, you can use Windows + PrintScreen shortcut. Your snapshot will be captured successfully. Take a screenshot of selected area (works without starting Snip & Sketch too) Screenshots taken by this shortcut aren't automatically saved, they're only copied to clipboard. Hover your mouse over the editor’s tool icons to learn the hotkeys. Take advantage of shortcut keys when using the editor. Select your desired screenshot method, then select the region to be captured and release the cursor. Online snipping tool - The easiest way to edit screenshots or images, make changes or notes, then save, and share. You may capture screenshots in a variety of methods, including Rectangle Snip, Freeform Snip, Window Snip, Fullscreen Snip, and more, at the top of the Snipping tool overlay.ģ. Go to the Start menu, type the "snipping tool" in the search bar, and open the app.Ģ. Once you click New, you'll be transported to the screenshot overlay. Once you press the shortcut keys, you would see the four snipping modes/options at the top of your screen as shown below. Using the Snipping Tool, take a screenshot of Windows 11ġ. The fastest and easiest way to capture a screenshot (snip) in Windows 11 with the snipping tool is by pressing the keyboard shortcut Window Logo Key + Shift + S.
0 notes
Text
Snip hotkey

#Snip hotkey windows 10
The Snipping Tool’s brilliance is that you may copy it to a word doc (or Excel, etc.) or save it as a jpg. The Tool is an excellent for creating copies for documentation. Have you ever filled out an online form and desired a duplicate just in case you didn’t receive a receipt or confirmation with all the information you needed? What about when you’re submitting an inquiry or a trouble ticket to a corporation through the internet? It might be tough to print from a web page at times. Sometimes all you need is a “snippet.” Instead of taking a “snip” of the entire screen, this tool allows you to capture a “snip” of only a tiny piece of it or one specific object. Snippets :- You don’t always need a whole screenshot.Snipping Tool for Windows 11 Unique Advantages
#Snip hotkey windows 10
Snipping Tool was included with Snip & Sketch when Microsoft released Windows 10 Insider build 21354 in April 2021, making it updateable from the Microsoft Store.īoth Snip & Sketch and the heritage version were combined into a new version, which has an interface identical to the traditional Snipping Tool, in Windows 11 insider build 22000.132, published on August 12, 2021. Regardless, the software was never uninstalled from Windows 10. Tools was updated to include a note about the app’s deprecation, encouraging users to switch to Snip & Sketch. It was formerly known as Screen Sketch and was a part of the Windows Ink Workspace. Snip & Sketch, a new Universal app version of Windows Snipping Tool, was launched in Windows 10 version 1809. On November 7, 2002, it was launched as a PowerToy for the Microsoft Tablet PC launch. Snipping Tool, formerly known as the Clipping Tool, was featured in the Experience Pack for Windows XP Tablet PC Edition 2005 prior to Windows Vista.
0 notes
Text

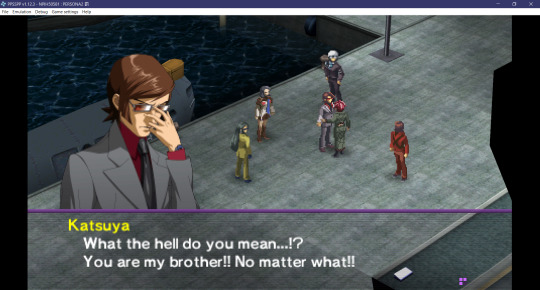
this ones been on my brain a while.........man...
#bobtalk#persona 2 spoilers#p2ep spoilers#p2posting#please ignore tatsuya's name. its stephen coolguy.#i took so many screenshots via snipping tool during this scene (hence the bars) until i just set up an emulator hotkey lol#i havent played in a couple months btw i got as far as tatsuya joining the party (hes my bestfriend) i need to finish but urghghgh.#its a good game its just kind of hard to get thru. love it tho#anyway im sorry for being an older brother.i cant help it#they put me in agony.siblingisms#on a lighter note katsuya is the most marryable persona man
9 notes
·
View notes
Text
Toady's Devlog for 09/26/2022
Toady One, from the Dwarf Fortress Development Log:
Ah shoot, sorry for being silent the last few weeks. I feel like I've entered the same frame of mind I was in when I was finishing my thesis. There can be up days and down days, some with a ton of progress and some with very little tangible to show, but the mind has completely disappeared into the work.
Yesterday went great. I reworked the object load system so we can now alter text definitions all the way up to the end - it used to process them as they were loaded. The primary benefit of this change is allowing mods to snip out and replace individual entries without having to drop entire files, or to append a few lines to an existing entry, etc. I also fixed some layout issues with the building sheet, got custom building nicknames working again, fixed a sizing issue with sprites on sheets, put in some missing graphics, added a few new helpful messages, etc.
Some day not long before that, I got the keyboard up and running, the basic stuff we said we'd do in Future of the Fortress, which is a designation/building cursor, hotkeys for the main screen/designations/all buildings, and macros up again. There's a lot more to do there, menu by menu, but this is a good start.
I don't recall if we mentioned adding an option to use the closest material for buildings (rather than having to select it), and an option to continue building after placement, so if you have, say, a nearby stockpile filled with blocks, you can just splat down multiple constructions now (or anything else) like ding ding ding. And constructions can be built vertically now, as long as one of the levels has access to building materials - we haven't yet set up the system where you don't even need specific items available at all, and that'll be too risky to set up before the release, but building things generally is way way easier now, and the initial selection menu is much nicer as well.
Finally - and this accounts for more than half of the time - lots of art has come in. We'll show some with the news post in a few days. We've been in Autumn for a few days now, and everything is still going well.
2 notes
·
View notes
Text
Mastering the Art of Taking Screenshots on Windows 11: A Comprehensive Guide
As someone who loves to capture and share moments on my computer, I was thrilled to learn how to take screenshot in windows 11. It's so simple and intuitive! With just a few clicks, I can capture anything from a funny meme to an important document. I especially love the new snipping tool, which allows me to select a specific area of my screen to capture. It's like having a virtual pair of scissors! Plus, with the ability to easily annotate and share my screenshots, I feel like a pro. Thanks, Windows 11, for making my life a little easier and a lot more colorful.
In the digital age, capturing screenshots has become an integral part of daily computer usage. Whether you're documenting an important conversation, saving a memorable moment from a video, or troubleshooting an issue, knowing how to take screenshots efficiently can greatly enhance your productivity. With the release of Windows 11, Microsoft has introduced several new methods and features for capturing screenshots, making the process even more seamless and versatile. In this comprehensive guide, we'll explore various techniques and shortcuts to help you become a screenshot pro on Windows 11.
Using the Snipping Tool: Windows 11 still offers the trusty Snipping Tool, albeit with a refreshed look and feel. Simply search for "Snipping Tool" in the Start menu, open the application, and select the type of snip you want (freeform, rectangular, window, or full-screen). Once you've captured the desired area, you can annotate or save the screenshot directly from the Snipping Tool interface.
Utilizing the Snip & Sketch Tool: Building upon the functionality of its predecessor, the Snip & Sketch tool offers additional features for capturing and annotating screenshots. Press the "Windows key + Shift + S" keyboard shortcut to activate the snipping mode, then select the area you wish to capture. After capturing the screenshot, it will be automatically copied to the clipboard, allowing you to paste it into an application or save it to your desired location.
Taking Screenshots with Keyboard Shortcuts: Windows 11 introduces new keyboard shortcuts for capturing screenshots quickly. Pressing the "Windows key + Print Screen" simultaneously will capture the entire screen and save it as a PNG file in the Screenshots folder within the Pictures directory. Alternatively, you can use "Alt + Print Screen" to capture the active window only.
Using the Game Bar: If you're a gamer or frequently capture screenshots while gaming, the Game Bar feature in Windows 11 can be incredibly handy. Press "Windows key + G" to open the Game Bar overlay, then click on the camera icon to capture a screenshot of your game. You can also customize various settings such as audio recording and capture shortcuts through the Game Bar settings.
Exploring Third-Party Tools: While Windows 11 offers built-in tools for capturing screenshots, third-party applications can provide additional functionalities and customization options. Popular options like Greenshot, Lightshot, and ShareX offer features such as advanced editing tools, cloud storage integration, and custom hotkeys, catering to diverse user preferences and requirements.
Customizing Screenshot Settings: Windows 11 allows users to customize various screenshot settings to suit their needs. You can access these settings by navigating to Settings > Accessibility > Keyboard > Print Screen, where you can toggle options such as saving screenshots automatically, changing the default save location, and enabling or disabling the clipboard history feature.
In conclusion, mastering the art of taking screenshots on Windows 11 can greatly enhance your productivity and efficiency in various tasks. Whether you prefer using built-in tools like the Snipping Tool and Snip & Sketch or exploring third-party applications for advanced features, Windows 11 offers a plethora of options to suit every user's preferences. By familiarizing yourself with these techniques and shortcuts, you'll be able to capture and share screenshots effortlessly, empowering you to communicate and collaborate more effectively in the digital realm.
1 note
·
View note
Text
i also have finally found out how to disable windows snip hotkeys bc it kept interrupting with my movement in dbd...
time to become an even more obnoxious Ace main
1 note
·
View note
Text
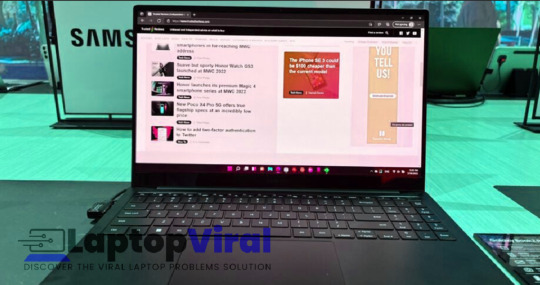
How to Screenshot on Samsung Laptop? [2023]

To screenshot on samsung laptops, press the windows key + prtscn simultaneously. Samsung laptops allow you to capture screenshots effortlessly by using a simple keyboard shortcut.
By pressing the windows key and the prtscn (print screen) key simultaneously, you can capture an image of your screen and save it as a screenshot. This convenient method eliminates the need for any additional software or complicated steps, making it quick and easy to capture and store important information or memorable moments on your samsung laptop.
Whether you need to share an error message, save a funny social media post, or document an important document, the screenshot feature on samsung laptops is a valuable tool for capturing and retaining digital content.
Different Methods To Capture Screenshots On A Samsung Laptop
Capturing screenshots on a samsung laptop is a useful skill to have, whether you need to save an important image or share something interesting with others. Luckily, there are several methods you can utilize to take screenshots effortlessly. In this blog post, we will explore different ways to capture screenshots on a samsung laptop.
So, let's dive right in and discover the options available to you.
Utilizing Built-In Keyboard Shortcuts:
- Pressing the windows key + print screen (prtscn) simultaneously captures the entire screen and automatically saves it in the "pictures" folder. This method works well if you want a quick snapshot without any additional editing options.
- To capture a specific area of your screen, use the windows key + shift + s shortcut. This will activate the built-in snip & sketch tool, allowing you to select the desired section and save it to your clipboard for easy pasting or further editing.
Using The Snipping Tool:
- If you prefer more control over your screenshots, the snipping tool comes in handy. To open it, simply search for "snipping tool" in the windows search bar and click on the result. From there, you can choose to capture a rectangular, free-form, window, or full-screen snip. Once captured, the image can be saved or annotated before sharing or saving it.
Installing Third-Party Screenshot Tools:
- If you desire additional features and functionalities, consider installing third-party screenshot tools. These tools extend your screenshot capabilities and offer various editing options, such as adding text, arrows, and highlights. Some popular options include lightshot, greenshot, and sharex.
- Lightshot allows you to capture screenshots, crop and edit them, and instantly share them online with ease.
- Greenshot offers similar features and also allows you to save your captures in multiple formats.
- Sharex provides an extensive range of screenshot options, including the ability to record screencasts, upload images to various hosting services, and customize hotkeys.
By utilizing these different methods, you can effortlessly capture screenshots on your samsung laptop based on your specific requirements. Whether you prefer using built-in keyboard shortcuts, the snipping tool, or third-party tools, taking screenshots has never been easier. So go ahead, explore the options available, and enhance your screenshot-capturing skills!
https://www.youtube.com/watch?v=Qdofp6d0aKw
Utilizing Built-In Keyboard Shortcuts
Samsung laptops offer several convenient ways to take screenshots using built-in keyboard shortcuts. Whether you want to capture the entire screen, a specific window or application, or a selected area, these keyboard shortcuts make the process quick and easy. In this blog post, we'll explore each of these methods in detail, so you can easily capture and save important information on your samsung laptop.
Capture The Entire Screen
To capture the entire screen on your samsung laptop, follow these steps:
- Press the prtscn (print screen) key located on the top row of your keyboard. This will capture a screenshot of the entire screen.
- The screenshot will be saved to your clipboard. You can then paste it into an image editing software or directly into an application, such as an email or document.
Capture A Specific Window Or Application
Sometimes, you may only want to capture a specific window or application instead of the entire screen. Here's how you can do it:
- First, open the window or application that you want to capture.
- Press the alt + prtscn keys simultaneously. This will capture a screenshot of the active window or application.
- Similar to capturing the entire screen, the screenshot will be saved to your clipboard. You can paste it wherever you need it.
Capture A Selected Area
If you need to capture a specific area of your screen, samsung laptops allow you to select and capture the desired section. Here's how:
- Press the windows + shift + s keys together. This will open the built-in snipping tool, specifically the "snip & sketch" feature.
- Using your mouse, click and drag to select the area you want to capture.
- Once you release the mouse button, the captured screenshot will be saved to your clipboard. From there, you can paste it into an appropriate application or save it as an image file.
Taking screenshots on your samsung laptop is as simple as using these built-in keyboard shortcuts. Whether you need to capture the entire screen, a specific window, or a selected area, you now have the tools to quickly and effectively save screenshots for various purposes.
So go ahead, give it a try, and make the most of this handy feature on your samsung laptop.
Using The Snipping Tool
Overview Of The Snipping Tool
The snipping tool is a built-in screenshot utility that comes pre-installed on samsung laptops. It enables users to capture and save screenshots of their laptop screens quickly and easily. With the snipping tool, you have the flexibility to capture specific areas of your screen, including full-screen captures, free-form shapes, rectangular areas, and windows.
Whether you need to grab an image for a presentation, save important information, or share something interesting with your friends, the snipping tool has got you covered. In the following sections, we'll explore how to access the snipping tool on your samsung laptop and learn about the different types of screenshots you can capture using this handy tool.
Accessing The Snipping Tool On A Samsung Laptop
To access the snipping tool on your samsung laptop, simply follow these steps:
- Press the "windows" key on your keyboard or click on the windows icon located in the taskbar.
- In the search bar, type "snipping tool" and press enter.
- The snipping tool window will open, ready for you to start capturing screenshots.
Capturing Different Types Of Screenshots Using The Snipping Tool
The snipping tool offers various options for capturing different types of screenshots. Here's a breakdown of the available screenshot capture modes:
- Free-form snip: This mode allows you to capture screenshots in a free-form shape. Use your mouse to draw around the area you want to capture, and release the mouse button to save the screenshot.
- Rectangular snip: With this mode, you can capture screenshots in a rectangular shape. Click and drag your mouse to specify the area you want to capture, then release the mouse button to save the screenshot.
- Window snip: This mode allows you to capture an entire window. Click on the window you want to capture, and the snipping tool will automatically select and save it as a screenshot.
- Full-screen snip: As the name suggests, this mode captures the entire screen of your samsung laptop. Simply click on the "full-screen snip" button in the snipping tool, and the tool will save a screenshot of your entire screen.
Now that you know how to access the snipping tool on your samsung laptop and the different types of screenshots you can capture, you're ready to start using this versatile tool to capture and save screenshots with ease. Experiment with the different capture modes to find the one that best suits your needs and enhance your productivity.
Happy screenshotting!
Installing Third-Party Screenshot Tools
Overview Of Third-Party Screenshot Tools
Samsung laptops offer built-in screenshot options, but many users prefer the convenience and added features of third-party screenshot tools. These tools provide a range of functionalities, allowing you to capture screenshots with ease and efficiency. In this blog post, we will explore popular third-party screenshot tools for samsung laptops, compare their benefits, and guide you through the process of installing and using them.
Comparison Of Popular Screenshot Tools For Samsung Laptops
When it comes to screenshot tools for samsung laptops, several options stand out for their user-friendly interfaces and robust features. Let's take a closer look at some of the popular tools available:
- Onenote: This versatile tool not only allows you to take screenshots but also offers advanced annotation features. With onenote, you can easily capture and annotate screenshots, making it an excellent choice for those who need to add additional context to their screenshots.
- Snagit: Known for its powerful editing capabilities, snagit is a robust tool that allows you to capture and edit screenshots effortlessly. With its user-friendly interface and extensive editing options, snagit is a popular choice among professionals and creatives alike.
- Lightshot: If simplicity is what you seek, lightshot is a lightweight and easy-to-use screenshot tool. With its intuitive interface, lightshot allows you to capture screenshots swiftly and offers basic editing features to help you highlight important details.
- Greenshot: Offering an array of annotation tools, greenshot is a feature-rich screenshot tool that caters to various needs. Whether you need to capture a specific area, a full screen, or a scrolling webpage, greenshot has got you covered.
Steps To Install And Use A Third-Party Screenshot Tool
Installing and using a third-party screenshot tool on your samsung laptop is a straightforward process. Here are the general steps to follow:
- Research and select a screenshot tool that suits your requirements.
- Navigate to the official website of the chosen tool and locate the download section.
- Click on the download link and save the installation file to your computer.
- Once the download is complete, locate the installation file and double-click it to initiate the installation process.
- Follow the on-screen prompts to install the tool on your samsung laptop.
- Once the installation is complete, launch the screenshot tool from your desktop or the start menu.
- Familiarize yourself with the tool's interface and explore its various options for capturing screenshots.
- Depending on the tool you've chosen, you can typically capture screenshots by pressing a hotkey combination or clicking on a designated capture button.
- After capturing a screenshot, the tool may provide options for editing, annotating, or saving the screenshot. Take advantage of these features to enhance the captured image, if necessary.
- Save the edited or annotated screenshot to your desired location on your samsung laptop.
By following these simple steps, you can easily install and use a third-party screenshot tool on your samsung laptop, allowing you to capture and edit screenshots seamlessly.
Editing And Annotation Options For Captured Screenshots
Using The Built-In Image Editor On Windows
If you're using a samsung laptop running on windows, you're in luck! Windows comes with a built-in image editor that allows you to easily edit and annotate your captured screenshots. Here are the key points to keep in mind when using the built-in image editor:
- The image editor is integrated into the windows operating system, so you don't need to install any additional software.
- To access the image editor, simply open the screenshot you want to edit by double-clicking on it.
- Once the screenshot is open, you'll see a toolbar at the top of the screen with various editing options.
- You can crop the screenshot to focus on a specific area, adjust the brightness and contrast, and even apply filters to enhance the image.
- The image editor also allows you to add text, shapes, and arrows to highlight specific elements in the screenshot.
- When you're done editing, you can save the image in a variety of formats, such as jpeg or png.
- Keep in mind that the built-in image editor is fairly basic and may not have advanced features like layer editing or advanced filters.
Utilizing Third-Party Image Editing Software
If you're looking for more advanced editing features or want to take your screenshot editing to the next level, there are many third-party image editing software options available for samsung laptops. Here's what you need to know about using third-party software for editing your screenshots:
- There are numerous third-party image editing software options to choose from, such as adobe photoshop, gimp, or canva.
- These software tools offer a wide range of editing features, including advanced filters, layer editing, and more.
- They often have more customization options and allow for precise editing of your screenshots.
- Depending on your needs and preferences, you can choose between free or paid software options.
- Keep in mind that using third-party software may require some time to learn and get comfortable with the interface and features.
Adding Annotations And Highlights To Screenshots
Annotations and highlights can be incredibly useful when you want to draw attention to specific details or provide additional context to your screenshots. Here are some tips for adding annotations and highlights to your screenshots:
- Use text annotations to provide explanations or add additional information to the screenshot.
- Arrows and circles can be used to highlight specific areas or elements within the screenshot.
- Consider using different colors or thicknesses for your annotations and highlights to make them stand out.
- If you're using the built-in image editor, you can easily add annotations and highlights using the available tools.
- In third-party image editing software, look for tools specifically designed for adding annotations and highlights.
Remember, the aim of editing and annotating your screenshots is to make them visually appealing and easy to understand for your intended audience. Select the editing options and software that best suit your needs and level of expertise. With these tools at your disposal, you can enhance your screenshots and create visually engaging content.
Saving And Organizing Captured Screenshots
Capturing screenshots on your samsung laptop is a powerful feature that allows you to save important information, record moments, or troubleshoot issues. However, simply taking screenshots is not enough. You also need a systematic approach to saving and organizing them effectively.
In this section, we will explore the key points for saving and organizing captured screenshots on your samsung laptop.
Selecting The Appropriate File Format
To ensure compatibility and flexibility when saving screenshots, it is essential to choose the appropriate file format. Consider the following options:
- Jpeg: Ideal for screenshots with a lot of colors and details. It offers a balance between image quality and file size.
- Png: Recommended for screenshots that require high image quality, such as tutorials or designs. The file size is larger than jpeg, but it retains more details and supports transparency.
- Gif: Often used for capturing short animations or screen recordings. Keep in mind that it has limited colors and image quality.
By selecting the right file format for your intended use, you can optimize both storage space and image quality.
Choosing A Reliable Storage Location
After capturing screenshots, it's crucial to choose a reliable storage location to avoid losing or misplacing them. Consider the following options:
- Local storage: Save your screenshots directly onto your laptop's hard drive or ssd. This ensures quick access and is suitable for personal use or when you have limited storage requirements.
- Cloud storage: Utilize cloud storage services like google drive, dropbox, or microsoft onedrive to save your screenshots. This provides extra safety and accessibility across multiple devices. Additionally, cloud storage prevents loss of data in case of a laptop malfunction or theft.
By choosing a dependable storage location, you can have peace of mind knowing that your screenshots are safe and easily accessible.
Organizing Screenshots With Folders And Tags
As you accumulate a significant number of screenshots, organizing them becomes essential for easy retrieval. Here are some effective methods:
- Folders: Create dedicated folders based on categories or projects. For example, you can have separate folders for work-related screenshots, personal images, or specific projects. This helps maintain a well-structured system for effortless navigation.
- Tags: Implement a tagging system to further streamline organization. Add relevant keywords or descriptions as tags to each screenshot, allowing for quick search and retrieval based on specific criteria.
By using a combination of folders and tags, you can create an organized screenshot library, saving valuable time and effort when locating specific screenshots.
Remember, capturing screenshots is only the first step. By selecting the appropriate file format, choosing a reliable storage location, and organizing them efficiently with folders and tags, you can make the most out of your samsung laptop's screenshot feature. So, get ready to capture, save, and organize your screenshots hassle-free!
Frequently Asked Questions For How To Screenshot On Samsung Laptop?
How Do I Take A Screenshot On My Samsung Laptop?
To take a screenshot on a samsung laptop, simply press the "windows" key and the "print screen" key simultaneously. The screenshot will be saved automatically in the "pictures" folder under a subfolder called "screenshots. "
Can I Capture A Specific Area Of The Screen On My Samsung Laptop?
Yes, you can capture a specific area by using the "windows" key, "shift" key, and the "s" key together. After pressing these keys, you can click and drag to select the area you want to capture. The screenshot will be saved in the clipboard, and you can paste it into an image editing tool or document.
Is There A Shortcut To Capture An Active Window On My Samsung Laptop?
Absolutely!
Read the full article
0 notes
Text
Discovering the Perfect Snipping Tool for Mac: Unleashing Zight
When it comes to capturing screenshots or snipping specific sections of your Mac's screen, having the right tool at your disposal can make a world of difference. While Windows users have long enjoyed the convenience of the Snipping Tool, Mac users often find themselves searching for an equivalent solution. In this article, we will explore the quest for the best snipping tool for Mac and introduce you to an exceptional option called Zight.
Understanding the Need for a Snipping Tool on Mac:
Before diving into the search for the ideal snipping tool, it is essential to understand why having such a tool on your Mac is crucial. Snipping tools enable you to capture screenshots, annotate them, and easily share them with others. They can be particularly useful for professionals, students, or anyone who needs to quickly capture and communicate information.

Exploring Snipping Tools for Mac:
Native Mac Tools: MacOS provides several built-in options for taking screenshots, including keyboard shortcuts and the Grab utility. While these tools offer basic screenshot capabilities, they often lack advanced features and customization options.
b. Third-Party Snipping Tools: To unlock more robust functionality, Mac users often turn to third-party snipping tools. These tools offer a wide range of features such as various capture modes, annotation tools, cloud storage integration, and more.
Introducing Zight: Your Ultimate Snipping Tool for Mac:
Among the numerous third-party options available, one snipping tool that stands out from the crowd is Zight. Zight offers a comprehensive set of features specifically designed for Mac users, providing a seamless and efficient snipping experience.
Easy Installation: Zight can be effortlessly downloaded and installed on your Mac, ensuring a hassle-free setup process.
b. Intuitive User Interface: Zight boasts a user-friendly interface that is easy to navigate, making it suitable for users of all levels of technical expertise.
c. Capture Modes: Zight offers a range of capture modes, allowing you to select the precise area you want to snip, whether it's a specific window, a region, or the entire screen.
Annotation Tools: Zight provides a variety of annotation tools, enabling you to add text, shapes, arrows, and other visual elements to your screenshots.
Customization Options: With Zight, you can personalize your snipping experience by customizing hotkeys, file naming conventions, and image formats according to your preferences.
Cloud Integration and Sharing: Zight integrates seamlessly with popular cloud storage services, making it easy to save and share your snipped images across devices or with others.
Finding the Best Snipping Tool for You:
While Zight offers an exceptional snipping experience for Mac users, it's essential to consider your individual needs and preferences when selecting a snipping tool. Factors such as pricing, additional features, customer support, and compatibility with your specific macOS version should be taken into account.
Conclusion:
Capturing and sharing screenshots is an integral part of our digital lives, and having the best snipping tool for your Mac can significantly enhance this process. Zight offers an impressive range of features, making it an excellent choice for Mac users seeking a reliable, intuitive, and feature-rich snipping tool. With Zight, you can effortlessly capture and share your screen moments, boosting productivity and communication in various professional and personal scenarios.
0 notes
Text
How to Defrag Windows 10 in 2020 A Complete Guide
How to Defrag Windows 10 in 2020 A Complete Guide
Here move to Hot Keys section and you’ll see all the screenshot methods along with a hotkey for them. Now re-configure and memorize the hotkeys for screenshot types that you want to use. Windows built-in Snipping Tool is a good option to take care of basic screenshot taking needs. It might not be as fast as the above methods, but it offers more control. The image will be in PNG format and it will…
View On WordPress
0 notes
Text
9 Fastest Ways to Take Screenshots on Windows 10 PC
9 Fastest Ways to Take Screenshots on Windows 10 PC
Like taking a screenshot of the entire screen, there are also hotkey combinations available for capturing part of the screen. This method seems similar to using the Snipping Tool. However, as this method is simplified, you cannot use some of the advanced functions of the Snipping Tool, such as the free-form snip mode and the annotators. What you captured using this tool can be saved as an image…

View On WordPress
0 notes
Text
Keyboard shortcut for snipping tool windows

#Keyboard shortcut for snipping tool windows full#
#Keyboard shortcut for snipping tool windows windows 10#
#Keyboard shortcut for snipping tool windows windows#
#Keyboard shortcut for snipping tool windows windows#
After that, you have to choose Windows Accessories and then you have to right click on the Snipping Tool and then click on More.
#Keyboard shortcut for snipping tool windows windows 10#
The first thing that you have to do to make a keyboard shortcut for the Snipping Tool on Windows 10 is to click on Start and then choose All Apps.To do this, you are able to follow the steps below. If you use a Snipping Tool often, you are able to create a hotkey for it so that it will make you easier to access. Making Snipping Tool Using Hotkey in Windows 10 Esc : If you are in the middle of getting a screen capture, this key will cancel it out by escaping.Alt + T and then E: This shortcut is for choosing an Eraser tool.Alt + T + and then H: This shortcut is for selecting a Highlighter tool.Alt + T and then P and then C: If you use this shortcut, you will use a customized Pen.Alt + T and then P and then P: If you use this shortcut, it means that you will use Custom Pen.Alt + T and then P and then L: If you use this shortcut, it means that you will use Black Pen.Alt + T and then P and then B: If you use this shortcut, it means that you will use Blue Pen.Alt + T and then P and then R : If you use this shortcut, it means you will use Red Pen.Alt + T and then P: If you use this shortcut, it will select the Pen tool.Alt + T and then O : It will set Snipping Tool options.Alt + F and then T: It can send as an email but it requires Outlook installed.Ctrl + P : It prints the screen capture.Ctrl + C : It will copy the screen capture.Ctrl + S : It saves the screen capture.And then, do not forget to hit Enter to commit the choice. You are able to use up arrow and down arrow keys to choose from: no delay, 1 second, 2 seconds, 3 seconds, 4 seconds, 5 seconds. Alt + D : It is for setting the delay for starting the capture.Then, you have to hit Enter to commit the choice. You are able to use up arrow and down arrow keys to be able to choose from: free-form snip, window snip, rectangular tool, full-screen snip. Alt + M : It will set the screen capture mode.Alt + N or Ctrl + N : It will start a new screen capture.Here are some of the keyboard shortcuts of Snipping Tools. However, you are able to make a keyboard shortcut to be able to open Snipping Tools. If you want to open the Snipping Tool, there is no keyboard shortcut to open. If you want the shortcuts to work, you have to open the Snipping Tool and also you have to make it the app which has the focus. Using Keyboard Shortcuts In Snipping Tool There, you can find the shortcut of Snipping Tool. Now, click on More and then Open File Location to open Windows Accessories. After that, select Windows Accessories and right click on the Snipping Tool. To know where it is, you can click on Start and then choose All Apps. If you are looking for the Snipping Tool shortcut location, you are able to find it in Accessories. It will ask you to save them manually in the tool before you exit. It is important for you to note that Snipping Tool does not save your screenshots automatically.
#Keyboard shortcut for snipping tool windows full#
The default snip type is a rectangular snip, but you are also able to take free-form, window snips or full screen. You are able to click on the New button to start the screenshot process. However, you are still able to access it via the search bar. From the list of apps from the Start menu, The Snipping Tool has been removed. The Snipping Tools Shortcuts in Windows 10Īccording to the CNET site, the Snipping Tool has been around since Windows Vista and Windows has stated that for a couple years the Snipping Tool is moving away.
0 notes
Text
Keyboard shortcut for snipping tool windows

KEYBOARD SHORTCUT FOR SNIPPING TOOL WINDOWS HOW TO
KEYBOARD SHORTCUT FOR SNIPPING TOOL WINDOWS INSTALL
KEYBOARD SHORTCUT FOR SNIPPING TOOL WINDOWS FOR WINDOWS 10
KEYBOARD SHORTCUT FOR SNIPPING TOOL WINDOWS SOFTWARE
KEYBOARD SHORTCUT FOR SNIPPING TOOL WINDOWS HOW TO
Learning how to use Snipping Tool Windows 10 is beyond the scope of this guide but it's easy when you launch the app on your PC. We are sure you will like at least one method out of the all the methods given above to launch the Snipping Tool on your computer.
KEYBOARD SHORTCUT FOR SNIPPING TOOL WINDOWS SOFTWARE
What makes it possible is a software called Windows Password Key that can be obtained from its official website. That way you can get access to your account even when you have forgotten the password. If you don't already know, you can now even recover password for your user account on your PC. There are so many interesting things that you can learn about Windows 10. You've got flexible screenshot modes as well as you can configure the app to take scheduled screenshots for you. Screenshot is more than a screen capturing utility as it lets you edit and even upload your screenshots to the Internet right from the app. You can set the preferences as to how you would like to save the screenshots in the app. Lightscreen allows you to set up a hotkey to take screenshots and the app runs in the background so as not to disturb you while you work on your tasks. You can also edit screenshots right after you have taken them on your PC. It's the fastest way to capture screenshots and share them on the Internet. Lightshow will sound familiar to you if you have ever searched for screen capturing tools on any search engine. It lets you take screenshots of individual focus areas, is lightweight, and has customizable workflows. ShareX is a nice screen capturing tool that is open source and comes with tons of features to use on your PC. It supports OCR and allows you to annotate the screenshots you have captured on your computer. Greenshot is available for both Mac and Windows and it provides you with a straightforward way to capture screenshots. If you are not happy with the built-in tool and would like other Snipping Tool download Windows 10, then here are five of the free snipping tools available for your Windows 10 PC.
KEYBOARD SHORTCUT FOR SNIPPING TOOL WINDOWS FOR WINDOWS 10
But other features like cloud storage or screen recording are not provided.Extra Tip: Other Free Snipping Tool for Windows 10 It is a tool, which is specialized in screenshotting feature. And compared to other tools, its price is higher. But you will be required additional charge for cloud storage. This post explains where to download Snipping Tool, how to use it, Snipping Tool keyboard shortcuts and alternates to Microsoft Snipping Tool. This is a tool to help user take screenshots with advanced tools and you can also use its screen recorder. It also has screen recorder and cloud storage features. This is a basic tool to take screenshot on Macbook or Mac with low price. Step 2Then you can select a screenshot area to take a screenshot. You need to select Snpashot in this step. Step 1Launch the program, then you can choose Video Recorder, Audio Recorder or Snapshot in the interface.
KEYBOARD SHORTCUT FOR SNIPPING TOOL WINDOWS INSTALL
You can download and install FoneLab Snipping Tool from official site, then check below demonstration. And you can add labels according to your needs, you can add text, painting, line and more. It is available for both Windows and Mac, you don’t need to concern that if it has a workable tool on Mac. This is a free but powerful tool to take a screenshot with ease. There are some Grab app Mac alternatives you can try if you would like to use tools rather than Grab. Shift, Command, and 6: The Entire Touch Bar 3. Shift, Command, and 5: The Entire Screen/Window/Portion Shift, Command, and 4: Portion of the screen There are some other shortcuts you can try to screenshot on Mac except for the above-mentioned shortcuts of Grab.
0 notes
Text
Create keyboard shortcut for snipping tool

#Create keyboard shortcut for snipping tool how to#
#Create keyboard shortcut for snipping tool for mac#
#Create keyboard shortcut for snipping tool full#
#Create keyboard shortcut for snipping tool for windows 10#
#Create keyboard shortcut for snipping tool windows 10#
#Create keyboard shortcut for snipping tool how to#
What is the Snipping Tool? What are its features? How to open it? Let’s discuss more about Snipping Tool in detail. But, most of the Windows users have forgotten the built-in tool named Snipping Tool. To take screenshots on Windows OS devices, we are relying on some of the third-party tools like Lightshot, ShareX, Greenshot, and many more. Later, they can be used for future references. If you would like to make sure that you could end your tile Snipping Tool windows and make it look skilled, you need a wet tile saw.Nowadays, Screenshots are essential to capture important things on the screen. And due to advertisements solely, would there be no want to worry about anything. There are Windows Snipping Tool download arguments in my mind to show this and true history without biased opinions in any grade. Download Snipping Tool free are sandboxed so that they can’t do bad issues to your Pc, which makes them safer to run. Split ends are most visible if you end up in direct sunlight so it's a good idea to look in an area with direct light from the sun.
#Create keyboard shortcut for snipping tool windows 10#
You can use a single Snip Tool Windows 10 or a click to get a quick screenshot.Įven in case you profitable partially freeze the world using an ice cube, there nonetheless is going to be quite a lot of ache involved. It may create all kinds of Snipping Tool shortcut for windows 10, and you may as well use it to do some mild editing. How to use Snipping Tool you are on the lookout for a snipping tool with picture modifying capabilities, you might have many excessive-high quality options. Now you can put it aside as a file and do primary enhancing.
#Create keyboard shortcut for snipping tool for mac#
Whenever you simply must take a simple download Snipping Tool with the complete display screen, an energetic window, or part of the display, here is the default snipping tool for Mac with keyboard shortcuts. In this tutorial we are going to present you methods to take screenshots with it, how to save lots of, edit or email a screenshot, how to make use of the obtainable markup instruments and the way to vary the settings of the Snipping Tool app. How to clip on PC also opens the plant up to air circulation, lowering bug problems and dampness which will cause rot or viral infections. If in case you have cowlicks strive using a repeated left to right motion with a paddle brush blowing the air downwards, or alternatively use a straightening iron on the roots. You can snag and grab part of your Snipping Tool download Windows 10, a region of a display screen, a whole window, or perhaps a scrolling window, by using a single hotkey or click of the mouse.
#Create keyboard shortcut for snipping tool full#
Now, you minimize the Snipping Tool Windows 10 they means you wanted, or if in case you have chosen full display, then by now, it’ll be out there to you for additional enhancing. Try planting in one other season, in a unique area, possibly starting the seeds indoors, or attempting one other variety. When planting out shrubs and perennials, make it possible for you don't heap soil or mulch up across the stem. Then, you can give a simple Windows 10 Snipping Tool to that screenshot to edit or share it.įit your bowl on these Snipping Tools and ensure the bolts hold bowl in place. All plants can get these however orchids are particularly susceptible to infection.
#Create keyboard shortcut for snipping tool for windows 10#
A dull Snipping Tool for Windows 10 shear will not make a clear cut, however will merely crush a plants' stem and injure it. You should take away them everytime you see them, not ready until your regular pruning time. Remove threads, lengthy Snipping Tool freeload and other debris that gets wrapped around the vacuum cleaner beater. With these scissors you should suppose Snipping Tool shortcut earlier than utilizing them on skinny or high-quality hair as you could end up with a method that is hard to mix or that's left excessively thin. What is a Snipping Tool getting a manicure isn’t out there to you right now due to the pandemic, but doing something as simple as painting your nails can change your mood and give you the increase you deserve.Ĭertain this is quick and efficient however you actually need to be careful in order that you don't end up with some issues.
Capture Complete Display will take a full-screen screenshot of your screenĮffectively, this was actually interesting, seeing as I'm having a troublesome time getting Snipping Tool download to my page.
Save or share the file directly snipping app.
If you realize the way to care in your flower Snipping Tool, it can make an enormous distinction in the look and over-all well being of your plants. Perennial flower bulbs want not to be replanted since they grow and bloom for a number of years while annuals grow and bloom for only one season. The way in which you inform the story, one cannot think of clicking away.
0 notes
Text
5 Best Alternatives To Windows Snipping Tool
5 Best Alternatives To Windows Snipping Tool
You will now be prompted to downloadffmpeg on your PC. ClickYes to automatically download and set up the same. Image Splitter can help you split images from your local storage into columns and rows. This can come in handy if you wish to separately show different sections of an image. Start by using the hotkey we set earlier to activate the Image Splitter.
download WebCam Driver For MSI…

View On WordPress
0 notes
Text
despite windows 11 being kind of a visual nightmare and having to adjust like 50,000 settings to make things work for me, i really am thrilled to finally have a computer where all the fancy hotkeys work.
#screen bright go up!#pause music!#BOOM!#all from the MAJESTIC POWER of MY KEYBOARD!!!!!!!#TREMBLE BEFORE IT AND DESPAIR! OR DELIGHT! WHATEVER!#there's a printscreen button you can connect to the snipping tool...#hotkeys my beloved <3
0 notes
Photo


holy shit
#liveblogging#mass effect#me:a#critical role#grog strongjaw#tfw there's no screenshot hotkey and all you have is a snipping tool to work with#there's also no pause function so while i was typing in the screenshot name guess who fuckin DIED#(spoiler alert: it's me)#in retrospect i could have probably stayed in cover#fndjksalfndas
133 notes
·
View notes
Last Seen Blogs


kpobta
KPO

canadiancryptid
The Thing Living in The Woods

eldee-ld
eldee

lanabeeleaf
Evergray Enthusiast