#altersuperego
Photo


Dry Heat/ Cold Rain/ Green Blade - altersuperego
More detail and what inspired the design here
Format: approx. Din A5
Materials used
cover:
cardboard (two layers)
bookcloth
goat parchment
bookbody
paper munken polar 100g/m²
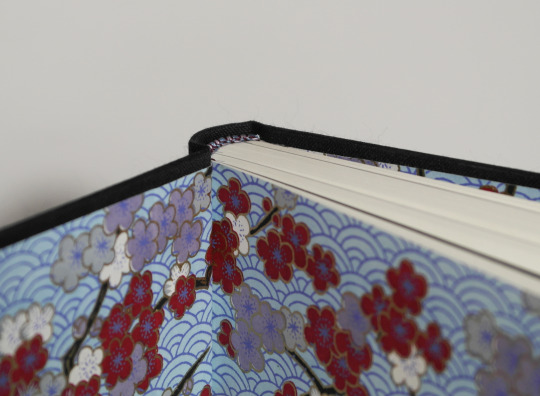
endpapers: chiyogami
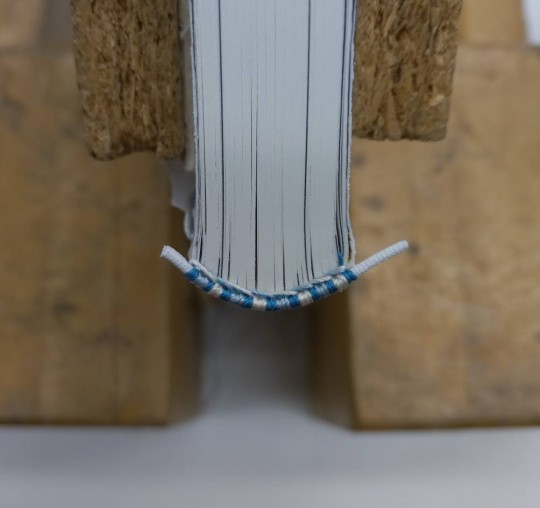
endbands: buttonhole silk
transparent paper
story dividers: satogami
fonts used
title: Felix titling (15)
text: Garamond (10)
clamshell box
cardboard (1mm and 1,5mm)
elephanthide paper
Efalin
#bookbinding#fanbinding#ficbinding#altersuperego#dry heat#cold rain#green blade#clothbinding#parchment inlay#Bleach#Tite Kubo#bleach fanbinding#clamshell box#headbands#hellbutterfly#jigokuchō#gotei 13
149 notes
·
View notes
Photo


Dry Heat/ Cold Rain/ Green Blade - altersuperego
See the finished project here and here
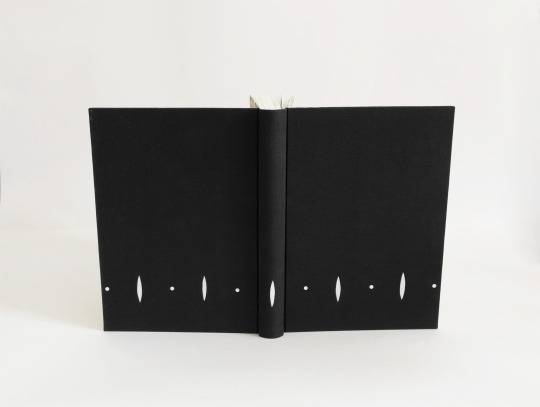
The book is done, the gift made, so now I can share a bit more detail about the inspiration. I think the design was subtle enough to not give away too much (although I felt like I wrote a lot about Hollows and that just had to be a dead give away.)
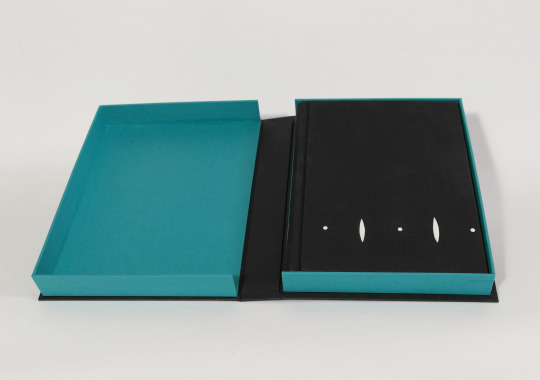
The cover was inspired by the captains haori. I went for an inverted version of it for completely practical reaons though. A white cover would look dirty and grey in no time, that’s also why I went for paper backed parchment instead of simple white paper. The parchment is much more dirt resistant.
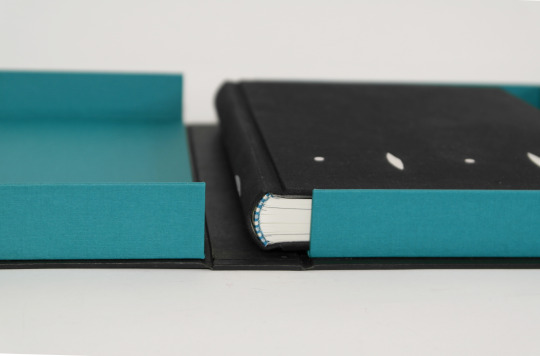
The black looks just as dusty though, so that was that plan... now I built a clamshellbox to keep it clean
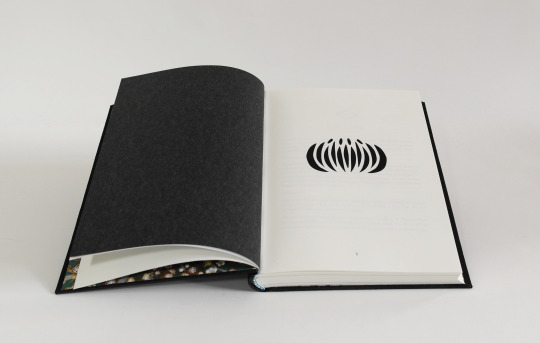
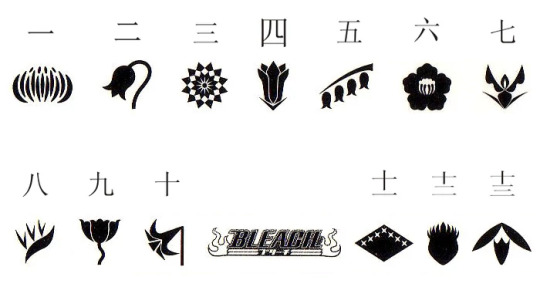
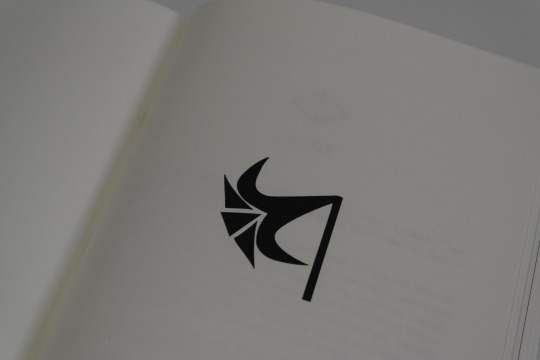
The chapter numbers had first been regular roman numbers until I realised there was no chapter higher than 10! I could go for the a division style there! The unfinished last fanfiction, Green Blade ís just 3 chapters in... and there was my Gotei 13, Since all three fics together are not excessively long I had some blank pages to spare and went for a lot of space in between, So every chapter comes with it’s respective division’s insignia.
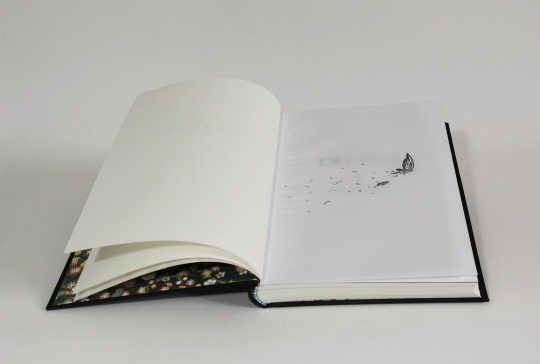
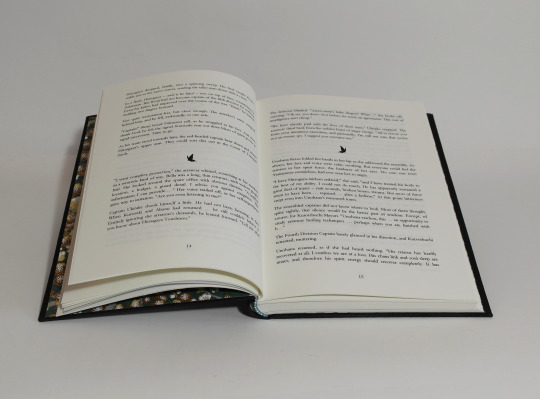
Each of the stories has different chapter dividers featuring the jigokuchō, the hellbutterfly, a messenger of the shinigami (deathgods) in form of a black butterfly.


#bookbinding#dry heat#cold rain#green blade#altersuperego#ficbinding#fanbinding#Bleach#Tite Kubo#design inspiration#jigokuchō#gotei 13#bleach fanbinding
69 notes
·
View notes
Photo

@AlterSuperego Hello, hit me up on my website https://en.ikeviin.com if you need professional artwork like mixtape cover, single cover, motion cover and more
0 notes
Photo


Dry Heat/ Cold Rain/ Green Blade - altersuperego
More detail and what inspired the design here
Format: approx. Din A5
Materials
cover:
cardboard (two layers)
bookcloth
goat parchment
bookbody
paper munken polar 100g/m²
endpapers: chiyogami
endbands: buttonhole silk
transparent paper
story dividers: satogami
fonts
title: Felix titling (15)
text: Garamond (10)
clamshell box
cardboard (1mm and 1,5mm)
elephanthide paper
Tsumugi
Chiyogami
#bookbinding#Bleach#fanbinding#ficbinding#altersuperego#Dry Heat#Cold Rain#Green Blade#clamshell box#Tite Kubo#bleach fanbinding
131 notes
·
View notes
Photo

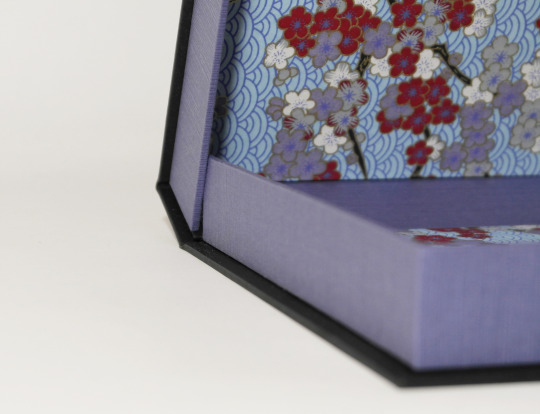
WIP Dry Heat/ Cold Rain/ Green Blade - altersuperego
casing in
I had just rounded the spine and glued the tube on the book spine against the spine of the cover, when I noticed the front edge has gotten a bit short delicate (sometimes that happens), but it made me worry that with the stretching of the paper I’d end up with just a tiny strip of front edge. So I cut back the paste down about a mm to prevent that.
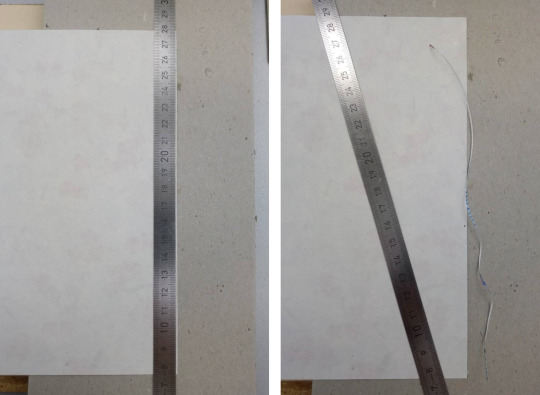
When applying glue (or any moisture for that matter), paper stretches which can be a hassle if unaccounted for. With Chiyogami the stretch is not as bad as I feared, but it still made up half of what I cut back. Being shorter than necessary is ok in this case though. When the book is closed no one will notice the paste down is actually a bit smaller than the innerbook and when it’s open, well, then it makes for a good looking front edge. The only must here is, USE SOME MACULATION WHEN APLLYING GLUE.
I forgot that once and it would have been fine had both my endpapers had the same size... as it was I had a very neat strip of glue on the fly leaf...

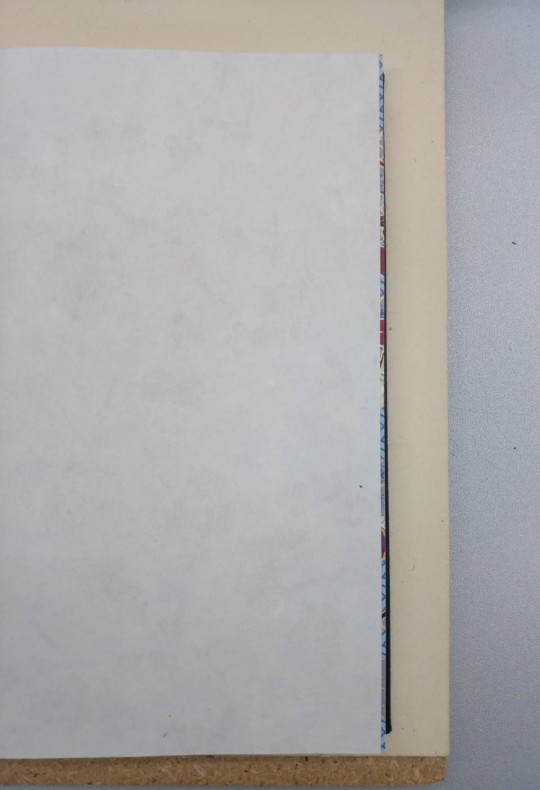
I closed push down the hinge and close the cover only lightly just to lift it up a tiny bit again and check if the endpaper is straight or askew. Because the endpaper is only lightly attached to the cover it can be carefully corrected if necessary before I turn to the other endpaper.
When both are done I apply some short, but heavy pressure to get the paste down to stick firmly to the cover. Take it out of the press and check immediately for emerging glue on the paste down. This is a bit tricky, because the cover needs to be opened far enough to wipe away any excess glue, but the glue is still fresh enough that the paper can be pulled out of place if opened carelessly or too far, which would result in nasty wrinkles close to the inner hinge.
I prevent that by pushing down the cover so the inner hinge gets kind of clamped and can’t move too much while opening the book a bit.
It looks somewhat like this:
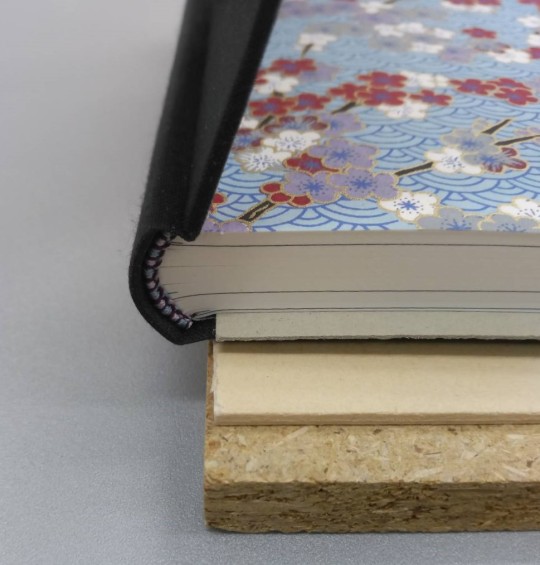
When the book is clean I put thin cardboards between paste down and fly leaf and align them with the cover board without blocking the hinge. The cardboard is to prevent the glue-moisture from wandering into the inner book and make everything wavy. Instead it can wander into the cardboard without doing any harm. Then I settle the book between more clean cardboard (I use finnboard, but any cardboard will do, it only has to absorb the moisture and protect the cover from scratches), weigh it down and let it dry.

#bookbinding#fanbinding#ficbinding#WIP bookbinding#casing in#altersuperego#dry heat#cold rain#green blade#Bleach#paste down
16 notes
·
View notes
Photo

WIP Dry Heat/ Cold Rain/ Green Blade - altersuperego
Part IV
I decided to go with the cut out method and a cut in the fabric to get it worked into the hollows neatly. Part of making it stick was done with a sharp edged bonefolder, part with a foam rubber mat that I put on top and pressed in firmly in a press.
Once it’s dry enough I cleaned out the turn ins. I never get them just nice and even, so I just plan for that in advance.

(I trimmed the front turn ins before remembering of taking a picture... )
Even if the fold ins show through the endpaper they still look neat and tidy when this way.

7 notes
·
View notes
Photo
WIP Dry Heat/ Cold Rain/ Green Blade - altersuperego
Part III
More trials.
So I tried to cut out the shape I wanted from the fabric and glue in the inlay, but apparently I’m not capable of cutting the inlay neat enough. There are small gaps between the fabric and the inlay and I just can’t not see them. I’m also convinced the fabric will fray at the cut edges.
So I was back to square one and went for the first option again because, while the inlays were not perfect in size, they were set in smooth and nice on the cover.


With greater attention which cut out belonged to which recess and some more thorough preparation the result should be what I want. Only the fabric was too stubborn to stick closely to the edges. Each time I worked one side in and moved on to the other, the first one pulled loose again.
I solved the problem with the fabric having too much tension to nicely sit in the hollows, by simply adding a cut that would be covered by the inlay later and I really like the result.

What I learned from this book was: small and narrow inlays are hell, but if you want them, make sure they are a good fit or they look crappy. If they don’t fit, cut out some more until there is an inlay that fits. This means ALWAYS keep your cut outs until your done, you might need them again for tracing new inlays...
(I also got to see why it’s smart to first try small samples with a technique I’m not familiar with or utterly convinced of. I’d have hated to ruin my cover just because I was impatient or too lazy to take the really ridiculous little amount of time it takes, compared to making a new cover)
#bookbinding#WIP#inlay#trials#parchment inlay#bleach#tite kubo#dry heat#cold rain#green bläde#altersuperego#fanbinding#ficbinding
9 notes
·
View notes
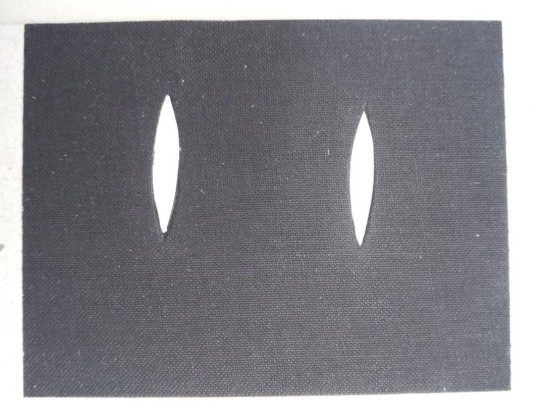
Photo

WIP Dry Heat/ Cold Rain/ Green Blade - altersuperego
Part I
More pictures and descriptions under the cut
New WIP that’s going to be a birthday gift so I’m not naming it properly just yet.
This post is a bit of a jumble, Sorry for that. I think I wrote quite a bit about some of my processes already though, so this one is partly about stuff I have not written about yet and partly about things particulary concerning this work.
After printing there was a lot going on that I wasn’t quite happy with. I am, however, even more happy with the result now as I might have been if the printing hadn’t required some adjustment.
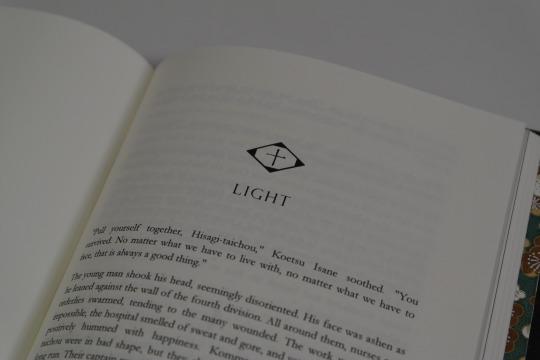
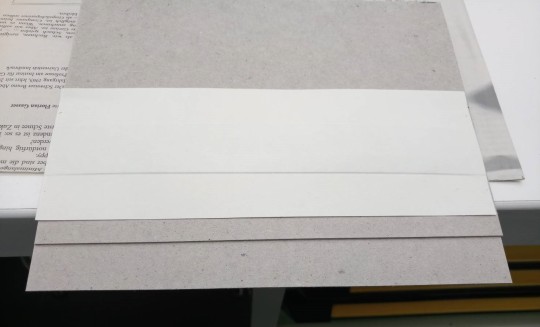
For example the pages following the title pages showed through much more than I liked, so I added black Satogami papers, which now also mark off different sections of the book. I cut the paper to size plus 3-5mm to have a small ledge to sew through (the ledge is glued down to make sewing easier and keep the paper in place).

This time there are a few pics of my sewing process.
I like to sew on Ramie band because it is so thin and can be easily spread out after moisturising so it barely shows after glueing the paste down down.
Historically entwining the thread while sewing the bookblock was done when books were not sewn on bands so those intersections connected the signatures and offered some more stability. Since the use of bands to sew on, it’s not really necessary anymore.
I still like to entwine the sewing thread of the first and following and the last and previous signature to keep the thread firmly on the spine and my first and the outside signatures from slipping out too much when rounding the spine.

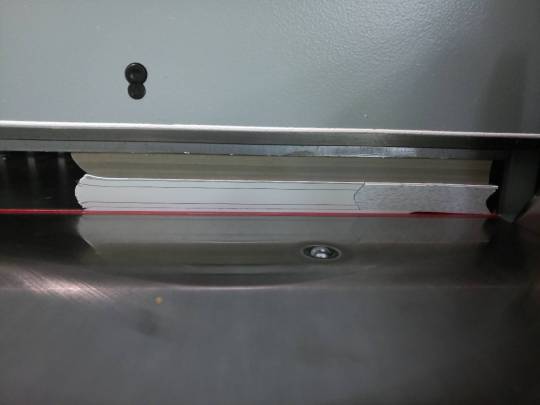
When guillotining the head and foot edge, I place the book on a cardboard an to protect the shoulders from getting squashed by the pressure of the guillotine (you can see another cardboard construction with one rounded edge on top of the bookblock). I also fill up the front edge (which was guillotined before rounding the bookblock) with some scrap paper or maculation to keep the uper pages from fraying. I think next time I’ll also cut the paper to fill the edge smooth so I have a smooth edge to line up against the side of the machine.
Even without a professional guillotine I can only recommend to fill out the front edge of rounded books for trimming the head and food edge. Knives are made to cut against surface and the results will always be neater with a surface to cut against, than pushing down on paper in mid air!
#WIP#bookbinding#headbands#endbands#bookblock sewing#guillotining the bookblock#fanbind#ficbinding#altersuperego#dry heat#cold rain#green blade#tite kubo#bleach
8 notes
·
View notes
Photo

WIP Dry Heat/ Cold Rain/ Green Blade - altersuperego
Making covers
I took the measurements after finishing the headbands. I barely use a ruler for that though. I just take a strip of paper and mark all I need there (spine width, height, board width... all goes down on the same strip)
I do the cutting of same measurements with the same setting on the boardcuttter to make sure they ARE the same measurements. When I cut the board’s width I just make sure it’s larger than they need to be. When I’m working with A5 for example, I cut them the width of A5. In addition to the hinge that leaves more than enough board for the front edge).
I assemble the boards with a another strip of paper before covering them in bookcloth, paper or whatever I chose for materials. First on is the spine board, then I mark the hinge-width on both sides and use those marks to add the cover boards. I use a thick metal ruler to get them properly aligned.
(I know there’s a way to do the assembling directly on the covering materials, but I’ve never done that and I’m a creature of habit. So this is how I’m doing it.)

For Dry Heat I had to add an extra layer of thin cardboard with the cut-out design I wanted. This was the moment I added those cardboard layers.

After everything dried well weighed down I rounded the spine and trimmed the front edge so there’s no small ‘step’ in case the thinner cardboard was not completely even with the front edge.
I covered the case in bookcloth and returned to the front to work in the hollows for the later inlays before letting everything dry under weight.

Almost last step for the cover was the trimming of the turn ins. this time I even remembered to take before and after pictures. One side was a bit close to the edge and I just made the others look even in comparison (it’s actually still a bit askew but no one will ever notice because it’s my copy)

Last came the parchment inlays, another night in the press and I was done.
... or so I thought. After rounding the spine (again) and glueing the back to the inner book, I noticed the paper on the spine was splitting and the parchment wouldn’t hold. I pulled it off, removed any loose paper and glued it on again.

#bookbinding#making covers#WIP bookbinding#fanbinding#ficbinding#altersuperego#dry heat#cold rain#green blade
5 notes
·
View notes
Photo


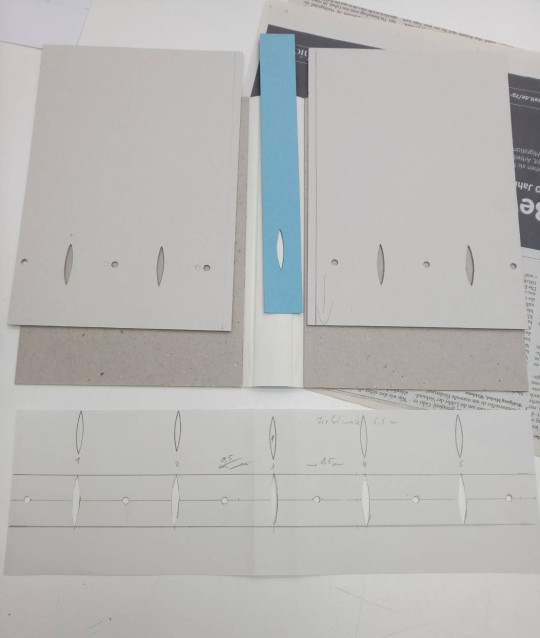
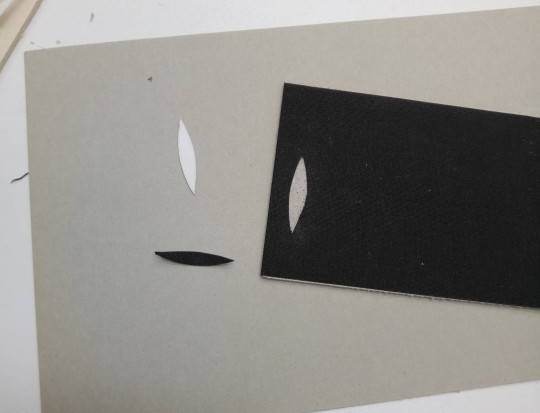
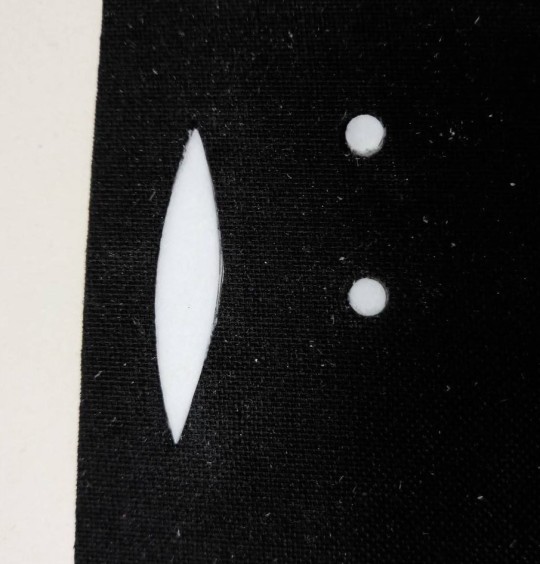
WIP Dry Heat/ Cold Rain/ Green Blade - altersuperego
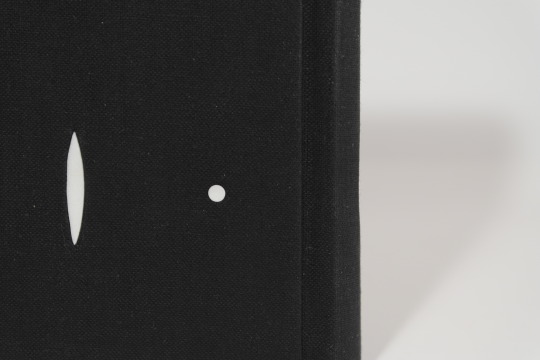
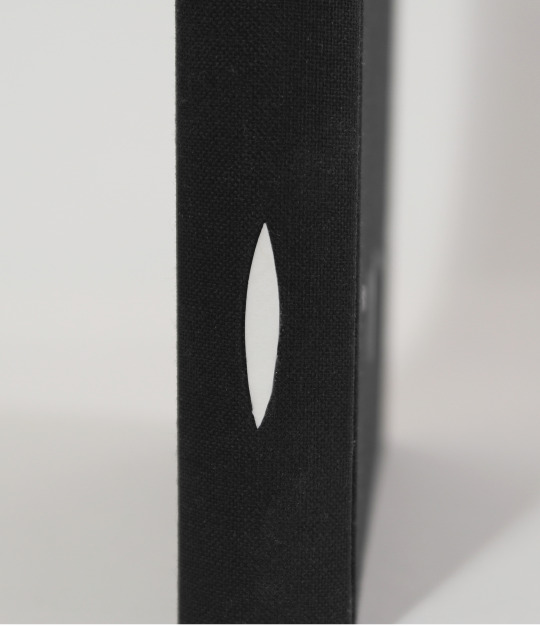
Trial for the pattern I want to use. I backed parchment with white paper to really make it stand out against the black fabric and cut out hollows so the parchment layers don’t just sit on top of the fabric where the edges would be unprotected and could peel off with use, but are more of an inlay. The sizes of the cut-outs still need some tweaking to get them right or maybe I’ll see whether or not my parchment and fabric have the same thickness and I could just cut out the part of fabric and embedd the parchment directly into it. Usually I try to avoid open fabric cuts on the surface. I always worry some thread might come loose and start fraying, but it might be a neat solution. I’ll try that next.
#bookbinding#WIP#pattern trial#parchment#process musings#inlay vs onlay vs recessed onlay#fanbinding#ficbinding#bleach#tite kubo#altersuperego#dry heat#cold rain#green blade
2 notes
·
View notes
Last Seen Blogs

kindnesskru
Everything Amazeballs

xeavy
Untitled

liamsroom
JerryM.

midcoastperformancehorses
Midcoast Performance Horses
cool-bosskaulitz-blog
Kaulitz