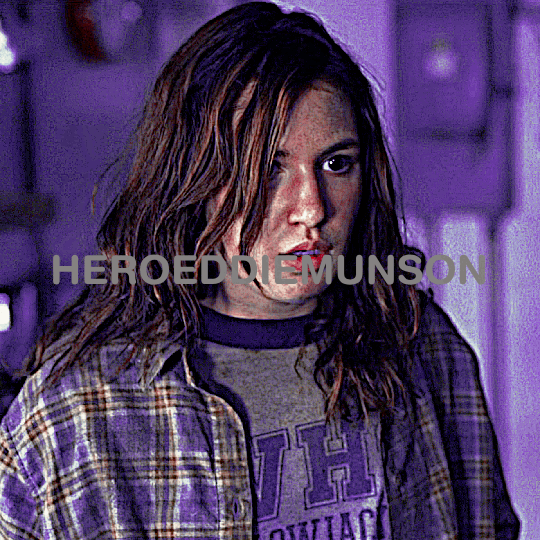
#save me photopea save me
Text
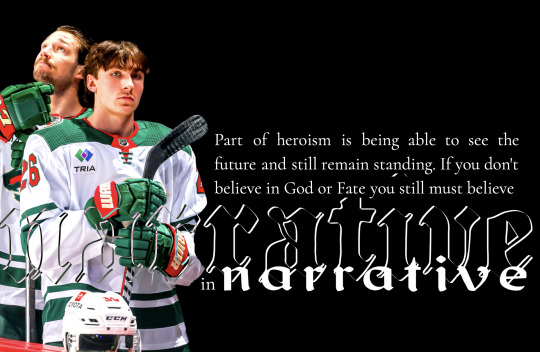
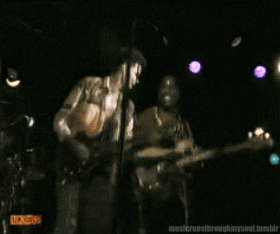
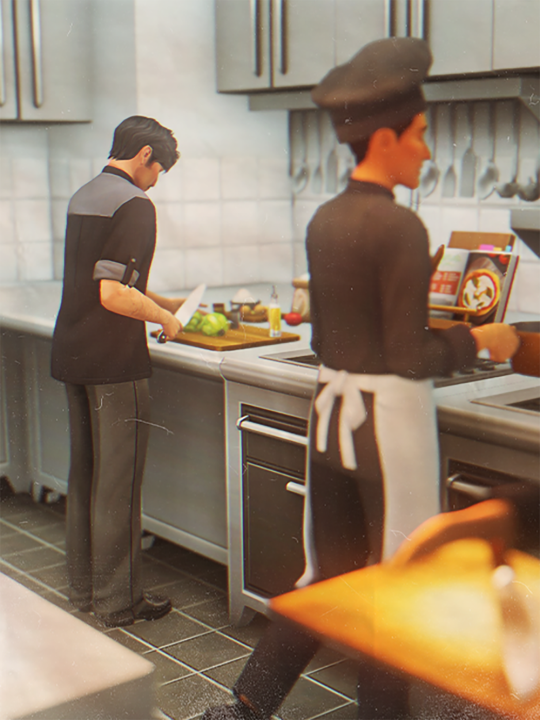
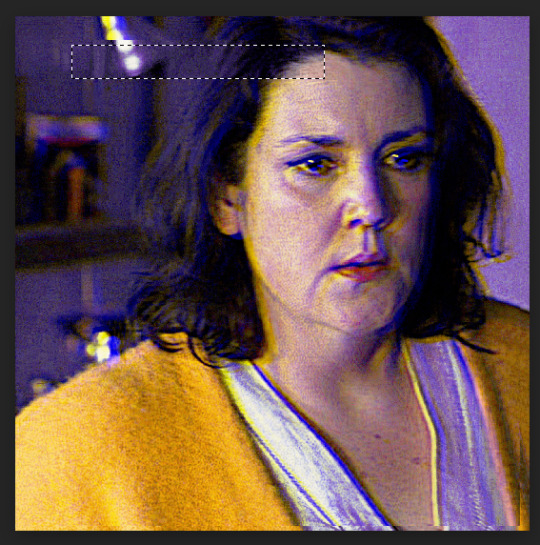
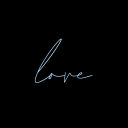
siken, four proofs
#connor dewar#brandon duhaime#minnesota wild#hockey poetry posts#save me photopea save me#photopea adventures
65 notes
·
View notes
Text
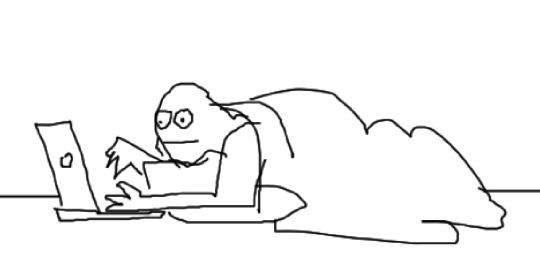
This is basically the only position I can write in because if I'm not weighted down by my own body and a mass of blankets I will become distracted and walk away in under 5 minutes every time
#Drawn on mouse trackpad in photopea because I am in this position rigt now#as you can see it doesn't save me from being distracted by other things on the computer#Such as drawing my position with my mouse trackpad#god I need to get back on adderall
20 notes
·
View notes
Text
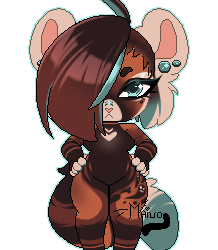
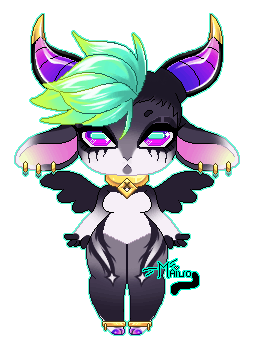
I might have to do pixel works of the boys again...
First one is my own OC, Hectate; Second one belongs to a good friend Zeia/Glitching3RR0R of Baphy ♥
#MaiuoART#Maiuo#My art#Pixel#Animated#Blinking#Fur#Furry#Furry art#Zeia/Glitching3RR0R#Hectate#Baphy#I remember doing pixels#Or animations in general#And they ALWAYS had to have BGs#Because Clip wouldn't let me save overwise...#Photopea is an amazing program to Photoshop
18 notes
·
View notes
Text

Apparently "Wonderland" synchronized hopping is a thing. 💗
#Big Country#Stuart Adamson#Tony Butler#gif#my gifs#THEY'RE SO CUTE I COULD NOT RESIST GIFING THIS :')#haha this took me less time than I thought it would because Photopea saved my edits from one of the Stuart gifs I made from this show#also sorry (not sorry) to be like this on my own post but TONYYYYYYYYYYYYYYYYYYYYYYYY 😍😍😍😍😍
2 notes
·
View notes
Text


TRUE☆HEART! ♪
reblog if save, credit if use * no kin/id/me tags
#tried out photopea for the first time w these . . .#well by first time i mean the first time i’ve edited entirely in photopea (save for doing cropping / blur effect in ibis paint)#its nice but i dont think i’ll use it much its just not rlly for me#idk maybe i’ll like it more if i get more practice#anyways#☁️。 mine#aesthetic icons#aesthetic layouts#d4dj#kokoa shinomiya#shinomiya kokoa#urrgh tagging for a fandom im not in is so hard#wtv idc <- will be upset later when these flop but thats a problem for later me
14 notes
·
View notes
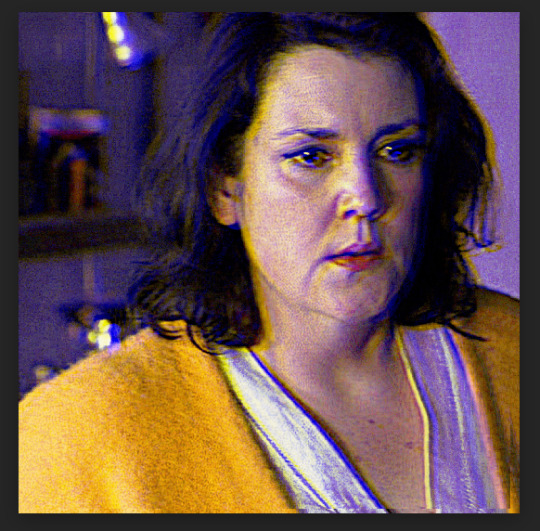
Photo


#i saved this tiktok and watch it once a day . like a vitamin . it keeps me going#* colson ricci .#poor colson has had 15 faces in his lifetime but this one .... this one feels best#photopea once again kinda butchering the koala tea but . that's fine .
2 notes
·
View notes
Note
I saw ur tag of inb4 they lock cymk behind the sub and I just got so mad I didn't even think about that...that would save my ass from having to use photopea
RIIIGHT like imo that's the One thing that its missing!! every time it updated i went running to check if they added in the ability to properly work in cmyk, it's crazy to me that such a massive art program like it doesn't have it!! and like they definitely know this. if they're ""smart"" they'll use it as a way to get people to buy into this subscription bullshit, i can already see it
#also i know there's ways to like preview cmyk colours and save files as cmyk#but i would like to open cmyk files and have them remain in cmyk. and work in them as such#hopefully even have a colour wheel that represents cmyk colours like photoshop does#Also the fact that it's mildly unclear how to save a file as cmyk in program so much so that ppl (me included up until recently)#prefer to just use photoshop or photopea to convert it is like... embarrassing imo
7 notes
·
View notes
Text
btw since ill get getting into editing more (...again? >.>) ive only once b4 actually made a self ship moodboard (w a gif i made myself too hehe <3) but !! for any of my mutuals/friends ... if y'all wld mayhaps like, i can make self ship moodboards for y'all too !
#personalised even w wtvr u want if u like !! and i edit all my uh. edits. uniquely (unless i mean to do smth sinilar to another)#so it will be Unique to You and your Self Ship for sure >.< idk tho bcs that might be a lil draining for me#esp bcs i get tired and lose energy a bit quickly bcs i use a lot of it like. a lot OFHEIWHDISJ im an energetic person okay 🥹✨#but yeah i wld like to make more self indulgent moodboards for myself and mayhaps for others too if y'all want hehe#esp for mutuals !! but i might even take requests too - who knows ;D#damn tho eiwhofjsod idk if ill even be able to do any of this considering theres a lot i want to do but ill try my damnest to fix my sched#⋯ ꒰ა starry thoughts ໒꒱ *·˚#✩.saved#tbh it doesnt even have to be self ship moodboards. just like. yeah#maybe ill do it as a lil gift !! for bdays maybe but idk TvT KFHWOWHDK#i started getting into editing bcs of the pandemic ngl#i dont have photoshop or anything but i do have photopea which is free so ayeee 😭✨
2 notes
·
View notes
Text

very low effort eternal sunshine redesign
1 note
·
View note
Text


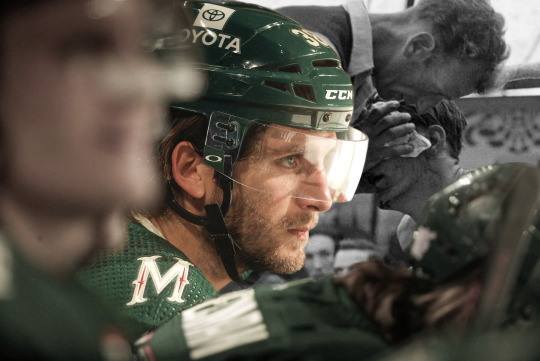
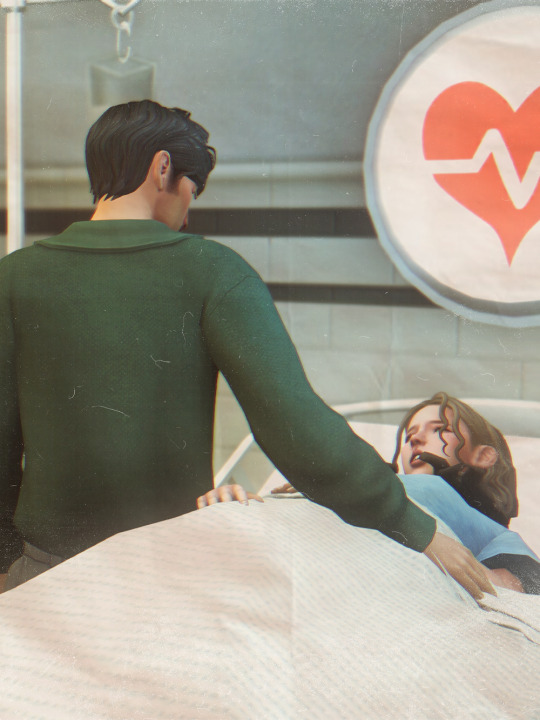
There sits no higher court / Than man’s red heart.
#save me Ryan Hartman save me...#photopea rocks u guys i understand nothing#hockey poetry posts#ryan hartman#minnesota wild#photopea adventures
31 notes
·
View notes
Text
What do y'all use to gif other than PS?
#I'm using photopea currently but it doesn't let me play the gifs unless I'm saving it#like how you could play the frames in PS to see how the gif plays out#I'd like something like that back#ooc. /
0 notes
Text
maybe ill start making like. aes stuff. yeah ? idk ueudhdiehdisj making the akechi gifs for my acct ere n putting em together in a draft post w the dividers + other pics i edited makes me feel good bcs it looks so nice and !!!
#✩⤻; rambles !#save for later#proud !! it makes me proud UWHWJDBSJ idk im just rlly happy w em (i like it when i make stuff okay)#i think ill just post em ere too !! ion have any actual applications aside from photopea ... and maybe canva can be used too fr that ?#so yeah EYWHHDHSJSJA !! but tbh at the same time i might just keep em to myself bcs im a lil selfish hehehe /lh#but i wanna show em too ........ hm. dilemma.#ill think abt this more !! bcs i think id rlly enjoy this but also i just kinda want to keep it to myself WHHSKDBDJS <333#yeah i think ill start making layouts for real sometime !! and editing more bcs it makes me happy fun fun yeah >:) ♡
1 note
·
View note
Text

Advice on how to achieve aesthetically pleasing gameplay photos!
UPDATED: 4/22/2024
I made this post earlier today and people were interested in the comments! Which made me more excited to make this post~
this is just some advice from me! this isnt a tutorial or anything of that sort, but I will be linking some things that could be helpful for editing gameplay! :D
First things first, I want to say that I use a graphics overhaul, lighting mods check my resources page for what reshade i use if ur interested.
I use these lighting mods & graphics override specifically:
sunblind
graphics overhaul
Lotharihoe's ootd* curseforge download :)
Northern siberia winds in-game better lighting mod (bright base)
these are some other lighting mods you can try out as well!
Luumia's NoBlu & NoGlo
these are some other lighting mods like sunblind
how to install lighting mod
I just wanted to add these things in since we're talking screenshots + I wanted to share for the no reshade ppl <3
Now we can move on to the advice!

I love the simple style of gameplay editing so much, but for me I love creating an ambience with my posts and put the audience inside of my gameplay. I also enjoy storytelling with gameplay more than just the "usual" gameplay post (when it comes to me). I am currently playing the globetrotter challenge with my sim Daichi. I really went all out with the editing for that gameplay. For this one its very much a virtual collage of my sim doing things. Trying new things and getting inspired by others is always fun and cool! Remember when u do take inspo: link to the inspiration and @ the simmer that inspired u!!

In my other save (my cozy save) I also take creative liberties there.


its more of a cozy vibe & silent story-telling (storytelling w/o the dialogue). for my cozy save i take inspiration from @/stellarfalls. er gameplay really helped me find my niche thing in the way i play the game tbh!
Angles/Screenshots
When you're taking your screenshots, angles are important. Depending on the shot, you're putting emphasis on a specific thing. This post is very helpful and talks about different types of angles/shots and what they mean. Check it out especially if you want to play around with the way you take screenshots!
Here’s some editing tips from @stellarfalls !!
simmingstars editing tips
Reshade
If I want to create a moody or dreamy ambience I can use reshade. Looking for a reshade that will fit the overall vibe is a must or you can make your own~
i know not everyone is able to use reshade because they're not on windows. I highly recommend using photoshop actions to create that ambience you're looking for.
*These can be used in photopea, but it cant read topaz clean. If you want to achieve topaz clean in photopea, check this post out! just something i'd like to add in case people are new to all of this + dont use photoshop. Lastly, I want to say if you decide to edit photos on photopea, it does tend to crash if you upload a big number of photos and slows down. I usually upload like 6 or 8 and then save and repeat the process. Its kinda annoying, but ive been using photopea for a while now so im used to it. My mac users, use early-grapes butter action if you want things to look cleaner and less harsh!! + the other ps actions down below. I used these a lot when I was a mac user. Of course, that comes with extra steps, but I feel its worth it in the end.
I like these photoshop action packs bc theres tons of stuff in here that can help create a reshade like look:
intramoon's ps action dump
wooldawn's ps acton dump
smubuh's photoshop actions
early-grape's butter action
hazelminesims's ps actions
Templates!
I loveeeeeee templates so much!! theres so many out there to use for gameplay. It really adds more to gameplay posts! This can be dust/dirt, film burn, that cute camera template etc etc. templates are really fun to use and play around with~
I usually go on deviantart to find templates to use! if you want to check out my deviantart account you can find it here! I favorite a lot of things I can use for gameplay screenies.
Gifs
making gifs is cool because it brings the gameplay "to life" ~
EZgif is a free website that converts videos to gifs. You'll need a recording program like OBS (which is also free).
i like making gifs when i want to capture a (cute) moment (kisses, hugs, cooking etc etc). Its also cool to capture the weather in game like when its snowing or raining.
Little details
Some people really go all out on editing gameplay posts like adding hair strands and adding more details to sims faces (catchlights, tears, blushing, etc). You dont really have to do this, but I want to mention it anyways! I want to try doing this at some point because I enjoy editing my gameplay posts/photos in general and adding tiny details is fun to me lol. It adds realism to posts, but it isnt necessary!
Procreate is a really good program that you can get if you have an ipad. its 10$ and thats, that. You dont have to make any payments. You can also animate on procreate too if you're down for that!
Find inspiration in other simmers!
the sims community on tumblr is filled with such talented people! Theres lots of gameplay simmers who dont do your typical gameplay posts that you can check out and learn from!!! Ive always struggled with getting the right angles when taking screenies. I looked at other simmers and how they take screenshots & it was really helpful for me since I noticed I would take too many over the shoulder photos on my sims lol.
I think thats all the advice I have! I hope this was helpful and if you have any questions please send me an ask or dm! :D
296 notes
·
View notes
Text
I wanted to make some fucking gifs for Odetta's birthday but it doesn't seem like I have enough time to do so now unless they're really shitty/no-effort quality (and I will not do that to Odetta), but I've spent a few hours today learning to make gifs (haha, wait no - A SINGULAR GIF) with Photopea and let me tell you all: I am so disoriented by it.
It makes way better quality gifs than GIMP, though, I will certainly give them that, but...UGH. I DON'T UNDERSTAND IT.
#crystal visions of lilies in the valley#WHY CAN I NOT JUST ASSIGN A BUNCH OF DIFFERENT LAYERS ONE SAME LAYER MASK QUALITY#like no I have to do a whole 'new adjustment layer' and then I have to duplicate that layer and merge them with the layers I want affected?#BRO. I DON'T HAVE THE TIIIIIIIIIME-#like god damn...I know GIMP certainly is not intuitive in the slightest but at least it's non-intuitiveness is more familiar to me 😭#then again I've been using GIMP for well over a decade so I've had...a lot of time to become accustomed to it!#so uh...some of my gifsets might look a little wonky because I'm combining new Photopea-made gifs with old GIMP-made gifs. lol#saving time...that's what I try to do (arguably; maybe)
1 note
·
View note
Photo

PHOTOPEA GLITCH TRANSITION TUTORIAL by kai @heroeddiemunson
howdy! so i’ve recently come to realize that i haven’t come across any tutorials for creating a glitch transition on photopea. as someone who has done this transition many times in photopea, i figured that i should create a tutorial to show how i personally do this effect!
what you need:
photopea (basically photoshop in your browser, completely free!)
basic giffing knowledge, because i won’t cover it in this tutorial (other tutorials: tutorial by @benoitblanc, tutorial by @ashleysolsen)
i also recommend watching this youtube video for a real time visual of what i’m going to be describing in this tutorial. this video is what taught me how to do this glitch effect, so if how i’m describing it is at all confusing, check out the video to see it in action!
without further ado, make sure you save your psds regularly and let’s begin the tutorial :)
step one: making your gifs
before we do anything, you have to first make the gifs that you are going to doing the glitch in between. for the sake of this tutorial, i will be transitioning between two gifs, but this tutorial works for however many gifs you want to glitch between for your edit. here are my two gifs that i will be transitioning between:

i highly recommend keeping these individual gifs small in their frame count to make sure your final gif doesn’t go over tumblr’s size limit. the gifs i am working with are both 22 frames; you dont have to make the gifs have the same amount of frames, but i do it because i think it looks cleaner.
with your two gifs, edit them however you would like. if you have a specific order you’d like the gifs to look/a way that your finished product will look like (ex: black and white with a transition to fully colored), then you should color them accordingly. here are what my gifs look like after fully editing them:
once you’re happy with your editing, go to file > export as > GIF and save your gifs. now that we have our gifs to transition between, let’s make our canvas!
step two: making your gifs’ canvas
now that we have the gifs we’re going to be transitioning between, we need to make a “canvas”, or place where we put these two gifs in order to transition between them. so, going to file > new…, create a new canvas. here are the specifications for my canvas (size of your canvas may vary, depending on your cropping for your gifs):

the background for this canvas doesn’t really matter like it does when you’re blending two gifs, but i still made my canvas’s background black because it contrasts the brightness of the gifs i’m placing onto it.
with your canvas now created after clicking “Create”, open up the two gifs that you will be transitioning between. right click the gif’s folder in the layers panel on the right, and select duplicate into… and choose the canvas you just created. once your gifs have been duplicated into the canvas, your layer panel should look something like this:

if you didn’t duplicate your gifs in order, arrange your gifs however you want them to appear. from here, we can now get to the purpose of the tutorial, creating the glitch effect!
step three: creating the glitch effect
generally, with any transition effect, i like to make my gifs seem like they are endlessly looping. while this is a little more work when it comes to giffing, i do think it gives the gifs a nice polish and doesn’t make it feel like there’s a harsh transition between the gif’s looping cycle.
click the eye next to your top most gif(s) in order to make it invisible, as we will worry about it later. scroll down to the layer titled “_a_frm0,50”, right click, and select “duplicate layer”. this should create a new layer, “_a_frm0,50 copy”, on top of the original layer. double click on the copy, and you should see this pop up:
below the fill slider, you should see something titled “channel” with three checkboxes with R, G, and B next to each checkbox. you can uncheck any one of these checkboxes for a different effect; unchecking the R box creates the stereotypical red/blue glitch effect, unchecking the G box creates a green/pink glitch effect, and unchecking the B box creates a blue/yellow glitch effect. for my transition, i have chosen to go with the blue/yellow glitch effect by unchecking the B box. however, you can play around with whatever effect you prefer for your gif.
once you have chosen what checkbox to uncheck, click “OK”. with the “_a_frm0,50 copy” still selected, make sure you have the move tool selected (the curser at the top of the left toolbar), and choose the direction you want your glitch to go and move the layer using the arrow keys on your keyboard. it can move as much or as little as you want, whatever looks good to you! i chose to move this first layer 10 clicks to the left and 5 clicks up, which creates this effect for my first layer:
which looks cool, right? now, you could stop here with the glitch effect, but me being me, i’m extra, so i’m going to include the next half-step that you don’t have to follow unless you want to.
step 3.5: the glitch effect, advanced
with “_a_frm0,50 copy” still selected, go to the left toolbar and find the rectangle select tool (right under the move tool from before). this part is a bit tedious, but i like the results, so i feel that the work is worth it.
using the rectangle select tool, make a shape around part of the layer, and then go back to your toolbar and select the move tool again so we can move the selected section. do you remember how many clicks you used to move your layer and in what direction it goes in? well, now, do the opposite; since i moved 10 clicks to the left and 5 clicks up, my selected section needs to go 10 clicks right and 5 clicks down. below is what this looks like before and after moving the selected area:
once you’re happy with the moved selection, go to the top bar and go to select > deselect so that you are no longer selecting the section you just moved. repeat this step however many times you like; i tend to do this about 5 times for each layer of varying sizes/lengths to allow variety. here is what the final product looks like for this first layer:
and viola! your fully glitched layer one. now we can move on with the rest of the tutorial.
step three, continued: creating the glitch effect
now that you have finished this layer, make sure you have selected both frames “_a_frm0,50” and “_a_frm0,50 copy” by left clicking while holding down CTRL on your keyboard. with both layers selected, right click and choose the “merge layers” option in the popup; this ensures that the glitch effect that you have created stays as one frame.
now we get to do this many more times! make your next layer, “_a_frm1,50”, visible by clicking the little box next to it in the layer panel, and repeat the before steps. i personally alternate between what direction my glitches go in to add more variety and interest for my gifs. so, for example, with my “_a_frm0,50” frame, i moved it 10 clicks to the left and 5 clicks up; this means, for “_a_frm1,50”, i’m going to move it 10 clicks to the right and 5 clicks down, so on and so forth.
i do this for the first 3 frame layers and the last 3 frame layers for both gifs. when your gifs are finished with their individual gif transitions, they should (individually) look like this:

and together, they should look something like this:
and that’s the hard part done! congratulations, you just made a glitch transition!
step four: finishing touches
now, this entire step is optional, as if you already did stuff like add text to the individual gifs you are using this transition with, you’re probably already done. however, if you’re like me and you’re making a gif where the text remains stationary on top as the gif itself transitions underneath, take this time now to do so.
i will also note that if you want your gif transition to match with the rest of your gifs, you can do that in this layer. for example, i want the blue in the transition to be purple like in the rest of my gif; to accomplish this, i will use a combination of a hue/saturation layer and a selective color layer to make the blue be purple (which does change the purple a little from how it was originally, but i don’t mind). i would put these layers on top of both of my gif layers so that the transition layers in both gifs get the same coloring. doing so creates this effect:

(that isn’t a step that’s required by any means (nor do i do it all the time), but in case you wanted to do that, now you know!)
now that i am fully happy with how the gif looks, i will add my finalized text and end up with this as my final product:
now, if you run into the problem of your gif being a little too large for tumblr’s size limit (for example, my finished gif was 10.7MB, and the limit for 540x540 gifs is 10MB) and don’t want to redo all of the process of doing the glitch effect after deleting some frames, i recommend using ezgif’s gif optimizer. it helps shrink the size of your gif without costing you the quality of your gifs. :) i dont normally recommend that for other types of gifs where it’s easier to delete frames, but in this case i know that deleting frames and having to recreate the glitch effect may be annoying!
other than that, this is the end of the tutorial — congrats, you know how to make a glitch transition in photopea! good for you! :) if you ever need any help with photopea, or have a request for how i have done an effect, please feel free to shoot me an ask and i’ll do my best to explain or make another tutorial to help!
#photopea tutorial#photopea gif tutorial#gif tutorial#glitch transition tutorial#photopea#dailyresources#allresources#completeresources#usergif#userars#tusergeo#userlace#tusersai#mystuff#mytutorials#eyestrain#pulsing lights
386 notes
·
View notes
Text
★ How to: Tumblr Dividers ★
personally i had a really hard time trying to make dividers so i'm making this to hopefully help others who may be having the same problems as me.

1. Programs
i like to use clip studio paint since that is what i have but there are other free options too like: Photopea (free, browser), Canva (free, browser),IBIS Paint (free, ios/android), ect...
2. Canvas Sizes
this is where i struggled the most since it can be hard to judge how something will look in a post vs how it looks when you're making it. i put together some "guideline" dividers so its easier to see how things will look:

^ small divider 2000 x 40px ( good for pixel art )

^ medium divider 2000 x 100px (good for small doodles)

^ large/ medium divider 2000 x 140px (small text and drawings)

^ large divider 3000 x 225px ( good for titles )
obviously you don't have to follow these exactly but they are a good reference for what looks good at different sizes
3. Saving
the way that you save your drawings will affect how they look if you want parts to be "clear/ see through" make sure to save in .png these files may be a little bit bigger but they will keep any transparent parts of your divider / drawing.
^ a good example of this is my star divider
if you're ok with having no transparent parts/ a solid colour, pattern divider you can save in .jpg these files are smaller than .png so are good if you don't have a lot of space on your device.
All of the above "size example" dividers are .jpg so they don't have any transparent parts.
[Side note: if you have transparent parts in your drawing but save it in .jpg they will become white]
i hope that this was a helpful little tutorial, i didn't go through everything but i tried to give some good starting points!
179 notes
·
View notes
Last Seen Blogs

travytravz-blog
Untitled
lovesbiggerthanpride
i’m that girl.
ingolditrust
ingolditrust
gallifreyacosplay
Gallifreya Cosplay
rksainzph
KIER SAINZ ph