#then it holds out the pieces of Caladbolg and says ''this can be yours now''
Text
can’t stop thinking about how for a Sylvari Commander the broken Caladbolg represents how far they’ve come and how they can never go back and I am feeling so absolutely rabid over it my man
#guild wars 2#gw2#sylvari commander#heart of thorns#HoT#especially if while you were playing the pre-80 story#you were like me and thinking#wait why don't I get the cool sword??? I literally am the one who retrieved it#and the game waited until you were established hero and takes almost everything from you#then it holds out the pieces of Caladbolg and says ''this can be yours now''#I'M NOT NORMAL OVER THIS#I feel like that should be a Sylvari-specific loot drop honestly#just to make it even worse emotionally
12 notes
·
View notes
Text
Fate and Phantasms #72: Fergus mac Roich
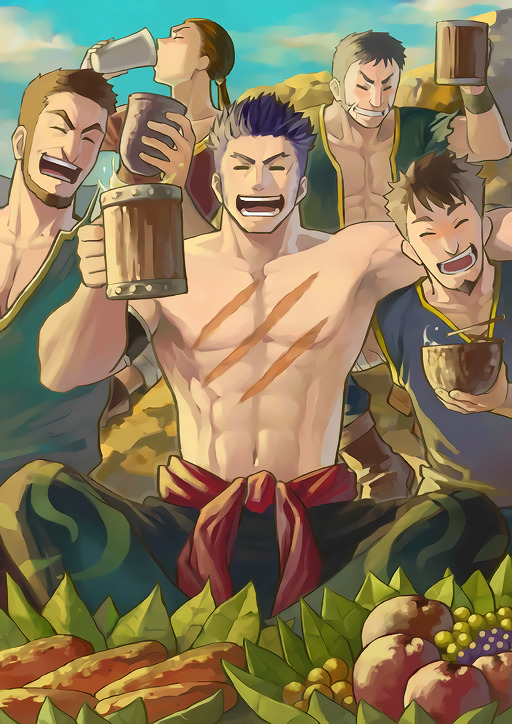
Today on Fate and Phantasms, we’re making the only man who can fuck more people in a single night than the electoral college, Fergus mac Roich! Fergalicious is a big man with big muscles and an even bigger... sword, so this build will make you the life of the party and the death of your enemies.
Check out the breakdown below the cut, or his character sheet over here!
Race and Background
Fergus is a Human, netting him +1 to all stats. As a Knight of the Red Branch, he gets proficiency in History and Persuasion as well.
Stats
Make sure your Constitution is high, Fergus is very, very, well known for his stamina. Second is your Charisma; you’re fun at parties, as well as... other locations. Your Strength also needs to be pretty good, those abs aren’t just for show. Your Dexterity isn’t bad, but you’re more the kind of guy to tank hits than avoid them. I wish your Wisdom could be higher, but we can’t be good at everything. Finally, dump Intelligence. You thought Brynhildr and Kiyohime were good dates. No. That might also be wisdom, now that I think about it.
Class Levels
1. Fighter 1: First level fighters get a Fighting Style. Caladbolg is a pretty great sword, so let’s call it a Great-sword. This means you’ll want Great Weapon Fighting to go along with it. This lets you reroll 1s and 2s on weapon damage with two-handed weapons. You also gain a Second Wind, letting you regain HP on a bonus action equal to 1d10+your fighter level once per short rest. Fergus is famous for being able to go all night, so this will help.
You also get proficiency in Strength and Constitution saves, as well as Athletics and Insight. To give people reliable unclely advice, you have to know what kind of problems they’re having at a glance.
One last note, we’re not going with barbarian this build, so make sure you grab some armor. Fergus’ higher ascensions use bits and pieces of metal armor, so that might count as medium armor, as long as your ignore how it doesn’t protect any vital organs.
2. Fighter 2: Second level fighters get an Action Surge, letting you tack on an extra action to your turn once per short rest. You’re a busy man, you’ve got to know how to multitask.
3. Fighter 3: Third level fighters get their Martial Archetype. If you couldn’t tell by us dumping intelligence, we’re not going Eldritch Knight three times in a row. Instead, you become a Champion, gaining an Improved Critical to deal critical damage on rolls of 19 as well as 20.
4. Fighter 4: Use your first Ability Score Improvement to bump up your Strength. You’re pretty beefy.
5. Fighter 5: At this level you get an Extra Attack, giving you an extra attack. Fighter skills are pretty much what they say on the tin.
6. Fighter 6: Use your next ASI to become a War Caster, granting you advantage on concentration saves, the ability to cast spells with somatic components while holding weapons, and cast spells as attacks of opportunity. That might not make sense yet, but we’re getting there.
7. Fighter 7: Seventh level Champions are Remarkable Athletes, adding half your proficiency modifier to Strength, Dexterity, and Constitution checks you’re not proficient in. It’s like Jack of All Trades, but only for physical checks. Also, you get to add your strength modifier to the length of your long jumps.
8. Bard 1: Fergus is the man Tiktok bards wish they could be. He married an elemental, has Queen Medb as a casual hookup, and if neither of them are available he needs 7 side-side-chicks to sleep at night. Fergus might not play music, but he’s very proficient with his instrument. Also he’s just a really cool dude who inspires those around him a bit.
When you become a bard, you gain Spells that are cast with your Charisma. You also gain some Bardic Inspiration that you can give to another creature as a bonus action, letting them add a d6 to one attack roll, skill check, or save. You have 2 per long rest right now, and you’ll get a third at the next ASI.
You also gain proficiency in one skill of your choice. Traditionally, Performance is for music and such, but gladiators also get proficiency, so I choose to believe they mean performance in every sense of the word.
For your spells, Blade Ward will make you a bit tougher to damage, and Light will help you turn your boring normal sword into an amazing rainbow sword. They never specify it has to be a specific color, so have fun with it. Most of your charisma is natural, but it doesn’t hurt to have Charm Person on standby. Heroism will help turn you or one of your friends into a true legendary hero. Finally, the real reason we’re here to blast apart the scenery with Earth Tremor and Thunderwave.
9. Bard 2: Second level bards are Jacks of All Trades. It’s like Remarkable Athlete, but for every kind of ability check. This means you have half proficiency in all mental skills, and pseudo-proficiency in all physical skills. You also gain a Song of Rest. You break out the drinks on short rests, adding 1d6 to any healing done during one.
For your spell, Longstrider is always a good way to enhance your movement. Since we’re not going barbarian, you might as well steal the cool stuff from the class.
10. Bard 3: Third level bards graduate from their College. The college of Valor will inspire your party even more with Combat Inspiration, letting them add their inspiration to damage rolls and their AC when attacked.
You also gain some Expertise, doubling your proficiency in Athletics and Performance. If it’s not one, it’s probably the other.
For your spell, chew the scenery even harder with Shatter, breaking apart constructs and nonmagical items in its range.
11. Bard 4: Pick up another ASI to round up your Dexterity and Charisma for stronger spells and a higher AC.
For spells, grab Friends to save your spell slots and Enhance Ability to turn yourself into even more of a skill monkey than you already were, giving advantage on one kind of ability check for up to an hour. If you choose constitution, the target also gains some temporary HP, if you choose strength, their carrying capacity doubles, and if you choose Dexterity they don’t take falling damage from heights of less than 20′.
12. Fighter 8: Pick up yet another ASI for more Strength for even harder hits.
13. Fighter 9: You become Indomitable, letting you reroll a failed save once per long rest. Given how low your Intelligence and Wisdom are, you’ll need it.
14. Fighter 10: Tenth level champions get an Additional Fighting Style. Defense gives you +1 AC. It’s simple, but effective. Like most of the back half of being a fighter.
15. Fighter 11: Congratulations on gaining another Extra Attack. Now you can attack three times with an action, for up to 6 times in a turn with your Action Surge.
16. Fighter 12: Use your next ASI to enhance your Constitution even further.
17. Fighter 13: You gain another use of Indomitable per long rest, making you even more... indomitable.
18. Fighter 14: Use yet another ASI to maximize your Strength. Unless you rolled really well, in which case, good for you.
19. Fighter 15: Fifteenth level champions have a Superior Critical, dealing critical damage on any roll better than or equal to a natural 18. If your drill is going to pierce the heavens, it’s got to be really sharp.
20. Fighter 16: Use your last ASI at your final level to become Tough, gaining an extra 40 HP for your trouble.
Pros:
It’s safe to say you’re pretty skilled, with at least half proficiency in every skill and full proficiency in all strength and dexterity skills. It’s just a shame that most skills are mental.
You’re also pretty Tough, with an amount of HP typically seen in barbarians and the ability to give yourself resistance, you can be really hard to kill when you want to be.
Not every fight is about dealing damage, and those bard levels can really help expand your tactics. Break up the ground to slow down enemies, or shatter the villain’s McGuffin before they can use it. Sure, it’s unorthodox, but it works.
Cons:
You have some magical damage, but not on your sword. Since magic isn’t your forte, you’ll likely run out of slots when fighting things that resist nonmagical damage.
You also have a very small amount of Inspiration, and it’s not that powerful. The boost is always appreciated, but with only three dice to hand out between long rests, you’ll be spread thin quickly.
With your low intelligence and wisdom, you’ll have a rough time with some of the more common spell saves.
Next up: Christmas is coming early
61 notes
·
View notes
Text
The Sylvari Story, Oasis’s Version
I don’t like how involved Caithe is with the sylvari personal story compared to the other races’ “mentors” and how uninvolved the luminaries are. Here’s my fix. Note that a whole lot of it plays out pretty similarly, I’m just altering Caithe’s and the luminaries’ involvement a bit. Also something I talked about with my friends that could make Caithe's "the egg is my wyld hunt" less aggravating.
The Tutorial
You become aware in the Dream, you hear someone shouting “Sapling!” before your eyes focus. When they do, you see your luminary. They’re calling for you- Malomedies is leaning on a staff. They call for you, waving you close to speak with them. Something is wrong, they say. The Mother told them to wake a specific sapling- you- to help from inside. They explain that something is attacking the Dream, you fight odd creatures until you get to the Shadow of the Dragon.
Caithe is there, but she is not fighting it. She greets your luminary, the dialogue between them in the background as you fight more of the creatures. She explains that Mother senses something nearby is the source of the problems. Next to you, the Shadow moves. Your luminary and Caithe shout for you to move. Caithe becomes ‘solid’ and pushes you out of the way.
You fight the Shadow. Once defeated, Caithe and your Luminary tell you that they’ll be waiting when you wake to the outside. Serimon greets you when you wake. You ask where your luminary and Caithe are. He explains that your luminary is in a lesson and Caithe is recovering. They’ll meet with you when they’re done and she’s stronger.
The Green Knight
You’re urged back to the Grove, where you walk to Dreamer’s Terrace. Your luminary is there, they ask to speak with you. Dagdar runs up, begs you to help. the initial instance plays out practically the same, Caithe just is not there until after you fight Bercilak. She asks what was going on, who that Knight who just left was. You explain, your luminary notices the connection between the Knight and your Dream. You’re told about Gairwen, you go off to help her.
Help her, she tells you to try to find Occam. The next instance starts a little bit away from his house, Caithe is there. She’s genuinely surprised to see you, asks what you’re doing. She smiles, she knew her hunch was right. She was going to speak with Occam to ask if he’d crafted any armor recently. She says that he’s missing, and asks you to search. She’ll guard.
Courtiers attack, you get a choice. If you help one, she goes to help the other. If you go get Occam, she hands you a trap seed and tells you how to use it. “Set the trap so you can’t be followed,” she says. If you choose Gairwen, she hands you a turret seed, she has a feeling you’ll need it. She’ll meet you at Mabon Market when all is said and done.
After you fight Bercilak, she watches, wary. She’s not sure, but she trusts your ability. She suggests speaking with the Mother.
The White Stag
You receive a letter from your luminary. They explain that they’d like to meet with you, but there is something you must do first. They explain about the stag, they don’t realize you dreamed of it just yet. They tell you to track it and bring it back to the Grove. You track it, meet Gavin, he steals the stag. You resolve to yourself to speak with your luminary to ask what to do now.
They’re concerned why you enter without the stag. They ask where it is, you explain. They look genuinely upset, but tell you to wait here. They call a warden to bring Caithe. They know you’re capable, but you’re young. They want you to retrieve the stag, and bring Caithe with you to help. You and Caithe discuss, she suggests the meeting some courtiers are having, rather than blindly attacking every nightmare camp.
She tells you where one will be, she will go to another. Your luminary offers both of you luck, promising to do what they can from the Grove. You infiltrate one meeting, you find out where the Stag is- either by outwitting the information out of the Courtier or fighting them. You can choose to kill them or leave them alive- which chooses distraction or disguise.
Caithe meets you outside Hemlock Coil. She asks what your plan is to get the stag. If you killed the courtier, you disguise and get Sariel to leave. If you left them alive, they notice you, and begrudgingly cause a scene for you, only because they refuse to owe you. Once you get the stag out, she urges you to hurry to the Grove, as it is still not safe.
The instance starts the moment you enter the Grove. The stag is in the Pale Tree’s Circle, Caithe beside it. She will protect it, with a smile she tells you that your luminary will be fighting. Niamh leads wardens. Aife stands atop the “hut” that has the first vista of the Grove. Malomedies leans on his staff, but assures you that he can fight. Kahedins is at your side with a hammer.
When you fend off the Court, Mother calls you to speak with her in the Omphalos Chamber. The stag chooses on its own to stay with you, and your luminary praises you for fighting so well.
The Shield of the Moon
The first instance is just outside Caer Verdant. You witness the attack, both you and wardens run to help. Tiachren is poisoned, you don’t even notice his shield but you’re compelled to help. He’s shouting for someone to help Ysvelta, his life means nothing without her. The warden captain- Llewyr says that he will go with the valiant to help Ysvelta. He orders the other wardens to bring Tiachren to the Grove for menders.
You and Llewyr remain to fend off the last of the attack. He explains between the waves that the Court probably attacked to get at Renvari, up at the top of the tower. You posit that Renvari probably knows where they might be taking Ysvelta, and that you two need to protect and get him to the Grove as fast as you can.
On arrival to the Grove, Caithe meets with you. She’s confused, asking why you’re with a warden captain. Llewyr explains your part in helping with Renvari, and she agrees with your suggestion that he knows. She helps you trick him, then helps you, the warden, and a barely recovered Tiachren to infiltrate the Vale to try to get Ysvelta.
She has already fallen to Nightmare, when you arrive, the four of you split up to search, but Renvari’s speech keeps you from running off to find her. Tiachren is broken down in tears when you catch up with him, he’d witnessed what they’d done to her. He begs you to let him try to speak with her, she just fell, surely he can still bring her back!
Llewyr calls for you from behind. He and Caithe have been caught and are fighting. Once Renvari is defeated, you explain why Tiachren is so frantic. Llewyr pities, but insists that you join them to defend Astorea.
If you choose to help Tiachren, you two find Ysvelta as the attack is going. She accuses you of stealing him from her, she doesn’t seem to be listening to him saying he still loves her. You two fight her. As a last ditch effort, she begs Tiachren to hold her one last time. You witness just how horrible Nightmare is when she stabs him. You fight her a second time, Caithe and Llewyr run up as you kill her. Tiachren is alive, he shouts to help you during the fight. He’s just injured and heartbroken.
If you choose to defend Astorea, you see their confrontation past the courtiers. You and Caithe press through to try to help. Tiachren attacks you alongside Ysvelta. You have to kill both of them.
Caithe runs up to you. If Tiachren is alive, she helps you get him to his feet. Llewyr takes him, promising to get him to a mender. Caithe helps you calm down and takes you to the Omphalos Chamber, where your luminary is speaking with the Mother.
Level 20 and 30 quests
For the most part, these quests are the same, but the 20 quests spend more time introducing you to Trahearne. During the level 30 quest, both of them offer insight on Riannoc and Caladbolg during each step. Both urge you to choose the Priory in the second choice, for example. You can sense mourning from both of them, as if this has dug up all their pain for losing the Knight. You are also saddened, feeling it from both of them and Mother.
Level 40-80 quests are the same
Defeat of Zhaitan and Post Personal Story
Aboard the Glory of Tyria, a piece of Zhaitan shatters part of the ship. You and Caithe are still aboard, but there is a massive gap between you and the other members of Destiny’s Edge. She urges you to use the cannons to fight Zhaitan, she will protect you. As the dragon falls, Rytlock, urges you to leap across, the Dragon makes one last attempt to take you down with it. You and Caithe jump across, Rytlock and Eir catch you two.
Adrenaline is running high, the cheers are so loud you can’t hear yourself think. Caithe looks... distressed, though.
During the party in Fort Trinity, Caithe asks you and Trahearne aside. You two step into Caer Aval with her, she turns to you two. “We’ve mistaken my Wyld Hunt,” she says, “I still feel the call, bringing down Zhaitan was... Not it.”
Trahearne is confused, asking what her hunt could possibly be. You ask what it felt like for Trahearne to complete his hunt. He describes a weight being lifted, a relief flooding his being, despite his exhaustion. You explain that you felt that too, a bit. That you still feel the call, but it’s quieter.
You ask Caithe if it’s the same for her. “No,” she says, “If anything, it’s louder.”
All this time, the three of you realize, you had her Wyld Hunt wrong... It wasn’t to slay Zhaitan. But then... What is her wyld hunt? The three of you return to the rest of the Pact and the celebration continues, though Caithe is visibly still wondering about her hunt.
#long post#gw2#oasis rambles#shoutout to the literally one person who was interested in this lmao this entire post is for you <3
6 notes
·
View notes
Last Seen Blogs