
2ttf
iFontMaker FAQ
© iFontMaker by Eiji & Tom, inc.
66 posts
Don't wanna be here? Send us removal request.
Last Seen Blogs

dallomerline
dallomerline


differentfishcroissantwinne-blog
Frasi_citazioni_23
beautifulsparks
1997

avenirdelight
this is my club, my one and only club.
Text
Install fonts from 2ttf on iOS devices
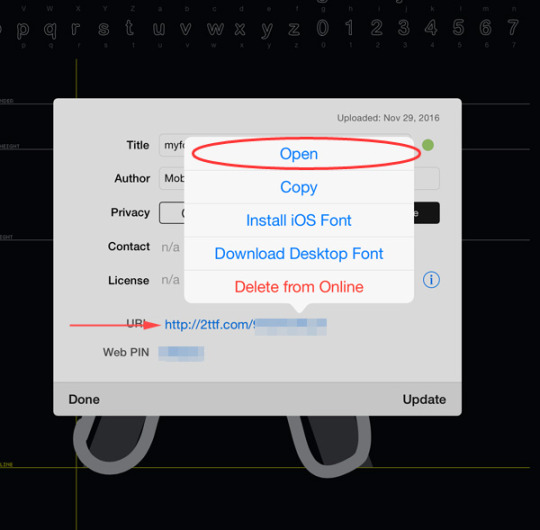
0. Build your font and open its URL in ‘Safari’ browser on your iPad/iPhone.
1. Tap the "Install (for iOS)" button.

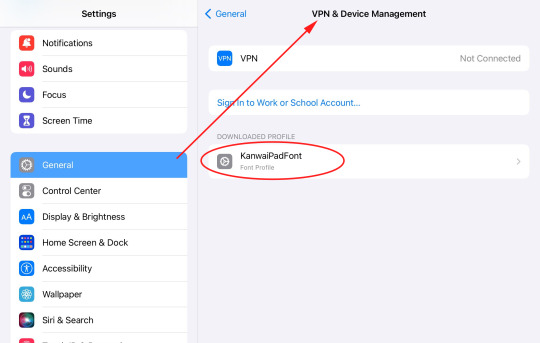
2. Settings > General > VPN & Device Management (or Profiles)
3. Tap "Install" → see more details
(If "Enter Passcode" dialog is shown, please enter your iPad's passcode)

4. Close (e.g. Pages) app If it is running
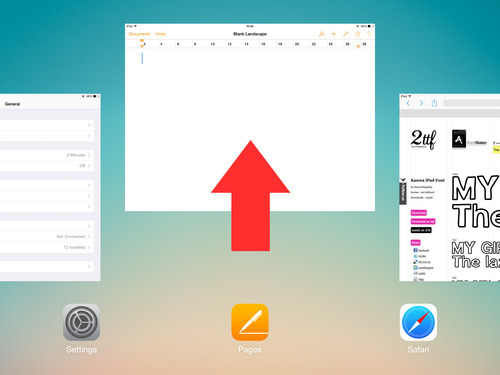
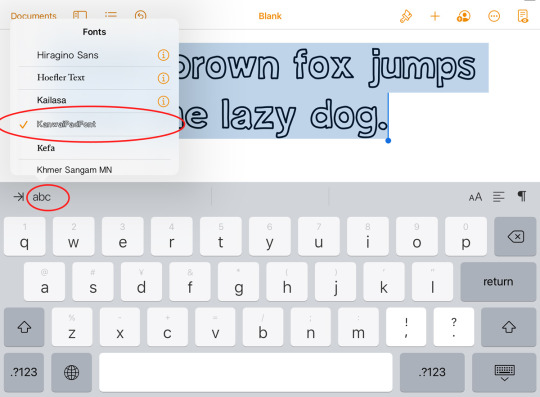
5. Open "Pages" again and choose your font.
Have fun!
.......
6. To uninstall your fonts, go "Settings > General > VPN & Device Management (or Profiles )"

25 notes
·
View notes
Text
How to edit ligatures
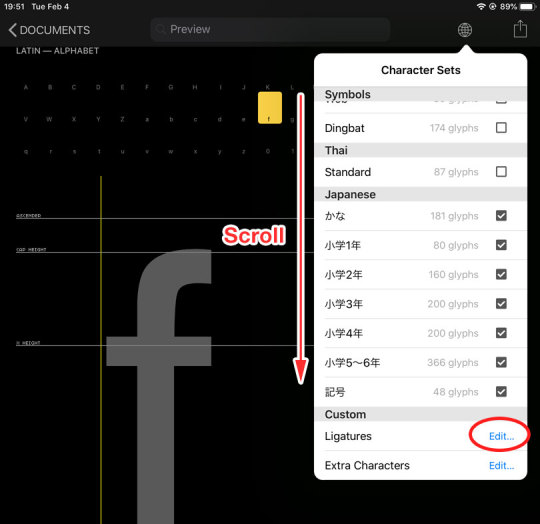
1. Tap the “Character Sets” button > scroll down to the “Ligatures” > tap the “Edit...” button.
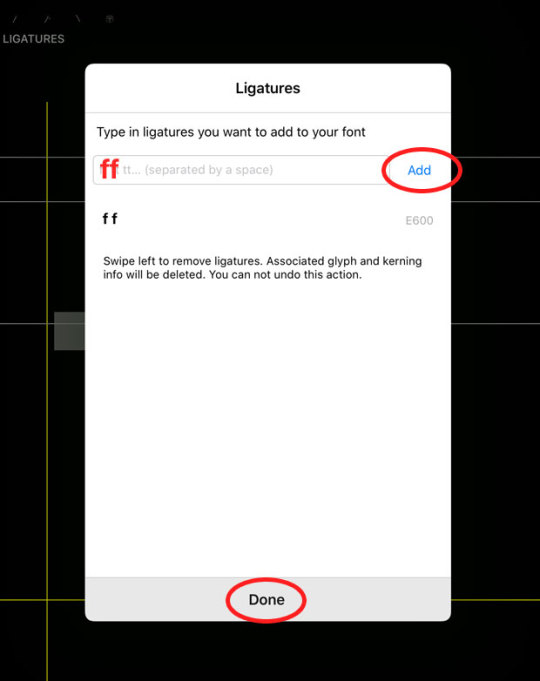
2. Add source glyphs (e.g. ff) for a ligature and tap the “Done”.
3. Draw the ligature glyph.
(Note: You have to edit source glyphs first. For example, for the “ft”, draw “f” and “t” first, then draw the “ft” ligature)
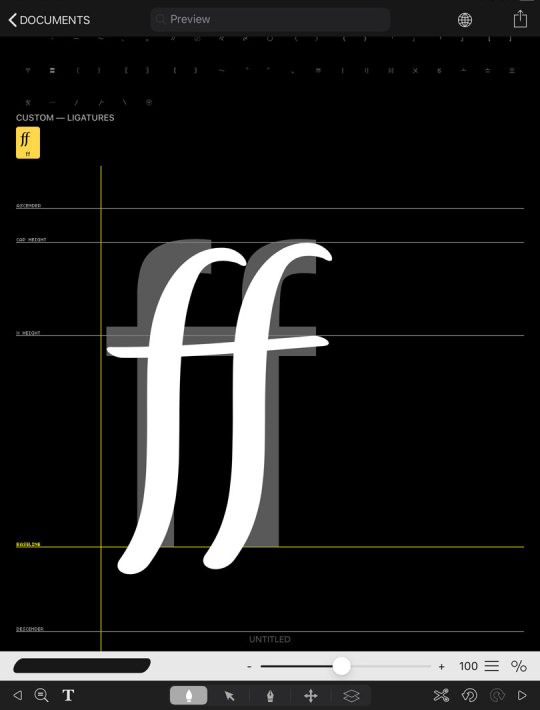
4. Check it in the preview window.
5. Tap the “eye” button to toggle ON/OFF the ligatures.

0 notes
Text
Importing SVG files
1. In illustrator, draw a glyph in a 1000px square. (or use this template / zip)
2. Make sure the paths of the glyph are a Compound Path.
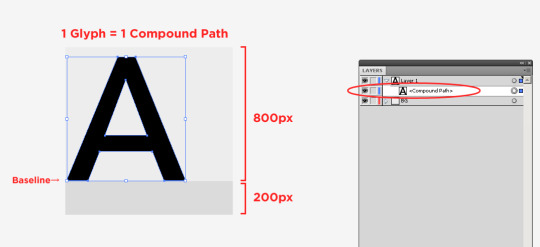
3. Export it (including 1000px square object) as a svg file and send it to your iPad via email, Dropbox etc.
4. Open the svg file on iPad and select “Copy to iFontMaker”
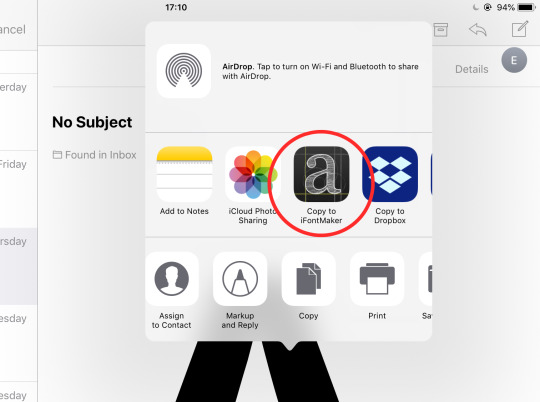
5. In iFontMaker, Import the svg file from clipboard menu.

youtube
Note:
You can import multiple glyphs from a single svg file.
Add names to compound-paths.

See also:
Importing SVG Files (Affinity Designer)
Importing SVG Files (Illustrator iOS)
Importing SVG Files (Vectornator)
If you have a problem with square shapes when building a font, try the “Expand” menu.

0 notes
Text
The app is stuck on the DOCUMENTS screen
1. Reboot your iPad
see: https://support.apple.com/en-us/HT210631
2. Re-open the App again
freeze freezing frozen loading document crash crush clash crashing crushing clashing clashed clash
0 notes
Text
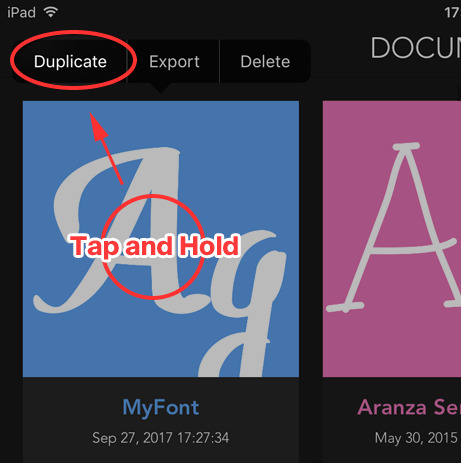
How to add a bold version of your font
1. Duplicate your font
2.Expand the strokes of the all glyphs
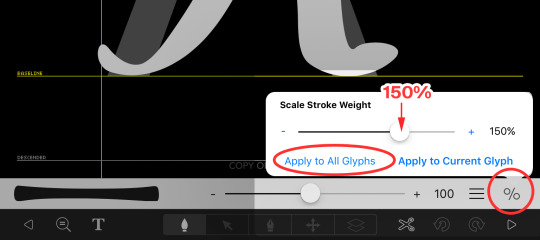
3. Add a suffix (e.g. ”-Bold”) to your font-name.

4.Check the font styles. (font family)

*List of Suffixes
font stylesuffixThin-ThinExtraLight-ExtraLightLight-LightBook-BookRegular-RegularMedium-MediumSemiBold-SemiBoldBold-BoldHeavy-HeavyBlack-Black
Italic-ItalicOblique-Oblique
Bold and Italic-BoldItalicLight and Italic-LightItalic
table#suffix { border-spacing: 3px; border-collapse: separate; } table#suffix th{ font-weight:bold; background:#eee; text-align:center; } table#suffix th, table#suffix td{ padding:5px; }
For example:
MyFont (normal) → MyFont
MyFont Bold → MyFont-Bold
MyFont Bold Italic → MyFont-BoldItalic
MyFont Light → MyFont-Light
MyFont Light Oblique → MyFont-LightOblique
3 notes
·
View notes
Text
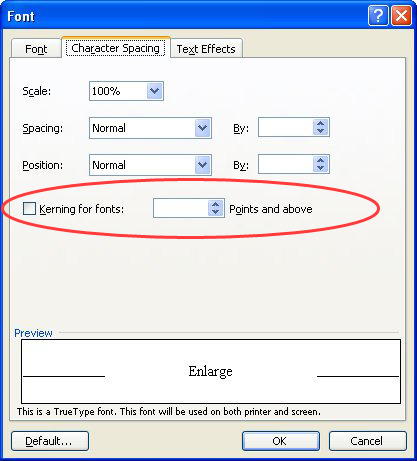
How to enable kerning in Microsoft applications
MacOS
1. Convert your TTF font to an OTF font from here (ttf to otf converter).
2. Install the OTF font and Open an Office Application
3. Select text and open the font dialog (e.g. Command + D key in Word)
4. Click on the “Kerning for Fonts” check box

Windows
1. Select text and open the font dialog (e.g. Ctrl + D key in Word )
2. Click on the “Kerning for Fonts” check box
0 notes
Text
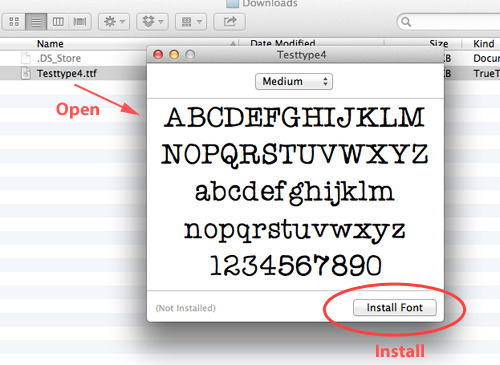
How to download / install your created fonts
1.Build your font.

2.Tap the URL link and tap the “Download Desktop font” menu.
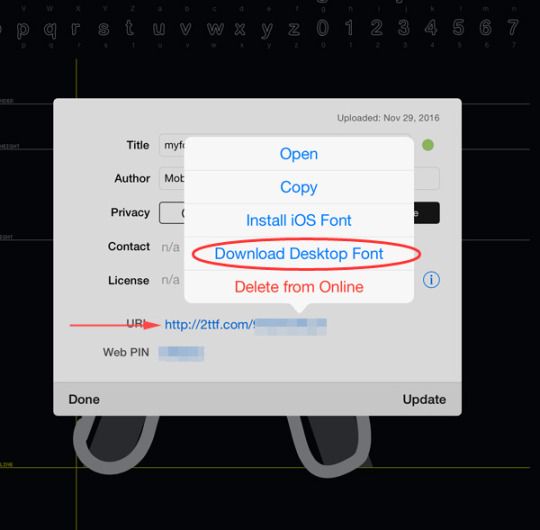
3.Send your font to Mac/PC
4.Open your font on your MAC/PC and install it.
See also:
How to install your fonts (Mac OS X)
Install Fonts from 2ttf on iOS Devices
How to install your font (Windows)
0 notes
Text
How to fix a collapsed glyph when building a font
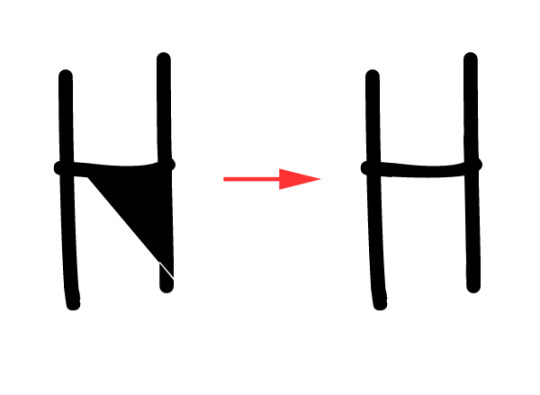
Add the " -rasterize" option to your font name and rebuild it.
(for example: "MyFont -rasterize")

.........
Note:
If you need clearer shapes, try the " -rasterize=2", " -rasterize=4" or " -correctdirection" option.
2 notes
·
View notes
Text
Backing up your projects (macOS Catalina or later)
You can back up your project files via Finder:
1. Connect your iPad to your Mac via USB.
2. Open your iPad in the Finder and select the “Files” tab.
3. Select your project files (XXX.ifm2proj folders) and drag-and-drop them to your Mac.

(view larger image)
.....
Restoring your projects:
1. Select your backed up projects and copy them to the “iFontMaker” directory on your iPad.

See also:
Backing up your projects (Mojave or earlier)
0 notes
Text
How to edit glyphs that are not listed on iFontMaker
1. Tap the Character Sets > Extra Characters > Edit... button

2. Paste custom characters into the form.
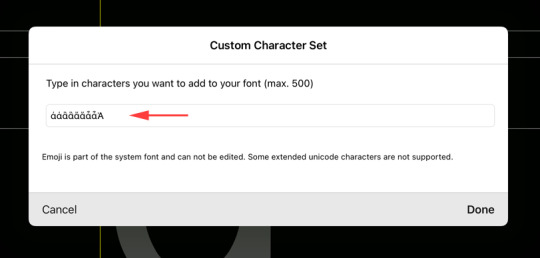
3. Scroll down the glyph map to the bottom and edit them.
another way:
http://2ttf.tumblr.com/post/169650420802/how-to-edit-a-glyph-that-is-not-listed-on
see also:
https://2ttf.tumblr.com/post/186968584482/ifontmaker-supported-glyphs
2 notes
·
View notes
Text
How to add your custom font as a guide font
1. Attach your TTF/OTF font to an email on your Mac/PC.
2.Open the attached font on your iPad and tap “Open in iFontmaker” icon.

3.Done. You will find it in “User” section.

(see also : How to remove your custom guide font from iFontMaker )
1 note
·
View note
Text
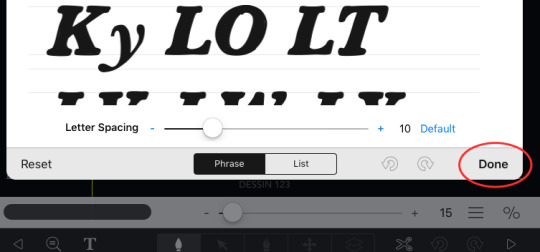
How to set kerning pairs
1. Tap the “Preview” box and tap the “Kernings” button.
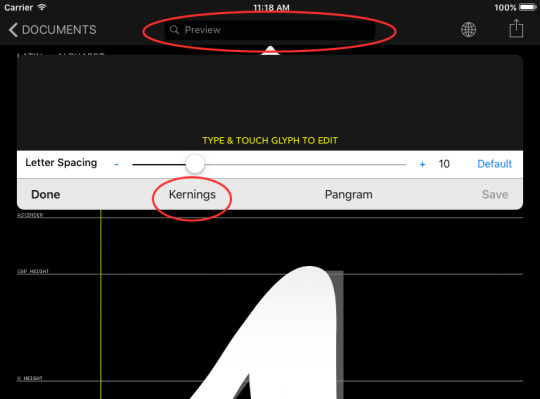
2. Swipe a glyph to adjust the kerning space.
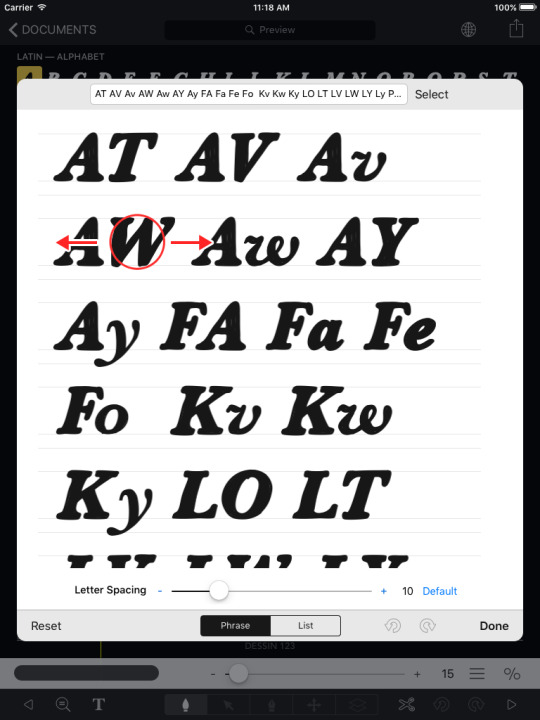
3. To delete a pair, change to the “List” view and swipe-left the item.
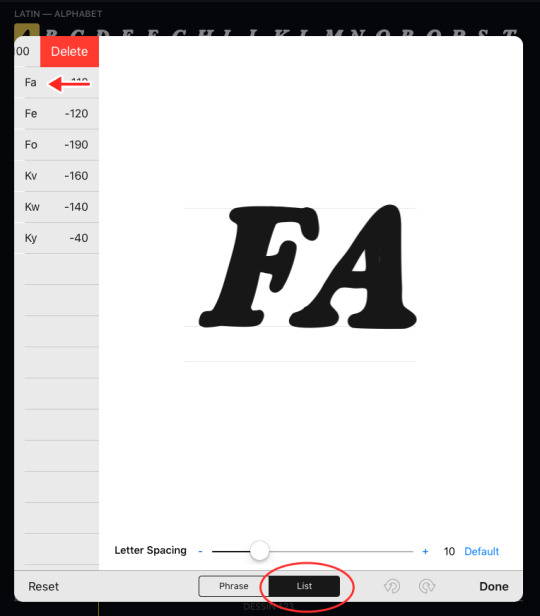
4. You can set your custom phrase or select preset phrases to check the kerning.
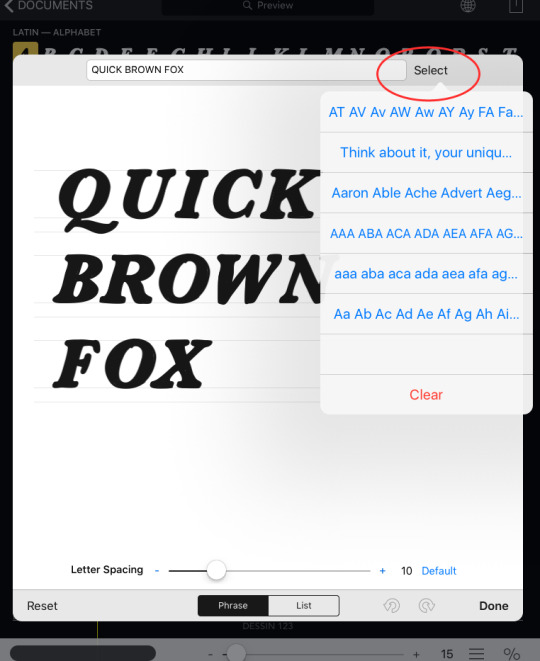
5. Tap the “Done” button to finish editing.
0 notes
Text
Rights of your font
You retain all rights to your fonts. You can use your font freely for any purpose including selling and commercial use.
When sharing your font on our gallery, you also have the option to apply a license (such as Public Domain, CC-BY, or CC-NC) to it.
2 notes
·
View notes
Text
How to access Accented Characters (e.g. ÄäÆ)
You can find these glyphs in "Latin - Accent" set.

See also:
iFontMaker - Supported Glyphs
1 note
·
View note
Text
Unable to build a font
If your font takes a too long time to build, please try the following workaround:
How to fix a collapsed glyph when building a font.
0 notes
Text
Importing image files
1. Open the import tool.
2. Open an Image (JPEG or PNG) file.

3. Download the converted SVG file and send it to iFontMaker.


youtube
4. Done.

See also:
1 note
·
View note
Text
How to make a cursive font
1. Set the letter spacing to a negative value of half the size of the brush diameter. (e.g. when the brush size is 26, set the letter spacing to -13)
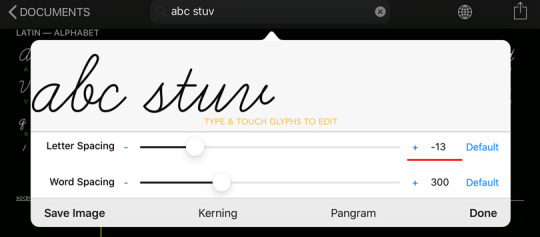
2. Open this image and save it to the Photo Library in your iPad.
3. In iFontMaker, select the Background tool, open the guide-image and place it in the height of the glyph's tail.

4. Adjust the beginning and end point of glyphs to the guide.

5. Use kerning or ligature feature to tweak it.
0 notes