gowiththeflowscape
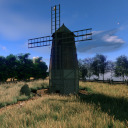
Go with the FlowScape
A compilation of images created with the program FlowScape
127 posts
Don't wanna be here? Send us removal request.
Last Seen Blogs

askthegreekgods-blog
We are the Gods

jadeblumsblog
Dakota._.yoshi

miurahps
題名未設定

jjksblackgf
brat

sunny-side-up-mm
Australia, tennis etc
Text
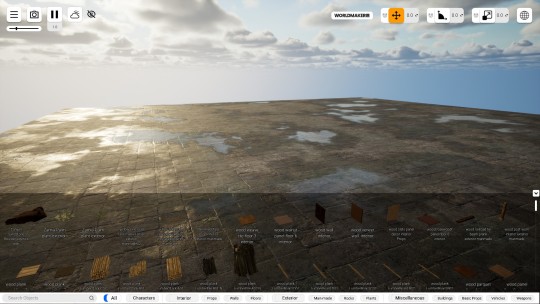
WorldMaker
I found out about this FlowScape style program thanks to a poster on the FlowScape discord.
Like FlowScape it allows you to create digital art using a wide range of premade assets. Though while FlowScape uses the Unity engine, WorldMaker uses Unreal 5.
There are a couple of caveats. WorldMaker is Windows only. if you use Linux then you can run it using Proton, but OSX users are currently out of luck.
Secondly due to the assets used the only commercial uses allowed for the art you create are either monetised youtube videos or live streams.
Rather than selecting an asset and then painting it onto the scene, you have to drag the assets onto the scene one at a time which means creating a field full of foliage is more bother than it would be with FlowScape. The organisation of the various assets isn’t great, which makes finding a specific one difficult. Though this is less of a problem due to there being a search feature.
This is the starting scene. The only terrain available is this concrete slab, and there’s no way to sculpt it.
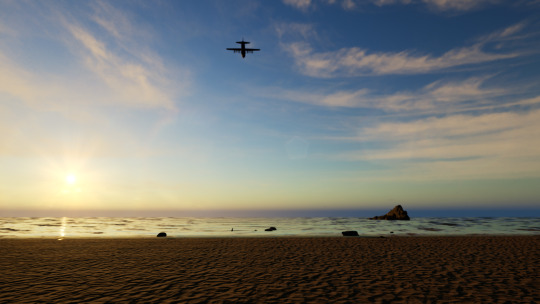
I’ve had it a few days and these are some of the images that I’ve made so far
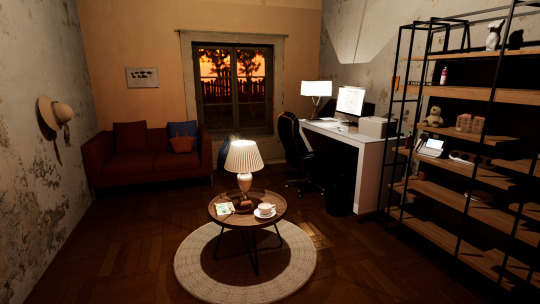


It’s missing some of the features that FlowScape has (such as oceans and volumetric fog) but it also has some extra features (such as procedural volumetric clouds).
It’s $10 (or about £7) so I’d say that if you like FlowScape and want to try something new then it’s worth picking up.
You can get it from steam - https://store.steampowered.com/app/1944670/WorldMaker/
0 notes
Text
Asset Browser
One of the additions that’s coming with Blender 3.0 is the asset browser. You configure a folder as your library folder and if any of the .blend files in that folder contain objects that have been marked as an asset that object will appear in the browser. Then to add it to a scene you can just drag and drop it into the scene view.

It takes some work to get a library set up, but once it is it makes reusing objects between scenes a lot easier.
(Some objects look a bit weird in the browser, but they look fine when actually used in the scene)
0 notes
Text
A few months ago I released a program for generating terrains

The generated terrain can be exported as an obj file which can then be imported into other 3D software such as FlowScape

You can get the program for free from itch.io - https://prof-yaffle.itch.io/terrain-generator
3 notes
·
View notes
Text

My winning entry for the last weekly competition. The prompt was mysterious island.
1 note
·
View note
Text
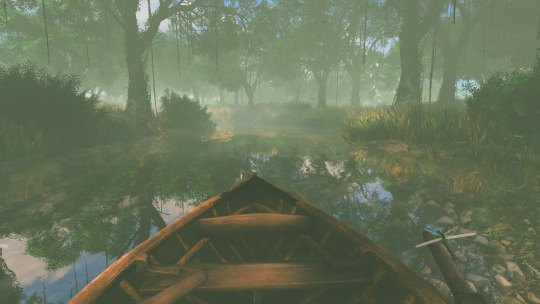
The latest competition prompt was Into The Jungle
1 note
·
View note
Text
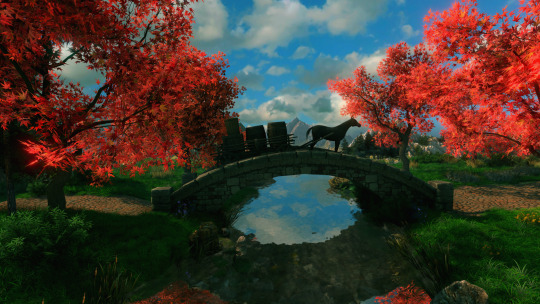
My latest challenge entry for the prompt “bridges”
1 note
·
View note
Text

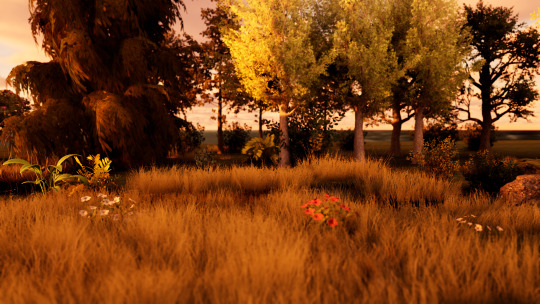
This was my entry for last weeks competition which was for a desert themed picture.
2 notes
·
View notes
Text
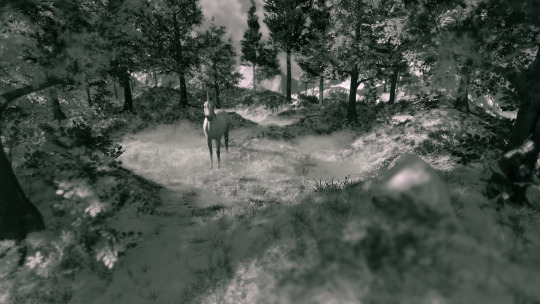
My entry for last week’s competition which was to make an image in Black and White
0 notes
Text
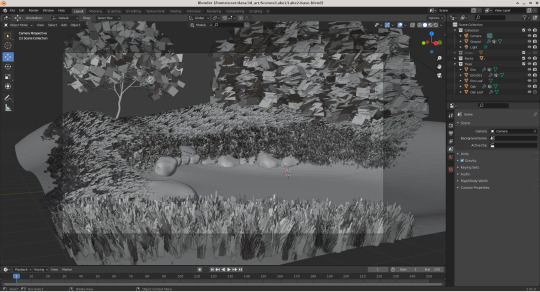
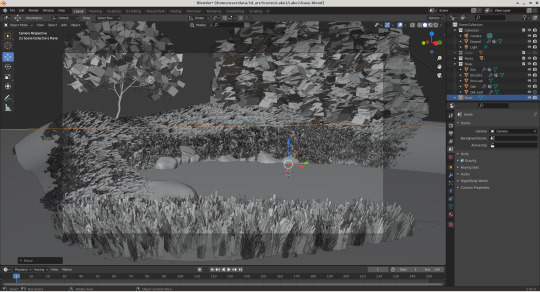
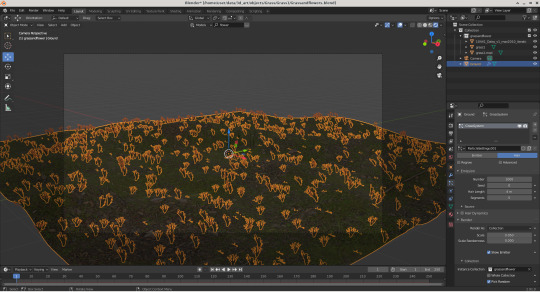
Version 2.92 of Blender has just been released. One of the new features to be add is the Geometry Nodes modifier. Which allows you to modify the geometry of an object using nodes, in the same way you can modify its appearance using shader nodes.
The thing that makes this interesting is it allows you to paint grass, trees and other plants onto a landscape without having to set up particle systems and vertex groups.
This is my first attempt, which took less than ten minutes

This was the node system I used to create it
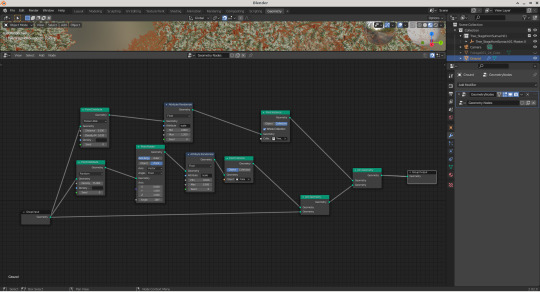
On the one hand this is a move away from the “paint the plants where you want them system” you get with FlowScape, but I think this will make making large enviroments quicker and easier.
0 notes
Video
A couple of weeks ago there was a competition to make a video of a haunted cemetery. This was my entry.
1 note
·
View note
Text
Animated Water
Earlier I talked about using textures to give water the appearance of having ripples. This is fine for still images, but what if you want an animation. So now I’m going to talk about adding animated ripples to water.

I’m starting off with the same scene as before
Then adding a plane and scaling it to fit
Then adding shaders to make it reflective
Now we have a problem that the plane doesn’t have enough vertices. So you need to go into the edit mode and right click on the plane and choose subdivide

I chose 100 subdivisions. The more divisions, the smoother the waves will be, but at the expense of longer render times. (At this point I realised the plane was too big so I scaled it down a bit)
Now you need to go to the modifier tab and add a wave modifier
Which looks okay if you’re modelling a tidal wave. Otherwise adjust the height and width settings so it looks more reasonable. You can also adjust the origin settings so the ripples start art the centre of the lake.
If you press the play button on the timeline bar then you will see the ripples spread out from the origin. (NB I’m using solid mode for these previews in order to get a decent frame rate.)
The ripples are a bit too clear though. To fix that expand the texture heading and add a new texture

Now go to the texture tab and adjust the settings for the texture. I used the cloud texture with the type set to hard.
Which looks like this
Lastly you just need to go to the output properties tab and decide which frames you want in the final animation.

I decided to animate 50 frames and started at frame 20 to ensure the ripples had spread out over the whole lake.
Then find something else to do for the next half hour to an hour, since even using eevee rendering an animation takes some time.

0 notes
Photo
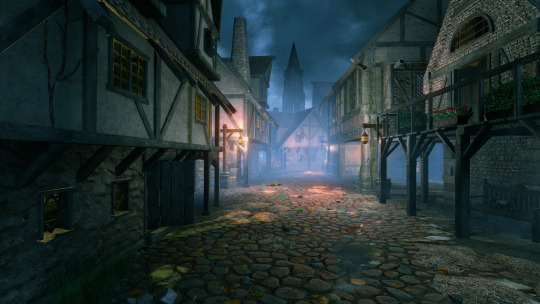
Midnight Walk
1 note
·
View note
Text
Let It Snow
FlowScape has 2 sliders which control the appearance of snow on the terrain and another which controls snow appearing on most of the objects.
Blender comes with a real snow addon which can accomplish something similar.
First off you need to turn it on by going to the addons section of the preferences and searching for snow

In the layout mode select the object you want to add snow to and press the n key to bring out the sidebar then select the real snow tab.

you can select what proportion of the top surface is covered and how deep the snow is. It’s also possible to only add snow to the selected faces.
Then click on the add snow button.

The render looks like

This addon uses metaballs to create the snow which gives better looking snow which has depth. The downside is it’ll probably cause performance issues if there’s a lot of snow covered objects in the scene.
The other downside is that rather than being a single slider you need to manually add snow to every object.
0 notes
Text
Grass Painting 2: The Regrassening
Previously I wrote about how you can use particles systems to paint grass similarly to how you do in FlowScape, but what if you want to have different types of grass in an area? Or what if you want to have a grassy field with flowers spread amongst the grass?
It turns out it’s possible to do these things with just one particle system by using collections

My first step was to make a collection including the grass I used before, a modified version of that grass and a daisy model that I downloaded from https://free3d.com/3d-model/-daisy-v1--359225.html

I then added a plane, scaled it up, added some hills and a ground texture

I added a particle system and set it to hair as before, but this time I set the render option to collection instead of object, setting the collection to the one I created at the start. By setting the Pick Random option each particle will be a random object from the collection.
Which is when I hit the first stumbling block. The grass is rotated correctly, but the daisies aren’t. The fix was to turn on the rotation section and to change the Orientation Axis to Global y. Doing this made it so the daisies were rotated correctly, but the grass wasn’t. However turning on the Object Rotation setting in the Render section fixed that.

I increased the number of particles and adjusted some settings to make it look better before adding a sunlight and an HDRI background. Which was when I hit the second problem. The scene looked like this in the editor

Looking good. Problem is it looks like this when rendered

Well that’s not right.
This turned out to be the problem

It turns out that using a collection to render a particle works differently from using an object. When you’re using an object it’ll still work even if the object itself is set to not render. However when using a collection the particle system will only use objects from the collection which are set to render. (This is made more confusing by the fact that setting an object to not display in the viewport doesn’t affect the particle system)
So I set all three objects to be rendered and this was the result

If you want to control how often each object appears you can do that by turning on the use count section. By default it’s set to use each object equally, but by increasing the use count for an object you can make it appear more frequently. I didn’t want many daisies in my scene so I increased the use count for each grass object to 5

Which resulted in the render at the start.
It should be noted that everything else I mentioned before applies here. If you only want the grass and flowers to appear in certain places you can add a vertex group to the ground plane and then assign that to control the density of particles.
0 notes
Text
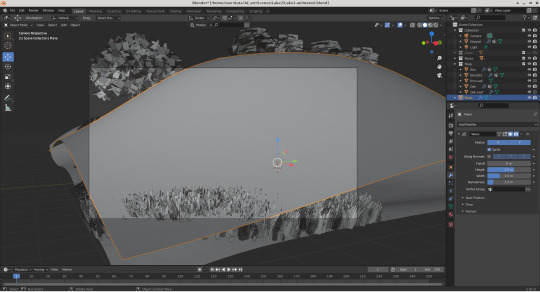
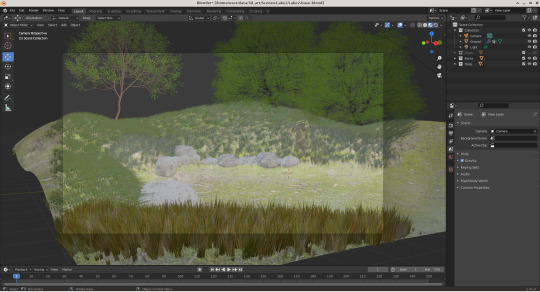
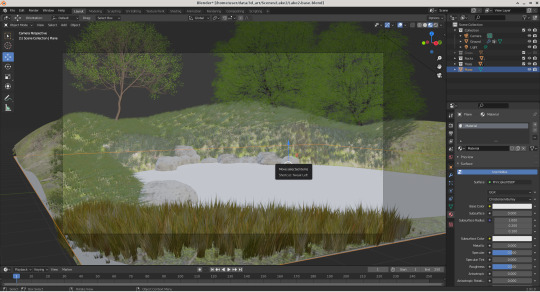
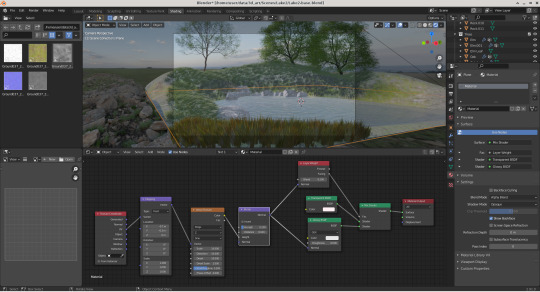
Water, Water Everywhere
FlowScape has multiple different types of water. There’s a water plane which can be bound to the landscape or extend to infinity, an infinite ocean plane, a water disc, rivers and a waterfall.
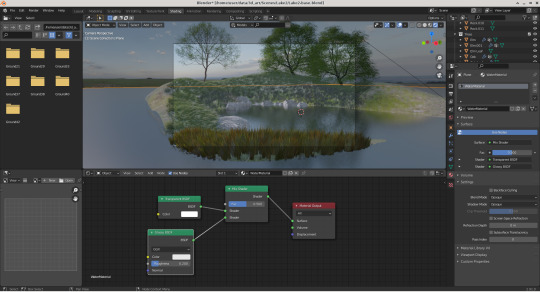
In this post I’m going to discuss how to recreate the water plane and water disc object resulting in an image like this

I started off with this scene
Which tou can download from here (http://blender.analytical-engine.co.uk/scenes/lake2-base.blend)
The first step is to add a plane and then move and scale it to the right place
To get it to look like water we’re going to need to add some shaders. First off add a new material to the plane. Then in the shader view delete the principle BSDF and add a mix shader connected to the material output’s surface input. Then add a transparent BSDF and a glossy BSDF connected to the two shader inputs on the mix node
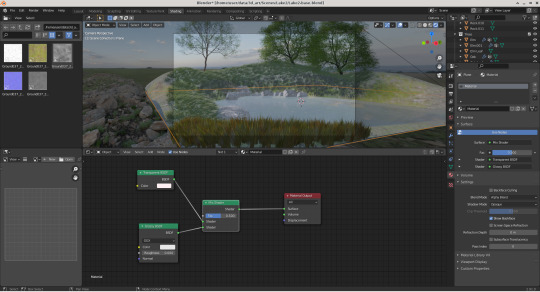
(Note there are other ways to achieve the same effect, such as using a glass node. I prefer this set up since you can use the factor input of the mix shader to control how reflective the water is. Similar to the fresnel slider in FlowScape)
If the water goes black when you turn the factor down to 0 then check the Blend Mode in the material settings is set to Alpha Blend. If you don’t get any reflections then go to the render settings and make sure that screen space reflections are turned on.
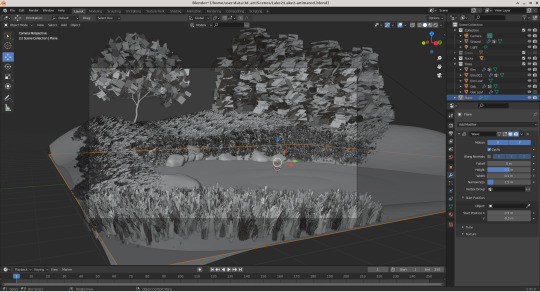
This is what the water looks like
The problem is it’s a bit flat. More like a mirror than a lake. Go back to the shader editor and add the following nodes
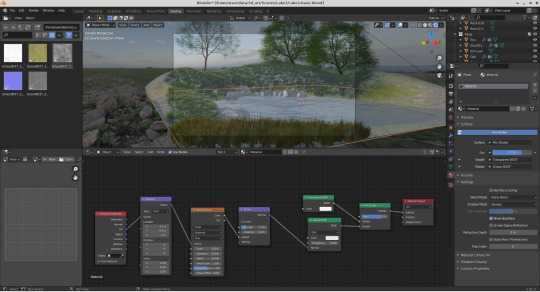
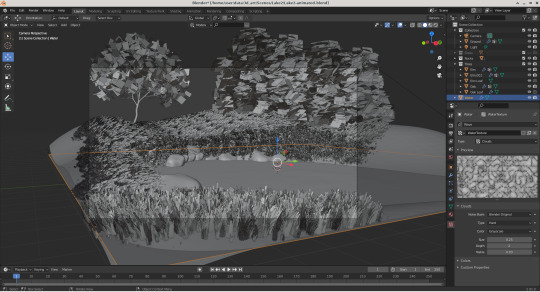
Changing the strength of the Bump node will change the height of the ripples. Changing the Distortion, Detail, Detail Scale and Roughness for the Wave Texture will change the ripples from being perfect circles. Adjusting the Location in the Mapping node will move the origin of the ripples.

This looks less flat but it’s now impossible to see anything through the water. You can either adjust the factor of the Mix shader to make the water more transparent or you can achieve a more realistic effect using a Input->Layer Weight node.
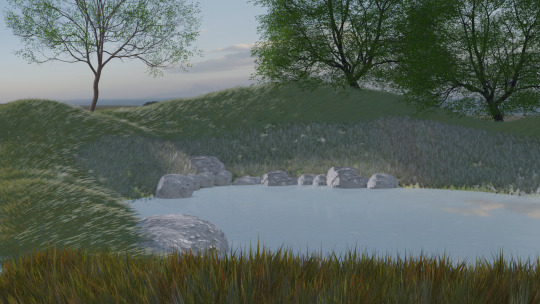
Which gives this

I then adjusted the colours for the transparent and glossy BSDFs to give the water a slight blue tint for the final render above
That gives you a water plane, but FlowScape also has disc shaped water objects. To add one of these add a circle mesh and then open up the Add Circle settings and set the fill type to Ngon or Triangle Fan
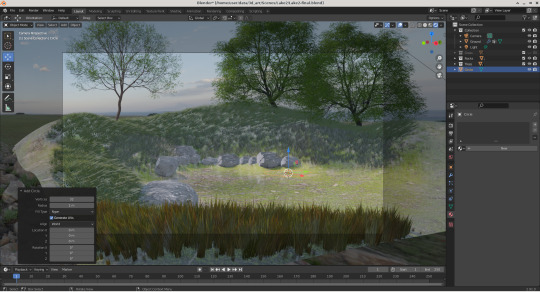
Then use the same shaders as with the water plane. After scaling and moving the disc into place.
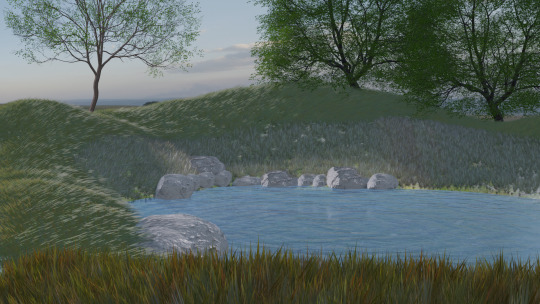
You can get the blend file of the finished scene from here (http://blender.analytical-engine.co.uk/scenes/lake2-final.blend)
1 note
·
View note
Text
While watching a CG Geek video where he created a forest of 20,000,000 trees in Blender I got the idea to create a scene of a forest overlooking an ocean.

I then recreated the scene in FlowScape
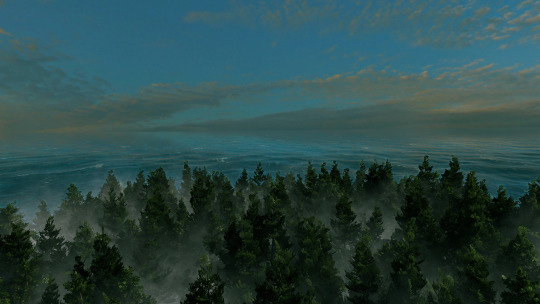
Note the tree model used in the Blender version is from - https://blendtree.blogspot.com/
0 notes
Video
A feature that has been teased for a future FlowScape update is procedurally generated clouds. (At the moment you can fake the effect using volumetric fog, but the previews look better).
The good news is Simon Thommes has written a shader for Blender which does the same thing which you can download from here - https://blenderartists.org/t/procedural-cloudscape-generation-in-cycles-now-eevee/694700/11
The bad news is that it doesn’t have any instructions and AFAICT it hasn’t been updated in more than 2 years, still it gets the job done.
After downloading the blend file there’s 2 ways to use it in a scene
1) Add the shader by appending ProceduralCloudscapev0.4.blend->NodeTree->ProceduralCloudscape_v0.4. Then add a cube to your scene and add a material. In the shader editor delete the Principle BSDF and add a Group->ProceduralCloudscape_v0.4 connecting the Cloud Volume output to the Volume input of the Material Output node.
2) Add a configured cube by adding ProceduralCloudscapev0.4.blend->Object->Custom Cloudscape. This has an image texture node connected to Cloud Distribution input which you can either replace or delete
Once you have a cube with the shader attached it’s just a matter of moving it to the right place and then tinkering with the settings until you’re happy with the effect
If you want the clouds to animate like in the video above then you need set the Wind Strength option to something above 0 and set the wind direction. This needs to be a vector with the components of the direction. So if you want the wind to just go along the x axis it’d be [1,0,0]. If you want the wind along the y axis it’d be [0,1,0].
The only way I could figure out to provide a vector input was by adding a Converter->Vector Math node set to Add mode. I put the values I wanted in the first vector and left the second one as all 0′s.

The tree in that scene was from BlendTree - https://blendtree.blogspot.com/
0 notes