#'it's pupils fill the bottom two thirds of each long oval'
Text

I know I've thought of a good shitpost when the premise is only funny to me and maybe three other people
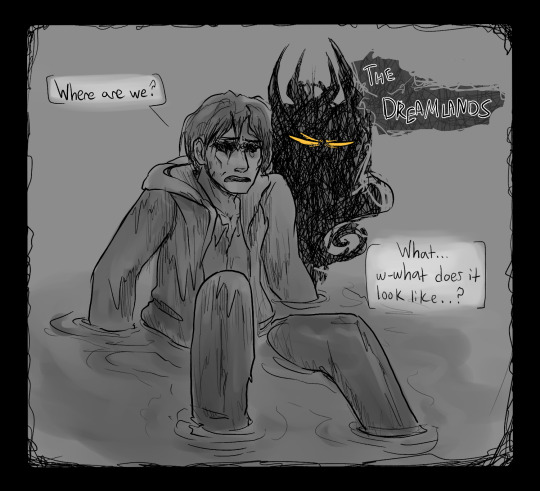
#i bet you all thought i'd do an fma crossover first huh? Foolish. kirby shitpost attack#malevolent#malevolent podcast#arthur lester#john doe#comic#my art#doodles#kirby#not shown is john describing a waddle dee to arthur in the worst way possible#'oh arthur....'#'it's a small orange creature - unlike anything from your world'#'it stands maybe one foot high and moves with an odd gait - its limbs sliding across its body as if disconnected'#'fleshy protrusions on both of its sides sway with it...almost like limbs that have been amputated - leaving just the stumps'#'oh god arthur...its face...'#'two long wet eyes sit in the center of its body - they're drawn and pulled in an uneven shape'#'it's pupils fill the bottom two thirds of each long oval'#'the rest of the face or head is featureless and smooth - it has no mouth only tan stretched skin that looks pliant to the touch'#'arthur...it's Staring Right. At. Us.'#waddle dee: wanya
959 notes
·
View notes
Text
Illustrator Tutorial
So for quite a while I’ve been mulling over the idea of making a tutorial of how I create art in Adobe Illustrator. I’m not the best at explaining things but I just thought I’d share how I make my art! Warning—this is a super long post. And it’s not exceptionally interesting. Sorry about that….
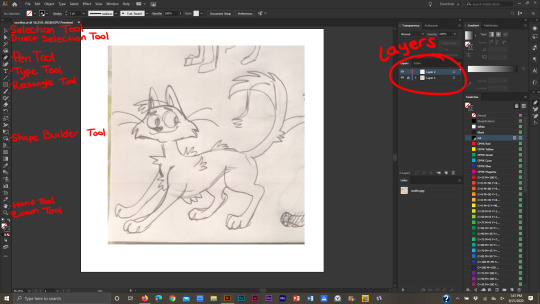
I draw traditionally, so when I’m satisfied with my drawing, I open up Illustrator, make a new file, and place the artwork in it.
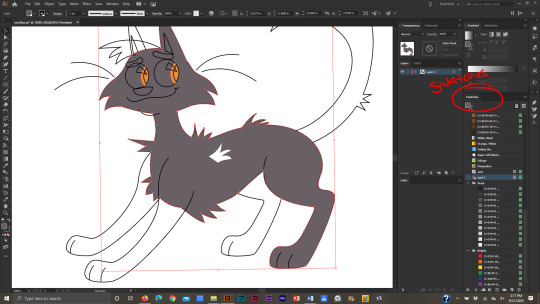
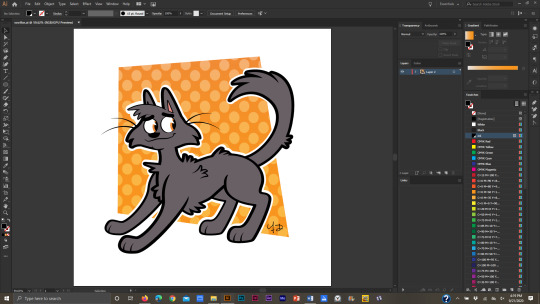
This is how I set up my file and work space. My layers are at the right of the screen (the top layer is my drawing layer, the bottom layer is my “sketch” layer, locked and usually set on 65-72% opacity). If I wanted to change the size of my Artboard (the file, basically) I would go to the Artboard window (located above my layers) and make my changes there. To the left is the Toolbar. It contains a ton of useful tools, such as the Selection tool (basically the “mouse”), Direct Selection tool (helpful for editing line work), the Pen tool (what I use to trace over my drawings), Type tool (for typing), Rectangle tool (for making quick shapes like squares, stars, circles, etc), Shape Builder tool (for merging shapes), the Hand tool (for moving the screen around—if that makes sense…) and the Zoom tool (lol pretty self-explanatory). There’s many more tools of course, but these are the ones I utilize the most. (Uh unfortunately the tools I am using aren’t showing up in my screenshots while I work…so I’ll just point them out as I use them)
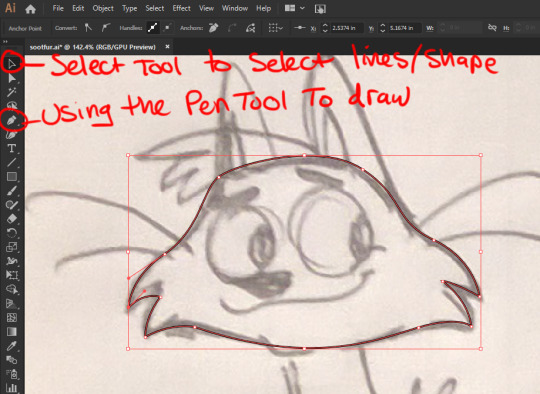
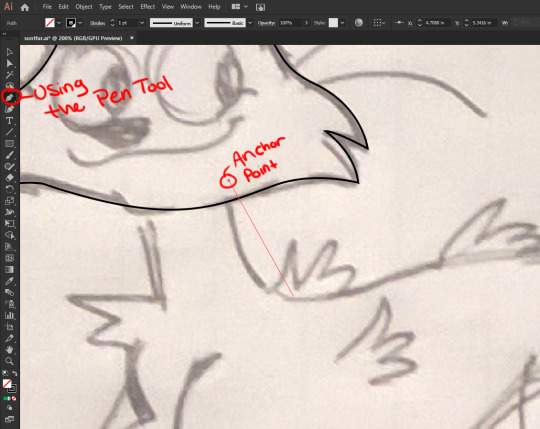
Now that I’ve got my file set up and drawing in place, I trace over it with the Pen tool. There is also another way to make line work. If you’ve got nice line work that you’re satisfied with you can simply select your drawing, then click “Image Trace.” Illustrator will make a vector image of the drawing. Personally I don’t like making line work that way because, well, I’m sorta odd when it comes to line work and I prefer to use the pen tool.
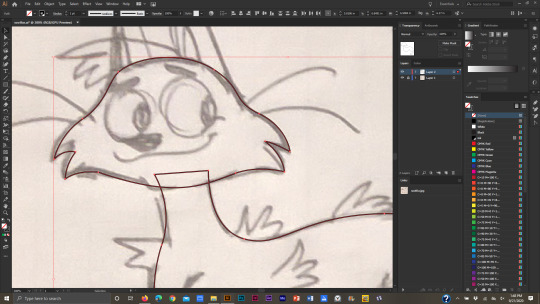
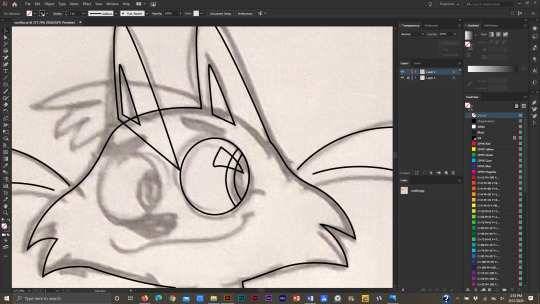
When I make a shape and connect two anchor points together, they make a single shape, like this head. You don’t necessarily have to make shapes in Illustrator, but it does make things easier imo.
To edit my line work, I select the line work itself using the Selection tool, then go to Object>Transform>Reflect.

Another window will pop up, and from there, I can choose if I want the image to be flipped horizontal or vertical. Then I click “Ok.”
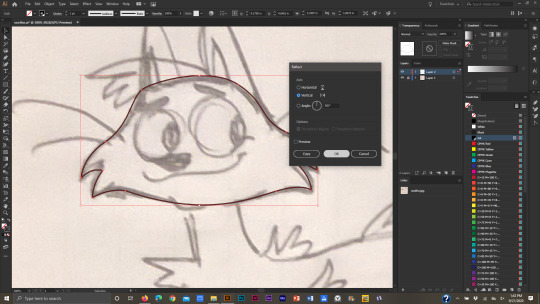
I make edits using the Direct Selection tool. Then I flip the line work back to how it was. I can do this by right clicking the line work and going to Transform>Reflect. The same window will pop up again, and I click Ok.

But how do I make lines in Illustrator? I use the mouse when I work in Illustrator (I used to just use my laptop’s track pad, but uh…I highly suggest that you don’t do that! Using the mouse is a lot easier on the hand, and the track pad is pretty bad for carpal tunnel). You can also use a Wacom tablet or whatever, but I prefer using a mouse. Anyway, to draw in Illustrator using the Pen tool, simply click anywhere on the canvas to make an anchor point and drag the mouse away from where you clicked. As the mouse moves around, a line will follow it. If you click again, a straight line will appear.
To make curved lines though, after you click on the canvas, drag the mouse around to make a curved line.

To merge shapes, select each shape with the Selection tool (click on a shape, and while holding down the Shift key, click on another shape. Two shapes are selected at once now…or just drag the Selection tool over multiple shapes at the same time).
Drag over the selected shapes with the Shape Builder tool…
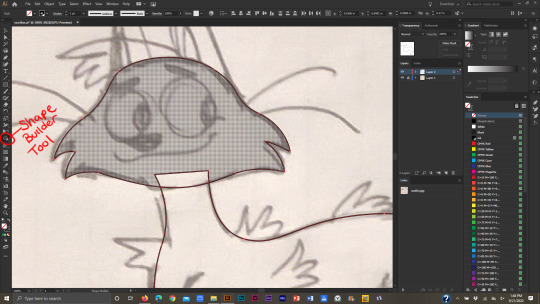
…and one shape will be formed.
So that’s how I make line work and shapes in Illustrator. If I want to rearrange which shape is “in front” or “behind” another shape, I select the shape, right-click on it, go to Arrange>then Send to Back or Bring to Front.

If I want to make a duplicate of a shape, I select it with the Selection tool, click “alt” (on Windows) then drag the new shape away. Then I de-select it.
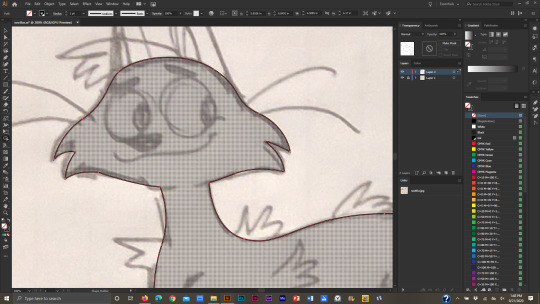
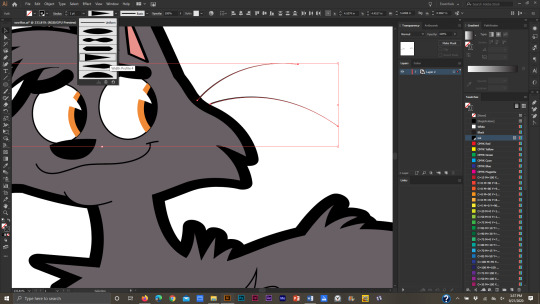
When building shapes, sometimes I have to “delete” part of a shape so that it doesn’t show up in the final illustration. For example, when I make pupils. To do this, I select the shapes that have to be edited: the iris, pupil, and the eye itself. The eye won’t change, but in order to make the iris and pupil fit inside the eye, I’ll have to select it. If I don’t then all I’ll manage to do is merge the iris and pupil together.


So after they’re all selected I use the Shape Builder tool and drag it over the part of the iris and pupil that I don’t want anymore. While doing this I hold the “alt” key down, so that when I’m done editing the eye, the extra shape will be deleted.
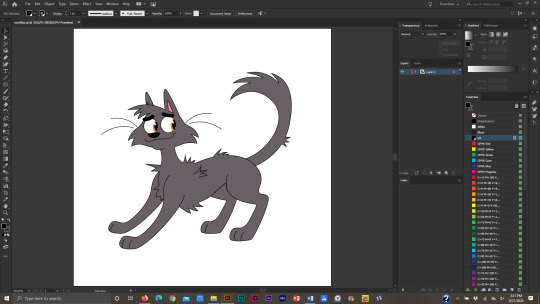
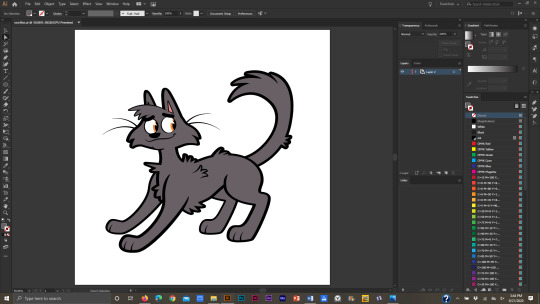
And finally the line work is DONE!

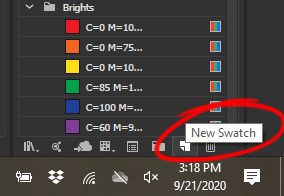
Now to add color. To change the color of a shape, I select it with the Selection tool then change the color from the Swatch window.

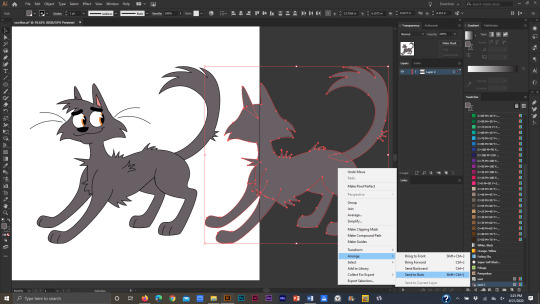
When the artwork is colored, I get into the intricacies of line work! I like bold line work, and I like to create tapering lines for legs, mouths, and other little details. To make a bold outer line, I select all the major shapes that form the “outside” of the image, make a copy of them, and send them to the back (Arrange>Send to Back)

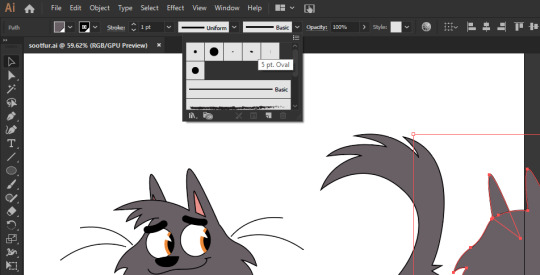
To make the lines bold I change the stroke to a 5 pt. Oval (the upper left section is where the lines, or “strokes,” can be edited) then increase the stroke weight to 4 points.
I slide all the shapes back behind the “front” shapes like so.

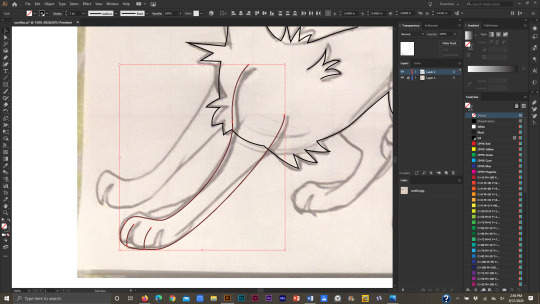
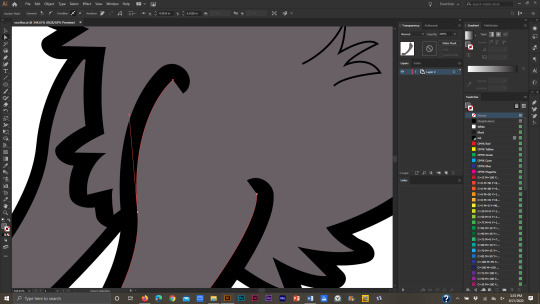
For the front leg, I don’t want to keep the line work near the shoulder odd-looking like this.

So I use the Direct Selection tool, select the anchors at the shoulders, and move them around till I’m happy with how they look.

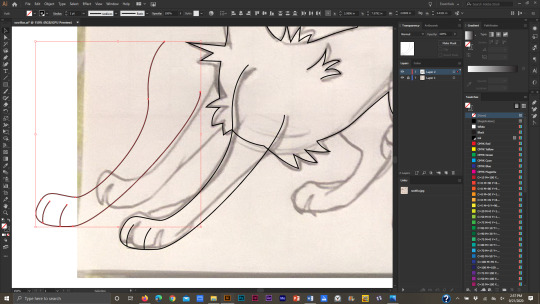
To further edit my lines I can select individual lines and change their shape from the “Uniform” line to any design I want. I like using this triangle-shaped line for whiskers and toes. Then I can edit the stroke width to be bigger or smaller.

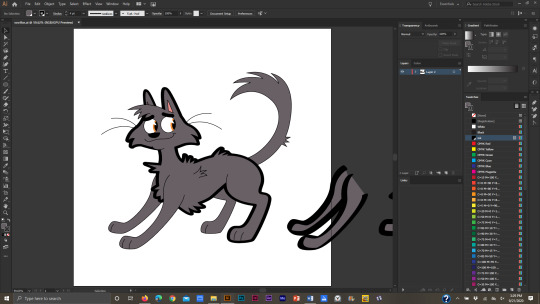
And finally, a cat is born!
I’ll go over how I make backgrounds too. It’s not all that interesting though XD When I make backgrounds for my Warrior Cat drawings, I like to include patterns and gradients in them. First though, I make a simple shape.
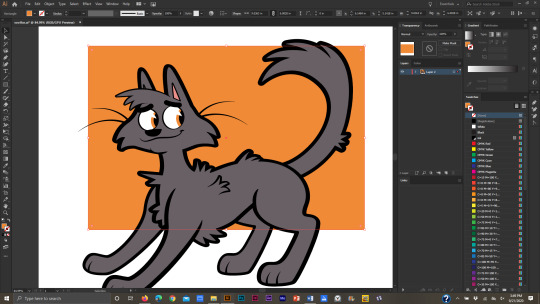
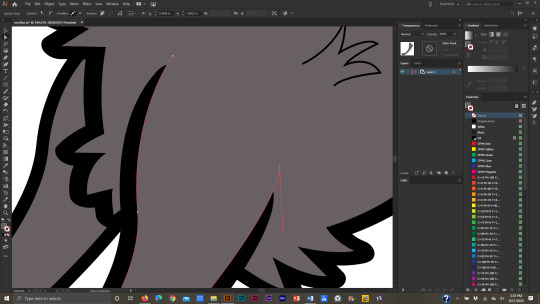
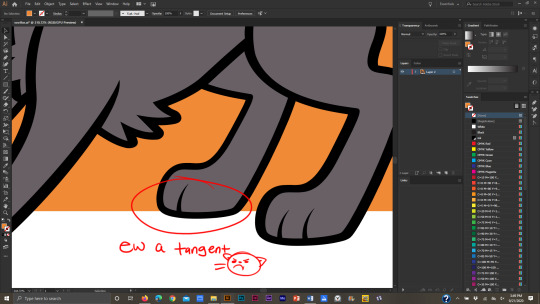
I try to avoid tangents at all costs so I use the Direct Selection tool to move the anchor points and lines around the main drawing. (BTW a “tangent” is when two lines touch each other without intersecting. It isn’t the most desirable thing to have in a piece of art). For example, the edge of the background square touching the bottom of the cat’s foot forms a tangent.
When I’ve settled on a final design for the background shape, I make a pattern to fill it.

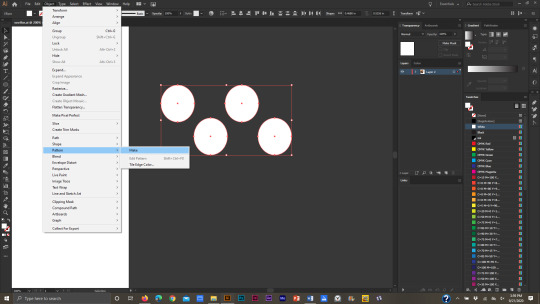
I like to keep my patterns simple, so for this one, I made a circle pattern. To make the pattern, select the shapes you want for the pattern…

…go to Object>Pattern>Make. A window will pop up saying that a new pattern has been added to the Swatches panel; click ok.
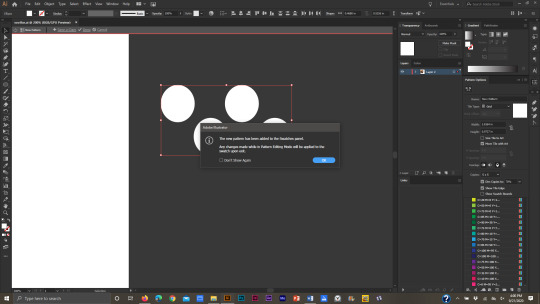
In the dialogue box to the far right, the pattern can be edited even further. When I’m done editing it I click “Done” in the upper left corner of the screen.

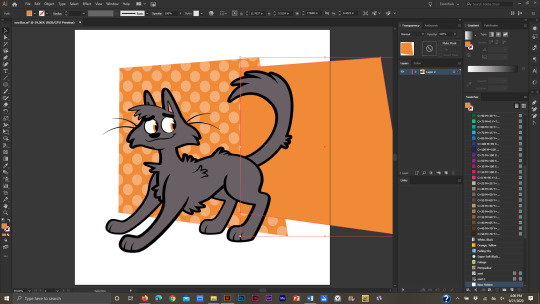
And a new pattern has been added to the Swatches! I make a duplicate of the background shape and change the Fill color to be the new pattern.

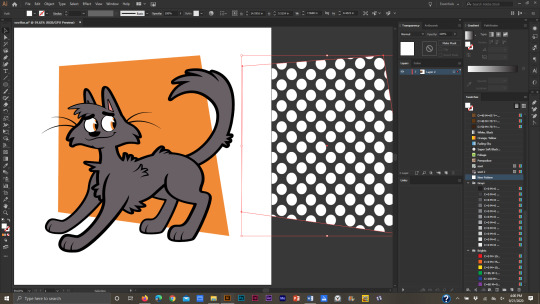
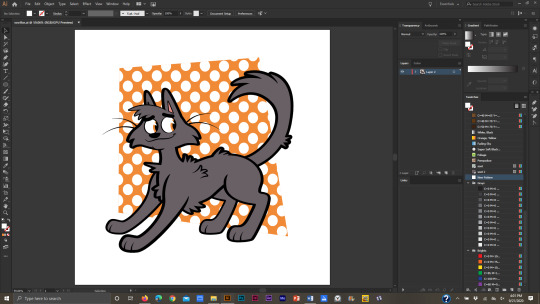
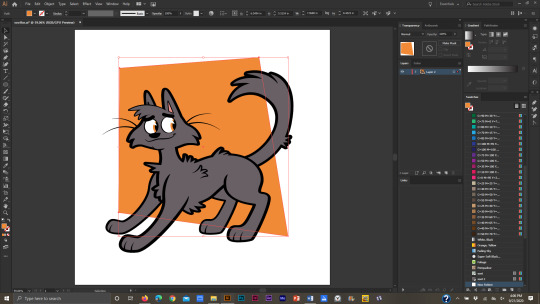
Then I slide the patterned box in front of the orange one, but behind the cat, then I adjust the opacity.

I make a third copy of the background shape, move it in front of the last two shapes, then click on the gradient box in the gradient window. It automatically makes a white and black gradient in the shape.
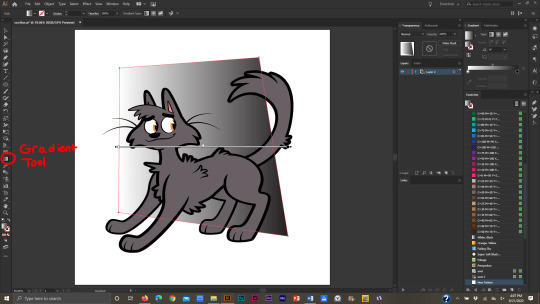
To edit the gradient I click on the Gradient tool in the Toolbar. Then I can adjust the direction of the gradient.


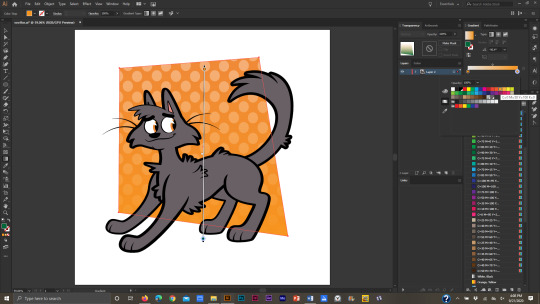
In the gradient window I can change the colors. I also change the opacity of the shape and switch it to “Overlay.”

I add a bold white line behind the illustration, add my watermark, and I’m done!
If I want to add shadows, I draw them over the illustration and adjust the opacity of the “shadow-shapes” till it looks decent. I change the shadow-shapes to “Multiply” as well. (I uh was just too lazy to add them to this pic but I have examples of cell-shading in a lot of my other pics).
Like I said, I’m not the best at explaining things, so here’s one of my speed drawings that show me using all the tools mentioned to make my drawings: https://www.youtube.com/watch?v=hD3wA_pwn4k
To finish this long (and probably boring) post, Adobe Illustrator is a vector based program. It doesn’t utilize pixels—I am NOT eloquent enough to discuss the differences so here’s a few sites that do:
https://stinajones.co.uk/the-difference-between-vector-and-pixel-graphics/
https://www.printcnx.com/resources-and-support/addiational-resources/raster-images-vs-vector-graphics/
https://www.ionos.com/digitalguide/websites/web-design/pixel-graphics-vs-vector-graphics-a-comparison/
Anyway I hope this was useful, even if in a small way! If any other Illustrator artists have tips, tricks, or tutorials they’ve made or have found useful, please share!!
2 notes
·
View notes
Last Seen Blogs


alwayssagilmore
"It's Not About Deserving, Its About Believing"

nepalnail65
The Journaling of Dreyer 547

kassiopeiaa
You cant be a pro with just one trick

guro-man
new uploads on sundays!