#can i season it afterwards? just a pinch of salt? or sugar? or sauce?
Text


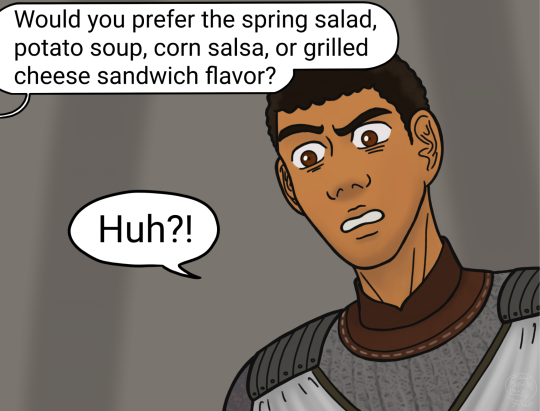
Local Alchemist needed to be stopped.

My formula of restore fatigue:
Spring salad: lettuce, radish, potato, (optional: apple, orange, watermelon). Unfortunately it has Burden side effect. (if choose orange, you'll get a bonus Shield effect)
Can also side with Ranch dressing: cheese wedge, leek, onion, garlic. And this one has Damage Agility side effect. It can be fix by removing the garlic.
Potato soup: potato, garlic, leek. This recipe has Frost Shield side effect. Perfect choice for a cold weather.
Corn salsa: corn, tomato, onion, garlic. Unfortunately it has Damage Agility side effect, but you can get Detect Life in the process.
Grilled cheese sandwich: bread loaf, cheese wedge, cheese wheel. Unfortunately it has Damage Agility side effect. I should have removed the cheese wedge. Sorry Baurus :(
Classic ham sandwich: bread loaf, cheese wedge, ham, lettuce. Unfortunately this recipe also has Damage Agility side effect, but bonus Fire Shield woohoo!
Gyudon: beef, onion, rice
Mix berries: blackberry, strawberry, (we only have two kinds of berries?) (optional: apple, orange, pear). Actually, don't put apple or pear in it. They will cause Damage Health.
Crabby corn soup: crab, corn, onion. You can add cheese wedge for bonus Fire Shield (and Damage Agility) effect.
Chili con carne: beef (/boar meat /mutton /venison), onion, garlic, tomato. Side effect is Detect Life. (Beef flavor will grant you Shield effect. Unfortunately Boar meat will have burden side effect and Venison is Damage Health)
Pumpkin pie: pumpkin, sweetcake (/flour /sweetroll). Unfortunately both flour and sweetroll has Damage Personality side effect
Carrot cake: carrot, sweet cakes
Strawberry cheesecake: strawberry, cheese wedge, flour (/sweetcake /sweetroll). The flour version has Reflect Damage side effect. I highly recommend it.
#tes#oblivion#hero of kvatch#baurus#tes oc#oc: acelta#oblivion alchemy could be full of flavor and nonsense#i don't have any mushroom recipe bc i'm not sure about the flavors#but it's cool to know most shroom in oblivion is safe to eat (the first alchemy effect is restore stuff#i love how the 3rd era folks incorporated food in their potions#but my recipes are not perfect for i lack some good ingredients like salt and pepper and butter and cream and broth and vanilla extract...#can i season it afterwards? just a pinch of salt? or sugar? or sauce?#can i put two different flavor of potions in a shaker and make two balanced flavor potions? like drink them in one go?#most potions are made by distillation methods (with alembic and retort) so the flavor probably is subtle#i watch some show with bartender use this rotary evaporator to distill drink ingredients#and the final product is clear liquid with a hint of it's original flavor#so maybe that's what oblivion potion is like. some flavored water#wait... is- is potion like some kind of wired flavor soda?#as a alchemy 100 mad lad i can make potion from a single ingredient so i can literately make a ham water of restore fatigue
148 notes
·
View notes
Text
What I’m Prepping This Week: April 1-5
damn these weeks really fly by huh.... I’m already on my third week of sharing what I prep for the week wow! I hope you all enjoy these recipes, they’re all super easy this week!
#1: Brown Sugar Green Beans (can be made vegan)
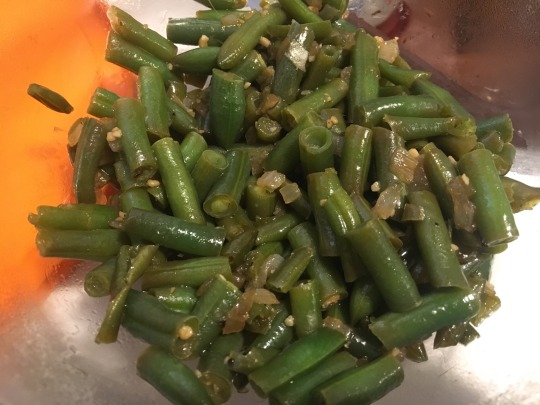
Had some frozen green beans in the freezer and I’ve been dying for a veggie I haven’t made in a while, so I went with green beans because they are one of me and my dad’s favorite vegetables. This is a super simple recipe, but I don’t believe this is vegan because it has Worcestershire sauce in it, which I can’t remember if that’s vegan or not, but you can skip it or swap it if you like this recipe. You just cook the onions and garlic in a pan, make the sauce, and then add the green beans and cover for a few minutes.
Ingredients: 2 cups frozen cut green beans, 1/4 cup chopped onion, 1 tbsp olive oil, 2 tbsp brown sugar, 1 tbsp apple cider vinegar, 2 tsp Worcestershire sauce, salt to taste (I used 3 pinches) and pepper to taste
Nutrition Per Serving (Makes 6 Servings, about 1/3 cup each):
Calories: 43
Total Fat: 2g / Saturated Fat: 0g / Trans Fat: 0g
Cholesterol: 0mg / Sodium: 71mg / Potassium: 65mg
Total Carbohydrate: 6g / Dietary Fiber: 1g / Sugars: 4g / Protein: 1g
#2: Smokey Roasted Potatoes (vegan)

(Haven’t made potatoes in a hot minute and I fucking love them, so I tried this recipe using smoked paprika to give it a bit of a smokey flavor and kick of flavor all around. I cooked them at 425 for about 25 minutes or until tender. I put them under the broiler for like 5 minutes but they didn’t really get crispy :( They still taste DELICIOUS though! I tossed them with some Italian seasoning and dried parsley afterwards because I like the color.
Ingredients: 6 medium Russet potatoes (or any potato of your choice), 2 tbsp olive oil, 2 tsp smoked paprika, 1/2 tsp chili powder, 1 tsp garlic powder, 1 tsp onion powder, 1/2 tsp salt (use more if using coarse salt), and 1/4 tsp black pepper (or to taste)
Nutrition Per Serving (Makes 6 Servings, around 1 cup each depending on potato size):
Calories: 156
Total Fat: 5g / Saturated Fat: 1g / Trans Fat: 0g
Cholesterol: 0mg / Sodium: 209mg / Potassium: 636mg
Total Carbohydrate: 27g / Dietary Fiber: 2g / Sugars: 2g / Protein: 3g
#3: Chocolate Banana Bread (can be made vegan)

I made this in the first post of meal prepping which, in the effort of not repeating myself, can be found here! All details on how to make this bread and the nutritional info can be found there :) It’s absolutely delicious and a new favorite. It can be high in sugar, so you can adjust for your needs but it has a rich dark chocolate flavor and a beautiful texture. I didn’t have as much cocoa powder this time, so I adjusted the ratios. If you want more of a dark cocoa flavor, use the amount in the recipe, if you want a stronger banana flavor, use only about 1/3 cup of cocoa powder! That way, it’s still chocolatey, just with a much more present banana flavor.
#4: Honey Dijon Vinaigrette (can be made vegan)

My fave vinaigrette because it’s so tangy and sweet and the perfect balance of flavors. If you are vegan, you can sub the honey for maple syrup or agave (I think that’s vegan!) and I’m sure it’ll turn out the same! This is an amazing vinaigrette for using fruit in salad, it just pairs super well and balance the sweet in the salad because it’s got tang from the vinegar and spice from the mustard. I also doubled this recipe when I made it.
Ingredients: 1 1/2 tbsp olive oil, 1/2 tbsp Dijon mustard, 1/2 tbsp honey, 1 tsp red wine vinegar, salt to taste (occasionally I also put a few shakes of Italian herb seasoning in it but never salt! The mustard is plenty salty)
Nutrition Per Serving (Makes 2 Servings, roughly 1 1/4 tablespoon each):
Calories: 110
Total Fat: 11g / Saturated Fat: 2g / Trans Fat: 0g
Cholesterol: 0mg / Sodium: 90mg / Potassium: 4mg
Total Carbohydrate: 4g / Dietary Fiber: 0g / Sugars: 4 g / Protein: 0g
What I Have On Hand This Week
Bought This Week:
Archer Farms Dried Cranberry & Pecan Salad Topper - I love pecans, but nuts are expensive. When I saw this for $1.99, I was intrigued and picked it up to add to my salads this week.
MorningStar Farms Meal Starters Chick’n Strips - I’m not vegan, but I really want to try some vegan stuff, so I picked up these chicken-less chicken strips at Target. I was surprised that they were cheaper than pretty much all the real frozen chicken products!
Bird’s Eye Zucchini Lentil Pasta - While I like to prep my own stuff usually, I decided to try a frozen side dish of pasta made from zucchini and lentils in a marinara sauce. I love pasta and hopefully this can be a more nutritious way of eating it (not that I think pasta is bad, I just love cool ways to get your veggies)
Simply Balanced Low Sodium Cannellini Beans - These are a smidge more expensive than other brands -- for example, the SB ones were around $1.30, while the Bush’s ones are usually $0.99 -- but in this case it’s worth it. The serving in the SB beans have around HALF of the sodium in the so-called “reduced sodium” beans that Bush’s sells. Totally worth it, imo.
Bananas - For banana toast with homemade nut butter!!
Leftover From Last Week:
½ loaf Pepperidge Farm 15 Whole Grain Bread (froze last week)
Homemade Mixed Nut Butter
Sargento Ultra Thin Swiss Cheese Slices
Hillshire Farms Deli Turkey Slices
Green Apples
#meal prep#meal prepping#mealprep#meal prep recipes#healthy easy recipes#easy recipes#healthy eating#healthy recipes#my recipes
26 notes
·
View notes
Text
Upside Down Walnut, Chocolate, & Pear Cake
Our little back house we are renting is about four miles from the ocean here in Costa Mesa/Newport Beach. We get the foggy marine layer on the mornings it chooses to hang over the coast, and we have a very tempered climate year round. In the past I’ve brushed southern California off as having no seasons, but this just isn’t true. I think with social media these days we see so much in the fall of the iconic leaves changing, and more clearly defined seasons of certain regions of the world, that is has become commonplace to standardize these quarterly shifts. Maybe it’s just me and my tendency to seek out change, but I’m coming around to seeing a more full, open picture. Every little dot of latitude and longitude on the map has it’s own unique characteristics when it comes to seasons, and I’m beginning to appreciate our a-typical southern California ones.
September and October are two of the warmest months here where I live, which is wonderful if you can get past the photos of falls leaves and warms mugs of cocoa elsewhere. Why is it wonderful? The crowds of people have all gone home, the kids are back in school, and the beaches and national parks are now near-empty to enjoy. Around here we call it “locals’ summer”. I don’t do well in the heat, so this time can be tough for me to get through, but November and December are the greatest gift after these few warm months. This is my season, this is the time of year I fall in love with California. The air is chilly and as crisp as you can get with the pacific ocean nearby. The light is the most beautiful light I’ve ever seen. The sunsets make you weak in the knees. And the smell that permeates the entire city is pure heaven. The farmers market is still overflowing, with fall produce finally coming in alongside unlikely jewels such as tomatoes, avocados, oranges, and so many greens (kale, chard, herbs, etc). Local pomegranates are half the size of my head and two dollars a piece.
Approaching Thanksgiving this year, and hosting for the first time with my parents coming into town, I tried pondering a new theme we could base our cooking around that felt more fitting for our area. As is typical this time of year, we have a three day heat bump that lands right over Thanksgiving. Normally I would say something negative about California and how I wish I lived somewhere cooler. But not this year, I’m celebrating where we live. So we are having a California-themed Thanksgiving with dishes made from all of the produce that was overflowing the most at the farmers market this past weekend. Our backyard will be in shade in the late afternoon, so we will set up the table under our twinkle lights and eat outside. Roasting a dozen heavy dishes on a warm day doesn’t sound right to me, so I’m planning a few lighter twists. I’ll be sure to share them on Instagram stories a bit if you’re curious to see what we are making. I’m really excited you guys, it feels good to be going with the grain and not against it for once.
Part of my inspiration to dig deeper into understanding and loving the unique spot in the world where I live came from reading Valentina‘s pages in her new cookbook, Everyday Vegetarian. She lives in a small medieval town on the eastern side of Italy and shares her region’s history and culinary traditions in a way that reads like a poetic novel. From cover to cover you are immersed in recipes and stories that overlap each other into one beautiful picture of her culture. Valentina takes traditional recipes that have been passed down for generations in her family, alongside some newer ones of her own, and shows how to make them vegetarian (and many of them vegan too) without compromising the tradition. It’s beautifully photographed, with such a lovely cover to have sitting out on your kitchen counter too (see photo below recipe). She shows how there is so much more to Italian cooking outside of pasta and tomato sauce (although she has recipes for both from scratch that are incredible) and how to cook throughout the seasons in her nook of the world as well. I want to make every recipe from cover to cover and book a trip to Italy ASAP to experience so much of what she describes.
The first recipe that jumped out to me was her grandma’s upside down prune cake, which she suggests in the fall making with pears, nuts, and chocolate instead. So I did just that, and it was so scrumptious I had to share it with you here too! I used a mixture of freshly milled flours from the incredible people over at Eat Grain, which I link to individually in the recipe below. You can taste the freshness, and even see it, in these flours. I’ve never experienced anything like it – and the nutrition is suppose to be even better as well! Check out their line on their site here if you’d like, they are shipping anywhere in North America for free for the rest of the year – which is perfect timing for some holiday baking.
I hope those of you celebrating Thanksgiving this week have the most wonderful, joy-filled time. Maybe this cake could even squeeze onto one of your holiday tables too ;). -xx
SHOP MY PANTRY >>
RECIPE NOTES: The recipe below is pretty darn near exact to Valentina’s, with a few small exceptions. Here are the few substitutions I made which you can convert back to the original if you desire to: I use coconut sugar instead of brown sugar, apple sauce instead of sunflower oil, and a mixture of whole spelt and rye instead of whole wheat. I also halved the recipe below and prepared it in a 6 inch springform pan in the photos above, since I knew we would have lots of sweets on hand this week. This worked out really well, but I know I’ll be making the full recipe next time – it was just too good.
UPSIDE DOWN WALNUT, CHOCOLATE, & PEAR CAKE
Makes one 10 inch cake, serves 8 to 10.
1 3/4 cups almond or soy milk
1 tablespoon apple cider vinegar
1/4 cup of water
2 teaspoons vanilla extract
1/4 cup unsweetened apple sauce (or sunflower oil)
juice and zest of 1 lemon
1 cup coconut sugar, plus 1 teaspoon for the pan
1 cup of sifted spelt flour (white)
3/4 cup whole spelt flour
1/4 cup whole rye flour
1/3 cup potato starch
1 heaping teaspoon baking soda
1 heaping teaspoon baking powder
1 teaspoon ground cinnamon
pinch of salt
15 small pears
1/3 cup chopped raw walnuts
1/3 cup chopped dark chocolate
optional: extra chopped walnuts and dark chocolate for sprinkling on top
Preheat the oven to 350F. Line a 10-inch springform pan with parchment paper and lightly oil the sides (I forgot to oil mine and it still removed itself nicely, but it is probably safer to do so). Sprinkle about a teaspoon of coconut sugar on the bottom.
Combine the sifted (white) spelt, whole spelt, and rye flour with the potato starch, baking soda, baking powder, cinnamon, salt, coconut sugar, and lemon zest in a large bowl and whisk to remove any lumps (I sifted mine, and added the sugar and zest afterwards).
In a large glass measuring cup, combine the almond or soy milk, vinegar, and lemon juice and stir. After a few seconds, the milk will start to curdle. Immediately add the water, applesauce (or sunflower oil), and vanilla. Stir well. Slowly pour this into the dry mix, stirring with a whisk to break any lumps. The batter will be somewhat on the liquid side.
Core each pear and slice into 1/4 inch thick wedges. Arrange in a circle in the prepared springform pan, until the bottom is completely filled. Sprinkle the chopped walnuts and dark chocolate on top, and slowly pour the cake batter into the tin. Bake for 40 to 50 minutes (mine took 50), until cooked through when tested in the center with a toothpick. Once cooked and golden on top, turn off the oven and let it sit inside for 5 minutes more.
Remove the cake from the oven and release from the springform pan onto a wire rack. Flip upside down so that the pears are on top, and peal away the parchment paper. This is optional, but while the cake is warm I sprinkled some dark chocolate on top, and when it had melted I added a small handful of additional chopped walnuts. Once fully cooled, slice and serve the cake. Store leftovers in an airtight container on the counter, or in the fridge (it’s really good cold), and enjoy within three days.
This recipe was originally found in the cookbook Everyday Vegetarian, and is being republished here with Valentina’s permission. See more of her beautiful work on her blog, Hortus Cuisine, and on Instagram.
I love seeing what you create! Be sure to tag your photos on Instagram with #FWmakers.
This post contains affiliate links (they are underlined for clarity). Purchases you make through these links will help fund the work I do here on Faring Well at no extra cost to you. Thank you sincerely for your constant love and support.
Naturally Vegetarian by Valentina Solfrini
O R D E R H E R E
Source: http://faring-well.com/upside-down-walnut-chocolate-pear-cake/
0 notes
Text
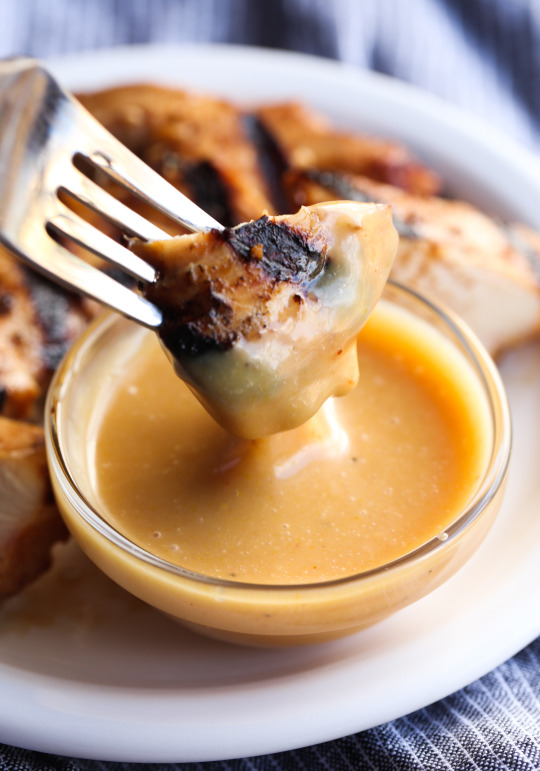
Homemade Flatbread with Yogurt, Eggs and Curry Brown Butter [Giveaway]
I recently had the chance to check out The San Diego Museum of Art’s latest exhibit, Epic Tales from Ancient India, and I absolutely loved it! Afterwards, they asked me to come up with a recipe inspired by the artwork. Here’s what I made: Homemade Flatbread with Yogurt, Eggs and Curry Brown Butter. Below, I’m sharing this tasty recipe along with more details on the exhibit and a museum giveaway.
I just love a good creative challenge, so when I got the opportunity to make a recipe based on unfamiliar works of art, I was like, “sign me up!” Epic Tales from Ancient India features more than 90 works of art depicting themes of adventure, battle and romance. Most of these paintings came from books and were intended to accompany a text. The exhibition is arranged by narrative, allowing the viewers to take in the tales as if they were reading a book. This recipe, inspired by one of the romantic scenes, starts with golden homemade flatbread warm from a skillet. The tender bread is then slathered with a garlic-infused yogurt and topped with eggs, torn cilantro and nutty brown butter flecked with aromatic curry. Each bite is so rich and savory with a pleasant tang from the yogurt. And the flatbread couldn’t be easier to make! Continue reading for the recipe and giveaway details.
First, I’m going to chat a bit about the recipe, and then we’ll get to the museum inspiration + giveaway! I just love making bread at home. Normally I’ll bake up a loaf of no-knead bread or focaccia, but for this recipe—intended for breakfast or brunch—I wanted to make an easier bread that could be done in under an hour. To make homemade flatbread, you simply mix together flour, baking powder, sugar, salt and yogurt in a big bowl until a shaggy dough comes together. You then turn it out on a lightly floured surface and knead for a couple minutes until somewhat smooth. Divide into four balls and let rest for 15 minutes. Each ball of dough is then rolled out and cooked for about 3 minutes in a hot skillet.
At this point, you could top the warm, golden flatbread with a number of different things. Cream cheese and smoked salmon. Eggs, tomato sauce and Parmesan cheese. Ripe tomato slices, mozzarella and basil. Here, I opted for an Indian flavor profile, pairing sunny-side up eggs with garlic yogurt, cilantro and curry brown butter. These flavors are bold, but approachable. The richness of the butter rounds out the complexity of the curry powder. Enjoy with a hot mug of chai or coffee infused with cardamom. Now, more about the Epic Tales plus giveaway info.
Epic Tales from Ancient India introduces viewers to the world of South Asian paintings and their original narrative context by explaining the classics of literature that the works illustrate. The stories showcased in Epic Tales are classics of literature, some of which are thousands of years old, but the narratives still remain relevant today, as they touch on themes of love, death, war and celebration. I could spend hours looking at all of the fine details throughout the exhibit. The museum provides magnifying glasses so you can really appreciate the intricate paintings. Some of the finest brush strokes were done using a single hair!
The exhibition features four sections arranged by the literary categories, including:
Bhagavata Purana, a Sanskrit text about the Hindu god Vishnu and his different incarnations
The Ramayana, recounting the adventures of Prince Rama of Ayodhya and his wife Sita
The Ragamala, verses illustrating music played at particular times of day or season
Works of Persian literature, including the Shahnama, a poem about the legendary kings of Iran
This recipe was inspired by the painting above called Desavarati Ragini of Dipak where a female lover is throwing her hands up in a wave a passion as she recalls a satisfying sexual encounter from the night before. When I saw this painting, I immediately thought of a girlfriends brunch—Sex and the City style—where all the ladies are chatting about their weekend adventures. I would imagine these women enjoying this flatbread while gossiping and having fun together!
The San Diego Museum of Art has graciously provided 2 tickets to view the exhibit along with an Epic Tales catalogue (pictured above) to one Kitchen Konfidence reader! Enter to win here:
a Rafflecopter giveaway
Epic Tales from Ancient India opened on Saturday, June 9 and will be on view through September 3, 2018.
Author Brandon Matzek
Yield 4 servings
Flatbread recipe lightly adapted from here.
Ingredients
For the flatbread:
2 cups all purpose flour, plus more for dusting
2 teaspoons kosher salt
3/4 teaspoon baking powder
1/2 teaspoon sugar
1 cup plain, full-fat yogurt
4 tablespoons olive oil
For the toppings:
1 cup plain, full-fat yogurt
1 garlic clove, finely grated or minced
Kosher salt
1/2 stick (1/4 cup or 2 oz) unsalted butter
3/4 teaspoon curry powder
8 eggs, cooked sunny-side up, over-easy or poached
Cilantro leaves, for scattering
Flaky sea salt
Freshly ground black pepper
Instructions
Add flour salt, baking powder and sugar to a large bowl, whisking to combine. Add 1 cup yogurt, and stir until a shaggy dough forms. Turn dough out onto a lightly floured work surface, and knead until a mostly smooth ball of dough forms (1 to 2 minutes). Divide dough into 4 pieces, and shape each into a ball. Cover with plastic wrap and let rest for 15 minutes.
While the dough is resting, prepare some of the toppings. Add 1 cup yogurt, grated garlic and 3/4 tsp kosher salt to a medium bowl, whisking to combine. Season to taste with additional salt. Set aside. Cook butter in a small saucepan over medium heat until the butter turns a deep golden brown color and takes on a nutty aroma (about 5 minutes). Take the saucepan off the heat, and stir in the curry powder and a pinch of salt. Let cool for a moment then season to taste with additional salt. Set aside.
Place a large, cast-iron skillet over medium heat. While the skillet is heating up, roll 1 ball of dough on a lightly floured surface into a 1/8" thick round (doesn't have to be perfect). Add 1 tablespoon of olive oil to the hot skillet (it should smoke a little), then carefully add the dough round. Cook until the bottom is golden brown and the top starts to bubble and puff (about 2 minutes). Flip and cook until the other side is golden in spots (1 to 1.5 minutes longer). Transfer to a plate, and then repeat this process with the other 3 balls of dough. I like to roll out the next ball while one is cooking in the skillet.
To serve, slather each flatbread with garlic yogurt, then top with eggs, cilantro leaves and a drizzle of curry brown butter. Finish with a sprinkling of flaky sea salt and freshly ground black pepper. Enjoy immediately!
This post was written in partnership with The San Diego Museum of Art. Thoughts, opinions and recipes are my own.
13

Source: https://www.kitchenkonfidence.com/2018/07/homemade-flatbread-with-yogurt-eggs-and-curry-brown-butter-giveaway
0 notes
Text
Upside Down Walnut, Chocolate, & Pear Cake
Our little back house we are renting is about four miles from the ocean here in Costa Mesa/Newport Beach. We get the foggy marine layer on the mornings it chooses to hang over the coast, and we have a very tempered climate year round. In the past I’ve brushed southern California off as having no seasons, but this just isn’t true. I think with social media these days we see so much in the fall of the iconic leaves changing, and more clearly defined seasons of certain regions of the world, that is has become commonplace to standardize these quarterly shifts. Maybe it’s just me and my tendency to seek out change, but I’m coming around to seeing a more full, open picture. Every little dot of latitude and longitude on the map has it’s own unique characteristics when it comes to seasons, and I’m beginning to appreciate our a-typical southern California ones.
September and October are two of the warmest months here where I live, which is wonderful if you can get past the photos of falls leaves and warms mugs of cocoa elsewhere. Why is it wonderful? The crowds of people have all gone home, the kids are back in school, and the beaches and national parks are now near-empty to enjoy. Around here we call it “locals’ summer”. I don’t do well in the heat, so this time can be tough for me to get through, but November and December are the greatest gift after these few warm months. This is my season, this is the time of year I fall in love with California. The air is chilly and as crisp as you can get with the pacific ocean nearby. The light is the most beautiful light I’ve ever seen. The sunsets make you weak in the knees. And the smell that permeates the entire city is pure heaven. The farmers market is still overflowing, with fall produce finally coming in alongside unlikely jewels such as tomatoes, avocados, oranges, and so many greens (kale, chard, herbs, etc). Local pomegranates are half the size of my head and two dollars a piece.
Approaching Thanksgiving this year, and hosting for the first time with my parents coming into town, I tried pondering a new theme we could base our cooking around that felt more fitting for our area. As is typical this time of year, we have a three day heat bump that lands right over Thanksgiving. Normally I would say something negative about California and how I wish I lived somewhere cooler. But not this year, I’m celebrating where we live. So we are having a California-themed Thanksgiving with dishes made from all of the produce that was overflowing the most at the farmers market this past weekend. Our backyard will be in shade in the late afternoon, so we will set up the table under our twinkle lights and eat outside. Roasting a dozen heavy dishes on a warm day doesn’t sound right to me, so I’m planning a few lighter twists. I’ll be sure to share them on Instagram stories a bit if you’re curious to see what we are making. I’m really excited you guys, it feels good to be going with the grain and not against it for once.
Part of my inspiration to dig deeper into understanding and loving the unique spot in the world where I live came from reading Valentina‘s pages in her new cookbook, Everyday Vegetarian. She lives in a small medieval town on the eastern side of Italy and shares her region’s history and culinary traditions in a way that reads like a poetic novel. From cover to cover you are immersed in recipes and stories that overlap each other into one beautiful picture of her culture. Valentina takes traditional recipes that have been passed down for generations in her family, alongside some newer ones of her own, and shows how to make them vegetarian (and many of them vegan too) without compromising the tradition. It’s beautifully photographed, with such a lovely cover to have sitting out on your kitchen counter too (see photo below recipe). She shows how there is so much more to Italian cooking outside of pasta and tomato sauce (although she has recipes for both from scratch that are incredible) and how to cook throughout the seasons in her nook of the world as well. I want to make every recipe from cover to cover and book a trip to Italy ASAP to experience so much of what she describes.
The first recipe that jumped out to me was her grandma’s upside down prune cake, which she suggests in the fall making with pears, nuts, and chocolate instead. So I did just that, and it was so scrumptious I had to share it with you here too! I used a mixture of freshly milled flours from the incredible people over at Eat Grain, which I link to individually in the recipe below. You can taste the freshness, and even see it, in these flours. I’ve never experienced anything like it – and the nutrition is suppose to be even better as well! Check out their line on their site here if you’d like, they are shipping anywhere in North America for free for the rest of the year – which is perfect timing for some holiday baking.
I hope those of you celebrating Thanksgiving this week have the most wonderful, joy-filled time. Maybe this cake could even squeeze onto one of your holiday tables too ;). -xx
SHOP MY PANTRY >>
RECIPE NOTES: The recipe below is pretty darn near exact to Valentina’s, with a few small exceptions. Here are the few substitutions I made which you can convert back to the original if you desire to: I use coconut sugar instead of brown sugar, apple sauce instead of sunflower oil, and a mixture of whole spelt and rye instead of whole wheat. I also halved the recipe below and prepared it in a 6 inch springform pan in the photos above, since I knew we would have lots of sweets on hand this week. This worked out really well, but I know I’ll be making the full recipe next time – it was just too good.
UPSIDE DOWN WALNUT, CHOCOLATE, & PEAR CAKE
Makes one 10 inch cake, serves 8 to 10.
1 3/4 cups almond or soy milk
1 tablespoon apple cider vinegar
1/4 cup of water
2 teaspoons vanilla extract
1/4 cup unsweetened apple sauce (or sunflower oil)
juice and zest of 1 lemon
1 cup coconut sugar, plus 1 teaspoon for the pan
1 cup of sifted spelt flour (white)
3/4 cup whole spelt flour
1/4 cup whole rye flour
1/3 cup potato starch
1 heaping teaspoon baking soda
1 heaping teaspoon baking powder
1 teaspoon ground cinnamon
pinch of salt
15 small pears
1/3 cup chopped raw walnuts
1/3 cup chopped dark chocolate
optional: extra chopped walnuts and dark chocolate for sprinkling on top
Preheat the oven to 350F. Line a 10-inch springform pan with parchment paper and lightly oil the sides (I forgot to oil mine and it still removed itself nicely, but it is probably safer to do so). Sprinkle about a teaspoon of coconut sugar on the bottom.
Combine the sifted (white) spelt, whole spelt, and rye flour with the potato starch, baking soda, baking powder, cinnamon, salt, coconut sugar, and lemon zest in a large bowl and whisk to remove any lumps (I sifted mine, and added the sugar and zest afterwards).
In a large glass measuring cup, combine the almond or soy milk, vinegar, and lemon juice and stir. After a few seconds, the milk will start to curdle. Immediately add the water, applesauce (or sunflower oil), and vanilla. Stir well. Slowly pour this into the dry mix, stirring with a whisk to break any lumps. The batter will be somewhat on the liquid side.
Core each pear and slice into 1/4 inch thick wedges. Arrange in a circle in the prepared springform pan, until the bottom is completely filled. Sprinkle the chopped walnuts and dark chocolate on top, and slowly pour the cake batter into the tin. Bake for 40 to 50 minutes (mine took 50), until cooked through when tested in the center with a toothpick. Once cooked and golden on top, turn off the oven and let it sit inside for 5 minutes more.
Remove the cake from the oven and release from the springform pan onto a wire rack. Flip upside down so that the pears are on top, and peal away the parchment paper. This is optional, but while the cake is warm I sprinkled some dark chocolate on top, and when it had melted I added a small handful of additional chopped walnuts. Once fully cooled, slice and serve the cake. Store leftovers in an airtight container on the counter, or in the fridge (it’s really good cold), and enjoy within three days.
This recipe was originally found in the cookbook Everyday Vegetarian, and is being republished here with Valentina’s permission. See more of her beautiful work on her blog, Hortus Cuisine, and on Instagram.
I love seeing what you create! Be sure to tag your photos on Instagram with #FWmakers.
This post contains affiliate links (they are underlined for clarity). Purchases you make through these links will help fund the work I do here on Faring Well at no extra cost to you. Thank you sincerely for your constant love and support.
Naturally Vegetarian by Valentina Solfrini
O R D E R H E R E
Source: http://faring-well.com/upside-down-walnut-chocolate-pear-cake/
0 notes
Link
How to Cook Broccoli Dr. Mercola Broccoli (Brassica oleracea var. italica) is a vegetable that means “branch” or “arm,” which pertains to its small, tree-like appearance. It belongs to the cruciferous family of vegetables, which also includes Brussels sprouts, cabbage, kale and cauliflower. It is considered to be one of the healthiest foods available, and research has shown that the nutritional value of broccoli is unmatched, as it may help: Fight Cancer Broccoli’s ability to fight cancer is arguably its most well-known benefit thanks to its naturally occurring sulforaphane. Experts believe that this compound works by activating more than 200 different genes that fight cancer, while switching off those that fuel tumors, as well as detoxifying present carcinogens in your system. Promote Digestive Health Broccoli is rich in dietary fiber, which is an important nutritional component to promote wellness. Fiber helps nourish gut bacteria, as well as adding bulk to your stools to help promote regular bowel elimination. Furthermore, it breaks down into short-chain fatty acids that may help reduce your risk of inflammatory diseases. Slow Down Aging Consuming broccoli may help restore your metabolism to more youthful levels. It allows your body to produce the enzyme nicotinamide mononucleotide (NMN), which helps increase nicotinamide adenine dinucleotide (NAD), a compound involved in mitochondrial health and energy metabolism. Fight Free Radicals Phenolic compounds in broccoli have great potential in helping fight free radicals throughout your body, which is a major source of inflammation. Maintain a Healthy Weight Animal studies suggest that the sulforaphane in broccoli may help curb obesity by speeding up tissue browning. Brown fat is a beneficial type of body fat that can help you stay slim. Furthermore, the calories in broccoli are very low, making it an ideal health food that won’t give you excess pounds. A 3.5-ounce serving (100 grams) only contains 28 calories. Sulforaphane was also discovered to help decrease certain gut bacteria known to induce metabolic endotoxemia and obesity. Manage Diabetes According to one study, diabetics who took broccoli sprout extract for 12 weeks were able lower their fasting blood sugar levels by 10 percent. Even though this may look like a small number, the researchers noted that this difference is significant enough to reduce your risk of diabetes-related health complications. However, many people do not enjoy broccoli’s flavor, making them miss out on its powerful health-promoting properties. This is because it contains allylisothiocyanate (AITC), a compound that gives the vegetable a pungent taste.[i] If you’re looking to add broccoli into your diet but the flavor isn’t to your liking, there are plenty of ways you can cook broccoli. Discover how you can make the most out of this vegetable and get enjoyment from it for years to come. How to Cut Broccoli Properly to Maximize it’s Nutrition Most broccoli dishes require florets in different sizes. Knowing how to slice the vegetable properly will allow you to prepare your dishes accordingly to avoid wasting edible parts. To begin slicing broccoli, follow this procedure:[ii] 1. Cut off and discard the very bottom part of the stem since it is usually tough. 2. Next, trim away small florets to make the stems easier to peel. 3. Using a peeler or a small knife, remove the outer layer of the stem to expose the tender green flesh underneath. 4. Separate the florets and the stem. 5. Now, you can slice the vegetable in any way you want. For small cuts, make slices one-fourth to one-half inch thick. For larger pieces, cut the stems into 1- to 3-inch sections. With this process, you will be able to include the stem in your dishes as this is an edible part of the plant, too. This allows you to make the most out of the vegetable and getting value for your money. Different Cooking Processes for Broccoli Eating broccoli raw is one of the simplest ways to get the vegetable’s nutrients and antioxidants into your system. However, the main disadvantage to this approach is ingesting oxalic acid, a chemical that can cause irritation to your mouth and intestinal tract. It also blocks the absorption of iron and calcium, which are crucial nutrients for a healthy body.[iii],[iv] However, do not fret because broccoli is a versatile vegetable – it can be cooked in a various ways to give you different results. So how long does it take to cook broccoli? The answer depends on the cooking method you choose. Here are some ways on how to cook fresh broccoli:[v] · Steamed: Steaming your broccoli may not sound like the most appetizing thing ever, but it’s one of the healthiest methods to consume brocolli. Lightly steaming your broccoli for three to four minutes eliminates epithiospecifier, which is a heat-sensitive, sulfur-grabbing protein that inactivates sulforaphane, a very crucial nutrient in the vegetable. Don’t go beyond this specified time as the nutrients will greatly decrease afterward. · Sautéed: Sautéing broccoli gives the vegetable a crispy texture when cooked with a high-quality cooking fat. You can create a simple sautéed broccoli snack by frying it in coconut oil and a pinch of salt over high heat. · Roasted or baked: Roasting is another way of cooking broccoli aside from the usual steaming and sautéing. Simply mix the vegetable with a few teaspoons of coconut oil and a pinch of salt, then place it in the oven for 20 to 25 minutes at 425 degrees Fahrenheit. · Blanched: Blanching is a process that involves boiling the broccoli (or any vegetable) in a large pot of water with a teaspoon of salt. Wait for one and a half minutes, remove the broccoli from the pot, then plunge it into ice-cold water to stop the cooking process. This helps the broccoli maintain its green color, and removes any bitterness in the flavor.[vi] But what if you don’t have fresh broccoli on hand and you only have the frozen variety? If you you don’t know how to cook frozen broccoli, there’s no reason to worry because the process is practically the same as the ones mentioned above – you just have to thaw it beforehand.[vii] To thaw frozen broccoli, simply place it in a bowl of warm water for a few minutes, then drain off the water. To speed up the process, keep changing the water once it gets cold until you get the desired firmness. From there, you can proceed to cooking your broccoli normally.[viii] Two Amazing Broccoli Recipes You Have to Try Like many people, you may have not enjoyed the taste of broccoli because you didn’t like the way it’s cooked. But used correctly (and in an enticing way), it can quickly become your favorite vegetable for the years to come. I highly encourage you to check out the two recipes listed below that use broccoli as the main ingredient. Not only are they delicious, but nutritionally fulfilling as well. Creamy Ketogenic Broccoli Soup With Wild Trout and Rosemary Ingredients: · 2 tablespoons of coconut oil · 2 cloves of garlic, minced · 2 heads of broccoli, broken into florets and stalks chopped · 1 onion, chopped · 3 cups of organic chicken broth · 1 tablespoon of finely chopped fresh rosemary · 1 tablespoon of dill (leaves only), finely chopped, plus extra for garnish · Zest of 1 lemon · 1 wild-caught rainbow trout, skin and bones removed, flesh smoked and flaked · 2 tablespoons of sunflower and pumpkin seeds, toasted (optional) Procedure: 1. Heat a saucepan over medium-high heat with the coconut oil. Add the onions and cook for five minutes until translucent. 2. Add the broccoli stalk and garlic and cook for another five minutes until everything starts to brown, stirring occasionally. 3. Add the broccoli florets, rosemary and dill, then pour in the broth and bring to a boil. 4. Reduce the heat to medium-low and gently simmer for 20 minutes or until the broccoli is tender. Season with sea salt and freshly cracked pepper. 5. Using a handheld/stick blender, blend the soup until it has a thick a chunky texture. 6. Ladle the soup into serving bowls, then top with the smoked rainbow trout flakes, a sprinkle of toasted seeds and a sprinkling of lemon zest. Serve hot. Another recipe you can try is the Beef Broccoli Stir-Fry. Compared to the soup, the stir-fry recipe works better as the main course because it contains a mixture of meat and vegetables. Beef Broccoli Stir-Fry Ingredients: · 1 pound organic grass fed ribeye boneless steak, sliced into thin strips · 1 cup organic broccoli florets · 1 cup lima bean pods · 1 small organic red bell pepper · 3 cloves garlic, crushed · 1/2 cup water or beef broth · 2 tablespoons Dr. Mercola coconut oil for stir-frying For Marinade: · 5 tablespoons organic Kikkoman soy sauce · 1 tablespoon Dr. Mercola raw honey Procedure: 1. Combine marinade and stir. 2. Pour marinade over sliced beef. Cover, place in the refrigerator and let set for 30 minutes or up to one hour. 3. Heat coconut oil in a pan. Place marinated beef in the pan and cook until it becomes tender. Set aside. 4. In another pan, sauté garlic and then add broccoli, lima bean pods and red bell pepper. Cover and let simmer for one minute. 5. Add water or beef broth. Cover and bring it to a simmer for one minute. 6. Add the beef to the vegetable mixture, and all juices accumulated. Cook for three minutes longer, stirring frequently. 7. Remove from heat and serve. Broccoli Should Be a Regular Fixture in Your Diet If you’ve avoided broccoli before because you don’t like the taste, I urge you to have a second look. It’s one of the healthiest foods you can eat that can help boost your overall well-being. That being said, make sure that you purchase organic broccoli to help maximize the nutrients you’re getting. The possibilities with this vegetable are endless, so get cooking right now! [i] Huffpost, July 12, 2013 [ii] CookThink, “How to Cut Broccoli Into Florets” [iii] The Healthy Home Economist, July 8, 2017 [iv] Live Science, June 15, 2017 [v] Kitchn, September 26, 2016 [vi] The Spruce, October 15, 2017 [vii] Martha Steward, October 12, 2015 [viii] See reference 8
0 notes
Text
How to Cook Broccoli
Broccoli (Brassica oleracea var. italica) is a vegetable that means “branch” or “arm,” which pertains to its small, tree-like appearance. It belongs to the cruciferous family of vegetables, which also includes Brussels sprouts, cabbage, kale and cauliflower. It is considered to be one of the healthiest foods available, and research has shown that the nutritional value of broccoli is unmatched, as it may help:
Fight Cancer
Broccoli’s ability to fight cancer is arguably its most well-known benefit thanks to its naturally occurring sulforaphane.
Experts believe that this compound works by activating more than 200 different genes that fight cancer, while switching off those that fuel tumors, as well as detoxifying present carcinogens in your system.
Promote Digestive Health
Broccoli is rich in dietary fiber, which is an important nutritional component to promote wellness. Fiber helps nourish gut bacteria, as well as adding bulk to your stools to help promote regular bowel elimination.
Furthermore, it breaks down into short-chain fatty acids that may help reduce your risk of inflammatory diseases.
Slow Down Aging
Consuming broccoli may help restore your metabolism to more youthful levels.
It allows your body to produce the enzyme nicotinamide mononucleotide (NMN), which helps increase nicotinamide adenine dinucleotide (NAD), a compound involved in mitochondrial health and energy metabolism.
Fight Free Radicals
Phenolic compounds in broccoli have great potential in helping fight free radicals throughout your body, which is a major source of inflammation.
Maintain a Healthy Weight
Animal studies suggest that the sulforaphane in broccoli may help curb obesity by speeding up tissue browning. Brown fat is a beneficial type of body fat that can help you stay slim.
Furthermore, the calories in broccoli are very low, making it an ideal health food that won’t give you excess pounds. A 3.5-ounce serving (100 grams) only contains 28 calories.
Sulforaphane was also discovered to help decrease certain gut bacteria known to induce metabolic endotoxemia and obesity.
Manage Diabetes
According to one study, diabetics who took broccoli sprout extract for 12 weeks were able lower their fasting blood sugar levels by 10 percent.
Even though this may look like a small number, the researchers noted that this difference is significant enough to reduce your risk of diabetes-related health complications.
However, many people do not enjoy broccoli’s flavor, making them miss out on its powerful health-promoting properties. This is because it contains allylisothiocyanate (AITC), a compound that gives the vegetable a pungent taste.[i]
If you’re looking to add broccoli into your diet but the flavor isn’t to your liking, there are plenty of ways you can cook broccoli. Discover how you can make the most out of this vegetable and get enjoyment from it for years to come.
How to Cut Broccoli Properly to Maximize it’s Nutrition
Most broccoli dishes require florets in different sizes. Knowing how to slice the vegetable properly will allow you to prepare your dishes accordingly to avoid wasting edible parts. To begin slicing broccoli, follow this procedure:[ii]
1. Cut off and discard the very bottom part of the stem since it is usually tough.
2. Next, trim away small florets to make the stems easier to peel.
3. Using a peeler or a small knife, remove the outer layer of the stem to expose the tender green flesh underneath.
4. Separate the florets and the stem.
5. Now, you can slice the vegetable in any way you want. For small cuts, make slices one-fourth to one-half inch thick. For larger pieces, cut the stems into 1- to 3-inch sections.
With this process, you will be able to include the stem in your dishes as this is an edible part of the plant, too. This allows you to make the most out of the vegetable and getting value for your money.
Different Cooking Processes for Broccoli
Eating broccoli raw is one of the simplest ways to get the vegetable’s nutrients and antioxidants into your system. However, the main disadvantage to this approach is ingesting oxalic acid, a chemical that can cause irritation to your mouth and intestinal tract. It also blocks the absorption of iron and calcium, which are crucial nutrients for a healthy body.[iii],[iv]
However, do not fret because broccoli is a versatile vegetable – it can be cooked in a various ways to give you different results. So how long does it take to cook broccoli? The answer depends on the cooking method you choose. Here are some ways on how to cook fresh broccoli:[v]
· Steamed: Steaming your broccoli may not sound like the most appetizing thing ever, but it’s one of the healthiest methods to consume brocolli. Lightly steaming your broccoli for three to four minutes eliminates epithiospecifier, which is a heat-sensitive, sulfur-grabbing protein that inactivates sulforaphane, a very crucial nutrient in the vegetable. Don’t go beyond this specified time as the nutrients will greatly decrease afterward.
· Sautéed: Sautéing broccoli gives the vegetable a crispy texture when cooked with a high-quality cooking fat. You can create a simple sautéed broccoli snack by frying it in coconut oil and a pinch of salt over high heat.
· Roasted or baked: Roasting is another way of cooking broccoli aside from the usual steaming and sautéing. Simply mix the vegetable with a few teaspoons of coconut oil and a pinch of salt, then place it in the oven for 20 to 25 minutes at 425 degrees Fahrenheit.
· Blanched: Blanching is a process that involves boiling the broccoli (or any vegetable) in a large pot of water with a teaspoon of salt. Wait for one and a half minutes, remove the broccoli from the pot, then plunge it into ice-cold water to stop the cooking process. This helps the broccoli maintain its green color, and removes any bitterness in the flavor.[vi]
But what if you don’t have fresh broccoli on hand and you only have the frozen variety? If you you don’t know how to cook frozen broccoli, there’s no reason to worry because the process is practically the same as the ones mentioned above – you just have to thaw it beforehand.[vii]
To thaw frozen broccoli, simply place it in a bowl of warm water for a few minutes, then drain off the water. To speed up the process, keep changing the water once it gets cold until you get the desired firmness. From there, you can proceed to cooking your broccoli normally.[viii]
Two Amazing Broccoli Recipes You Have to Try
Like many people, you may have not enjoyed the taste of broccoli because you didn’t like the way it’s cooked. But used correctly (and in an enticing way), it can quickly become your favorite vegetable for the years to come. I highly encourage you to check out the two recipes listed below that use broccoli as the main ingredient. Not only are they delicious, but nutritionally fulfilling as well.
Creamy Ketogenic Broccoli Soup With Wild Trout and Rosemary
Ingredients:
· 2 tablespoons of coconut oil
· 2 cloves of garlic, minced
· 2 heads of broccoli, broken into florets and stalks chopped
· 1 onion, chopped
· 3 cups of organic chicken broth
· 1 tablespoon of finely chopped fresh rosemary
· 1 tablespoon of dill (leaves only), finely chopped, plus extra for garnish
· Zest of 1 lemon
· 1 wild-caught rainbow trout, skin and bones removed, flesh smoked and flaked
· 2 tablespoons of sunflower and pumpkin seeds, toasted (optional)
Procedure:
1. Heat a saucepan over medium-high heat with the coconut oil. Add the onions and cook for five minutes until translucent.
2. Add the broccoli stalk and garlic and cook for another five minutes until everything starts to brown, stirring occasionally.
3. Add the broccoli florets, rosemary and dill, then pour in the broth and bring to a boil.
4. Reduce the heat to medium-low and gently simmer for 20 minutes or until the broccoli is tender. Season with sea salt and freshly cracked pepper.
5. Using a handheld/stick blender, blend the soup until it has a thick a chunky texture.
6. Ladle the soup into serving bowls, then top with the smoked rainbow trout flakes, a sprinkle of toasted seeds and a sprinkling of lemon zest. Serve hot.
Another recipe you can try is the Beef Broccoli Stir-Fry. Compared to the soup, the stir-fry recipe works better as the main course because it contains a mixture of meat and vegetables.
Beef Broccoli Stir-Fry
Ingredients:
· 1 pound organic grass fed ribeye boneless steak, sliced into thin strips
· 1 cup organic broccoli florets
· 1 cup lima bean pods
· 1 small organic red bell pepper
· 3 cloves garlic, crushed
· 1/2 cup water or beef broth
· 2 tablespoons Dr. Mercola coconut oil for stir-frying
For Marinade:
· 5 tablespoons organic Kikkoman soy sauce
· 1 tablespoon Dr. Mercola raw honey
Procedure:
1. Combine marinade and stir.
2. Pour marinade over sliced beef. Cover, place in the refrigerator and let set for 30 minutes or up to one hour.
3. Heat coconut oil in a pan. Place marinated beef in the pan and cook until it becomes tender. Set aside.
4. In another pan, sauté garlic and then add broccoli, lima bean pods and red bell pepper. Cover and let simmer for one minute.
5. Add water or beef broth. Cover and bring it to a simmer for one minute.
6. Add the beef to the vegetable mixture, and all juices accumulated. Cook for three minutes longer, stirring frequently.
7. Remove from heat and serve.
Broccoli Should Be a Regular Fixture in Your Diet
If you’ve avoided broccoli before because you don’t like the taste, I urge you to have a second look. It’s one of the healthiest foods you can eat that can help boost your overall well-being. That being said, make sure that you purchase organic broccoli to help maximize the nutrients you’re getting. The possibilities with this vegetable are endless, so get cooking right now!
[i] Huffpost, July 12, 2013
[ii] CookThink, “How to Cut Broccoli Into Florets”
[iii] The Healthy Home Economist, July 8, 2017
[iv] Live Science, June 15, 2017
[v] Kitchn, September 26, 2016
[vi] The Spruce, October 15, 2017
[vii] Martha Steward, October 12, 2015
[viii] See reference 8
from HealthyLife via Jake Glover on Inoreader https://articles.mercola.com/sites/articles/archive/2018/04/08/how-to-cook-broccoli.aspx
0 notes
Text
In our country, it is said that Saint Valentine bring the keys of roots.
People from this area have known him before church, and his name was Zdravko.
He was one of the saints in Slovenian old mythology.
Zdravko was a saint of good health and was a patron of beekeepers and pilgrims.
14.th of February was celebrated because nature starts to wake up from winter sleep, and plants, fruits, vegetables start to grow after this day. It meant a beginning of work in vineyards and fields.
And then catholic church took over the area and Zdravko lost his old Slavic name and became a Valentine.
The celebration of it remained the same: you can still find a mark on Slovenian farm calendar that you should start planting your seeds and working in the fields and vineyards. The most optimistic and impatient of them all – people of Bela Krajina, say that Valentine’s day means beginning of spring.
But it is also connected in love affairs in some kind. It is known to us that on that day, and two more days after (12 of March and 22nd of March), birds start to mate.
And not only celebration, Valentine was privileged – like he was in times when his name was Zdravko, to look after sick, old, epileptic people, and to guard those people and children that had problems with their abdominal cramps. His mission was always to protect livestock from cattle plague. People in Škocjan (a beautiful village which you should visit if you ever get carried into Slovenia) every evening still pray to their saint Valentine and recommend themselves for health.
Valentine is worshipped the most in the region of Primorska.
He opens a season of feasts!
For me, the best way to celebrate a Saint Valentine’s day is to go to village Šmaver (something even google maps has trouble to find) and join them at their traditional feast of “štruklji”. Many people from this area (Nova Gorica region) go on the hill of Saint Valentine, wherein a “big house” they bake thousands of “štrukljev” (and no matter how many of štruklj they make … they always run out of it).
Children are not forgotten: they all get sweets, cakes and štruklje from their loved ones.
So hereby I share with you recipes so you can make your own “Štruklj” with your loved ones, and afterward go on some hill and eat it. :)
(“Struklji, pronounce as shtrooclee)
Struklji are a “multi-purpose” dish: they can be served as a side-dish
with any dark meat and a heavy sauce, as an independent
course (usually with a salad) or as a dessert (with a sweetened cream
sauce or just dusted with sugar).
The dough can be made from buckwheat or wheat.
Buckwheat dough
1 kg buckwheat flour
0.1 kg wheat (“white”) flour
1 liter boiling water, slightly salted
Scald the buckwheat flour with boiling water, mixing with a wooden
spoon, allow cooling just enough that you can knead the dough with
your hands. Knead in the wheat flour and roll out the dough about 2-3
mm thick immediately, cut off any thicker or crooked edges and spread
the filling (see further). Roll the dough and prepare for cooking (see
further)
Wheat dough
0.5 kg “soft” wheat flour
2 eggs
2 Tsp lemon juice
2 Tsp vegetable oil
warm water as needed
a pinch of salt
Mix the flour, eggs, oil, lemon juice, salt (with your hands!),
adding enough warm water to form a thick, but pliable dough. Knead
well until the dough is smooth. Form one or several “buns”, oil
the surfaces and allow the dough to rest for at least one hour on
a surface dusted with flour.
Roll out the dough just to make it flat, then continue stretching
it using the backs of your hands, the dough should be stretched to
approximately 1 mm thick or less. Cut off the thick edges, spread
with filling and prepare for cooking.
There are five different ways to fill your Štrukelj
Walnut
1/2 liter freshly ground walnuts
2 eggs
0.25 l heavy or whipping cream
3 Tsp dry breadcrumbs
ground cinnamon
ground cloves
lemon zest (grated lemon peel)
add 0.1 kg sugar (if intended for dessert only)
Walnut and honey
1/2 liter freshly ground walnuts
2 eggs
6 Tsp honey
0.08 kg softened butter
3 Tsp dry breadcrumbs,
ground cinnamon
ground cloves
lemon zest
Cottage cheese
1 kg fresh, smooth, unsalted cottage cheese (pot cheese)
2 eggs
4 Tsp whipping cream
3 Tsp dry breadcrumbs
50 g melted unsalted butter
add one cup raisins or sultanas, soaked in dark rum (for dessert only)
0.2 kg sugar (for dessert only)
Tarragon
6 Tsp freshly chopped tarragon
0.1 kg softened unsalted butter
1 egg
0.1 kg sugar
Tarragon (my favorite!)
Mix:
8 Tsp freshly chopped tarragon
0.25 kg fresh unsalted cottage cheese
2 egg-yolks
0.25-liter whipping cream
3 Tsp dry breadcrumbs
0.15 kg sugar (for dessert only)
Wish you a very happy merry Valentine’s day! :)
Happy Valentine’s day and eat your Štrukelj! In our country, it is said that Saint Valentine bring the keys of roots. People from this area have known him before church, and his name was Zdravko.
0 notes
Last Seen Blogs

dylanconrique
dream a little dream...

i-found-the-shoe-guys-blog
Fanfic Enthusiast

sheenastark22
Sheena

queenofthecarrousel
Off to Fantasyland

circleofeyes
CIRCLE OF EYES