#training with meta knight to help boost your stats
Text
KIRBY RPG WHAT COULD HAVE BEEN

#item shop magolor with new bits of conversation every time you buy something#playdate sidequests where you have to do stuff like help chuchu plan a party or find ados paintbrush#training with meta knight to help boost your stats#except you have to go to dedede to boost charisma. mk has none#kirby rpg#kirby series#magolor#shopkeeper magolor#veves ultra cool art#ough this was rushed
323 notes
·
View notes
Note
Join Kirby in an open world RPG that connects and explains the lore of all previous games, and even the Anime! Team up with old friends and maybe even make new ones. Help the inhabitants of cappy town with daily tasks, cook in Kawasaki's kitchen, play hide and seek with the waddle dees, or train with meta knight in the unique biomes of Popstar. With hundreds of side quests and beautiful structures to explore, such as Floralia, Cappytown, Castle Dedede, the Halberd, Lor Starcutter, and both the Mirror world and Patchland, you'll never run out of things to do! You can collect cool weapons and trinkets like keychains, stickers, swords, or personal belongings to add to your collection! Get yours for the Nintendowo Switch 4/20/69
I have. Been thinking abt this ever since you posted that one post it has been on my mind 24/7 this is the most entertaining thing that has crossed my mind in a long time. I just. Imagine the possibilities.. things you do and say can affect how people think of you,And if you take too long to complete a side quest the person who asked you to do that certain thing may get mad at you. Like... Certain side quests only appear at some times, and since it's probably a fairly large game (Like BOTW) you'd use the warp star to travel long distances [by selecting the area on your map]
And instead of things being task/completion based it's time based. So you can't just speedrun the game. You have to play the game for so many hours before the next event can trigger. I knoW I am rAMBLING but I must share my ideas with you- So yeah we're adding the Anime to this already half-baked cake so YES Escargoon is there (but not A!DDD because fuck him), and Fumu and Bun as well. And you.. don't even have to be friends with them because fuck Fumu she doesn't control the Warp Star, Kirby does. I already kinda sorta said this but you choose who you get to be friends with. If you Like Taranza but don't like Marx all that much? That's ok! You'll only really be forced to interact with them during their Boss battles. Completely fill your friendship meter with someone and you'll start getting gifts and stuff from them! Like Taranza could give you flowers to decorate your house, Susie could give you parts that may help you with side quests, marx could give stat-boosting candies, etc.. You can totally befriend everyone too if you want to ;) the higher the Friendship stat the more they'll trust you, and they'll be more comfortable with asking you for stuff. ALSO CUDDLE BENEFITS
There is sm I could add but this is already really long and the game [idea] itself isn't really even in the classic 2D scroller style anyhow
Thank you for coming to my Ted Talk 😘(sorry for the long ask lol) luv you/p bye 💙
Dude you understand me like no other
Also even implying that you’d have a little house to decorate is perfect and I’m funding the Kickstarter right now
#I desperately want smth like this#just#please hal I’m beggin#show us the worlds#also fuck yea the anime dudes#anime dedede is dead tho which is always poggers#long post
29 notes
·
View notes
Photo
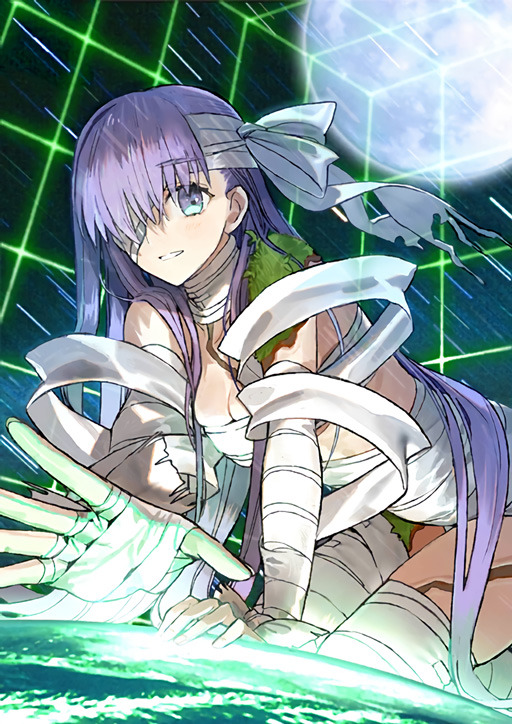
Big Grill in Little Chaldea - Review
Overview: KP is the best unit of 2019 and she was released back in March. Also it’s only May.
Kingprotea is the Alterego G of the Sakura Five, a High-Servant composed of multiple Earth Mother Goddesses, particularly everyone’s favorite Beast II, Tiamat, as indicated by her final ascension.
KP’s kit is unique, encouraging a lot of creative and non-conventional team building due to the versatility of the Alterego class and KP’s own kit. In a lot of ways, she’s self-sufficient out of the box, boasting a power level that is essentially unchallenged by other units in the game, without even taking into account her active skills or Noble Phantasm. I consider her the best Alterego in the game, at least for most situations.
Generally speaking, her kit is pretty simple almost deceptively so when you take into account her unique self-buffs, widely-varying in length cooldowns, and situational buff procs. Essentially, she’s a bruiser-type unit who can take and deal significant amounts of damage.
Under the Hood: Kingprotea is a Buster unit, boasting two single-hit Buster cards, two triple-hit Arts cards and a lone triple-hit Quick card. Her extra attack hits six times. She has a Buster Noble Phantasm that is area of effect and shares some level of similarity to Ishtar’s Noble Phantasm in that it has a low scaling, but regardless can deal serious damage.
Generally speaking, KP fits in well with almost any Buster team, although, I would personally discourage the choice to use her with Osakabe.
Kingprotea’s stats are monstrous. She boasts the second-highest attack stat in the game, a whopping 13835 at level 90 with silver Fous. She’s no slouch in terms of HP either, with a 14338 pool at level 90, but that starting point is largely negligible for our headpat goddess.
Generally speaking, all of KP’s cards are awesome, save for her lone Quick card, which honestly isn’t even that bad.
Passive Skills: KP is honestly overloaded in this department. In my opinion, she has the best set of passives currently in game. Every single one, roughly equates to a relatively generic Craft Essence of decent potency.
Mad Enhancement A+ is starting off extremely strong. An 11% Buster up for free on a Buster unit makes most Merlin targets jealous. This is most often found in Berserkers, who balance their offensive power with a certain level of frailty, KP doesn’t share that general weakness.
Independent Action B is probably KP’s weakest passive. An 8% free boost to critical damage really isn’t a bad boon at all, as we’ve been in a crit meta since Merlin was released, but KP really isn’t a crit unit. With that in mind, she totally can take good advantage of this, depending on your team.
Territory Creation EX is extremely strong. Honestly, most units would kill to have KP’s passives up to this point. A 12% boon to Arts performance at all times, turns KP’s Arts cards from “good” to “very good.”
Divine Essence A is KP’s defensive skill. 25% debuff resistance makes her just a little more robust and reliable and 250 free damage on every attack is nice, even if it largely won’t make too much of a difference at high-level content. I guess at least it adds up over time?
Active Skills: At first glance, KP’s actives are odd, but upon closer inspection, they are both potent and grant good synergy with the rest of her kit.
Huge Scale C is one of KP’s id_es skills. This grants her a unique “Infinite Growth” buff that grants her stacking max HP buffs with a permanent duration every turn. These buffs start at 2000 HP and at max level reach 3000. KP can stack up to 10 of these for a max boon of 30000 HP. This acts as faux-healing of sorts and it also fuels some of her other abilities. It has a 10 turn CD.
Infantile Regression C is KP’s internal engine of sorts. It eats her “Infinite Growth” buff and any stacks that she has acquired in order to give her a turn of skill haste and grant her NP charge based upon the number of stacks she consumed. The NP charge ranges from 10 to 20% per stack, resulting in a maximum NP charge effect of 200%. It winds up with a 5 turn CD.
Monstrous Strength EX is an excellent self attack buff. 40% for 3 turns on a 5 turn CD is nothing to scoff at, especially with a skill haste effect. With certain compositions, it becomes possible for two of these buffs to be active at once, granting our headpat goddess a nightmarish 80% attack up atop the unit with the second highest attack stat in the game. This is without taking into account other party members, as this can be easily achieved with KP and the Atlas Academy Mystic Code. (Oh pardon me, I’m getting ahead of myself.)
Noble Phantasm:
Airavata King Size: The Colossal Figure Coming Out From The Ocean of Life
E Rank, Anti-Unit Noble Phantasm
KP headpats the enemy party. If they’re not dead, she consumes her stacks and pats them again. If she needs a little more oomph, she waits a turn after the consumption.
This attack is a 5 hit Buster NP. It increases own Buster performance between 20 and 60% depending upon overcharge and if KP has so much as a single stack of growth when activated, it grants her an additional 20% Buster buff. Both of these buffs last the turn and KP is capable of Buster Brave Chaining.
This Noble Phantasm is very very good and provides perfect explanation for KP’s surface level weirdness.
Bond 10 CE:
These Are, Both Arms of Full of... is a perfect CE for KP. Depending on your choice of usage of her, it may not always be optimal but, no matter how you use her, it is quite potent. This CE increases her Buster performance by 20% and additionally increases her attack by 20% if she has at least one stack of growth. With this CE equipped and without any additional party members, KP can Buster Brave Chain with an 100% attack buff and a 71% Buster performance buff while boasting base attack second only to Alterjeanne.
Tips and Tricks:
KP is incredibly hard to claim a definitive means of use for. She can solo, she can be a primary damage-dealer, she can be a crit unit, she can be an NP spammer... honestly, she can fill a lot of roles. Consequently, claiming a best CE for her can be tough, as it depends on what you want her to do. In general, her bond CE probably has the best effect for economy, challenged only by The Black Grail (especially if you want her to NP spam.)
I like to use her to fight Riders, who can sometimes discourage conventional support-type units. A typical comp includes Florence (shout out to @acclerated-railgun) and some sort of tank, typically her sister-Alterego Passionlip. A very good argument could be made for Leonidas, especially if you happen to have his Bond CE. Essentially, Florence and the Tank keep everything running smoothly while KP winds up to give headpats of destruction, powered by Angel’s Outcry and sometimes with a nice bounty of crit stars. Mashu is also an excellent choice.
With Merlin and Tamamo you can create a potent NP spammer that is entirely overloaded with buffs. Tamamo’s party skill haste and KP’s own haste skill enables the 80% attack up (or 100% with Merlin) that I mentioned earlier and you can combine that with The Black Grail’s NP damage boon, with the demerit all but entirely mitigated by infinite growth. The result is a KP who can consistently hit like the Beast she is partially derived from and with party upkeep and defense options that resemble a dedicated stall team.
Waver and Andersen legitimately go with anything. If the only rare unit that you happen to have is KP, Andersen + Merlin is a top tier Buster-Crit support set up that will enable her.
If you’re really going for broke, Shakespeare isn’t a bad unit to pair her with, although the previously mentioned units are all better picks.
She works decently well with fellow Sakuras, Passionlip and Summer BB. Where Passionlip tanks and heals and Summer BB controls and enables broken KP Buster Brave Chains.
In terms of Mystic Codes, Fragments of 2004 is an excellent choice, particularly in tandem with her Bond CE and/or a Leonidas tank for optimal application of the stars from Thermopylae Enomotia.
The Atlas Academy Uniform freely enables the attack shenanigans that I mentioned before, I’d recommend it when trying to solo with a CE like Duke of Flames or Demonic Bodhisattva. (Less optimal for that regard is Before Awakening and even worse at that is Steel Training.)
The Arctic Chaldea Uniform is a great choice for general application, though it is the hardest Mystic Code to level.
KP is weak to buff removal, so running her with Tamamo and Tropical Summer can help mitigate that.
The Chaldea Combat Uniform, New Years and Chaldea Uniform are also viable for less niche reasons. Also Anniversary Blonde, because Buster.
Recommended CEs:
Her Bond CE and The Black Grail are probably the most optimal. Throwing a Crit CE if you’re trying a crit build with likely be beneficial. I would personally recommend Knight’s Pride as she has more than enough HP to offset the defense demerit.
I personally think you should try and focus on NP damage, as her NP scaling is low and you want to fire her NP as often as possible when trying to do damage, even in crit-focused teams.
With that in mind, anything that buffs Buster or attack in general is likely at least usable on her.
Any CEs I mentioned earlier are also good choices, especially in the context I mentioned them.
Conclusion: If there was ever a Servant to Grail for gameplay, KP is it. She can literally make the most of any base attack increase with her own absurd self-buffing.
She’s also an adorable giant headpat goddess with a completely distinctive sprite.
Also her kit is so unique that using her feels completely different from every other unit in the game. Even other high damage units or AoE Alteregos don’t feel anything like Kingprotea.
In a lot of ways, you can really just try stuff with her, a lot of it works a lot better than you’d think it would on the surface.
She’s really good fun honestly, and I can’t recommend her enough.
#fate grand order#kingprotea#alter ego#review#headpat goddess#tiamat#florence nightingale#merlin#hans christian andersen#william shakespeare#leonidas I#passionlip#summer bb#waver velvet
32 notes
·
View notes
Text
A META KNIGHT’S TALE/META KNIGHT AND THE MYSTERIOUS ECLIPSE
No cover art this time! Might update this later with it.
It was pretty difficult trying to make this game work as a stand-alone, but still have the Kirby charm. That applies to both the storyline and the gameplay, for the record. Any and all criticism is encouraged! Just like with Kirby’s Inferno, this is not meant to be speculation on a future Kirby game, this is solely made for fun! If there ever is a Meta Knight spinoff, you didn’t hear it from me.
STORY
It’s an average peaceful day in Dreamland, and Captain Vul is overseeing the Meta-Knights’ training. They’re all doing pretty well, except for Sailor Dee, who just can’t seem to get a hang of his bow and arrow. Vul is most proud of Meta Knight himself, however, and lauds him when he shuttle-loops a training dummy into stuffing. This exercise is interrupted when a strange meteor crashes down about a mile away, and Sword, Blade, and Meta Knight go off to scope it out.
Upon further inspection, they see that it appears to be a small escape pod of some sort, and there’s a person covered in stars inside of it. Without warning, he bursts from it and lunges at Meta Knight, thrusting a nodachi at his face. They clash for quite some time until Sword and Blade take over, and the other Meta-Knights sans Sailor dogpile on as well. As Meta Knight catches his breath, a small fairy then exits the pod, dazed and weak. She shakes it off, and gasps at the sight before her.
The man manages to break through the barrage of attacks and tries again to strike Meta Knight, but their blades clash and they struggle to maintain their own ground. The fairy girl then yanks the guy away by his ponytail and shows him a picture of a certain spherical hero. It’s actually Kirby, but due to the picture having no color (or any other identification, WTF, Tara?), he believes it to be Meta Knight.
They apologize for attacking and explain themselves. Orion comes from the planet of Aurora Cosmos, which is currently under attack by a mysterious moon-like structure known as the Eclipse Castle. Being the gentlemen that they are (and a little sheepish for attacking an innocent guy), they agree to help him and lead him to the Halberd. Sailor Dee finally hits the target dead on, and Tara cheers him as Axe and Mace guide him into the ship.
Upon reaching Orion’s planet, they can safely affirm that the massive crescent moon-shaped object above the shimmering green planet probably isn’t supposed to be there. I mean, usually, it’s a bad thing when half of the planet’s coated in a gross blackish tar. Landing on the planet proves difficult as well, being that they’re attacked by shapeshifting beasts (which Tara refers to as Morphix) and nearly crash.
Unfettered, the band of knights marches on through the land, slaying these freakish creatures and saving the natives from a gooey torment. But, something seems to be off about Orion. Even for the Meta-Knights, he seems a bit too aloof and unattached, only focusing on the mission at hand and refusing to take a load off.
This reaches a head when after defeating a massive Morphix that begins ripping the place to shreds, Orion does something obscenely reckless. He nonchalantly leaps off of a cliff, and Meta Knight dives after him, catching him and flying him to safety. When they land, the poor guy is in a state of utter bewilderment at what just happened. Apparently, Orion should be able to fly, and is pretty shocked at his sudden inability.
Later, when the crew is roasting marshmallows around a fire, he stands alone and ponders what could be happening. Much to his horror, the answer is made clear when he sees that the stars on his arms are disappearing. He quickly yanks his arm guards over the now-blank spots to hide them as Meta Knight approaches.
Meta Knight can tell something’s wrong but doesn’t pry; instead silently reassuring him that he’ll be fine if they stick together. They hear a scream of terror and turn to see that Tara’s marshmallow has caught fire, and she’s flying around in a tizzy trying to put it out. Sailor Dee helps her out by chucking it into a pond, which gets everyone to laugh and finally unwind.
Once all the countries of the planet are nice and monsterless, the knights turn their attention to the Eclipse Castle. Something goes horribly wrong when they bring the Halberd to the surface. Not only are they immediately grounded by black spires and crash land, Orion suddenly yells out and collapses, the stars from his body rapidly dissolving. The crew rushes over to him and a tearful Tara reveals that they haven’t been exactly honest with them.
Many years ago, Orion’s people were cursed by a vengeful and chaotic mage named Pitch Shadow, who threatened to destroy their planet if they did not submit to his will and give him their magical power. Orion knew that going after him alone would mean certain demise, but he didn’t care as long as his planet was safe. It was only with Tara’s urging that he changed his mind and decided to seek out allies.
Orion is true and fully dead. Furious, Meta Knight leaps through the portal to destroy him, the hesitant crew following suit. Inside the Midnight Castle, they find a massive crystal ball chained to the ground with thick glowing chains. Upon breaking it open, they realize their horrible mistake, as it turns out that the chains were what was giving it it’s energy.
Now fully freed, Pitch begins to siphon all the life out of the planet. They’ve got to turn around to the Halberd and use its cannons to shatter the chains before pummeling him into a pulp once more. With the mage blasted into oblivion, the Eclipse Castle itself starts falling to pieces, and they bolt out of there as fast as they can.
The Halberd continues its journey back down to Aurora Cosmos, while both Meta Knight and Tara sadly gaze upon Orion’s body in the sick bay. Meta Knight turns to leave, but something catches his eye outside the window; a vast collection of golden stars has appeared where the Eclipse Castle used to be, and they’re heading right towards the ship.
As they fill the interior, the markings on Orion’s body reappear, and he awakens. Tara is overjoyed, fluttering around him, and cheering as Meta Knight stares in shock. Overcome by emotion, Meta Knight rushes over to him and embraces him, Orion taking it in stride as he pats Meta’s head.
Triumphant, the knights and Orion land to a cheering crowd. Orion’s wings reappear, to which he responds to by challenging Meta Knight to a race. But as the two take off and dart around the city, it becomes less of a competition and more of the two simply having fun!
GAMEPLAY
Each member has their own personal move set and stats, which can be paired up with another knight to create exclusive moves (and to help with puzzles)
However, they all share one move; they plant their weapon in the ground and clutch onto it, preventing them from being blown away or sucked up by enemies. (ha-ha, wow, that’s dark)
By defeating enemies with combos, you fill up a meter called “boost points”. This gives you the ability to call on Tara so that she can give you extra help with a quick nuzzle or a beam of light from her horn.
These powers include temporary invincibility, stronger attacks, more health, or heightened speed.
Pieces of armor can also show up in hidden crates across various levels, all randomized.
You can mix and match different caps, armor, and weapons, but there are exclusive sets that can permanently boost your stats if completed.
There’s a daily roulette wheel (à la Miitopia) that can give you brand new armor, more boost points, or Maxim Tomatoes.
The game’s map operates the same way that Amazing Mirror’s does, with an open world you can freely move around to which level you’d like and replay them at your leisure. They’re connected all by a central hub in the Halberd, which has a training room and an armory that you can enter at any time.
There’s a boss at the end of every level, not just the worlds! Admittedly, they’re still about the same difficulty as midbosses.
LEVELS
Sable Shores
Tornado Terrace
Energy Expo
Lachrymose Loch
Lit Landing
Ablaze Alcove
Roaring Reaches
Eclipse Castle
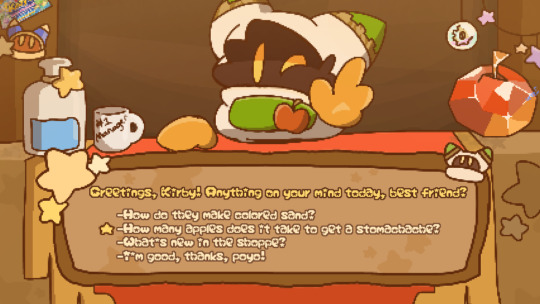
Tara’s Dialogue (hub)
(answers to "Greetings.")
You're so cool, Meta Knight! I know you can save us! I-I-I mean, help us.
(post-game) I knew you could do it! Thank you so much for all your aid.
(answers to "Let me see the armory.")
Want to see what armors you've got?
(50% or higher completion) It's getting pretty packed in there! Watch your head!
(100% completion) Brings back memories, doesn't it?
(answer to "I want to try the roulette.")
It's time to play some roulette!
(answers to "What do you think of the crew?")
Captain Vul is astounding! But he's so tall, it scares me a little bit.
Sword Knight is great! His helmet looks like a yummy loaf of bread!
Blade Knight is so brave! He looks up to you a lot, you know.
Mace Knight is so funny! That guy always knows how to cheer me up!
Javelin Knight is very smart! I've never met a robot before!
Axe Knight is so loyal! You two remind me of Orion and me!
Trident Knight is pretty mysterious! But he's good fun!
Sailor Waddle Dee is so cute! ...um, that's all I have to say.
Orion is awe-inspiring! He's my best friend in the whole world!
(answers to "Do you have any advice?")
Have you tried out the training room? It never hurts to brush up on your skills!
Some knights mesh better than others. Try out a bunch of teams and see which works for you!
You should smile more! ...oh, that's not what you meant, is it?
(answers to "Thank you. Goodbye.")
Bye-bye!
It's been a long journey so far. Why not take a rest?
#kirby (nintendo)#kirby (series)#kirby oc#meta knight#a meta knight's tale#hnk art#skylastories#there's less story meat here aheh...#I WAS SCARED OF MAKING IT TOO EDGY#i mean okay sure kirby has dealt with apocalypses before but uh... suicide missions??? yeah...
6 notes
·
View notes
Text
Chapter 5
In this chapter you learn that a disinherited son of a noble house has stolen a Hero’s Relic and you are tasked with getting it back.
Before setting off for the first week, Byleth hit level 10 in the previous chapter and is now ready for an Intermediate class. I’ve elected to go with Thief.
Not only did I pass, but the minimum speed stat for a thief is apparently 11, and since I had a lower speed then the minimum it automatically boosted me to the proper level, It helps to offset all those terrible level ups I’ve been getting.
Week 1: Explore
Starting off with my usual explore phase ritual, I watch all the new supports I’ve unlocked, Go around and collect all of the quests and blue items scattered around the grounds. I check the garden, Asked Petra to join me this month again, asked her to tea, did choir practice, ate a meal with Petra and Lysithea, and ate another with Hilda and Lorenz. All in all nothing spectacular, accept for one minor detail…
AHHHHHH GHOST IGNATZ!?
Well to be perfectly honest when you lose a character this early in the game they are not technically ‘dead’ they just get injured and retire from combat. Apparently they still show up at the monastery, but you cant interact with them in a meaningful way. You cant give them gifts, or return their lost items. You cant invite them to meals, or observe their supports. Soooo, I’m still going to treat him as dead. This apparition is a lingering fragment of his being put here to make me feel bad for not protecting him better.
Week 2: Battle
In the second week, I chose to battle. I only have 1 action point for this phase, and I have 2 quests that need to be finished. Clearing the Way is a quests that unlocks additional merchants, and Maintaining Your Training doesn’t unlock anything meaningful. Try to guess which one I picked.
This map is the exact same map we’ve run a couple times all ready. They used it for that one fog battle. Strategy wasn’t anything special but here are the highlights
The level ups were nothing spectacular, but they were better than nothing. Byleth was the MVP
Week 3: Explore
Happy Birthyday, Leonie
Exploring again, 5 AP.
Trained Swords with Catherine, and Rhea. Choir practice then a meal with Leonie and Ingrid, and a second with Lorenz and Hilda.
Assignment
Before starting the assignment Petra asked to join my house as a full member.
I accepted, obviously
With the assignment started, we tracked the bandits the stole the relic to an old tower in the Kingdom Territory.
This mission is unique in that there are several reinforcements that appear through out the map. Some of them will ambush you, and attack you the turn they appear. To make matters even worse, the ambushers also have Pass, meaning they can team up on your weakest members and there is generally little you can do about it. So we need to move forward with that in mind.
To help augment our forces Lady Rhea sent a knight with us. Gilbert is a Fortress Knight, and because of that carries a massive shield and axe. He is meant to be a tank of sorts.
For this I really wish I had a capture card so I could have recorded it. I’ll try to go into the strategy I used, but it is a little difficult only having screen shots.
Derp
You start off at the bottom of the map in a checker pattern. There are 3 units to the east in your immediate way: 2 to the north east and 1 on the other side of the wall in front of a treasure chest. Before you start clearing out units though, make sure you turn on the enemy danger areas. Specifically turn on the red markers for the 4 archers in the center of the map. This is important because if you (Or Gilbert) stop moving within range of one of those archers, not only will they hurt you, they will also aggro every other unit on the map to get to you. It cost me 2 Divine pulse to learn this lesson.
Do NOT stop within range of any of these archers.
My first goal was to clear out the three in front of me and bunch my self in the hallway so as to create a choke point for the first two waves of reinforcements.
By the time the first wave arrives you want to have your formation looking something like this. Put your tanks in the bottom row, pack in your mages in the second row, and your long range archers in the third row. This will make the enemies take on your tough units first instead of running though you and hitting the back rows. Strike with the achers/mages first where there is no retaliation, finish injured units off with your melee when you can kill them off without a counterattack happening. Damage the mages with high resistance units and finish them off in the same manor.
Once you move into this formation the first wave will appear and attack. If you did it quick enough, Gilbert will take the brunt of their attack. This is what you want. Sad as it may sound, you want Gilbert retreating from this battle. If he survives it he WILL aggro the archers on the hill. It’s just the way his programming works. You cant control him, and the only way to prevent him from stopping in one of those squares is to stand in them yourself, which defeats the entire purpose.
In my run Gilbert did not survive the first wave, but he did get a lucky crit and took one of them out for me.
Clearing out the initial 3 units, and the 3 remaining units of the first wave netted me the following levels
Lysithea, you are my most deadly unit, but if you keep up these levels you wont be for long.
Close up of the formation
Take the time to heal up. When you are ready, move one unit to this square to spawn the second wave
When the second wave spawns, take it the same way you took the first one. Clear out the second wave and use the key your found (or a thief) to open the chest for an Armorslayer sword. It will come in handy later.
The second wave got me these levels.
A solid level
After clearing out the second wave I pushed forward. There was a lone mage sitting in the middle of the hallway, I baited her out with Marianne who had the best Res in the army. She was able to tank her attacks without taking a single point of damage, your mileage may vary on that. Note: The healer on top of the hill did heal this mage, and I was afraid it would agro the entire hill, but that wasn’t the case. Once we killed the mage the healer did run around the hill towards me, but he didn’t bring anyone else with him. You can start setting up for the next ambush point while you wait for him to make it to you.
Setting up in this formation is perfectly safe, the ambush will not happen until someone from the formation steps beyond this first pillar, so watch that you don’t step past it until you are ready to engage.
Once you do engage, 2 thieves will jump out of the wall to the east and one mage will approach from the west. The mage is too far to be a threat at this point, but if you followed my formation above and moves the entire formation 1 square west to spawn the ambush then the thieves will attack your two rightmost units. In my case this was Claude and Byleth. Each thief got off one attach, ate the counter attack of both, then I was able to pick apart the ambushers. Gaining me the following:
Marianne, come on 😦
I am not sure what specifically triggered the second wave from this spot, but it involved 2 more thieves from the exact same spot without anyone having to move. At this point the mage from the west caught up to me so I had 3 units to deal with. Clearing them out got me the following levels:
Once you get past this part the rest of the level up to the boss is pretty straight forward. Just take your time, take it one mob at a time, and if you can help it do not take any damage on the player turn. Move the rest of your army forward and progress.
From this point to the boss I gained the following levels:
Not off to a great start, Petra 😦
Marianne, no.
See, this is what the rest of you should be aiming for. Good job, Leonie
Leonie took out Michlan with this shot, AND she got a superior level up
With Leonie’s arrow Michlan was defeated, but he wasn’t quite ready to let defeat claim him. He attempted to use the Hero’s Relic he has stolen, but because he didn’t possess a crest of any kind it transformed him into a giant beast.
Using the last remaining gambits, I was able to break all four of his shield plates, which rewarded me with 5 umbral steels. I also got one of his health bars down.
Byleth was able to take a second of his health bard with a crit with the Sword of the Creator
Lorenz finished the beast off with a well placed Fire Spell
46 turns? If felt like it took a lot more than that.
I went extremely slowly in this run. I basically walked around the entire arena in formation being careful of additional ambushes. I only ran into the 4 total waves, I dont know if there are others that I didn’t trigger, but even going as slow as I did I only used a bit over half of the total turns available to me.
Take it slow and you can get through this without losing anyone.
Overview
Byleth +3 Levels: +3HP, +1Str, +1Mag, +1Dex, +2Spd, +1Lck, +1Res, +2Cha
Claude +3 Levels: +2HP, +1Mag, +2Spd, +2Lck, +1Def, +3Cha
Marianne +3 Levels: +1Str, +1Dex, +3Res, +2Cha
Hilda +3 Levels: +2HP, +1Str, +1Dex, +1Spd, +1Lck, +3Cha
Lorenz +4 Levels: +1HP, +1Str, +3Mag, +4Dex, +2Spd, +2Def, +3Res, +2Cha
Lysithea +2 Levels: +1Str, +1Dex, +2Spd, +1Res, +1Cha
Leonie +3 Levels: +2HP, +2Str, +1Mag, +2Dex, +3Spd, +1Lck, +2Def, +2Cha
Raphael +2 Levels: +1HP, +1Str, +1Mag, +1Dex, +1Lck, +1Def
Petra +1 Levels: +1Spd, +1Cha
Gilbert: Retreated (Fatal)
Total number of levels gained: 70
Total number of unsatisfactory levels ( >= 2 Stat ups): 22
Total number of null levels (0 Stat ups): 0
Remembering the Fallen
FE Golden Deer Maddening: Chapter 5 Chapter 5 In this chapter you learn that a disinherited son of a noble house has stolen a Hero's Relic and you are tasked with getting it back.
0 notes
Last Seen Blogs


m0d3rn-l0v3rs
Modern Love

wine-drunk-academic
daily thoughts