#Prusa 3D Printer
Video
youtube
✅ Best 3D Printers Under $1000 in 2022 ➡️ Top 5 Tested & Buying Guide
Product Description:
Number 1. Elegoo Mars 2 Pro
If you are just getting started with resin 3D printing, you will find that you have an overwhelming number of options to choose from, each with a different price point. The good news for people just starting out is that quality does not have to come at the expense of their budget. You can get your hands on the intuitive Mars 2 Pro for as little as $200 if you look hard enough.
Number 2. Anycubic Kobra
The Anycubic Kobra is the ideal 3D printer for you if you are searching for a machine that is not only simple to use but also produces high-quality prints. a fun hobby. Because it is so simple to put together, you can start printing within half an hour of taking it out of the box.
Number 3. Anycubic Kobra Plus
The Anycubic Kobra Plus has your back when you need a little more space than the average 3D printer. The Kobra Plus is a great tool for big projects because it has a large 300 x 300 x 350mm build volume and a nearly perfect auto bed leveling system.
The Kobra Plus is priced competitively at $499, and it has a light Bowden extruder and a Volcano-style hot end to make printing faster.
Number 4. Anycubic Vyper
The Anycubic Vyper is made for high-throughput 3D printing, and its rock-solid build and long list of features really impressed us. The Vyper is a good choice for anyone who wants to print out a lot of parts because it has features like silent stepper drivers, dual Z threaded rods, and a high-air flow part cooling system.
Number 5. Phrozen Sonic Mini 4K
The Phrozen Sonic Mini 4K should be on your shortlist if you want to print models with a lot of fine detail. The Sonic Mini 4K uses a 4K mono LCD screen to print high resolution models with a per-layer cure time of slightly over 2 seconds per layer. This translates to excellent detail and speed, but the price gap between the Sonic Mini 4K and comparable MSLA 3D printers like the Anycubic Photon is significant.
#youtube#Best 3D Printers#Best 3D Printers Under $1000#Best 3D Printer#3D Printer#3d printer review#best home 3d printer#home 3d printer#Best 3D Printer for beginners#Longer 3D Printer#Top 3D Printer#Quality 3D Printer#3D Printer for hobby#Prusa 3D Printer#Eleego Qidi 3D Printer#Aquila 3D Printer#Best FDM 3D Printer#Best Resin 3D Printer#ReviewGeny#Review Geny
1 note
·
View note
Text

20240125 - Head Count
2 notes
·
View notes
Text
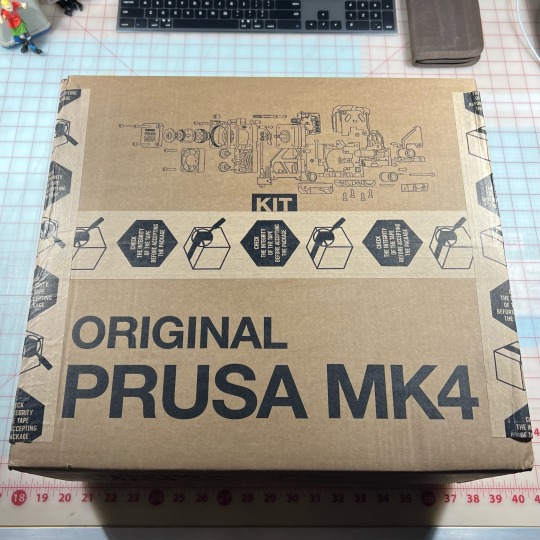

It's here!
2 notes
·
View notes
Photo

Inspired by @toms3dp's video about a 5-year old Original Prusa MK3, we decided to update an old article about the MK2 upgrade. Updated the article with a lot of interesting stuff - 6 Years On!
2 notes
·
View notes
Text

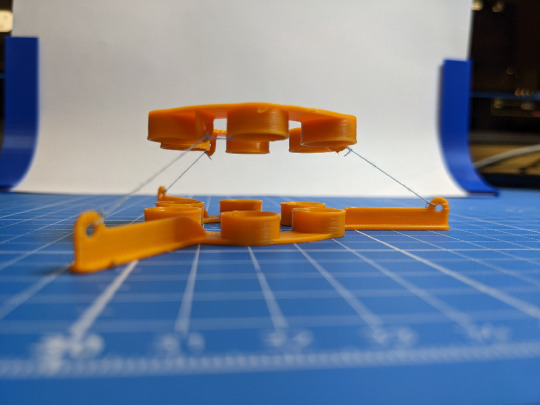

I designed a simple permanent magnet levitation toy stabilized by sewing threads.
#magnet levitator#magnet levitation#levitan#levitator#floating magnets#magnets#anty gravity#3d printing#3d printed#3d printer#i3 mk3s#prusa i3#fusion 360#made with fusion 360
3 notes
·
View notes
Text
Never have parts warp off the bed again!
Tips not commonly shown that I learnt the hard way on how to keep those parts on the bed from warping. Full video below. Please subscribe!
https://youtu.be/8393lxSxzu4?si=4P4jzUlnjsdgveKg
#3dprinting #warping #absfails #leemerie3d #failedprint #fyp #youtube #instagood #3d
#ender 3#leemerie3d#prusa#tech#voron#x1c#3dprint#fyp#subscribetomychannel#pc build#warped abs#warped asa#3D printer warping
0 notes
Text
its really a kick in the balls that the prusa mk3s is like $150 worth of parts and people are like oh but youre paying with REAL CUSTOMER SERVICE unlike fucking chinese factory products and then when our 3d printer has never worked right in its entire life that $650 of customer service value is waiting 20 minutes for a chat opportunity that's just some guy saying "show me these 10 indicators of user error again even though you just showed me and demonstrated no user error because i dont believe you that our product could be fucked up if it wasnt your fault" and after all that its not even worth melting down for parts. its a 2005 garage kit printer they sell as worth the same value as modern $1000 printers because It Just Works™️. you can get approximately the same value out of a $200 ender 3 and a swift kick in the head
#its partially on me for buying in but i didnt know shit about printers in 2020 or whenever and literally every single publication and#3d print community was so definitively confident that your 2 options are an ender 3 if you like suffering. or a prusa.#i had no reason at the time to think a rabidly open source and anticommercialist community would mislead me for the sake of a brand name!
0 notes
Text

This week's post is not as I expected, but I am excited to do it anyway. I had to disassemble my first printer (from 2018) to make way for the new one that is coming, and it seems like a good time to remember everything I lived with it (and that people do not make my same mistakes) and all the changes I made.
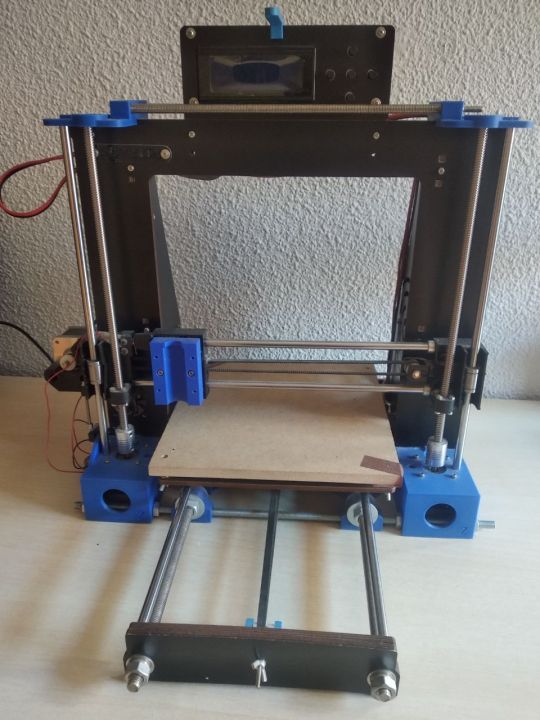
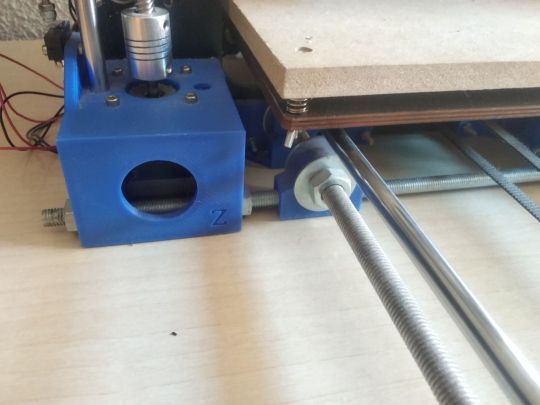
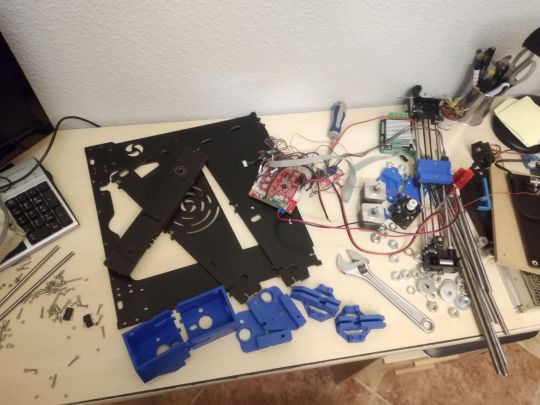
Photos 1-3: My first printer was a Prusa i3 clone, super cheap, which as you can expect ... It wasn't a big deal. The structure was made of plywood and that added a lot of vibrations (Z-wobble for those who understand more) to the prints. I tried everything: printing parts to decouple the Z-axis, changing it... But in the end the most effective thing was to reinforce the structure.
In 2020, while the confinement due to covid, I participated with my Ender in a project to make equipment for the protection of health personnel, and I decided to fix the Prusa, at that time inoperative, to go faster. That's when I added the iron bars to reinforce the structure, which is what worked. I used 1.5 kg of filament a day making visors, whose photo is lost on my Instagram account.
As you can see, I chose blue as the main color for the Prusa, just as for the Ender I have red, because I like to have them decorated uniformly. The new printer will also be red, so it seems that I chose well having red as the basis of my logo. And well, also comment that two of the rods that are seen in the structure are the Z-axe of the printer itself, which I changed them for trapezoidal spindles (no, it did not bring them before, just as I put the union between axes and motor because the one it brought was a piece of shabby plastic).
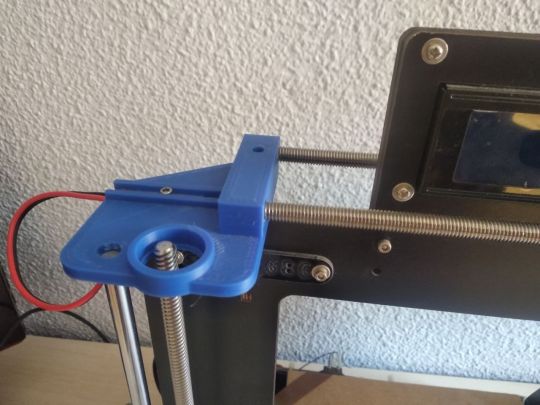
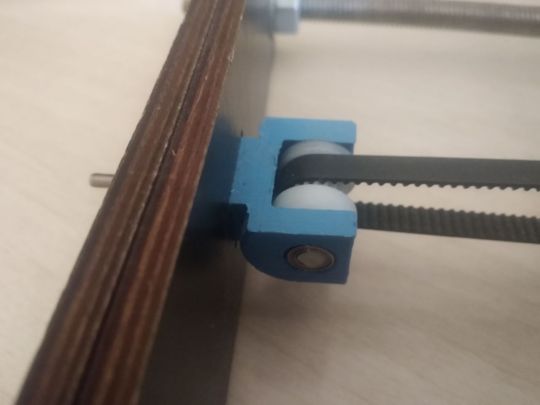
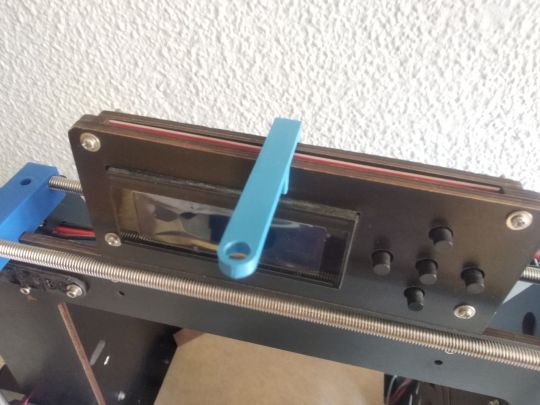
Photos 4-5: Some improvements I made separately. The first is a tensioner for the Y axis (the one it brought did not work) and the second is a guide for the filament I designed. Since the printer had nowhere to leave the filament coil, I had the holder for the coil on a shelf above the printer, and with the guidance I made sure it fell on the extruder. NASA technology, as you see.
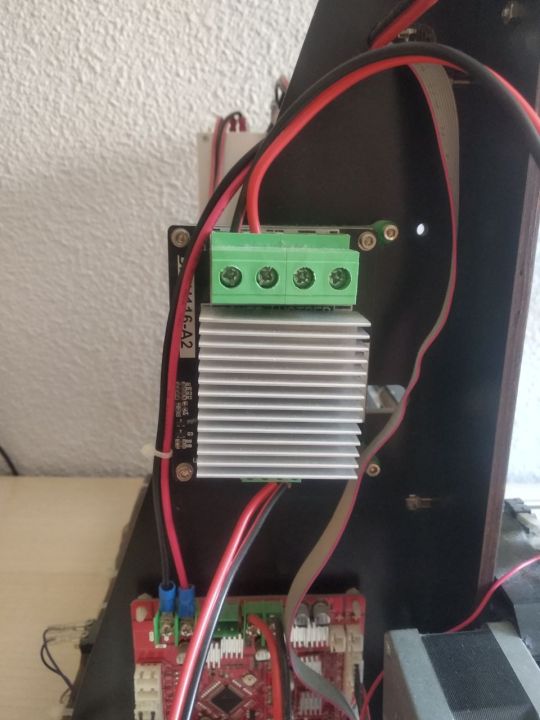
Photos 6-7: Here we enter electronics/electricity. First, a MOSFET that had to be put in at that time, because if you didn't put it the risk of the hot bed start a fire... Super safe everything. The second thing, as silly as it sounds, is that I put a switch on the printer. No, it did not bring one, the plug cables went directly to the power supply. There was one of the reasons why this printer was so cheap.
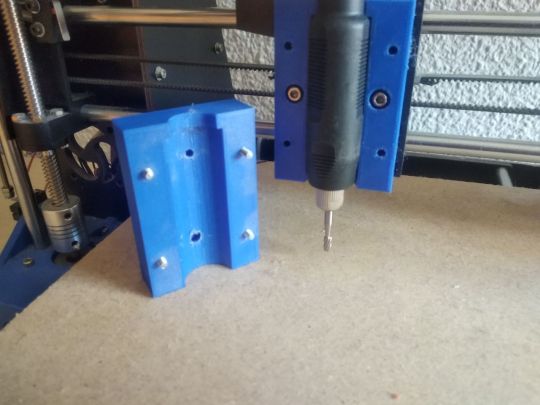
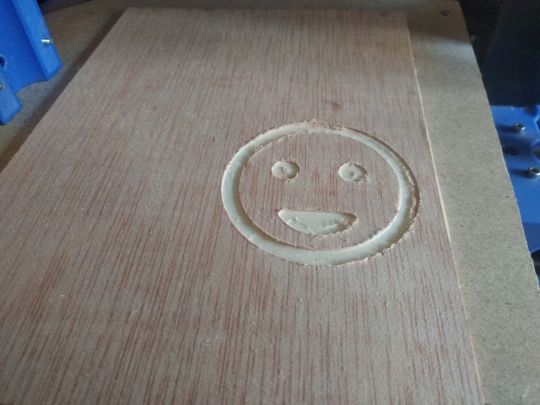
Photos 8-9: The most observant people will have noticed that the printer does not have an extruder, since I did not use it after COVID, there came a time when I said "what if I transform it into a CNC machine?". And so I did, attaching a Dremel-style rotary tool to it. I think I only used it for the smiley face testing if it worked, but hey, I have fun adapting the hardware and software.
Photo 10: And finally... We say goodbye. I plan to reuse all the components for other things, that's why it doesn't taste so bad to disassemble it, but I do have good memories spending hours with this printer. Of course, as much as I have learned with it, I strongly recommend with this type of technology to inform yourself well in advance and invest a little more to make sure you have something in conditions.
En español:
El post de esta semana no es como esperaba, pero me hace ilusión hacerlo igualmente. He tenido que desmontar mi primera impresora (de 2018) para dar paso a la nueva que está por llegar, y me parece un buen momento para recordar todo lo que viví con ella (y que la gente no cometa mis mismos errores) y todos los cambios que le hice.
Fotos 1-3: Mi primera impresora fue una Prusa i3 clónica, super baratilla, que como podéis esperar… No era gran cosa. La estructura era de contrachapado y eso añadía muuuchas vibraciones (wobble para quien entienda más) a las impresiones. Probé de todo: a imprimir piezas para desacoplar el eje Z, a cambiárselo… Pero al final lo más efectivo fue reforzar la estructura.
En 2020, en pleno confinamiento por el covid, participé con mi Ender en un proyecto para hacer equipamiento para protección del personal sanitario, y decidí apañar la prusa, en ese momento inoperativa, para ir más rápido. Fue entonces cuando le añadí las barras de hierro para reforzar la estructura, que fue lo que funcionó. Gastaba 1,5 kg de filamento al día haciendo viseras, cuya foto está por ahí perdida en mi cuenta de Instagram.
Como podéis apreciar, elegí el azul como color principal para la Prusa, igual que para la Ender tengo el rojo, porque me gusta tenerlas decoradas uniformemente. La nueva impresora también será roja, así que parece que elegí bien teniendo el color rojo como base de mi logo. Y bueno, comentar también que dos de las varillas que se ven en la estructura son los propios ejes de la impresora, que se los cambié por husillos trapezoidales (no, no traía de antes, igual que le puse yo la unión entre ejes y motor porque la que traía era un trozo de plástico cutre).
Fotos 4-5: Algunas mejoras que hice aparte. La primera es un tensor para el eje Y (el que traía no funcionaba) y la segunda es una guía para el filamento que me diseñé. Como la impresora no tenía donde dejar la bobina de filamento, tenía el soporte para la bobina en una estantería sobre la impresora, y con la guía me aseguraba de que cayese sobre el extrusor. Tecnología de la NASA, vamos.
Fotos 6-7: Aquí entramos en electrónica/electricidad. Primero, un MOSFET que había que poner por aquel entonces, porque si no corrías el riesgo de que la cama caliente echase a arder… Super seguro todo. Lo segundo, por tonto que parezca, es que le puse un interruptor a la impresora. Porque no, no traía, los cables del enchufe iban directamente pelados a la fuente de alimentación. Por algo era tan barata esta impresora.
Fotos 8-9: Las personas más observadoras se habrán dado cuenta de que la impresora no tiene extrusor, y es que como no la usaba después de lo del COVID, llegó un momento en el que dije “¿y si la transformo en una máquina CNC?”. Y así lo hice, acoplándole una herramienta giratoria estilo Dremel. Creo que sólo la usé para la carita sonriente de prueba de si funcionaba, pero oye, ¿y lo bien que me lo pasé adaptando el hardware y el software?
Foto 10: Y finalmente… Decimos adiós. Pienso reaprovechar todos los componentes para otras cosas, por eso no me sabe tan mal desmontarla, pero sí que tengo buenos recuerdos echando horas con esta impresora. Eso sí, por mucho que haya aprendido con ella, recomiendo encarecidamente con este tipo de tecnologías informarse bien previamente e invertir un poquito más para asegurarse de tener algo en condiciones.
0 notes
Text

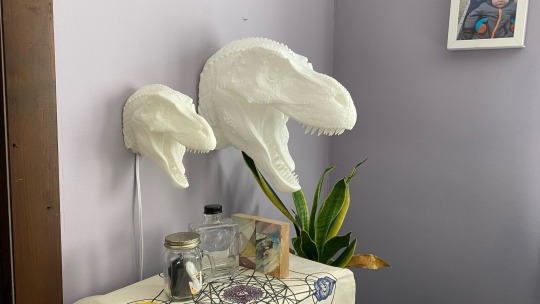
Making some new, bigger 3D printed lamps for our ShoeBoxLighting store on Etsy - testing out some photo placement

#lets make things#lamps#3d printed lamps#3D printed#3d printing#prusa#Prusa printer#Etsy#etsyshop#artist#small business
1 note
·
View note
Text


Smol Raph print test.
@PowerAuerArt ‘s 3D printer took forever to calibrate and the Sunset Bros project IS A GO!!
Modeled in Blender. Meghan’s modeling Mikey later. ❤️🧡
#rottmnt #raph #prusa #blender
51 notes
·
View notes
Text
Last Monday of the Week 2023-08-14
Accidentally did the Pride Parade.
Listening: I finally finished the Haitian Revolution in Revolutions. I have to actually pay some attention to Revolutions so I can't just put it on idly at work, so it goes slow. The Haitian Revolution is absolutely buckwild, there's so many different actors at play and it doesn't help that simultaneously to all of this is the French revolution, with a several week to month delay in communications between Haiti and France.
Reading: A load of 3D printing docs, the Kobra Neo that I just got is only kind of half-assedly supported by the slicers. You can use the older Kobra profiles but you'd have to forgo some important features, so I'm now learning about how to write profiles for Prusa Slicer. There are some community profiles but for something like this I like to know what the hell I'm doing so that I can debug problems.
Watching: Nothing.
Playing: At the behest of noted tuesdayposter @girlfriendsofthegalaxy I played through Abzu, the astoundingly gorgeous underwater game.
It's a very beautiful game, very Journey (same composer) and it controls well (like Journey) and that's what to go there for. It reminds me a little of Terra Nil, which was on the Mondaypost a few weeks back, as "a game with ecological trappings but little actual concern for ecology." I don't dislike that genre but I do dislike when people try to claim that things like this are ecologically minded, which I've seen in some coverage of both Terra Nil and Abzu when I look them up.
Terra Nil is often called an "Anti-Citybuilder" but that's pure set dressing, it's a city builder with one major caveat, which is that you also have to clean up the infrastructure behind you, but it's still a citybuilder at heart. An anti-citybuilder would be, I guess, about disrupting an existing complex interlinked system as efficiently as possible, causing it to collapse. Or something like that.
Anyways I did like Abzu, I got actively loudly excited when I found that you could ride on a sunfish and even more excited when it let me ride a giant squid.
Making: The 3D printer is here and I am setting it up. Printed the test-owl that came with the system but I'm still working on getting the slicer set up satisfactorily so that I can print some handy parts for around the house. Stated CAD'ing up some parts, though, which is making me get back into FreeCAD. FreeCAD is good but it is decidedly Open Sourcey.
Also out doing photography during Prague Pride, which was this weekend. I wandered into the middle of the parade while out in town and figured "hey, I have little else to do today" and then ran into a friend and hung out. Good day. Those photos will be along as soon as I get to them.
Tools and Equipment: A secret they don't tell you about extremely heavily patterned shirts is that it's much, much harder to tell if you forgot to iron it and just went out in an unironed shirt. There are many reasons why I wear extremely loud ridiculous shirts and this is one of them.
10 notes
·
View notes
Text
So my psych called me out today, as a very kind and giving person who needs to focus more on myself and what I want
She straight up told me that as a creative person, getting the new 3d printer I have been eyeing up for months and months would be good for my recovery, so I should get it
So I have. It's the Prusa Mk4 kit, and I am so excited to get it and put it together
I have also ordered purple hair dye, because I have missed having coloured hair
I might also be waiting on an order of clothing from darkcottage.com
I've also been recommended to look into taking part in competitive HEMA once I have recovered more (and have more skill with a blade), which is just like...
Is this how having a psych works? She's helping me to recover mentally from long covid, in addition to an exercise physician who is helping with the physical recovery
Because I'm not complaining
2 notes
·
View notes
Text
Anemoculus earrings!

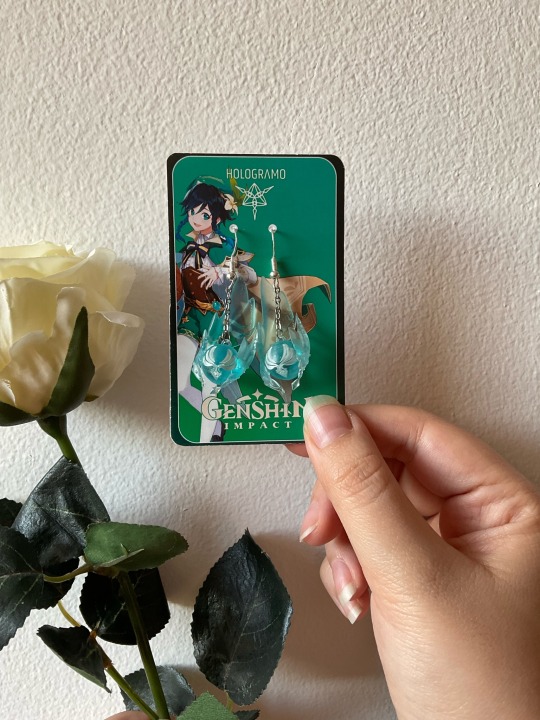
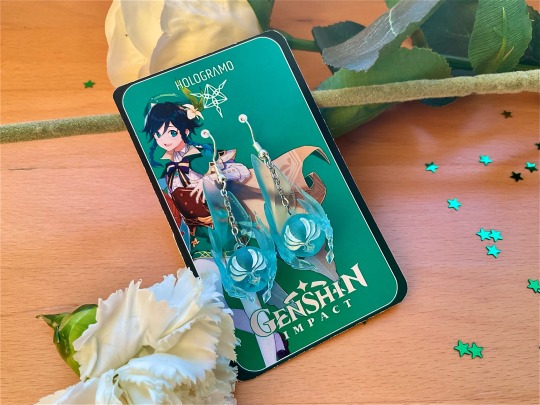
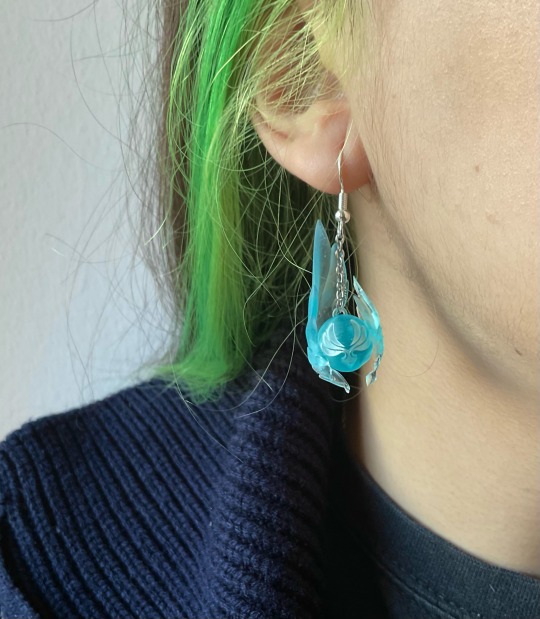
Finally the Anemoculus earrings are now on our Etsy Store! You can visit it in the link below.
These earrings are modelled in Blender using in-game references and 3D printed in UV resin with a Prusa Printer. The wings are printed separately for a better result and then glued together. The anemo symbol is handpainted using white acrylic color and it has a proactive coating.
Disclaimer: this item is 3D Printed and handpainted so minor defects may be present.
#blender 3d#etsyshop#etsyartist#etsy#etsygifts#genshin impact#gift#gifts#handcraft#3d printed#3d printing#genshin#oculus#uv resin#aesthetic#venti#kazuha#xiao#wanderer#heizou#anemo#anemoculus#mondstadt#jewlery#jewerelly#earrings
17 notes
·
View notes
Note
have always wanted to try 3d printing how do i start?
If you get into this hobby, be warned that it takes a LOT of patience, time, troubleshooting, and money lol
I got an Ender 3 kit by Creality (the base, original, Ender 3) and used guides from the r/ender3 and r/3dprinting subreddits to troubleshoot issues as I went. This route was rough lol. The bed plate, extrusion gears, and mainboard all needed replaced before I could print anything bigger than about 3x3x3" due to the low quality of those stock parts. The bed and gears were relatively easy, but that was still like an extra $50. Replacing the mainboard was a pain in the ass. That involved very careful reading of esoteric documentation and wiring schematics to install.
Prusa printers are expensive, but their quality overall seems to be higher than the lower end Creality printers, though Creality's printers have the advantage of being the most popular and having a wider variety of 3rd party upgrades/parts out there. There are affordable upgrades for every single part on my Ender 3 and hundreds of guides for how to install/fix them.
Ultimately, it depends on what you want to get a 3D printer for. I got mine because I wanted to print a giant video game sword so if you're also hoping to print large cosplay parts/props, getting a good printer right off the bat will save you some pains later. The Ender 3 Pro comes with higher quality stock parts than the base model Ender 3. I'd recommend spending a little extra for that one than the cheaper models just because you're gonna have to replace parts quickly with the cheaper ones anyway.
If you want to shop around before buying one, look for these things on the printer because they will be the first things to go:
Plastic extrusion gear housing - These crack very fast, aluminum/steel ones are the way to go. I got a dual gear aluminum extruder by Redrex that's been flawless so far.
Mainboard - This is tricky because it's hard to tell which models are bad or not at a glance. I recommend reading reviews and seeing if anyone mentions crashes, printing errors (prints with voids/entirely missing parts), and glitches. The board my Ender 3 came with was a Creality V4.2.2 and it wasn't great. I replaced it with a BigTreeTech SKR Mini E3 v2.0.
The printing bed - The bed was the first thing I had to replace on my Ender 3 because absolutely nothing stuck to the stock one after a few prints. It looks like only the base Ender 3 uses this bed though so I think the other models' beds are alright. Ideally you want one made of carborundum glass or a PEI plate. I got a Comgrow flexible PEI plate with a magnetic bottom and it's been golden, no issues at all.
Bed springs - This isn't super vital but getting better springs and steel gears for them will save time calibrating haha
Fiddling with my 3D printer has been a LOT of fun and I enjoy messing around with machines like it. I know this response sounds like a huge red flag for 3D printing lmfao but finally getting the damn thing to work is VERY rewarding. You get what you put into it, basically.
Good luck!!
7 notes
·
View notes
Text

I recently bought a 3D printer kit (Prusa MINI+), assembled it, and finally debugged it and started getting it to print things. I'm pretty excited about it!
8 notes
·
View notes
Last Seen Blogs

viktoriabrutalsniper
Vika

madisongeorge420
THE DOCTOR PILLS

thehealthsharelady
TheHealthShareLady

laennil
travelling across the stars