#hisources
Text

I had to delete my previous bokeh overlay pack because zight died on me and I no longer had the file, so here is a new one.
Please like or reblog if you use
Do not repost
Download
#completeresources#sadresources#onlyresources#usergif#allresources#gifmakerresource#gif overlay#hisources#dailyresources#overlay#*#textures
258 notes
·
View notes
Text
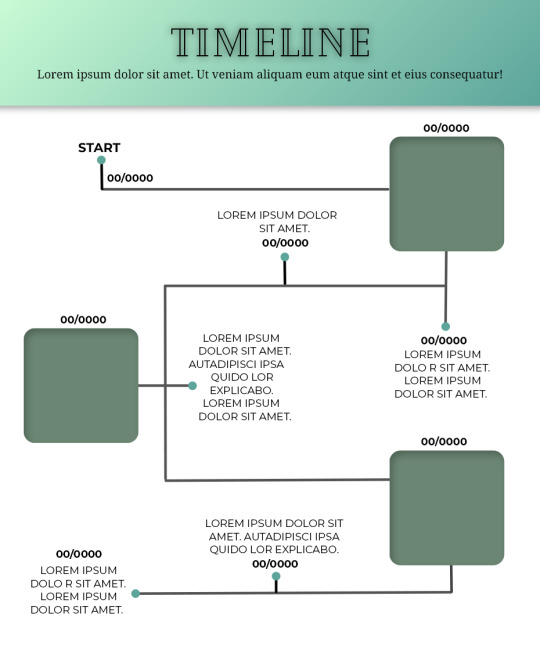
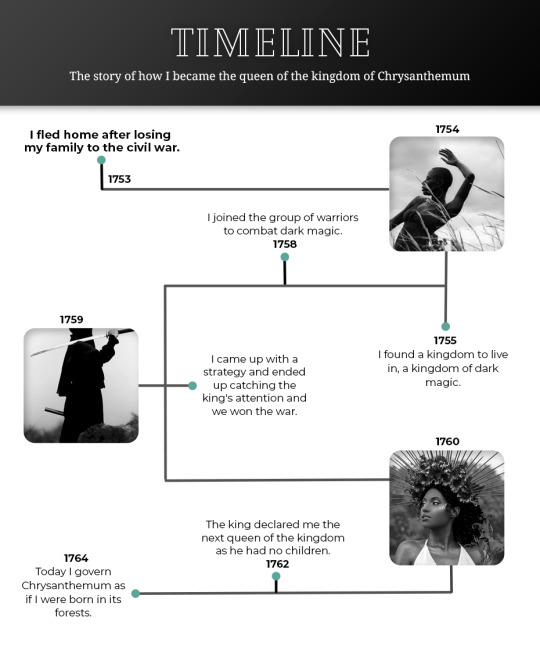
Template #008 by dailyresources
— Timeline Template
Please do not repost / redistribute or claim as your own.
Please, like or reblog if you download.
You may edit as much as you like, it is fully customizable.
This is a free template. PSD File.
Credit is very much appreciated.
Photos by pexels.
Any issues, don’t hesitate to contact me!
Fonts: Cheque, Noto Serif and Montserrat.
Enjoy ❤
Download Link: [mediafire] or [payhip]
Support me on [ko-fi]
#templates#timeline template#timeline#free template#psd template#free resources#graphic template#photoshop template#photoshop resources#evansyhelp#dearindies#chaoticresources#allresources#hisources#yeahps#my creations#*mine#*
159 notes
·
View notes
Text
As part of my 4k celebration, here is another gift! More textures/gif overlays for use.
Included are 16 textures in GIF format-- each gif has a regular (unedited) version and a version that is edited in B/W or transparent, for 33 files in total.
Please like/reblog if using. No credit necessary! You can make any changes you want and use however/wherever you would like, but Do Not repost or claim as your own!
Download: [MEGA]
Also check out my previous gif textures and PNGs.
Textures used on preview gif: Line Border, Purple Shimmer, & Bokeh 03
#resources#*resources#textures#gif overlay#mine#ash's 4k celebration#dailyresources#hisources#dailyps#allresources
152 notes
·
View notes
Text


a18093 - e3b8b2 - f5ddbb - fffbd4
#color palette#completeresources#hisources#onlyresources#sibylresources#red#orange#yellow#purple#four#simple
198 notes
·
View notes
Text
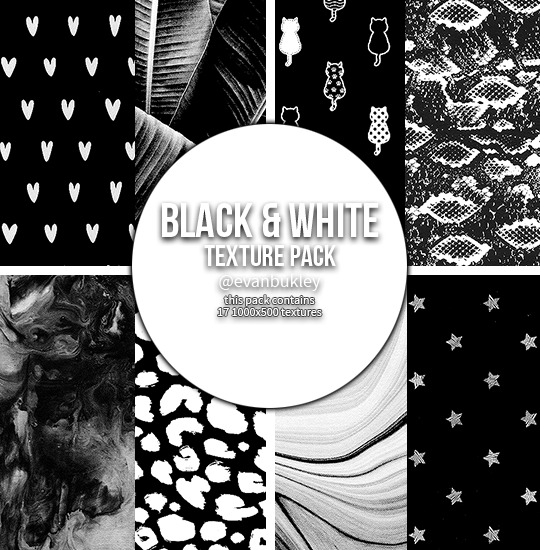
black & white textures
17 large textures // 1000x500
textures in the preview are all from the pack
please do not edit or claim as your own
credit is appreciated, but not required
download // deviant
if you download them please reblog/like!
hope you like them (⊃。•́‿•̀。)⊃
#textures#texture pack#resources#header textures#patterns#photoshop#texture#edit*#textures*#resources*#jddryder#tuserella#tuserandrea#userireland#usermiia#alielook#allresources#kmresources#chaoticresources#hisources
158 notes
·
View notes
Text
STORM.PSD © MINIEPSDS
rules: don’t copy or use as a base, don't modify or share and don't claim as yours. give credits, use #miniepsds in your posts or tag the blog. If you adjust or use with another psd or if you use on other social media, still give credits.
download: follow me + like or reblog and ask me (public) politely with the psd name. be an active editing blog to get the link. or get it on deviantart and buy to support me.
#miniepsds#psd#psd coloring#miniepsds new#hisources#psd: black#psd: dark#psd: blue#coloring psd#psds#colorings#coloring
195 notes
·
View notes
Note
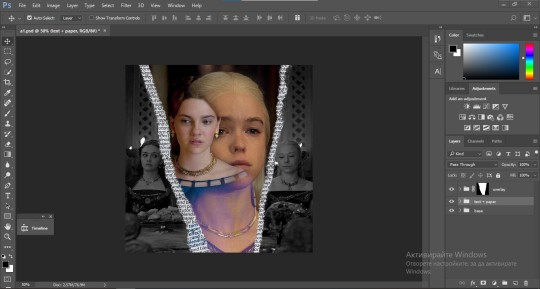
could you please do a tutorial of your game of thrones 'so much for stardust' gifs where it has the ripped paper textures? it's so pretty, and i'd like to learn how to do one with just the texture in the middle and two gifs on either side, like half and half and just having a rip in the middle. it's so cool how you did a gif in the middle though so i wanted to ask as well! all of them are so cool looking. you are extremely talented. if you don't want to though i understand :) thank you
TORN PAPER EFFECT + BLENDING TUTORIAL
thank you so much for your sweet words, dearest anon and i'm sorry it took so long to answer but it's here now so i'll try my best to explain <3
disclamer: this is the first tutorial i ever made, it's very screenshot heavy and it assumes the basic knowledge of ps and gifmaking. if there's something you don't understand, don't hesitate to ask <3 so, let's get to it!
1. PREPARING THE BASE
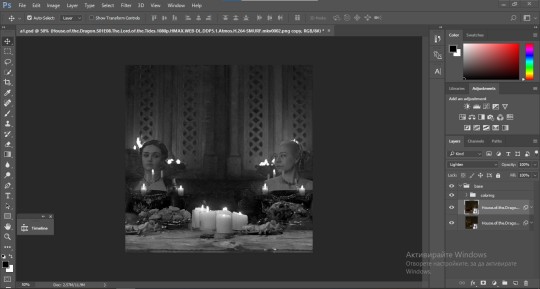
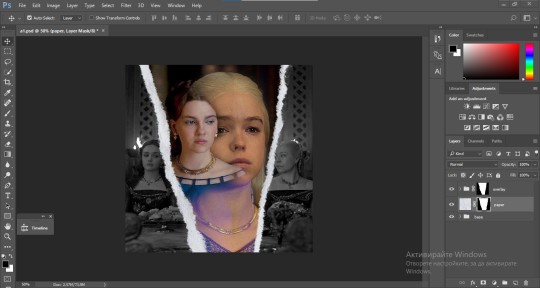
As you can see in this shot there's a lot of space between Rhaenyra and Alicent and that makes it perfect for the ripped paper overlay without hiding much of the base gif. So the first thing i did was to crop it like this:
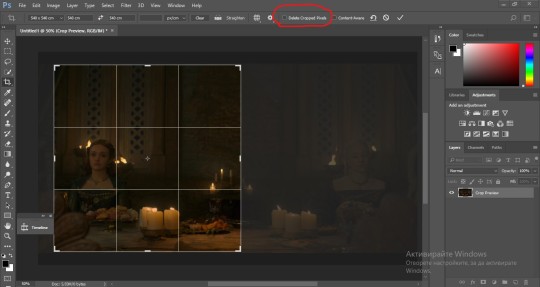
Also you want to make sure that the highlighted box (delete cropped pixels) is unchecked! After taking the usual steps for the animation (creating frames from layers, reversing the frames, setting frame delay) you continue with the video timeline and convert your frames into a smart object.
psa: if you don't have the motivation or the time to play around with coloring here are some psds i recommend: 1, 2; as for the sharpening i think this one is the best.
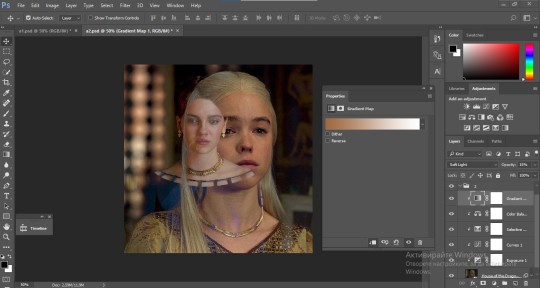
now that you have your smart object sharpened and colored what you want to do next is drag it to the end of the canvas and duplicate it. after that you move the copy on the other end like the original and make sure it's under the coloring layers, like this:
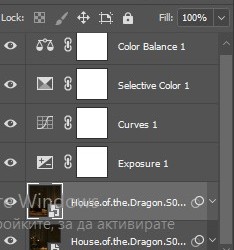
After that you have to create layer masks (the highlighted icon above) for both smart object and the copy and change the blending option of the copy to screen or lighten (whatever looks best!). So this is how it looks now:
pls ignore that there are no layer masks on the smart objects i just added them after changing the blending rip </3
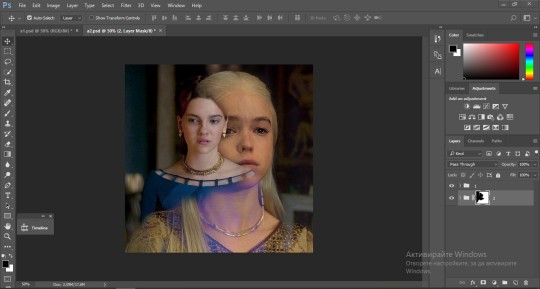
Now, as you see both gifs are like fighting eachother for their rightful place on the canvas. (fgfgfdf) To fix that you have to use a soft round brush to delete the parts you don't want. (feel free to play around with the brush however you want to get the result you want!) Here's my result:
2. THE OVERLAY
Now for the both gifs you want to use for the ripped paper effect you pretty much apply the same steps as the ones you did with the gifs for the base. Here are the two gifs i chose:
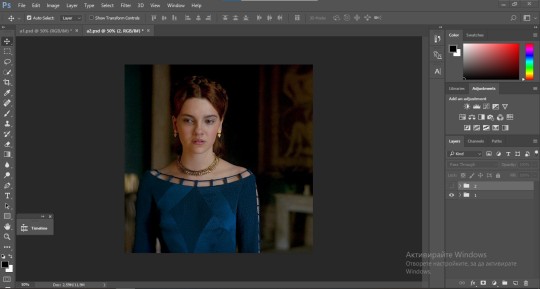

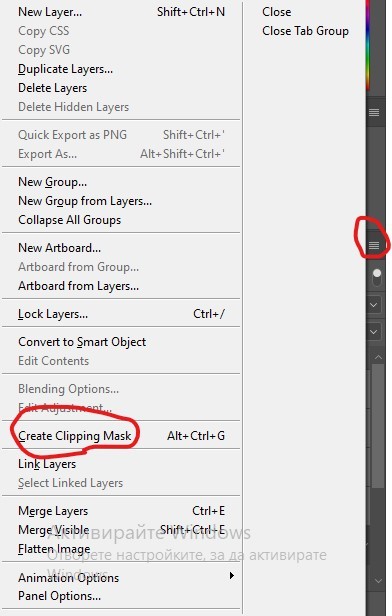
Before blending both gifs however you want to create a clipping mask for each of the smart objects coloring layers, like this:
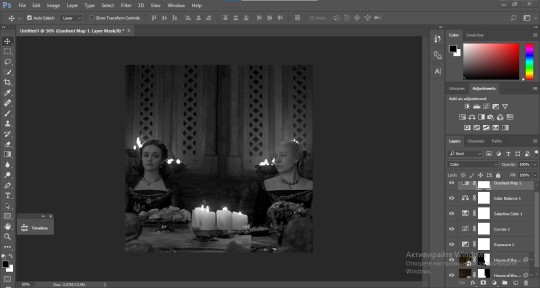
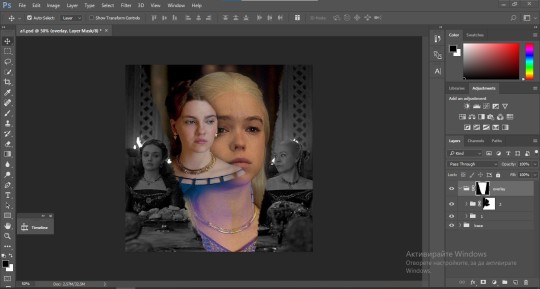
And now you're ready to blend both gifs together! You choose the group with one of the gifs and change the blending again to screen or lighten and place the said group on top of the other. So this is how it looks now:
optional: if you feel like the base gif doesn't pop out enough you can always add a gradient map on one of both gifs and play around with the opacity and the color you think fits best.
Then you add a layer mask on the overlay gif group and again play around with the brush to delete what you don't want. So this is the final result:
ps - don't repeat my mistake by placing the group with the layer mask under the other group. it should be on top and the blending option should be lighten or screen.
After blending both gifs together, you're ready to place them on the base. So first thing you want to do first is place both groups of each gif in one single group together. Then you duplicate the said group in the psd of the base gif and create a layer mask. This is how it should looks:

Now, in order to create the ripped paper effect, you'll have to download a ripped paper brush pack. This is the one i use. After loading the brushes in ps (if you don't know how here is explained) you're ready to begin! Change the size and angle however you'd like to make it look how you want. And if you want you can move the overlay gif by choosing both groups in case you aren't happy with the adjustment. This is how it looks like so far:
We're almost done! Now you have to find a paper texture, (i got mine from google) place it between both groups of your gifs and create a layer mask, like so:
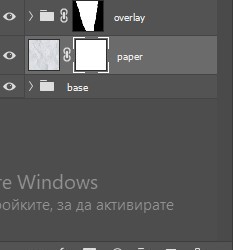
What you have to do here is pretty much the same thing you did with the overlay gifs. Still, make sure there's enough space for the text you want to write in. However, if you think that the space isn't enough you can just delete a bit more of the overlay gifs. Here's mine:
3. THE TEXT
You're finally ready to type out the text you want! If you're having troubles with choosing the right font and size, here are my text settings:
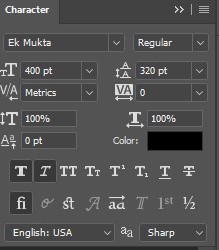
You can always play around with the angle and if your text is too small, zoom in so you can place it just how you like it. And since i'm a bit lazy to deal with it later, i choose to add the highlight color while it's still zoomed. You just have to add an layer above the text and use a soft round brush with opacity from 70-75% and flow from 15-18%.
For the repeated text you want to make sure you create a big space for writing so it can contain the whole space of the torn paper. Also, write where the text will be seen only and use the tab button to skip the space where the gif is. This is how it looks:
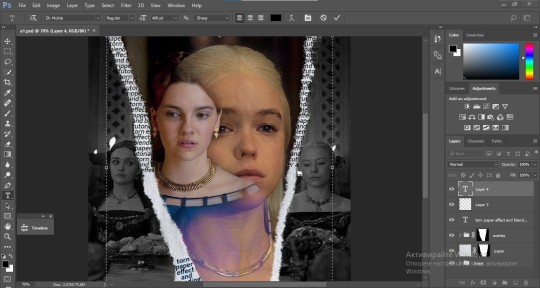
Once you're done with writing the repeated text, you want to select all the character layers and the highlight layer and move them under the overlay gif and on top of the paper, like this:
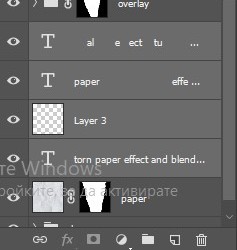
With the layers still selected and in order to contain the text within the paper the last thing you want to do is create a clipping mask. And that's It. You're done! This is the final result:
#allresources#dailyresources#usergif#chaoticresources#gifmakerresource#hisources#onlyresources#alielook#usermaguire#userrobin#usernik#userpat#userbells#gif tutorial#ps help
87 notes
·
View notes
Text
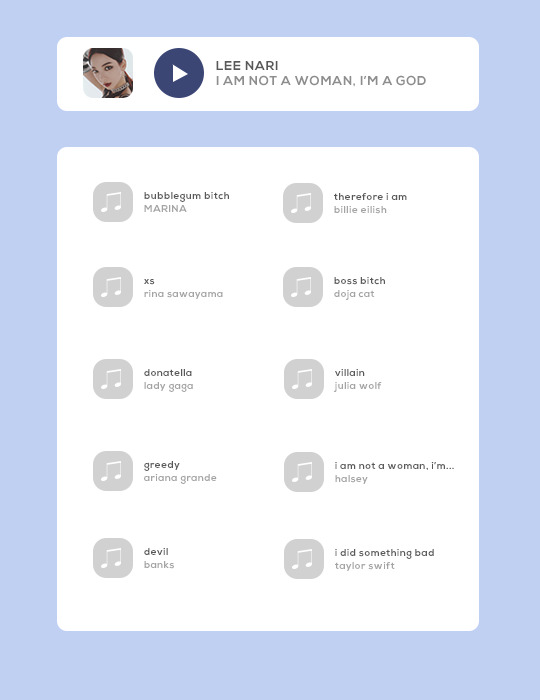

template: now playing...
this is a fully customizable playlist template. feel free to use it for any of your musical needs, and edit it as you please!
DETAILS
* font used: keep calm
* this includes both the ten song and five song versions of this template.
* please do not steal, copy, or use this template commercially
* see here for full rules
* please credit me if you use this by linking to this blog or my payhip
* please like and/or reblog if you use this (or like it!)
* customize it to your heart's content, so long as you still credit me
* this is a free template; share it with your friends! (but please still credit me)
* feel free to send me a link of what you make with this 💓
* don't hesitate to message me with any questions or problems you run into!
🌻 download for FREE on payhip!
#playlist template#playlist psd#dailyresources#hisources#rp resources#rp template#rp psd#roleplay resources#roleplay template#roleplay psd#free rp resources#roleplaying resources#rp playlist template#rp playlist psd#free resource#templates#*zena#*zena:templates#*zena:free
255 notes
·
View notes
Text


USERBRU'S PSD #3 + SHARPENING ACTION FOR GIFS #2
psd download | action download
psd file contains optional b&w group
you might need to adjust selective colors, brightness, color balance. layers to be adjusted are highlighted.
this coloring can also work for any other show/movie/video with minor adjustments.
action will do everything for you, all you have to do is crop & click play :)
how to install and use actions
buy me a coffee? | i accept commissions!
#resources#completeresources#dailyresources#allresources#hisources#riverdale#gif psds#gif sharpening#action#psds#gif action#tuserdee#userbecca#userkraina#userjacko#maziekeen#*
171 notes
·
View notes
Text

TAYLOR SWIFT HEADERS requested by anonymous
8 headers (640x360)
Like or reblog if you save/use
No need to credit but would be appreciate
Don’t repost any header
Find they here
Request are open
#taylor swift#taylorswiftedit#tswiftgif#tswiftedit#chaoticresources#candy swift#tscreators#dailyresources#allresources#hisources#completeresources#resource#headers*#tumblr headers#headers#ts*#tswiftdaily#tsedit#mine
82 notes
·
View notes
Note
hello! just wondering if you know of a tutorial for the lines going through gifs? and getting them all to match up? like in these sets /post/714978685858496512 and /post/733101286452559872 also are they overlays or how did you make them? thank you in advance!
hey! so, i've attempted to show you with a little tutorial on how i made lines like the ones here and here, i've not seen one around myself and decided to try this out one day and it didn't go too badly so, i hope this makes sense and helps.
so, i'll be explaining and showing you how i did the lines on these gifs:
now, firstly i'm going to assume you know the basics and can create/colour etc a gif, you'll need your base gif ready to go. in this example i've flattened them to frames, but you can do this in timeline as well.
step one: add a new layer on top of the gif/smart object, and set up your brush ready. i personally have used 2px brush, 100px hardness, 100px smoothing and 75% flow;

the flow is the main thing i think that is more down to personal preference, it affects how the line draws/moves and will be down to a little bit of trial and error - i've added below how the lines look at difference levels of flow (no other setting from the above has changed just the flow)

step two: decide where you want your lines to link, i've always done from the centre of the gif but you could want your lines to meet up 100px from the left at the top and exit the gif 100px from the right at the bottom. no matter what, the best thing to do here is to add guides to your gifs. as i'm just going straight from the centre to the centre for every gif i add a guideline at 270px

step three: i recommend testing this all out on a separate canvas first to play around and see how you want your line to look etc, but when you're ready you're good to go. start from when the guideline is and draw your line until where you want it to end, the best way to show you this is on video so i've screen recorded the whole process.
youtube
it's honestly pretty straight forward, so i hope this all makes sense, and just have fun with it, i love messing around and drawing 30 versions of the same line until i'm happy with it!!
ALSO, in case you were wondering about the final gif in the wheel of time set, the moving line, that was simply an overlay from this video that i set to screen so the black background disappeared leaving just the line (i stretched/rotated/moved it around get it to start and end where i wanted it to! i just played around with the line thickness when drawing my lines to match as best i could with the line in the overlay!
#ask#anonymous#ps ask#quirkyresources#usernik#userhella#uservalentina#userrobin#userannalise#userrainbow#usershreyu#alielook#useralison#userives#useryoshi#ps help#ps tutorial#chaoticresources#dailyresources#hisources
217 notes
·
View notes
Text

Please like or reblog if you use
Do not repost
Download
#completeresources#usergif#dailyresources#gifmakerresource#hisources#onlyresources#allresources#textures#overlay#gif overlay#*
324 notes
·
View notes
Text
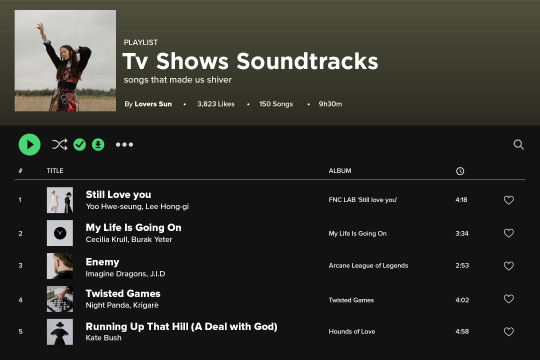

Template #006 by dailyresources
— Spotify Playlist
Please do not repost / redistribute or claim as your own.
Please, like or reblog if you download.
You may edit as much as you like, it is fully customizable.
This is a free template. PSD File.
Credit is very much appreciated but not necessary.
Photos by pexels.
Any issues, don’t hesitate to contact me!
Fonts: Gotham and Proxima Nova (spotify fonts)
Enjoy ❤
Link: [payhip]
Support me on [ko-fi]
#templates#free template#graphic template#social media template#spotify template#playlist template#templatepsds#dailytemplate#resources#hisources#evansyhelp#ps re#ps templates#my creations#*#*mine
145 notes
·
View notes
Text
As part of my 4k celebration, I've made some PNGs for use! Disclaimer: I did not make the artwork; I just made it transparent and cleaned it up. The art is mostly sourced from stock websites.
Please like/reblog if using. No credit necessary! You can make any changes you want and use however/wherever you would like, but Do Not repost or claim as your own!
Download: [MEGA]
Gallery Link: https://postimg.cc/gallery/4dQGGbd
Speech Bubbles: https://postimg.cc/gallery/fT403Ps
If you like this, please check out my other textures and my PSDs!
#resources#*resources#textures#pngs#mine#ash's 4k celebration#dailyresources#hisources#allresources#dailyps
114 notes
·
View notes
Text
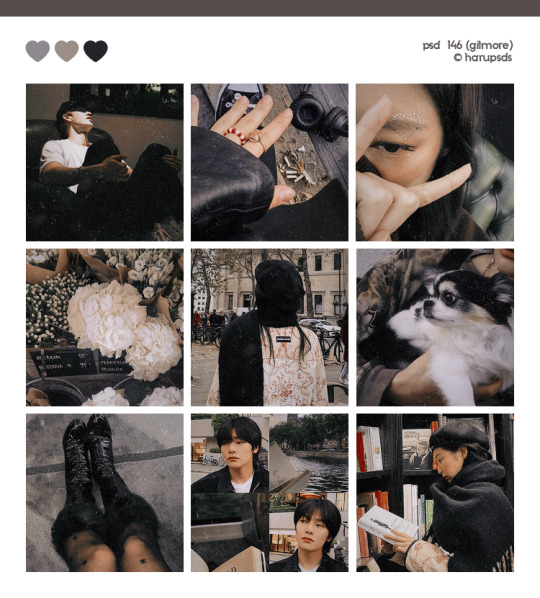
(146. gilmore).psd coloring made by harupsds ©
This effect was made by me in photoshop cc and it works better on it. Before downloading read all the rules and follow them, be honest. Don't forget to leave your feedback or suggestion.
Like or reblog if you download and follow me for more content.
Don’t repost, reupload or put on pack/google drive.
Don’t claim as your own.
Don’t recreate, use as base or steal layers.
Adjust the layers or add new ones if needed.
Give me credit if you use it.
Free for personal/non-commercial use. For commercial use pay the download.
Before/After.
▸ Download: Follow me + like or reblog + ask (logged) “psd 146. gilmore, please?” UNTIL October 20, 2023 or pay the download on deviantart.
Thank you @miniepsds for amazing template. || This is our work done with effort and time spent. Please do not copy do not violate, and do not sell it as if it were yours. The Preview was made by me, being my own. Please, if your photo is here, talk to me. It is not my intention to violate the copyright rules.
#dailypsd#dailyresources#allresources#hisources#makersleague#psd*#psds*#psd#psds#psd coloring#coloring#image psd#psd download#psd for icon#for icon#photoshop resouces#harupsds#black#brown#analog#analog film#analog filter#analog film psd
149 notes
·
View notes
Text
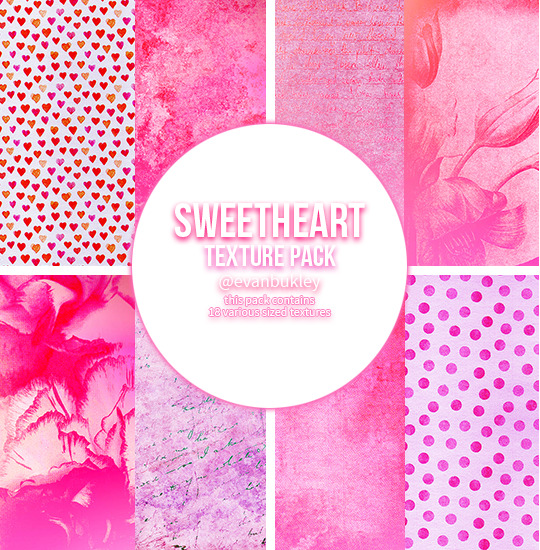
VALENTINE TEXTURES
18 large textures // various sizes
textures in the preview are all from the pack
please do not edit or claim as your own
credit is appreciated, but not required
download // deviant
if you download them please reblog/like!
hope you like them (⊃。•́‿•̀。)⊃
#valentine#valentine's day#valentines day#resources#textures#texture pack#valentine textures#edit*#textures*#valentine*#jddryder#alielook#userireland#dailyresources#tuserandrea#usermiia#kmresources#chaoticresources#hisources#tuserella#tuserdaria
91 notes
·
View notes
Last Seen Blogs
tsalala
tsalala
aidench17
aiden B)

fromfaust
Yes. This is Blog.
itsunicornpearl-blog
UNICORN X PEARL

cyo-x
Cassandra