#scotchbrite
Text
i’ve been looking forward to this alllllll week 😩😍😋
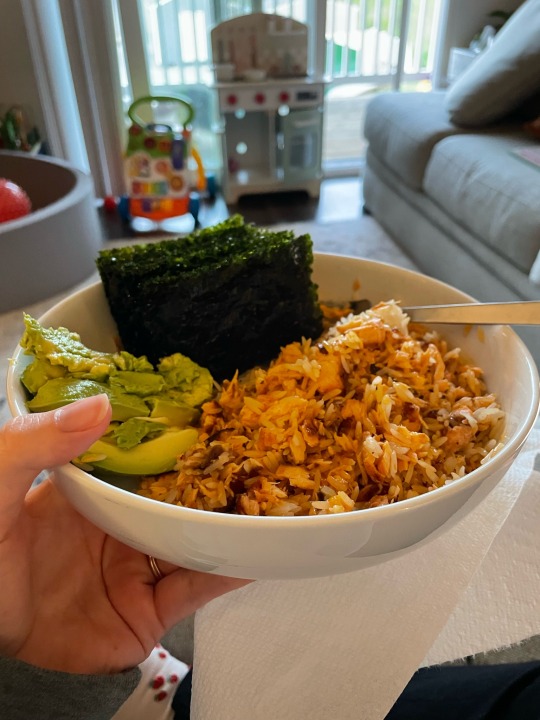
#personal#salmon bowl!#with seaweed!#not a scotchbrite pad like riana thought 😆#I’m also trying Olipop for the first time and it’s super yummy
22 notes
·
View notes
Note
I love your blog. It is SO refreshing to find a chastity blog that expounds on the REAL aspect of chastity, and I find the dynamic between you two to be simply amazing. Thank you both for sharing your journey. I have a question for Tom. I have the same cage, the A276, and love it. It nicely accommodated my PA. I seem to recall a post a little while back where you addressed comfort, and you mentioned polishing. I was curious if you have any recommendations for polishing compounds or other methods that you’ve used successfully? I was even thinking of something like a jewelers tumbler, but if you have another recommendation, I’d be grateful. Thank you both for a great blog!
(OP clarified that he meant the A272)
🔒Tom here. I simply buffed the inside of my cage with extra fine Scotchbrite, noting if there were sharp edges that might pull the fibers (there were not), and did the same on the outside. I remember using some regular jewelers rouge (the kind meant for stainless steel) on a buffing wheel around the outside, and up near the locking flange. I probably did the same with the cuff ring, and washed everything thoroughly in hot soapy water with a cloth. Buffing compound is not water soluble so you have to use detergent to make sure it's cleaned.
I have thought about using a small tumbler with corn cob or walnut shells, but that would be more for shine and surface finish. I don't think it would have much affect on the inside surfaces. If you try that, let me know how it worked out.

184 notes
·
View notes
Note

Here's what yer gonna do. You're gonna find some free time. You're gonna talk to your shop supervisor. You're gonna ask for a regular chip brush, rags, WD-40, Simple Green degreaser, a stiff-bristled plastic brush, scotchbrite, a small clean container of way oil, and a powerful solvent, like kerosene or mineral spirits. You're gonna brush off all the chips and shit that you can with the chipbrush before soaking a rag in diluted simple green and giving the whole machine a good wipedown, focusing on exterior painted panels on the headstock, tailstock, and carriage. You're gonna tackle the stubborn bits with that stiff brush and more simple green. Past that, get the scotch brite going. Careful not to strip the paint. Next, get the ways, the chuck, and any shit gunked onto the pivot points of the levers with the solvent and scotchbrite, using the stiff brush to really get into those tight corners and hinge points. Dry everything off. Then, soak a rag in way oil and wipe the chuck, ways, and any other exposed steel in order to prevent rust and encourage smooth function. Do the same to everything else (controls, cosmetic panels) with a WD40 rag.
Your shop teacher will slonk your shit silly style.
finger...
59 notes
·
View notes
Text
Se non c'è lui....

C'è Scotchbrite.
😏
( usare con moderazione )
21 notes
·
View notes
Text
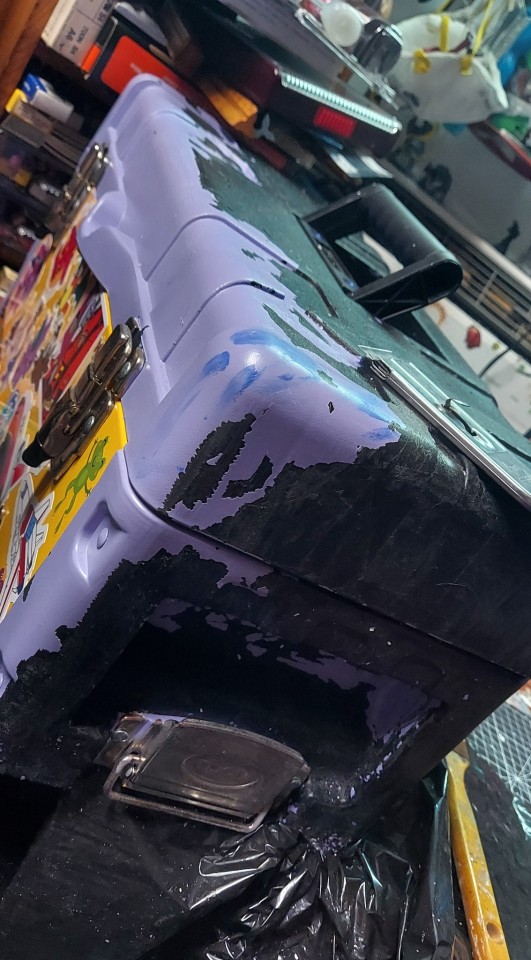
Suffering the consequences of my own actions rn :'))
Finally putting some effort into hand scraping off this purple spray paint/primer/sealer that did not properly adhere to the type of plastic this toolbox is made of. It's taken about 6 hours so far to get 3/4 of it scraped off :')
Gonna paint what I cant reach with the scraper or scotchbrite and slap stickers all over the scratched up bits. Fun stuff- said no one ever
12 notes
·
View notes
Text
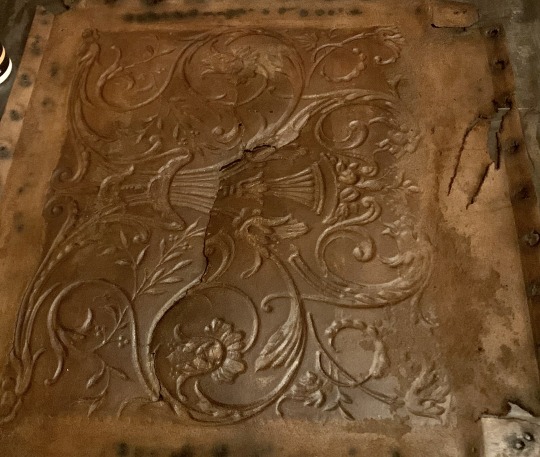
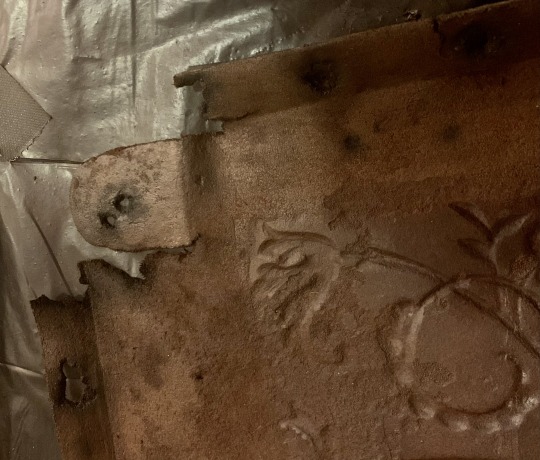
The antique chair restoration project—part 3
As I mentioned in my last post, the impression I had when removing the seat was that the leather was extensively affected by rot and too far gone to save. Not so!
Actually, the areas of rot are fairly limited to the parts of the seat which were in direct contact with rusty metal (the blackened areas), and since it seems to have been caused by a local chemical reaction with the tacks and nails, it isn’t really “red rot” as such, at all. That’s a good thing!
Now, the leather is still old and weak and stiff and needs lots of attention, but I think now that I can save the vast majority of it.
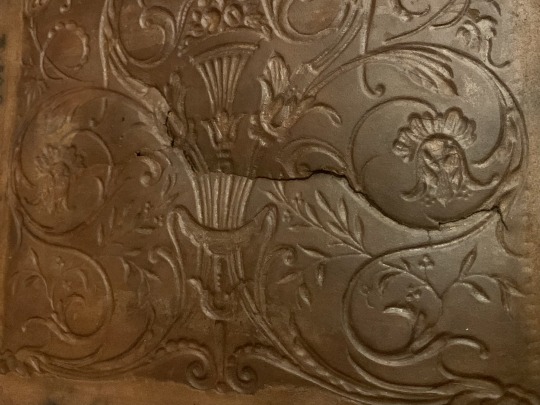
The first thing I did was to apply Cellugel (this is a conservation grade leather consolidation treatment that was developed for antique leather book bindings) on both sides to consolidate any rot and stop any further disintegrating and shedding as I am working on it. Anyone who has experienced this type of leather rot knows how messy and horrible the stuff can be! It sheds a fine dust on everything it touches, as well as dispersing the stuff into the air. Not nice! Hence the Cellugel. :-)

I let that dry overnight, and then used a very fine Scotchbrite pad to remove all of the old crusty adhesive from the old patch (the old patch came off fairly easily, thank goodness), and as much of the rotten surface as possible from the areas that were in contact with metal. I suppose that, ideally, it would be a good idea to neutralise whatever it is that’s causing the reaction, but I’m not sure of the chemistry involved, or what would be safe to use, so I just opted for mechanically removing as much as I could. I’ll almost definitely cut away more of the black parts when it comes time to patch the missing areas, but I’m leaving it as-is for the moment.
Then I gave the whole underside a wipe with 99% isopropyl alcohol to clean off the powdery residues.
I next applied a couple of coats of leather binder to the back of the piece to bond the fibres back together and strengthen the whole thing as much as possible.
Next, I’ll apply some mink oil on the top surface, to try to restore a bit of flexibility, and then probably apply the binder to the top surface as well.
This is what it looks like now, from the underside. There are some areas from around the nails and tacks that have completely rotted away, as well as the large cracks in the middle of the seat, and the torn area at the back. My plan is to fully line the whole piece with new leather for strength (including creating a backing for patching the missing areas at the edges), and then use patches and fillers to repair the missing and damaged parts.

#Antiques#AntiqueChair#AntiqueFurniture#restoration#AntiqueRestoration#LeatherChair#EmbossedLeather#AntiqueChairRestorationProject#Cellugel
2 notes
·
View notes
Text
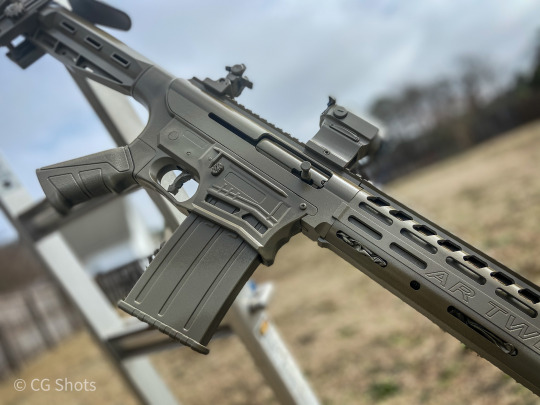
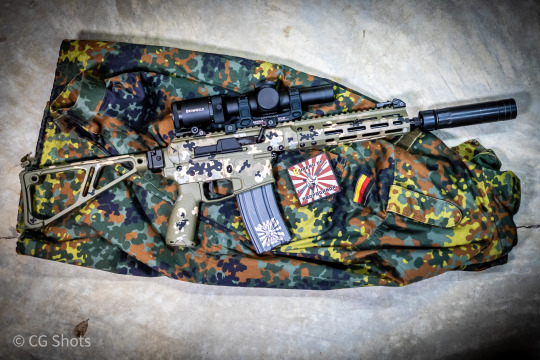
Aluma-Hyde II…Firearm Finishing for the People.
I consider myself to be a moderately proficient individual when it comes to firearms, especially in the case of building, taking apart as well as troubleshooting. I am mostly self taught, but have just a tad bit of formal training. Now when it comes to the job of refinishing a firearm or applying a protective coating, I’ve merely scratched the surface of the possibilities. With many of my older mil-surp firearms, I’ve went through the task of stripping and re-finishing the various wood stocks, removing cosmoline and sanding said wood. Then applying a stain and then a correct oil or shellac to try and replicate the original looking wood furniture. The metal I typically would clean a bit, then oil as necessary.
A couple of years ago, I received a Charles Daly AR-12 shotgun that I decided I wanted to make an attempt at trying to paint it with a desert kind of camouflage theme. Nothing too crazy, but something just to get my feet wet. Initially I was going to go with a spray paint, but learned about Aluma-Hyde II finish from Brownells. It’s a firearm finish that’s applied from a spray can like a paint would be, but cures much harder. I won’t say that it’s as durable as Cerekote or Duracoat, but it also doesn’t require anything but prepping supplies and the can it comes in. To prep the surface before applying, anything not wanting to finish should be taped up and the entire surface degreased. Removing of anodized finish or bluing isn’t necessary. Aluma-Hyde II will bond to an already existing finish. You can take a Scotchbrite pad and scuff up the surface, but I have found it not to be necessary. I was shocked at how nice the AR-12 shotgun turned out. The only real issue I encountered was sometimes the nozzles would clog up, requiring a clean out. The only other negative is it takes an enormously long time to air cure…up to 2 weeks!
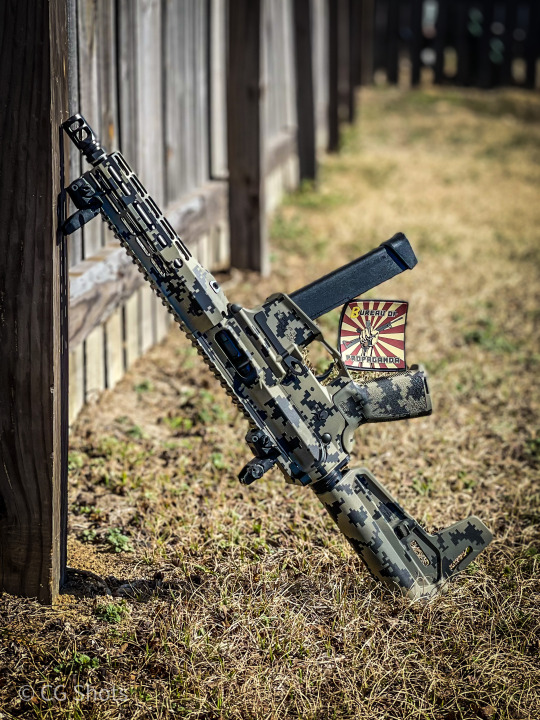
After having gotten my feet wet with my first project, I wanted to try using a stencil pattern to apply a camo finish using Aluma-Hyde II. I chose a woodland pattern from Branson Cerekote to paint my 10.5” BRN-180 pistol in .300 Blackout. This time, I also picked up an extra large toaster oven to oven cure the finish. My understanding with cerekote is to apply each color at a time with cure time in between. Aluma-Hyde II starts to cure after 30+ minutes allowing time to apply more colors/coats and add/remove stencils. I found this to be ideal, but you have to work fairly fast. My first project using stencils came out really nice and I was more than happy with the results.
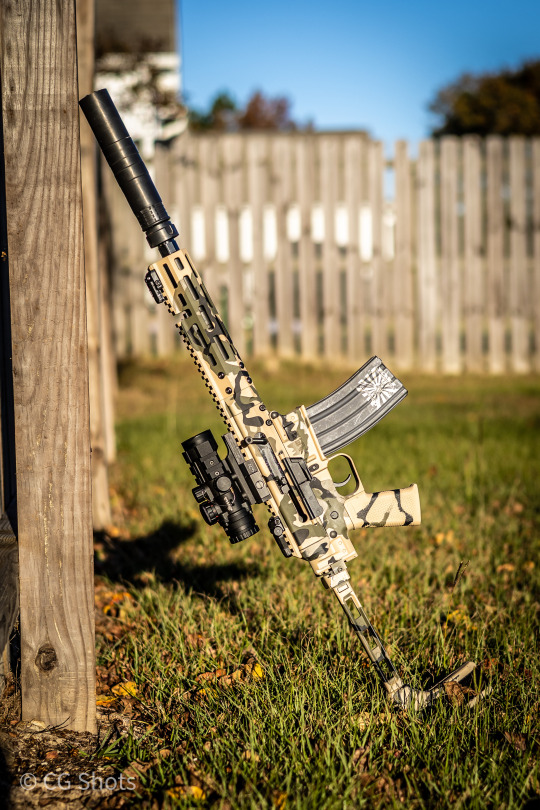
Since those 2 projects, I’ve completed 2 additional projects using stencils and Aluma-Hyde II finish. I completed an Aero Precision EPC9 as well as another BRN-180 project. Aluma-Hyde II is truly an impressive firearm finish that is easy enough for a novice such as myself to apply and come out with a good looking outcome. Preparation of the surface is truly the key to a good outcome and try not to apply too many colors. 3-4 colors is really the maximum I would recommend since the finish is relatively thick in nature. Now I just wish Brownells would start to offer additional colors!
3 notes
·
View notes
Text
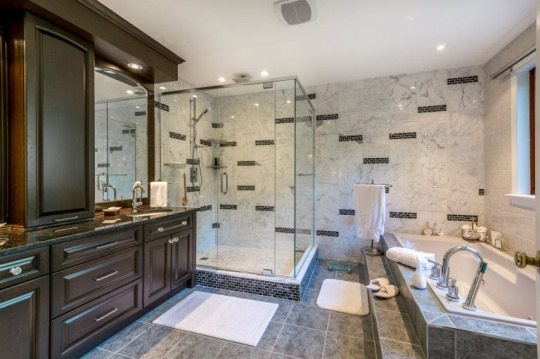
Bathroom Remodeling - Select The Right Countertop For Your Bathroom
Renovating a bathroom can be challenging, with a wide range of materials and edge details to choose from, selecting the ideal countertop. Moreover, excepting aesthetics, price, and maintenance should also be considered. Plux, tile countertops are becoming less popular, giving way to full slabs. Selecting the right countertop may be difficult, but if you have a brief knowledge of it, it will be easy to select the right countertop for your bathroom remodeling, so you may continue to be here if you want to know more.
How To Select The Right Countertop For Your Bathroom Remodeling?
When renovating a bathroom, the toughest task is to choose the right countertop. And it becomes easy when you gather some knowledge about it. So here are some types of countertops that you can explore in depth. Have a look below.
1. Corastone & Corian
Corastone, a resin-based material resembling natural stone, offers an appealing appearance with a matte finish. However, color choices are limited, and it requires moderate maintenance. Although reasonably priced and highly durable, Corastone can be susceptible to scratches, so its location should be considered carefully. An advantage is that if scratching occurs, a Scotchbrite pad can restore the surface due to the color permeating the material.
2. Natural Stone
Some frequently used natural stones are - Marble, Granite, and Quartzite. Furthermore, these materials are available in large slabs, which may not be necessary for bathroom renovations. However, each piece is unique, needing more consistency in veining and coloring. Also, it is important to examine the slab before making a purchase. While visually appealing, Natural Stone needs care on a regular basis and maintenance, including sealing and neglecting highly acidic materials.
3. Porcelain Countertop
Opting for a half slab or remnant piece may assist you in saving money and avoiding paying for unnecessary materials. The cost of slabs varies, ranging from hundreds to thousands of dollars, depending only on your choice. The best thing is they are made of strong material and come with easy cleaning, and you don't have to worry about stains with this countertop. Also, you can plan for house painting while remodeling the bathroom, as it will save you both money and time.
4. Quartz Countertops
Quartz is currently in high demand and is considered a top-demanded countertop for bathroom remodeling. Although it is generally the most costly option, Quartz consists of natural ground stone combined with resin. And its exceptional qualities include being resistant to scratches, heat, and stains, making it ideal for bathrooms and kitchens. Many reputable quartz brands provide a lifetime warranty and offer non-sealing products.
5. Porcelain Countertop
Porcelain countertops are renowned for their exceptional hardness and durability, effectively withstanding impacts and scratches. Liquids do not absorb easily with a non-porous surface, and any occasional stains can be effortlessly cleaned. Although porcelain is incredibly attractive, it presents a few challenges. Due to the fabrication process involving large sheets, there are limitations on the edges, sink areas, and the type of sink that can be used.
Give Your Bathroom A Fancy Look!
When renovating a bathroom, opting for an appropriate countertop is vital as it enhances the bathroom's overall appearance. A few and most frequently used countertops have been shared. If you are looking for help with bathroom remodeling, Icon Remodeling Dallas. Not only this, they also provide services for painting, designing, etc., and their professionals assist with all kinds of projects.
0 notes
Text
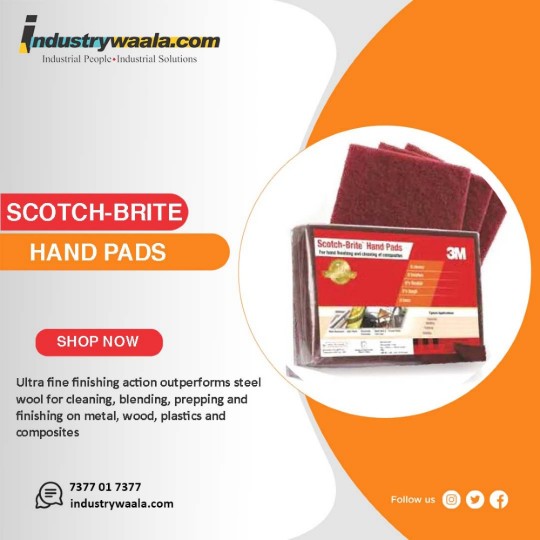
Scotch-Brite hand pads
Our Scotch-Brite hand pads is highly flexible, making it easy to fold and bend for use on corners and hard-to-reach areas, allowing you to effectively reach tight spaces. Call now +91 7377017377 and visit my website--https://industrywaala.com/. #ScotchBrite #handpad #flexible
0 notes
Text
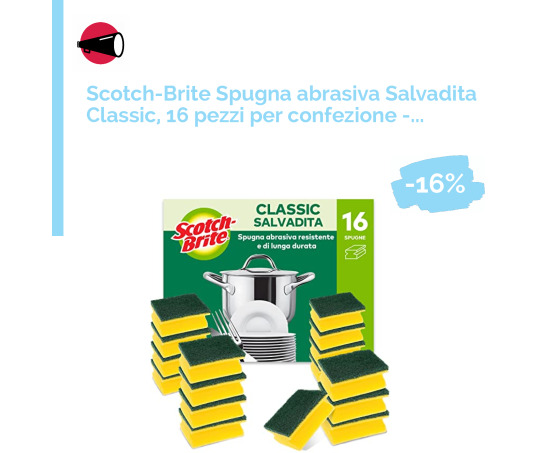
💣 Scotch-Brite Spugna abrasiva Salvadita Classic, 16 pezzi
🤑 a soli 8,39€ invece di 9,99€
➡️ https://www.scontomio.com/coupon/scotch-brite-spugna-abrasiva-salvadita-classic-16-pezzi-per-confezione-spugna-abrasiva-resistente-e-di-lunga-durata/?feed_id=100845&_unique_id=642d91a93082c&utm_source=Tumblr&utm_medium=social&utm_campaign=Poster&utm_term=Scotch-Brite%20Spugna%20abrasiva%20Salvadita%20Classic%2C%2016%20pezzi
#coupon #scotchbrite #accessoriperlapuliziadellacasa #amazon #scontomio
0 notes
Text
Scotch-Brite Non-Scratch Scour Pads, Scouring Pads for Kitchen and Dish Cleaning, 3 Pads
Price: [price_with_discount] Customer satisfaction rating 4.5
(according to Amazon product Details)
There's no need to worry about scratching your favorite stainless steel and nonstick cookware. Add some of your favorite detergent to this daily wonder and watch those messes melt away. It's great for all pots and pans...nonstick cookware too!
Product Dimensions: 3.98 x 5.98 x 0.98 inches; 0.96 ounces
Product model number : 623-10
First available date : December 10, 2015
Manufacturer : 3M
ASIN : B0196H6TKM
Country of origin : Canada
Safe for nonstick cookware.
scratch-free cleaning
Durable
Scrubbing fibers made with 100% recycled content
#ScotchBrite #NonScratch #Scour #Pads #Scouring #Pads #Kitchen #Dish #Cleaning #Pads
See more related items:
Scotch-Brite Non-Scratch Scour Pads, Scouring Pads for Kitchen and Dish Cleaning, 3 Pads
Read More:
This site is affiliated with Amazon
0 notes
Note
Question for Tom, how do you deal with the internal pressure? The A272 has a slightly protruding ring section inside, near the base. It digs into the underside of the penis causing bruising.
I wear the largest size ring and everything is comfortable when flaccid, toilet trips can be a little uncomfortable but nothing worth complaining about.
Nocturnal erections however cause me severe pain and injury and as a result I’ve stopped wearing it at night. I’ve tried using lotion but it’s not enough. I’m slightly “thicker” than average so that may have something to do with it; I was just wondering if you had the same issue, if so any advice would be appreciated.
The A272 (and A271) are comprised of a section of curved, grade 304 stainless tube (approx 33mm inner diameter), and a cage tip welded to one end, and a welded ring with a "boss" that attaches to the cuff ring. The rings at both ends are about the same diameter as the tube, and held in place by several spot welds.
I noticed that the rings at the end of the tube had a slight offset from the tube itself, so I polished mine with some find emery, and finished it with several more grades of Scotchbrite pads. However, keep in mind that these cages are selling for less than $20 USD, so the assembly is probably not super tightly controlled. Your cage may be offset a bit more, or the tack welds may be in a spot that rubs your skin.
If you are at all handy, try noting where on the cage the high spot or rough spot may be located, and then blend in that spot with some fine emery paper, and then use some finer polishing cloths to smooth it out. Our skin is surprisingly sensitive to picking up little imperfections.

172 notes
·
View notes
Text
4l60e transmission diagram pdf handbuch
4L60E TRANSMISSION DIAGRAM PDF HANDBUCH >>Download (Herunterladen)
vk.cc/c7jKeU
4L60E TRANSMISSION DIAGRAM PDF HANDBUCH >> Online Lesen
bit.do/fSmfG
06.07.2018 — ATRA-4L60 Rebuild (GM 700R4).pdf. Hier die Rep-Anleitung 2. gm_tv_cable_adjust.pdf Ich weiss ist nicht deutsch. Die Übersetzung dazu. 4L60E Transmission ATSG Technical Service and Repair Rebuild Manual 1993 Up (Passt zu: Chevrolet Caprice). Gewerblich. EUR 60,21. EUR 13,97 Versand. orion garage door opener manual · cherokee prayer for protection dreambox craft storage · mitsubishi l200 automatic transmission problemsAlthough there are differences specifically suited for Ford, this manual will serve nicely when rebuilding a ZF6HP transmission. 4L60E/4L60 Rebuild Procedures piston. Step 5: Resurface the accumulator bore with ScotchBrite. Step 6: Use the following illustrations as a guide for 19.02.2019 — GM 4L60E, 5,7 l. GM 4L80E, 5,7 l Immer versuchen so viel Öl wie möglich aus dem Getriebe zu bekommen und den Filter wechseln! General Motors Automatic Transmission Overhaul Manual (1964-1994) Cliff Ruggles demystifies the popular GM 700-R4 and 4L60 automatic transmissions. May 8, 2018 - Mercedes 722.5 Transmission Repair Manual. PDF ONLINE - THM 700-R4 4L60 (1982-1986) – ATSG (Automatic Transmission Service Group).
https://www.tumblr.com/wadakehed/698410988474630144/2016-vespa-gtv-300-owners-handbuch, https://www.tumblr.com/wadakehed/698410988474630144/2016-vespa-gtv-300-owners-handbuch, https://www.tumblr.com/wadakehed/698410988474630144/2016-vespa-gtv-300-owners-handbuch, https://www.tumblr.com/wadakehed/698410988474630144/2016-vespa-gtv-300-owners-handbuch, https://www.tumblr.com/wadakehed/698410988474630144/2016-vespa-gtv-300-owners-handbuch.
0 notes
Text
Yesterday I went to an Icecream store and called for a Scotchbrite Cone. The guy on the counter laughed a little and gave me one.
It took me a whole night to realise what I did.
0 notes
Text
Crusty
New Rock 161
Renovation
PART 4
CLEANING
&
COLOURING
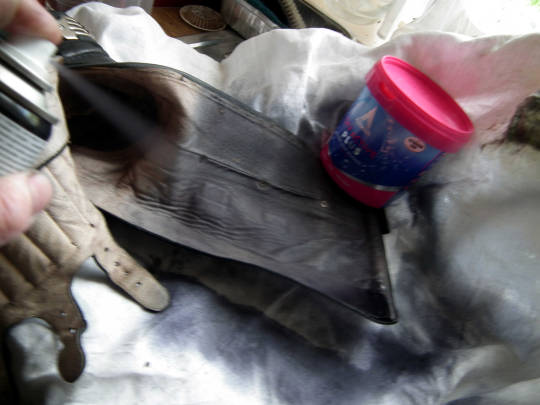
The insides are pretty discoloured, quite minging really. I know stuff like this really adds character, the smell does amazing things for followers of certain sites.
And rampant foot fungus does some pretty interesting shit too, which is where alcohol comes in handy. A good scrub with 70% proof hand gel, now readily and cheaply available thanks to covid works wonders and burns really well if you smoke. (3 100ml bottles in the British Heart Foundation charity shop for a quid!). It might kill all the wee beasties and bugs, but it won’t cure the discolouration, so it’s out with the Brillo pad, Scotchbrite or even a good stiff brush, using generic Vanish/Oxypower as a stain remover.

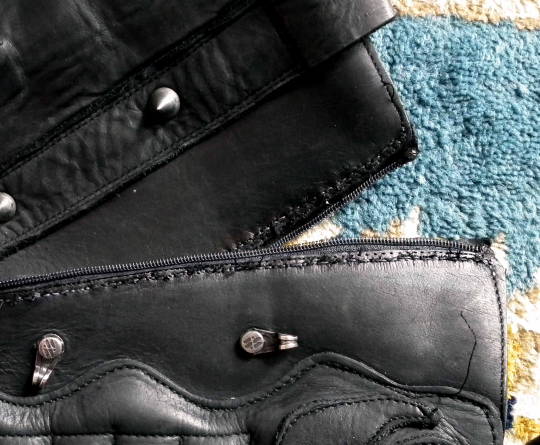
This is the right boot, the one with the OK zip. The lining was the most problematical. It was given a really good scrub with a Brillo pad, Scotchbrite and a nail brush, all mild but definitely abrasive. The other boot which I had glued was more gently treated, with less water in case it harmed the glue on the other side of the lining. Note the mottled effect and various splodges. They did not take the dye the same so gave me extra work. There could be all sorts of reasons for their effect on the recolouring, but I suspect the bloody good scrub I gave it was the original cause. Leather is quite obviously organic and was once very much alive, holding the bits of the relevant original wearer together, even if it was vegan, so it’s behaviour on recolouring is not always consistent.
The left boot was redyed with spray dye. Morrisons were selling their stock out at half price. Spray dye seems an obvious development, a god’s gift if you’re used to spray painting. I’ve used it before, and it has a nice satin finish, not too shiny. To avoid overspray onto the insole, I stuffed the foot with rags and used a brush and either suede dye or scuff cote, which is basically a liquid polish. I’ve used suede and leather dye interchangeably. I’ve never been sure of the difference. Maybe one is absorbed a bit more easily. I really don’t know.
The next pic is of brushing the scuffcote on the suede ankle lining and crevices between the white insole where spraying is a nono. The bottle and foam applicator/stopper can be seen. Because of the uneven absorbtion of the spray dye on the boot lining in general, a couple of coats of the scuff cote via the foam applicator usually evens things out. This was the case in the left boot which is seen here. The right was another matter.
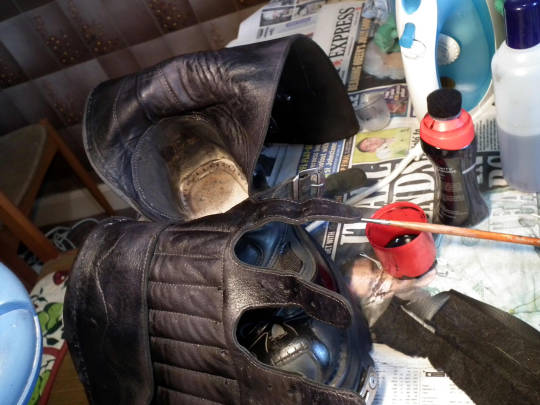
The demon head and flames embellishments have also been given scuffcote and brush on dye. Hopefully they’ll have a different shine to the whole boot.
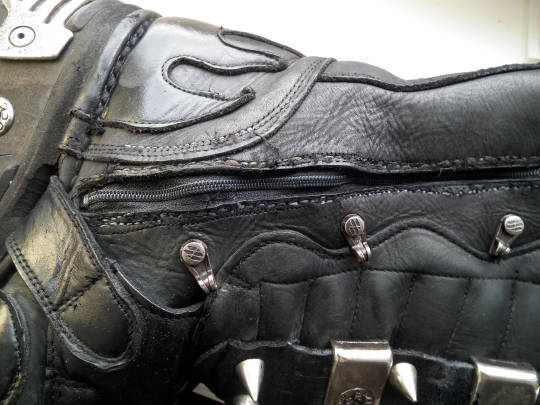
The zip and stitching are gradually taking colour. They will be black.
#New Rock#new rock#new rock shoes#metal#Shoe repair#New Rock repair#Crusty#Punk#gothic#steampunk#cyberpunk#cyberpunk aesthetic
0 notes
Photo
Use #ScotchBrite sponges, they're great for #Cleaningup Counter tops
2 notes
·
View notes
Last Seen Blogs

hafidzferdiansyahh
Pabrik Karpet Lapangan Futsal Bandung PAKET MULAI 50 JUTA, 08131

theunderestimator-3
THE UNDERESTIMATOR

muckety-mucks-i-s-goin-delux
Stop the Presses, It's 88°F and the Moon Is So Big and Yellow

iconsgirlsnu
icons girls