lildohnut
munch munch
resource blog for sammie. themes, tutorials and more. ✨
66 posts
Last active 2 hours ago
Don't wanna be here? Send us removal request.
Last Seen Blogs
hamianderson
Everything and Nothing

dknylocksmith-blog
DKNY Locksmith

honkaigakuen
dora ☆
angelscandles
Donna☆
Text
INTRODUCING... GIFMAKERHUB!
GIFMAKERHUB is a new Discord server aimed at gifmakers of all skill levels. This server is intended solely to be a low-pressure place for creators to hang out and share resources: no obligations based on creation or activity level!
To join this community of gifmakers, you must:
Reblog this post
Be a gifmaker
Be 14 years old or older
Click the link here for server access!
251 notes
·
View notes
Text

roll deep | preview , code
simple commissions page with anchor links for easy navigation
responsive design
sidebar with open/closed toggles, anchor links to every section
topbar with image, title page, links for follow, askbox and tumblr dashboard
header with title, text and quick links
contact section with icons for social media, dm link and email
terms section with text, numbered list, bullet point list, do/donts
prices section with optional type, price, image, text
how to commission/cancellation section with text, subtitles, numbered list and bullet point list
faq section with text, styled question and answer, tumblr askbox iframe
footer with last updated date
is something wong? need help? let me know!
if you’d like, you can support me on paypal or ko-fi
396 notes
·
View notes
Text
Friday, November 17th, 2023
🌟 New
On web, we’ve added a keyboard shortcut for deleting posts. Hit the D key while you’ve got a post in view, and you’ll see the “Are you sure you want to delete this post?” prompt (if it’s a post that you can delete).
Also on web, we added the ability to pause (and resume!) your blog’s queue. The button can be found at the top of your blog’s queue page, along with the rest of your queue settings. One quick note: If you have Queue 2.0 enabled (in Labs), you’ll need to disable it in order to see the pause/resume button.
🛠 Fixed
When using Tumblr in a mobile web browser, blog mention suggestions now fill the full width of the dropdown.
🚧 Ongoing
Nothing to mention here today.
🌱 Upcoming
We’re working to fix a longstanding issue that prevents folks from liking posts on blogs using custom domains.
Experiencing an issue? File a Support Request and we’ll get back to you as soon as we can!
Want to share your feedback about something? Check out our Work in Progress blog and start a discussion with the community.
Wanna support Tumblr directly with some money? Check out the new Supporter badge in TumblrMart!
408 notes
·
View notes
Text

Hey guys!! Here's a tutorial on how to create those little animated doodles for your gifs so that you don't have to look for the exact overlay you want for hours 👍 This tutorial was requested by @fabines :) It's a long process but it's not too difficult, you just need to know the very basics of gif making! The steps are below the cut :)
1.
First we're going to have our gif ready, and make sure you know how many frames it is!! It should preferrably be an even number! (or a divisible number)

2.
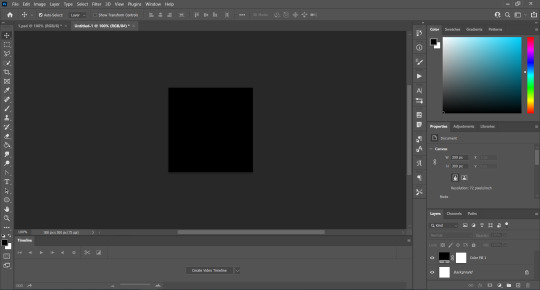
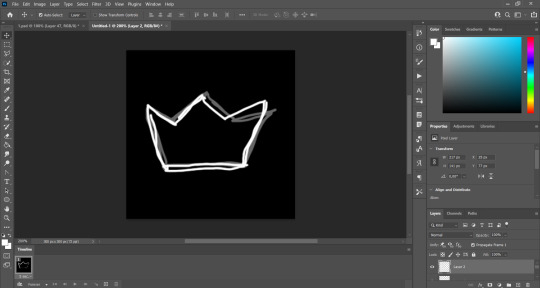
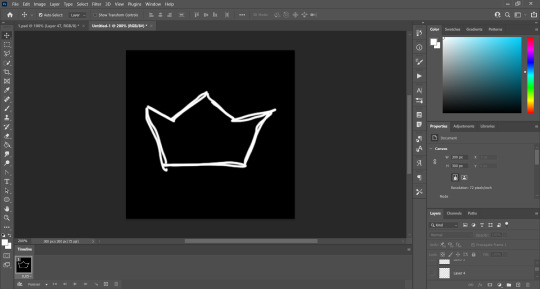
Now we're going to make another gif, which will be the lil animated doodle. Go to file > new or press ctrl+n. Create a new document that's going to be 300x300 px, and we'll make the background black:
3.
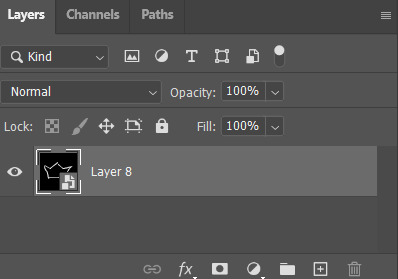
Now we're going to use a brush to paint the doodle! We're gonna set the size to 4px-7px depending on how thick you want it to be (here i used a 4px brush) and the hardness to 100%, and we're going to trace our doodle on a new layer:
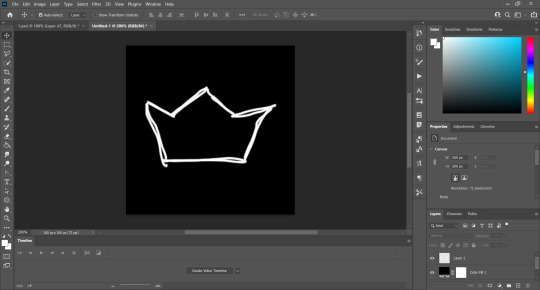
It does not have to be perfect!! It took me a while to get that crown and it looks half assed 😭 if you can use something other than your mouse like a tablet or something i definitely recommend you do it :)
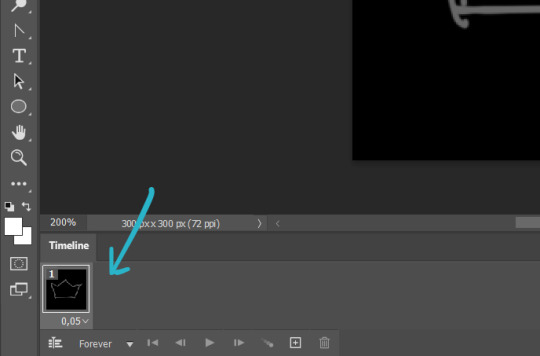
Now we're going to click on "Create Video Timeline":

Now the bottom of our workspace is gonna look like this:

We're going to click on those three little boxes on the bottom left to convert to frame animation:

And there's that! Now for the slightly tricky part.
4.
We're going to set the layer where we drew the doodle to 40% opacity:
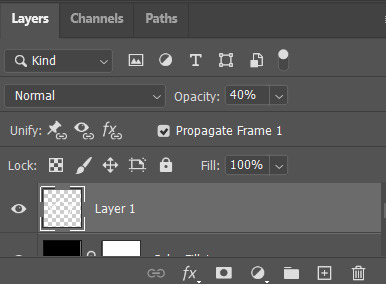
And on a new layer, we're going to trace the same doodle:
As you can see it doesn't look the same and it's because it doesnt have to be, that's how we're going to make it look animated!
We're going to repeat that process a few times! What i do to not get confused is that for examples when i'm going to draw layer 3 i first make layer 2 invisble, and then for layer 4 i also make layer 3 invisible and so on
My gif here:
is 40 frames, which means i can make 8 different variations of my doodle and duplicate each 4 times. This is why it's important that you know how many frames your gif is! And it's even much easier if it's an even number.
But what are we going to do to make it look animated? Well, it's all about using the timeline! First, make sure that the frame delay is set to the same as your base gif. I usually set it to 0,05:
Now our first layer can go back to 100% opacity, since we're going to use it too:

So this is what we have so far:
Only layer 1 is visible. So what we're gonna do is click this little plus icon:
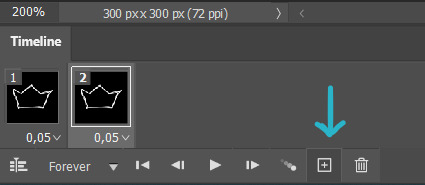
It duplicates our frame. And on our layer section we're going to make layer 1 invisible and instead make layer 2 visible, and you'll notice that now our first two frames correspond to our first two layers:
And we're going to do the same thing for each layer! Add a new frame, make layer a invisible, make layer b visible, and so on! Here's what my crown looks like after doing this process with my 8 layers:
As you can see it's too fast, so that's why i'm going to duplicate each frame 4 times, so each variation has 5 frames on the timeline, and that's how we're going to get the same amount of frames as our base gif:
So once we have our animated doodle it's very easy from here! We're going to click on the bottom left again to convert our frame animation to a video timeline:

And we're going to select all of our layers (ctrl+alt+a in windows or just go to select > all layers) and convert them to a smart object (right click > convert to smart object):
So we're going to select our doodle and copy + paste it on top of your base gif, and we're going to set it to lighten or screen, whichever you prefer:
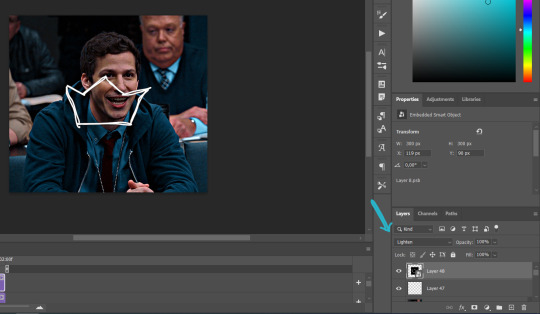
So now we place our doodle where we want it, make it whatever size we want, rotate it... and we're freaking done!
I hope at least half of this made sense akdhsk if you have any questions feel free to send an ask! 💙
561 notes
·
View notes
Photo
MISC. LAYOUT TEMPLATES
Through the following drive link, you’ll find 12 misc. templates, mainly aimed for gifmakers! There are 5 basic layouts, 3 shape templates and 4 design templates.
I DO NOT CLAIM OWNERSHIP OF ALL THE DESIGNS. However, please credit the design or shape templates where you can!
To fill this folder up a bit more I’m happy to take requests on any layouts you would like a psd for with the dimensions.
Each template in this folder relatively follows the tumblr gif guides (gutter width and gif size) so it takes the hassle out for you. As well as that, design templates each come with the relevant fonts, or similar fonts.
Please rb if you are going to use these! You can find the pack here ꨄ
445 notes
·
View notes
Text
i think we should have a custom blog theme renaissance
22K notes
·
View notes
Text
How to create custom photoset/gifset templates from scratch in photoshop
Hey all! I’ve seen many tutorials about how to use pre-made templates, but I never seen an actual tutorial on what to do if you want to create your own templates in case everything you find doesn’t fit your needs, here is one of the cases in which it can be used (no offense to the people that made these kind of tutorials, that simply means that I’m blind lol). I hope it’ll be useful and feel free to write me if you have any questions. Let’s get started!

Pick your scenes. That’s simple. Just decide how many gifs you want to include in your template and pick your favorite scenes.
Create a new document. In my case, I created 540x540 document.
Time to create the grid. That’ll probably sound dumb af (and it is dumb af 💀), but I never made grid gifs before bc I always thought that it's like.. manually measuring the gaps between each gif, then figuring out what size you actually want the gifs to be, making a new layer, filling it with a shape of the required size (and man am I bad at math), blah-blah-blah.. guess what? WRONG! All you have to do is go to view > new grid layout and you’ll see this window:
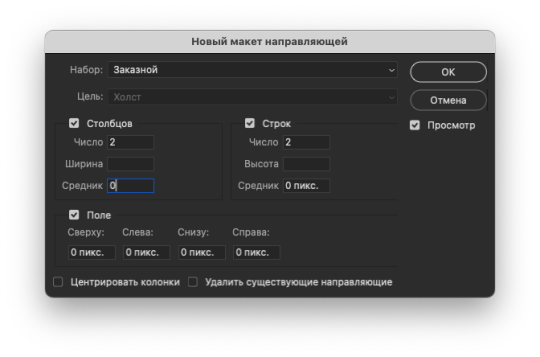
Here you can enter your number of rows, columns, and gutter (the number of space between each gif in pixels). Margin can evenly divide your whole document, we’ll get to that later. For this tutorial, I’ll keep things simple. I made my basic 4 gifs layout, gutter between each gif is set to 3 px for both rows and columns. After I click ok, my canvas looks like this
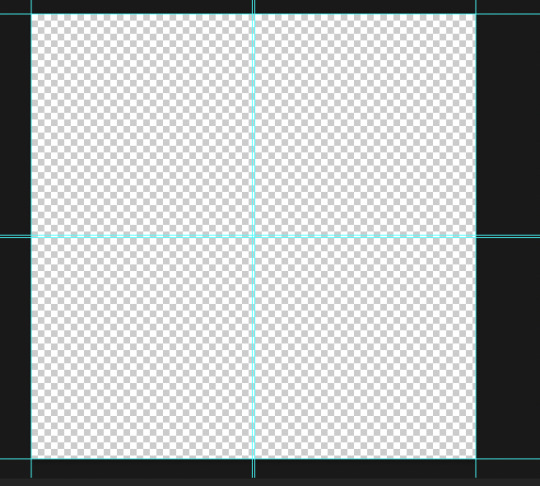
Pretty neat for a couple of clicks right? Now, let’s insert some gifs. Before doing that, go to view and make sure overall snapping and snapping to guides, grids, layers and document bounds is check bc we’ll need that. Now take your regular selection tool, and drag it across one part of the document until it snaps to the guides we created

Here's my finished template (i just duplicated the same layer 3 more times and positioned it accordingly)
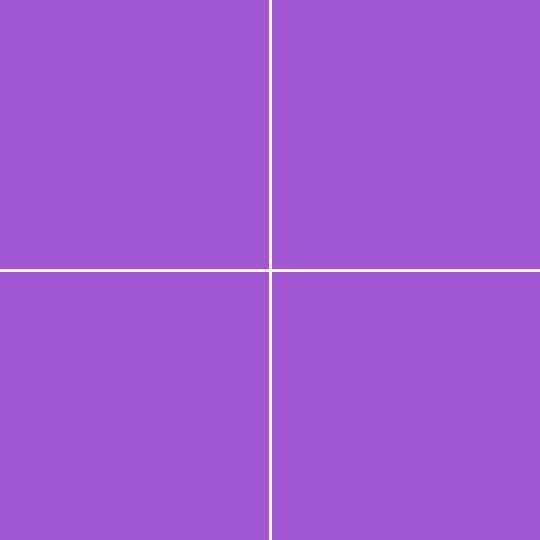
the actual size of the gifs doesn't really matter because we'll use clipping mask and resize them to fit our shapes better
How to use "Margin" section
That section is useful when you already have something in your template, and want to fill the left off space. For example:
I made this

But it's completely empty on the right side, so i go to view > new grid layout, and here's what i do

it adds a divider between gifs that are ready so i don't have to measure anything again and guessing how far or close these new gifs should be to/from each other. If i want, i can also change the top, bottom or left number to split this part of the document in half and add another gif. So i end up having 7 gifs on my canvas in total.
New guide from shape function
This function tries to follow whatever shapes you have on your canvas and create new guides according to those shapes (not very good with complex shapes tho, usually you'll end up with many guides chaoticly placed all over your document, so it's all trial and error). Here's another example of custom layout i made (still epirimenting with these).
And that's it folks! That was pretty short huh. Feel free to write me any questions of ypu have them and happy creating :)
506 notes
·
View notes
Photo
HOW TO: Make a Pantone “Color of the Year” Gif
A few people have asked about my Pantone sets which use the “Color of the Year” swatch design. So, here’s a full tutorial with a downloadable template of my exact overlay! Disclaimer: This tutorial assumes you have a basic understanding of gif-making in Photoshop.
Keep reading
960 notes
·
View notes
Photo
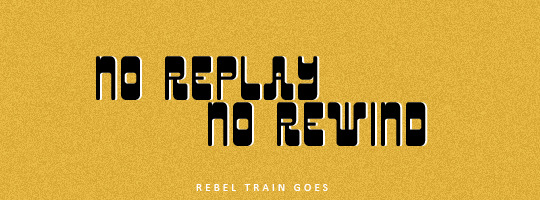

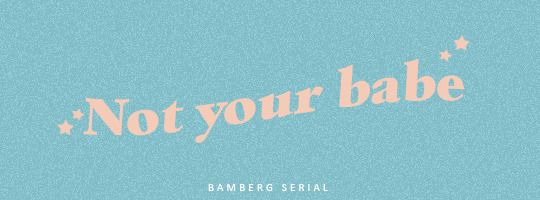
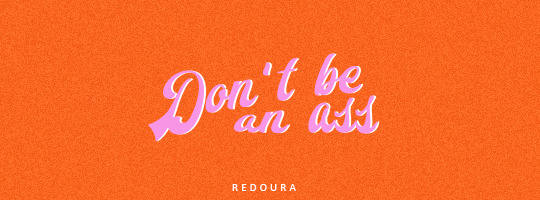

Fonts for texts (pt3)
Please, like or reblog if you download it
Rebel train goes
Vandmelon
Bamberg serial
Redoura
Dk bungehuis
3K notes
·
View notes
Text
GIF LAYOUT/TEMPLATE PACK!
i've had my beloved blog for what feels like forever, but today it turns 13, so in celebration and as a little thank you to all of you for following my nonsense and sticking around, i've decided to share some of my favourite layouts that i've created.
PLEASE credit if you use any of these! either link to this post or the original sets linked below!!! (except of course the sharpening actions!)
HEXAGON LAYOUT - this is my favourite kind of set to make so i hope y'all have as much fun with this as i do. there's two folders of the layout, one is just the reverse of the other depending on how you want your gifs to look, just clip your gifs to each hexagon and watch it all take shape!
[first seen here]
PALETTE MOVIE POSTER - this psd has folders for each element, so the text layers are labelled in a group, and then the palette boxes are grouped together too, just fill each layer clipped to a palette square with your chosen colour!
[first seen here]
LETTERBOXD TEMPLATE - i almost didn't share this one because of the labour of love it was to make, but feel like i'm so proud of it, it deserves to be shared. each movie space is split into a group, and within that there's the folders for the star ratings. you can toggle on/off the heart/review/date (as the ratings change you'll just have to shift over these logos to keep things uniform!) and clip your gif over the shape for the movie poster.
[first seen here]
DIAMOND MULTI GIF LAYOUT - the most simple of all the layouts, but it got a really great reaction so i'm throwing that in here too, again like the hexagons, there's two versions. one being the reverse of the others, just clip your gifs to each shape.
[first seen here]
SHARPEN ACTIONS - VERSION #1 & VERSION #2 - have been asked about sharing these recently so thought i'd add this in, i mostly use version one but occasionally it's too sharp for certain media, so i use version two, which is just the same thing without the last extra sharpening!
902 notes
·
View notes
Text
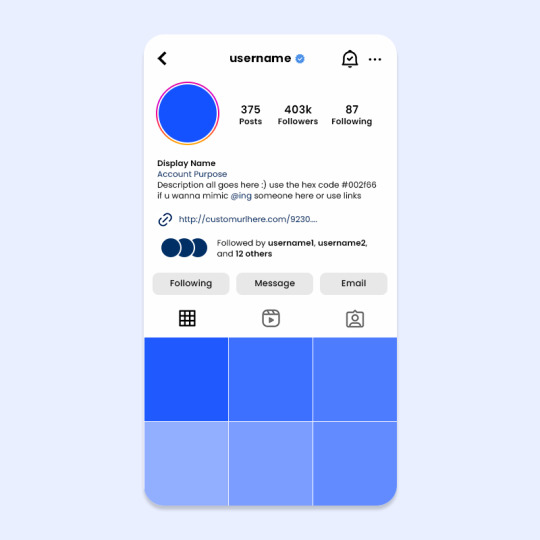

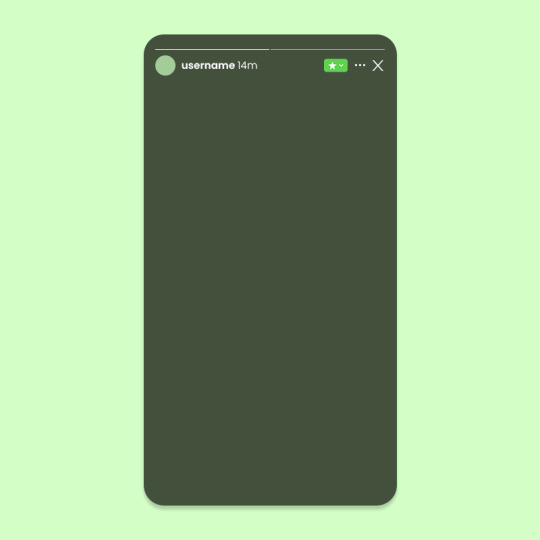

DAYSLILY DELIVERY 💌 template #34: instagram.
by clicking the source link, you will be directed to a psd download of the template shown above (via deviantart). this is one psd file sorted into four main folders so you can achieve each template shown above. each and every layer within this template is labeled to make it beginner friendly. all you need is a knowledge of clipping masks.
this template was requested a while ago in my discord server :D i'm always open to template suggestions, so feel free to leave them!
usage guidelines: read here.
fonts needed: poppins (dl via google fonts).
998 notes
·
View notes
Text
get to know me meme
I always see variations of 'get to know me' memes on here and I figured I would make my own and share it in case anyone else is looking for one too. Feel free to edit/change/add anything to make it more fitting to you 💞
50 films (live action)
30 films (disney/pixar/animation)
30 shows
20 actors
20 actresses
15 male characters
15 female characters
15 ships
10 family/friendship dynamics
8 notes
·
View notes
Photo

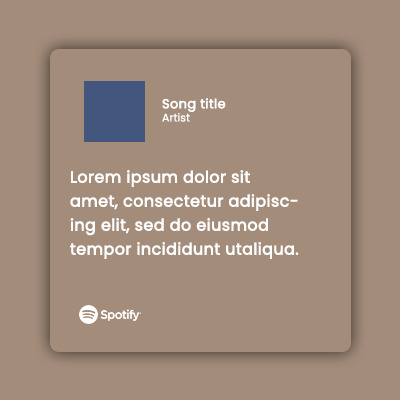
♡ bet you wanna
a template by cozysip.
by clicking in the source link ( deviantart ) you’ll find 01 psd template made by me from scratch. credit is not needed , but do not claim as your own ! this template was inspired by spotify ! if you enjoy this or you use it, please reblog or like this post . thank you !
781 notes
·
View notes
Note
I would love if you could give some tips on making blended gifs with two dominant colors - for example your friends cheesecake set. I would love to make like that but I have no idea were I’m going wrong
friends cheesecake set
hi!! blending is honestly so hard to give tips on bc it's so dependent on the scenes but i can try! below, i link some tutorials that i have used and try to explain the methods i personally use :)
btw this is very image heavy with gifs as visuals to try and explain my processes!
the tips i give assume you have basic giffing knowledge and at least some knowledge and experiencing of both blending and coloring. if you have any questions on anything i explain, please don't hesitate to come ask!
firstly, here are some very very helpful general blending tutorials that i have used in the past: this one and this one go pretty in depth (both by the lovely @yenvengerberg.
secondly, here are some coloring/color manipulation tutorials that i love:
general color manipulation (different methods) again by @yenvengerberg
manipulating the background by @fionagallaqher
coloring gifs for rainbow sets! by @rhodeys
now, as for combining the two techniques, i use trial and error. again, both blending and coloring are very fickle and the methods can change based on the scene i'm using.
there are two ways that i blend gifs with two dominant colors:
color the gifs separately and then blend
or blend the gifs together and then color the whole gif
first method: color first and then blend —
i usually use this method for gifs with little movement and where the colors can be easily manipulated (see the coloring tutorials i referenced above).
an easy way to tell what colors are dominant in a gif, go to the hue/saturation adjustment and turn saturation all the way up to 100.
for instance, this gif of anakin has little movement and i can see the background has hints of blue.
this gif will be easy to manually color on its own, seeing as i can use selective color and brushes to color the background. here is the same gif but now i have colored the background, and i used the method outlined in this tutorial:

NOW, moving onto the second gif. the second gif/scene i chose also has little movement and a background that can be easily manipulated:

using the same method as the first gif, i'll now color this padme gif on its own.
TIME TO BLEND!!! after converting the two gifs to smart object and putting one on top of the other, i set the top object to screen. for this example, i put the padme gif on top of the anakin one. this is what the blended gif and my layers panel looks like:


now, i'll create a layer mask on the padme gif and get rid of any parts i do not want or expose any areas of the anakin gif i want to see.
next, as you can see, the left side of padme's face is purple and pretty transparent. so in order to make it more visible, i will add a blank layer in between the two smart object and use a black brush to paint the areas i want to see (see this tutorial!!)
and here is the final blended gif:

now, you can totally stop here, but for me, it's pretty purple-heavy and i'd like to see some more orange. so i simply take an orange brush and color some areas i'd like to add more orange, and then set the layer's blending mode to color.
and HERE IS THE FINAL PRODUCT!
second method: blend first and then color —
i usually use this method when at least one of the gifs/scenes i want to use has colors or a background that is difficult to manipulate. or sometimes i do this because i just don't know what i want my coloring to look like and blending first gifs me a better sense of the whole gif.
there are two different ways you can blend first and then color. using the brush tool or the gradient tool.
brush tool:
using the brush tool is the best method when there is little movement and when you have distinct subjects to color around.
for instance, this gif of rhaenyra. while there is little movement, the background is a similar tone to her skin so it would be difficult for me to use selective color.
i could possibly use a brush to color the background, but i do not know how that will blend with my other gif and i don't know what coloring will work best overall. this is why i want to blend first!

and now for my second gif. similarly to the rhaenyra shot, the background of this alicent shot has very similar tone to alicent's skin color, so selective color would not work:
TIME TO BLEND!! i do the same thing as the last method (placing one smart object on top of the other) and this is what it looks like:

following the same steps as last time, i erase what i don't want and paint over areas i want to be more visible. this is what i came up with:
because there is that orange light on the left hand side of the gif (on rhaenyra's side), i decided to play into that and go with orange as one of the colors. sometimes the color scheme i go with depends on the colors i find in the gif bc that's just easiest!
now is when i use a brush to color the background! i color the left side with an orange brush and set the blending mode to 'color':

for the second color, the background on alicent's side is kind of neutral so i'm going to pick any color i want! i decide to go with green bc that is her color lol, and i do the same method, coloring with a green brush and setting the blend more to 'color'.
this is what i came up with:

you can totally stop here, but i like adding colors to the bottom, orange on the right and green on the left, so it kind of ties it all together.
HERE IS THE FINAL PRODUCT! (notice how in the bottom left corner, there is some hints of green. similarly for hints of orange in the right corner)

gradient tool:
another tool i use is the gradient tool (not to be confused by an adjustment layer).
this tool is really good for blended gifs that have lots of movement or where there are subjects that are difficult to draw around with a brush.
for example, this blended gif of yennefer has lots of movement so the brush tool may not be the best method.
here is where the gradient tool comes in! i add a new layer and draw a gradient in the direction i want. this is what my gif and layer panel looks like:
next, i change the blending mode. this heavily depends on the scene and also what looks good to your eye, but i usually alternate between 'overlay', 'soft light', or 'color'.
for this gif i chose 'overlay' and this is what it looks like:

again, you can stop here...BUT i want to go back in and intensify the pink/purple color at the top in the white areas. to do this, i am going to use a large soft brush and paint areas, setting the layer's blending mode to 'color.'
HERE IS THE FINAL PRODUCT:

and those are my methods!! if you made it this far, thank you for reading and following along. i hope that this was at least somewhat helpful and huge shout out to @yenvengerberg who's coloring and blending tutorials basically taught me everything i know.
if you still have any questions at all pls feel free to hope in my inbox :D
135 notes
·
View notes
Text
Warning: do not delete any sideblogs
I’ve been seeing it happen to a handful of people, but apparently if you try to delete your sideblog you will end up deleting your MAIN tumblr account entirely as well
I don’t know if this is a bug or something, but I’ve seen it happen to ~4 people now, so until this possible bug gets worked out do NOT delete any of your sideblogs unless you want to risk deleting your account entirely
52K notes
·
View notes
Photo
theme sixteen ♡ by userbru
live preview / code
option for 400px, 500px and 540px width
option to change post margin
option for scroll to top
day/night toggle
300px sidebar
4 links
custom desktop description
unnest captions
like/reblog buttons
custom select text/background
base code by seyche
~i do not claim any of the scripts, fonts or icons used on this html unless stated. full list of credits in the html. ♡
i am accepting theme commissions. for more information, dm me on here or on @lizzies. making content/resources is my main source of income on the internet, so if you’d like to support me, buy me a coffee?
581 notes
·
View notes
Photo
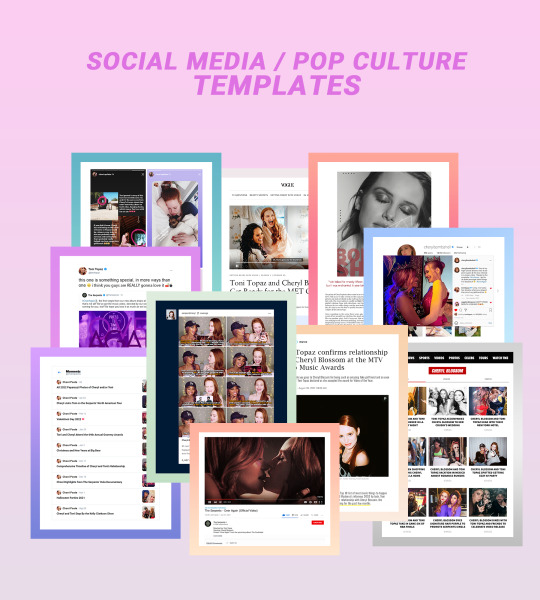
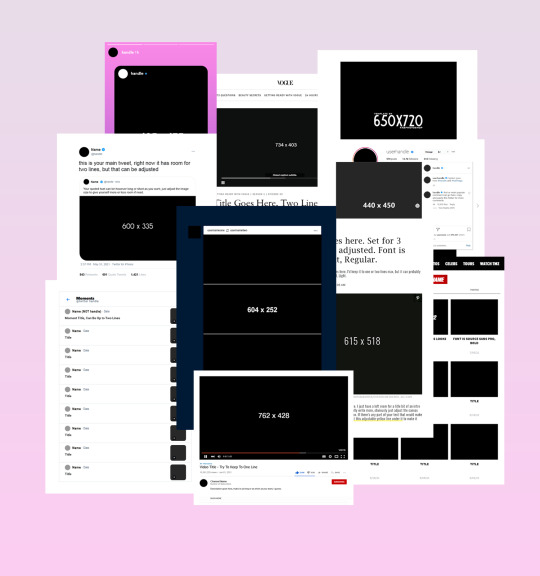
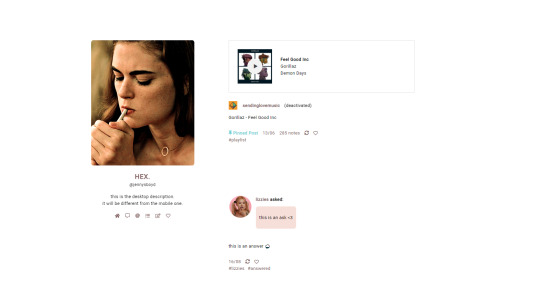
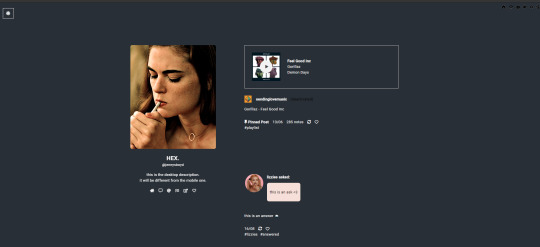
SOCIAL MEDIA/POP CULTURE TEMPLATES
last year, i spent way too much time putting together social media/pop culture edits for a famous ship au, and despite only ever receiving one request inquiring about the templates for said edits, i finally decided to put all my hard work to use and share the templates i made for it with anyone that might be interested.
some of them i made myself from scratch (twitter moments, vogue page, tmz tag, people magazine dot com article, tumblr gifset) while others i built updated and bigger versions from various templates from other people (of which i’ll try my very best to give proper credit to in this post!). these were up to date at the time i made them eight months ago but might be/probably are slightly outdated now but what can you do! free free to make any necessary tweaks to them if you’re a stickler for that kind of thing like i am.
i tried my best to organize each psd to be as simple as possible, included fonts when possible/needed, as well as picture sizes and any other limitations or tips. i hope someone else finds use for these and has as much fun creating things with them as i did!
INFO:
download link
please like/reblog if you download
credit isn’t necessary but an inspo link to the og post would be cool
basic knowledge of photoshop - especially clipping masks - is necessary
templates included: tweet with reply, instagram post/page, youtube video, tmz page, twitter moments, tumblr gifset, people dot com article, vogue getting ready with article, magazine interview, instagram stories
base credits: magazine base by fabphotoshop, instagram base by aqualvng, youtube bases by itsporcelain & luc van loon, twitter bases by unblast and sharkresources, instagram story base by thlaurgraphics
enjoy!
2K notes
·
View notes