
meatismurderbutalsodelicious
Meat is Murder (But Also Delicious)
A Cooking Blog for the Pandemic
35 posts
Don't wanna be here? Send us removal request.
Last Seen Blogs

you-cant-spell-subtext-without
later, ho nuggets.

youremysunshine8
Sunshine on a Cloudy Day

fuckyeahancestors
FYHomestuck Ancestors

keito-hair-salon
keito hair salon

spice-tree
Untitled
Text
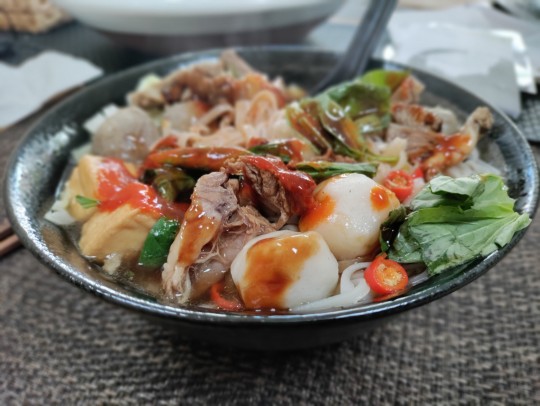
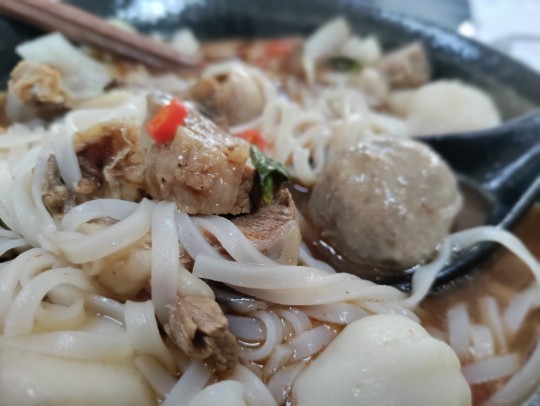
Made a lovely beef pho with gorgeous beef shortribs
2 notes
·
View notes
Text
A walk on #dollymount led to a fresh Atlantic #shrimp salad with #marierose sauce followed by a #spaghettiallevongole with fresh clams. #homecooking #ireland🇮🇪
instagram
0 notes
Text
OK, this was amazing. Slow-roasted on the grill for three hours. Irish #spring #lambshoulder with broasted potatoes and a snap pea, petite pois medley. #homecooking #ireland🇮🇪
instagram
0 notes
Text
That's one spicy meatball 🧆. #meatballs with #penne #homecooking #italianfood #ireland🇮🇪
instagram
0 notes
Text
This one is a winner. #beefstew with mushroom and port wine. #homecooking #ireland🇮🇪
instagram
0 notes
Text
That worked a treat. Crispy on the outside, soft and flaky cod on the inside, served with sautéed Haricots Verts and a rice pilaf. #homecooking #ireland🇮🇪 #cod
instagram
0 notes
Text
Mmmmm... #phillycheesesteak #homecooking #ireland🇮🇪
instagram
0 notes
Text
First attempt at panko-encrusted cod fillets. #homecooking #ireland🇮🇪
instagram
0 notes
Text
A Lazy Lasagna (or, a Better Baked Ziti)

Being a suburban boy from "Cheever Country", my husband, Bob, is a huge fan of suburban favorites like Baked Ziti (something I actually dislike).
However, I found myself with some pancetta, Italian sausage, tomato passata, garlic, onion, basil, Mozzarella, Parmigianino Reggiano, fresh cream, and a half-pound of Mafaldine pasta earlier this week and came up with this tasty compromise.
Ingredients
4-5-ounces Pancetta
8-ounces Sweet Italian sausage, unskinned
14-ounce can of tomato passata, or chopped tomatoes
3 tablespoons tomato paste
3 cloves of garlic, finely minced or crushed
1 white or yellow onion, finely diced
1 or 2 springs of basil with leaves (no need to chop)
Extra virgin olive oil
Sea salt
Black pepper
1 cup of grated Mozzarella
1 cup of grated Parmigianino Reggiano
8-ounces of fresh cream or full milk
2 tablespoons of butter
2 tablespoons of corn starch
1/2 teaspoon white pepper (optional)
Half-pound of Malfadine pasta (or Tagliatelle or Pappardelle, they're very similar)
In your favorite pot or pan, slowly sauté the pancetta in one or two tablespoons of olive oil. Season to taste with crushed black pepper and sea or kosher salt.
Both the pancetta and the sausage are going to give off a lot of fat so you don't need much oil to get started.
Once the pancetta has nicely browned and rendered add the ground sausage and brown it. Once it's released its oil and also has cooked, add the crushed garlic, onions and basil stems and leaves.
When it's all cooked down and glassy, add one can of passata/crushed tomatoes, one can of water and three tablespoons of tomato paste. Bring to a simmer, stirring to make sure everything is well mixed. Let simmer for an hour.
Break the Malfadine in half and add it to boiling water. No need to salt as both the meat sauce and the cheese sauce are salty enough at this point.
As your waiting for the pasta to cook and the meat sauce is simmering, get a small saucepan and with the corn starch, white pepper and butter create a roux.
Let that cook for a good minute or two to make sure it's integrated and the flour is no longer raw, then add your cream/milk and half a cup of both the grated cheeses.
You want this over medium heat and you need to keep staring with either a whisk or a fork to ensure the cheeses melt and incorporate into the milk/cream.
Once this comes to a light boil it will thicken very quickly, so lower the heat and keep stirring to ensure perfect smooth cheese sauce.
When you’re ready, pre-heat your oven to C200-F390 degrees for at least a half-hour.
Next, grab a glass baking or casserole dish. I used one that was about 8-inches by 12-inches and 2- to 3-inches deep. The pasta should be cooked to al dente, strain out the water, but don't rinse.
Ladle in a layer of red sauce into the baking sheet, then just fill the pan, willy-nilly with the pasta, it doesn't have to be perfect, but you want even distribution.
Add more meat sauce, and then some cheese sauce. Repeat, until all the pasta, meat, and cheese sauces are integrated into the baking dish.
Now, sprinkle the remaining grated cheeses over the top of the casserole dish and stick it in the heated oven for 25- to 30-minutes, or at least until the top of the pasta dish is a lovely, crispy brown color.
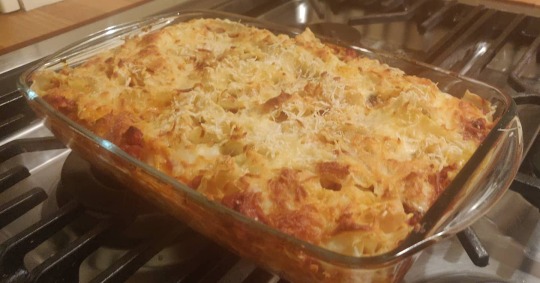
An easy delicious midweek meal on a cold winter's night.
4 notes
·
View notes
Text
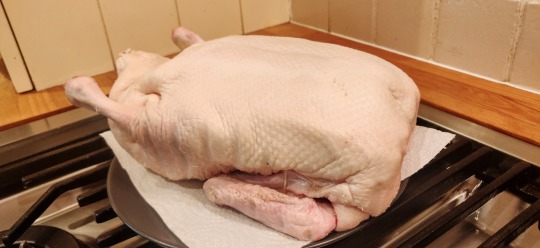
Peking Duck for Beginners

Ireland is all about the produce and the farming. It’s about tender beef, lamb and pork, fresh seafood and bountiful, beautiful poultry.
All at remarkably reasonable prices compared to say our former homes in New York and Hong Kong. Admittedly, when you choose to live in two of the most expensive cities in the world, costly groceries and the dreaded “gourmet stores” and “artisanal” anything comes with the territory.
Not so in Ireland. While downtown Dublin and some of the more affluent towns have shops and markets with pretensions, the major supermarkets and local produce stores, butchers and fishmongers overflow with reasonable prices, gourmet quality products.
I walked into the local Centra supermarket on the Tuesday before Thanksgiving and saw they had fresh duck for sale, an almost 5-pound bird, locally raised, for €6. Yes, you read that correctly. And these were beautiful!
Thanksgiving was upon us and both Bob and I are not much for sentimentality these days, what with the United States verging on failed state status.
But, you know what? I've always hated Thanksgiving. Don't miss it. The forced bonhomie. Turkey. Weird relatives. Shit television and phony patriotism. This year, with added death.
And turkey’s are too much work with too little reward—the breast meat is notoriously dry, and the dark meat often cooks first before the rest of the bird, so in the end you need gravy and cranberry sauce to save it.
So, with that in mind, I pulled together a pretty authentic Peking Duck recipe.
Full Disclosure: I Googled a lot of recipes and while many of the fast and easy recipes use honey to create the glaze, as well as using jarred Hoisin sauce, I wanted to go with as many natural ingredients as I could find to make it as homemade and natural as possible.
Ingredients
1 4- to 5-pound whole duck
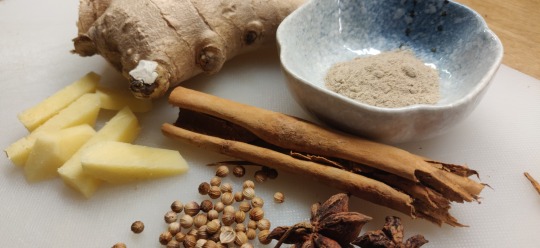
1 2- to 3-inch cinnamon stick
3 1-to 2-inch pieces of fresh ginger
1 tablespoon cilantro/coriander seeds
1 tablespoon Chinese Five Spice (if not available, 1 teaspoon of ground nutmeg)
1 teaspoon white pepper
2- to 3 cloves
1 teaspoon distilled white vinegar
2- to 3-tablespoons light soy sauce
2- to 3-tablespoons dark soy sauce
1 tablespoon honey
1 orange, quartered
2 to 3 green onions
½ cup plum sauce or Hoisin sauce depending on availability
1 teaspoon palm or brown sugar
One large scallion, finely chopped
One stick of celery, finely chopped
A handful of fresh cilantro/coriander, roughly chopped
I left the duck out to come to room temperature and let it become more pliable. Ducks are fatty fowl with a meat that has a sweet, almost beef-like quality.
Don’t let the size of the duck fool you, in all honesty, one duck barely feeds to adult grown men, so if you’re going for a party of four to six, I recommend TWO ducks and a lot of side dishes. LOL!
In a traditional setting, the Peking Duck is slow roasted, hung indirectly over the fire in giant earthen-ware ovens with the rendered fat dripping away, keeping the meet juicy and the skin crisp.
All I got is a gas-oven, so, improvisation is key.
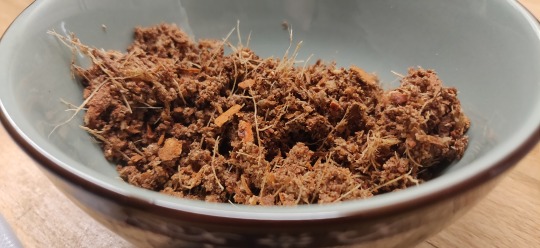
While the duck came to room temperature, I made the paste of what was to become the the basting sauce.
Take half the cinnamon stick, chop two to three inch slices of peeled ginger, a handful of the cilantro, the cilantro seeds, white pepper, salt and cloves, the five spice or nutmeg and throw that into a food processor.
Now, I read multiple recipes and watched several videos and decided it was easier to cut to the chase.
Peking Duck is defined by its aromatic sweetness, its crispy skin and succulent flesh kept moist by the slow-roasting method which renders the fat through the meat on its way out of the bird.
So, instead of just seasoning the cavity of the duck with a portion of the paste, I opted to stuff the bird with two quarters of an orange, three to four-inch pieces of ginger, the other half of the cinnamon stick, crumbled, two to three star anise and and a tablespoon of cilantro seeds.
My concern was first and foremost keeping the duck meat moist. This was my first attempt at slow-roasting a duck of any kind and I wanted to assure maximum flavor and tenderness.

Next, I added two tablespoons of light soy sauce, one tablespoon of dark soy sauce and a tablespoon of vegetable oil to the spice paste to create the sauce that I was going to baste the duck in prior to, and during the roasting process.
I used a roasting tin with a tray that’s about three-inches deep. I lined it with tinfoil and added about an inch-and-half of water.
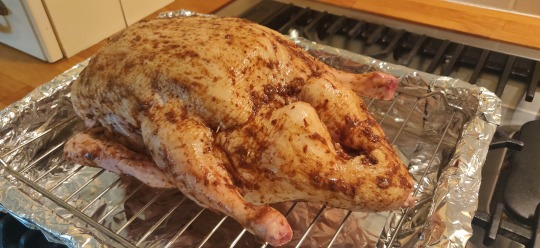
Next, with a sharp paring knife I pierce the duck’s skin, about a dozen to 20 piercings on the top of the duck and the bottom. You want all the fat to render out during the cooking process.
As you begin to brush on the sauce and prepare it for cooking, pre-heat your oven to C200-F390 degrees for at least a half-hour.
Once the oven is at the desired temperature, place the duck in the center rack of the oven and lower the temperature to C120-F250.
This was about a five-pound duck, so every thirty minutes, I would take the duck out and turn it over on the roasting tray. I would also pierce the skin, as during the cooking process, the skin tightens and sometimes the initial piercings reseal.
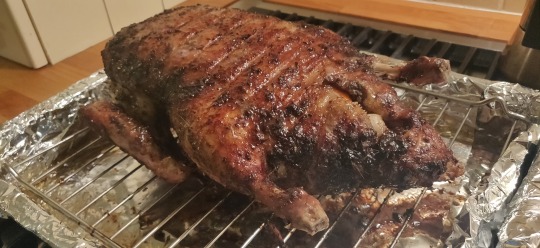
I rotated the duck every 30 minutes for 3 hours. Each time I flipped the bird, I would brush over the remainder of the glaze. As you start to run out of glaze, just add some soy sauce to the mix, to extend the sauce. It’s already packing a lot of flavor, so you’re not diluting it at this point, since most of the herbs and spices are on the duck.
Following the three hours, I turned the over to the grill for 15 minutes to get a nice crispiness to the skin. Watch it carefully as you don’t want it to burn.
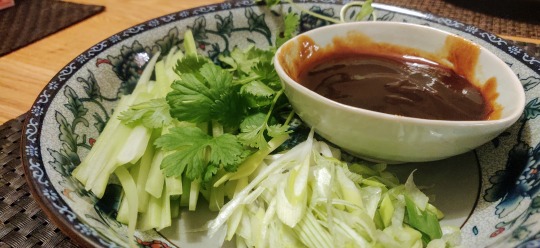
Next, I chopped up celery and scallions into a fine julienne, as well as fresh coriander/cilantro. You can use either plum or hoisin sauce with the small pancakes. Plum is preferred, but might be hard to come by if you don’t have a dedicated Asian market.

I’ve tried to make this as authentic as possible, and while visually, it lacked the beautiful deep orange sheen of a Peking Duck from an authentic Chinese restaurant, the flavors were spot on and I can’t recommend this recipe enough for fans of the dish.
Enjoy!
0 notes
Text
Korean-Style Cabbage Omelette

I’m obsessed with the South Korean street food videos on YouTube, specifically all the variations of egg, cheese, meat of some kind and bread, all mixed and baked in these almost steam-punk style cooking contraptions that beggar the imagination.
That said, it was scrolling through a series of these videos when I stumbled across this recipe. Further explorations found variations of the theme, but it’s a pretty straightforward way to make a healthy egg breakfast that is both filling and introduced a healthy low-carb, nutrient-rich vegetable into your body early in the morning.
Let’s hit it...
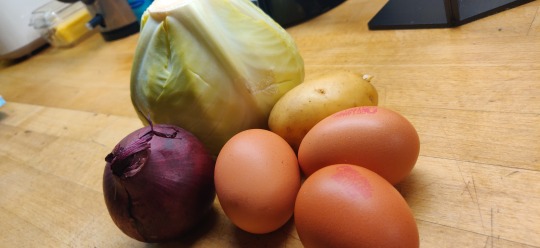
Ingredients
One small cabbage of the green or white variety
3 larger eggs
1/2 small red onion or a shallot sliced into thin moon shapes
1 small waxy potato freshly grated
1/2-cup grated cheese (Optional)
1 tablespoon vegetable oil
2 tablespoons of butter
I make these for one person, two tops. I’m a big eater so I can knock off one of these made in a small oven-safe skillet quite easily.
If you’re looking to feed two or more people, just double, or triple recipe as needed and choose a proportionately appropriate-sized oven-safe skillet or pan.

Make sure your cabbage is fresh, crisp and clean and slice off a nice wedge, enough to give you about a cup of roughly chopped cabbage.

Next, grate in your potato. This gives your omelette body and structure without overwhelming the flavor of the cabbage or the eggs.
Make sure the potato is washed and all blemishes removed from the skin. You’re going to use the tater, skin and all.

Toss in the chopped onion, season to taste with sea or kosher salt and fresh crushed black pepper and the fold in your three eggs.
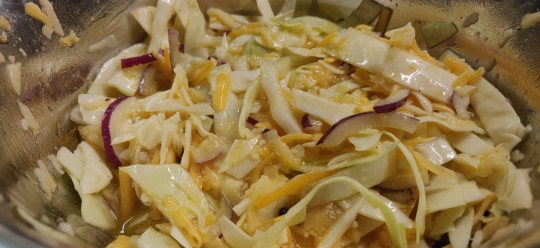
Now, this is where I fold in my grated cheese. Usually a combination of cheddar or an Irish red; something with a bit of sharpness to the flavor, but creamy enough to melt.
Again, this is an optional addition, but since the South Koreans have made cheese and eggs a winning breakfast combo in so much of their street food, it’s not heresy.
Now, put your skillet on the stovetop, add the oil and butter and slowly turn up the heat to get a nice soft simmer.
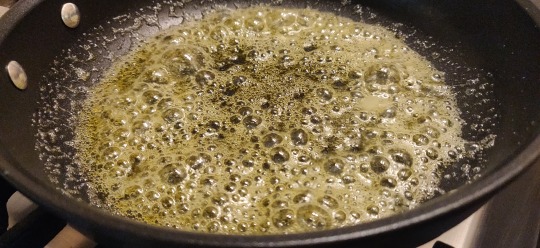
This is going to give the omelette a lovely caramelization and crispness.
Make sure you rotate the pan just before you add your cabbage/egg mixture to ensure the heated oil goes up the sides of the pan.
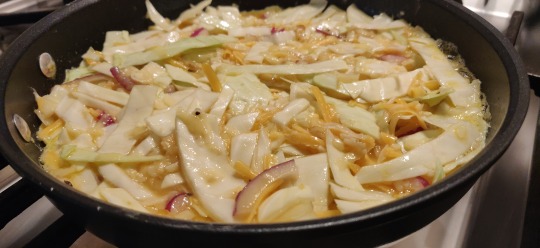
Pour the mix into the pan and evenly distribute and flatten out the top. Evenness assures equal cooking throughout.
You want to keep the stovetop heat at a moderate temperature to cook the omelette evenly, yet crisp the bottom without burning. This takes a little patience and an attentive eye.
Now, turn on the oven grill, to warm it up for when you’re ready to finish cooking the dish.
My trick is to rotate the pan quickly about three to four minutes into the cooking process to makes sure the dish is setting properly and cooking.
youtube
See, easy.
I’m not a fan of runny eggs, but neither am I too keen on a hard, dry omelette, so what I look for is a browning, a crispiness to appear on the edges and that the dish has begin to solidify from the edges towards the center of the pan.
Full Disclosure: Real rockstars expertly flip their cabbage omelettes with one snap of their wrists.
Yeah, good luck with that. I’ve nothing to prove, I just want to eat!
Once I see that the omelette is about one-third of the way firm from the outside, yet still wet and jiggly towards the center, this is when I stick the oven-safe pan under the grill to finish cooking.

You will know it’s done when you pull it from the grill, pierce it with a knife and see if it has been cooked to your preferred doneness. Moist, but not runny is what I look for.
To me, this makes a great break from a regular egg breakfast and it’s a great way to get some veggies in early in the day. Honestly, you don’t even need toast with this omelette, it’s that satisfying and should keep you going until lunch.
0 notes
Text
How I Make a Chicken Stock
This is a special request from a friend and former colleague who wanted a good, simple chicken stock recipe.
As a home cook, one thing I’ve learned over the years is that it’s good to have various stocks and broths available for making soups, sauces and stews, as well as to add character to a variety of notoriously bland starches like potatoes, pasta or rice.
I first learned to make stock on Alton Brown’s Good Eats back when the Food Network actually cared about cooking, food and educating its audience.
However, over the years I’ve seen and read other recipes and the following is how I make one type of chicken stock; I’ll refer to it as Western-style.
I also make an Asian-style chicken stock, inspired by the broth needed to create Hainan Chicken Rice.
A lot of stock recipes begin with using the carcass, giblets and remnants of a hearty roast chicken dinner bird.
I don’t know about you, but I don’t roast a chicken on a weekly basis. If anything, I might just roast or pan-fry some chicken thighs if I am in the mood for a chicken dinner. Also, of late, butchers, especially those in supermarkets can sometimes not include the giblets—the liver, heart and neck—in the raw bird’s cavity.
So this is a recipe completely made from scratch, that incorporates basic ingredients, a few not-so-basic, and a little bit of roasting.
Carpe pullum!
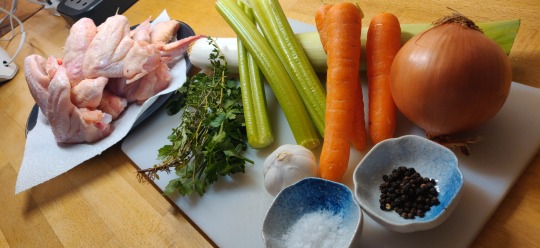
Ingredients
4 pounds chicken wings or thighs or a combination
1 large onion, skin-on, halved
4 carrots, washed cut into 2-inch half-moon slices
4 Celery ribs cut into two inch slices
1 Leek
2- to 4-sprigs Fresh Thyme
1- to sprigs Fresh Rosemary
1 cup Fresh Parsley
2 bay leaves
1-tablespoon of black peppercorns
1- to 2-tablespoons kosher or sea salt
4 to 6 whole cloves garlic, peeled and crushed
3- to 4- tablespoons vegetable oil
(Optional, see recipe below: Saved miscellaneous vegetable bits and bobs)
Water to cover and replenish
Butcher’s twine
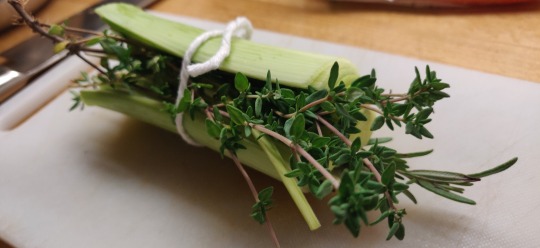
First off, I’m all fancy ‘n shit, so I make a bouquet garni with about a 5-inch piece of the leek. I tend to take from the transition part of the leek, where the dark green begins to turn white.
Next, cut into the leek segment about half-way through, so you can open its leaves and run it under the water to remove dirt, insects and impurities. Once that’s completed, open the leaves and tuck in the rosemary and thyme sprigs and the bay leaves. Then, using the butcher’s twine, tie the leak up firmly. It should look like this.
I use either all chicken wings, or a combination of chicken wings and thighs for this recipe. Both parts of the chicken are full of fatty skin, rich meaty flavor, and cartilage, which adds an underlying unctuousness to the final broth.
Next, pre-heat your oven to C200-F390 degrees for at least a half-hour.
Grab your carrots, give them a quick wash under the tap with a veggie brush or good sponge. I want all the nutrients and flavors for this recipe. Then chop the carrots into 2- to 3-inch half-moon slices.
Toss the chicken and carrots in the vegetable oil in a bowl to make sure they’re all evenly covered. Season with kosher or sea salt and fresh crushed black pepper.

I prefer to use a roasting pan with a rack, since I want to cook the combination on a high heat, very quickly to evenly brown and to render out as much fat as possible. I do not like a fatty stock, it limits its culinary flexibility.

Pop the tray into the middle of your oven and let it cook for 20-minutes. Then, go in and check for browning and to make sure you avoid uneven cooking and/or burning of the carrots.
This is all about caramelization and releasing sweetness.
Flip the chicken and carrots as you see fit then return to the oven for another 20- to 30-minutes until the chicken is cooked through, its skin golden and carrots lightly charred.
Obviously, you can go for longer in the oven and get the skin much darker and crisper, but, remember, that impacts the color and flavor of the final stock.
While the chicken and carrots were browning, you should have prepped your veggies. I mean, it takes all of five-minutes, but micromanaging is kind of the whole point of writing recipes, when you stop and think about it.
This is where Alton Brown and I diverge—you’re going to be simmering your big stock pot for three to four hours and in the end you’re going to want to be able to strain as much of the nectar from the pot without having to be squeezing water-logged vegetable matter through a sieve. I mean, I don’t, anyway...
We’re talking big chunks of celery, 2-inches, easy. The onion? Just leave the skin on and half it.
The broth is going to be simmering for so long, it will draw out the flavor and nutrients from veggies without them all collapsing to mush. Well, almost all...
Garlic. I love garlic. I believe it adds the underlying umami flavor to a chicken stock, so, depending on their size, I use anywhere from 3 to 6 crushed garlic cloves with their skins. But, you do you.
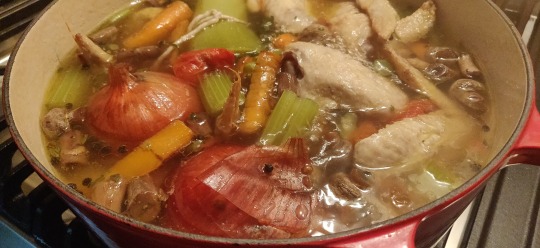
Let’s get to the simmering...

Into your stock pot—I use my trusty Dutch Oven (because you can bung this in a C200-degree oven if you’re in a hurry and get it done in about two hours)—add the chicken and carrots, the bouquet garni, celery, onion and garlic.
Fill the pot until the contents are covered by at least an inch of water. Throw in the parley, and the whole tablespoon of black peppercorns and on tablespoon of kosher or sea salt. You can taste and season again towards the end of the cooking process before you prepare the broth for storage.
Now, this is where we kind of throw authenticity and strict rules out the window.
I cook a lot and I hate food waste. For the last two years, inspired by Not Another Cooking Show’s Steve Cusato, I’ve been storing remnants and bits and pieces of leftover fresh veggies in my freezer in a storage bag.
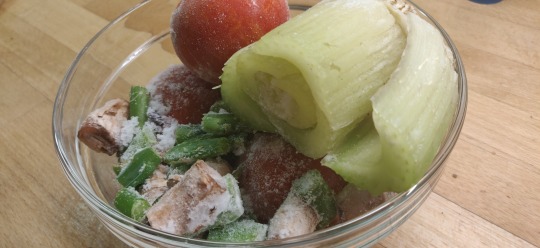
The ends of fresh asparagus or fresh broccoli? Yes. Mushroom stems? Yes. Whole tomatoes or mushrooms that are looking a little long in the tooth? Of course!
My mission, when I create a stock, is to maximize the flavor so that the final product is complimentary with a wide variety of other vegetables, meats and fish.
My chicken broths never taste the same, their colors vary, but, they’re flexible and delicious. And that’s the joy of cooking, really.
Now, put a lid on the pot and bring it up to a rapid boil, give the pot a good stir to mix all the chicken, herb, spices and vegetables together, then put the temperature down to create a nice, gentle, easy rolling simmer.
Put the lid back on and let the stove-top burner do the rest.
I tend to check on the broth on the hour. I give it a good stir and if I see the fluid level dropping too much, I top it off with water and adjust the burner.

Four hours is the longest I’ve ever simmered a broth. As I said above, I once did it in about two hours by blasting it in the oven, but for me, making a chicken stock is the kind of exercise you do on a cold, rainy Fall or Winter Sunday afternoon.
It’s actually easy to prep and the steps are pretty straightforward, the monitoring, quite lazy.
Once you feel the chicken stock is completed to your taste profile, season as needed, stir and then strain the broth into storage containers.
I use a fine-meshed strainer with either cheesecloth or paper towels as a screen to make sure all the meat and vegetable matter is screened from the liquid.

This recipe easily gives me 2- to 2-and-1/2 quarts of chicken stock.
Normally, I keep one quart in the fridge, while portioning off the remainder into 8-ounce or 16-ounce containers I can keep in the freezer.
I hope you give it a try. Enjoy!
0 notes
Text
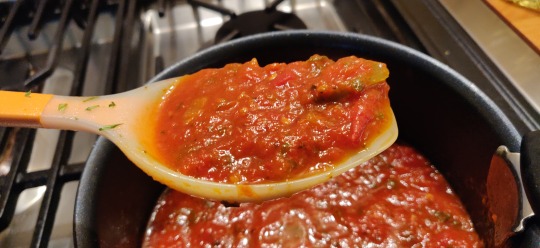
Easy, One-Pot Ranchero Sauce

I’m a huge fan of Huevos Rancheros, just as I am huge fan of all kinds of egg breakfasts.
But sometimes I get in a rut—bacon and eggs, a “Full Irish” breakfast, omelettes, Denver Omelettes, scrambled eggs, etc. So, to spice things up, I keep about a pint of ranchero sauce in my fridge at all times.
“Ranchers’ Eggs” is from the border regions of Mexico and the United States and is hugely popular in Southern California, where I was born and lived a good portion of my life in the 1980s.
Most traditional versions of Huevos Rancheros have you fry the corn tortillas that will be the bed for your sunny-side up, runny fried eggs. But, I prefer to serve mine on corn quesadillas, a purely personal taste.
If I’m going to put more fat into my body, why not a lovely white cheese, like cheddar or a Monterey Jack?
This version is close to authentic as possible, based on the availability of herbs and spices. Purists would argue I should use Serrano or Habanero chilies—and to render down fresh tomatoes instead of my combination of fresh and canned—and I do when I can, but for this version, I used a Thai green chili, that has a sweeter skin, offset by the lovely heat and spice of its seeds.
Ingredients
3 medium size tomatoes
1/2 red onion, chopped into thin moon or half-moon slices
1 medium size Habanero/Serrano pepper (or whatever is available)
1 14-ounce can of crushed tomatoes
1 cup chicken broth or water
1/2 cup chopped fresh cilantro (coriander)
1 tablespoon dried oregano
1 tablespoon cumin
1 teaspoon freshly crushed black pepper
1 tablespoon of salt
1 teaspoon sugar (optional)
Full Disclosure: I often make this up when I realize that I have some fresh tomatoes that are getting a little on the soft side. Whatever tomatoes I don’t use in the ranchero sauce, I throw in the freezer and will add to my chicken stock. Nothing goes to waste!

This is a one-pot wonder. First, toss your onions, garlic and chopped chili into two to three tablespoons of olive oil. Liberally salt to help kickstart the sweating process over a medium heat on your stove.
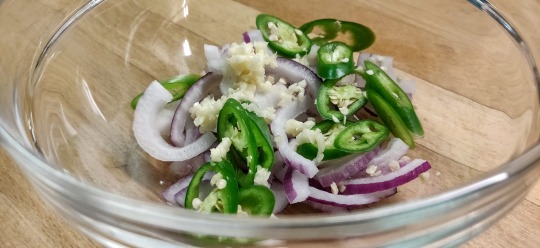
Once you’ve got a nice shimmer on the oil, and the chili and onions are shiny and glassy, toss in the cumin and oregano to let them cook and impart their flavor into the oil and liquor given off by the vegetables.

Next, toss in your sliced tomatoes. They give the sauce some body. I have seen versions where the cooks blend the final preparation into a smooth, deep orange-y-red sauce and you can go that route, if you would like.
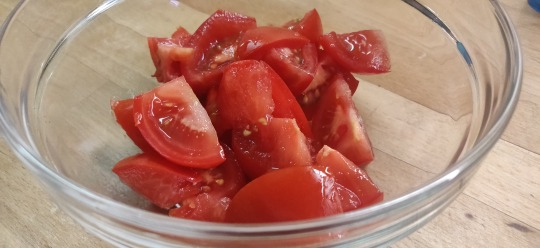
I feel that by adding the tomatoes now and slowly simmering and breaking them down, really adds to the richness of the final sauce and blends in all the flavors.
I love how the sauce has an underlying heat to it; not just explosions of spice from the chili.
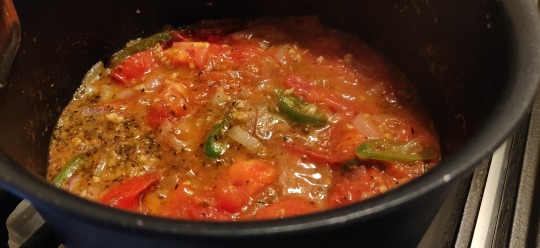
Once the fresh tomatoes have rendered, now add your can of tomatoes and bring to a simmer.
Here is where you want to taste for the level of sweetness and/or acidity of the sauce. Sometimes the combination of fresh and canned tomatoes can have an underlying bitterness due to the high acid content, either of the fresh tomatoes, or the canned.
If you feel it’s a little too astringent, add a teaspoon to a tablespoon of preferably brown sugar. Let that simmer for a bit, then salt and pepper to taste.
Where getting near the end of the process and I now add the cup of chicken broth or water and the chopped cilantro/coriander.
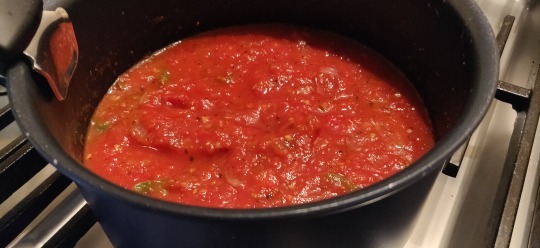
Let the ranchero sauce simmer and reduce to the consistency you prefer—about 20 minutes.
Again, if you don’t want to add the broth, just blend the mixture down into a fine sauce. But, I prefer mine with the a lumpier texture of onion, chilies and tomato.
Some would argue non-traditional, but like a lot of indigenous family-style recipes from the Americas or Asia or Europe, it’s based on tastes and customs and traditions.
You can serve immediately, but I prefer to put it in the fridge for at least one day.
A little trick I have is that I warm the ranchero sauce in the same small saucepan that I’ve fried my eggs, sunny-side up. Once I see the egg whites in the pan are firming up—but the white near the yolk is still somewhat raw and translucent—I ladle in the amount of ranchero sauce I want, then, place a lid on the pan and let the eggs continue to cook, and poach a little in the sauce.
Then serve, on or over corn or flour tortillas; with or without a side of refried beans and rice.
Enjoy!
11 notes
·
View notes
Text
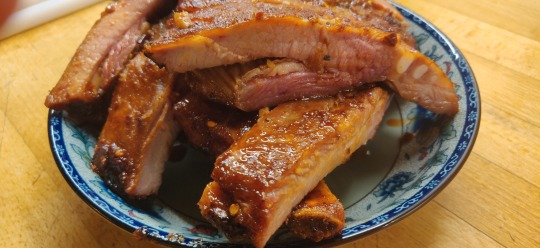
Easy Asian-Style Pork Ribs
Last weekend I set myself the challenge of making a variation of the wonderful Marion Grasby of Marion’s Kitchen’s Shoyu Ramen.
I wanted to get a lean porky belly—I know, a contradiction in terms—but I needed a cut that, while rippled with fat, also had substantial meat on it, enough to satisfy Bob’s palate as he is very much the Jack Sprat of our relationship.
Luck would have it, I wandered into JC’s Supermarket in Swords, Co. Dublin and the butcher had the most beautiful pork belly, ribs and all. It easily weighed 4-pounds and he cut away the ribs, and rolled and tied the pork belly for me.
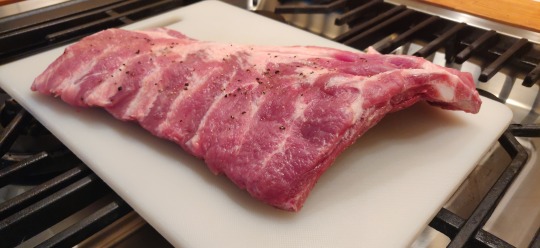
There were eight large ribs and while I had not planned on making ribs for dinner that night, it seemed like the perfect opportunity to make something new and interesting.
This is a combination of recipes from the Interwebs, so you’re authorized to improvise as you see fit.
Ingredients
One rack of pork ribs, the meatier, the better
3 tablespoons of Hoisin Sauce
1- to 2-tablespoons of your homemade Chili Oil or authentic Lau Gan Ma
2 tablespoons of Ginger Scallion Oil (easy to make, handy to have, the recipe is here)
1- to 2-tablespoons of Chinese black vinegar (or Balsamic)
3 tablespoons of Sriracha sauce
2 tablespoons of Shaoxing cooking wine (or Japanese Mirin or a dry cooking sherry)
Sea or Kosher salt to taste
Crushed black pepper to taste
Plastic freezer bag
Do yourself a favor, and the next time you’re in an Asian market or in your local Chinatown, pick up a jar of Lau Gan Ma (Lao Gan Ma). It’s an amazing chili oil, it comes in varieties, some with tofu, others with roasted peanuts. All variations on a basic, rich, spicy, warming chili oil that adds heat and umami to any dish.

Now, I season the ribs with the salt and pepper and leave them on the rack in the fridge to dry out a little.
Once you’ve got all your ingredients for the marinade, just place them all in a mixing bowl and go at it will a fork or a whisk to incorporate the flavors.
Trust me, when I say having Singaporean Ginger Scallion Oil handy, I mean it. It’s just a great all-around utility condiment that is both a sauce and a cooking oil.
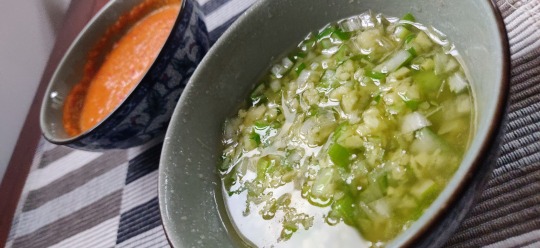
The reason I’ve called this recipe “Asian-Style” is because I’ve added both the Singaporean Ginger Scallion Oil and the Sriracha sauce.
Sriracha sauce adds a sweetness to grilled food that I don’t think you can get with the vinegars or cooking wines and reduced the need to use honey or sugar, which I’ve seen in several recipes.
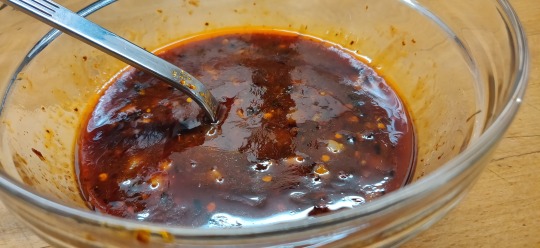
Admit it, it looks like a savory pudding, and, to be fair, you could simmer this into a lovely dipping sauce for fried chicken wings, or spring rolls.
Next take the ribs from the fridge place them in a large freezer bag and add the marinade.
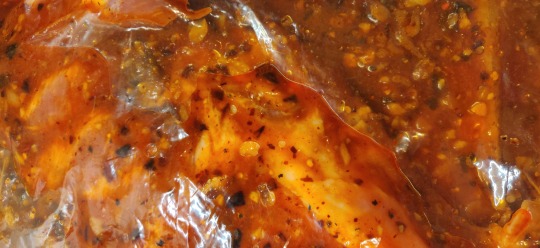
Toss the ribs in the marinade. I like to let them marinate for a good two hours as I want the meat to be begin to breakdown as well as absorb enough of the sugars to give great caramelization during the cooking process. But you can let them marinade for 20- to 30-minutes and that should be enough.
When you’re ready to begin cooking, pre-heat your oven to C200-F390 degrees for at least a half-hour.
Use a broiler tray with a grate. Fill the tray, depending on its depth or shallowness, with a 1/4- to 1/2-inch of water.

Place the ribs on the rack and place them tray in the middle of your oven.
Once you’ve closed the oven door, lower to the oven to C165-F325 degrees and let the ribs cook from a minimum of 40-minutes to an hour, depending on the size of your ribs.
I love an even crispiness, so after 20-minutes, I flip the rack. I’ve seen some recipes that you should brush the ribs every ten minutes with your remaining marinade, but these are based on Chinese ribs, not ‘Murican BBQ, so I want a drier, crispier coat when they’re done cooking.

After about 45-minutes, I felt the ribs were at my level of doneness, so I finished them with about 5 minutes under the grill, to sear and crisp the surface.
Ribs are always packed with flavor, and this marinade—or a variation of it—helps contain the fatty, juiciness of this cut of meat. Serve it with fluffy white rice, which I think compliments the savory, spicy heat of the ribs.
Enjoy!
0 notes
Text
A Simple Chili Oil
I don’t know about you, but sometimes I go to the market and come home with just a few too many fresh vegetables.
I’ve set the menu for a few days, and I know what’s needed, but often you can’t purchase something small or “recipe size” like a couple of chilies, one two carrots, or a stalk of celery; it all comes in packs or packages.
A couple of months ago I realized I had an over abundance of birds eye chilies, and knowing I wasn’t going to use them all, I took about a dozen and tied them up with some string and hung them on the curtain rack in the kitchen to dry.
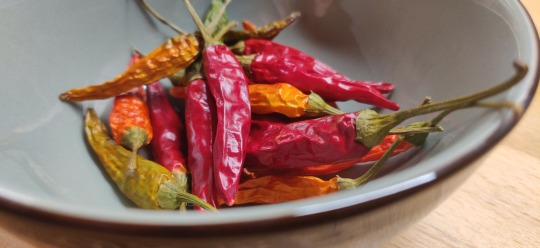
I must say that they turned out perfect. Their skins, waxy and brittle with the slightest hint of sweetness when you smelled them up close.
Anyway, this week I realized I had four milder, red Thai chilies in the fridge that were not going anywhere fast, so I decided to make a variation on a Chinese Chili Oil.
There are so many varieties of Chinese chili oils—Szechuan, Chou Chow, and Lao Gan Ma, probably the most popular brand of Chinese chili oil inside and outside of China—that it’s hard for me to identify a favorite, they all bring so much to the dining experience.
The recipes, however, are simple, a combination of dried and fresh chilies, finally chopped, and scalded in a screaming hot vegetable oil with anything from dried garlic or tofu, to cinnamon and star anise to the amazing Szechuan peppercorns or any combination of the above.
Here’s an easy recipe that will make a great all-around chili oil that you can use as a condiment or in your cooking. Remember, a little goes a long way, so tread carefully...
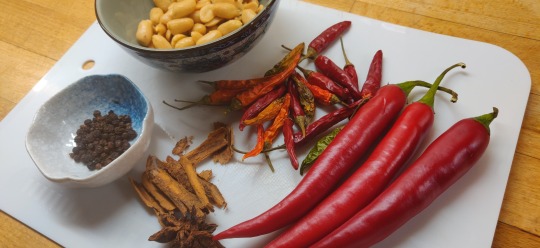
Ingredients
1/2 cup of dried birds eye chilies (or whatever you prefer)
1/2 cup of red chilies (or whatever you prefer)
1 Tablespoon black peppercorns
1/2 cup of roasted peanuts
1- to 2-inches of a cinnamon stick
1 or 2 star anise
1 cup of vegetable oil
1 Tablespoon of toasted sesame oil
1 Tablespoon of palm sugar (or brown sugar, go with regular sugar if you have to
1 Tablespoon sea or kosher salt
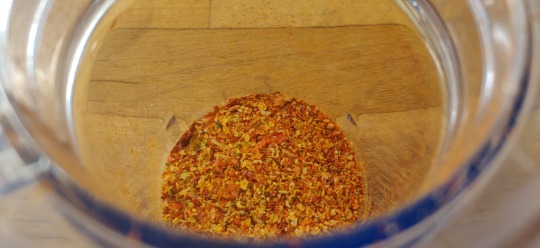
Take your dried chilies, remove the stems and place in a food processor or mortar and pestle, whichever you have handy or whatever suits your mood.

Full Disclosure: I over ground my dried chilies, completely by accident; I actually prefer my chili oils to be coarse and chunky, but this was not a tragedy, and probably added to the heat of the final product.
Next, take your roasted peanuts and give them a good grind. I prefer dry-roasted, unsalted peanuts, but they were no available so I went with the over-the-counter salty snack variety.
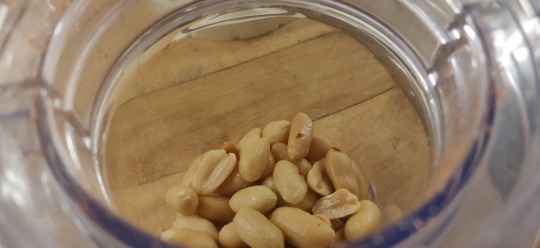
Give them a good blend or grind, depending on your kitchen appliance; these you definitely want a lot coarser than the chilies as they will give the chili oil depth and crunch when completed.

Now, chop up your fresh peppers; give them a good rough chop as you want to release the oils and the seeds, again for both texture and flavor.

I love the combination of slightly sweet and slightly salty in my chili oil. Remember, you’re going to scald this in a hot oil, so the palm sugar or brown sugar is going to caramelize and give a subtle sweet, smoky taste to the dish.
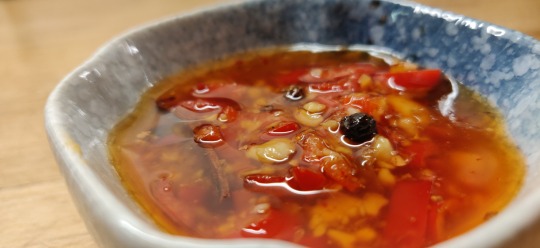
Put the chilies—dried and fresh—the crushed peanuts, the black peppercorns, the cinnamon stick, star anise, sugar, the one tablespoon of toasted sesame oil and the tablespoon of salt in a heat proof cooking dish or bowl and give it all a good mix with a spoon.
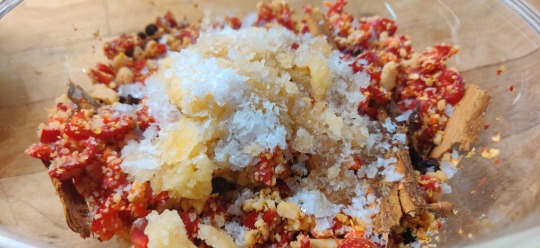
OK, it’s not gonna win any beauty contents, but, we’re not done yet and here comes the fun, slightly dangerous part, the cooking.
Take one cup of a plain, neutral vegetable oil. Canola is great, I am using a light Irish rapeseed oil that I often use to fry potatoes and make chips with.
Heat the oil in a good pot on the stove, keeping your eye on it at all times. You want the oil at such a temperature that the surface shimmers, a light smoke begins to rise and you can smell the oil cooking and feel it giving off heat.
This is dangerously hot, so take precautions and make sure no small children or pets are underfoot.
Pour half the oil into the bowl, from a safe height—about six to eight inches, you don’t want the oil to splash up on you—and let the chili and spice mixture boil and sizzle.
Give it about 10 seconds to calm down, then, give the mixture a stir. Next, pour the remaining oil, the mixture will once again boil and sizzle as the oil cooks the combination through.
Again, after about 10 to 15 seconds, when the sizzling subsides, give the chili oil a good stir to make sure everything is combined evenly.
Transfer the chili oil into a good storage container to let it cool and marinate before you use it or store it in the refrigerator. I find you can leave it in a kitchen cabinet for up to two weeks, but its shelf life in a fridge can be up to a month.
Use it on your eggs at breakfast, put it on boring boiled rice, throw it into a stir-fry with chicken, or shrimp or vegetables and you will get an explosion of heat, and a lovely smoky umami flavor that I think is wonderful.
Enjoy!
4 notes
·
View notes
Text
A Quick Cioppino (With Apologies to SF’s Tadich Grill)

The first time I enjoyed cioppino, an Italian-American seafood stew, was in 1985, when San Francisco was still somewhat affordable, DARPA hoarded access to what was to become the Internet, and the Tadich Grill, home of this amazing meal, was still a “cash only” restaurant in the Financial District serving The City’s old money brahman class.
The man I was seeing at the time, the late Dr. Ernest J. Cioffi, formerly the dean of continuing studies for the University of Southern California, ran a program out of the school called “Taming the S.A.T.” a prep class for kids who really wanted to ace the country’s standardized testing used to place kids in colleges and universities.
The “Taming the S.A.T.” program was usually held on weekends, either on the USC campus or on the campuses of junior colleges and smaller schools throughout California.
Ernie hired local instructors to give the classes, but preferred to go himself to the campuses to set up the forum and help with the registration. It also allowed him to visit places like San Francisco, Santa Barbara and San Diego on the university’s dime.
Often, I would take a vacation day from work and we would drive up to San Francisco for a long weekend. It was on the first trip that Ernie introduced me to the Tadich Grill, martinis and cioppino.
From that time on, the Tadich Grill became a tradition for Ernie and I; even after I moved to San Francisco to go to school, when he would visit, we would always make the effort to dine there.
As traditions go, it’s one I try to keep every time I am in the City by the Bay. Thanks, Ernie, rest in peace.
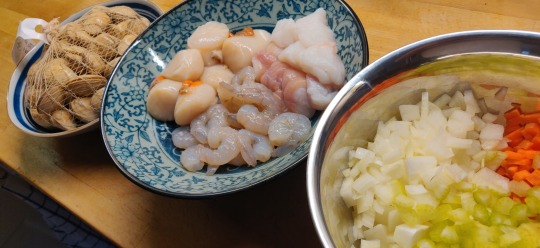
Ingredients
2 tablespoons extra-virgin olive oil
2 tablespoons butter
1/2 small white or yellow onion finely chopped
4 cloves of garlic, thinly sliced
1 regular-size carrot finely chopped
1 rib celery finely chopped
(Recommended, but Optional, based on availability, 1/2 large fennel bulb, finely chopped)
2 tablespoons tomato puree/paste
1 cup white wine (dry)
1 14-ounce can diced tomatoes
1 cup vegetable or seafood stock (or water)
1 teaspoon dried chili flakes
1 bay leaf
1 teaspoon dried oregano
1/2 teaspoon dried thyme
A handful of fresh basil, chopped
A handful of fresh parsley, chopped
Sea or kosher salt
Crushed black pepper
8 ounces firm white fish (monkfish or cod)
8 ounces shrimp, peeled, veined and headless
1 pound of small clams or mussels washed and sorted
6 to 8 large sea scallops
(Optional, 6 to 8 small new potatoes, halved )
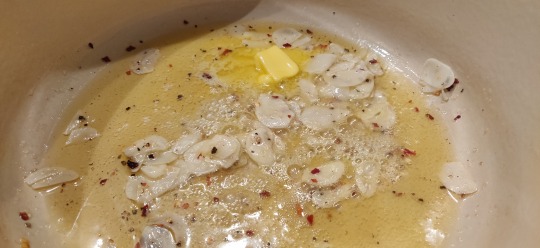
After you’ve prepped your veggies, herbs, seafood, break out the Dutch oven or favorite soup pot and put it on a medium burner on your stove top.
Sauté the garlic and chili flakes in the olive oil and butter. Season with salt and crushed black pepper to taste.
You just want to sweat the garlic until it becomes glistening and fragrant.
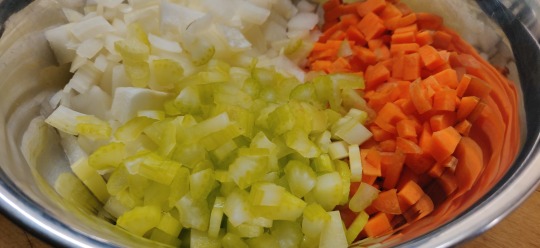
Once the garlic is shimmering, then add the mirepoix and continue the sautéing process.
It’s here where I add the fresh basil, dried thyme and oregano and the bay leaf. I’ve seen the recipe with dried basil, but I find using fresh just is so much more fragrant and flavorful.
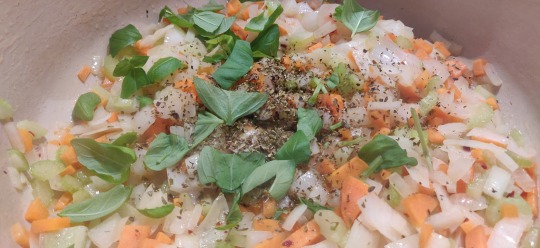
As the mirepoix renders down and releases the moisture from the carrots, onions and celery, stir in two to three tablespoons of tomato puree.
Cook the veggie, herb and puree mixture until well integrated. Once the puree starts to form a fond on the bottom of the pan, then add your cup of white wine. I went with a Pinot Grigio, but any dry, citrusy white wine would be grand.
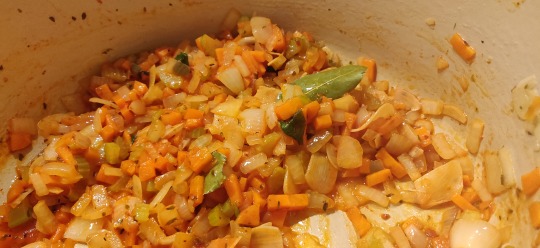
You want to simmer the broth until all the alcohol burns away, then add the can of diced tomatoes and the fish or veggie stock or water.
I won’t lie, go with the seafood stock as the first option if you can, it just adds levels of umami flavor to this stew that is unbeatable. If unavailable, then go with vegetable stock as your second choice. Water, if you’re back’s to the wall.
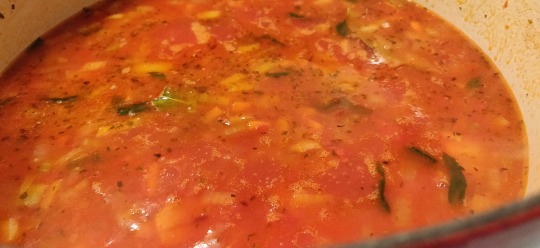
You’re going to let this broth simmer on a low heat for at least an hour before adding the optional potatoes.
Now, potatoes is just a personal preference for me; if you have enough seafood, and some lovely crusty croutons or toasted slices of a baguette, this stew is more than enough.

However, cioppino was created as a cheap fisherman’s lunch back in the day and, like a lot of local recipes, I’m sure the vegetables—and the seafood selection—changed day-to-day, if not week-to-week.
I like how the new, waxy potatoes give off enough starch to lightly thicken the broth, as well as offer an al dente contrast to the various seafood.
You do you.

If you’ve added potatoes, then let the broth simmer for another 20 or 30 minutes until the spuds can be pierced with a fork, but don’t fall apart.
Now, you’re ready to add your seafood.
I’ve enjoyed this with both mussels and clams, or mussels OR clams. Since you’re the master of your own kitchen, any variation is up to you, but definitely include chunks of a firm white fish, scallops and shrimp.
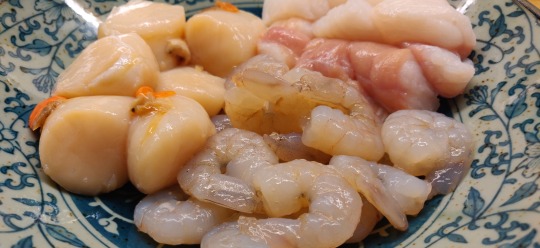
The stew will be generating heat by this time, so add the seafood based on cooking time; chunks of fish in first, they take the longest, about three to four minutes, followed by the shrimp and scallops.
After the shrimp and scallops have been given a minute, then fold in the clams or mussels, put the lid on the pot and raise the temperature to a rolling boil.

Be attentive, you don’t want to over boil the fish, but you want to make sure the bivalves all cook and open and release their liquor into the broth.
Once all the clams have opened, I throw in the handful of fresh chopped parsley to finish the cioppino proper.
Ladle into bowls and serve with a nice crusty bread or croutons; a wonderful, warming broth for cool Fall or cold Winter evenings.
1 note
·
View note
Text
The Six Week Lockdown Challenge

Chinese-style pork ribs marinating
When the Irish government announced it was putting the country into a strict, six-week lockdown in an effort to contain the coronavirus pandemic, my first thought, naturally, was:
“God, what are we going to have for dinner?”
The rules are pretty straightforward: All citizens are limited to a 5K travel zone. All restaurants are take-out and delivery only. Supermarkets are essential services, that do offer delivery.
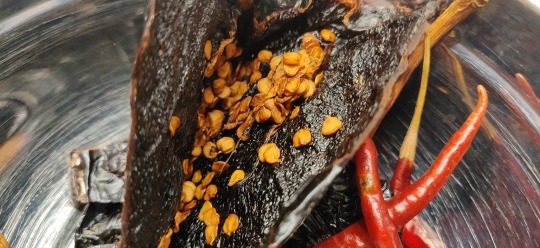
Arbol and Ancho chillies
Over the last few weeks I’ve stocked up with ingredients from Dublin’s largest Italian, Asian and Mexican specialty markets.
The challenge? Over the next six weeks I’m going to cook and chronicle 12 recipes—breakfast, brunch, lunch or dinner—that are culinarily diverse, yet with the right amount of planning and preparation, easy, affordable and delicious.

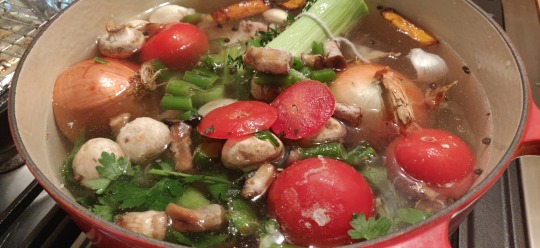
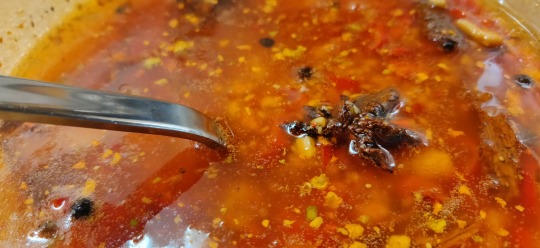
Beef pho stock
When it comes to the foods of Asia and South and Central America, I’m not aiming for authenticity, but to get as close to authentic that I can with the limitation put on me by the pandemic, product and produce availability and personal taste.
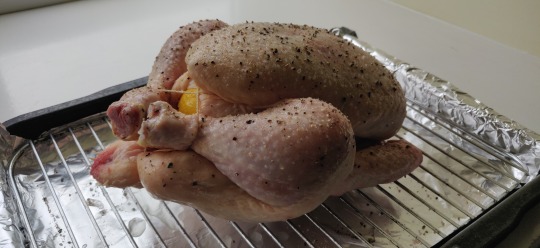
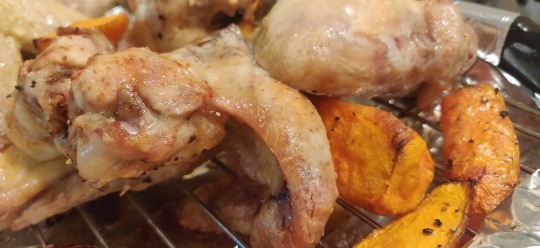
Chicken prepped for roasting
For me, cooking is one of the greatest, most generous of gifts you can give to yourself, your friends and loved ones; it’s something that buoys the spirits of even a stranger just passing through.
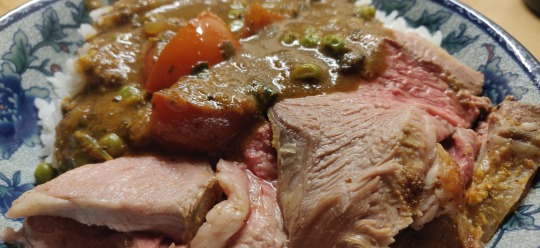
A roasted lamb curry
So, since we’re unable to have friends, family or colleagues over to our home in these troubled times, I want to share recipes that make me happy and I’m confident will delight you and yours.
First up, a simple cioppino...
0 notes