#also need to marinate the tofu overnight next time
Text

made fried tofu to go with ep #3 of dungeon meshi!!
#text#dungeon meshi#TOFU MY BELOVED!!!!!!!!!!!!!!!!!!!#first time trying it in four years I hope I get to keep eating it 😭🤞#reading and watching this series as I've struggled through so many health issues- it has been so inspirational!!!#god i love tofu. perfect food. need to find more dipping sauces I can use and also work on the breading#i need it CRISPY#this was crispy but it fell apart too easily#i used cashew instead of wheat flour#but the nutritional yeast did hit#also need to marinate the tofu overnight next time#convinced that marination + improving the crust will result in the perfect tofu dish
85 notes
·
View notes
Text
Until I Can Go Back to My Favorite Restaurant, This Jerk Paste Is the Next Best Thing
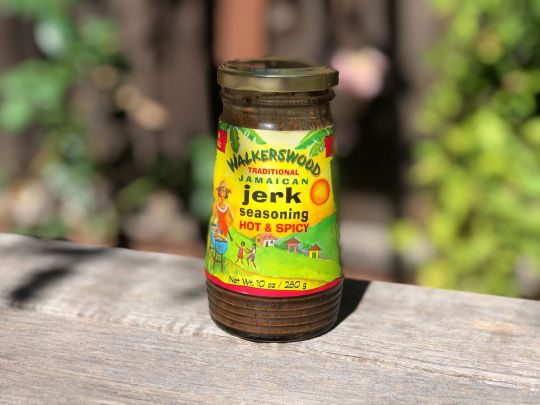
I don’t know how I lived so long without a jar of Walkerswood jerk seasoning | Elazar Sontag
Walkerswood Jamaican jerk seasoning has quickly become a kitchen staple
I smear the dark brown paste on everything. I pat it onto salmon filets before I slide them into the oven and sneak it between tightly stacked leaves of cabbage layered into a steamer basket. I use my hands to massage it into Brussels sprouts, roughly chopped carrots, and broccoli florets. And every time I pull the container from my fridge, I ask myself how the hell I lived so long without a jar of jerk seasoning.
I didn’t grow up eating much Jamaican food in Oakland, California. This city, awash with some of the best Ethiopian and Eritrean, Filipino, Mexican, and Laotian food in the country, has comparatively few spots offering flavors of the Caribbean. And neither of my vegetarian Jewish parents were making a whole lot of curry chicken or braised oxtails.
My introduction to jerk chicken — its skin soaked in the flavor of sweet smoke, of Scotch bonnet peppers, allspice berries, ginger, and green onion — was during my first year of college, across the Hudson river from a New York town called Kingston. That’s where I had my first meals at Top Taste, where you’ll find the best — and more or less only — jerk chicken, curry goat, and oxtails in town. The snug restaurant, painted with wide stripes of yellow and green in the colors of the Jamaican flag, and set on the corner of a sleepy residential street, sells all sorts of groceries you can’t find elsewhere in the area: ackee, saltfish, canned callaloo and Tastee Cheese in vacuum-sealed aluminum containers.
As soon as the door swung open on my first visit four years ago, I was greeted by booming dancehall coming from a boombox propped above the entrance and the smiling faces of owners Melenda Bartley and Albert Samuel Bartley, known to a stream of friends and loyal customers as Sammy. For many, Top Taste brought familiarity and reminders of faraway homes. To me, everything about the experience was new, a welcome and deeply needed change of pace and scenery from the always-boiled, never-baked food of my college dining hall. I didn’t own a car, but whenever I could convince one of my new friends to drive me there, I was at Top Taste.
This wasn’t the sort of recipe I could transcribe, fold up, and stash away for safekeeping.
Over the years, Melenda and Sammy became friends, and their restaurant felt more like home than the cement-block dorm where I slept. I’d order from the menu scrawled on a piece of neon green cardstock on the wall, and while Melenda was filling my square plastic plate with rice and peas, stew chicken, oxtails, and plantains, I’d walk around to the restaurant’s snug concrete patio, where a plume of smoke tipped off the whole neighborhood that Sammy was making a fresh tray of jerk chicken.
That chicken was like nothing I had eaten. The meat was almost blackened by the time it absorbed the smoke, and while the skin was crisp, it gave way between my teeth. The flesh was ever so slightly past the point of juiciness, the fat and connective tissue broken down over hours of gentle cooking, so that the meat melted with each bite, mixing with starchy sweet plantains, steamed cabbage and peppers, and a dot of ketchup and scorching hot sauce.
A few months into my often twice-weekly trips to Top Taste, I asked Sammy how he made his jerk chicken. He sat down next to me with his spice-smudged apron still on, and explained the process in very matter-of-fact terms: The meat gets marinated overnight in a rich jerk seasoning blend (very, very heavy on the ginger), and the next day — rain or shine — he lights a spark under the pimento wood in his old barrel grill, caked with a thick layer of seasoning from good use, and cooks the chicken until it’s done.
I’d known as soon as Sammy first walked me through his process that this wasn’t the sort of recipe I could transcribe, fold up, and stash away for safekeeping. He’d made the dish on so many occasions that each step was second nature: an inkling that more scallion, garlic, or Scotch bonnet was needed, a sniff test confirming the salt, heat, and herbage was balanced to his liking.
When I moved to the city after leaving college, I made it a point to seek out jerk chicken whenever and wherever I could, always comparing it to the meat that came off Sammy’s grill. Some restaurants in Brooklyn had plantains more plump than the ones at Top Taste. Others had the perfect rice and peas, each grain and bean whole and separate, never mushy. Many served a jerk chicken that was good — exceptional, even. But despite following every recommendation, no one’s chicken compared to Sammy’s.
I came back to Oakland to spend the first month of shelter-in-place with my family. But like so many others who up and left cities with no real plan, a month turned into three, and then four, and now here I am, writing from my childhood home six months later. When I lived in Brooklyn, I hadn’t once tried to make jerk chicken in my own kitchen, knowing when a craving really hit — which it reliably did — I could buy an Amtrak ticket for $38 and be perched comfortably at one of Top Taste’s plastic-upholstered booths by lunch. Now, I feel pangs of sadness thinking about Sammy and Melenda and the plate of jerk chicken and rice and peas I could be eating 3,000 miles away.
But on YouTube, where I spend so much of my life now, I recently came upon Terri-Ann, a Saint Lucian home cook who walks viewers through hundreds of incredibly appealing recipes. They include pandemic classics — banana bread and dalgona coffee, our old friends — but also some favorite dishes I didn’t get a chance to peek into the kitchen and watch Sammy or Melenda make on visits to Top Taste. Terri-Ann has recipes for oxtails robed in velvety gravy, flaky golden beef patties, and, to my great satisfaction, jerk chicken. In one video showing viewers how she makes her chicken, Terri-Ann pulls out a glass jar of Walkerswood Jamaican Jerk Seasoning, a pre-blended mixture of spices and herbs which she says she swears by. She plops a generous spoonful of the deep brown mixture into a bowl of chicken drumsticks, along with a big spoonful of her herby green seasoning blend and a drop or two of browning sauce for color. I hastily switched tabs and bought three jars of the seasoning blend with expedited shipping. It wouldn’t be the same, but maybe it’d do the trick.
Since then, the Walkerswood blend has become a staple in my kitchen. The spicy mixture of scallions, Scotch bonnet, allspice, nutmeg, and plenty of thyme finds its way into more or less everything I cook. It’s notably lacking in the generous heaps of grated fresh ginger I know Sammy adds to his blend, but still, it’s excellent. I live just blocks from Minto, one of few Jamaican markets in Oakland, and I regularly stop in to add new sauces and seasoning blends to my growing pantry. I have a jar of browning sauce now, and I’ve bought as many of the hot sauces I remember seeing on the tables at Top Taste as I can find. But nothing I’ve added to my pantry since coming home comes close to my jar of jerk seasoning. In addition to using it in recipes from Terri-Ann and other Caribbean and Caribbean-American YouTubers and food bloggers, I add the paste to fried rice, to tofu, to — you get it.
The boldly flavored mixture is a perfect match for chicken, but that’s where I use it least, instead opting to put it on a thick slab of salmon or slather it on vegetables before roasting. Perhaps there’s just too much dissonance when I pair it with chicken, the bar too high to meet.
I miss Sammy’s jerk chicken like I’ve never missed food before. It’s a yearning that’s become familiar during this pandemic, for those things I know I can’t have. There is no takeout order that will meet the craving, which is as much about the environment surrounding a plate of chicken as it is about the blend of spices or the kiss of smoke that permeates each bite. Those meals were colored by a sort of care and hospitality that you can’t pay for and that’s hard to even seek out. The extra steamed cabbage and carrots because Melenda knew I liked to run the mixture through a pool of curry goat gravy on my empty plate. A piece of bubblegum set on the table as I finished eating, just something to chew on during the drive back to campus. Later, Melenda would send me off with a warm slice of her homemade rum cake wrapped in aluminum foil. It sat in my coat pocket and warmed my hand as I boarded Amtrak to go back to Penn Station.
The first time I bit into a piece of baked chicken I’d marinated in the Walkerswood seasoning blend, I felt pulled in two directions: It was delicious — fragrant and hot, every spice and herb present but not overwhelming. I also felt a little disappointed, as if I’d really expected my thrown-together Wednesday night dinner to taste anything like what Sammy pulled off his smoker after hours and hours of slow cooking and constant attention. I know now, as I go on seven months without a single meal in a restaurant’s dining room or even on a reopened patio, that what’s missing isn’t a handful of grated ginger or the smoke from pimento chips (though both would improve my chicken game dramatically). What’s missing is something only a restaurant like Top Taste can provide, that can’t be found in a jar of seasoning. But right now a jar of seasoning is what I’ve got, and until I find myself in that tiny dining room again, this one is pretty damn good.
from Eater - All https://ift.tt/32ZNWqa
https://ift.tt/3mNPQlT
I don’t know how I lived so long without a jar of Walkerswood jerk seasoning | Elazar Sontag
Walkerswood Jamaican jerk seasoning has quickly become a kitchen staple
I smear the dark brown paste on everything. I pat it onto salmon filets before I slide them into the oven and sneak it between tightly stacked leaves of cabbage layered into a steamer basket. I use my hands to massage it into Brussels sprouts, roughly chopped carrots, and broccoli florets. And every time I pull the container from my fridge, I ask myself how the hell I lived so long without a jar of jerk seasoning.
I didn’t grow up eating much Jamaican food in Oakland, California. This city, awash with some of the best Ethiopian and Eritrean, Filipino, Mexican, and Laotian food in the country, has comparatively few spots offering flavors of the Caribbean. And neither of my vegetarian Jewish parents were making a whole lot of curry chicken or braised oxtails.
My introduction to jerk chicken — its skin soaked in the flavor of sweet smoke, of Scotch bonnet peppers, allspice berries, ginger, and green onion — was during my first year of college, across the Hudson river from a New York town called Kingston. That’s where I had my first meals at Top Taste, where you’ll find the best — and more or less only — jerk chicken, curry goat, and oxtails in town. The snug restaurant, painted with wide stripes of yellow and green in the colors of the Jamaican flag, and set on the corner of a sleepy residential street, sells all sorts of groceries you can’t find elsewhere in the area: ackee, saltfish, canned callaloo and Tastee Cheese in vacuum-sealed aluminum containers.
As soon as the door swung open on my first visit four years ago, I was greeted by booming dancehall coming from a boombox propped above the entrance and the smiling faces of owners Melenda Bartley and Albert Samuel Bartley, known to a stream of friends and loyal customers as Sammy. For many, Top Taste brought familiarity and reminders of faraway homes. To me, everything about the experience was new, a welcome and deeply needed change of pace and scenery from the always-boiled, never-baked food of my college dining hall. I didn’t own a car, but whenever I could convince one of my new friends to drive me there, I was at Top Taste.
This wasn’t the sort of recipe I could transcribe, fold up, and stash away for safekeeping.
Over the years, Melenda and Sammy became friends, and their restaurant felt more like home than the cement-block dorm where I slept. I’d order from the menu scrawled on a piece of neon green cardstock on the wall, and while Melenda was filling my square plastic plate with rice and peas, stew chicken, oxtails, and plantains, I’d walk around to the restaurant’s snug concrete patio, where a plume of smoke tipped off the whole neighborhood that Sammy was making a fresh tray of jerk chicken.
That chicken was like nothing I had eaten. The meat was almost blackened by the time it absorbed the smoke, and while the skin was crisp, it gave way between my teeth. The flesh was ever so slightly past the point of juiciness, the fat and connective tissue broken down over hours of gentle cooking, so that the meat melted with each bite, mixing with starchy sweet plantains, steamed cabbage and peppers, and a dot of ketchup and scorching hot sauce.
A few months into my often twice-weekly trips to Top Taste, I asked Sammy how he made his jerk chicken. He sat down next to me with his spice-smudged apron still on, and explained the process in very matter-of-fact terms: The meat gets marinated overnight in a rich jerk seasoning blend (very, very heavy on the ginger), and the next day — rain or shine — he lights a spark under the pimento wood in his old barrel grill, caked with a thick layer of seasoning from good use, and cooks the chicken until it’s done.
I’d known as soon as Sammy first walked me through his process that this wasn’t the sort of recipe I could transcribe, fold up, and stash away for safekeeping. He’d made the dish on so many occasions that each step was second nature: an inkling that more scallion, garlic, or Scotch bonnet was needed, a sniff test confirming the salt, heat, and herbage was balanced to his liking.
When I moved to the city after leaving college, I made it a point to seek out jerk chicken whenever and wherever I could, always comparing it to the meat that came off Sammy’s grill. Some restaurants in Brooklyn had plantains more plump than the ones at Top Taste. Others had the perfect rice and peas, each grain and bean whole and separate, never mushy. Many served a jerk chicken that was good — exceptional, even. But despite following every recommendation, no one’s chicken compared to Sammy’s.
I came back to Oakland to spend the first month of shelter-in-place with my family. But like so many others who up and left cities with no real plan, a month turned into three, and then four, and now here I am, writing from my childhood home six months later. When I lived in Brooklyn, I hadn’t once tried to make jerk chicken in my own kitchen, knowing when a craving really hit — which it reliably did — I could buy an Amtrak ticket for $38 and be perched comfortably at one of Top Taste’s plastic-upholstered booths by lunch. Now, I feel pangs of sadness thinking about Sammy and Melenda and the plate of jerk chicken and rice and peas I could be eating 3,000 miles away.
But on YouTube, where I spend so much of my life now, I recently came upon Terri-Ann, a Saint Lucian home cook who walks viewers through hundreds of incredibly appealing recipes. They include pandemic classics — banana bread and dalgona coffee, our old friends — but also some favorite dishes I didn’t get a chance to peek into the kitchen and watch Sammy or Melenda make on visits to Top Taste. Terri-Ann has recipes for oxtails robed in velvety gravy, flaky golden beef patties, and, to my great satisfaction, jerk chicken. In one video showing viewers how she makes her chicken, Terri-Ann pulls out a glass jar of Walkerswood Jamaican Jerk Seasoning, a pre-blended mixture of spices and herbs which she says she swears by. She plops a generous spoonful of the deep brown mixture into a bowl of chicken drumsticks, along with a big spoonful of her herby green seasoning blend and a drop or two of browning sauce for color. I hastily switched tabs and bought three jars of the seasoning blend with expedited shipping. It wouldn’t be the same, but maybe it’d do the trick.
Since then, the Walkerswood blend has become a staple in my kitchen. The spicy mixture of scallions, Scotch bonnet, allspice, nutmeg, and plenty of thyme finds its way into more or less everything I cook. It’s notably lacking in the generous heaps of grated fresh ginger I know Sammy adds to his blend, but still, it’s excellent. I live just blocks from Minto, one of few Jamaican markets in Oakland, and I regularly stop in to add new sauces and seasoning blends to my growing pantry. I have a jar of browning sauce now, and I’ve bought as many of the hot sauces I remember seeing on the tables at Top Taste as I can find. But nothing I’ve added to my pantry since coming home comes close to my jar of jerk seasoning. In addition to using it in recipes from Terri-Ann and other Caribbean and Caribbean-American YouTubers and food bloggers, I add the paste to fried rice, to tofu, to — you get it.
The boldly flavored mixture is a perfect match for chicken, but that’s where I use it least, instead opting to put it on a thick slab of salmon or slather it on vegetables before roasting. Perhaps there’s just too much dissonance when I pair it with chicken, the bar too high to meet.
I miss Sammy’s jerk chicken like I’ve never missed food before. It’s a yearning that’s become familiar during this pandemic, for those things I know I can’t have. There is no takeout order that will meet the craving, which is as much about the environment surrounding a plate of chicken as it is about the blend of spices or the kiss of smoke that permeates each bite. Those meals were colored by a sort of care and hospitality that you can’t pay for and that’s hard to even seek out. The extra steamed cabbage and carrots because Melenda knew I liked to run the mixture through a pool of curry goat gravy on my empty plate. A piece of bubblegum set on the table as I finished eating, just something to chew on during the drive back to campus. Later, Melenda would send me off with a warm slice of her homemade rum cake wrapped in aluminum foil. It sat in my coat pocket and warmed my hand as I boarded Amtrak to go back to Penn Station.
The first time I bit into a piece of baked chicken I’d marinated in the Walkerswood seasoning blend, I felt pulled in two directions: It was delicious — fragrant and hot, every spice and herb present but not overwhelming. I also felt a little disappointed, as if I’d really expected my thrown-together Wednesday night dinner to taste anything like what Sammy pulled off his smoker after hours and hours of slow cooking and constant attention. I know now, as I go on seven months without a single meal in a restaurant’s dining room or even on a reopened patio, that what’s missing isn’t a handful of grated ginger or the smoke from pimento chips (though both would improve my chicken game dramatically). What’s missing is something only a restaurant like Top Taste can provide, that can’t be found in a jar of seasoning. But right now a jar of seasoning is what I’ve got, and until I find myself in that tiny dining room again, this one is pretty damn good.
from Eater - All https://ift.tt/32ZNWqa
via Blogger https://ift.tt/2EBMbWY
0 notes
Photo


Hoisin Fungus
A recipe by from the project sensplorations by Jesper Jansson
https://jesperkjansson.cargocollective.com/
https://www.instagram.com/jesperkjansson/
Oven settings:
For round one: 150°C
For round two: 175°C
You’ll need:
Pearl oyster mushrooms
Sesame oil
Sesame seeds
Olive oil
Rice vinegar
Garlic
Peanut butter
Red wine
Chinese soy-sauce
Kosher salt
Soybean paste
Sugar
Consider:
Before you start, consider when you buy the pearl oyster mushrooms to get them whole, it makes this recipe a lot more interesting also when serving. Also this recipe will work with almost any mushroom that has a larger body; cep mushrooms, portabello, shiitake and others. As long as the grow in a larger body which aren’t separated. Of course you could try to do it with smaller mushrooms, but that means you might have to adjust the temperature settings for the oven.
As a second comment; this is a slow recipe, not complex, but you’ll need patience and time. It takes around 2-4 hours for the whole process.
If you’re preparing this for a few people, make sure to do a few at the same time. You can for example cook up to 6-8 bodies of pearl oyster mushroom in the oven.
Steps:
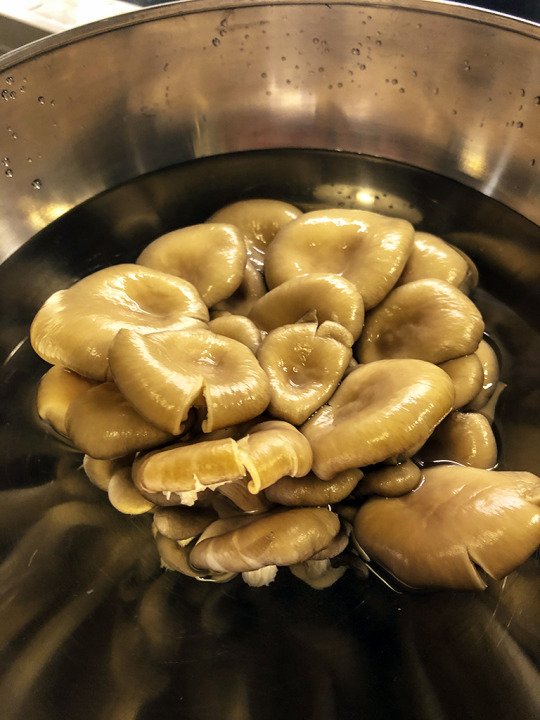
First of all you need to wash the pearl oyster mushrooms thoroughly to get the dirt out. Get a large bowl with water and soak the mushroom in the bowl. Whilst in the water; carefully separate the ”branches” without breaking them from the stem and try to get the dirt out from every corner and pocket.
You can move the body of the mushroom around a little bit in the water as a rinsing process, take it up, soak it again as so on.
Drain the water and repeat this process a few times until the water comes out clear, as a final step rinse the body of the mushroom under running water to make sure you got everything off. This is a vital step since we’re cooking it whole we need to make sure no germs or dirt slips through.
Let the mushroom(s) drip dry, I used a fine mesh sieve and just let the body of the mushroom rest over the sink for at least 15-20 minutes. Turn it over after a few minutes in the sieve to let the water drop off.
While you wait, set your oven to 150°C.
Now for this next step we wanna get as much water out as possible, sprinkle a few pinches of salt over the entire body of the mushroom, this will help to ”pull” a lot of water out.
Place the mushroom(s) on an oven rack with a dripping tray underneath that can catch the dripping water. Place in the middle of the oven for a least 20-30 minutes. The mushroom will lose a bit of it’s shape, this is part of the cooking process.
(After a while in the oven you’ll see, on drip tray, what looks like burned ashes. Don’t worry about this; you can just wash it off easily later. It’s just salt and water, nothing harmful).
Prepare a marinade with the following (counting for one body of mushroom):
1/2 dl of sesame oil,
1/2 dl of olive oil
1-2 dl of rice vinegar
2 cloves of crushed garlic
1/2 dl of peanut butter
2-3 dl of red wine
1-2 tablespoons of highly concentrated chinese soy-sauce
1-2 teaspoons soybean paste (optional)
1/2 dl of sugar
If you want a bit of heat, add some chili powder. Hickory chili works wonders.
After about half an hour, take the oven rack and dripping tray out of the oven. Be careful when opening, lot’s of steam might escape.
Let the mushrooms cool for about 5 minutes on the rack.
Wash the dripping tray and dry it with a kitchen towel – you’re going to need it for the next step.
Soak the body of the mushroom in the marinade in a large bowl, pot or plastic bag which will allow the marinade to coat or cover thoroughly. Marinate for at least 2 hours, preferably 4 hours. Overnight works to for a real deep flavor.
If you’re doing more than one at a time, make sure that the marinade coats everywhere, just flip them around in the bowl 2-4 at a time, use a brush or flip the bag around, but be careful so they don’t break.
(It’s easier to do more than one body of mushroom with a larger quantity of marinade).
After a few hours of marinating take them out of the bowl/bag/pot, and place on the oven rack again.
(Make sure to save the marinade, it lasts a long time in the fridge and is really good to use for sauces or other marinades, works great on burgers).
Put the rack in the oven, with a drip tray underneath the rack, cook the mushroom for 20-30 minutes, you’ll see when it’s ready. The smaller branches will get darker, don’t worry if it’s a little hint a burnt there, it will add some nice flavor. But you can trim it off if you want to. The drip tray will have som burned marinade oil, just soak it in water for a while and it will come off easily.
Take it out of the oven and serve whole and warm with rice/noodles, stir fried of steamed veggies, fresh coriander, satay sauce and some soy-sauce on the side.
Optional also slice the mushroom into smaller pieces and use as a main in Vietnamese rolls, a wrap, or Pho soup instead of tofu, chicken or beef. Or if you wanna real crazy! Use the mushroom whole as a ”burger”.
The end result is a savory, a bit crispy, chewy and deep umami flavored pearl oyster mushroom that works great as a main course. In another context these spices and ingredients could be replaced with more french herbs and western cuisine style to work as a ”steak” served with oven roasted potatoes and veggies with red wine sauce.
0 notes
Text
Stone Bowl BiBimBap
Hi! Dolsot Bibimbap is one of the most popular Korean foods among visitors to Korea. Today I will show you how to make this delicious food at home. This is my updated version of bibimbap recipe that I posted years ago. I had to delete my original bibimbap video on Youtube. To make the bibimbap video again, this time I made it even better by adding some other ingredients and show you how to make stow bowl bibimbap in details. I hope you like my upgraded version of bibimbap. 🙂
Yield: 2-3 Servings
Short Korean Lesson
Dol (돌) = Stone
Cheol (철) = Metal
Video Instructions
Main Ingredients:
Fernbrake Side Ingredients:
2 Cups Soaked Fernbrake
½ Cup Onion
1 Tbsp Soy Sauce
1 tsp Garlic, Minced
1 tsp Olive Oil
1 tsp Sesame Oil
Beef Ingredients:
Sauce Ingredients
Directions
In my opinion, bibimbap is all about good sauce. Whatever vegetables and other sides you put in your bibimbap, the sauce makes your bibimbap taste good. To make good bibimbap sauce, mix 3 Tbsp of hot pepper paste, ¼ tsp of soy sauce, ¾ tsp vinegar, 1 tsp of sugar, ½ tsp sesame oil, ¾ tsp of sesame seeds and ½ tsp of minced garlic. If the sauce is too thick, add about 1 Tbsp of water.
Next, let’s marinate the ground beef. In a bowl, mix ½ cup of ground beef, 1 tsp of soy sauce, 1 tsp of sugar, 1 tsp of cooking wine (optional), 1 tsp of sesame oil, ½ tsp of minced garlic, 2 pinches of salt, and 2 pinches black pepper all together.
Set it aside while you prepare the other ingredients. You can substitute the beef with mushrooms or firm tofu.
We call fernbrake ‘gosari’ in Korea. If you buy dried gosari, soak a handful in water overnight. If it is still not soft the next day, then boil it in water until it becomes soft.
We need 2 cups of softened gosari. Ready to use gosari can also be found in Korean grocery stores.
Cut the gosari into 3-inch long pieces, you can also slice up ½ cup of an onion to add to it.
In a pre-heated pan, add the gosari, onion, 1 Tbsp of soy sauce, 1 tsp of sesame oil, 1 tsp olive oil, and 1 tsp of minced garlic. Fry it for 10 minutes on medium-high. Then, the sogari namul is done.
Along with the gosari namul, I will also use about 1 cup each of musaengchae (korean radish side) and sigeumchi namul (Korean spinach side),
bokkeum kimchi (fried kimchi) (or chopped fresh kimchi), and kongnamul muchim (Korean soy bean sprout side) for today’s bibimbap recipe. These are typical ingredients that can normally be found in bibimbap, but seriously there is no rule for it, so you can grab whatever Korean sides or vegetables you have on hand for your bibimbap.
Now, let’s prepare some vegetable ingredients for better color, flavor, and nutrition. You can pick your favorite vegetables, but these are the common vegetables we use for bibimbap in Korea.
I will chop ½ cup worth of onion, ⅓ cup worth of carrot, ⅓ cup worth of zucchini, and ¼ cup worth of green onion into 2-inch long thin strips. The similar size of the vegetables makes your bibimbap look more neater when you assemble the dish.
Wipe a heated pan with an oiled paper towel to slightly grease the pan. Fry the onion with 1 pinch of salt for 3 minutes on medium-high.
After 3 minutes, remove the onion from the pan and do the same thing for the green onion. Fry it for 1 minute. The next one is zucchini for 2 minutes.
Fry the carrot with a pinch of salt for 2 minutes. I fried all the vegetables separately for a better appearance. However, many times, I just fry all the vegetables together at once in the same pan. For example, I start to fry the onion, then add carrot and zucchini, then add the green onion, and so on, based upon the cooking time of each vegetable.
Finally, fry the marinated beef for about 3 minutes on meidum-high.
We are getting closer to the end of the preparations. Cut about ½ cup worth of roasted dried laver into thin 2-inch strips with scissors.
Some people add the eggs raw, but if you want them cooked, fry them now. So, all the ingredients for bibimbap are ready now. Now, it is time for the fun.
To make deliciously crispy rice on the bottom of your stone bowl, as you get in a Korean restaurant. 😉 Drizzle 1 Tbsp of sesame oil on the bottom surface of your stone bowl for bibimbap. Swill it around your bowl so that the oil will be spread out evenly on the bottom. Make sure to get the oil about 2 inches off the bottom.
Put about 1¼ cups of freshly cooked short grain rice in the bowl and spread it on the bottom. I press down gently on the rice so that it cooks better with the sesame oil and becomes crispy golden brown later.
On top of the rice, put some of each ingredient that we prepared earlier.
It already looks very colorful and tasty.
Put your fried egg in the center of the bowl.
Place your stone bowl on your stove top and start to cook it on high. Depending on your stove temperature, the time can be slightly different, but it should be done in 5-6 minutes. When it is almost done cooking, you will hear this sizzling sound from the bottom of your bowl. That means your rice is getting crispy.
After 5 minutes, steam will come out of the bowl with a crazy amazing smell. Put your desired amount of bibimbap sauce in your bowl.
Mix everything with the sauce and eat. Please be careful not to burn your mouth. It is hot. When I mix it, I carefully leave a thin layer of rice at the bottom of the bowl undisturbed so that it continues cooking to get crispy. If you mix it into your bibimbap, you will not get much, if any, crispy rice.
Please try my bibimbap recipe and share your story with us. 🙂
Source: http://aeriskitchen.com/2019/02/bibimbap-ë¹ë¹ë°¥/

0 notes
Text
Stone Bowl BiBimBap
Hi! Dolsot Bibimbap is one of the most popular Korean foods among visitors to Korea. Today I will show you how to make this delicious food at home. This is my updated version of bibimbap recipe that I posted years ago. I had to delete my original bibimbap video on Youtube. To make the bibimbap video again, this time I made it even better by adding some other ingredients and show you how to make stow bowl bibimbap in details. I hope you like my upgraded version of bibimbap. 🙂
Yield: 2-3 Servings
Short Korean Lesson
Dol (돌) = Stone
Cheol (철) = Metal
Video Instructions
Main Ingredients:
Fernbrake Side Ingredients:
2 Cups Soaked Fernbrake
½ Cup Onion
1 Tbsp Soy Sauce
1 tsp Garlic, Minced
1 tsp Olive Oil
1 tsp Sesame Oil
Beef Ingredients:
Sauce Ingredients
Directions
In my opinion, bibimbap is all about good sauce. Whatever vegetables and other sides you put in your bibimbap, the sauce makes your bibimbap taste good. To make good bibimbap sauce, mix 3 Tbsp of hot pepper paste, ¼ tsp of soy sauce, ¾ tsp vinegar, 1 tsp of sugar, ½ tsp sesame oil, ¾ tsp of sesame seeds and ½ tsp of minced garlic. If the sauce is too thick, add about 1 Tbsp of water.
Next, let’s marinate the ground beef. In a bowl, mix ½ cup of ground beef, 1 tsp of soy sauce, 1 tsp of sugar, 1 tsp of cooking wine (optional), 1 tsp of sesame oil, ½ tsp of minced garlic, 2 pinches of salt, and 2 pinches black pepper all together.
Set it aside while you prepare the other ingredients. You can substitute the beef with mushrooms or firm tofu.
We call fernbrake ‘gosari’ in Korea. If you buy dried gosari, soak a handful in water overnight. If it is still not soft the next day, then boil it in water until it becomes soft.
We need 2 cups of softened gosari. Ready to use gosari can also be found in Korean grocery stores.
Cut the gosari into 3-inch long pieces, you can also slice up ½ cup of an onion to add to it.
In a pre-heated pan, add the gosari, onion, 1 Tbsp of soy sauce, 1 tsp of sesame oil, 1 tsp olive oil, and 1 tsp of minced garlic. Fry it for 10 minutes on medium-high. Then, the sogari namul is done.
Along with the gosari namul, I will also use about 1 cup each of musaengchae (korean radish side) and sigeumchi namul (Korean spinach side),
bokkeum kimchi (fried kimchi) (or chopped fresh kimchi), and kongnamul muchim (Korean soy bean sprout side) for today’s bibimbap recipe. These are typical ingredients that can normally be found in bibimbap, but seriously there is no rule for it, so you can grab whatever Korean sides or vegetables you have on hand for your bibimbap.
Now, let’s prepare some vegetable ingredients for better color, flavor, and nutrition. You can pick your favorite vegetables, but these are the common vegetables we use for bibimbap in Korea.
I will chop ½ cup worth of onion, ⅓ cup worth of carrot, ⅓ cup worth of zucchini, and ¼ cup worth of green onion into 2-inch long thin strips. The similar size of the vegetables makes your bibimbap look more neater when you assemble the dish.
Wipe a heated pan with an oiled paper towel to slightly grease the pan. Fry the onion with 1 pinch of salt for 3 minutes on medium-high.
After 3 minutes, remove the onion from the pan and do the same thing for the green onion. Fry it for 1 minute. The next one is zucchini for 2 minutes.
Fry the carrot with a pinch of salt for 2 minutes. I fried all the vegetables separately for a better appearance. However, many times, I just fry all the vegetables together at once in the same pan. For example, I start to fry the onion, then add carrot and zucchini, then add the green onion, and so on, based upon the cooking time of each vegetable.
Finally, fry the marinated beef for about 3 minutes on meidum-high.
We are getting closer to the end of the preparations. Cut about ½ cup worth of roasted dried laver into thin 2-inch strips with scissors.
Some people add the eggs raw, but if you want them cooked, fry them now. So, all the ingredients for bibimbap are ready now. Now, it is time for the fun.
To make deliciously crispy rice on the bottom of your stone bowl, as you get in a Korean restaurant. 😉 Drizzle 1 Tbsp of sesame oil on the bottom surface of your stone bowl for bibimbap. Swill it around your bowl so that the oil will be spread out evenly on the bottom. Make sure to get the oil about 2 inches off the bottom.
Put about 1¼ cups of freshly cooked short grain rice in the bowl and spread it on the bottom. I press down gently on the rice so that it cooks better with the sesame oil and becomes crispy golden brown later.
On top of the rice, put some of each ingredient that we prepared earlier.
It already looks very colorful and tasty.
Put your fried egg in the center of the bowl.
Place your stone bowl on your stove top and start to cook it on high. Depending on your stove temperature, the time can be slightly different, but it should be done in 5-6 minutes. When it is almost done cooking, you will hear this sizzling sound from the bottom of your bowl. That means your rice is getting crispy.
After 5 minutes, steam will come out of the bowl with a crazy amazing smell. Put your desired amount of bibimbap sauce in your bowl.
Mix everything with the sauce and eat. Please be careful not to burn your mouth. It is hot. When I mix it, I carefully leave a thin layer of rice at the bottom of the bowl undisturbed so that it continues cooking to get crispy. If you mix it into your bibimbap, you will not get much, if any, crispy rice.
Please try my bibimbap recipe and share your story with us. 🙂

Source: http://aeriskitchen.com/2019/02/bibimbap-ë¹ë¹ë°¥/
0 notes
Text
Durarara!! Light Novel Volume 4 Special Illustrations and Excerpts
(Please Note that this was a translation put together before the official one came out.)


Kawagoe Highway, Ikebukuro
"Attention, everyone! To make good three-five-eight marinade, the quality of the yeast and the ratio of the ingredients are key! As the name suggests, it's just a marinade made with salt, yeast and rice in a 3:5:8 ratio! It's really simple, but it works like magic in a lot of Japanese dishes!"
Wearing a pink apron with "Seiji LOVE" written on it, Harima Mika, the stalker girl with a long scar on her neck, was giving out cheerful instructions to others on how to cook. ((Don’t ask me why her illustration didn’t show the “Seiji LOVE”))
Celty had an incredibly mixed feeling as she watched Mika, whose face looked the same as hers, cook like an expert.
Celty seized the chance to learn to cook after the ten million reward had been retracted.
She had at first turned to Anri, but Anri didn't know how to cook either.
Then she asked Karisawa, but Karisawa knew nothing about Japanese cooking.
Celty had wanted someone good at Japanese cooking in order to learn how to make her target dish - three-five-eight marinated sandfish - but she never expected Anri to bring Mika here.
Of course, Yagiri Seiji had come with her; upon meeting Celty, he had asked brusquely:
"Have you given up looking for your head?" After Celty had nodded in reply, he had said: "So I'll have to look for it myself......" and looked as if he was up for some strange kind of challenge.
Celty saw Mika eavesdropping from behind a pillar and felt a little uncomfortable, but Mika's cooking skills were beyond disputable.
She was an expert with the cleaver and was able to produce a series of side dishes almost immediately. The three-five-eight marinade, which Celty had looked forward the most to, was done in no time as well.
Celty had bought some fish thinking that she would invite everybody over since this is a rare occasion -
"Nice! Now all we have to do is to put the fish inside and marinate it overnight!"
Overnight......?
She was worried that they would end up starving that evening when Shinra clapped his hands and said:
"We'll do hotpot."
"Since this is a rare occasion, why not have a hotpot party and invite as many people we know as we can?"
♂♀
Meat Meat Greens Meat Greens
Meat Meat Greens Meat Greens
Tofu with sesame seeds wild greens with ponzu sauce
What goes with meat depends on how much fat comes with it
What was going on in the room could be summed up in these four lines. That was how everyone was practically throwing themselves at the hotpot.
On the top floor of an expensive-looking apartment building on Kawagoe Highway, the huge dining room felt threateningly small thanks to all the noise and heat coming from the guests flooding the apartment.
Around the nice big table sat about ten people. Two equally-sized clay pots were sitting on their respective gas stoves specially prepared for the occasion.
There was hardly anything in common about the group of people that surrounded the hotpot: there were students in their uniforms, a man in a bartender suit, and even a Caucasian woman.
"Here here, the meat's ready!"
A young woman walked towards them with a huge plate in her hand and a smile on her face. Her apron was apparently made from a dakimakura of some manga character.
Chopsticks begun to fly over the table as a most inappropriate fight over food broke out.
On the sofa in the neighboring room, someone was watching everything that was going on in the dining room.
Though she looked comfortable with herself, there was something special about her.
The black figure who was sitting on the sofa with her legs crossed - had nothing above her neck.
A young man in a white coat sat down next to her.
The black figure had no head, but her hand had begun to move and was typing on the PDA she produced from her chest pocket.
[Are you not eating with them?]
"I feel full as long as I can see you smile."
The young man was saying strange things to his faceless partner. The figure shrugged and continued to type.
[You don't have to do that. But thanks.]
The man in the white coat looked embarrassed as he read it. He opened his mouth to express his mixed feelings as he listened to the noise of the shabu-shabu hotpot:
"Really, we've been through a lot in these few days."
[That's true.]

"About what happened...should I start from the neglect play I was put through......?"
[Don't call that neglect play!]
Celty grabbed Shinra's neck as if to strangle him - and the atmosphere suddenly felt normal again.
She looked serious all of a sudden and typed one question onto her PDA.
[So what exactly should I do?]
"What do you mean?"
[I still have no idea what exactly happened. Should I.....really keep doing that courier job......?]
"What made you have second thoughts all of a sudden?"
[I could get Shinra in trouble if I take suspicious jobs again even if I can deal with them-]
Shinra closed the PDA for her before she could finish typing.
"We're family now. Didn't I tell you? A little trouble would be nothing...not to mention that I won't call anything 'trouble' as long as I'm in it with you."
[......]
"After all, I've overcome the major difficulty in my life - which was to make you love me back!"
Celty couldn't help but smile silently in her heart as the underground doctor said these things unembarrassed as if he thought it sounded cool. She picked up her helmet and pressed its forehead to Shinra's forehead.
They were so content and in love. The people around the dining table were enjoying the small happiness in their lives as well.
They were all members of the enormous family called the city, and everyone was gradually finding a place to call his or her home in their routine.
It almost felt as if the city, while enjoying its holiday, remembered that it should give something back to its people.
♂♀
[But still, I struck gold that day. A lot of things happened that I couldn't even begin to understand, but I got 800,000 just in down payment...although the baggage ended up moving on its own. Does that count as a job accomplished or...?]
"Well, I wouldn't complain about it if I were you. That night was hectic for me, but I earned 200,000!"
[Ohhh! That's a million in total......the exact amount I had dropped!]
"Well done Celty! This is the power of our love!" In fact, they were the exact bank notes Celty had dropped. Shinra and Celty had been working for a whole day for virtually no pay.
But whether they realized that or not was another story.
♂♀
CHATROOM
Tanaka Taro
Speaking of which, I had hotpot with some friends today.
Setton
Me too! What a coincidence.
Kanra
Ehhh!? Hotpot? At this time of the year!?
Kyo
What a coincidence indeed! We too got to enjoy some nice steamy hotpot today!
Mai
It was so good.
[Private mode] Kanra
So you guys got in here again.
[Private mode] Kanra
You had hotpot as well? Where? Have you already got friends to do hotpot with?
[Private mode] Kyo
Alas, alas.
[Private mode] Kyo
Better not think you can interfere in the glow of all the friendship we girls are basking in, Big Brother.
Mai
It's a secret.
Tanaka Taro
?
[Private mode] Kanra
That's why I said Mairu should remember to use the private mode...!
Bakyura
I also went out to have sukiyaki with my girlfriend. You know that sukiyaki place? With an 1500-yen all-you-can-eat option?
Tanaka Taro
Ah, you mean that chain restaurant!
Saika
I had hotpot with Setton-san. It was very good
Kanra
Seriously, you guys need to have a sense of season!
Kanra
Hotpot is good only for winter, you know!
♂♀
Shinjuku, Izaya's apartment
"Hey, Namie."
"What is it?"
Namie continued to digest trivial tasks without looking up from her own laptop.
Izaya, eyes fixed on his desktop display, spoke with a refreshing smile.
"Want me to treat you to some hotpot? The shabu-shabu kind or the crab pot, pick whatever you think is good."
"Would you please refrain from using me to comfort your ego just because everybody else in the chat room has friends to eat hotpot with?"
Izaya looked away slightly and shook his head at Namie's reply. "......So you saw all that."
"I've been keeping track of that for a while."
"Does that mean...you also told my sisters about Celty?"
"Maybe. .......Really, recently your online gender-swapping's been getting even more disgusting."
Namie, who kept an eye on the chatroom as she went on with her tasks, glanced at Izaya as she spoke sarcastically and as an ill-natured smile crept over her face.
"Despite that, though......I'm sort of surprised that you've got a human-like side. Well, guess you are Forever Twenty-One for a reason after all?"
"I see...looks like I will have to take you increasingly seriously. Damn, I should have limited the access to invited users only - like what Tsukumoya's done with his chatroom."
The so-called puppet master, who had been left out of the loop on all the recent happenings until the very end looked outside as he grumbled.
Shinjuku lay itself bare before his eyes as Izaya began to think to himself.
Peaceful everyday life is something I decided I could do without since long ago.
Though it's far from necessary for me, I do understand why it's desirable for most people.
Izaya, jealous of the other participants of the chatroom who seemed to be enjoying the peace of their lives, felt like he was jealous of the city Ikebukuro itself as he looked up at the sky through the window.
Swallowing the jealousy of guys like these, the city enjoyed its holiday all the same.
♂♀
After he was done being jealous of the city enjoying its holiday, Izaya closed his eyes silently and smirked.
"Yeah......it's about time I began to enjoy my holiday as well."
The man, who had been completely left out of the incidents that happened this time, laughed as if it was his way of revenge.
"After all, there are always as many ways to start a fire as you want there to be."
♂♀
"Fires...you can just start with anything, in any way you can imagine."
Izaya smiled coldly and talked in front of Namie as if to himself.
"All I have to do is to gather the combustibles in one place - and throw a spark in."
The information broker shook his head with a dreamy expression on his face as if he could already see the fire burning.
"And then, I'm going to say to what Tsukumoya calls the 'city' - "
Cheerfully, cheerfully, as if only to himself, in a tone that sounded like he was way absorbed in himself, his intoxication only slightly spiked with hatred, Izaya said:
"'Your holiday's over, bastard.' - Just that."

--- Durarara!! Light Novel Volume 4
#Namie Yagiri#emelia kishitani#Shinra Kishitani#Celty Sturluson#izaya#Izaya Orihara#drrrx4#mika harima#Anri Sonohara#Shizuo Heiwajima#shinra x celty#shincelty#drrr!!#Drrr#Durarara!!#durarara#seiji yagiri
77 notes
·
View notes
Text
Easy Oven Baked Tofu • The Healthy Foodie
Think you’re not a fan of tofu? Boy, have I got just the thing to change your mind… This Easy Oven Baked Tofu is so crazy yummy, tasty and addictive, you’ll soon find yourself popping it like potato chips!
When I first made this Oven Baked Tofu, my son — who was a teenager at the time — was still living at home and, well, just as pretty much any other reluctant growing boy — I guess — he was not exactly what one could call a fan of tofu.
But I remember the day I’d initially posted this recipe, he almost wolfed down the entire batch before I’d even had a chance to take pictures… or even bake it, for that matter!
I was standing in the kitchen, laying the marinated tofu cubes on a baking sheet, getting ready to put them in the oven, when he walked up to me and asked:– “What’s that?”
Before I even had a chance to answer, “THAT is tofu”, in an almost scandalized voice, as if he was going to get poisoned if he dared touch it, he had already wolfed down a piece and was grabbing a second one, followed by a third…
And then he said:– “Wow, it’s really good!” and walked away.
Whoa… wait a minute. Really good? This was TOFU he just ate, raw tofu! And he said, it’s really good? I couldn’t believe my ears!
But wait, there’s more… 40 minutes later, when I finally took the now baked tofu out of the oven, my son SPECIFICALLY returned to the kitchen to grab a couple of pieces and walked away, once again, telling me how really good he thought this baked tofu was.
I was speechless. SHOCKED! I just couldn’t believe it.
So one of two things, people: either there is genuinely something wrong with my son, or this baked tofu is seriously good s… tuff!
I think it’s the latter, honestly!
But really, don’t take my word for it… Try it for yourself!
You can eat it right as it comes out of the oven, or you could choose to have it at room temperature. Heck, you can even eat it cold! And you know what? You don’t even need to cook it, really. It’s super good even before it hits the oven. Hey, even my son said so!
Just one word of advice, though: if you’re going to make this, I think that you should totally double the recipe. Or maybe even triple it…
It just goes down way too fast!
Start by removing the tofu from its packaging, then drain and press it for about 1 hour to release excess liquid, and then pat it dry with a clean towel or paper towel.
Now, if you didn’t happen to own a tofu press, don’t go running to the store just to get one… You can very quickly set up a little rig that’ll work just as good:
Grab a cooling rack and place it over a container of some kind, to collect all the liquids that’ll drip. I chose to use a glass loaf pan, but practically any container will do!
Next, place your block of tofu onto that cooling rack and then place a small plate or other flat object right over that block of tofu…
Finally, place a heavy object, such as a large book or a cast iron skillet, over that plate or flat object. Now simply put that entire rig aside and let your tofu slowly drip away for about an hour.
Once the tofu is good and pressed, preheat your oven to 375°F and line a baking sheet with parchment paper.
Then, cut the tofu into 1/2-inch cubes and, in a medium sized bowl, combine the tamari, maple syrup, rice vinegar, sesame oil, grated ginger, minced garlic and sriracha; stir to combine.
Add the cubed tofu to the bowl and stir delicately until all the cubes are completely and evenly coated. Set aside to marinate for at least 5 minutes. You could also do this the previous day and let your tofu marinate overnight; just don’t go preheating your oven right now, if you’re gonna do that…
Arrange the cubes of tofu in a single layer on the prepared baking sheet, making sure to leave ample room between each cube for air to circulate. Just try not to eat it all now… it’s worth trying it baked too, you know!
Oh, and whatever you do, do not discard that leftover marinade: it makes for an amazing dipping sauce!
Now bake the tofu in your preheated oven for 40 minutes, flipping the cubes once halfway through, until it becomes all nice and beautifully golden brown.
Let the baked tofu cool for about 5 minutes in the pan — try not to eat it all during that time; it might be best to keep the kids out of the kitchen! — then serve it with that leftover marinade as a dipping sauce, garnished with a handful of chopped cilantro and a few sesame seeds, if you so desire.
That’s IF you still have any left to serve by now…
Easy Oven Baked Tofu
Think you’re not a fan of tofu? Boy, have I got just the thing to change your mind… This Easy Oven Baked Tofu is so crazy yummy, tasty and addictive, you’ll soon find yourself popping it like potato chips!
Servings: 2
Remove the tofu from its packaging, drain and press it for about 1 hour to release excess liquid, and then pat it dry with a clean towel.
Preheat your oven to 375°F and line a baking sheet with parchment paper.
Cut the tofu into 1/2-inch cubes and, in a medium sized bowl, combine the tamari, maple syrup, rice vinegar, sesame oil, grated ginger, minced garlic and sriracha; stir to combine.
Add the cubed tofu to the bowl and stir delicately until all the cubes are completely and evenly coated. Set aside to marinate for at least 5 minutes (or up to overnight).
Place the cubes of tofu in a single layer on the prepared baking sheet, making sure to leave ample room between each cube for air to circulate. Whatever you do, do not discard that leftover marinade: it makes for an amazing dipping sauce!
Bake the tofu in the preheated oven for 40 minutes, flipping the cubes once halfway through, until it becomes all nice and beautifully golden brown.
Let the baked tofu cool for about 5 minutes in the pan, then serve it with that leftover marinade as a dipping sauce, garnished with a handful of chopped cilantro and a few sesame seeds, if you so desire.
Calories: 179kcal, Carbohydrates: 13g, Protein: 19g, Fat: 5g, Saturated Fat: 1g, Sodium: 1177mg, Potassium: 410mg, Fiber: 1g, Sugar: 9g, Vitamin C: 1mg, Calcium: 81mg, Iron: 3mg
If you’ve tried this recipe, please take a minute to rate the recipe and let me know how things went for you in the comments below. It’s always such a pleasure to hear from you!
You can also FOLLOW ME on PINTEREST, FACEBOOK, INSTAGRAM and TWITTER for more delicious, healthy recipes!
*Editor’s Note: This post was originally published in January of 2012 and has since been completely revamped and updated with better pictures. A few minor modifications to the original recipe may also have been made.
Source link
قالب وردپرس
from World Wide News https://ift.tt/2MedJ4V
0 notes
Text
4 Impossibly Easy Meal Prep Recipes That spend 5 Ingredients Or Less

I’ve recently been busting ass at the office and, as a result, my weekly meal prep routine has more-or-less disappeared. I just haven’t had the time, or the energy, to devote to cooking as I did before. But, I also wanted to continue to stick to my budget of $50 per week of groceries.
My travel-to grocery store is Trader Joe’s or the local bargain grocery outlet in my neighborhood. Both stores offer a mix of produce, which is usually what I purchase, and semi-pre-made dishes. Over the past few weeks, I’ve been exploring the latter options in greater detail.
Here are some simple meal prep ideas for when you’re sick, bogged down at the office, or just want a smash. They’re all five ingredients or less, which helps to maintain that budget, too.
5-ingredient meal prep recipes:
1. Chicken shawarma bowls
One of my pre-made discoveries has been pre-marinated chicken shawarma from Trader Joe’s. Even if you don’t shop at Trader Joe’s, there are definitely meats that occupy already been seasoned available at your grocery store. I started pairing this with some pita bread, hummus, tzatziki, and cherry tomatoes to create a simple, healthy, and within-my-budget plate for lunch. As the chicken cooked, I assembled the hummus, tzatziki, and cherry tomatoes and packed my pita bread in a separate Ziploc so that it wouldn’t rep soggy. I then added the cooked chicken shawarma into my five meal-prep bowls and, shockingly, within 30 minutes I was done!
Usually, meal-prepping takes me roughly an hour since I occupy to marinate the meat or vegetables myself. And if I hadn’t been so pressed for time or energy, I would occupy made my own tzatziki. Despite that, however, this meal-prep still came within $25, leaving me with plenty of leftover cash for my travel-to breakfasts of overnight oats and a simple dinner consisting of an omelet. You can change up this recipe however you wish, substituting tzatziki or cherry tomatoes for a Mediterranean salad (there are salad kits available at Trader Joe’s!) or choosing to do wraps with the pita bread and chicken instead of a bowl.
2. Pumpkin bisque
I adore the October food options at Trader Joe’s, and one that I���ve completely fallen in esteem with is their Pumpkin Bisque. It’s creamy and enjoyable and two cans of it (at $3.99 each!) last for an entire week of meal-prepping. I added some grated parmesan cheese on top (around $4) for added healthy fats (and to do the soup more filling), and even splurged on some bread to dip into the soup. (Trader Joe’s has loaves of focaccia for about $3.99 in their bakery aisle.)
I find that this is the perfect I-only-occupy-15-minutes meal-prep that also manages to be healthy, filling, comforting, and ideal for the cooler weather. You can add pepper, roasted chickpeas, or even spinach to the soup if you want a diminutive extra “oomph!” or pair this with a smaller salad on the side to be even healthier. Overall, this recipe costs me about $16.
3. Potstickers & stir-fry veggies
I esteem Asian food, and potstickers along with frozen stir-fry vegetables are guaranteed staples in any grocery store. You can simply cook the frozen veggies with soy sauce, microwave or bake the potstickers to perfection, and add some quinoa on the side for a quick and healthy meal-prep. If you live near a Trader Joe’s, their General Tso’s Sauce makes this dish even tastier, and you can always substitute the quinoa for frozen fried rice. You can also add tofu or chicken to the stir-fry, if you wish.
I devour cooking Asian cuisine, but when I’m stressed and pressed for time, I simply don’t occupy the energy to slice vegetables, tofu, chicken, and do a genuinely tasty sauce. In discovering so many tasty frozen options, I was pleasantly surprised, especially by the fact that these packages didn’t smash the bank. This recipe costs anywhere between $15-25, depending on the additional garnishes. It can pick as diminutive as 20-30 minutes or as long as an hour, depending on if you choose to add tofu or chicken to the recipe.
4. Quesadillas
This is definitely my travel-to since it hits all the flavor profiles I adore and is so, so easy to do. Tortillas, even wheat or spinach ones, are cheap and each package comes with 5-8 large tortillas, so just one is sufficient for an entire week of meal prep for me. A large package of Mexican Blend cheese at about $6 is essentially enough for this recipe. I like to buy pico de gallo, roughly $5, and splurge on avocados to eat alongside these simple quesadillas. Overall, this takes me roughly 15 minutes to do and assemble into my meal prep bowl and if time permits, I even add black beans and jalapeno peppers, both canned.
Being able to buy canned goods which are essentially ready-to-assemble is incredibly helpful. The hardest portion of this recipe, for me, is just opening the can. But once I conclude, I just add the black beans to the melting cheese atop the tortilla on my stove, garnish with jalapenos, and assemble with a few slices of avocado and a generous helping of pico de gallo. Overall, this can cost anywhere from $10-20, depending on how many toppings you want to include.
Frozen foods = meal prep gold
When I’m stressed, it’s incredibly primary for me to maintain a sense of routine. This means going to the grocery store and meal-prepping, but I often want to spend as diminutive time as possible doing these chores so that I can rep back to the work I need to finish or to finally rep in some much-needed rest. I hope these quick recipes can attend others who are similarly overwhelmed before the holiday season and maybe even inspire other, unique dishes!
I rarely ventured into the frozen aisle before this month and having done so, I’m definitely re-evaluating how I can meal-prep, going forward. My prior assumptions about frozen foods being unhealthy or not filling were proven entirely fake. And while I discover forward to having the time to actually slice vegetables and marinate my meats myself, I’m glad these options exist for the moments when I don’t occupy those luxuries.
Keertana Anandraj is a recent college grad living in San Francisco. When she isn’t conducting international macroeconomic research at her day job, you can find her in the spin room or planning her next adventure.
Image via Unsplash
Like this chronicle? Follow The Financial Diet on Facebook, Instagram, and Twitter for daily tips and inspiration, and sign up for our email newsletter here.

!function(f,b,e,v,n,t,s)
{if(f.fbq)return;n=f.fbq=function(){n.callMethod?
n.callMethod.apply(n,arguments):n.queue.push(arguments)};
if(!f._fbq)f._fbq=n;n.push=n;n.loaded=!0;n.version='2.0';
n.queue=;t=b.createElement(e);t.async=!0;
t.src=v;s=b.getElementsByTagName(e);
s.parentNode.insertBefore(t,s)}(window, document,'script',
'https://connect.facebook.net/en_US/fbevents.js');
fbq('init', '1864103540333553');
fbq('track', 'PageView');
Read the full article
0 notes
Text
Multicolored Lunch Box
Hi everyone! Happy New Year! Did you start off to a great New Year? Did you make any New Year’s resolutions? This year, I want my family and I to become healthier and happier. I also want to share many more delicious recipes this year. One of the categories that I want to post more often this year is Korean lunch box recipes a.k.a. dosirak in Korean. Many people are interested in it, so I will be more than happy to share fun and tasty lunch box ideas. As a start, I will make this multiple colored Korean lunch box. I got my inspiration from Japanese Soboro bento. Basically, you put your choice of side-dishes on top of rice for your lunch box. My design has a good combination of Korean flavors and is also colorful, so you will love it. I used egg for yellow, cucumber for green, kimchi for red, and beef for brown. You can prepare things ahead of time, so you can easily can pack the lunch box quickly in the morning.
Yield: 1 Serving
Short Korean Lesson
BaekHyeolGu (백혈구) = White Blood Cell
JeokHyeolGu (적혈구) = Red Blood Cell
Video Instructions
Main Ingredients:
1½ Cups Cooked Short Grain Rice
1 Egg (1 Pinch Slat, ½ Tbsp Cooking Oil)
½ Cup Stir-fried Cucumber Side
Some Sesame Seeds (For Garnish)
Beef Ingredients: (4 Servings)
1 Cup Ground Beef
1 Tbsp Green Onion
1 Tbsp Soy Sauce
1 Tbsp Water
1 tsp Garlic, Minced
1 tsp Sugar
½ tsp Sesame Oil
2 Pinches Black Pepper
Radish Kimchi Ingredients:
¼ Cup Bachelor Radish Kimchi
1 tsp Kimchi Broth
¼ tsp Sesame Oil
¼ tsp Sesame Seeds
Directions
One night before you pack your lunch, you can prepare the bulgogi topping. Obtain 1 cup of ground beef. You can also use ground pork, chicken, or even firm tofu.
Add 2 Tbsp green onion, 1 Tbsp soy sauce, 1 Tbsp water, 1 tsp of minced garlic, 1 tsp sugar, ½ tsp sesame oil, and 2 pinches black pepper to the ground beef.
Mix everything together.
Cover it with some plastic wrap. Keep it in the refrigerator overnight. Alternately, if you suddenly have to make this lunch box, you can marinate the meat while you are preparing the other toppings.
I recommend making the cucumber side-dish the night before, since it tastes better when it’s chilled, and you can save some time in the morning. Please check my stir-fried cucumber side recipe post.
The next morning, cook some rice for your lunch box. Whether you use a pressure cooker or electric rice cooker, you can prepare the toppings while the rice is cooking. We already made the cucumber topping before, so for the second topping, the radish kimchi, let’s season it. I love using bachelor radish kimchi, but plain radish kimchi is good too.
Chop about ¼ cup worth of radish kimchi into little chunks.
Season the radish kimchi with 1 tsp Kimchi broth, ¼ tsp sesame oil, and ¼ tsp sesame seeds. Mix everything together, and that is it. With just a few ingredients added to the kimchi, it turned into a tasty side-dish. Set it aside for later.
For the third topping, scrambled eggs, break 1 egg and mix it with a pinch of salt.
On a heated 8-inch nonstick pan, add ½ Tbsp of cooking oil.
Pour the egg mixture into the pan and wait a few seconds.
When the egg mixture starts to become solid, stir it with chopsticks – at first gently – but then break it into little pieces with a spatula. In 1 and a half minutes, the scramble eggs will be done.
For the last topping, the bulgogi, take your marinated ground beef out of the refrigerator. I marinated 4 servings worth of it, so I will divide the beef into 4. We will only cook one serving today.
Put each portion of the unused beef in a snack bag and freeze them until you want to make this lunchbox again. When you want to use it again, I recommend thawing it in the refrigerator overnight for better texture.
Fry the beef in a heated pan for about 3 minutes on high.
When all the liquid from the beef evaporates, and it becomes nice golden brown, it is done.
So, all 4 colorful toppings are ready. By now, your rice will be done cooking too.
For this particular lunch box, I like to use a rectangular-shaped lunch box. Does it look familiar to you? Yes, you are right. I got this container from a Chinese restaurant when I got take out food. Do not throw away this kind of container and reuse it for your lunch box.
Put the cooked rice in the container and spread it out evenly. This container was kind of a big, so I used about 1½ cups of cooked rice.
Now, it’s the fun part. Let’s decorate it with the toppings. For the best look, make sure that you divide the space evenly into 4 strips vertically and fill each with one topping. I tried different color combinations, and this is my favorite order: yellow, green, red, and brown. So, I put the egg first, cucumber next,
then the kimchi, and finally the beef.
If needed, sprinkle some sesame seeds here and there to garnish it.
Yay! The delicious and colorful looking lunch box is done. It was so simple and easy for this amazing looking lunch box, don’t you think so?
Wrap a spoon, fork, and paper towel in some plastic wrap. Then put them on top of the toppings.
If you do not want to use the lunch box container again, you can just throw away everything after you eat it.
My second son, Logan loved it so much that he said he can eat it every day. lol I hope you enjoyed my lunch box recipe. If you want to see more lunch box ideas, please let me know.
Source: http://aeriskitchen.com/2018/01/multicolored-lunch-box/
0 notes
Text
Stone Bowl BiBimBap
Hi! Dolsot Bibimbap is one of the most popular Korean foods among visitors to Korea. Today I will show you how to make this delicious food at home. This is my updated version of bibimbap recipe that I posted years ago. I had to delete my original bibimbap video on Youtube. To make the bibimbap video again, this time I made it even better by adding some other ingredients and show you how to make stow bowl bibimbap in details. I hope you like my upgraded version of bibimbap. 🙂
Yield: 2-3 Servings
Short Korean Lesson
Dol (돌) = Stone
Cheol (철) = Metal
Video Instructions
Main Ingredients:
Fernbrake Side Ingredients:
2 Cups Soaked Fernbrake
½ Cup Onion
1 Tbsp Soy Sauce
1 tsp Garlic, Minced
1 tsp Olive Oil
1 tsp Sesame Oil
Beef Ingredients:
Sauce Ingredients
Directions
In my opinion, bibimbap is all about good sauce. Whatever vegetables and other sides you put in your bibimbap, the sauce makes your bibimbap taste good. To make good bibimbap sauce, mix 3 Tbsp of hot pepper paste, ¼ tsp of soy sauce, ¾ tsp vinegar, 1 tsp of sugar, ½ tsp sesame oil, ¾ tsp of sesame seeds and ½ tsp of minced garlic. If the sauce is too thick, add about 1 Tbsp of water.
Next, let’s marinate the ground beef. In a bowl, mix ½ cup of ground beef, 1 tsp of soy sauce, 1 tsp of sugar, 1 tsp of cooking wine (optional), 1 tsp of sesame oil, ½ tsp of minced garlic, 2 pinches of salt, and 2 pinches black pepper all together.
Set it aside while you prepare the other ingredients. You can substitute the beef with mushrooms or firm tofu.
We call fernbrake ‘gosari’ in Korea. If you buy dried gosari, soak a handful in water overnight. If it is still not soft the next day, then boil it in water until it becomes soft.
We need 2 cups of softened gosari. Ready to use gosari can also be found in Korean grocery stores.
Cut the gosari into 3-inch long pieces, you can also slice up ½ cup of an onion to add to it.
In a pre-heated pan, add the gosari, onion, 1 Tbsp of soy sauce, 1 tsp of sesame oil, 1 tsp olive oil, and 1 tsp of minced garlic. Fry it for 10 minutes on medium-high. Then, the sogari namul is done.
Along with the gosari namul, I will also use about 1 cup each of musaengchae (korean radish side) and sigeumchi namul (Korean spinach side),
bokkeum kimchi (fried kimchi) (or chopped fresh kimchi), and kongnamul muchim (Korean soy bean sprout side) for today’s bibimbap recipe. These are typical ingredients that can normally be found in bibimbap, but seriously there is no rule for it, so you can grab whatever Korean sides or vegetables you have on hand for your bibimbap.
Now, let’s prepare some vegetable ingredients for better color, flavor, and nutrition. You can pick your favorite vegetables, but these are the common vegetables we use for bibimbap in Korea.
I will chop ½ cup worth of onion, ⅓ cup worth of carrot, ⅓ cup worth of zucchini, and ¼ cup worth of green onion into 2-inch long thin strips. The similar size of the vegetables makes your bibimbap look more neater when you assemble the dish.
Wipe a heated pan with an oiled paper towel to slightly grease the pan. Fry the onion with 1 pinch of salt for 3 minutes on medium-high.
After 3 minutes, remove the onion from the pan and do the same thing for the green onion. Fry it for 1 minute. The next one is zucchini for 2 minutes.
Fry the carrot with a pinch of salt for 2 minutes. I fried all the vegetables separately for a better appearance. However, many times, I just fry all the vegetables together at once in the same pan. For example, I start to fry the onion, then add carrot and zucchini, then add the green onion, and so on, based upon the cooking time of each vegetable.
Finally, fry the marinated beef for about 3 minutes on meidum-high.
We are getting closer to the end of the preparations. Cut about ½ cup worth of roasted dried laver into thin 2-inch strips with scissors.
Some people add the eggs raw, but if you want them cooked, fry them now. So, all the ingredients for bibimbap are ready now. Now, it is time for the fun.
To make deliciously crispy rice on the bottom of your stone bowl, as you get in a Korean restaurant. 😉 Drizzle 1 Tbsp of sesame oil on the bottom surface of your stone bowl for bibimbap. Swill it around your bowl so that the oil will be spread out evenly on the bottom. Make sure to get the oil about 2 inches off the bottom.
Put about 1¼ cups of freshly cooked short grain rice in the bowl and spread it on the bottom. I press down gently on the rice so that it cooks better with the sesame oil and becomes crispy golden brown later.
On top of the rice, put some of each ingredient that we prepared earlier.
It already looks very colorful and tasty.
Put your fried egg in the center of the bowl.
Place your stone bowl on your stove top and start to cook it on high. Depending on your stove temperature, the time can be slightly different, but it should be done in 5-6 minutes. When it is almost done cooking, you will hear this sizzling sound from the bottom of your bowl. That means your rice is getting crispy.
After 5 minutes, steam will come out of the bowl with a crazy amazing smell. Put your desired amount of bibimbap sauce in your bowl.
Mix everything with the sauce and eat. Please be careful not to burn your mouth. It is hot. When I mix it, I carefully leave a thin layer of rice at the bottom of the bowl undisturbed so that it continues cooking to get crispy. If you mix it into your bibimbap, you will not get much, if any, crispy rice.
Please try my bibimbap recipe and share your story with us. 🙂
Source: http://aeriskitchen.com/2019/02/bibimbap-ë¹ë¹ë°¥/
0 notes
Text
Easy Sheet Pan Recipes for Chicken, Fish, Tofu, Pork—Even Pizza!
New Post has been published on http://foursprout.com/health/easy-sheet-pan-recipes-for-chicken-fish-tofu-porkmdasheven-pizza/
Easy Sheet Pan Recipes for Chicken, Fish, Tofu, Pork—Even Pizza!
Maybe you’ve finally gotten used to busting out the sheet pan when you are in a recipe rut, or super-short on time. And perhaps you already know that you can make top-notch granola with it, or roast a whole head of cauliflower on it.
But consider this: You can make a whole meal on a baking sheet, no matter your dietary preferences or restrictions. Cooking chicken? Great. Add chopped potatoes and leeks to the pan, too. Got halibut you’re wrapping in parchment? Consider the starches and veggies you might nestle around it. If you’re heating up that oven anyways, you might as well employ all its power, conserving energy.
As you get more familiar with tucking one favorite dish in with another, you’ll start noticing which flavors have crossover potential for vegetables and proteins alike: If chicken is going into that oven seasoned with harissa, olive oil, and salt, remember that potatoes also do well with those flavors. If you’re making an Asian-inspired pork dish using a hoisin marinade, consider which produce might favor those elements—hello, broccoli!—and go for it.
While amping up your creativity, consider your go-to spices plus the baking temperatures of your favorite recipes. And don’t forget: Among the many charms of the sheet pan is its quick cleanup potential. Here are some notions to get you cracking.
RELATED: The Best Healthy One-Dish Dinners for Busy Weeknights
Halibut and Brussels Sprouts
When making this delicious halibut recipe, in which the fish gets tucked into parchment paper to keep it moist, why not add Brussels sprouts to that 450-degree oven, too? If you keep their seasoning fairly neutral, you can keep everything together. Just toss the sprouts with canola oil and salt, cut them in half, and place them face-down (as is done here) starting them half an hour before the fish.
Roast Broccoli and Pork Tenderloin
Lean pork tenderloin can marinate overnight, then cook up in just half an hour in a 400-degree oven. Consider this recipe, setting aside extra hoisin-honey sauce, and arranging a whole head of broccoli florets and thinly sliced stems (tossed with a bit of olive oil and salt) on the pan alongside the meat. Not only will the crucifer soak up the tenderloin’s juices, but when it’s good and crispy at the end of cooking, you can toss it with the hoisin-honey sauce. It’s the sort of easy homemade Chinese dish you’ll find sneaking into your weekly repertoire. (Pro tip: For extra flavor, sear the tenderloin in a skillet first. It’s an extra dish to wash, but it’s worth it!)
Chicken, Leeks, and Potatoes
Food writer Melissa Clark is famous for her Instant Pot savvy and skill with spatchcocked chickens (which you can also plop on a sheet pan,) but this recipe has a cult following. Chicken thighs and drumsticks nestle next to creamy Yukon gold potatoes and leeks perked up with lemon zest and olive oil. The chicken and potatoes get a fabulous kick from harissa, a Middle Eastern spice mix (and sometimes paste) generally comprising chiles, garlic, cumin, coriander, and caraway. Super-savory, smoky and sensuous, it’s the sort of spice that once you’ve had a taste, you’ll be dousing everything in it.
Eat clean (and save money!) with our 30-Day No Takeout Challenge With Giada DeLaurentiis!
Baked Tofu and Shaved Brussels Sprouts
If you haven’t pressed and dried tofu, some might argue you’ve never really tried tofu. Baking the soy protein dries it out even further, which amplifies its silky texture while also making its texture denser and more meat-like. This recipe utilizes miso paste, a delightful thing to have in the fridge for stir-fried collards, soups, glazes, and pretty much almost any Japanese or Chinese dish you concoct. Swap out the baking dish for a baking sheet, and surround the tofu with shaved Brussels sprouts you’ve tossed with grapeseed or olive oil and salt. Toss the sprouts occasionally; and when they’re crisp but not completely black, toss them with the miso marinade you used on the tofu.
Smoky Eggplant and Provolone Pizza
Once you’ve started making your own pizza, whether from store-bought dough or homemade dough, it’s quite difficult to go back to even the best frozen brands. We especially love when a pizza delivers plenty of protein and produce along with that lovely crust. This smoky eggplant-provolone number delivers on that, and it is divine. You might need one extra bowl or an additional sheet pan, but the cleanup is still minimal. Roasting eggplant sweetens it, and fresh basil adds a pizzeria-worthy brightness. You could serve this to guests and they’d be happy.
0 notes
Text
New Post has been published on CrossFit 416
Short on Time? That's No Excuse.
I’ve decided to put together for you a list of Toronto’s best and healthiest take out restaurants that will help you stay on track while you’re on the go. These restaurants are scattered around the city so wherever you may be and wherever you’ve going, there’s an option for you.
IQ Food Co.
With multiple locations around the city and a few in the financial district, this is a great option for those running in between meetings who need a good pick-me-up.
http://www.iqfoodco.com/nutrition/
Location:100 King St. W
100 Wellington St. W
181 Bay St.
18 York St.
55 Avenue Road
What we’d order:
THE SPICY SALMON
Oven roasted steelhead salmon, avocado, roasted sweet potatoes, shredded red cabbage, charred broccoli, pickled onions, organic microgreens, lime juice, spinach, brown rice, sriracha vinaigrette
*This option is gluten free and also high protein with a great dose of Omega 3 to help with inflammation.
*Ask for dressing on the side and dress with half the amount if you’re managing your fat intake
THE NOTORIOUS G.R.E. SMOOTHIE
Spinach, kale, cucumber, parsley, celery, lemon juice, chia, coconut water + pineapple (pro tip: remove the pineapple if you’re looking for straight greens)
ADD A BOOSTER! PROTEIN (WHEY // VEGAN) |
For tracking purposes: add 1 tbsp olive oil to account for hidden fats potentially used to roast the potatoes or the salmon
Fresh Restaurants
Toronto’s original source for modern vegan food, made-to-order juice and organic, raw, cold-pressed juices and nut milks.
http://www.blogto.com/restaurants/fresh/
Location: 147 spadina ave.
What We’d Order:
PURE GREENS & PROTEIN
Steamed kale, bok choy & swiss chard
, marinated tofu cubes & adzuki beans, toasted nuts, lemon and tahini dressing, dressing on the side
*This dressing is high fat
. Ask for it on the side or simply sub with lemon juice and balsamic vinaigrette.
RADIANT KALE SMOOTHIE
kale•romaine•spinach•apple•ginger•lemon•banana•raw almonds
*Added Vega protein boost
Spark Fresh Bar
Spark, formerly Fueled Espresso and Fresh Bar, opened across from the Ossington subway station in place of an old convenience store. It offers commuters a bit of morning zing caffeine, fresh juice or smoothies, or stop by later in time for lunch and dig in to one of their rice boxes or hearty salads.
http://sparkfreshbar.ca
Location: 739 ossington avenue
What We’d Order:
CRUNCH BOWL
Almond Lime dressing, carrots, fennel slaw, beets cucumber, tomatoes, pickled onion, smoked hummus, avocado, mixed nuts
*add 1-2 eggs
*If you’re watching your fat intake, hold the mixed nuts, avocado or both. Dressing on the side.
BREAKFAST SMOOTHIE
Oats, banana, peanut butter, cinnamon vegan protein agave, almond milk
*add extra protein boost
Flock Rotisserie and Greens
With multiple current locations and a couple new ones on the way, this is a fantastic choice for those who are looking for a great source of naturally raised, freeof hormone and antibiotic chicken.
http://www.eatflock.com
Locations: 330 adelaide st w
97 harbord st
67 richmond st
175 bloor st
661 university ave
What We’d Order:
POWER FLOCK
Romaine Hearts & Baby Spinach, Steamed Squash, Marinated Black Beans, Daikon, Pickled Onions, Shaved Brussels Sprouts, Soy Beans, Cilantro, Goji Berries, Crispy Chick Peas, Sunflower Seeds with Carrot/Ginger/Soy Bean/ White Miso Dressing
*add chicken
On the side: Steamed Edamame
* A great clean source of protein
Impact Kitchen
CrossFitters, Paleo lovers, this one’s for you. Impact Kitchen offered minimally processed, nutrient dense real food that’s paleo. They also offer lots of vegetarian, vegan and gluten free options. If you’re not following a paleo diet, Impact still offers great options providing you with balanced, wholesome meals on the go.
http://www.impactkitchen.ca
Location: 573 King St E, Toronto
What We’d Order:
BUILD YOUR OWN MACRO BOWL
Protein: steak or chicken or falafel or salmon
Greens: arugula or spinach
Carb: roasted sweet potato or quinoa or rice
Dressing: balsamic & olive oil or lemon & olive oil
* dressing on the side – just balsamic hold the oil if you’re cutting fat
I also recommend checking out their collagen chocolate pudding. It’s nothing like anything I’ve ever had before and so delicious.
The Big Carrot
The Carrot Kitchen is The Big Carrot Natural Food Market’s new eatery and food service department. They are proud to serve our community fresh, local and organic dishes.
Daily our cooks create a healthy selection of fresh, innovative dishes with ingredients sourced from many local farmers and producers. They use organic ingredients when ever possible.
With a variety of dishes suitable for many specific dietary needs including vegan, vegetarian, paleo, made without gluten and/or dairy, there’s something for everyone.
In addition to traditional vegetarian dishes, theres a new food service concept including:
Salad Bar, Hot Food Bar, Sandwich Bar, Taqueria, 4 daily soups and stews, Dozens of Grab & Go snacks and meals, Rotisserie Organic Chicken,Pastries and Desserts
https://thebigcarrot.ca/home/
Location: 348 Danforth Ave
What We’d Order:
We’d go for a bowl filled primarily with greens and lean protein. Prioritizing nutrients and protein first will help keep you fuller, longer. Thena carb source (roasted potatos, sweet potato or a half cup of a rice dish on the side, or a bean dish) with light balsamic dressing drizzled on top. Having access to a self serve salad bar provides you with tons of options but it’s easy to get carried away. Stick to simple foods so you know exactly what you’re eating.
The Goods
The Goods offers vegan, organic, gluten free and nut free options. They offer raw, paleo, low glycemic, sugar free, grain free, soy free options. Really, it couldn’t get cleaner.
https://thegoodsisgood.ca
Location: 1255 Dundas Street West
What We’d Order:
THE DUWEST CHILI
Spicy and hearty chili with tomato, peppers, spices, brown rice, black eyed peas, kale, corn, peas, celery, leeks and carrots
*Black beans give you a good dose of protein while chili is the best for this time of year!
XO Bisous
http://www.xobisous.com
Location: 60 Adelaide St. East, Toronto
What We’d Order:
The frittata (subbed with egg whites, if available)
The Harvest salad with addition protein and the vegan protein bar
The Grow Op
“This is the Grow Op. Where good juice isn’t bought, it’s grown. By farmers who produce better produce. The stuff nature intended. Because sometimes being better is just that simple“
http://www.thegrowop.ca
Location: 222 Ossington Ave Toronto
What We’d Order:
SMOOTHIE
Pineapple/Spinach/Apple/Chlorella/Fresh Squeezed Orange Juice
*add 2x hemp protein for a boost
ZUCCHINI NOODLE SALAD
raw zucchini noodles/ roasted almond slivers / green onion / sesame seeds / cilantro / baby spinach/ vegan bean ball / house made almond butter dressing
*tip: for extra protein, ask for falafel balls on the salad
*for less fat, ask for dressing on the side
Garden Gangsters
Previously called Evolution Food Co. you can walk in or Uber Eats from these guys providing you with anything from acai breakfast bowls, breakfast toast, salad bowls and smoothies.
http://gardengangsters.com
Location: 12 Market St.
171 East Liberty st. 127A
What We’d Order:
CORFU CRUSH BOWL
Quinoa, greens, cauliflower, tomato, caramelized onion, sweet pepper, feta, mint, roasted bell pepper vinaigrette.
*add chicken for protein
SAPPHIRE SOLACE OAT BOWL
Overnight oats, vanilla almond milk, greek yogurt, vanilla bean, blueberry, blueberry drizzle.
*(pro tip, add your own protein powder into the mix and make it a high protein breakfast)
The Basil Box
The place is for those of you who like OPTIONS! With multiple locations (and even more soon), and the ability to create your own dish, Basil box provides us with tons of fresh ingredients you can put together into your own custom dish.
http://www.thebasilbox.com
Locations:
351 Yonge Street
441 Queen Street West
410-466 Bathurst Street opening soon
200 Bay St, Toronto opening soon
What We’d Build:
Spring Mix
This nutrient-rich mix of baby lettuces, greens, and radicchio blends slightly bitter flavours with soft, tender leaves and crisp textures. It’s a great place to begin your box.
Sautéed Peppers
Red and green bell peppers sautéed with a pinch of salt and pepper. Classic and colourful.
Roasted Edamame
Garden-fresh edamame oven-roasted to bring out the full flavour of these tasty vegetables.
Lemongrass Chicken
Tender chicken, marinated daily with an exotic blend of lemongrass, garlic and coriander.
or
Chili Lime Shrimp
We cook our succulent shrimp with Sriracha chili sauce and fresh lime juice for shrimp with a bit of a kick!
Our Sweet Chili Lime sauce packs a punch. We combine chili peppers and fresh lime juice to bring some heat to our sweet sauce.
*on the side
Pickled Veggies
This colourful blend of pickled carrots & daikon radish is refreshingly sweet and tart.
We hope that the next time you’re on the go, you choose one of these TASTY and QUICK options.
For more ideas on how to live a more healthy, balanced lifestyle while living a busy life, contact [email protected] to book your FREE consultation to chat all things nutrition and lifestyle.
0 notes
Last Seen Blogs

bronxcc-cuny-2019-beya-stem
B! C! C! You Know!!!

lovelyoptimisticglitter
Untitled

mongeesemeese
Moose Art Cave

urlocalmentallyunstablegal
active sept 23

histhetic
Histhetic