#knb217
Text
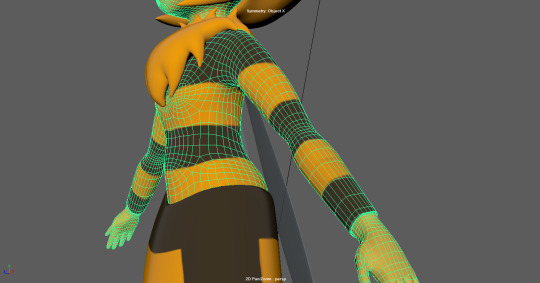
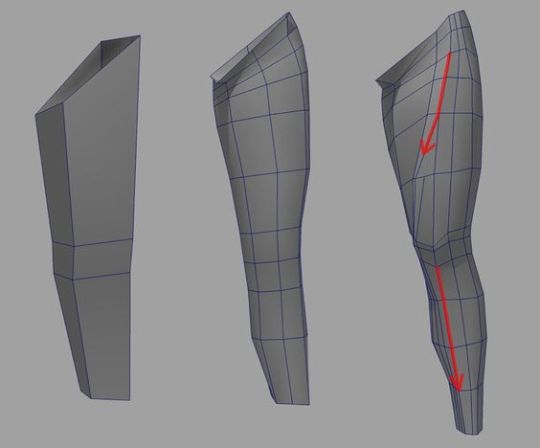
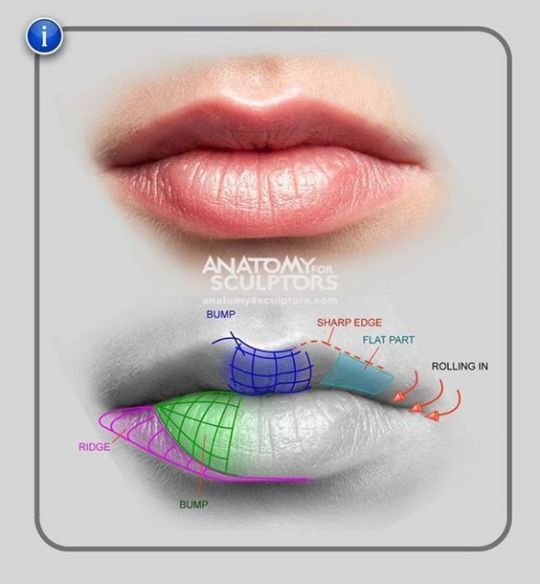
6. Retopology and UV unwrapping
Soojung Lee, n9667598

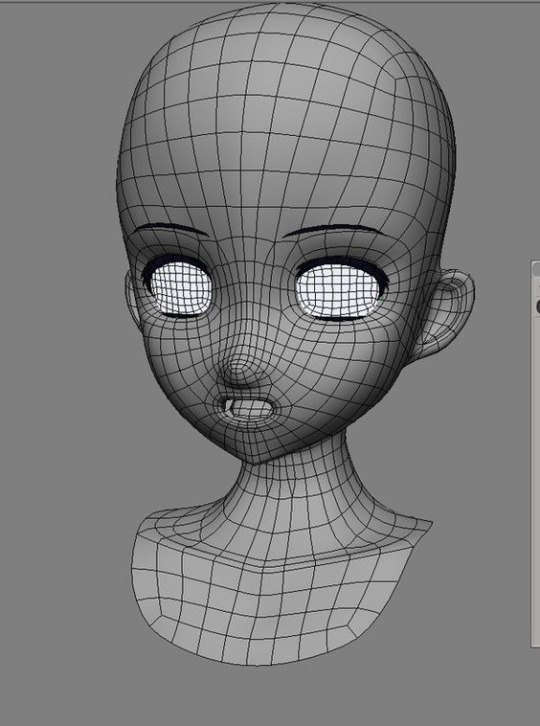
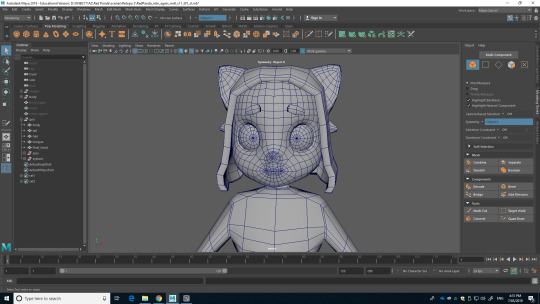
^ Figure 1: Finished
From the tutor’s comment, I better deleted the ribbon because it will make my job difficult and harder. I do not want to make my life difficult, but I hide the ribbon rather than delete because I want to keep this for the future my own exercise and practice.
As I finished with modelling and mirror the mesh to create perfect finished model, I have to work out the face loops to apply the face rig in the future, so, this is now the time to do the retopology on the face.
^ Figure 2: Tried retopology
I tried to do the retopology to the face using quad draw tool, but somehow, it was not working. I grab the faces to check is it working or not, but it was not working.
The problem in this was I follow the faces on the base mesh rather than create my own faces to creates the rings around the eyes, mouth and etc. Therefore, I started everything again.
^ Figure 3: Retry
To started again, I deleted what I have done and redo everything I have because starting from new is the best way to start rather than undo and fixing. I slowly review the YouTube tutorial video and follow all the steps.
I started drawing the ring around the eyes and mouth as a tutorial video.

^ Figure 4: Continue
I extruded the edges of the rings in Figure 5 and slowly cover the head mesh. As you can compare with Figure 2, this is now more looking right.
^ Figure 5: Final
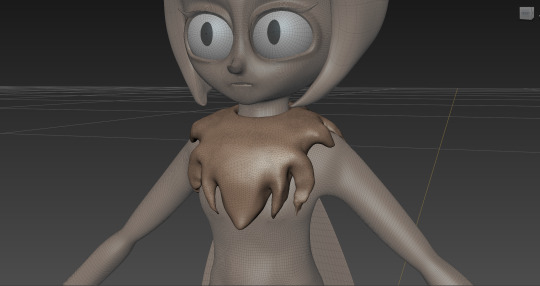
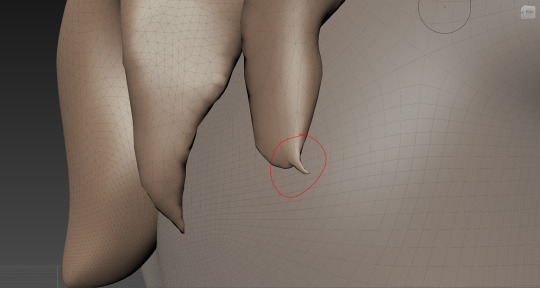
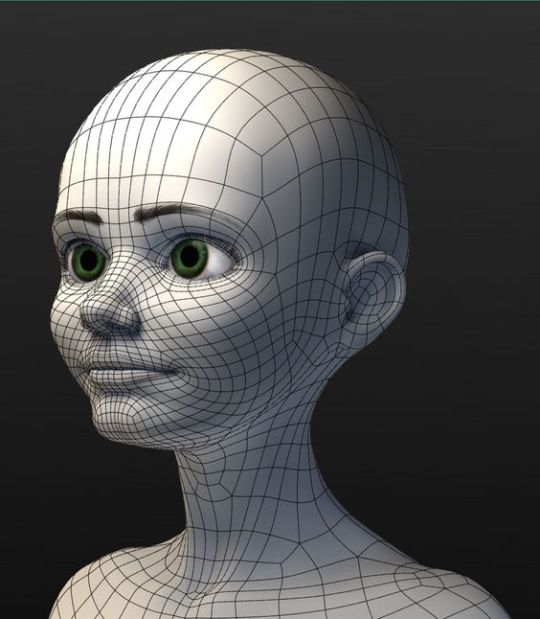
After all these stressful processes, I finally figured out. As you can see in Figure 7, I can now select the rings around the eyes and mouth where I need to add the rig and animate for facial expressions, but I still cannot select the faces around the head. Actually, I realised I forgot to create the ring for the headline, which means I have to do it again.

^ Figure 6: Fix the eyes
Before redoing the retopology again, I realised that eyes are not looking right, so I fixed the position of the eyes to move inside and as I change the position of the eyes, I also moved the eye wholes position as well. Now I can redo the retopology again with updated face mesh.

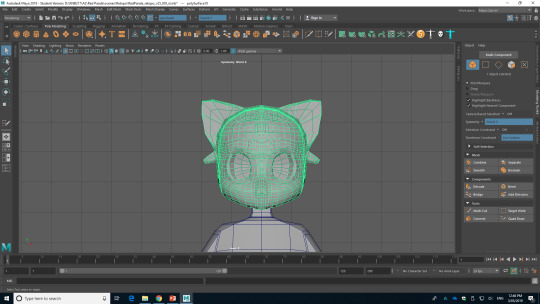
^ Figure 7: New retopology
I was having a bit of trouble when I was doing retopology again because this was only the second time to do after the first one. The problem I was having was a similar problem I have in the first try. I can grab the rings, but I keep selecting the all around the head. I did lots of deleting, undo and redo again and again to figure out the shape and problems. Figure 7 is the result of all the practice. This is much better retopology compare to previous meshes because I have more rings around the eyes and I can select the headline, which was not possible in the previous retopology.
I was checking my retopology in Figure 7 with the tutors, it also had the problem that I need to fix, but this was the best retopology I have done by myself, so I have no idea how and what to fix because if I do it again, I was pretty sure it will not look very different with the previous one. Therefore, I asked for help and I had a consultation with one of the tutors to help me to understand how to do the retopology and what I need to do to get a better result. As always, before we started work, we went to the Pinterest site to find the reference images so I can understand easily.

^ Figure 8

^ Figure 9

^ Figure 10

^ Figure 11

^ Figure 12

^ Figure 13
^ Figure 14

^ Figure 15
They are all the researches we have done. We were focused on anime character head rather than real human face as my model is designed in anime character style. By looking at those various reference images, it helped me to understand what and how I need to retopology, but I still have a problem with building retopology myself. Therefore, he showed me how to do and what I need to be careful about.

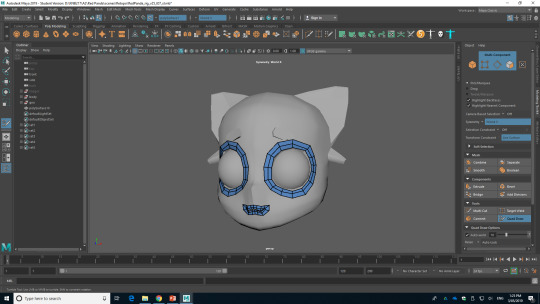
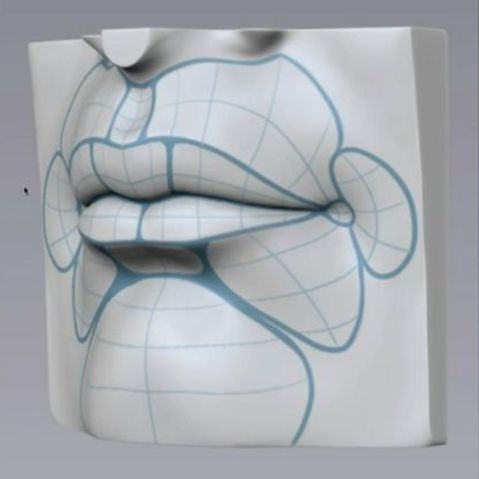
^ Figure 16: Rework
This is the retopology I have done with his instructions and helps. He showed and told me that the faces need to be in similar size as much as possible except the eyes, mouth, nose and anywhere there need the detail. I did not know that the size of each face has to be in a similar size that's why all my previous retopology were not looking clean and nice as Figure 16. He also told me that I have to build the eyes, nose, mouth and headline first so I can have the rings for the face rigging. He also showed me how to figure out the five angels and various things I did not know, therefore, I was able to reach to the improved result compared to all the previous retopology.
^ Figure 17: Final
This is the final looks of the mesh. I also told me to use soften edges if I want to soften looking model. I learnt various knowledge from him. He helped me and taught me the way to solve my problem and improve.
This was a seriously hard process. I did lots of mistakes and have various problems I could not solve. This was a really challenging process that I do not want to do it ever again, but I also want to try this again after this assessment finish.
I moved on to the UV unwrapping after finished with retopology.
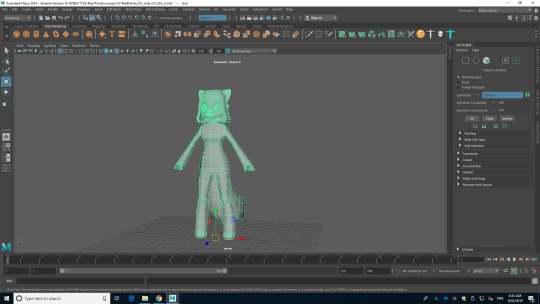
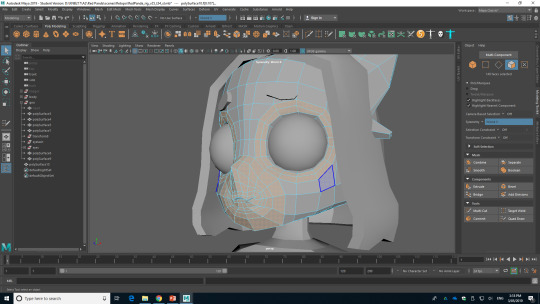
^ Figure 18: Combine mesh
Before starting UV unwrapping, my meshes are separated, so I have to combine them to keep them as one mesh. When I combined them, I also have to move the pivot because sometime it goes to somewhere different rather than the centre of the grid and character. Now, I am ready to UV unwrap the character.

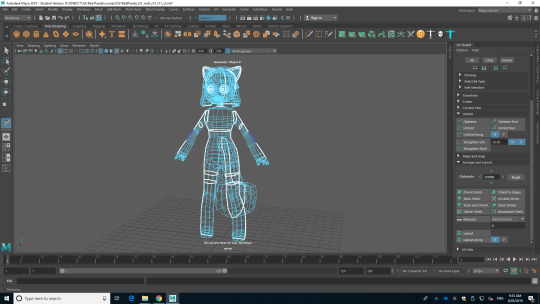
^ Figure 19: Start UV unwrapping

^ Figure 20: Unfold
It became like Figure 20 when I unfold the UV unwrap without doing any cut and saw process. This UV unwrap is not right, so I have to do the cut and saw process for texture and everything.
^ Figure 21: Cut and saw manually
This is the After I cut and saw the mesh. The white lines show where and how I cut.

^ Figure 22: Unfold and layout
When I was finished with cut ans saw process, I have to unfold the UV and layout automatically. However, as you can see in Figure 22, they layout randomly, which makes hard me to texture them.
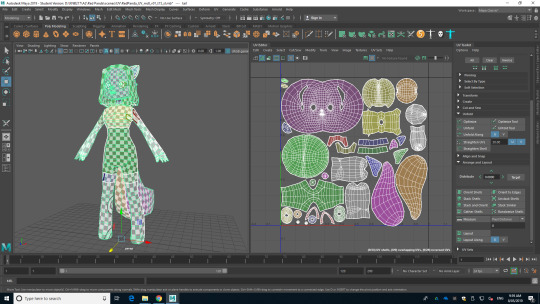
^ Figure 23: Clean up
Therefore, I moved on to layout them manually, and during this process, I also change its’ size to get similar size of the faces showing in left handside in Figure 23, so I will not have low and high resolution texture for each parts.
The UV unwrapping was not hard as I am used to UV unwrap, however, the retopology was the hardest process in this part. I have not done the retopology before and I was not fully understand the knowledge of how to build retopology. It was possible to improve until this level by getting help from tutor and the researches I have done.
Reference list
- FlippedNormals. (2018). Retopology for Beginners in Maya. Retrieved from https://www.youtube.com/watch?v=xpDWta5O3n8&list=LLmWZeSDkd1_mwsEKZ0Xs2Dw&index=4&t=0s
- Matthew Yourshaw. (2016). Maya Tutorial - Quad Draw Tool. Retrieved from https://www.youtube.com/watch?v=takFYSXDxzg&list=LLmWZeSDkd1_mwsEKZ0Xs2Dw&index=5&t=7s
- My Oh Maya. (2017). Maya 2017 Update 3: Quad Draw / Make Live Workflow. Retrieved from https://www.youtube.com/watch?v=edegRylKdzI&list=LLmWZeSDkd1_mwsEKZ0Xs2Dw&index=3&t=17s
- Next tot Education. (2018). Head Retopology in Maya Using Quad Draw Tool - Part 01. Retrieved from https://www.youtube.com/watch?v=MBJv_qLYmCo&list=LLmWZeSDkd1_mwsEKZ0Xs2Dw&index=2&t=170s
- RaveeCG Tutorials. (2016). EASY ZBRUSH - UV / UNWRAP - USING UV MASTER PLUGIN. Retrieved from https://www.youtube.com/watch?v=gQht6S7aWDg&feature=youtu.be
2 notes
·
View notes
Text
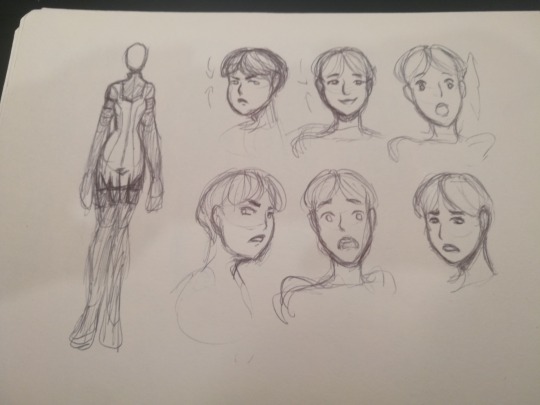
2. Character T-pose
Soojung Lee, n9667598
After I finished the character idea sketches, I started to draw t-pose of the character for the modelling.
^ Figure 1: Sketches
First thing I have done was to sketch out the character. I used two different guidelines to line them up at the same place, which allows me to draw more equal drawings, such as the height of the character, place of arm and etc.
^ Figure 2: Line
When I finished sketches of the t-pose of the character, I clean up the line, so it is more recognizable when I move to 3D modelling.
^ Figure 3: Finish with colour
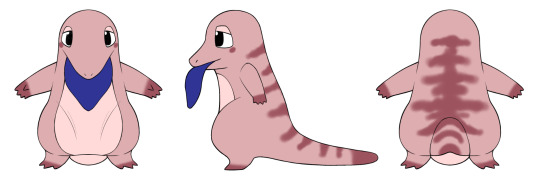
After cleaning up the lines of the character, I also add the base colour of the character. This is the plan for character texture.
1 note
·
View note
Text
A2 - Finalisation and Turntable Render
youtube
Here is my rendered turntable of the final version of my Honeydoo model, including a wireframe render. (Use this link if it doesn’t appear above: https://youtu.be/DOnKmIxNraQ)
I used the PDFs provided by Thomas in his Advanced Animation Production, composition workshops to help me get it set up. Although I was unable to get render layers working properly, which is something he too had trouble with.

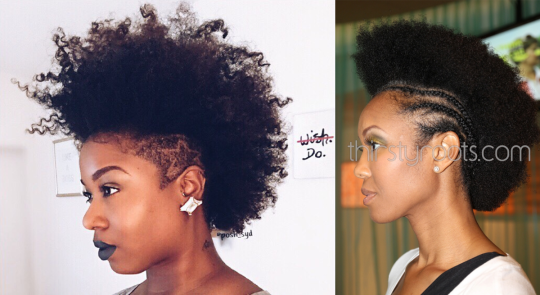
I’ve made adjustments to the mesh, especially around the hair in order to make it appear less like a helmet. I’ve attempted this by making her ears slightly visible, making the overall shape of the hair less ‘perfectly round’ as well as basing the side profile on that of actual afro hairstyles (see reference far below).
I’ve also updated her hands so that there’s an extra loop at where the fingers begin and I’ve moved the thumb down to a more natural position.
Ideally, I reckon they could use a lot more edge loops for extra definition, however since this is smoothed version (for sculpting) from the low-poly model, it might be best if I just did this by revising my low poly model with what I’ve learned from my first sculpt-modified version.
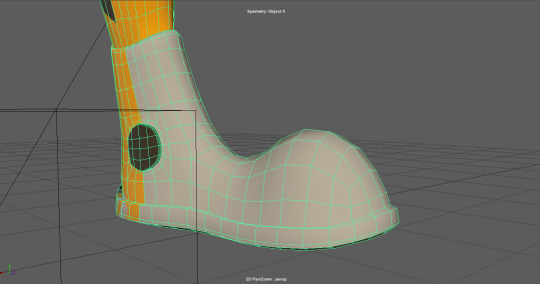
I’ve also made attempts to create an updated version of the model with additional detail, especially on the shoes. The arms have also been slightly updated to appear less sausage-like.
Unfortunately, I decided not to feature it in the turntable due to complications involving the UVs and having to painstakingly redo the texture, as you can kind of see with the texture on the shoe.
1 note
·
View note
Photo

Next step was to add the feet and create a collar for the shirt. The boots were modelled from a cube and were added to the legs. The collar was extruded from the body of the model. Although the drawings didn’t have a collar, I thought it was a good addition to the character to make him more believable.
1 note
·
View note
Photo
KNB217 Assignment 2 Human Character: Reflection
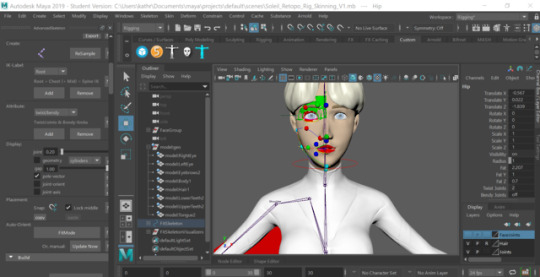
Rigging
I started rigging too late into production so there are plenty of things that could be improved. I’m unhappy with the placement of the wrists and scapula joints and perhaps the toes could be in a better place.
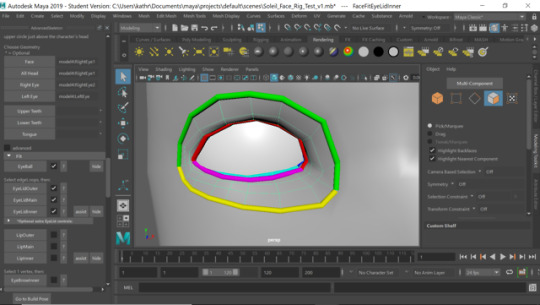
The face is mostly fine with a few problems with the inner lip being too close to the main lip edge loop causing it to clip into the lip and leaving me unable to do any open mouth smiles on the mode without clipping. The eyes also don’t close the entire way without me adjusting the face joints individually due to me sculpting the eyes as an exaggerated lopsided almond. (Jones, J. 2018)
Skinning

I didn’t have too many errors to fix in skinning because I made the skin cage fit very close to the model so there wasn’t too many errors in the skinning. I just made sure the joints would ‘squish’ together better like the thighs against the torso and the knees, and forearm and upper arm, and in particular the breasts when the chest is moving around were stretched too much with the model so I had to bind them to the chest more to create the illusion that they are separate objects that are subtly changed by the muscle movement, like they are in real life. Unfortunately, because I left this so late, I completely forgot to adjust in the skin in a few key areas like the neck being too heavily distorted by head movement, with the model unable to turn its head too much to either side.
Animating
This section did not give me much trouble since the animations did not have to be timed well and just flowed from key to key, however it was in this stage I found a lot of things I missed with the skinning and rigging that it was too late to go back and fix. I was unable to recreate the characters signature open mouth smile because of my errors rigging, and I broke the rig somehow so that the neck joint would not accept any key frames so that could not be in the calisthenics videos and had to be screenshot instead. (Maestri, G. 2015) (Animation Mentor Blog. 2019)
I made sure to make the expressions rather exaggerated as the character herself is quite open and unrestricted with her emotions. The only expressions I did not do this with was contempt, since it is more of a microrexpression and sadness, since I found if I pushed it too much she would look too pouty and sullen and not truly sad. (Science of People. 2019)
0 notes
Photo

0 notes
Text
KNB217 Modelling high poly model and rigging
This assessment was expected to model a human based character with high quality and developing rig for it. This time, I chose an Japanese cartoon character from a film named “Canaan”. The over-all progress was not done successfully with the rigging part while the modelling was just fine. The following blog will reflect on issues step by step.
1 note
·
View note
Text
KNB217 Assessment 1 - Conclusion and References
The weirdest thing I found when producing both of these models was the resulting polycount. The Mysterious Stranger model ended up being 28.7k triangles to 14.4k vertices, a mere fraction of what the shark model ended up being and a total inverse of the assignment brief. What was more interesting was the fact I put far more effort into The Mysterious Stranger than the shark model, or at least I thought I did. This is especially apparent when you compare the initial models I made for each in Maya.
With another, more detailed and rigged model to assemble for the final assessment of this subject, it would be in my best interest to better get to grips with Zbrush and its charitably “eccentric” ui. However despite the mishaps and the hurdles of my own hubris, I think the models themselves scrubbed up alright. Just maybe not as good as I could have done.
References
Amy McKenna. Accessed 16th of April 2019. Where does the Concept of a “Grim Reaper” Come From? https://www.britannica.com/story/where-does-the-concept-of-a-grim-reaper-come-from
Harry Lawson. April 2016. War-Paint, Shark Teeth and Pin-ups – A Brief History of Aircraft Nose Art. https://www.aerosociety.com/news/war-paint-shark-teeth-and-pin-ups-a-brief-history-of-aircraft-nose-art/
Morne Hardenberg. April 2018. Great White Shark. Smithsonian Institution: https://ocean.si.edu/ocean-life/sharks-rays/great-white-shark
Pixar Animation Studios. 2003. Finding Nemo. https://www.pixar.com/feature-films/finding-nemo
Will Vinton Studios. 1985. The Adventures of Mark Twain. https://www.youtube.com/watch?v=iJb3Gady7Vc
1 note
·
View note
Text
KNB217 - Digital Creatures
Assignment 2 – High polygon count character Modelling and Rigging
Euan Boyd (n9113894)
0 notes
Link
Sketchfab.
By this point I’d run out of time. I got my model uploaded to Sketchfab and figured out how to add and manipulate the textures and lighting so things where looking good! I then realised that faces of my model where missing, primarily on the lower back and waist. Again this due to me missing key edges on my initial model. I managed to fix this however in doing so it altered my UV shell, because I didn’t unwrap it correctly this could be fixed in the little time I had left so I left it. I spent so much time trying to fix this that I’d completely missed another error of the exact same nature on the face. Again I must have deleted two edges that go to the nose which resulted in my model now having an extremely fat and plug snout. I fix the issue however it completely warped the UV on the face so I decided just to leave it plump and have at lest some sort of recognisable facial textures. I was going to try and get back to university campus to correct these however by this point I’d used up my upload limit on Sketchfab and don’t currently have the spare finances to waste.
0 notes
Text
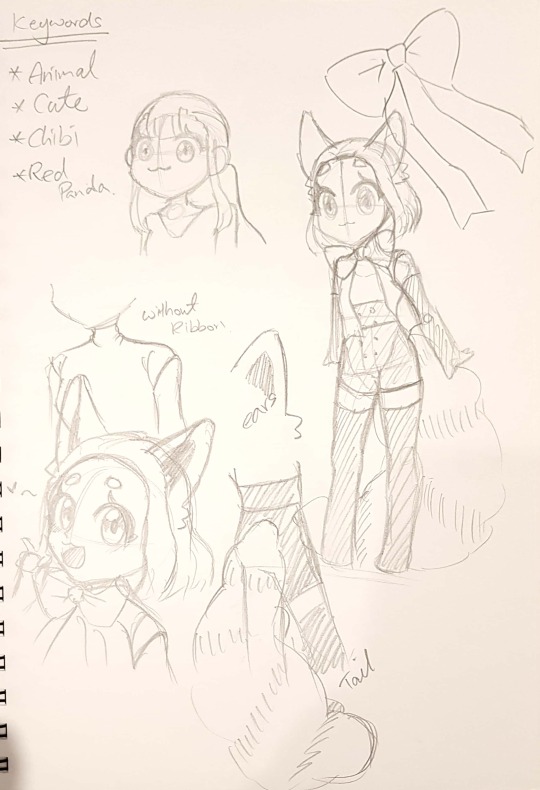
2. Character Design
Soojung Lee, n9667598
After I have done various researches on character drawing styles, I now started to design my own character to modelling for the second assessment.
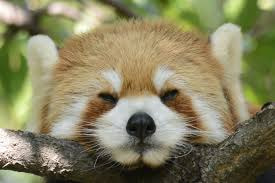
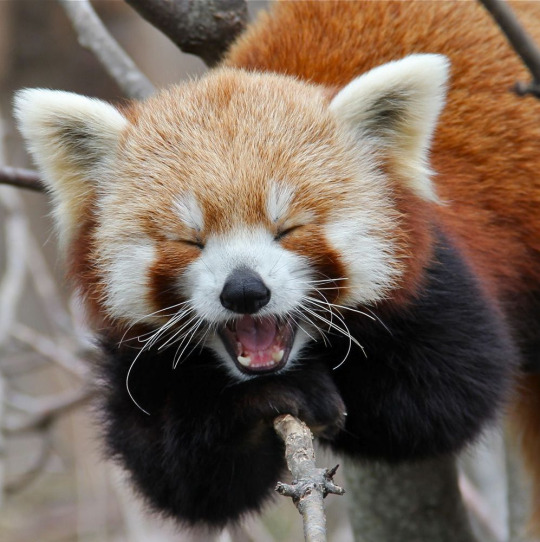
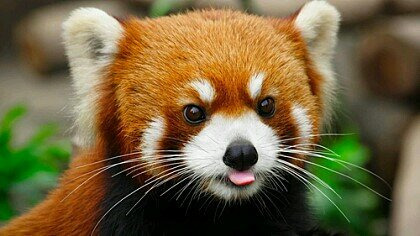
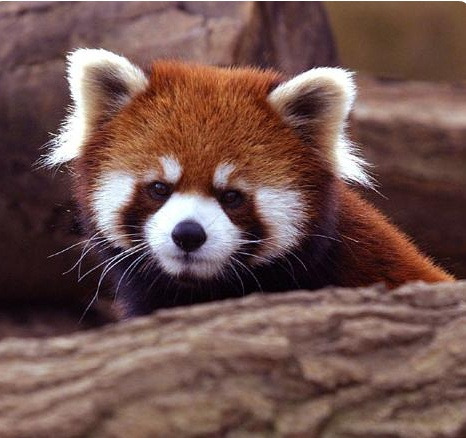
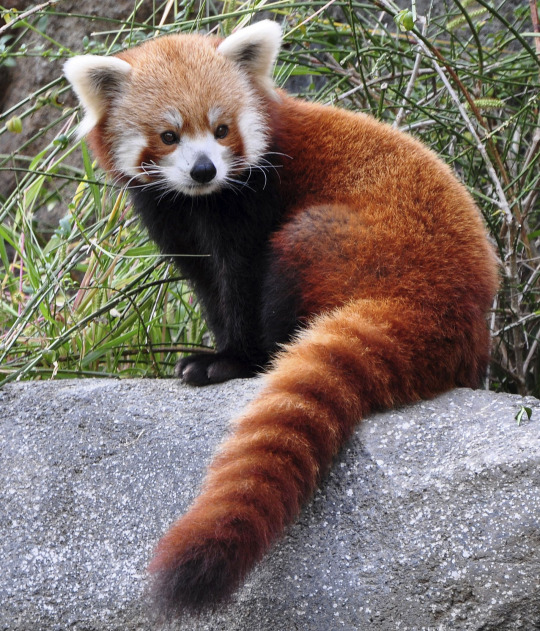
Firstly, I want to work on with anthropomorphism style because I personally think this is the easiest and interesting style to work on. I decided to anthropomorphism with red panda, therefore, I started to research about the red panda, so I can refer to my character.
I did not come up with red panda in the first place. The first animal I choose was the cat and dog, but I know they are too common. I want to work on something different from a common animal, therefore, I came up with red panda, which is cute and adorable animal.
^ Figure 1
^ Figure 2
^ Figure 3
^ Figure 4

^ Figure 5
^ Figure 6
^ Figure 7
Through those researches, I gather various points of the red panda. They have white triangle ears with some hair under the ear part, cute round tail, white circle colour top of the eyes which looks like eyebrows, cute colour and small and rounded body shape.
According to those points of the red panda, I got from the researches, I now started to sketch out my anthropomorphism style character of a red panda.
^ Figure 8

^ Figure 9
Figure 8 and 9 are showing the sketches I have done. As red panda has rounding and cute style, I decided to design with round and small type of character, which influenced by Figure 2 in the previous post called ‘1. Character design - Research’.
This character has red panda’s cute ears and tail. I decided to emphasise the tail because I think the tail is also one of the charming points of the red panda as the ears. In the first place, I was about to have normal eyebrows, but as I mentioned above, the red panda has white rounded colour on these eyes that looks like the eyebrows. Therefore, I decided to gave the same looking eyebrows to this character as well to emphasise the characteristic.
This character will have similar colour patterns and colour palette with red panda so it will have more red panda looking and feeling. Moreover, this character wears black gloves and stocking on the arms and legs because when you looking at Figure 1 to 8, all the red panda have black patterns on their arms and legs, so this design was done to represent this point.
As now I finished with sketching out ideas and character design, this is time to move to digital and draw the character turnaround for 3D modelling.
1 note
·
View note
Text
1. Create mood board and sketches
Soojung Lee, n9667598
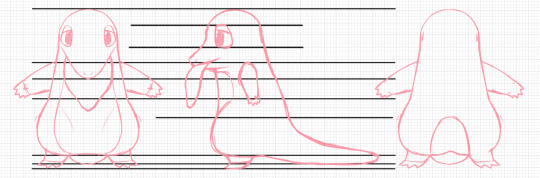
As the semester started now, I have to start work on the assignment. The first assignment I have to do is design the stylised character of Australia animals. In my case, I decided to work with blue tongue lizard. Therefore, I started to do some research to gather the ideas for my own characteristic character design.

^ Figure 1: Character mood board
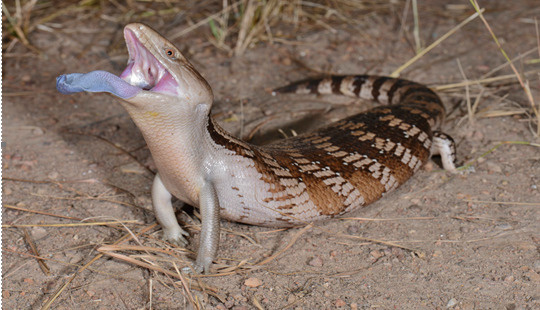
^ Figure 2: Blue tongue lizard 1
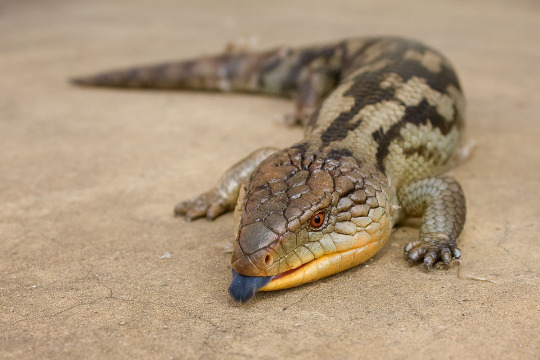
^ Figure 3: Blue tongue lizard 2
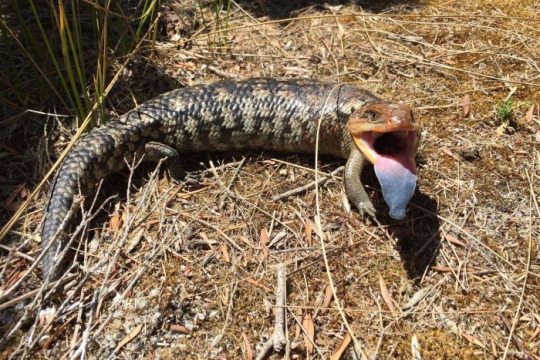
^ Figure 4: Blue tongue lizard 3
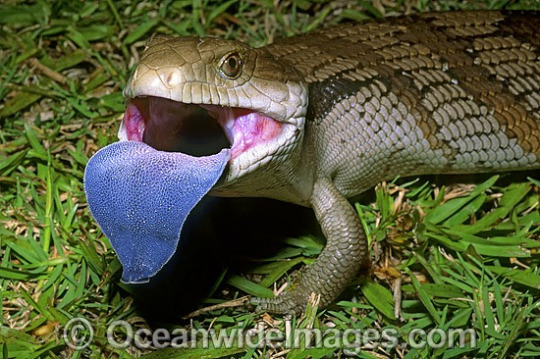
^ Figure 5: Blue tongue lizard 4
I did some research to gather the ideas and understand the style of the blue tongue lizard. I also did some research on cartoon style drawing because I need to draw a 2D character first before start 3D modelling.
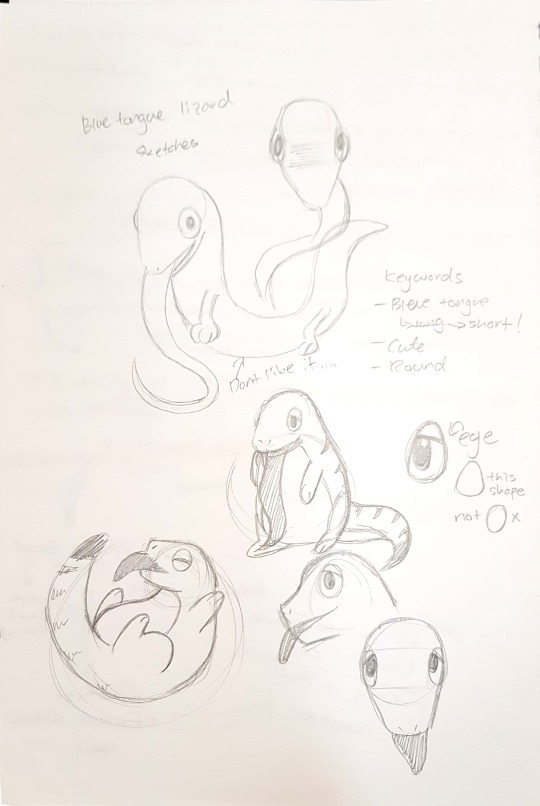
^ Figure 2: Idea Sketches
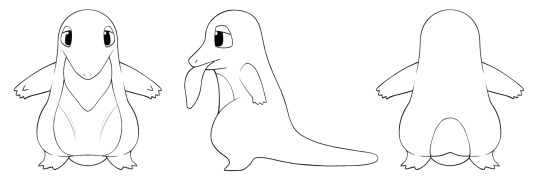
After I did the research, I started to draw some simple sketches for the character. I first set the keywords. They were long blue tongue, cute and round character. As this character does not have to be a realistic character, I decided to design something cute character, therefore, I came up with those keywords.
Also, as you can see on the top of the page, my initial character has a long body, but I end up with a rounded and cute body character. This decision was made because of the cute keyword. When I was drawing the initial long body character, it does not look cute. Therefore, I changed to more small and rouned body character.
However, the long tongue does not fit with that cute small rounded body. Therefore, I decided to change it to the short tongue, which is more balanced then initial sketches.
Additionally, I also designed the eyes. Eyes in the initial sketches were just circle. I thought this is not cute enough, and it also might look scary in some way. I changed the shape of the eyes from circle to drops, and add eyelid to create a more soft and cute image.
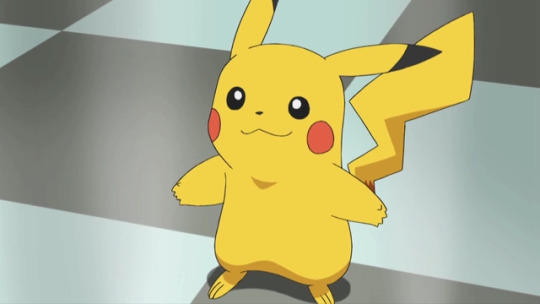
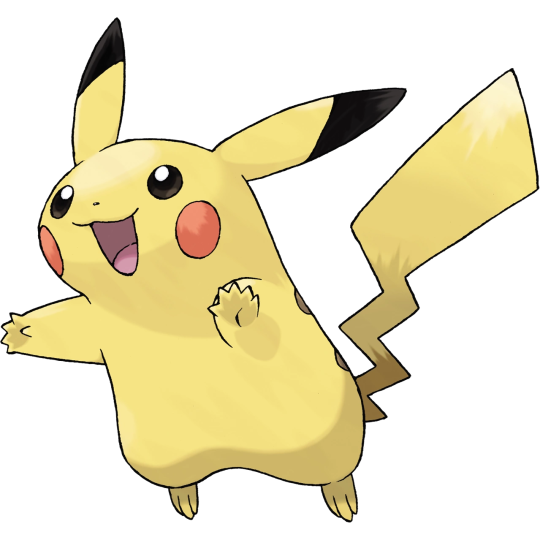
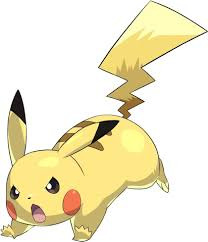
^ Figure 3,4, and 5: Pikachu Research
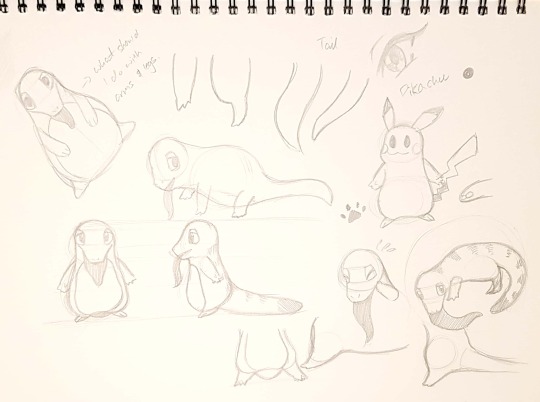
^ Figure 6: Extend the idea sketch
I did several more sketches to extend the idea and detail of the character design. Through this process, I realised that the arms, leg and body are not balancing the flow of the character. I tried to found out which style will suitable for the character. After trying several styles, the pocket monster image just came up to my brain. I did the research for the references.
I got the idea from Pikachu and started to apply it to my sketches. In the end, I came up with smoother and balanced sketches, but I still made a change to the legs. In the first place, I apply the Pikachu legs, but this was not working very well to me. Therefore, I change the legs longer and rounder so I can recognise there are the legs. I also made a small change to the length of the tongue. The tongue is now flatter, bit longer and rounder.
This was kind of my final sketches for character design.
1 note
·
View note
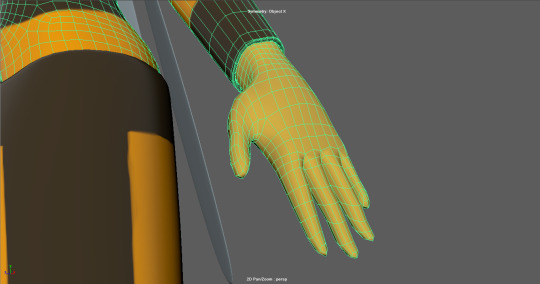
Text
A2 - Last minute additions and initial sculpting phase.
Initially I was planning on modelling Honey’s ears/antennas in Mudbox, via tessellation sculpting.
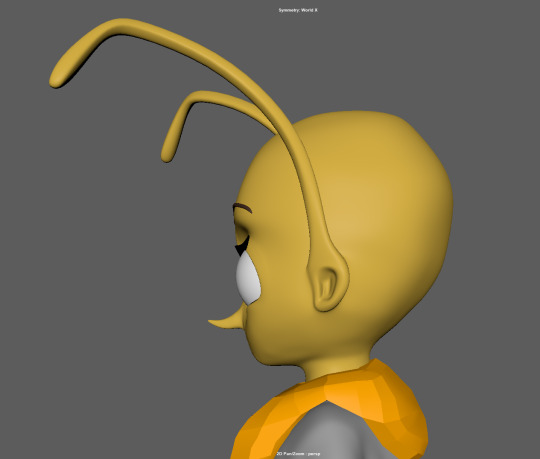
However I decided that it was too much unnecessary effort, since they weren’t supposed to appear particularly detailed and the quad-draw process would undo most of the work I did with retopology earlier. I’ve modelled the antennas with the ends straight, like in my reference sheet so they can be curved when rigged.
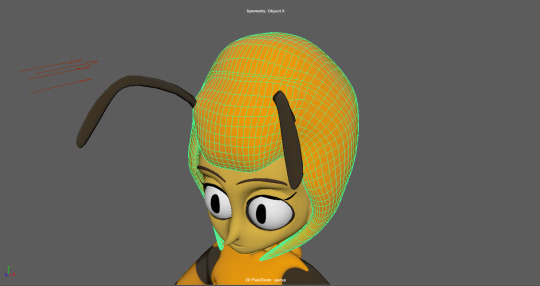
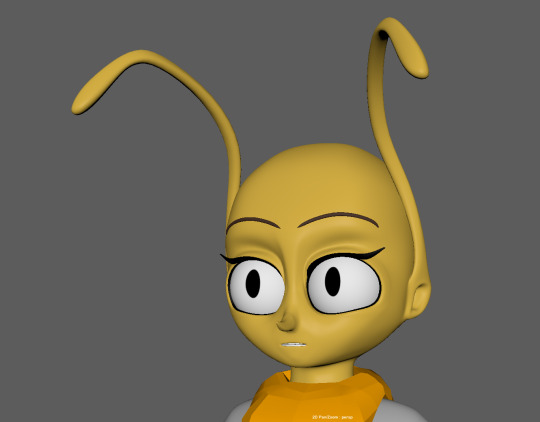
Sorin made another comment about her eyebrows being too lacking dynamics, with the uniform density. Just like he did with Perrys, which makes sense, since they’re copied and pasted from him without change.
I’ve modelled a relatively simple ear cavity, which looks a little odd with the lighting/shading, since some of the edges are probably too sharp and tight than what they should be. Thankfully, it’s mostly hidden for the sake of this assessment and I can smooth it during sculpting.
I’ve made her ear appear ‘thick’ in order to make it appear more like it can support the weight of the antennas.
I used images of Team Fortress 2 characters (lower images) as reference to help me define the form of the cavity. Originally I had the cavity ‘point towards’ the face, to be more realistic. However, the shading looked more unusual that way hence why I changed it to something simpler.
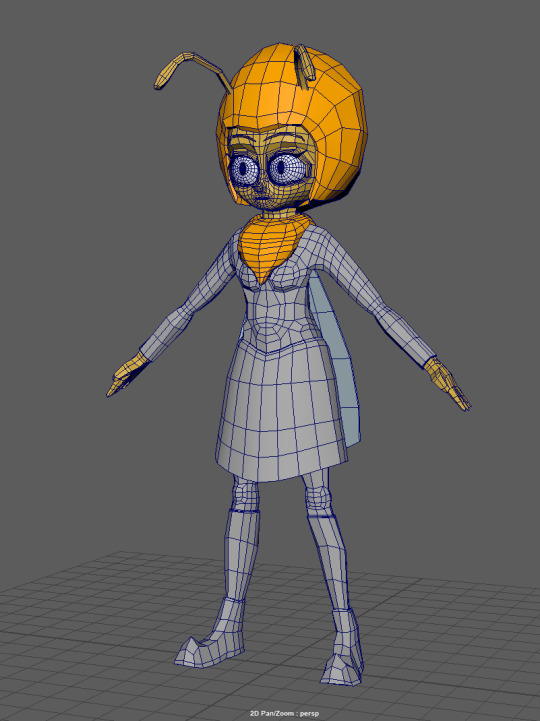
Here is the overall view of the mesh before I put her into Mudbox.
My export process is the same as the previous post, smooth, duplicate then export. However, with Andrew’s help, we confirmed that the cause of the ‘twitching tool issue’ was from conflicting ‘contact’ from exporting the mesh with separate parts.
The alternative solution, without combining the mesh, was to use the lock feature on the parts that I wasn’t working on whenever I’m sculpting.

Here is the updated UV with the antennas and ears included.
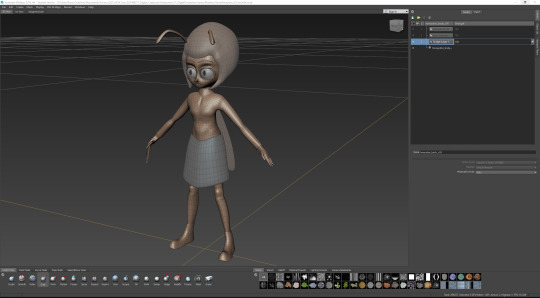
Here is the an overall view of my first sculpting pass, in progress.
I mainly focused on getting the general shape of my character right, with most of the tweaks at this stage being in the hair (so it no longer looks like a shoddy helmet), the fingers and the chest (so she looks more like she’s wearing a shirt). I’ve also tweaked the shoes a bit, so the proportions are a bit more balanced and convincing; using references such as the lower image.
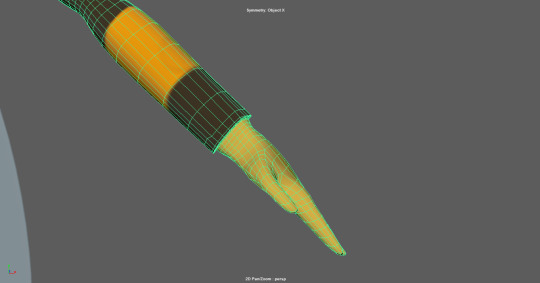
As you can see, the mirror functionality on the tools I used, failed to maintain its consistency on the other side shown by the grotesquely broken and stretched fingers on her right.
I plan on using Mirror in Maya to fix this, since Mudbox’s mirror feature is restrictive and would require more effort to clean up.
I also began attempting to sculpt her mane, using the tessellation feature, however my first pass turned out messy. Since not only is it poorly skewed but is also appearing too detailed and thus inconsistent with the rest of the character.
I also ran into some pretty bad ‘pinching’ issues with the ends of the points on her mane, where there’d be too much densely clustered definition in such a tiny area.
Smoothing it usually made the pinch tinier and worse, while bulging tended to ruin the established shape of the point and smoothing over it sometimes resulted in it reverting back to an unwanted pinch. So it often turned into an annoying, counterintuitive tug-of-war process.
Andrew’s solution was to ALWAYS use tessellation with my tools and go over it with a gentle (low tool strength) bulge and smooth process for more control.
#KNB217#Digital Creatures#Assessment 02#Honeydoo#Human Character#Mudbox#Sculpting#Base Mesh#Smoothing
1 note
·
View note
Photo
The final Low Poly geometry for the Wallaby after being mirrored.
0 notes
Text
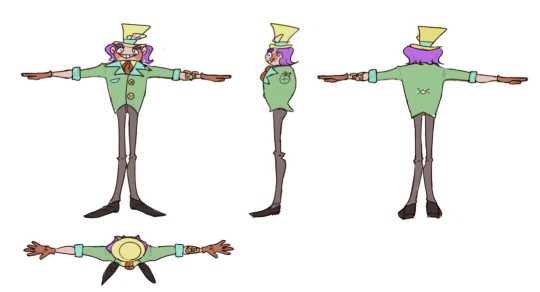
Final Design For Mad Hatter
0 notes


Last Seen Blogs

wolfslayer
dogblog

yikesrandy-blog
jack maynard
∘*:・✧∘*:・✧
randy /ˈrandi/

stagandsteer
✌🏼

ronbon77
Vanilla Salt
galaktor-blog
Door to the cosmos