#so might try and make another one from scratch with those. wahoo!
Text

eh, it’s admittedly pretty shitty, but here’s the jolyne-themed secondhand journal i painted, with some little stickers of doodles araki leaves at the end of chapters to add in randomly for some flavor

#personal#jjba#again trying to paint over the metallic bits of the original really sucked#but overall this was very fun! i saw someone selling mista’s clothes patterns on spoonflower#so might try and make another one from scratch with those. wahoo!#just imagine the cool section headers you can make printing it yourself…
7 notes
·
View notes
Note
Do you have an info or art about the other characters involved with Kalamari??? Esp Glass since you mentioned them directly!!! OwO
Okay SO I do have a few things!! Most of these are old and a lil messy/outdated, so I'm really hoping to whip out a bunch of new stuff soon, but!! I'm gonna put everything under a ReadMore link again bc boy I have things to say and none of it is organized or really coherent so good luck (and also I am still shy)
I've got my two protagonists, Iso (I-20) and Aerani--
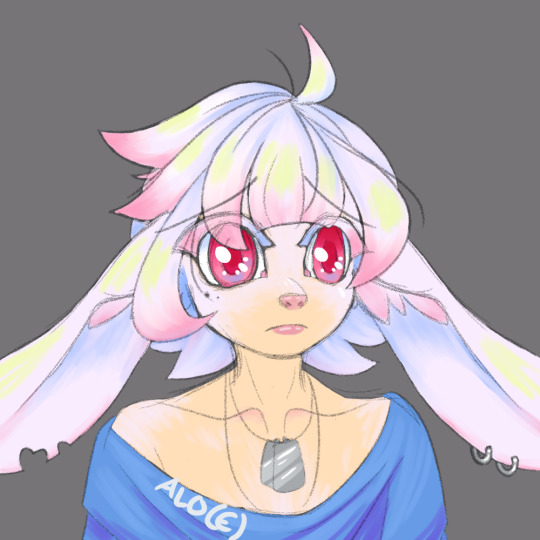
[These are Old outfit designs, I redesigned them sorta recently but haven't finished a drawing of them, sobs] I first drew Aerani in like, 2016 I think? and Iso followed not long after! Iso is a bunny chimera, so he's got big silly ears, wahoo. Chimeras have identification codes to keep track of like, when they were created, and Iso's is I-20: Chimera Generation I, Specimen Number 20. Aerani gave him the nickname Iso <3
Here was Iso in like. 2017? 2018? idk but it was ages ago. He's changed quite a bit, mostly bc I would Constantly misplace sketchbooks and Constantly forget exactly what things looked like lksad;f

This era of my art was so cute,, I wanna draw hair more like that again tbh
Here's a semi-recent doodle wip of their new outfits, hoorayyy. Don't mind how unfinished it is and my silly notes all over the place. I'm gonna just redraw this at some point bc my art has improved since then aklsdjf;lskdk
Comfy boys!! Iso's clothing is always kinda ill-fitting bc he Hates skintight stuff, and he is gonna lose those cute slouchy boots SO fast bc I'm gonna drop him in the desert. Woe, sand be upon ye
Iso used to live in a mansion w a rich guy that was Kind Of A Dick, until that guy's daughter-- Iso's childhood best friend-- snapped and killed her dad w a fireplace poker. I haven't drawn her yet and honestly How Dare I. I wanna draw her making flower crowns w Iso
I was Nervous about jumping straight into making smth about them, because I feel like I need wayyyy more practice to be able to tell the story I really wanna tell, so I ended up scooping up my dorky purple merchant Kalamari like 'you know what sure, you can be the protagonist of my practice project and it will be Silly As Hell'. I call my main Eventual Goal 'Quote Unquote Quest', so Kalamari's adventure I'm calling 'Quote Unquote Quest Negative One', since it becomes before the main thing! Aerani will be in that practice project as a side character, bc he's Glass's little brother, but Iso won't be
Also, please witness Aerani's pet, a squishy jello-like blob he calls a frog. It is absolutely not a frog. It sits on his head a lot and makes squeaky lil noises

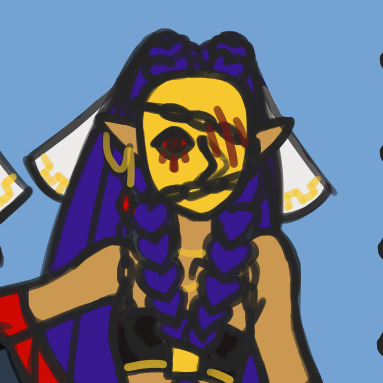
Here's another chimera! She's much older than Iso, from gen F! The only one left from gen F actually. She calls herself Fa, and she doesn't like to talk, she just hangs out by a pond all day to watch the fish

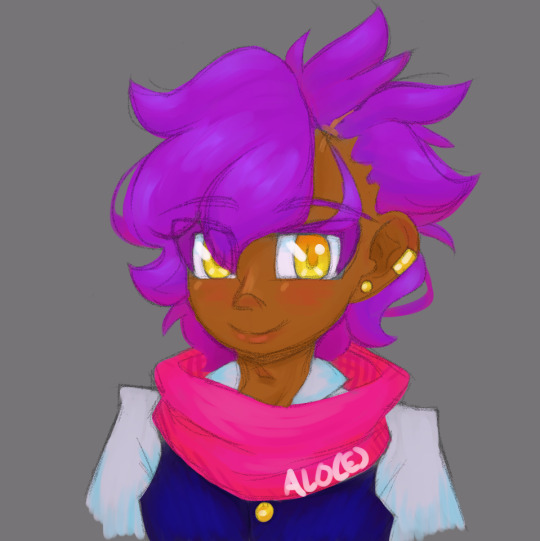
This is OLD so I'm def gonna redraw it soon, but here's one of my antagonists! They by the name Scratch, and they're sort of. the opposite of Kalamari. I have So Much I wanna draw abt them omg,,
While I do like their color palette, I'm gonnadesign one to match. everyone else. The colors I wanna use for this project (that might eventually change ofc) are brown, orange, golden yellow, magenta, a slightly more purple magenta, violet, indigo, and blueee, with Very Dark Blue and Very Light versions of the other colors for lines and junk. Basically Kalamari Colors ft. some extras to spice things up, since my silly littol practice project revolves around her and how he sees the world:
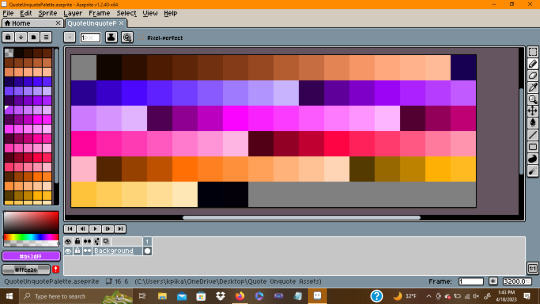
Everything is very saturated of course bc I'm. cannot and will not use desaturated colors. It's kind of like my chunky lineart-- I can try So Hard to make it thin, but that just doesn't look right to me and as I work woopsie everything is thick and I'm dying
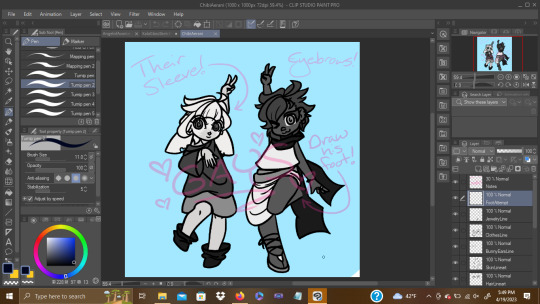
AND FINALLY. MESSY SKETCHY WIP OF GAY PEOPLE IN MY ART PROGRAM
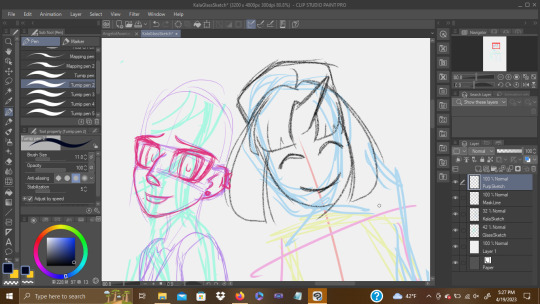
Glass and Kalamari!!!!!!! I hadn't drawn Glass yet and I'm crying bc she's turning out so cute. sobs. I was working on this before I realized oh shit yeah the oc tournament is posting Kalamari tomorrow, and I had to stop to go finish up my other art + my oc sideblog bc I wanted that to all be ready to go
#pikaposts#alo(e) art#quote unquote quest#slides facefirst down the stairs. thank you for attending my chaotic infodump. don't ask me how long i spent writing it#i wonder what it's like to be a person that can write a simple post in a reasonable amount of time. must be wild.#what do y'all do w all that free time#anyway i need to practice drawing more i am Dying
3 notes
·
View notes
Text
Fictober19 Day 29: Dove-ling in Distress
Prompt #29: I’m doing this for you.
Fandom: Good Omens
Characters: Crowley, Aziraphale, pigeons
Rating: Teen (swearing, inappropriate rescuing of wildlife)
Warnings: None
On AO3 at https://archiveofourown.org/works/20843936/chapters/50532392
One of the many lovely things about London was its walkability. That wasn’t unusual in Europe, Crowley knew, but he’d gotten around a bit over the millennia and knew that, for instance, a lot of American cities were designed more for cars than for pedestrians. They were missing out on a good thing: as much as he adored driving the Bentley, there was a lot to be said for a casual post-prandial stroll, holding hands with his angel. He could enjoy the scenery much more — and by scenery, he of course meant Aziraphale.
“I swear the pigeons get bolder every year,” Crowley said, eyeing a particularly well-fed specimen who was walking straight toward him. “Piss off, you little rat.”
The pigeon’s mad eyes fixed on him. Rather than bobbing casually out of Crowley’s way or taking to the air, they began pecking at his ankle.
“Oi! Stop that!” Crowley tried to spring out of range, but the pigeon came after him, jabbing and flapping.
“Hush, dear, you’re frightening them,” Aziraphale said.
“They’re bloody frightening me! Hey, not the trousers! Let go!”
“Shoo, now. Go on about your business and stop harassing my boyfriend.” Aziraphale told the pigeon firmly. This had no perceptible effect.
“Yeah,” Crowley said, dodging the pigeon’s attempt to grab his trouser cuff again, “that’s my fierce defending angel. ‘Shoo.’ Why didn’t you try that when,” he noticed they’d attracted human attention and some of the passersby had stopped to watch this unexpected street theatre, “when, uh, our former bosses were all ready to fight?”
“There’s no need to be sarcastic, my love.”
“I think — ow! — there blessed well is! I’m being attacked by a mad pigeon, and you’re just standing there — hey! — going ‘shoo.’”
Aziraphale tilted his head. “You know, I don’t think you are, actually.”
“Are what? Scram, you little scunner!”
“Being attacked.”
Crowley spared a moment from self-defensive hopping to give his angel an incredulous glare. “What do you think they’re doing? Asking me to dance?” This earned a few appreciative chuckles from the onlookers.
“No, I think they’re herding you. Trying to lead you,” he walked in the direction the pigeon had been forcing Crowley, toward a grubby alley, and peered in, “over here.”
Aziraphale pointed at another pigeon in the alley. This one had more unusual auburn feathers, but their most distinguishing feature was currently the small cottage cheese pot stuck on their head. “I suspect they’re trying to get help for their friend.”
There were a few “awws” and mutterings from the onlookers. “Stupid bird. What did they expect, sticking their head in something like that?” Crowley said. The first pigeon had stopped pecking once he entered the alley, but stood guard in case Crowley gave signs of wanting to leave.
“I suppose they were hungry. We simply must help the poor thing, but,” Aziraphale gave the small clump of watchers a meaningful sidelong glance, “the simplest solution is out of the question now. We’ll have to free them.”
Crowley balked; a miracle was out of the question, since there were too many humans watching and it would be a huge hassle to rewrite everyone’s memory. “Like Hea — He — Someplace, we will. Call the RSPCA or something. They’re the experts.”
“But it will take them time to get here, and they might fly off in the meantime, or be run over by a car, or attacked by one of those falcons they’ve brought in. The poor thing is defenseless. We simply cannot leave it like that. And besides: their friend chose you.” Aziraphale took off his coat and handed it to a bystander. “Would you hold this for me, please? So kind of you.” He began rolling up his sleeves. “I’ll coax them over, you grab them and get the pot.”
Crowley tore his gaze away from the suddenly bared angelic forearms; he wasn’t accustomed to seeing so much Aziraphale skin in public. “What?”
“Unless you have a better idea, of course.”
“But, but . . .” It was hopeless to protest: Aziraphale was already crouching in the filthy alley, careful not to touch any surfaces. Crowley could feel the angelic influence being extended toward the pigeon in distress, a sort of welcoming, soothing, benevolent siren song. The pigeon stumbled closer to him.
“Fine,” Crowley grumbled. He crept up on the pigeon, now mere centimetres from Aziraphale and thrumming happily. He pounced.
He pounced badly. Whether the pigeon sensed him coming and startled, or whether it was just another instance of Somebody making Crowley’s life unnecessarily difficult for Their own amusement, the pigeon flapped away at the last moment and Crowley’s hands grabbed nothing but air.
“Bless it!” he swore, and lunged again. This time he got scratched by the panicky bird. “Hold still, you fucking feathered bawbag! I’m,” an auburn wing swatted him in the face, “doing this — ow!” A clawed foot caught in his sunglasses, pulling them askew, but they saved him a nasty scratch to the eye. “For you, you daft dobber! Aha!”
His hands closed on the pigeon, and he held them aloft triumphantly. “Got you, you bastard. Ha!” The onlookers gave a smattering of applause.
Aziraphale gave him a tired but fond smile. “Excellent. But perhaps a little less gloating, my dear, and a little more rescuing might be appropriate?”
“Give us a sec,” Crowley said. “I think I’ve earned a little gloating.” Bringing the pigeon up to his face, he growled, “Thought you could get away from me, eh? Ha! Well, I showed you, didn’t I?”
The pigeon tried to peck at him, but wound up just bopping him on the nose with the cottage cheese pot. It made a hollow thunking sound.
“Ungrateful pillock.” Crowley plucked the pot off the pigeon’s head. Mad beady eyes glared back at him. “You’re welcome. Now don’t do that again.” He set the pigeon down, amid more applause and a couple of faint “wahoos” from the onlookers. The first pigeon, the instigator of all of this, bobbed over to their friend and seemed to briefly inspect them for damage; then, without thanks, the two of them flew off.
Dusting off his filthy hands and grimacing, he rejoined Aziraphale. “I feel like I need a shower. One of those decontamination ones.”
“I’m sure our shower back home will miraculously suit,” Aziraphale said, and kissed him. “You’ve got a smut on your nose, dear. Here, let me.” He fished out a lace-trimmed hanky and began dabbing as the onlookers began drifting away.
Crowley squirmed. “Just leave it for now, angel. I’m grimy all over, thanks to that little ungrateful little wanker.”
“I’m sure they are both very grateful, as am I, darling. That was very kind of you.” Aziraphale gave his hand a little squeeze.
“Aw, shuddup.” Crowley ducked his head, but he squeezed back.
“Now, let’s get you home and cleaned up. Such a brave knight in shining armor deserves some pampering, I think.”
“Not shining,” Crowley said as he allowed himself to be led back homeward. “My armor was black, remember? The Black Knight. Yours was the shining armor.”
“A brave knight in gleaming black armor, then. After your shower, perhaps you’ll let me paint your nails? I think you deserve a nice manicure after all that.”
Crowley rolled his eyes so hard the rest of his head rolled as well. “I don’t do manicures, angel. That’s your thing.”
Aziraphale glanced up through his long lashes. “Did I mention that a manicure usually includes a hand massage? A nice, long, slow, firm hand massage?”
Ooh. No angel should be able to tempt like that, but Aziraphale had always been special. “Gnglh. Well, maybe I could try it. Just to make you happy, of course.”
Aziraphale’s gorgeous eyes twinkled. “Of course, my love. You’re so good to indulge me like this.”
[Author’s note: Crowley and Aziraphale meant well and could have miracled the pot off and erased everyone’s memory if absolutely necessary; they also knew they could heal any damage they might cause while trying to rescue the pigeon. Humans and other non-occult/ethereal beings, however, should best call wild animal services for expert help in cases like this. In other words, please don’t try this at home, because, well, duh.]
#fictober19#good omens#good omens fanfic#ineffable husbands#ineffable spouses#fluff#aziraphale x crowley#random pigeons of london#fanfic#my fanfic
15 notes
·
View notes
Link
If you’ve been wondering how to start a blog…
Or putting it off because you’re afraid you’ll mess it up.
Well – today’s the day!
You’re FINALLY going to cross “create a blog” off your to-do list. And it’s going to be way easier than you expected. Even if you’re not good with computers.
In this beginner’s guide, I’m going to give you foolproof instructions for how to set up a blog, get your own “.com,” and find a design you love – with tons of pictures to guide you that make it impossible for to get wrong.
Along the way, I’ll share some tips that will save you time and money, too!
Here’s what we’ll cover:
6 easy steps for starting a blog
Pick your blogging platform.
Choose a host for your blog.
Decide on a domain name.
Set up WordPress (the easy way)
Choose and customize a design.
Start writing!
I promise: I’ll make all of this so straightforward, you’ll be able to start your own blog in just one sitting:
1. Pick a blogging platform.
When I say “platform,” I mean the software you’ll use to run your blog. You’ve got lots of options: WordPress, Wix, Weebly, and Squarespace to name just a few.
You can read a detailed review of the 10 most popular platforms here — but let me save you some time:
WordPress is your best option if you want to start a blog on a platform that…
Is beginner-friendly
Makes blogging as easy as writing an email
Allows you to have your own “.com”
Has no monthly fees (you only need a host and a domain name)
Comes with 5,000+ themes to suit your style, and
Gives you the power to make money from your blog one day,
There’s a reason why WordPress.org powers over 91% of all the blogs on the web, including 62% of the top 100 company blogs.
But please don’t rush out and sign up just yet! I’ll be showing you how to install WordPress in just one click in Step 4 – and how to configure it all — but there a few quick things we need to do first.
Couldn’t I just start a blog for free on a site like Blogger?
Yes, you can create your blog for free on sites like Blogger. I don’t recommend it, because there are some pretty serious drawbacks you should know about:
Your site will be hard to find.Want a nice site address like “Yourblog.com”? Too bad. With a free site, you’ll be stuck with something like “yourblogname.blogger.com” – so less people will find your content.
You won’t control the content.
Imagine losing years of work when your blog is taken offline because you broke a rule without knowing it. Sound far-fetched? It happens all the time.
You can’t customize your site the way you want to.No free plugins to add functionality like calendars or online shops. Limited themes, so your site looks like everyone else’s. Boooooring.
You’ll find it expensive to switch.When you decide you want more control, switching from a free platform to something like WordPress can take hours of manual work and formatting.
Someone else will profit from YOUR hard work.
This is the worst one: free platforms reserve the right to put ads all over your content. Imagine seeing a huge, ugly pop-up for a product you don’t even support on your blog– and not making a penny off of it! Unfair, right?
You’re better off creating a WordPress blog that can grow with you.
Unsure how much it costs to start a blog? Less than you think!
With a self-hosted WordPress blog you’ll pay less than $10 per month, get a design that’s all your own, AND have your own “.com” to boot. Not bad for the added control and flexibility!
2. Choose a host for your blog.
Assuming you’ve chosen WordPress as your blogging platform (smart move!) your next step is to choose a web hosting service.
Hosting explained in 10 seconds:
Your blog is just a bunch of files. WordPress is the software you create them with. And hosting stores those files so they can be viewed through the web.
TL;DR – Without hosting, nobody will be able to see your blog online.
If you’d like a detailed outline of what hosting is/how it works, check out this post.
When it comes to hosting, three things REALLY matter:
Uptime: You want a host that won’t go offline randomly (bad hosts do this all the time!)
Support: You need fast support from actual experts if something goes wrong.
Price: You deserve fair pricing – and no hidden fees!
If you want web hosting that is cheap, but secure and reliable, I strongly recommend Bluehost.
Why you’ll love Bluehost:
One-click WordPress installation (fast; no messing with tech stuff)
Their uptime is excellent
WordPress recommends them (since 2005!)
PLUS…
You can get a great plan for just $2.75/mo and they throw in a FREE domain name!
(Because I continue to use Bluehost and have had a great experience, all links to Bluehost are referral links. I’ll earn a commission if you make a purchase, and you’ll get that discounted price.)
Of course, you’re free to use any other web hosting provider suitable for WordPress, but to keep this guide focused, I’m going to use Bluehost to explain the setup process.
Sign Up for BlueHost
To take advantage of the discount and free domain, click this link to visit Bluehostin another window. Then, mash on the big fat button to get started. Wahoo – you’re on your way!
IMPORTANT: The site might look a little different, but the steps are exactly the same. Just push whatever “Get Started” button they’re currently running.
Choose the “basic” plan (and save some $$$)
The Basic option is perfect for beginners, and you can always upgrade later when you’re ready.
3. Decide on a domain name.
A domain name is just the address people can find your blog at, like “www.yourblogname.com”
I recommend you get the .com if you can, as it’s easiest for most people to remember, but it’s ok to get an ending like .net or .co if your first choice isn’t available.
Quick tip: Struggling with names?
Try using NameStation or Instant Domain Search! Simply enter a keyword or topic and get dozens of ideas for available domain names all at once.
If you’d like a little more help, this post on choosing a domain name will give you 10 of my top tips!
And if you’re really stuck on a name, just click “Skip this step” along the bottom of the screen above. You can always add your free domain name later, when inspiration hits.
If you already own a domain name, fill out the form on the right. You won’t break anything, even if you’re already running a live site.
Once you’ve added your domain, click “next.”
Complete your registration
There are three quick parts to this step. First, add your account info using a real email address (because you’ll need it to log in!)
Choose your package and optional extras
Next, select the options you want for your account. Your first choice you have is the “Account Plan” – 12, 24, or 36 months. I recommend just 12. Why? Well…
You’d potentially save money by paying for three years upfront. But at 12 months, the price is quite reasonable and you’re not out any extra money if you decide blogging isn’t for you after a year.
Finally, you can choose whether to add on extra features.
Quick tip: Most extras are a waste of $$$ for beginners, but two are absolutely worth considering:
1. Domain Privacy – $0.99/mo (must-have)
When buying a domain, your contact details are added to a public database by law. Buying privacy means Bluehost’s details are listed instead, preventing you from being spammed with hundreds of calls from telemarketers—well worth the tiny price tag.
2. CodeGuard Basic – $2.99/mo (optional)
Losing all your content to a hack or glitch would be a nightmare, agreed? CodeGuard Basic ensures your site is regularly and securely backed up, which is great for peace of mind. You can always add this one later on.
IMPORTANT: If you don’t want any of the optional features, make sure you uncheck the boxes before moving on! It’s very easy to miss.
Enter billing details
Pop in your credit card details, and you’ll be off to the races!
If you’d like to pay with PayPal, select “more payment options” at the top above the fields.
Set a password and log in
You should now see something like the screen below. Click the green “Create your password” button.
Then, set up a secure password, click “I have read and agreed to Bluehost’s Privacy Policy and Terms of Service” box, click “Next”…
And finally, click the “Log in” button. That was easy!
Quick tip: You’re about to get an email from Bluehost with your login information, and possibly an activation link. If you can’t find it, check your spam folder.
Save the emails you get from Bluehost with your login details just in case. I usually “star” them in my inbox.
4. Set up WordPress (the easy way)
Good news: now that you’re logged in WordPress is just sitting there, waiting for you!
On the first screen you see, you’ll be asked to pick a theme.
I recommend you skip this step by clicking the link below the pictures of themes, as I’ll be showing you how to explore more (and better) options later.
If you DO choose a theme now, you can always change it later without any problem.
On the next screen, click the “Start Building” button. If you accidentally click the “Or, go to my Bluehost account” link, just push the back button.
Quick tip: If you chose to use a new domain name, your blog may show up on a temporary domain name for a little bit. It’s NOT a glitch!
It can take a few hours for a host to sort out the tech stuff; Bluehost will automatically fix the domain as soon as it’s ready.
You should now see a screen that looks like this:
Welcome to your WordPress dashboard! This is where the magic all happens.
Quick tip: Wondering how to log into your WordPress after you’ve logged out?
You don’t need to revisit Bluehost: you can log into your WordPress dashboard quickly by typing in: “http://www.[YOUR DOMAIN NAME].com/wp-admin”
Just replace [YOUR DOMAIN NAME] with your actual domain name
It’s a super handy shortcut – consider bookmarking it!
On the side bar, you’ll see a few different tabs. Some quick highlights (don’t click any of these for now!)
Posts: This is where you’ll go to write new blog posts or view old ones.
Media: Check out the library photos and files you’ve uploaded or add more.
Pages: Create static pages (if you ever decide to.)
Comments: Manage the comments on your content.
Appearance: Choose new themes or edit the one you have.
Users: If you create content with others, you can add them as users here so they can edit blog posts.
Plugins: Add and remove plugins that give your blog new features.
Don’t worry about the others for the moment.
At this point, you’ve got two options to focus on in the center of the screen: Business, or Personal.
Pick whichever best applies to you right now, and again: don’t worry. All of this is EASILY changed later. Nothing is permanent, and you literally can’t screw this up.
If you clicked “Business” or “Personal”, you’ll see something like this:
“Site Title” is just going to be your blog’s name for now. Punch ‘er in – and don’t add the “www.” – just write it in plain English.
“Site Description” is your chance to write a short and sweet summary of what your blog is all about. Keep it brief – as if you were explaining your blog to a friend or potential client!
As always, don’t worry: all of this can be edited later if you change your mind.
On the next screen, you’ll be asked if you’d like to update your site with news or blog posts. Just click “Yes.”
Now, you get to choose what you’d like for people to see on your home page: the most recent blog posts/updates, or a more “static” home page. I recommend choosing the first option.
Next, you can set up a “Contact Us” page if you’d like people to be able to send you a message through your site. This one’s up to you!
Finally, you’ve got the option to connect your “Jetpack” profile to WordPress to improve security, grow traffic, and track your site’s stats. Jetpack is completely free – so I do recommend going through this quick process if you have a moment.
BUT!
You can always do this later, so simply click “Not now” if you’re not in the mood.
Quick tip: If you signed up with a new domain name, make sure you check your email from Bluehost for an activation link inside the message.
Click it to complete the activation process and bring your new blog to the world.
5. Choose and customize your design
Finally, the most fun part: it’s time to choose a design you are really excited about. In WordPress, they simply refer to designs as “Themes” – don’t let the language throw you.
The good news: You have over 5,000 FREE options to choose from!
The bad news: With so many options, you can spend HOURS going down the design rabbit hole.
I’ve put together a list of 30+ of the best free WordPress Themes if you want some ideas (though some are better for blogs than others!)
But, let’s get to the installation part. To access the Themes, click the “Appearance” tab, and you’ll see a screen like this:
Simply click “Add New Theme” to get started Here’s a quick video that shows you what to do next to find and install a great free theme for your blog – or change the theme you already have.
<VIDEO>
Found a theme you like? Then it’s time to do a little more customization.
My friend Karol put together an AWESOME beginner’s guide on how to customize your WordPress blog in some really important ways, like…
How to make sure Google can find your site
How to edit your site’s menu in WordPress
How to set up your home page
How to improve WordPress security
How to customize your WordPress theme (advanced tips made simple)
You don’t need to do all that right now (I’m about to show you how to write your first post), but I recommend you bookmark Karol’s guide for later.
It’ll be INVALUABLE in saving you some time and keeping things simple later on.
6. Start writing!
The good news is that if you can use Microsoft Word, Pages, or Gmail, writing a blog post in WordPress is just as easy. Let’s walk through some of the important features you should know!
To start writing a post, just click “Posts” in the side-bar, then click “Add New.”
If you’ve logged out of WordPress, type inhttp://your_domain.com/wp-admin/ to log back in!
What you’ll see is a very friendly editor screen that should remind you of MS Word or Pages on Mac:
Let’s break down what you’re seeing here:
1. Title Area: This is where you write the title of your post.
2. Content Area: This is where the body text of your post goes. The whole area works just like text editing in Word or Pages.
3. Standard Editing Tools: Here are options like bold, italic, lists, paragraphs, and headlines.
In a moment, I’ll show you how to use this section to add links, images, and more to your post.
At the very end of the Standard Editing Tools is the “Toolbar Toggle” that looks like this:
Click this to add even more options to your Toolbar, such as Undo/Redo buttons, text color formatting, indentation, and more.
4. Publishing Tools: This is where you get your post shown to the world.
The most important thing to note here is the big, blue “Publish” button you’ll push when your blog post is ready.
You can click “Save Draft” on an incomplete post to save your work without pushing the post live.
The “Preview” button can be useful to test out how your post will look when it’s live without having to publish it right away – especially when adding images or videos.
You can also use the options in this section to schedule a post for the future, make posts public or private (password required), or even UNPUBLISH a post by changing the “Stats” back to “Draft.”
5. Additional Fine-tuning Tools: You’ll sometimes use these tools to update your blog post, tag it with a category, or add a featured image – but for now, you won’t be using this much. You can learn more about
WordPress categories and tags here.
Quick tip: Do you write your blog posts in a program like Word, and then copy and paste them into WordPress? You may get frustrated by how WordPress formats the text you paste.
To avoid problems, make sure you’ve clicked the “Toolbar Toggle” button, then click the “Paste as Text” button that looks like the below:
WordPress will strip out all of your previous formatting, so you can customize the text to look exactly how you like.
Adding headings
Headings help you structure your content and make it easier for people to read. For example, in the text above, “Adding headings” is my heading!
This helps people who want to scan content find what they need. Consider adding headings for each of your main points.
To add a heading, scroll up to “Paragraph” drop-down menu and select the heading you’d like to use.
Note that the “Heading 1” is usually reserved for the post’s title, so stick to the smaller headings (with larger numbers) inside the post.
Quick tip: “Heading 1” is usually reserved for the blog post’s title, so you shouldn’t use it again in the body of your content.
Consider using “Heading 2” to break down the different sections of your content, and “Heading 3” for sub-headings inside those big sections.
Trying to get more traffic from Google? Google loves to see the keywords you’re targeting in your headings, so try to use them naturally!
Adding Links
It’s a good idea to link to other (credible) websites: whether to share a piece of content or back up a claim you’ve made, or share another one of your own posts. WordPress makes it easy.
To add links to your posts, highlight the desired text (for this example, I just wrote “Add links” as my text) and then scroll up to the blog menu.
Click the button that looks like a paperclip, to the right of the “Align right” item and above the “Add BWS Shortcode”.
From there, add the URL you want to link to:
Then, click the Settings icon on the right (the wheel-looking item above, next to the arrow).
Click the “Open the link a new tab” box. This is important—you don’t want people to leave your site when they click on a link!
Adding images
I touched on this briefly before, but I’ll explain it more here. Start by scrolling up to the top of the blog menu and click “Add Media” in the top left corner of the menu.
From here, select the files you’d like to upload. You can find previously uploaded files from the “Media Library” at the top-left corner next to “Upload Files” – no need to upload them again!
Once you’ve uploaded an image, you can choose its size and placement.
Adding a “Featured” Image
A featured image is simply the image that will be displayed at the very top of your post, and will be used in the thumbnails of your article when you share it on places like Facebook or Twitter.
To add a featured image, run your mouse along the right sidebar of your blog menu. You’ll see an option titled “Set featured image”.
Click that, then go through the same uploading process to add an image as you did in the step above.
Quick tip: Try to pick a featured image that draws the eye – you’d be surprised how colorful, weird, or interesting images can make a HUGE difference on how many people will click through to read your blog posts!
Adding videos from YouTube
Videos are AMAZING! Whether you want to showcase your own vlogs or just share a video you love, adding this type of content is a great way to keep people interested.
To add a YouTube video…
Visit the page of the YouTube video you want to share and copy the URL.
Paste the URL into the content area of your WordPress blog. Make sure the link is on its own line (no text before or after) and is NOT clickable (don’t make it a link!)
As soon as you push “Publish” on your post, the video will appear on the live version.
Still stuck? Our friends at WPBeginner have a guide for this if you need any further help—check it out here.
Customizing your “Slug”
What the heck is a “slug?”
It’s the URL of your post – for example, if your domain name is “yourdomainname.com,” the slug would be the address of the specific post you are publishing, such as “yourdomainname.com/my-post/.”
That last bit at the end? That’s the slug.
You want to make this slug clear and concise. This will make it easier for people to share your content on social media.
You can find the slug underneath the post title. It will say “Permalink: https://ift.tt/2wZ3TfR”.
By default, WordPress will make the title of your post the slug. But usually, this is way too long.
You should change it so that it’s no longer than 2 – 4 words.
Here are some tips for optimizing your WordPress slugs:
Target SEO keywords. Think of what people would type to Google when they search for the information you share in the post—those are SEO keywords.
Avoid duplicates (make sure it’s not the same as another slug on your website).
Don’t change the slug after publishing the post (unless you absolutely have to) as this will result in lost traffic.
Publish Your Post
All done? Click that “Publish” button. Then click “View post” when the link appears to see your new post live in action!
Congratulations! You just published your first blog post. But don’t stop there!
Here are some tips for creating strong blog content that your audience will love:
Start by creating a lead-generating content marketing strategy.
Follow this guide for creating strong blog posts.
Develop a reading habit, so you can internalize how great writers write.
Make your content scannable with headings, short paragraphs, and high quality images.
Write content that helps your audience solve a problem.
Follow this strategy to become a better blog writer in 30 days.
Use this formula to create stronger headlines (if your headlines aren’t compelling, people won’t read the content!).
Next Steps
Now that your blog is live, it’s time to put it to work for you!
0 notes
Last Seen Blogs

bone-apple-tea-scribbles
BoneAppleTea Scribbles

fromkimsasperspective-blog
From Kim-Sa's Perspective

escrevisobrevoce
Escrevi sobre você

xiaoyaa-blog
Untitled
crystal-store
Crystal Store