#clubgif
Text

alright someone asked me a few weeks ago how i colored my gifs to make them colorful like this so i thought would make a simple tutorial on it! it's a relatively simple process and also assumes you know how to make gifs, including basic coloring.
before we get started, it's important to note that scene selection is the most important thing here and could make or break the way you color your gif. i highly recommend scenes/videos with cyan/blue-ish backgrounds (or even gray bgs with cool tones) as they don't interfere with skin tones and therefore will be much easier to color.
now that you've picked your scene, go ahead and make your gif how you normally would, but limiting the coloring to just the basics (aka lighting and color-correcting). here's how mine turned out:

and then the fun part begins! first, we're gonna make a new selective color layer and crank up the blue & cyan layers to make the colors really pop. i find that doing this first before doing anything else makes the colors more vibrant. here's how mine looked like, but you're free to move the sliders whichever way you want as long as you end up with a pretty even cyan or blue base to work with.
after that we can go ahead and add a hue & saturation layer. go into the cyan or blue tabs (or both depending on which colors show up in your gif, in my case mine is predominantly cyan with some blue shadows) and move the hue sliders to whichever color you prefer! you can play around with the saturation and lightness sliders too, but i was already satisfied with how the color turned out.

you can choose to stop here, but if you think it still needs a bit of color correction (especially if you have a subject whose skin tone needs a bit of fixing), go ahead and do that! here's how mine looks after that:

aaaand that's it! easy peasy. here are a couple more examples using the same process across different media:
i hope this made a bit of sense and is helpful, and if you have any questions don't hesitate to ask! 💗
#tutorials#gif tutorial#completeresources#clubgif#uservivaldi#usermicu#userhekaates#userautie#userraffa#userhallie#tuserheidi#userfern#userkosmos#obligatorytag#usershreyu#*
399 notes
·
View notes
Photo

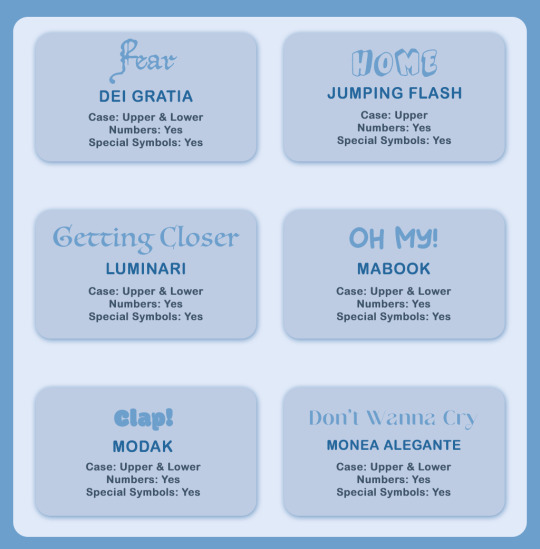
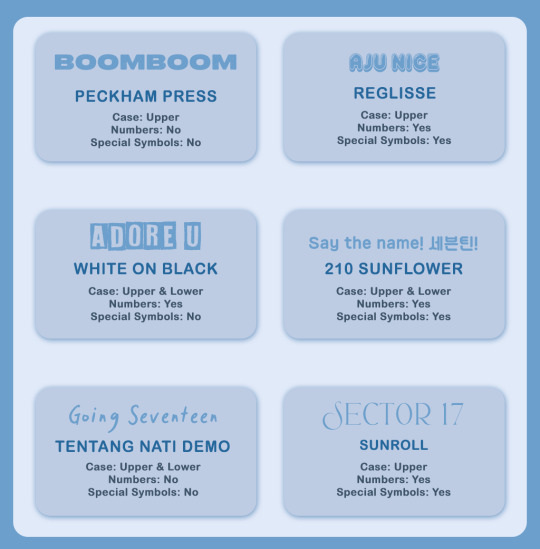
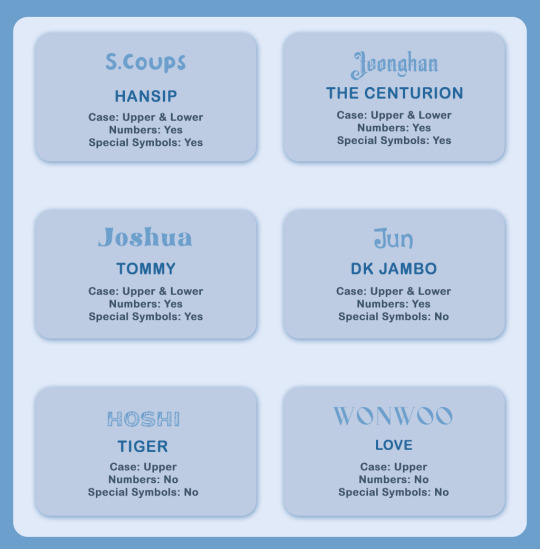
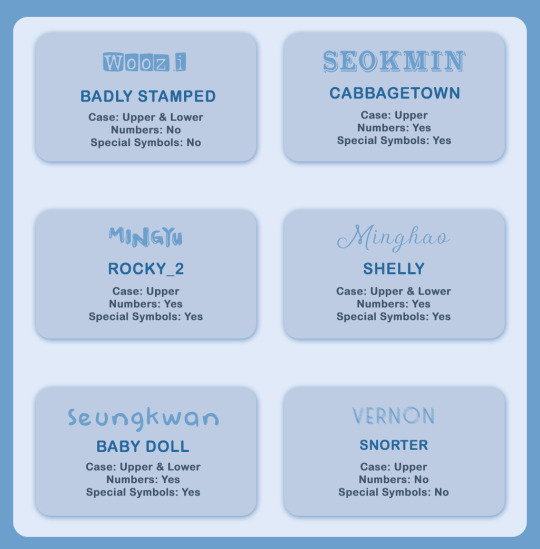
💎 FONT RECOMMENDATIONS (insp. layout)
i’ve received a few asks asking what fonts i use in my sets! so i’ve put together a small compilation of my favourite fonts <3
you can access all fonts that i’ve mentioned here! all credits for the fonts belong to their creators 💙 please like and reblog this post if you find it helpful!
#font resource#allresources#typography#clubgif#usergif#ps resources#photoshop resources#fonts#usernik#userdre#userjoanna#tusermanny#shuaria#cheytermelon#heyjoy#userkitty#useranusia#rosieposie#creations#creations: resources
638 notes
·
View notes
Text

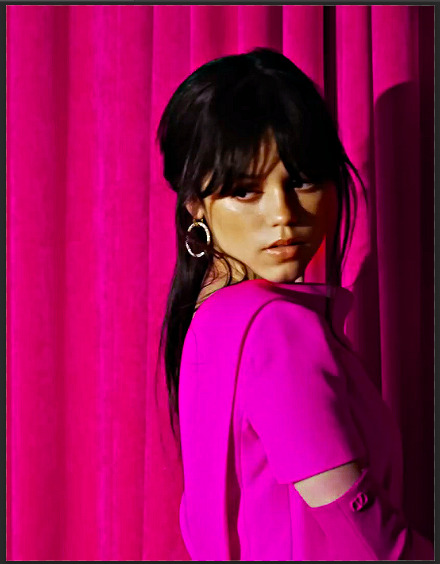
anonymous asked 💬 Hello there! Could you please make a tutorial on how you combined gifs and images in your edit THE RECENT FASHIONS OF JENNA ORTEGA? It's incredible. Thanks!
tysm for this ask 🫶🏼 below the cut is a step by step on how to do this kind of set. i will be using photoshop 2023 for this tutorial.
original inspiration was taken from sith-maul’s zendaya lookbook gifset !
step 1: cropping
for this style to work, your gif needs to be tall. the best dimensions are 540x700. make sure you don’t have too many frames because the bigger the crop, the bigger the file size !!
the other thing you want to do is crop it a little to the left or to the right, whichever works best. this is so you can slot in the photos of the outfit :)
step 2: colouring
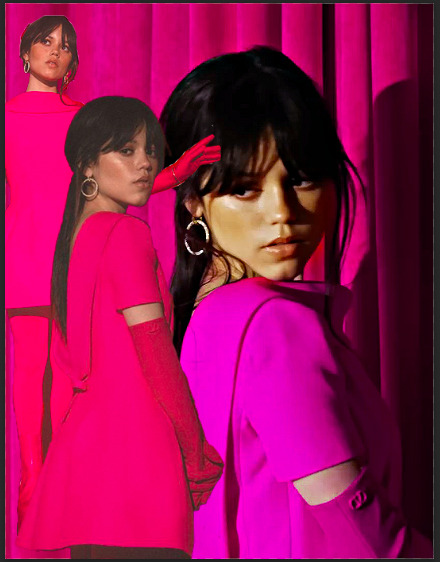
to make the whole thing more cohesive later on, how you colour your set is important. for the demonstration, i’m using a clip of jenna from her interview with who what wear, which has a lot of easy to manipulate colours. because the main colour is obviously pink, i’ll use a colour balance layer, a selective colour layer and a hue/sat. layer.
be mindful when using hue/sat and colour balance that you’re not whitewashing your subject or dramatically altering their skin tone. if there is low movement in the gif, you can use layer masks to prevent this.
you can see here that there’s a huge difference in the old vs. new colouring, which is what we want !!

step 3: source your pics
probably the easiest step. you can either just google search for pictures [person] [event/photoshoot] is the best way to search for that, or you can search for something on pinterest. you want one picture that’s ideally head to toe, plus another showcasing the outfit from around waist up.
step 4: edit the photos.
now that we’ve got our photos, load those into ps. once loaded in, you’re going to want to go to select > subject and then go option + cmd + x (for mac, i’m sorry idk the windows prompt !) and then just paste that on a new layer.
depending, the photo may select some of the background. but there’s really nothing you can do about that, so you just have to tidy it up manually using the eraser tool.
now my photo looks like this !

crop the photo to the same size as your gif and repeat the same process for the other photo.
step 5: placement of the photos
first off, duplicate your photos onto the gif. then, resize them to your liking. ideally, you want the full shot going from top to bottom on the gif, and the medium shot positioned down from it.
i also make the medium shot a little bit smaller, so we can highlight the head to toe. as well as that, put the head to toe shot behind the medium shot by swapping their layer orders.
here’s a ss of what mine looks like, just to give you an idea.
step 6: colouring the photos
first stop: add a black and white gradient map. completely ignore the fact the gradient map will go over everything; we’ll fix it in one sec ! colour the photos as normal: curves, levels, anything you do in your normal colouring process. just make sure all the layers are underneath your gradient map layer !
on top of it all, add a gradient layer and change it to a colour in the outfit. you can click and drag it in all different directions to get to a good point. don’t forget to change the angle of it so it fits best !
for example, here’s mine:
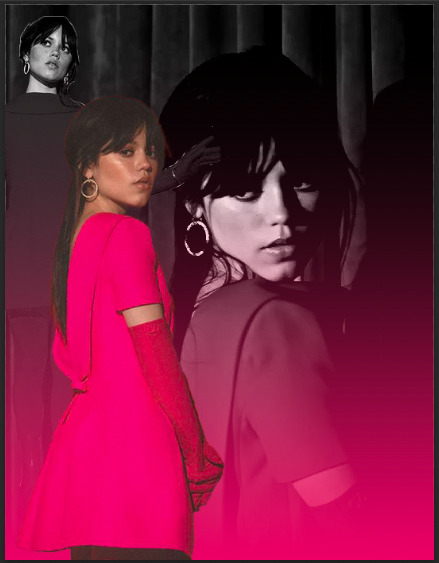
you can see that the gradient gradually goes up on the outfit, leaving it almost half half.
now, select all the layers that are over the first picture and right click > clipping mask. this clipping mask will make sure that all your colouring layers ‘clip’ only to your picture. DO NOT select the picture layer as well. this should be what you have:

the arrows show that it has clipped to the subject.
now, just repeat those colouring steps on the other pic so you’re starting to look like this:

OPTIONAL: i usually change the blending mode of my gradient layer to ‘colour’ so it blends nicer on the picture, it’s not compulsory, but the result looks better. you can also choose to sharpen your pictures if you like !
step 7: typography
there’s two main things you want: the title of it (this could be a fashion brand or maybe a show/film name if you want to do this for a character) which will be in a statement font as well as the location or the date (could be the episode and the episode air date or the film premiere date) to start, create your layer above the colouring layers for the gif, but below the pictures of your person.
for this tutorial, i’m using the font ‘magazine’ but you can really use any font you want, as long as it stands out against the cover.

next up, you’ll want to search ‘map pin point png’ on google and get your little pin point icon. this will be so you can add the location and the date, or whatever you want to add. i change the font that i use for the subheading, just to switch things up ! you can do whatever you like though.

here’s what i’ve got for my subheadings. make sure that you’re placing it in the empty space on the bottom corner, not on top of your pictures.
and that’s it ! you can add any other finishing touches that you’d like, or do any other effects that you want. this is simply a base for you to work off, but you can change things wherever you deem it necessary to improve upon. apologies for this being so long 😭 hopefully it helped a little though !
#*tutorial#asks#gif tutorial#clubgif#userriel#tusercat#usercim#usersmia#userv#thingschanged#userzesty#userlp#userpjo
40 notes
·
View notes
Note
How do you make your gifs?
Hello hello! I love talking about gifmaking, so thank you for giving me the chance to ramble.
Instead of a detailed step-by-step walkthrough, I will link tutorials and resources written by the wonderful Tumblr creators on here along the way. Everyone has their method and preferences, and there’s no right or wrong way to make gifs. I’m going to share techniques and resources I picked up along the way that work best for me—they may or may not be suited to your preferences, but I hope you’ll find some helpful things here.
(Warning: screenshot/image heavy)
USEFUL TUTORIALS AND RESOURCES
Here are some tutorials and resources that I found very useful when I got back into gifmaking:
Gifmaking tutorial using video timeline by @hope-mikaelson is identical to my own process
Gifmaking and coloring tutorial by @kitty-forman, whose process is very similar to my own
Giffing 101 by @cillianmurphy, an incredibly detailed tutorial that covers everything you need, including a step-by-step guide to using HandBrake
Gifmaking and coloring tutorial with 4K HDR footage by @sith-maul, another incredibly detailed tutorial with many useful tips
Gifmaking tutorial by @jeonwonwoo, incredibly comprehensive and covers so many aspects of gifmaking from basics, sharpening, captioning, and text effects
Gifmaking/PS tips and tricks by @payidaresque
Action pack by @anyataylorjoy, the Save action is especially a true life-saver
@usergif and @clubgif are amazing source blogs with many tutorials on gifmaking, color grading, and gif effects, can’t be thankful enough for the members for their work curating and creating for these blog!
TOOLS
Adobe Photoshop CS6 or higher, any version that supports video timeline. @completeresources has many links to download Photoshop, have a look!
Photopea is a free alternative to Photoshop, but it has a slightly different UI, check out these tutorials for gifmaking with Photopea
HandBrake or any other video encoder, especially if you’re working with .MKV formats
4Kvideodownloader for downloading from YouTube, Vimeo, Instagram, etc.
OBS Studio or any other similar screen capturing software. To prevent duplicate frames in gifs that prevents your gifs from looking smooth, try to match the recording frame rate (FPS) with the source.
IMPORTING FOOTAGE AND WORKING IN VIDEO TIMELINE
I work exclusively in video timeline instead of importing video frames to layers or loading files into stack. For videos that don’t require converting/encoding using HandBrake, especially ones that are already in .MP4 format, I tend to open the video directly on Photoshop, and trim the videos around directly.
As mentioned above, this gifmaking tutorial using video timeline is exactly how I make gifs. I find it more efficient, especially if you’re making multiple gifs from the same video/the same scene with little to no change in lighting conditions You can simply slide around sections of gifs you want to save, and they will all be the same length.
Another thing also covered in the tutorial linked is the ability to change video speed in video timeline mode. Right click on the video and set the speed before proceeding with cropping/resizing. This is also very useful when you’re making blended gifs where you need the footage to have the same length.
Slowing footage down.
As mentioned in this post, changing the FPS before slowing down the gif results in smoother gifs. Doubling the frame rate before slowing down your gifs usually yields the best result.
Speeding footage up.
I love using this to speed up slow motion B-rolls to make the speed slightly more natural. It will result in nice, smooth gifs:

(B-roll footage, normal broadcast speed)
(200% speed)
Subject won’t stay in frame?
Another feature of the video timeline mode. Keyframes are your best friend. This tutorial by @kangyeosaang covers everything you need to know about panning gifs. I use this technique regularly, it’s a life-saver.
COLORING
Here are some coloring tutorials I found very useful:
Coloring tutorial by @brawn-gp beloved, their coloring style is second to none
Mega coloring tutorial by @yenvengerberg, for stylized /vibrant coloring
Understanding Channel Mixer by @zoyanazyalensky
Coloring rainbow gifs by @steveroger, which delves deep into Channel Mixer
I tend to go for neutral-saturated coloring in general, especially for minimalist gifsets with no effects (blending/isolated coloring/overlays etc.), but the possibility is endless for stylized coloring. Here’s what my adjustment layers look like for the example gifs above.
The base footage for this Charles gifset is incredibly desaturated. I started with a Curves layer to bring contrast to the gif, as well as do some color-correcting to bring the base footage to a more neutral tone. To bump contrast, I also like to add a black and white Gradient Map layer with a Soft Light blending mode at 10%-30% opacity:
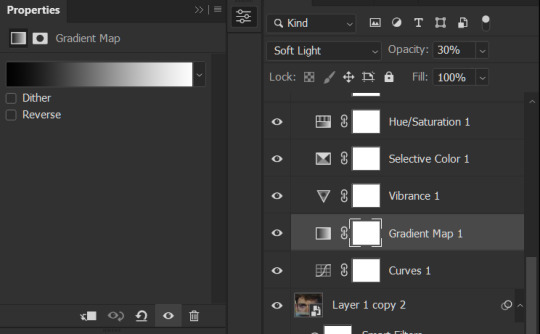
The Vibrance layer is then used to lift the saturation of the base footage, with the Selective Color, Hue/Saturation, and Channel Mixer layers to help remove the green/yellow tint to his skintone.
An underrated adjustment layer/preset in my opinion is the Color Lookup. You can layer in pre-loaded .LUT color grading presets to help speed up your process. For this gif, it’s simply a base preset Soft Warming Look to achieve a warm, pink-tinted tone.
In hindsight I feel like this gifset is too saturated, his skintone is skewing very red/pink, I could’ve bumped down the lightness of the reds with a Selective Color layer or a Hue/Saturation layer. Try to err on the side of neutral for skintones. Experiment with layer orders—there’s no right or wrong! Remember that each layer build up on the one before it.
The base footage of the Jalen gif is already quite nicely color-graded, but it’s still muddy and underexposed. As with the Charles gif, I started with a Curves layer to bring the gif to a better baseline contrast. Then I focus on brightening the gif with the Brightness/Contrast and Exposure layers.
The Hue/Saturation and Selective Color layers are to color-correct Jalen’s skin tone—it’s something I spend most of my time coloring gifs and focus a lot on, especially when color grading BIPOC skintones. Putting a Vibrance layer, upping the Vibrance and Saturation, and calling it a day would make his skintone skew very, very yellow/orange.
Focus on the reds and yellow for skintone, play around with the Saturation and Lightness sliders, use the Hue slider with caution.
It can be tricky to achieve the right skin tone when working with sports footage vs the higher quality, higher dynamic range footage of films or TV shows, but I try to keep it as close to the subject’s natural skintone as possible.
Here are some of tutorials with tips and tricks on coloring BIPOC:
How to fix orange-washed characters by @zoyanazyalensky
How to prevent pink-washing and yellow-washing by @jeonwonwoo
Coloring tutorial by @captain-hen
Changing lighting conditions?
Fret not—this is why I love working in video timeline. I’ll take this gifset as an example: it’s a deceptively difficult one to color. The footage is 720p and the sunlight shifts throughout the video, so matching across gifs was tricky.
My solution was to split the clips in sections with consistent lighting, and apply adjustment layers to the individual sections before applying general color grading layers on top of everything.
We can make use of the Fade Transition effect for sections where the lighting changes within the gif section we want to color.

(without vs with Fade on the Brightness/Contrast layer)
The difference is subtle in this example, but the brightness in the right gif is noticeably more consistent throughout. You can also add the Fade Transition effect to the beginning for a fade in, of course.
SHARPENING AND OPTIMIZING GIF QUALITY
This tutorial by @anya-chalotra covers everything you need to know about optimizing gifs for Tumblr.
Sharpening.
Sharpening is essential to making crisp gif images. Here’s another ask I answered re: my own sharpening settings and maximizing gif quality.
(base footage, unsharpened)

(color graded, unsharpened)
(color graded, sharpened)
The final gif is sharpened with Smart Sharpen, 500% at 0.3px and 10% at 10px (my standard sharpening settings).
Here are some tutorials and resources on sharpening:
Sharpening process by @anya-chalotra
Sharpening tutorial with added gaussian blur by @haleths
Sharpening action by @daenerys-stormborn
Size your gifs for Tumblr correctly.
This is essential: full width gifs are 540px wide.Two side-by-side gifs should be 268px wide. Here’s a handy post on gif size guide for Tumblr.
Incorrectly sizing your gifs will take away the quality of your gifs: undersizing your gifs will especially make them grainy, blurry, and /or pixelated, and won’t display correctly on many people’s desktop theme. Oversizing usually isn't as dramatic as undersizing, but it will make the gifset glitch when displayed, and the file size will be unnecessarily bloated.
Work with HD footage if possible.
Media fandoms (films/TV shows) are luckier than us in the sports trenches—we have to work with what we have. Broadcast footage is usually subpar: lacks contrast, pixelated, very desaturated, the list goes on. But it’s possible to still make high quality gifs from subpar footage. Here are a couple of tutorials to mask low source footage quality:
low quality video ➜ “HD” gifs tutorial by @nickoffermen
Sharpening low quality footage by @everglow-ing
(This gifset I made is from a 480p footage with horrendous lighting conditions and colors, and the end result is decent I’d say)
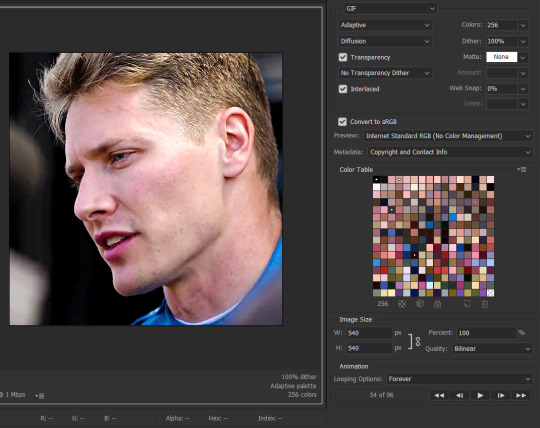
Save for Web (File > Export > Save for Web (Legacy) or Ctrl + Alt + Shift + S) settings.
I default to Adaptive + Diffusion but also use Adaptive + Pattern from time to time. Any combination of Adaptive or Selective + Diffusion or Pattern will give you a good result. In my experience some gifs will need the Selective color table for the colors to display correctly.
Here are my default settings:
SAVING AND EXPORTING FOR TUMBLR
Converting to frames and adjusting the gif speed.
If possible, avoid exporting your gif and reopening it to adjust the frame speed. I used to do this sometimes when I’m lazy, I have to admit, but this is where this Action as mentioned at the beginning comes in very handy. It converts all visible layer into smart object, then converts it back to frame animation.
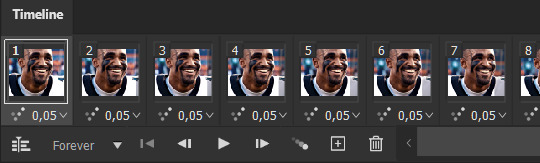
Step-by-step:
1. Select all layers
2. Right click > Convert to Smart Object
3. Go to the Timeline menu (≡) > Convert Frames > Flatten Frames into Clips
4. Go to the Timeline menu again (≡) > Convert Frames > Convert to Frame Animation
5. In the same menu (≡), select Make Frames from Layers
6. Delete the first frame (it’s a duplicate) then set your frame speed

Now you can adjust the frame speed before exporting it (Save for Web).
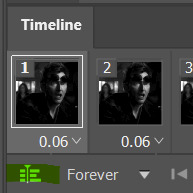
Pay attention to the source framerate.
The frame delay of 0.05 s is usually the default to make gifs for TV shows and films, and it is preferred by most gifmakers. This stems from the fact that most movies and TV shows are 24 or 25 FPS. This may not be the case for all source videos: you might get 30 FPS footage, and sports or gaming footage can be 50 or 60 FPS. Gif speed also depends on the FPS of your original file. Play around with gif speed and see what feels most natural to you.
My rule of thumb is the frame delay Photoshop gives you + 0.01 s. For example, 50 FPS footage will give you 0.02 s frame delay (25 FPS gives you 0.04, 30 FPS gives you 0.03, etc.), so set it to 0.03 s. I usually err on the side of a faster frame delay for smoothness in in-game sports footage, anything else (interviews, press conferences, B-rolls) can get away with being slowed down. Again, experiment and see what you think looks best!
Keep gifs under the Tumblr file size limit (10 MB).
Cut down the number of frames. My gifs are usually around 60-70 frames for 540px full-width gifs, but depending on the coloring, sometimes you can get away with more. 268px gifs can go up to 200+ frames.
Crop your gifs. Remember to keep full-width gifs at 540px wide, but if necessary, you can crop the height. My go-to sizes are 540x540, 540x500, 540x450, and 540x400.
Amp up the contrast of your gifs. Flat colors like black cut down gif size.
The Grain filter or Noise filter, though beautiful for aesthetics or simply necessary sometimes to mask low source footage quality/pixelating, may bloat your gif size.
Play your gifs back before exporting.
Pay attention to duplicate frames or glitches, you might need to get rid of them!
Hope this is helpful! Don’t hesitate to send an Ask or DM if you need any help, I will happily answer all your questions and send over PSDs. (I’m also on Discord—just shoot me a message if you need my tag!) Happy creating :]
#tutorial#PS asks#gif tutorial#Photoshop tutorial#I guess this is more of a resource link dump than tutorial but. Hey. Why reinvent the wheel...#Sorry for the late answer I hope you see this Anon :]#completeresources#allresources#userxoames#userbarbi#usernrzr
1K notes
·
View notes
Note
previous anon, asking for a tutorial on the choose your character gifs. Sorry for not giving an example, https://www.tumblr.com/usergif/750944312368480256 its second gif on this gifset
hi again! after going through the insp trail, it looks like that specific concept was started by @seance in this lovely set! i'll redirect you to their blog if you want to ask for specifics or an in-depth tutorial, as i wouldn't want to claim credit for the how-to
but for additional resources that could help with this effect, I would take a look at some of these transition tutorials:
fade transition tutorial by usergif
glitch effect tutorial by ajusnice
photopea glitch tutorial by miwtual
motion blur tutorial by me
(note: the gifset you linked doesn't use a transition, the gifs just continue moving to the next - but other versions in the insp trail use transitions)
and clipping/masking tutorials to get the character select modules set up:
clipping & layer mask tutorial by usergif
gifs on gifs tutorial by clubgif
tutorials on how to make a thin border:
thin border mini tutorial by usergif
thin border tutorial by eddiediaaz
i hope this helps!
37 notes
·
View notes
Note
Are there any tutorials on Transition effect in gifs?
elenas
usergif
sarah-snook
cal-kestis
pscs5
clubgif
anyataylorjoy
shangs
kiekiecarrera
coldasyou
deokmis
benoitblanc (for photopea)
heroeddiemunson (for photopea)
Hey! I'm not sure which type you're looking for but here are all the tutorials I could find for transitions.
11 notes
·
View notes
Note
i hope this makes sense but do you know how to screencap the very beginning of a video? i use kmplayer to cap but it's kind of impossible to screencap the first few seconds of something because you have to press play before you can click the start screencapping button. do you know if there's a way around this? thank you!
i'm sorry anon but i don't screencap so i have no idea! i would probably check out some gif source blogs on here like @usergif @clubgif etc.
4 notes
·
View notes
Note
How did you learn how to gif and what did you use? Please share to a fellow novice gif maker. 🙏
hi! so I use mvp for screencaps and photoshop 2023 to make the actual gifs
this is a tutorial to download mvp and for giffing (here for windows)
this is for giffing on photoshop (taught me how to gif in like 30 minutes, this is one of the best tutorials I've found)
@clubgif and @usergif all have great tutorials as well for everything (giffing for beginners, coloring, fonts etc)
I just started but if you have any questions I'd love to try to help! :))
7 notes
·
View notes
Note
Is it weird if I ask how you make your GIFS?
not at all! I use mvp for the screencaps and photoshop for the fun stuff (coloring, text, etc). This is the tutorial that I used to learn and @clubgif and @usergif have incredible tutorials as well :))
4 notes
·
View notes
Note
1, 14 and 28 💜💜💜
How did you get into graphics / gif making: I think it was after I saw one of those countdown for birthdays that used to happen every year. In 2018 it had one for Harry and I thought it would be nice to make my own edit with one of the prompts so my first ever gifset theme was my favorite hslot18 outfit, the pink suit he wore in london.
14. Colours I like: I'm a big fan of blues tbh, which is a problem as a gifmaker because everything too cyan gets grainy as hell so i have to suck it up and not do too much on that. Orange is quite nice too I found lately, it's just hard for me to manipulate it because it messes with the skin color too much and i go insane
28. Advice for any beginner graphic / gif makers: Don't try to do a whole lot right at the beginning. Try to master one thing at a time, get comfortable doing a certain thing then go ahead and try something more complex. Also follow the great resources accounts on this website, there are so many and they help out with tutorials, tips, inspiration and even support your creations. It makes beginning to gif/graphic so much easier with some guidance. my go to would for sure be @usergif & @clubgif, there's a great amount of resources on both of these blogs and pretty organized pages for you to navigate with specific things you're looking for.
4 notes
·
View notes
Note
Hi, I was wondering if you could help me. I really want to start making my own gifs but I can't figure out if there's a way to do it without paying for some kind of app. I love your gifs and I was wondering if you could tell me how you make your gifs. Also, do you use a screen recording app?
Thank you for liking my gifs, first off, that’s very nice to hear! 💜
I personally do pay monthly for Adobe Creative Cloud and use Photoshop to make my gifs. I’m not familiar with how to use other free programs/sites that people use to make gifs from, but I do know it's fully possible to have amazing gifs made from them. Here's two posts I've seen that talk about using those free software: here and here.
I taught myself how to make gifs via a variety of random gif tutorials here on tumblr that I found by google searching. I wish I could tell you there was one easy tutorial I followed and just immediately could make them, but I really pieced things together from a bunch of different ones and then used trial and error to figure out the basics. I think this blog may have been one I used as reference, but it's been about a year so I couldn't be 100% sure. I will say that once I did figure out the basics, the blog @clubgif has been a really helpful resource for trying out different experimental things on top of that. It's been awhile since I've done anything like that (just because of time and real life), but my 911 Lone Star Enneagram series came as a result of wanting to try out different font effects I saw through different posts on there.
As far as screen recording goes - I do use screen recording just on my laptop (by using Windows+ALT+R) on occasion for things outside of 911LS episodes. For example, this Brian podcast set and this Ronen set were from screen records. 99% of the gifs I make from the episodes though are done from downloads of the episodes. I've been downloading them from this folder that @3416 is fucking amazing for uploading the episodes to. The gif quality will depend on how good the video quality is that you get the frames from, so screen recording is never the best tbh, but sometimes it's the easiest or only option.
I hope this helps at least a little bit. If you really want to learn to make them, I say go for it! Mess around with some of the free software and see how you feel about it. But also don't expect your gifs to immediately look perfect. This is one of the first gifs I ever made:
compared to one I just made recently:

I hope think you can tell that there was improvement between the two. Just be patient with yourself and don't be afraid to post things!
#anon answered#if anyone else has some better links/tutorials for free software (or photoshop too) feel free to add to this to help out this anon!
5 notes
·
View notes
Note
hey! I really love your black, white and pink mick schumacher gifset back from june 15th, and I was wondering how you made the last gif in that set? the effect looks really cool!
hiii tsym !! it's actually very simple— if you're familiar with blending it's basically just that with the same gif. but if you're a visual learner like i am, i've made a lil tutorial !
so here's how to get this effect, as seen in this set
first of all, we're going to want to make our base gif. go ahead and make your gif and sharpen it, then you're going to add a black and white gradient map.
if you're satisfied with how it looks you can leave it at that, but if not then go ahead and edit it until you like how it looks. i decided to increase whites in the gradient map and added an exposure layer underneath it with the gamma correction lowered, so now my gif looks like this:

once that's done, group all your layers (ctrl/cmmd+g or select your layers then right click and select 'group from layers'). if you're working with frames, convert to timeline now by clicking the hamburger menu and selecting 'convert to video timeline'

then, we're going to duplicate our group, so now we have two copies of our gif. feel free to rename them for organization's sake, if you'd like.

and now the fun part 😉 go into your second group, select the gradient map layer, and change the white to any color you want. make sure it isn't too dark, otherwise it's blend into the black later on. select the group folder (make sure it's the group folder and not just one layer) and change the blending mode to lighten, and then right click on the group and select 'convert to smart object'.

now that our second gif has been converted to a smart object, move your gif to where you want the color to peek through. for this example, i moved it up and to the left.

add your final touches if you'd like (erasing harsh edges, additional color correction, etc.) and you're done!
i hope this is somewhat helpful, and if you have any questions don't hesitate to ask 💗
80 notes
·
View notes
Note
Hello! Sorry to bother you, but I just recently got a proper laptop and I really want to start making gifs. I just have no idea where to start! Do you have any advice/ how to's? I'm completely clueless about everything 😭😭 I would greatly appreciate anything you can tell me❤️ thank you for your time!
hi lovely!!! so excited to hear you're starting to gif <3
i'll send you an amazing tutorial that i followed :)
here - this is the one i followed from :)
also here — this is full of tutorials for giffing + other types of giffing :) i use this daily, it's amazing <3
also clubgif is great as well <3 (click the third button down from the left and it gives you a bunch of links) <3
it's important to know that you probably won't get the hang of it first time, it took me a few weeks to learn how to do it off by heart <3 so definitely be patient and don't give up 😘
#—anon ♡#( mail 💌 )#these are all the links i used <3#i hope the links help!! and if u need anything else i am here <3
3 notes
·
View notes
Text
finally made a new blog theme for the first time in ages, thanks to @clubgif for the header tutorial 💛
3 notes
·
View notes
Note
Hi, I love your gif sets. What programs do you use to make them? I would like to make some gifs too, but I'm a newbie and idk where to start.😅
Hi, thank you!
You totally should! Gifmaking is so much fun. I use Photoshop.
Here are some blogs that have great tutorials I'd recommend you check out to help get you started @itsphotoshop @usergif @clubgif
And if you have any other questions, don't hesitate to ask. I'm happy to help.
2 notes
·
View notes
Note
Hello! I was trying to find a tutorial on how to do a gif with a gradient border and outside of the border the same scene is in black and white. I tried looking on the navigation page but I couldn’t find it if there’s one. Can you help me?
hi! I asked some of our staff if they knew of a tutorial like this, and it may be this tutorial by clubgif! I'd never seen it before which is why it wasn't on the directory, but I'll go ahead and add it rn! :)
3 notes
·
View notes
Last Seen Blogs

files
find files

fish-risk77
Untitled

crookednon
>:^3c

formatside14
Tooth Whitening

siesta-key-s03-e022-hd-blog
Siesta Key Season 3 Episode 22