#dronegif
Text

@beautifulxxnature
#art#love#heart#design#fun#heart-shaped#surreal#nature#island#heart shaped island#cgiart#ultimatepad#lovemountain#gif#lovegif#beautifulxxnature#luxueypad#retreat#dronegif#aerialgif#aerial photography
66 notes
·
View notes
Text
How to print a drone in 5 easy steps
By Olivia Feld and Julien Gathelier
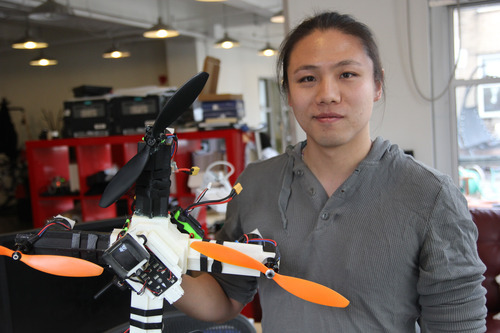
Drones At Home went to meet Ang Cui, 31, at his office in Midtown Manhattan. Ang is doing a PhD in computer security at Columbia University. In his spare time he is a drone hobbyist. He's built drones before, but last week he completed his first ever 3D printed drone.
Here's how he made it.
1. Design it
Many drone designs are available online for free at websites like Thingiverse (currently, there are 140 drone designs available).
Because the other models didn't seem sturdy enough to him, Ang decided to design his own while flying back to New York from a business trip in San Francisco.
2. Print it
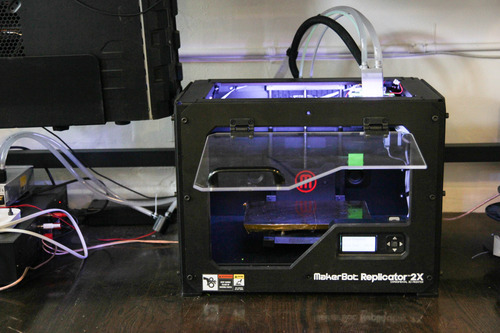
Ang printed the frame of his drone on his Makerbot Replicator 2X 3D printer. He said that his printer is small, so he had to print one part at a time. It took around 22 hours to print all the components of his drone. The honeycomb structure of the printed parts are roughly 10% plastic and 90% air. It ensures the parts are solid, while making them as light as possible.
3. Buy the spare parts and download the software
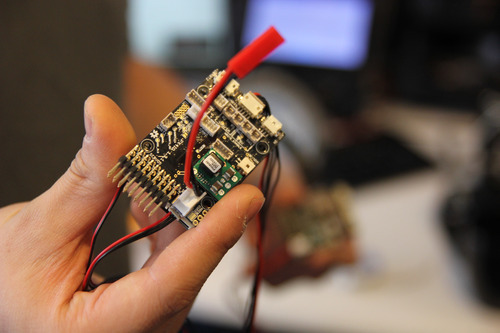
What Ang couldn't print, he bought online: the battery, the motor, the Spektrum DX8 Transmitter, to navigate the drone, and most importantly the flight controller or, as Ang called it: the drone's brain.

All in DIY spirit, the hardware and software for the flight controller are Open Source.
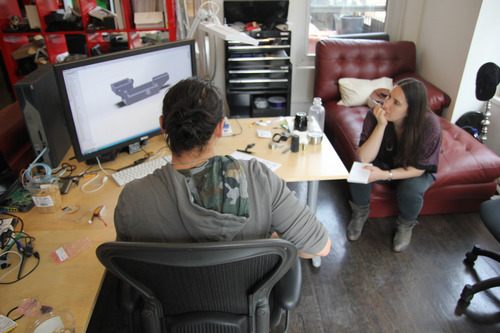
4. Build it
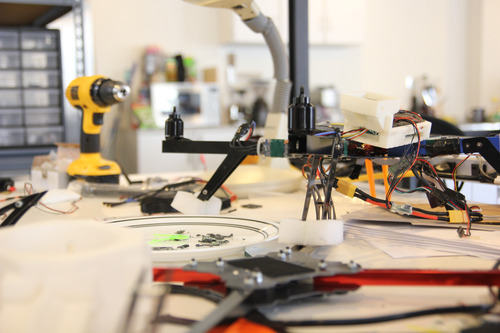
Above: a non 3D printed drone being built by Ang
He didn’t use screws. Instead he glued the parts together using epoxey, an industrial strength binary glue. He added a lipo battery and built a protective case around it (it's seriously flammable if pieced).
5. Fly it
He then tried out flying his drone inside his office. At first there was a problem with the software but after some brainstorming, Ang fixed it and the drone was airborne.

Here's some footage of the drone flying inside his Midtown office.
After testing the drone inside, Ang and his best friend Adrian Grabicki, 30, decided to test the drone outside for the first time on Sunday afternoon in Central Park.
Adrian was the pilot, having developed his navigational skills from building model airplanes.
The two friends were planning to use the homemade drone to film Adrian’s wedding in a couple of weeks time, but decided it would be a too distracting to have a drone hovering above the ceremony.

Here’s some videos of the 3D printed drone flying in Central Park.
Building the drone wasn't a cheap endeavor. Ang spent about $20 on the battery, $30 for two and a half pounds of plastic, $100 for the transmitter, $30 for the camera, $230 for the autopilot system and his priciest acquisition: $2,500 for the 3D printer.
Not including the price of the printer, building the drone cost Ang about $500, which is comparable to the price of drones currently on the market.
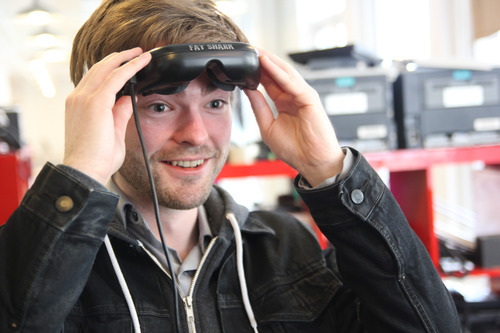
Next, Ang plans to attach a camera connected to a pair of goggles (as modeled by reporter Robert Hackett in the photo below) so that he can see the city from a drone's-eye-view.
Eventually Ang and Adrian want to develop software so their drone can be flown by a computer.
(photos: Julien Gathelier, videos: Olivia Feld, Robert Hackett)
7 notes
·
View notes
Last Seen Blogs


resdayn
beeper 2.0

parockeen
Enemy Of The State

avimour
chopping off body parts

jackshunter
our kids would look like horses