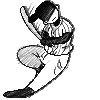
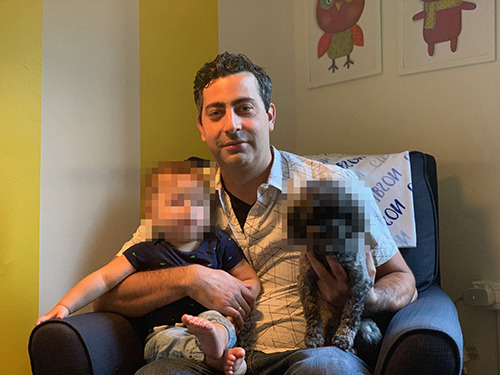
#if anyone wants to do this style i used procreate with the pixel brush (look up a tut to make it)
Text


some off gifs i made ^3^
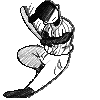
#off game#off mortis ghost#off#off fanart#off batter#off the batter#batter off#off zacharie#off the judge#off pablo#gif#scotcharts#art#digital art#artists on tumblr#if anyone wants to do this style i used procreate with the pixel brush (look up a tut to make it)#with an apple pencil#the pencil makes the cool pencil like texture
398 notes
·
View notes
Note
ok firstly, i love your art style. its just so amazing to look at! the smtiv art is awesome and i love that you draw walter with top surgery scars, and i completely adore the p5xsoul eater au, two of my favourite things in one lol. but i do have a question, I'm not sure if anyone else has asked this but would you be okay with explaining your creative/art/drawing process? kinda wanted to know for a class I've got, i gotta analyse artists' drawing processes. hope that's okay!
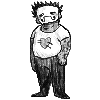
hi hi tysm for this ask! trans walter canon (real) & also im glad u like the p5 soul eater!! as for my drawing process it kinda varies but for the majority of my drawings nowadays, i start with a really rough sketch, lay down flat colors under it, and then start rendering in another layer on top of that one. it looks very chunky (cuz i sketch & color with the same blocky pixel brush) and i try to use many diff shades of colors to give it more variety. here’s a qifrey sketch from a while back as an example vv

the flat colors here are his skin tone and the inside of his cape, which is a somewhat washed-out green. but for the top rendering layer, i put in like a billion different colors of green, as well as using shades of yellow and blue (what i’m trying to say w this long ass explanation is i usually tend to go with rendering using the colors that r on either side of the base color on the color wheel.) if i really don’t like the colors i used, i’ll probably do some color adjustments in procreate by copying the entire canvas into a new layer and then putting a gradient map over it or upping the saturation or something, but for the most part i think that’s pretty much it. so uh. yeah! hopefully this helped!
17 notes
·
View notes
Text
David Ostow.
Bio: I'm a cartoonist and stay-at-home dad, not necessarily in that order. I came late to cartooning, because I thought I wanted to be an architect. In grad school, my professors were always hung up on the fact that I was more interested in drawing pretty pictures than in designing interesting spaces. Anyway, they graduated me, and should really answer for the disservice they did to the design industry.
Find this print here!
I came to cartooning by way of illustrating some books for my sister who's an author. To date, my work has also appeared in and on a combination of print publications and websites, including The New Yorker, Mcsweeney's Internet Tendency, The American Bystander, Buzzfeed, and The Weekly Humorist. My work and I were also featured in a New York Times piece about artists addressing gentrification in their work. I don't know if that counts. Does that count?
I live in New York City with my son and my wife, whose support is the reason I'm not drawing on grocery bags in my parents' basement, and raking their yard for allowance.
Tools of choice: Where to begin? I got an iPad Pro earlier this year, and I've been using it pretty exclusively since. But finding and experimenting with tools has been an odyssey unto itself for me, and I'd be remiss not to give a bit of history.
I started out employing a lot of the tools that I learned about in the architecture world. I went to UVA, and when I was there my sketching professor [fun fact: he was also the mayor!*] encouraged us to draw with Micron pens using a very loose hand. Check out the sketches of Michael Graves, and you'll see what we were emulating. My hand was naturally pretty shaky. Years of drawing have rendered it less so, but at the time, my peers teased me (in good fun) for being a teacher's pet with my wobbly broken lines. That introduction to sketching was definitely formative to the style I would eventually develop for cartooning. Sometimes I find myself trying to force my hand to be as wobbly as it used to be.
Architecture school was also where I first began using Photoshop as a diagramming tool, and I became more facile with it when I moved into the professional world, where it's a common tool for rendering presentation drawings. Since then, Photoshop has been my go-to for applying washes and colors to my drawings, although now that I have an iPad and I'm experimenting with Procreate, the Photoshop era may be coming to a close.

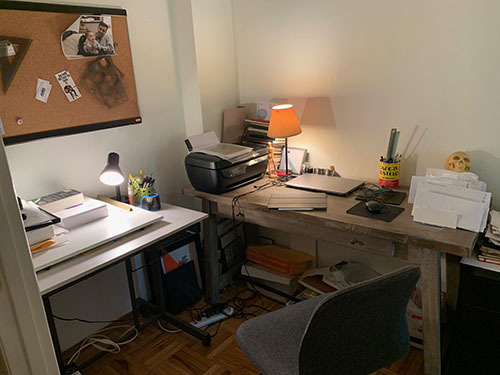
After taking a class on comics creation at The New School in Manhattan, I got up the nerve to add some ink and brushes into my toolkit, and while it was an adjustment, it was also fun to have a brand new way of making varied and expressive lines. At the height of my "pre-digital" period, I was using a combination of ink and technical pens. The accompanying photo shows my spread in more detail. All the tools pictured are easy to find, and easy to use, and I recommend them for anyone looking to take a stab at drawing cartoons or comics.
From there, I waded slowly and awkwardly into the world of digital drawing. I had a hybrid moment when I was roughing my drawings in pencil, scanning them, using a Wacom tablet to ink in a program called Clip Studio, and then adding colors / washes in Photoshop. It was an incredible time suck, but, for what it's worth, the cartoons I produced that way were some of the first I sold to The New Yorker. So there's that.
Since getting my iPad I've been drawing with Procreate, which seems to be the preferred drawing application among my iPad savvy colleagues, and which I enjoy, but I feel like I'm still getting comfortable with it. When it comes to new technology, I have a habit of doing the bare minimum to educate myself, and every time I need clarity on a finer point I'll do a tad more research. It's called the "Dave Ostow Kicking and Screaming Method" and I recommend it to no one.
Tool I wish I could use better: I've never had any formal fine arts training, so I lack the kind of mastery of many traditional tools that some of my peers have attained as a matter of course. One time I tried to use a dip pen, and was so overwhelmed by how hard it was to draw a single line that I put it in my drawer and just kind of forgot about it.
I also used to own a set of Koh-i-noor Rapidograph pens, which make amazing lines, but require saintlike patience to maintain. The nibs are super delicate and If you're not careful, they'll break and leak (or — worse — explode) all over your drawing.
In an ideal world, I would have the patience and time to master some of these more traditional and delicate tools, and I think I'd be a better artist for it. Maybe some day, but right now my schedule doesn't allow for much extracurricular activity.
Tool I wish existed: Kind of a no-brainer: an iPad / digital tablet that felt almost indistinguishable from real pen and paper. Think the Beyond Meat burger of digital drawing tools.
The iPad is great, and of course it's wonderful to have digital editing capabilities, but there's simply no hiding the fact that you're drawing on a screen that lacks the kind of tooth you'd get from dragging a pen across paper. Also, when I zoom in to do detail work, I'm always thrown by the pixelation.
I'm sure the more I use the iPad, the better I'll get at tweaking the settings to my liking. Like I said, when change is involved, I sometimes drag my feet. But that's okay. As a good friend who's also really my therapist said, "Maybe that's just the way you work."

Tricks: Not a trick so much as a suggestion: If you're drawing on an iPad or some other sort of tablet, get a matte protective cover. It will reduce glare, and soften the feel of the screen against your stylus, so you get an experience more like drawing on paper, albeit only slightly so.
Misc: Yes, that is a Dan Smith Will Teach You Guitar flyer on my bulletin board. I found it on the subway and it just seemed like a fun authentic New York artifact that was calling to be preserved. I look at it every now and again, and find it oddly inspiring. That picture of Dan Smith has been circulating around the city for God knows how many decades. What does Dan Smith look like today and would he still teach me guitar?
Website, etc.
Website
Instagram
New Yorker Link
Conde Nast Store
*Editor’s note: I went to Charlottesville High School with Mayor Cox’s son! I also went to UVA, though not at the same time as David. Small world!
Also, I happily do this blog for free, though there are a lot of hidden expenses that I take care of myself. If you enjoy this blog, and would like to help defray labor and maintenance costs, there is a Patreon! Or if you’d prefer to buy me a cup of coffee, there is a Ko-Fi account as well (which is essentially a PayPal donation)! Your support means a lot, and I'm grateful to everyone who has donated!
You can also find more posts about art supplies on Case’s Instagram and Twitter! Thank you!
#David ostow#how to draw New Yorker cartoons#cartoons#how to draw cartoons#art supplies#artists on tumblr#art process
11 notes
·
View notes
Text
Free and affordable creative software for photo & video editing, design and illustration.
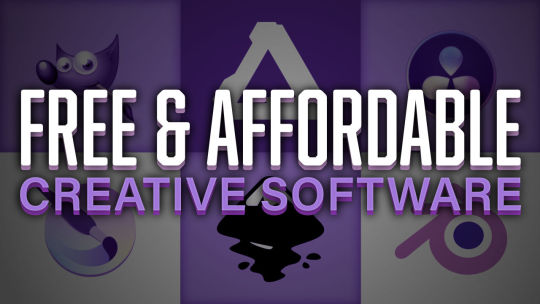
If you’re a creative and you don’t have a lot to spend on the latest software, you still want decent tools that will make life easier. Here’s a list of free and low cost software options that won’t make you a slave to outrageous pricing schemes and monthly subscriptions. All of the paid products listed here (except one) have retail options for under $50. Try them, see if they fit into your workflow and maybe they’ll find a new home on your hard drive and in your heart.
*Many of the applications listed here are open source meaning that the code base is available for anyone to tinker with and customize to their liking. It also means that fixing bugs and adding new features relies on the willingness of developers and often times the donations of users. Please support your favorite open source projects!
Photo Editing/Raster Graphics
Free:
Gimp (Windows, MacOS, Linux): Adobe’s Photoshop has long stood as the go to for photo editing, illustration and desktop publishing but their bloating app size and subscription based model doesn’t work for everybody. Short for GNU Image Manipulation Program, GIMP closely resembles Photoshop and is totally free and open source, nailing down the basic feature set you’d expect for editing photos along with some pleasant surprises. https://www.gimp.org
Krita (Windows, MacOS, Linux): This app caters specifically to raster or pixel based illustration with unique drawing features, a streamlined interface, a great selection of brushes and customization options. It also has traditional 2D animation features. https://krita.org/en/
Paid:
Affinity Photo (Windows, MacOS, iPadOS) : Serif’s Affinity line of products do a great job of giving a pro toolset without the pro price tag. Their one-time purchase price is super affordable. At first glance it may not have the same feature set as other packages, but on closer inspection it just does it in a different, perhaps even more efficient way. Kinda like if Lightroom and Photoshop had a beautiful baby without all the bloat. Check out their other entires on this list (Windows, Mac, ) https://affinity.serif.com/en-us/
Note: Affinity will often have discounts depending on the season!
ArtStudio Pro (MacOS, iPadOS): Closest thing to Photoshop on iPad I’ve ever seen, even more so than the newer iPad Photoshop app. Has plenty of pro features without feeling overwhelming. http://www.luckyclan.com/apps
Pixelmator (MacOS, iPadOS): a sleek, speedy alternative that focuses on integration into the Apple aesthetic. Great for editing profile pics and video thumbnails. https://www.pixelmator.com
Procreate (iPadOS): Procreate for me is the definitive illustration app for iPad. It’s simple, intuitive and has the fastest drawing engine in the west. https://apps.apple.com/app/apple-store/id425073498
Vector Illustration:
Free:
Inkscape (Windows, MacOS, Linux): I’ve always see Inkscape as sibling to Gimp, and certainly as the definitive open source replacement of Adobe Illustrator. The basic tools overlap but with some different terminology. You’ll definitely want to check this out if you’s like to make infinitely scalable artwork for logos, illustrations and mathematically perfect artwork. https://inkscape.org
Vectornator (MacOS, iPadOS): as a new comer, it does things a bit differently but has a super user-friendly interface. What it lacks in features it makes up in style. https://vectornator.io
Paid:
Affinity Designer (Windows, MacOS, iPadOS): Designer is unique in that it mixes vector graphics along with pixel brushes. I’ve used Designer for large scale illustrations and it doesn’t break a sweat. I appreciate it’s ability to handle raster effects like drop shadows, glows and blurs without losing performance. Definitely a game changer if you want to say sayonara to Adobe Illustrator and don’t mind the absence of some features. https://affinity.serif.com/en-gb/designer/
Print Design/Desktop Publishing:
Free:
Scribus: (Windows, MacOS, Linux) This entry is on the infrequently updated side and I haven’t used it in a while, but it’s worth a look. From it’s site, it’s “a desktop publishing (DTP) application. Scribus is designed for flexible layout and typesetting, and the ability to prepare files for professional quality image setting equipment.” https://www.scribus.net/downloads/unstable-branch/
Paid:
Affinity Publisher (Windows, MacOS): Publisher is the best replacement for InDesign out there in my opinion. Besides being able to import InDesign files via IDML, one of it’s strongest features is StudioLink: an on the fly, in-app switching to Affinity Photo and Designer (if you own them already), bringing to it all the features of the suite. https://affinity.serif.com/en-us/publisher/
Video Editing
Free:
Kdenlive (Windows, MacOS, Linux): Kdenlive is probably the most well-known of the multi-track open source video editors and comes full of features you’d expect from professional software. It’s got a great community and good documentation. It also runs well on aging or low-spec machines. https://kdenlive.org/en/
Shotcut (Windows, MacOS, Linux): Shotcut is an intuitive editor that is frequently updated and feels like iMovie with a Premiere Pro aesthetic. Easy to edit transitions, color grading and above average green screening and compositing effects make it great for someone needing flexibility without the learning curve. https://shotcut.org
Olive (Windows, MacOS, Linux): This one is a newcomer and shows promise. It’s got surprisingly decent text editing features, compositing and animation features. https://www.olivevideoeditor.org
Paid:
Da Vinci Resolve (Windows, MacOS): As non-open source, proprietary software, the free version of this video editor has it all: 8k editing, color correction, visual effects and audio post-production in an easy to use package. While you can purchase the full studio version for a pretty penny, the free version is available with a few limitations. https://www.blackmagicdesign.com/products/davinciresolve/
HitFilm Express (Windows, MacOS): HitFilm Express is a great tool for aspiring filmmakers who need to incorporate solid visual effects. It’s unique in that they offer a free base app and a sliding pay what you want scale, but spending more gets you extra features and you only pay for what you want. https://fxhome.com
BONUS: 3D Modeling/Animation/Creative Production
Blender: (Windows, MacOS, Linux) Blender is the biggest, most well-funded open source project around with a huge community of users. As an entire 3D-production suite, it includes modeling, sculpting, texturing, compositing, physics simulation, 2D animation tools, video editing, a real-time renderer and host of other features aimed at the creation of 3D artwork for motion and still images. It’s got a steep learning curve but plenty to keep happy for the price tag: zero. Download the current stable version at http://www.blender.org For the latest builds, go to https://builder.blender.org
Opentoonz (Windows, MacOS, Linux): Opentoonz is a dream come true for 2D traditional hand-drawn animators. Based on the original “Toonz” software, it’s been tweaked by Studio Ghilbli and was released to the public as open source in 2016. The original OpenToonz is available here: https://opentoonz.github.io/e/index.html
I recommend the further customized Morevna branch: https://morevnaproject.org/opentoonz/
Pencil 2D (Windows, MacOS, Linux): If you’re interested in traditional 2D animation, Pencil 2D is a lightweight app that’s easy to use. It has basic features like vector tools and sound import, but I like to think of it more like an animation sketch pad than a pro-level production tool. https://www.pencil2d.org
Andrew Carroll is a freelance graphic designer in Allentown PA that focuses on logo and illustration design for ministries and small businesses. When not pushing pixels you can find him volunteering with Simplicity Outreach, an urban community center and hosting the Adventist City Ministries podcast. See his work at 42design.co Instagram
1 note
·
View note
Last Seen Blogs
pandemoniclucio
PandeMonicLucio
artsynimbus
#FeelWithIt
phoenixflies
ph∅enix
pebblewonkle
Too weab for my own good.