yakaashianimations
Yasmin’s Animation Blog
A blog where I will be tracking the progress of my university animation workFOR VISUAL WORK SEE BLOG ⬇️
43 posts
Don't wanna be here? Send us removal request.
Last Seen Blogs
elenajones23
Defender Of The Character Who Desreve Defending

dreamcatcherjiah
❀JIAH❀

imobiliariasemalphaville
Imobiliarias em Alphaville - Modelo Construtora
river-styx-is-high-and-wide
river / riff
veldga
Veldga
Text
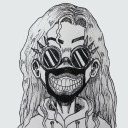
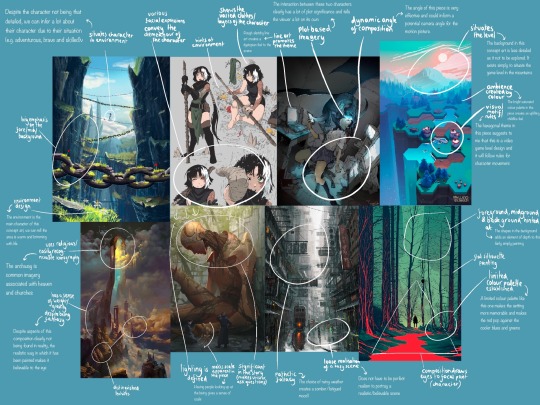
What makes good concept art?
Analytical mood board
1 note
·
View note
Text
Monty meets Endo shot 4 - Final render
Shot 4 static shot
vimeo
Shot 4 with camera movement
vimeo
Animation Principles shown:
- Pose-to-pose: Before beginning the keyframing process, I filmed a video of me acting out the desired movements to use a blocking/animating reference. I took screenshots of the defining poses in the movement sequence and used these to keyframe Endo's model from pose to pose.
- Staging: Specifically in the render that involves camera movement, I took staging into great consideration in this animation as I wanted it to mimic the point of view of Monty (since he is a much smaller character) this involved staging the scene in a way that a character with a low POV would see it, while still capturing the important moments.
- Exaggeration and Anticipation: I purposefully made the movement of Endo leaning forward before he steps back and waves his hands exaggerated. The purpose of this was to create a more expressive and goofy motion to contradict his initially startling stature and communicate that he is not meant to be menacing. Additionally, the leaning forward also acts as anticipation as it is a precursor to the main movement of leaning backwards, this adds a more realistic sense of weight to Endo's movements.
- Timing and Spacing: Referencing a live video when animating Endo walking was very helpful with timing and spacing. I took into account the weight of Endo's feet and hands and how that would affect how he moves them. Timing and spacing played a key role in making the movements appear more natural and expressive rather than the robotic feel my previous animations have given off in the past.
Successes/Struggles:
Successes
- Successful scene creation with a landscape, characters, lighting and sense of a coherent environment (the mountain base)
- Engaging camera movement that mimics the POV I was aiming to create
- Application of the animation principles to successfully convey Endo's character
Struggles
- Modelling aesthetics: When attempting to rig my character model I found myself having to sacrifice the aesthetics of the teeth in order to achieve model functionality when rigged.
- Unconfident in keyframe splines: spend more time adjusting keyframe splines to create more fluid and bouncy motions.
- Time management: unfortunately, despite my original plan of creating a 7 shot sequence, I only created the most complex shot in time for the deadline. I can overcome this easily by managing my time better and devoting more of it to animating rather than modelling.
Aims for next animation:
- Focus on the actual animation more. I will not rush the keyframing and spline adjusting.
- Don't make aesthetic compromises: Figure out how to rig the model in a way that doesn't sacrifice any elements of it's design.
- Increase output (time management): focus on creating longer animations and more complex scenes rather than spending most of the time in the modelling stage
1 note
·
View note
Text
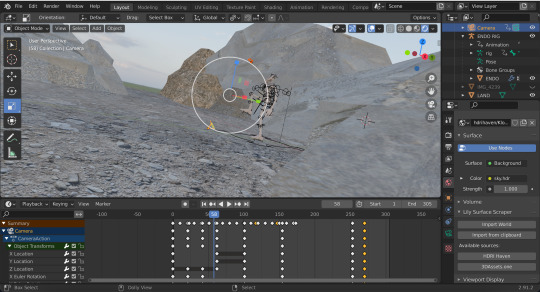
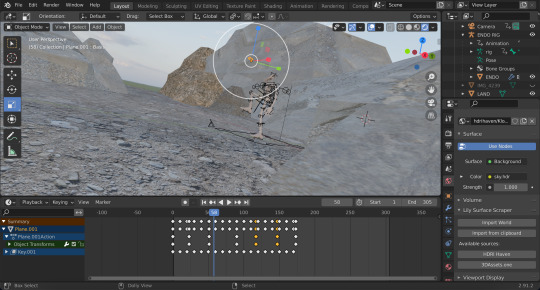
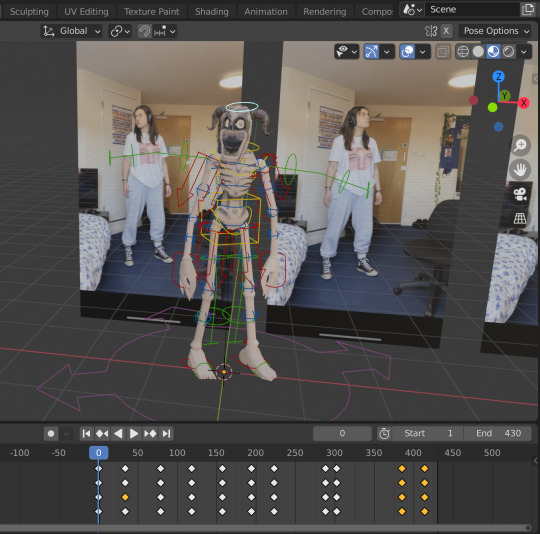
Shot 4 - animating with key frames
The screenshots below show the various keyframes I used to animate Endo, the butterfly he is chasing and the movement of the camera to mimic Monty's point of view. This shot is the main focus of my final video sequence as it evidences the most animation principles out of all the shots (for further explanation of which animation principles I have used, see post above 'Shot 4 - Final render').
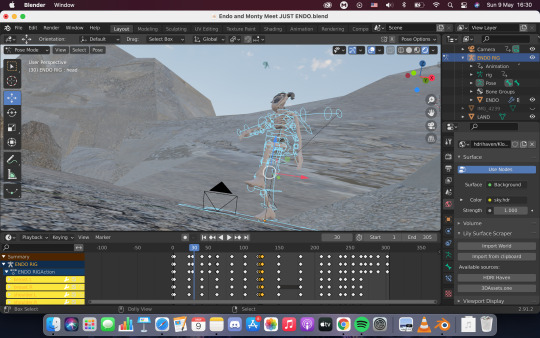
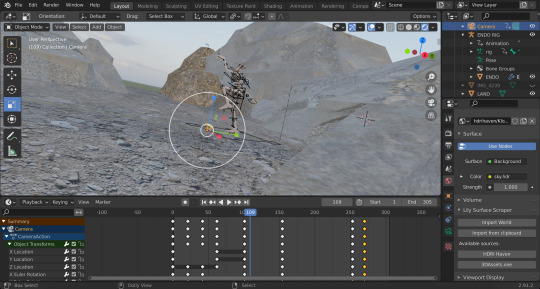
While there are some things I would like to refine about the animation (the change in Endo's physical location while he walks synching better with his visual location changing footsteps and the weight painting of the hips/thigh joints) I think this was an ultimately successful animation trial as it communicates Endo's personality and temperament without any speech or character interaction seen yet.
#3d modelling#3d model#3d animation#animation#animation principles#character design#original character
0 notes
Text
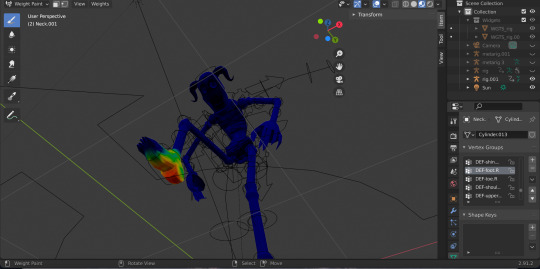
Monty rigged model: ready for weight painting + animation
I successfully implemented the wolf auto armature to create a complex rig for Monty's form. The basic movements that I will need for Monty to move in my scene are working well.


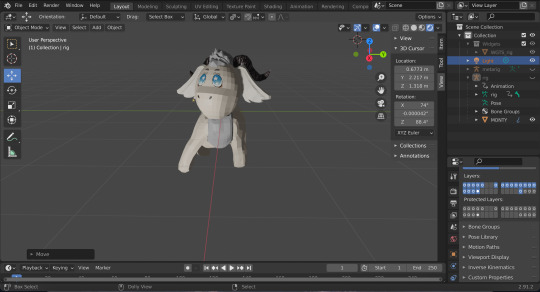
I now need to clean up the rig's functions through weight painting before exporting Monty into the scene where I will animate my final scene.
2 notes
·
View notes
Text
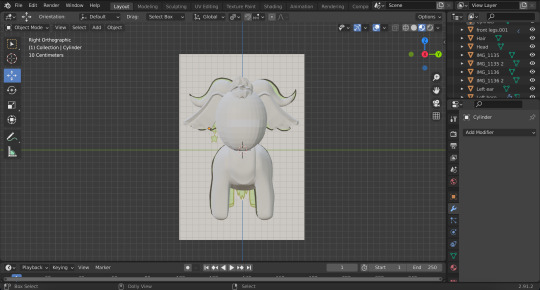
Monty's textured 3D model: ready for rigging
The images below display the final texture painted 3D model of Monty. I took a fairly basic approach to the texturing, featuring mostly flat colour and some more detailed painting for the facial features due to the limited time I have to complete this project.
I am already finding myself to be more efficient and confident in the texturing process as my familiarity with blender grows.

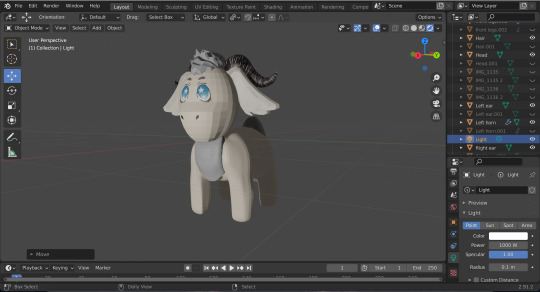
Next step: rigging Monty's model and importing him into the scene file for animating.
2 notes
·
View notes
Photo


Environment design - Rocky Mountainside
The environment design for this scene is fairly minimal as it is set in the barren rocky area on the outskirts of the forest and at the foot of the mountain range. I will further put a lighting system in before rendering to create a more realistic scene.
0 notes
Photo
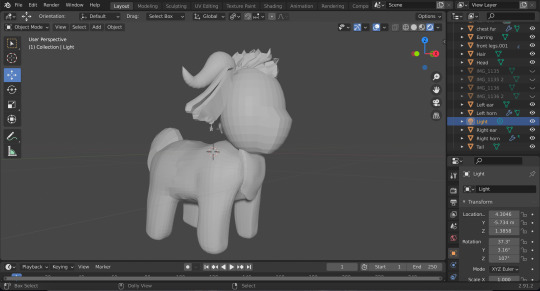
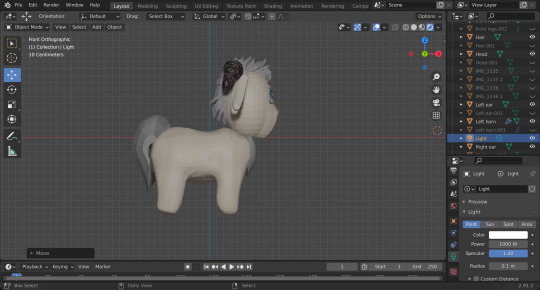
Monty 3D Poly-model completed: Ready for next step (painting/texturing)
The images above are evidence that I have successfully used the proportional drawings to model Monty’s character. I’m already finding myself becoming more efficient and confident with this process as my familiarity with poly modelling and Blender grows. This took me three hours compared to the many days of experimenting it took to make Endo.
Next step: Texturing/painting Monty’s model & Designing the scene where my final animation will take place (Mountainside)
0 notes
Text
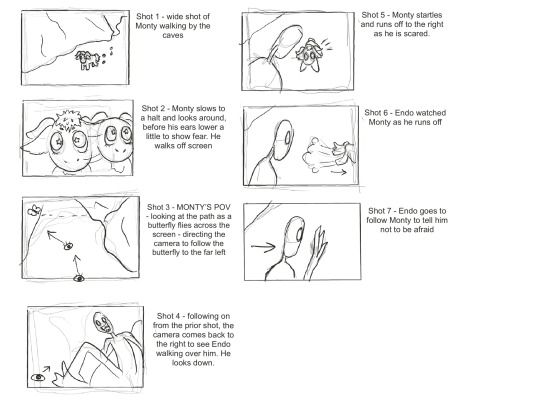
Final animation Storyboard - Monty meets Endo
The rough storyboard below is for my final animation of which my two main characters Monty and Endo meet each other. It is compromised of 7 shots with varying camera angles/movements.
#animation#character design#animation principles#3d modelling#3d model#original character#concept art#3d animation
0 notes
Text
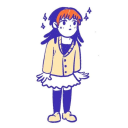
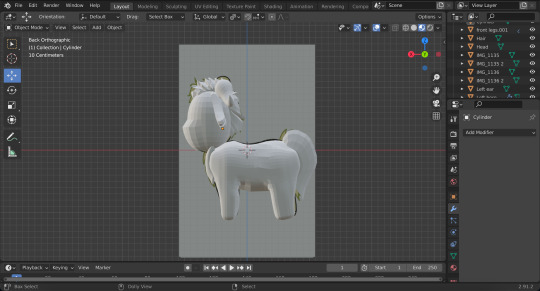
Monty 3D model diagrams
These are the proportionally accurate diagrams that will aid in the designing of Monty in the 3D environment.

#animation#character design#animation principles#3d modelling#3d model#original character#character building#3d animation#concept art
0 notes
Text
Trial Animation - Endo catching a butterfly
vimeo
The video above is my first trial animation using my original character 3D model. I used keyframes to chart the movements of the camera, butterfly and rigged Endo model as well as shape keys to animate the butterflies flapping wings.
This was my first time using a real life video as blocking reference for the animation and I believe this was successful at aiding me in capturing natural movements. To improve moving forward I will make the movements more expressive and exaggerated in order to apply more of Disney’s animation principles such as anticipation and appeal.
#3D Modelling#3d model#animation#3D animation#Character Design#world building#digital art#concept art
0 notes
Text
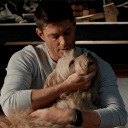
Using a blocking reference to animate my character
Now that I have successfully rigged Endo fully. I have begun trial animations to become well experienced with his rig’s functions
For this animation trial I used a video of a human reference inform the blocking of Endo’s movements to catch a butterfly on his finger. The chosen frames were imported as image planes behind Endo’s rigged character so that I could match up the positions in pose mode. I then keyframed the positions and adjusted the key frames accordingly along the timeline to create the adequate timing for the movements to appear natural.
Below are images of each blocked pose with it’s respective reference frame.


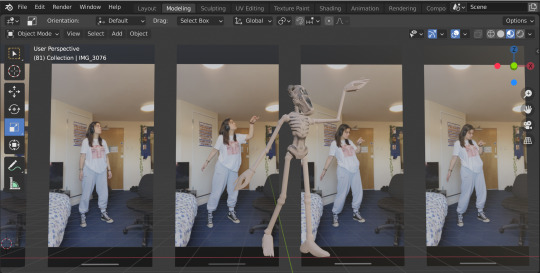


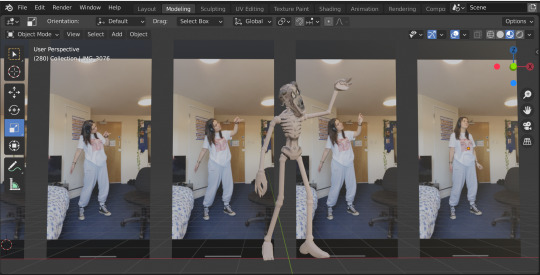


I believe the recreation of the poses shown in the human reference with my 3d model was very successful in this trial. However I am still struggling to edit the splines between key frames to make the flow of the animation more natural and so this is something I am going to focus on when completing my next trial animation.
Principles displayed: Motion Arcs & Appeal
Due to the video reference being quite simple and relaxed, I struggled to display more than 2 of the animation principles - moving forward I will undertake more complex scenes and movements in order to achieve more of the animation principles.
#animation#character design#animation principles#3d model#original character#3d modelling#3d animation
0 notes
Text
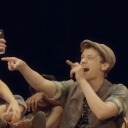
Elsa Let it go sequence - Blocking practice
The images below show the 6 blocking frames that I created using a rigged man model, inspired by the ‘Let it Go’ animated sequence.
Once I had screenshotted the chosen blocking frames from the original sequence, I imported them into blender as planes where my rigged model was. After positioning the screenshots behind my rigged man. (Rigged man model available on blendswap) I opened pose mode and began posing the man to match Elsa’s poses. After each pose was complete I inserted key frames of the location, rotation and scale for each pose to save them in order.
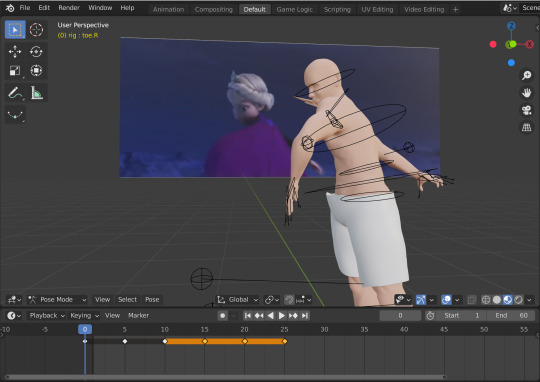
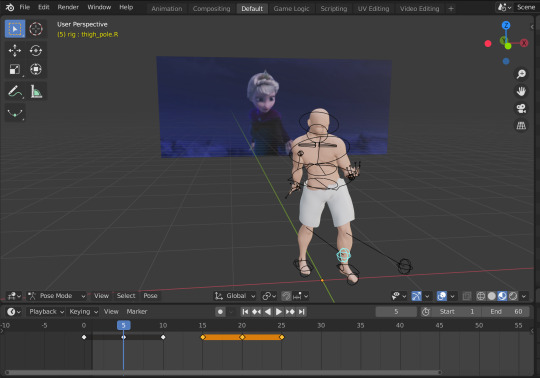
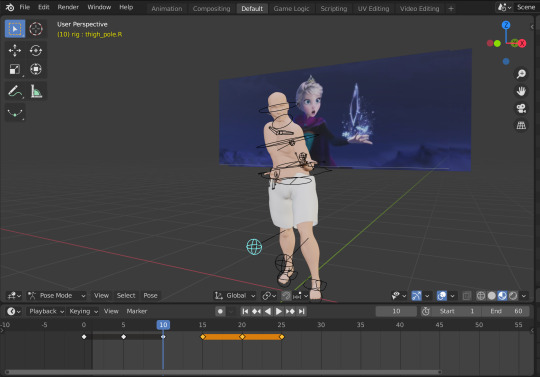
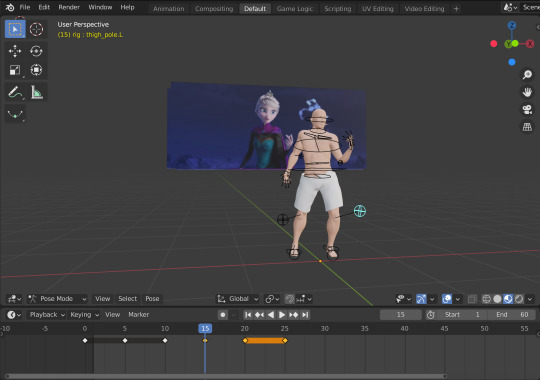
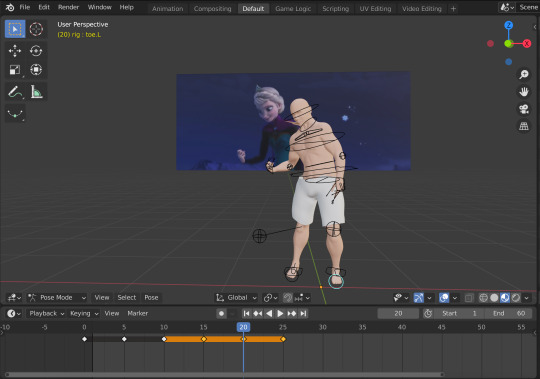
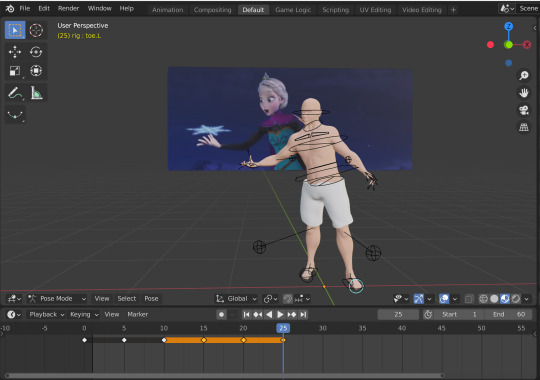
I believe this exercise was successful in the sense that I completed the task, however I believe I could make the poses more expressive and appealing with further refinement as well as the weight painting issue around the face which I was not able to fix despite my efforts.
2 notes
·
View notes
Text
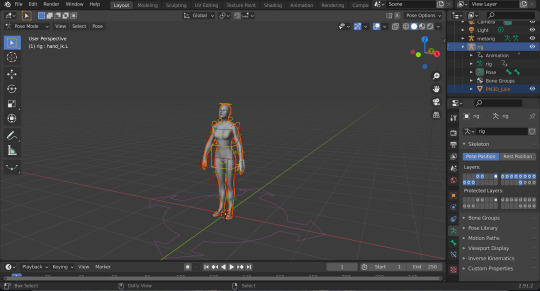
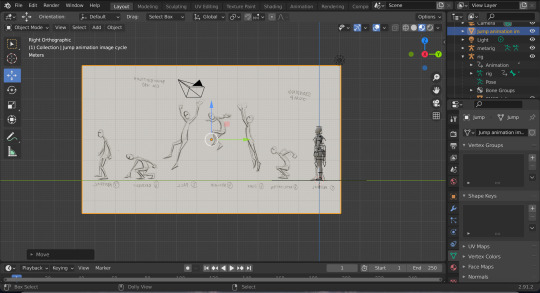
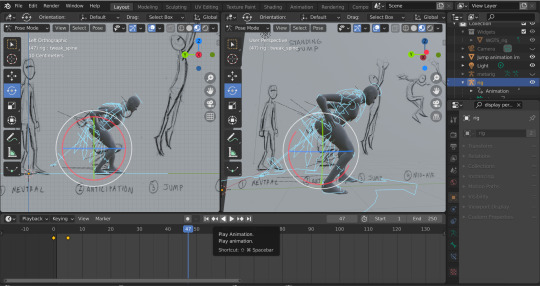
Animating jump cycle (generic 3d model)
In today’s lab session we trialled animating a 3D model using key frames. We first began with generating a rig and attaching it to a generic model. After this we imported a reference guide to aid us in the positioning of the character to assume a jump cycle’s positions. Once this was lined up with the character’s size and proportions, it was a fairly simple task of lining up the model with the diagrams shown in the reference. Between each location rotation and scale change we pressed i to insert key frames so that the sequence of positions would be saved in order.


1 note
·
View note
Text
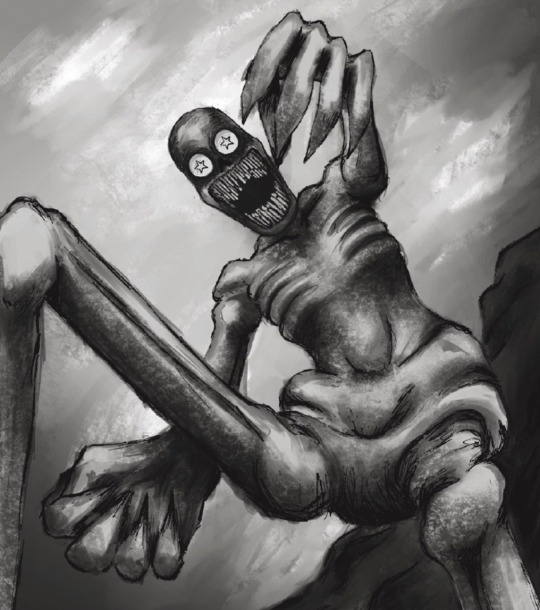
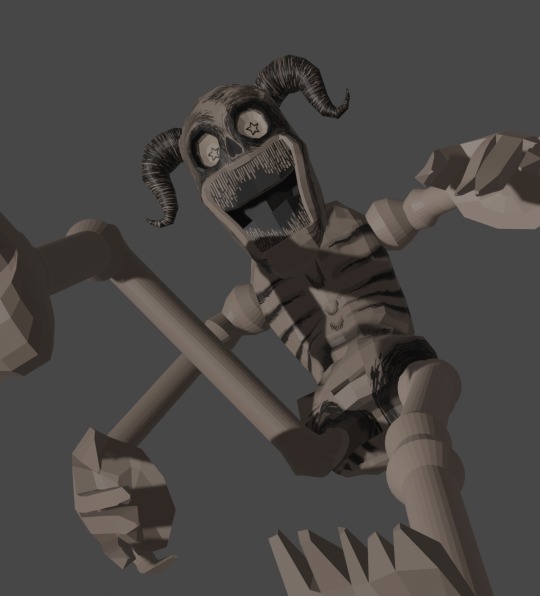
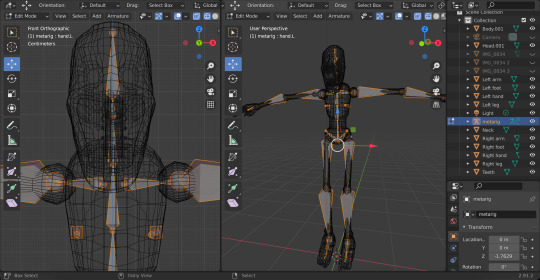
Endo full body model - final outcome
This is the final outcome of the modelling, texturing, painting and rigging processes that I undertook to create a 3D model of my character Endo.

Modelling - I used the technique of poly-by-poly modelling to make the more complex parts of Endo’s body (head, torso, hands and feet) and edited preset cylinder mesh objects to create the simpler parts (neck, arms, legs and horns).
Texturing - After I had completed the mesh for Endo’s full body, I painted the mesh by marking seams and unwrapping the objects as flat islands and painting them as flat images. I completed this on the head, horns, torso and neck.
Rigging - Now that I had the complete modelled and textured character, I used a basic meta rig to generate a character rig for him to be animated with. Once I had correctly sized and positioned the meta rig and used it to generate the rig that I parented to Endo with automatic weights, I refined the weight painting to make sure that the individual body parts being moved did not interfere with any of the others.
I now have a model that rigged ready for animating.
Edits made to the original design: in order to create a stronger sense of likeness between Endo and Monty, I have added horns that are very similar to Monty’s to Endo’s head. I also have removed the 3D teeth and replaced them with a textured block of teeth instead as there were complications with attaching the 3D teeth to the rig without them being warped.
1 note
·
View note
Text
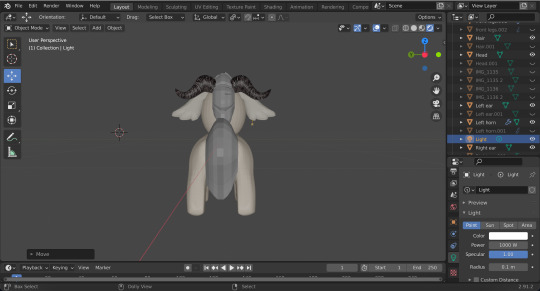
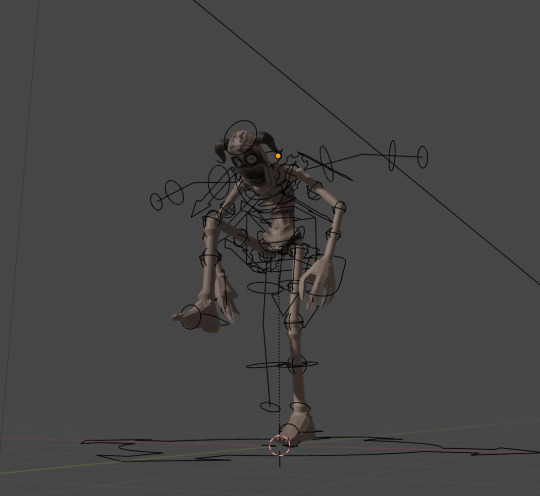
Endo full character model - Rigging
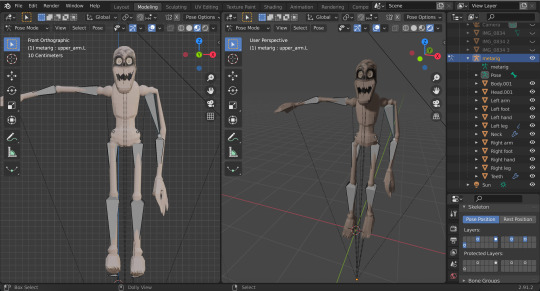
I have implanted a basic human meta rig as the rigging tool for Endo as he will not have overly complex body or facial movements.
After inserting the meta rig, I size it up and matched it to Endo’s proportions which was made easier by having the screens in mesh view. I then parented the rig to Endo’s body objects and began playing around with posing in pose view. Unfortunately the rigging at this time has quite a few bugs and glitches that I need to refine to get the desired movement and posing.
1 note
·
View note
Text
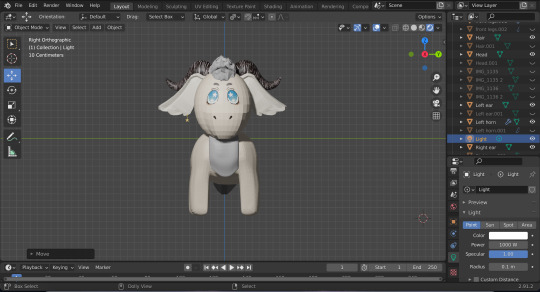
Endo full character model - Painting and Texturing
The below images show the progress I have made on the texturing and painting that I have done on Endo so far. I started on the face as this is the main point of interest and has the most defining features.

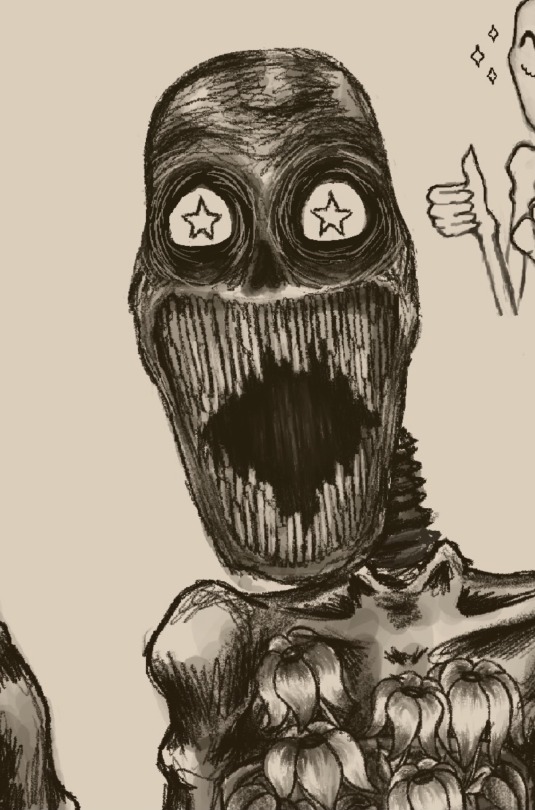

How I completed this texturing/painting process:
Firstly, I opened the object ‘Head’ in edit mode and marked seams along the sides and back of the head to create Islands ready to be unwrapped. Once I had created the islands I unwrapped the object and applied a material base colour (Beige to imitate being made out of clay).
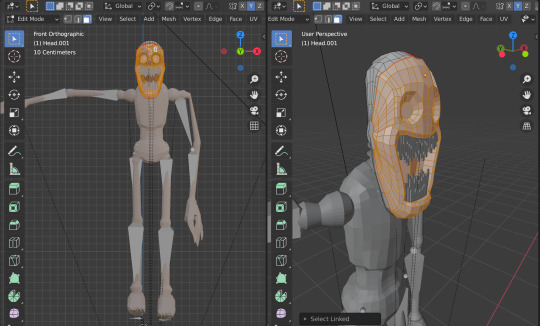
I then used a small darker beige/brown brush to create the illustrative marks on the face aswell as the stars and nose detail using the character as reference.
Moving forward:
Moving forward I will paint the rest of the body objects and use the same illustrative brushstrokes to indicate form of the bones.
2 notes
·
View notes