#Wikipedia pic
Text
I cry:


#Napoleon#Josephine#antoine jean gros#Bonaparte at the Pont d'Arcole#Antoine-Jean Gros#Napoleon and josephine#romanticism#french romanticism#Wikipedia#Wikipedia pic#napoleonic era#napoleonic#first french empire#french empire#frev#french revolution#1790s#18th century#painting#Gros#josephine bonaparte#empress josephine#josephine de beauharnais#napoleon bonaparte
196 notes
·
View notes
Text

#I just found out makkinen have their own Wikipedia 😭😭🥰#look at this pixelated pic of baby makkinen! 🥺😭🥰#makkinen#mika häkkinen#michael schumacher#mika hakkinen#formula 1#classic f1#f1#formula one#flatoutin-eaurouge
105 notes
·
View notes
Text
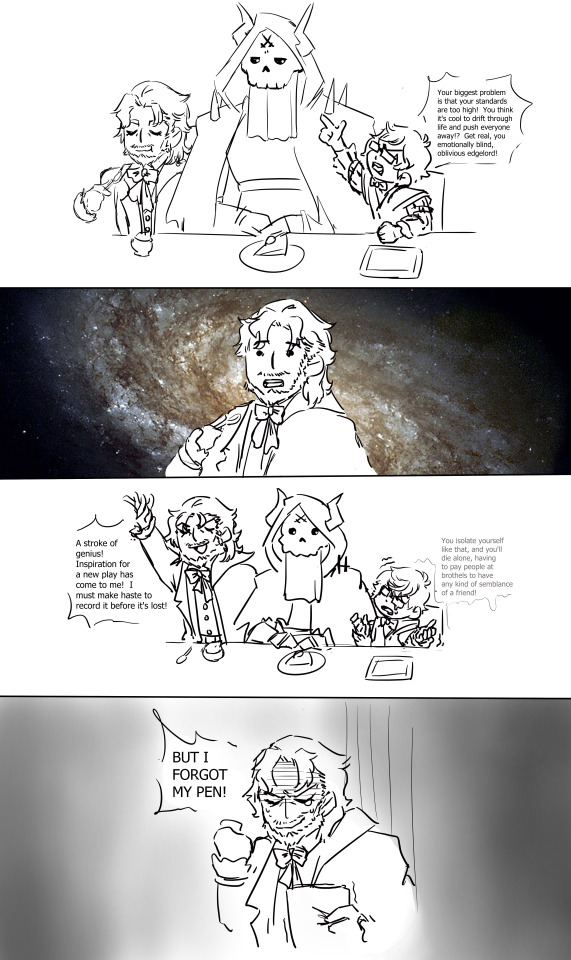
the eternal mood of being out and suddenly having a writing/art idea
#I ended up just using a galaxy pic from wikipedia because I didn't feel like trying to draw one#fgo#my art#(other than the galaxy pic)#william shakespeare#king hassan#hans christian andersen
66 notes
·
View notes
Text
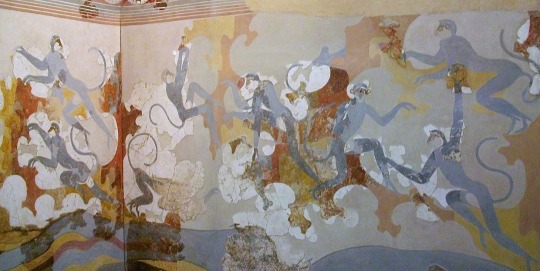
Minoan monkeys my beloveds.
#ancient greece#ancient art#pic from Wikipedia#They should only allow people who know about the Akrotiri frescoes to visit Santorini#i cannot tell you how sick I am of that island being the cute honeymoon destination with the Instagram buildings uwu#i am going off topic again anyway look at the monkeys they're amazing#look them up
65 notes
·
View notes
Text

#always a bit funny to see opinionated wikipedia#words#pics#wikipedia#ico#playstation 2#video game#video game covers#north american release
47 notes
·
View notes

Photo

tomb of the virgin mary, jerusalem.
781 notes
·
View notes
Text

Immediate swing around to a character that’s far less obscure and also technically existed when I was last active in the fandom, though I never drew her back then (I doodled everyone in the LoLK cast at least once except for her and Clownpiece). Anyway, I’ve been fascinated with the fact that she purified herself into being nothing more than her grudge so much that almost her entire identity was wiped away, so I wanted to draw her covering her face with a fan with a kitsune on it (used a couple ukiyo-e as reference for drawing that), looked up Chinese fans to make sure I was thinking of the right thing (this kind is called tuanshan), and found out they were historically used in a wedding tradition (queshan) where the bride covers her face with a fan and then reveals it at the end, so I was like. Well, that’s appropriate given that Junko is the Touhou character most likely to have been married at some point, so it all worked out nicely. But then I figured I should probably draw her face anyway, if only to practice giving Touhou characters faces that fit my style and aren’t all the same, and went a bit silly with it lol(k)
#art#digital#Touhou#Junko#legacy of lunatic kingdom#I did research on Wikipedia for this one!#also I actually used the color black for once#the first pic was supposed to be more graphic in style but as usual I chickened out on doing too much of it without lines or shading#second one I thought it would be funny to dip into American middle class white mom fashion (one of the styles which I am adjacent to)#aaand to be honest I was channeling just a little bit of coin boss blaseball energy#there are no other milfs to take it out on#anyway I’ve got a couple fan characters to tackle and if I don’t get more requests by the time I’m done with those I might just start doing#fun outfits for like whoever (Hecatia’s on that list for sure)#k0nfette is like my biggest aspiration in life rn
32 notes
·
View notes
Text
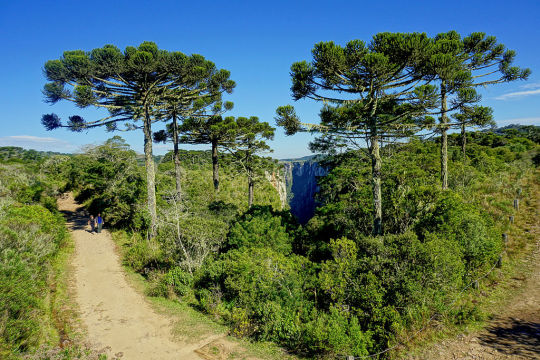
araucária my beloved
38 notes
·
View notes
Text
Just watched some video essay about Cats from a few years ago, and i kinda lost my shit when it mentioned it got multiple productions and one of the pics was Warsaw alongside the normal reps XD
#thank you ms photographer for putting warsaw pics on wikipedia and accidentally making it one of the 'usual' productions XD#cats the musical#cats warsaw#jellicle cats
11 notes
·
View notes
Text


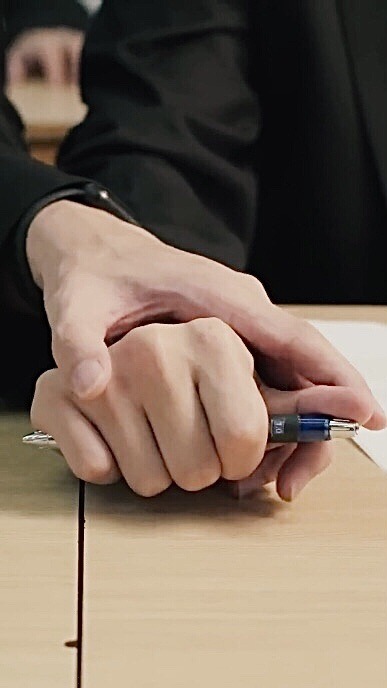


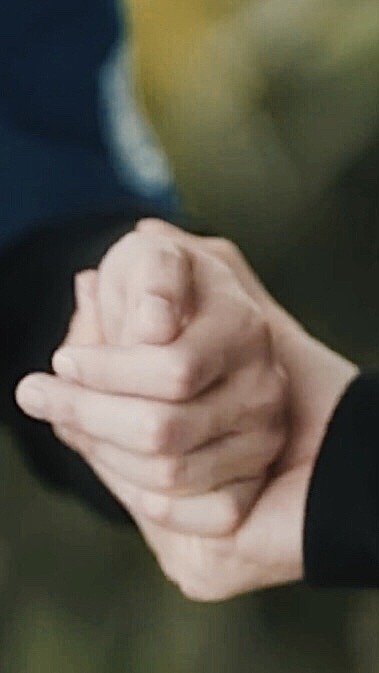
different ways of holding hands in THE ECLIPSE (akkayan)
#there are still other moments where they hold hands:’)#this kind of edits really makes me cry#at first i wanted to write the meaning of ways of holding hands on each pic#i even saw that wikipedia has a special page of holding hands lol#but i abandoned the idea bc the meanings of holding hands were repeating#and there were other angles of akkayan hands that i wanted to keep#maybe there will be a part 2 idk#anyway i love akkayan so muuch they’re really my safe space ifykyk#akkayan#akk x ayan#the eclipse the series#firstkhaotung#first kanaphan#khaotung thanawat#my edits🌱#hands#theeclipseedit#the eclipse#asianlgbtqdramas
16 notes
·
View notes
Text

the whiplash i got reading this sentence.....

#hello ???#oceangate#the titanic#titanic submersible#titanic sub#Titanic submarine#the titan#wow anna said something#anna's shitposts#like. holy shit ?? these connections i-#Sorry for the Pic being so tiny I guess it's bc it's. So long#txt#this is from the wikipedia page on isidor straus a rich guy who died in the titanic btw
38 notes
·
View notes
Text

damn ok yeah I'm down
88 notes
·
View notes
Note
Silly question time: what species of fish are you?
oh nO my time of reckoning is hERE AT LAST (I KNEW THIS DAY WOULD COME!!!!!!!)
when i drew my avatar i was channeling "what a toddler imagines when they think generic fish" so no specific species there
BUT if i were to start modelling myself after a real fish, it would probably be something like a dwarf pufferfish or lumpfish
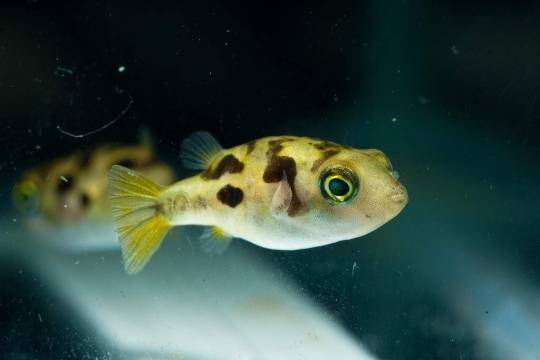

#this is very serious question time. i take fishy business incredibly srs.#click the second pic [lumpfish] to see the full wikipedia image in its glory#a fish on every finger!!! demonstrating their ADHESIVE POWER#whenever i draw lil fisheito the features change. sometimes i'm feelin angelfish fins. sometimes i'm feelin blobular. we morph wit the mood#but that's only bc of the eiden influence within the vessel#if it were just me i'd be a lump#fun fact: i don't enjoy swimming! so yes u can put me in the water but i'll just plonk myself on a rock and 🧍♂️#asks
7 notes
·
View notes
Text
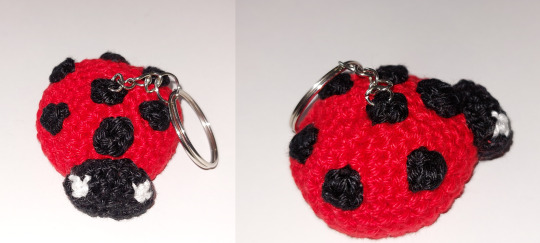
Free Ladybug Amigurumi Pattern

I made this (really simple) crochet pattern for a ladybug and I figured I might as well share
Materials
black yarn
red yarn
white yarn
fiber fill
Body – use red yarn
Rnd 1: make 6sc into magic ring [6]
Rnd 2: inc in each st [12]
Rnd 3: (sc in next st, inc in next st) x 6 [18]
Rnd 4: (sc in next 2 st, inc in next st) x 6 [24]
Rnd 5: (sc in next 3 st, inc in next st) x 6 [30]
Rnd 6 - 9: sc in each st [30]
Rnd 10: sc in each st but only the front loops [30] (we'll use the backloops to sew on the belly)
fasten off and leave long tail for sewing
Belly – use black yarn:
Rnd 1: make 6sc into magic ring [6]
Rnd 2: inc in each st [12]
Rnd 3: (sc in next st, inc in next st) x 6 [18]
Rnd 4: (sc in next 2 st, inc in next st) x 6 [24]
Rnd 5: (sc in next 3 st, inc in next st) x 6 [30]
fasten off
Head – use black and white yarn, start with black:
Rnd 1: make 6sc into magic ring [6]
Rnd 2: inc in each st [12]
Rnd 3: (sc in next st, inc in next st) x 6 [18] – we'll switch colors here: start with 4 black, 2 white, 4 black, 2 white, 3 black
Rnd 4: sc in each st [18]
fasten off and leave long tail for sewing
flatten the head so that it's oblong (as shown in picture)
Spots – use black yarn (make 7):
Rnd 1: make 4sc into magic ring [4]
fasten off and leave long tail for sewing
for bigger spots make a magic ring with five or six
if you'd prefer really small spots you could use the french knot embroidery stitch technique instead
Assembly:
sew everything together starting with the head
then sew on the spots
fill the body with fiber fill
if you want your bug to be a keychain remember to attach the chain
then lastly attach the belly by using the back loops you left out when making the body
#crochet#amigurumi#insects#crafting#my stuff#sometimes you just need to make a little guy#I wonder if I should've given him little legs#not like you would see them when he's sitting#also I made the spot closest to the head 6sc big#cuz the wikipedia pic I was referencing had a bigger one there
26 notes
·
View notes
Last Seen Blogs

bellalaloca
Bella, la Loca
roxxieeart
R O X I E

itssjustanillusion
✝✞ Hey honey, Take a walk on the wild side ✞

somchandra
Untitled
n3matode
NEMO ! 🦐