#it's been in my drafts for a while now
Text
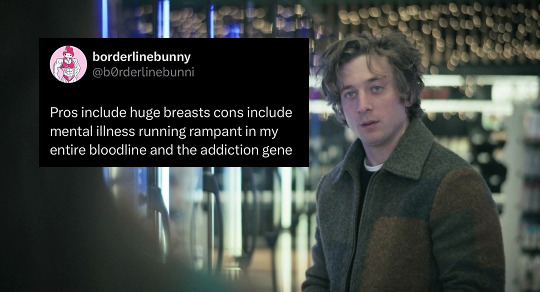
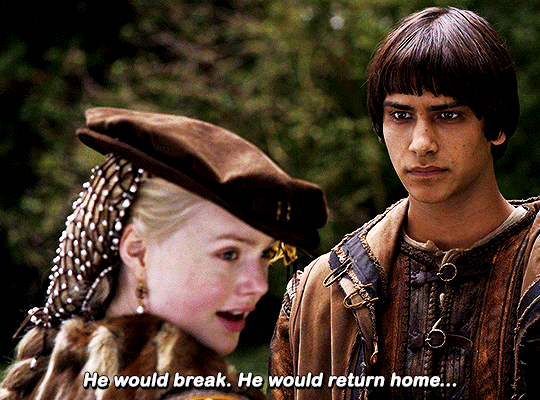
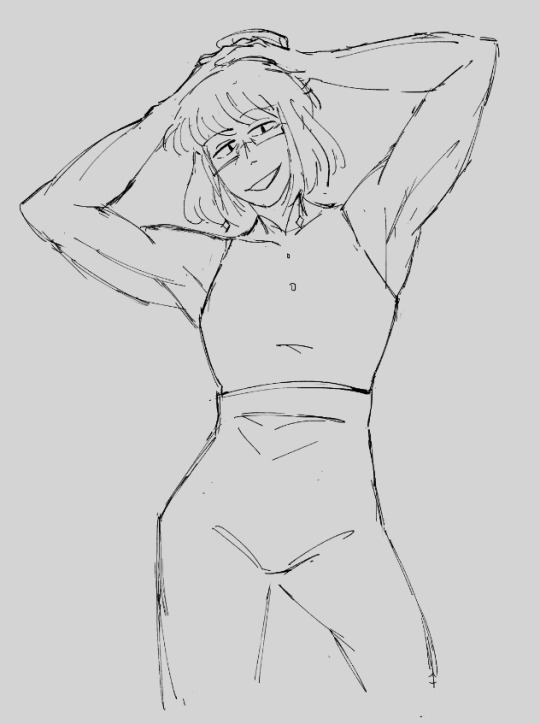
When Taylor Swift wrote “what’s a lifetime of achievement if I pushed you to the edge but you were too polite to leave me?” and when Phoebe Bridgers said “I don’t think I love you anymore, that goldmine changed you” and when Miranda Priestly said “you chose to get ahead; you want this life, those choices are necessary; everybody wants to be us.” and when Joni Mitchell sang “a woman must have everything” and when Lou May Alcott wrote “talent isn’t genius; and no amount of energy can make it so. I want to be great, or nothing.”
#when x said#web weaving#overachiever#tell me this makes sense#it's been in my drafts for a while now#taylor swift#tbh it's all about being a mirrorball amy march variant#also therapy should be for free#phoebe bridgers#lou was a trans guy btw i can give you an essay on that#but really he referred to himself as lou a lot#joni mitchell#shades of scarlett conquering is also my fav joni mitchell song#it means so much to me#the devil wears prada
100 notes
·
View notes
Text
Habits that changed my life for the better
I stopped joking about myself. It was mostly about suicide jokes (it was a decision that I made after the worst moment of my journey with depression, if I can call it that), but, really, it's about all self-deprecating stuff. It may be just jokes, but it stays in your brain.
Positive attitude. It's similar to manifestation, in a way, but in a... down to earth way, I guess. Thinking positively about stuff changes everything for me. Almost everything is simpler.
I deleted Twitter. It may be a different social media for everyone, of course - now probably TikTok for most - but, well, Twitter was where I spent long hours everyday. I started taking breaks from it about a year and a half ago and deleted it in August. It was hard - I loved the community there and I miss the daily updates from my fav fandoms, but it's for the best. I still can't explain how Twitter affected me but I do feel better since I stopped spending so much time there.
Taking vitamins. I didn't think it would really make a difference but it definitely did. The biggest surprise for me was vitamin C - my immune system has improved super quickly when I started supplementing it. I didn't even realise how bad it was before. Other than that, I take B complex, A+E (hair, skin), and iron (i tend to have a deficiency of it). (& D when it's winter).
Having a consistent skin care routine. It's calming and both doing the routine and seeing the effects make me feel better. (I do realise that many people have more demanding skin than me and searching for the right products can be frustrating and expensive. I'm just talking about my experience).
Other things that I think are worth mentioning:
Therapy - just a short explanation that I've been on therapy (with breaks) for about 6 years now. I've had social anxiety for most of my life, now still struggle with depression (and amnesia, actually) a bit, but what I wanted to mention here is that I learned a lot from it. It's obvious, but I just think it's important to pinpoint that I did not just learn how to think more positively and love myself by myself.
Exercising! - I still struggle to make it a habit, but when I actually do exercise regularly (I do pilates), I really feel better. It's worth it.
Hydration - same with drinking water. I really don't think I have to explain it in any way lol.
#habits#self care#self care tips#self love#daily habits#healing#growth#wellness#text post#it girl#that girl#health#self improvement#self development#this post has been waiting in my drafts for a while now and i thought that i'll finally publish it
500 notes
·
View notes
Text


Carmen Berzatto + text posts for @lunaintheskyforever, happy birthday bb! ❤️
#carmen berzatto#carmy berzatto#donna berzatto#richard jerimovich#richie jerimovich#the bear#the bear fx#again something that has been in my drafts for a while now#special days like these are a good motivation to finally finish and post
472 notes
·
View notes
Text

✨ Simple Gif Colouring for Beginners ✨
I wrote up my basic gif colouring process for a friend recently, but a couple of people here mentioned they'd also find it helpful! so, as requested, this is a beginner-friendly walkthrough of the way I colour my gifs :) it's aimed at brand new gif makers with no prior experience with photoshop or photo editing.
when I first started gif making I found colouring and photoshop in general suuuper daunting, so I've tried to simplify everything here as much as possible. hopefully this will be relatively easy to follow and not too intimidating!
a couple of things to begin with:
I'm only talking about colouring here - this is not a full gif making tutorial. I've linked to some of my favourites of those here!
I personally like to make bright, 'clean' looking gifs with vibrant but natural colours, so that is the style of colouring this tutorial is geared towards. most of gif colouring is subjective and about personal taste - the only thing that I'd say is possible to get wrong is skin tones, which I talk about a lot in this guide.
as I mostly gif Thai dramas, most of the advice is geared towards colouring for East Asian/South East Asian skin tones - but the techniques should be fairly universally applicable (and here are some tutorials that talk about gif colouring for other skin tones).
I'm not an expert! I'm not claiming this is the best or the only way to colour gifs - it's just how I do it.
this post is very image-heavy. if the images aren't loading (or the gifs are running slowly or cutting/looping weirdly), then try viewing the post in its own tab (rather than on the your dash or someone's blog) and refreshing the page.
okay, full walkthrough beneath the cut!
contents:
1. intro
a. natural gif colouring goals
b. very very basic colour theory
2. super simple colouring (the essentials)
a. curves
b. selective colour (and skin tone correction)
c. hue/saturation
d. saving and reusing colouring
e. another simple colouring example
3. other adjustment layers
a. brightness/contrast
b. levels
c. vibrance
d. colour balance
e. channel mixer
4. troubleshooting
a. curves
b. saturation
5. fin!
1. intro
the colouring part of gif making can be super overwhelming, especially if (like me when I first started!) you're completely new to photoshop and/or have no experience with colour theory or photo/video editing.
if you're opening photoshop and making gifs for the first time, I highly recommend getting used to making a few basic, uncoloured gifs to begin with. just to practice, rather than post anywhere (though you can always come back and colour them later if you want) - but it'll make the rest of the process much easier if you're already beginning to get used to working in timeline mode of photoshop. give yourself a bit of time to practice and get a feel for things like how many frames you tend to like in a gif, where you like to crop them for the best loop, what kind of aspect ratio you like etc* - so that you're not trying to navigate all of that for the first time on top of everything else!
* frames: for me between 60-90 frames is ideal, but 40-120 frames is the absolute min-max I'd personally use in a normal gifset
loops: for the smoothest loops, try to avoid cutting someone off mid-movement or mid-word if possible.
aspect ratio: for full-size (540px) gifs, I tend to go for either 8:5 (slightly 'skinnier' gifs), 7:5, or 5:4 (particularly big, thick gifs lmao)
✨ natural gif colouring goals
part of what can be so daunting about starting gif making is not knowing where to start or what you want to achieve. this is definitely something that gets easier with practice - the more gifs you make, the more you'll get a feel for what kind of look you like and the more instinctively you'll know how to get there. it also helps to see if any gif makers you like have made "before and after colouring" posts - these can help with getting a sense of the kinds of changes made through gif colouring. here's one I made!
in general, I like to make my gifs bright and 'clean' looking, with vibrant but natural colours. these are the things I'm usually hoping to achieve with colouring:
brighten dark scenes
remove muddy, yellowish lighting or filters
saturate colours
correct any skin lightening filters or overexposure
make lighting and colours as consistent as possible between gifs within a single gifset, especially gifsets featuring gifs from multiple scenes/episodes/videos
this guide is focusing on natural colouring, but of course there are many cool ways to make stylised/unnaturally coloured gifs. imo you'll need to master these basics first, but if you want to learn how to do things like change the background colour of gifs or use gradients or other cool effects, then @usergif's resource directory has loads of super helpful tutorials!
✨ very very basic colour theory
[disclaimer! I don't know shit about fuck. I do not study light or art. this is just an explanation that makes sense to me exclusively for the purposes of gif making.]
the primary colours for light/digital screens are red, blue, and green. having all three colours in equal measures neutralises them (represented by the white section in the middle of the diagram).

so to neutralise a colour within a gif, you need to add more of the colour(s) that are lacking.
in practice this usually means: the scene you want to gif is very yellow! yellow is made of red and green light, so to neutralise it you need to add more blue into your gif.
it can also mean the reverse: if you desaturate the yellow tones in a gif, it will look much more blue.
looking at the colour balance sliders on photoshop can make it easier to visualise:

so making a gif more red also means making it less cyan.
removing green from a gif means adding magenta.
taking yellow out of a gif will make it more blue.
tl;dr:
neutralise yellows by adding blue (and vice versa)
neutralise reds by adding cyan (and vice versa)
neutralise green by adding magenta (and vice versa)
2. super simple colouring (the essentials)
starting with a nice sharpened gif in photoshop in timeline mode. (these are the sharpening settings I use!)
some scenes are much harder to colour than others - it helps to start out practising with scenes that are bright/well-lit and that don't have harsh unnaturally coloured lights/filters on. scenes with a lot of brown/orange also tend to be harder.
I usually save a base copy of my gif before I start colouring just in case I end up hating it, or find out later that it doesn't quite fit right into a set and need to redo it etc.
so here is my base gif!

it's an okay gif, but it has a bit of a yellow tint to it that I want to reduce.
colouring is easiest to do in adjustment layers, which can be found under layer -> new adjustment layer - or for me they are here:

there are lots of different types of adjustment layers that do lots of different things - but for me the absolute essentials for colouring are curves, selective colour, and hue/saturation.
I also use brightness/contrast, levels, exposure, vibrance, colour balance, and channel mixer sometimes, depending on the gif - but I use curves, selective colour, and hue/saturation on every single gif.

✨ curves layer
the first thing I always do is a curves layer. when you first open one it will look like this:

first I usually click the ‘auto’ button, just to see what happens. sometimes it makes a big difference (it usually brightens the gif a lot) - but on this gif it didn’t do much.
if it had made the gif look nicer then I would have kept it and added a second curves layer on top to do the rest of these steps.
the next step is selecting the white and black points with the little eyedropper tools.
the bottom eyedropper lets you pick a white point for the gif. click somewhere super light on the gif to see what happens - for this gif, I clicked on the lampshade on the left. if it looks weird, I just undo it and try somewhere else - it usually takes a few goes to find something that looks good.
here's what that did to the gif:

then I pick the top eyedropper and use it to pick a black point by clicking somewhere really dark, again playing around until I find a black point that looks good.
here's what the gif looks like after picking the white and black points:

this can take some experimenting, but you can make super easy drastic changes to your gif just with this. in this case, the curves layer took out a lot of that yellowy tint.
and this is what the curves graph looks like now:

you can click and drag those lines to make further changes if you want - I usually leave them alone though. the colours of the lines indicate which colours have been changed in the gif - for example, you can see from that steep blue line on the graph that blue has been added to neutralise those yellows.
next I usually do another curves layer and just press the ‘auto’ button again to see what happens. usually it brightens the gif a bit more, which I like.
‼️if nothing is working: usually with a bit of fucking about a curves layer works well - but sometimes you can’t find a good white and black point anywhere, and instead your gif turns wacky colours and nothing looks good. this happens more often with very heavily colour tinted scenes :( the troubleshooting section at the end goes over some options, including starting with a levels layer instead.
✨ selective colour (and skin tone correction)
skin tones are made up of a mixture of yellow and red.
removing yellow (or adding blue or red) to a gif will make the skin-tones too red - and removing red (or adding cyan or yellow) to a gif will make the skin-tones too yellow.
adding blue to this gif with the curves layer took out the yellowy tint, which I wanted - but it also took the yellows out of Kim's skin tone, which I don’t want. so I need to put yellow back into the skin tones specifically - without putting it back into the rest of the gif.
selective colour layers let you select an individual colour and adjust the levels of other colours within that colour. you can change how yellow the green shades are, or how much cyan is in the blues, for example.
I need to add yellow back into the red tones to correct the skin tones on this gif. this is the case for most gifs in my experience - the vast majority of the time, unless a scene is very heavily tinted in another colour, a curves layer will add blue/remove yellow.
in the 'colors' dropdown, select the 'reds' section and drag the 'yellow' slider higher - this will add more yellow into just the red shades within the gif.

the amount of yellow you need to add back into the reds depends on how much yellow was taken out of the gif initially - I just play around with the slider until it looks right. if you're not sure, it helps to have some neutrally-coloured (not white-washed!) reference photos of the people in your gif to compare to.
here's the result. Kim's skin is a lot less pink toned and much more natural looking:

✨ hue/saturation
this adjustment layer lets you adjust the hue and saturation of the gif as a whole, and also of each colour individually.

I don't use the hue or lightness sliders unless I'm trying to do something more complicated with the colouring.
clicking the dropdown menu that says 'master' lets you edit the saturation of each colour individually. this is useful if your gif is still super tinted in one colour.
I thought the yellows on this gif were still slightly too bright, so I switched to the yellow channel and desaturated them slightly. (remember if you do this then you need to go back to selective colour and add more yellow into the red skin tones to balance out the desaturation!)
then I increased the 'master' saturation of all the colours to +5:
I usually find the right amount of saturation is somewhere between +5 and +12, but it depends on the gif.
‼️if the gif feels undersaturated, but the saturation slider isn't helping/is making the colours worse, try a vibrance layer instead.
done!

✨ saving and reusing colouring
you can copy and paste adjustment layers between gifs to make your colouring even across each of your gifs for one scene - so if you're making a set of multiple gifs of the same scene, or you think you might want to gif the same scene again in the future, you can save it as a psd so you can reuse the colouring again later.
each gif's colouring will then still need tweaking - different cameras/angles/shots of the same scene can still start out with slightly different colouring.
I recommend uploading the gifs as a draft post on tumblr so you can see what they all look like next to each other and catch any inconsistencies.
✨ another one! (speedrun!)

HI KEN!
the white point for the curves layer was in the window behind them.
the curves layer removes the muddy yellow tint, but again it makes their skin tones (especially Ken's) very red toned, which is adjusted by the selective colour layer.
3. other adjustment layers
imo many many gifs can be coloured really nicely with just those three adjustment layers, but some need different adjustments.
✨ brightness/contrast

pretty self explanatory!
I personally usually avoid using the 'brightness' slider because I rarely like the effect - I only tend to use the 'contrast' one.
the 'auto' button is sometimes useful though, especially if you’re struggling with the curves layer.
✨ levels

levels alters the white and black points of the gif, like curves - but unlike curves it doesn't also alter other colours.
use the sliders beneath the graph to alter how dark/light the gif is. you can slide the black slider further to the right to make the blacks darker, and the white slider to the left to make the whites lighter.
levels is a good place to start if your curves layer isn't working.
(I'm going to hit the image limit for this post lol so here are some screenshots of a table I made to demonstrate this rather than actual gifs. sorry!)


on both sides, I dragged the sliders up to where the big jumps are on the graph - this is usually a good place to start!
✨ vibrance
vibrance... makes the colours more vibrant. it's more subtle than saturation.
it's really helpful for gifs that feel grey. sometimes adjusting saturation just makes the greys kind of weirdly tinted, but a vibrance layer can fix that.

vibrance is much more subtle!
✨ colour balance

colour balance affects the overall balance of colours within a gif.
it's good for scenes with heavy tints.
I tend to stick to the 'midtones' dropdown, but you can also alter the colour balance within the shadows and highlights if you want.


✨ channel mixer
I avoided channel mixer for such a long time because it scared me. but it's great for scenes that are very heavily tinted in one colour.
basically, it works with the levels of red, green, and blue within a gif. you select an output colour and then play around with the levels of the colour you selected within each other colour.
kind of the reverse of selective colour?

so in the 'blue' channel, the levels of blue are at 100%, and the levels of red and green are at 0% - but you can impact how much blue is in the reds and greens and blues.
this tutorial explains it well - but imo the best way to get to grips with channel mixer is just to play around with it a bit (sorry)
(when I made this guide for my friend, I also made a slightly more complicated gif colouring walk-through that included using channel mixer. there isn't space to include it within this post, but if anyone is interested I could always upload it as an 'intermediate' gif colouring tutorial - lmk!)
4. troubleshooting
‼️curves
usually with a bit of fucking about a curves layer works well - but sometimes you can’t find a good white and black point anywhere, and instead your gif turns wacky colours and nothing looks good. this happens more often with very heavily colour tinted scenes :(
for example, with this base gif:

using many of the brightest points as a white point turn it wacky colours, like this:

yikes :(
some options for these cases:
try brightening the gif first with the 'auto' button on the curves layer or with a levels layer. having a brighter gif to start with can give you better options for picking a white point.
try finding an alternate, whiter/brighter white point. look for places the light reflects - on this gif, using the light on Porsche's cheekbone works well as the white point. it also helps to find places that would be white if the scene wasn't tinted - the lightest part of a white shirt is often a good place to start, for example.
skip the curves layer, and instead use a levels layer to alter your white/black points, and colour balance or channel mixer to balance the colours.
‼️over/undersaturation
if your gif (especially the skintones) is looking a little washed out or lifeless, it might be undersaturated. boost that saturation - or if that's not working, try a vibrance layer.
oversaturation is often easiest to spot in the mouths and ears of any people in a gif. if the mouths are looking unnaturally, vibrantly red, then you've gone too far with the saturation.
5. fin!
and done! I hope this was coherent helpful to somebody.
if there's anything that I've missed or that doesn't make sense pls feel free to shoot me an ask or a message and I'll do my best to help! I've also collated a bunch of additional reading/resources below.
happy gifmaking 🥰
✨ some links!
photoshop basics by @selenapastel
gifmaking for beginners by @hayaosmiyazaki
gifmaking guide for beginners by @saw-x
dreamy's gif tutorial by @scoupsy-remade (includes instructions on how to blur out burned-on subtitles or annoying video graphics)
beginner's guide to channel mixer by @aubrey-plaza
how to fix orange-washed characters by aubrey-plaza
colour correcting and fixing dark scenes by @kylos
does resampling matter? by usergif
how to put multiple gifs on one canvas by @fictionalheroine
watermarking using actions by @wonwooridul
resource directory by @usergif
#i got a couple of asks about this so i figured i'd type it up as a post#it's been sitting in my drafts for a while now though i'm so sorry omg.#i had to replace my laptop and it took me a while to get round to downloading photoshop on the new one#but i hope this is helpful!!#gif making#tutorial#photoshop tutorial#colouring tutorial#coloring tutorial#gif colouring#gif coloring#photoshop resources#gif tutorial#gif resources#userbunn#uservik#darcey.txt#darcey.gif#usergif
413 notes
·
View notes
Text
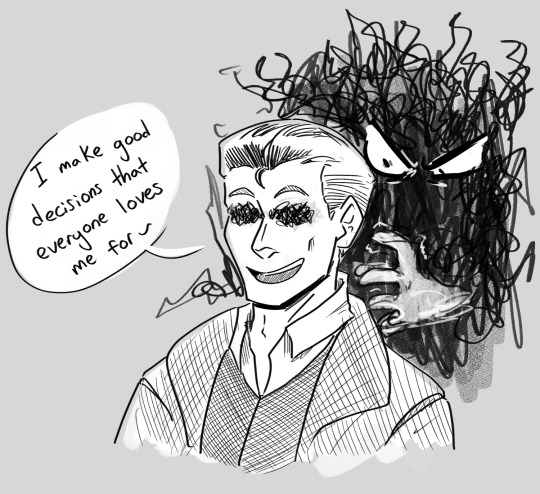
Danny bursting into the full batcave: Jason has ghost cancer
Batfam: wut
Danny fazing kryptonite out of the lead vault: Jason has ghost cancer.
Batfam: who tf are you?!
Danny already turning the corner into a dead end part of the cave: wouldn’t you like to know weather boy.
#listen this is going to be poked at in a bit#for now enjoy a little bit of crack from a very distraughting concept that has been three words in my drafts for like three months#dp x dc#writing prompt#danny fenton#dc x dp#jason todd#ghost cancer au#jason: update my family while you get the goods so they don’t loose their shit#danny: sure!#they promptly lost their shit
897 notes
·
View notes
Photo
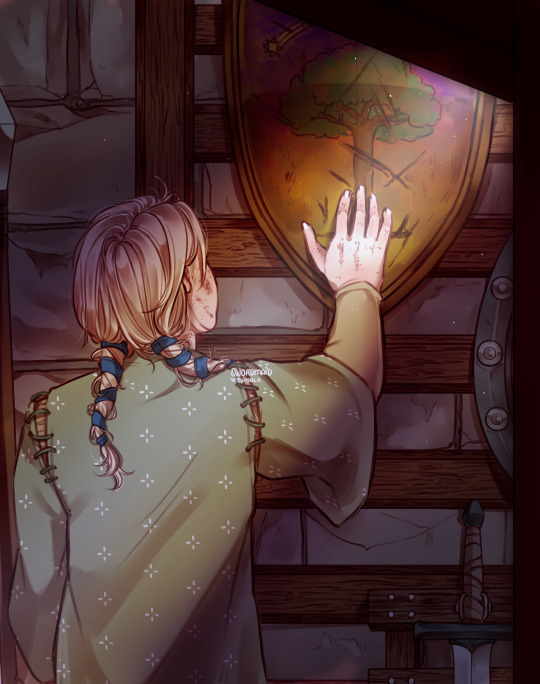
It was more a picture than a proper coat of arms, and the sight of it took her back through the long years, to the cool dark of her father’s armory. She remembered how she’d run her fingertips across the cracked and fading paint, over the green leaves of the tree, and along the path of the falling star. - AFFC Brienne II.
#brienne of tarth#asoiaf#mine.#valyrianscrolls#finally finished this wip!!! this one has been sitting in my drafts for more than a year now lol#but also the - run her fingertips across the cracked and fading paint / along the path of the falling star#feels like she'd take the shield off the display to get a good look of it properly#so now im imagining young brienne hiding in the armory looking at dunk's shield in detail 😭😭😭#this one is more of a practice run bc i havent been doing full illustrations in a while and i wanted to get that groove back again#but i like how this one turned out!!!
2K notes
·
View notes
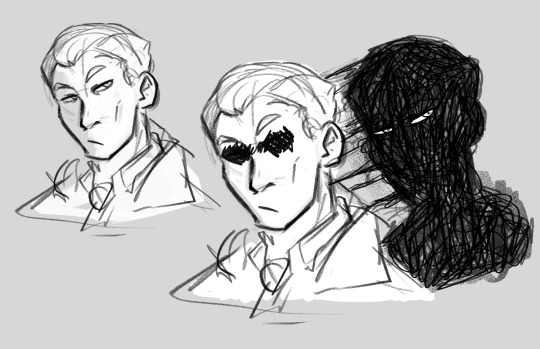
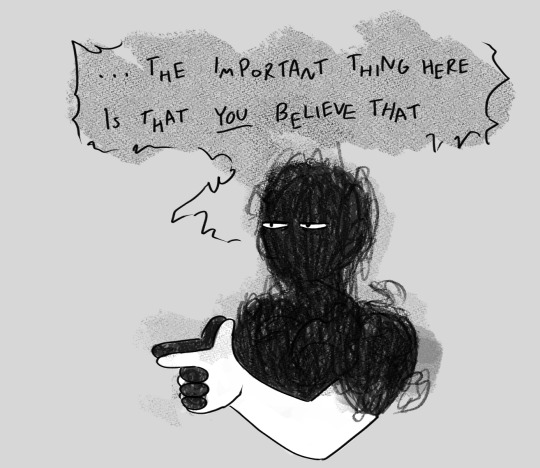
Text
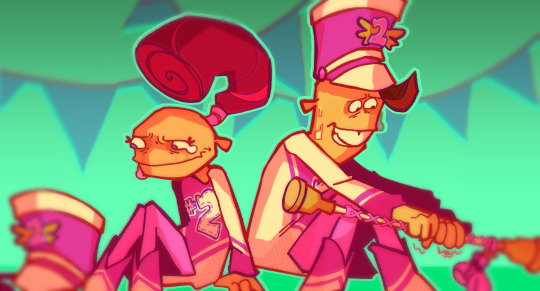
Think, and think, and think some more! Doubts will stick you to the floor!
#psychonauts#crystal flowers snagrash#clem foote#art :0]#Eyestrain cw#This concept has been a wip in my drafts for a WHILE now. Finally real.
676 notes
·
View notes
Text

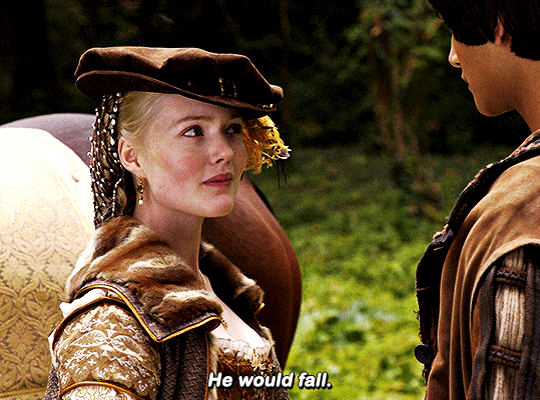

Do you suffer? Nightly. It must stop. It is a crime against... Against what? Against you. Your beauty. You are the pope's daughter. How can he stand it?
THE BORGIAS | 1.05 The Borgias in Love
+ bonus:
#theborgiasedit#perioddramaedit#periodedit#tvedit#hollidaygraingeredit#lucreziaborgiaedit#usersjen#userfefa#tusereliza#userlenna#userlj#tusertha#greengableslover#userbennet#userakrivi#arthurpendragonns#*mine#the borgias#lucrezia borgia#holliday grainger#there's truly nothing sexier than a woman plotting her revenge <3#don't like this colouring much but i wanted to get this set out of my drafts cause it'd been there for a while now
370 notes
·
View notes
Text
Ryuji having the worst bi crisis of his fucking life bc his mom just had to fucking ask “oh, whats this young ladys name?” when he showed her a picture of Akira petting Morgana. Like okay yeah Akira is like objectively pretty, hes like the Classic Delicate Pretty Boy just like Yusuke which is like whatever; straight dudes have eyes, and they know what women like to see. But now hes like. Seeing things he likes in girls IN Akira now and he cant make it Stop like its genuinely keeping him up at night 😭
Pretty boy used to be A Face that would come up in his mind when he thought of the term. There was no specifics in mind, just like. Pretty Boy. Pretty boy! You say that and theres like a Face Template that shows up in ur minds eye and hed just attribute that to any dude who was like Vaguely Pretty. But now its Akira 😭 and he finds himself cataloging things that Akira does that he KNOWS he finds cute when girls do it. The hairtuck behind the ears. The headtilt when he mishears a question. The Actually Pretty Doe Eyes. The breathy, nearly inaudible chuckle he does in place of a Real laugh (thats made better by the fact that its so hard to get him to laugh in the first place). He likes cute snacks. He blushes easily. Ryuji is sitting here like ‘theres no fucking way man. Like theres just no way. That shit makes NO sense (a lie)’ lying in bed in the middle of the night looking like this vvvv w his phone in his hands (looking at pictures of akira)

It drives him insane bc like he did Not see any of these things as like inherently girly or whatever. Like thats just akira thats just his bro! And he does OTHER weird shit that cancels all that shit out. Hes like a messy engineer/tinkerer, he rolls out of bed and whatever situation his hair is is everyones problem. He wears that AWFUL gym uniform and doesnt tweak it AT ALL?? He likes baseball?? hes got a whole binder of trading cards that he will show off if u show any moment of weakness. Like hes just Some Dude but also manages to be Some Girl at the same time and Ryuji is like thats not fair. Life sucked ass but at least it made sense before Akira stumbled into it 😭
#persona 5#pegoryu#akiryu#chattin#long post#THIS one is almost a year old lmao its been in my drafts for a while#i at least tagged it as pegoryu before running away cutely so i think i was finished ??? well now i am throwing it into the world#anyway. akira is the guy ever. and ryuji is exploding#‘i have died. badly’#i like thinking of akira like this; hes ryujis first exposure to nb ppl and gnc adjacent stuff#even if akira is p masc by most standards hes still got a bit of. aloofness. about his gender stuffs#ryuji is just really into the way akira carries himself#and it takes him a while to go oh. oh i think its cause i like this dude#um.#😳.#also i wanted to clarify#but ryujis mom just doesnt know Who akira is in that picture#and in my head hes like. looking down at mona and petting him (while sitting)#(AND hes with ann and theyre both kind of a distance away from the camera)#so at a quick glance; hes just Some Girl#and even though shes wrong; it kicks off the mental chaos olympics in ryujis head#‘what hes not a girl’ to ‘where would she even get that from’ to ‘well akira said himself he didnt rlly care what ppl thought about it’#to ‘well. where DID she get that from?’ to lookin at what his homie does a little closer to ‘aw fuck. man.’#but i love that for him#ALSO. RYU/GORO IN TAGS…..#but ryuji going oh my GOD oh my godddd 😨😓😓😓 when something clicks in his head about goro#his voice is so practiced and naturally softspoken and his public facing persona is very demure#and once he gets past the initial anger over goro being a pompous prick who shittalks about the thieves. hes like. god fucking dammit.#There Is A Pattern and A Type He Has and Its Killing Him To Realize it.#hes literally sitting in his room w his head in his hands
442 notes
·
View notes
Text
Y/N: I met this rabbit animatronic at my job at this horror attraction, and I asked for his name. He told me and went: “Doing a little background check? You might find out I’m a murderer, just ignore that” and winked.
Y/N: And so, I’m standing there thinking: “A good sense of humor, alright.”
Y/N:
Y/N: I looked him up. He’s a murderer.
#Incorrect Five Night’s At Freddy’s Quotes#Source: Unknown#Y/N#Springtrap#FNaF 3#Five Night’s At Freddy’s 3#Springtrap x Y/N#<Do I tag that? I guess I should#This one has just been in my drafts for a little while now#This rotting bunny man gives me so many quote ideas
220 notes
·
View notes
Text
Happy to report I have finally started listening to Malevolent and to no one's surprise I am already obsessed (I'm almost done with s2 atm please don't send me spoilers yet sdlkfj)
I'll skip over my usual formality of having one normal art post before diving into shitposts let's not waste anyone's time here

#to no one's surprise the body-sharing eldrich horror buddy comedy is right up my alley#this one's been on my 'to listen' list for a long while but the stars finally aligned to make it happen#okay time to figure out how to tag this uhhh#malevolent#malevolent podcast#arthur lester#john doe#i will probably change how i draw arthur a Lot as this goes on lol but enjoy these early drafts#unlike him I had a good idea how I wanted to draw john from the get-go#though the scrawling chaotic scribbles are actually a bit tedious to do in cleaner art#the pencil comic at the end is about the easiest way to do it he's just a bit more formless there#which is only really confusing when I also want to draw the hand like in the first shitpost#if i draw anything for s2 i'll update him a wee bit though probably pretty easy to guess what#i'll be playin with it i'm sure#idfk what tags people use for these i'm not allowed to search the tag till i'm caught up#so for now these'll work!#shorthand i'll probs just use#mp#pretty sure i haven't used that before#probably#my art#doodles#comic
340 notes
·
View notes
Text
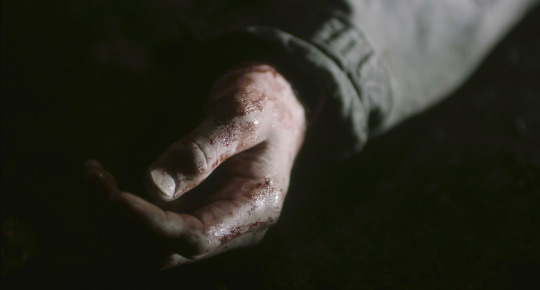
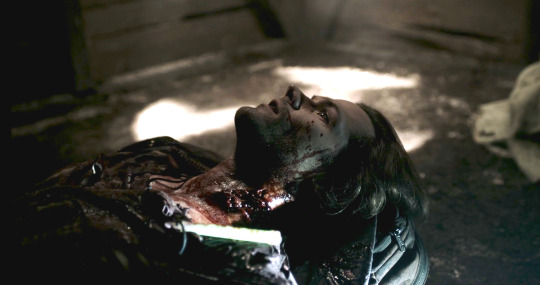
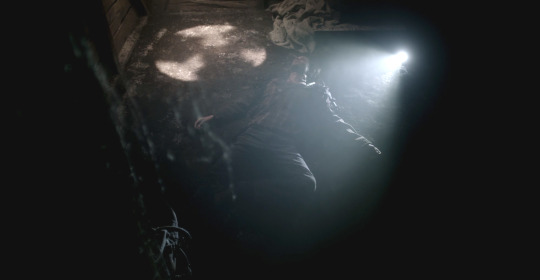
13.21 "Beat the Devil"
#STILL my fave beautiful girl corpse moment from him. this has been living in my drafts for a while now but i should free her#sam winchester#spn 13x21#spn caps#sfx makeup person who lovingly put so much detail into that neck wound....sending you a smooch#mycaps#j.edit
180 notes
·
View notes
Text
Etho is Joel's work wife, Joel's Etho's manic pixie dream girl, and Joel is Iskalls mysterious stranger, I fucking guess, idk
#my very own post#smallishbeans#joel smallishbeans#ethoslab#iskall85#this has been sitting in my drafts for a while#and it was originally adding jimmy instead of iskall but i couldnt think of anything for him#so its iskall now
303 notes
·
View notes
Text
Ushijima-Oikawa parallels with Kageyama-Hinata
To me, Ushijima and Oikawa are like a tragic parallel to Hinata and Kageyama. If Oikawa had gone to Shiratorizawa then he and Ushijima could've had the partnership that Kagehina had. But because he didn't, they will never know what it's like to make the other feel invincible.
Shipping goggles aside, the parallels have to be intentional (haikyuu is too well-written for it to be just a coincidence): Both Ushijima and Kageyama were framed as naturally gifted volleyball monsters. Meanwhile Oikawa and Hinata believed that they were just average (even though the people around them know that they have their own strengths). Ushijima was the one who kept winning against Oikawa, just like how Kageyama was always ahead of Hinata. Both Hinata and Oikawa went abroad to gain experience so they could finally beat their rival. Ushijima and Kageyama are both awkward, intimidating, and ASD-coded while Hinata and Oikawa are framed as easy-going extroverted chatterboxes. These pairs are literally so similar it's crazy. Look at them and tell me it's not intentional
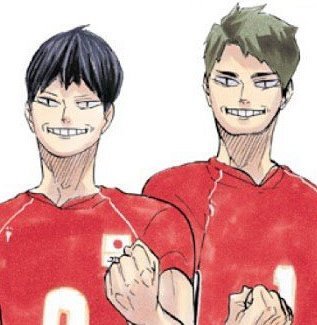

It also makes sense when you consider that their playstyles are also complementary. Kageyama and Hinata were a good match for each other because Hinata needed Kageyama's precision and Kageyama needed someone agile to match his own speed. But Ushijima's only requirement is for the ball to be set high and the right distance from the net so it's easy to hit. And which setter is known for dedicating themselves to their spikers, giving them easy sets? Oikawa. They truly could've been a terrifying duo.
I think Furudate was trying to show what Kageyama and Hinata could've been if they didn't team up. They'd still be strong, sure, but not invincible like they were in Karasuno. (as opposed to the Miya twins, who were supposed to show what they could've been like if they had an equal from the very beginning)
But in the end it all worked out for everyone! They all got to play on the world stage together. Ushijima and Oikawa even had their reconciliation at the all stars match (still waiting on the Oikawa-Kageyama reconciliation please please please 👀). They're all happy so I suppose it isn't actually tragic. I just cant help but wonder what could have been if Ushijima and Oikawa learned what it's like to be each other's greatest ally. Hinata and Kageyama were so lucky to have found each other after all.
#long story short i think kagehina and ushioi should go on a double date together#the shenanigans that ensue will be glorious#what if they play a 2v2 match: kagehina vs ushioi#it's also funny how ushijima has played on the same team as kageyama at least 4 times now and not once with oikawa#they are BESTIES your honor#sorry this has been in my drafts for a while and i just finished it now. yay vacation#haikyuu#haikyuu!!#kagehina#kghn#hq#ushijima wakatoshi#ushioi#oikawa tooru#kageyama tobio#hinata shoyo#hinata shoyou#my post#hq kageyama#hq hinata#hq ushijima#hq oikawa#hq analysis
227 notes
·
View notes
Note
omg i saw you do a mood board for a plesiosaur, could you do one for a Spinosaurus?
Definitely!!

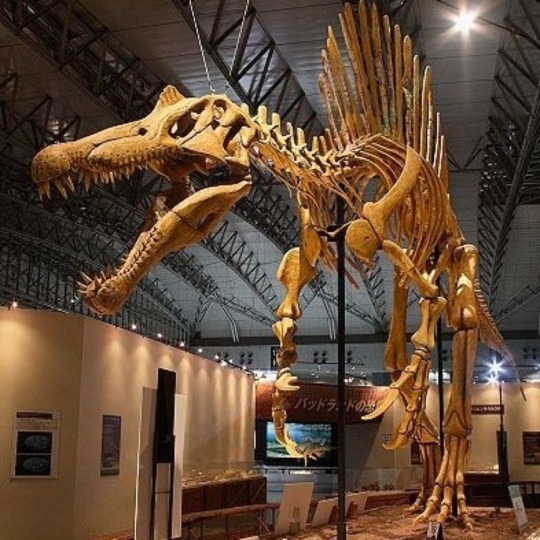


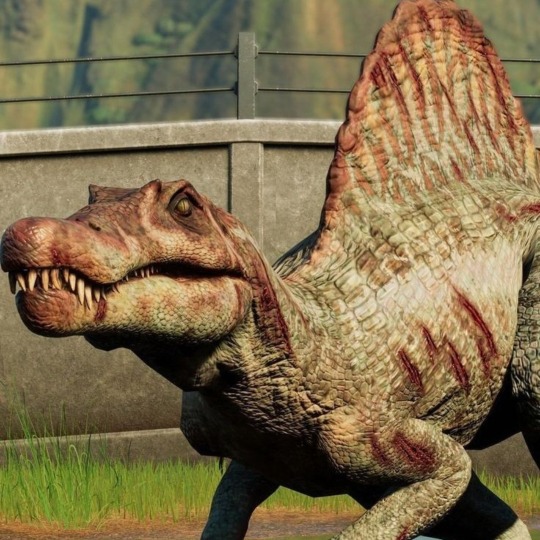

#Spinosaurus#!!!#this has been in my drafts for a while#like months#my bad#i hope you like it now that it's here!#sfw interaction only#moodboard#sfw agere#age regression#agere#sfw littlespace#agere moodboard#age dreaming#spinosaurus moodboard#dinosaur moodboard
350 notes
·
View notes
Last Seen Blogs


grimppleather
leather wear

longroadahead
Life Is Short, Try Something Naughty! Only 18+

jonathan-swims
jonathan-swims
otakuros
hiatus