
Last Seen Blogs

twiggovroom
If you need a friend. I can be them :)


oceanid3s
julia

vid-wrap
Untitled

mensbeautyhealth-blog
Men's Beauty Health
Text
Hydroponic Tower Garden (24 pots)
A hydroponic tower garden with 24 pots is a vertical gardening system that allows you to grow a variety of plants in a space-saving and efficient manner.
Here's what you need to know about this innovative gardening setup:
1. Vertical Growing: A hydroponic tower garden is designed to maximize vertical space. It consists of multiple stacked pots or compartments, allowing you to grow a substantial number of plants in a compact area.
2. Hydroponic System: This type of garden typically utilizes a hydroponic system, where plants are grown in a soilless medium and receive their nutrients and water through a nutrient solution. Hydroponics can promote faster growth and higher yields compared to traditional soil gardening.
3. Pots or Compartments: The 24 pots or compartments in the tower garden can accommodate a variety of plants, including vegetables, herbs, and even some small fruiting plants. Each pot is equipped with a growing medium and a system for delivering the nutrient solution.
4. Space-Efficient: Tower gardens are ideal for small spaces, balconies, or patios where traditional gardening may be limited. They allow you to make the most of your available area while growing a diverse range of plants.
5. Easy Maintenance: Hydroponic tower gardens are known for their relatively low maintenance requirements. They often come with automated watering and nutrient delivery systems, reducing the need for daily care.
6. Year-Round Growing: With controlled environments, such as indoor hydroponic setups or greenhouses, you can grow plants year-round, regardless of external weather conditions.
7. High Yields: Hydroponic gardening can result in higher yields due to optimized nutrient delivery and the absence of soil-borne diseases.
8. Plant Variety: You can grow a wide range of plants in a hydroponic tower garden, from leafy greens like lettuce and spinach to herbs like basil and cilantro, and even compact fruiting plants like cherry tomatoes and peppers.
9. Nutrient Management: Properly managing the nutrient solution is crucial for successful hydroponic gardening. You'll need to monitor pH levels and nutrient concentrations to ensure optimal plant growth.
10. Sustainability: Hydroponic systems can be designed to be water-efficient, using significantly less water than traditional soil gardening. Additionally, they can reduce the need for pesticides and herbicides.
11. Learning Curve: While hydroponic tower gardens offer numerous benefits, they may require a bit of a learning curve, especially for beginners. Understanding the nutrient requirements of different plants and the maintenance of the system is essential for success.
Hydroponic tower gardens can be an exciting and efficient way to grow a variety of plants, making them a popular choice for urban gardeners, those with limited outdoor space, and anyone looking to experiment with alternative gardening methods.
Read the full article
0 notes
Text
Organic fertilizer for leafy vegetables
Selecting the right organic fertilizer for leafy greens is crucial for promoting healthy growth and maximizing your harvest.
Here's how to choose the right organic fertilizer for your leafy greens:
1. Understand Nutrient Needs:
Different vegetables have varying nutrient requirements. For leafy greens, the primary nutrient of interest is nitrogen (N). Nitrogen supports lush leaf growth, which is the hallmark of these vegetables. Ensure that the fertilizer you choose is nitrogen-rich.
2. Check the N-P-K Ratio:
The N-P-K ratio on a fertilizer label indicates the percentage of nitrogen (N), phosphorus (P), and potassium (K) in the product. For leafy greens, look for a fertilizer with a higher nitrogen content (the first number in the ratio) relative to phosphorus and potassium. An example might be 10-2-2 or similar.
3. Organic Granular Fertilizers:
Organic granular fertilizers release nutrients slowly, providing a consistent supply over time. Look for granular options that are labeled for use with vegetables or leafy greens.
4. Compost or Well-Rotted Manure:
Compost or well-rotted manure is an excellent choice for leafy greens. These organic materials enrich the soil with a variety of nutrients and improve soil structure. Mix them into the soil before planting or use them as a top dressing during the growing season.
5. Liquid Organic Fertilizers:
Liquid organic fertilizers, such as fish emulsion or seaweed/kelp extracts, are quick-acting and can be applied directly to the soil or as a foliar spray. They are a good choice for providing an immediate nutrient boost to your leafy greens.
6. Consider Micronutrients:
While nitrogen is the primary concern for leafy greens, they also benefit from trace minerals or micronutrients like iron and magnesium. Some organic fertilizers, especially those derived from seaweed or kelp, contain a broad spectrum of micronutrients.
7. Organic Certification:
If you prefer certified organic products, look for fertilizers that carry the USDA Organic or similar certification. These products meet specific standards for organic farming.
8. Soil Testing:
Perform a soil test to understand your soil's nutrient levels and pH. This can help you choose the right organic fertilizer and prevent over-fertilization.
9. Follow Application Instructions:
Always follow the manufacturer's application instructions regarding the amount, timing, and method of applying the fertilizer. Avoid over-fertilization, as this can harm your plants.
10. Experiment and Observe:
Every garden is unique. Consider experimenting with different organic fertilizers and application methods to determine what works best for your specific leafy greens and growing conditions. Monitor your plants' growth and health to assess the results.
Remember that the key to successful organic gardening is balance and moderation.
Choosing the right organic fertilizer and applying it correctly will help you grow healthy, delicious leafy greens while maintaining the integrity of your organic garden.
Read the full article
0 notes
Text
How To Use Organic Fertilizers On Potted Plants?
Using organic fertilizers on potted plants is an effective way to provide essential nutrients while maintaining the health of your container garden.
Here's a step-by-step guide on how to use organic fertilizers for potted plants:
1. Choose the Right Organic Fertilizer:
Select an organic fertilizer that suits the specific needs of your potted plants. Common options include organic granular fertilizers, organic liquid fertilizers, compost, or well-rotted manure. Ensure the fertilizer is labeled for container or potted plants.
2. Read and Follow Instructions:
Carefully read the instructions on the fertilizer package to determine the recommended application rate and frequency. Organic fertilizers come in various formulations, so it's crucial to use them as directed.
3. Apply During the Growing Season:
Apply organic fertilizers during the active growing season of your plants, typically from spring through early fall. Avoid fertilizing in the dormant or winter months when plant growth slows down.
4. Water the Plant:
Before applying fertilizer, water your potted plant thoroughly. This helps prevent root burn and ensures that the fertilizer dissolves and distributes evenly in the soil.
5. Top-Dressing (Granular Fertilizer):
For granular organic fertilizers, sprinkle the recommended amount evenly over the top of the potting soil. Be cautious not to let the fertilizer come into direct contact with the plant's stem or leaves.
6. Incorporate (Granular Fertilizer):
Gently scratch the granular fertilizer into the top layer of soil using a small hand trowel or fork. This ensures that the nutrients are within reach of the plant's roots.
7. Dilute (Liquid Fertilizer):
If you're using liquid organic fertilizer, dilute it according to the package instructions. Use a watering can or hose-end sprayer to apply the diluted solution directly to the soil around the plant base.
8. Monitor Plant Response:
Keep an eye on your potted plants for signs of nutrient deficiencies or excesses. Symptoms may include yellowing leaves, stunted growth, or nutrient toxicity. Adjust your fertilization routine as needed.
9. Maintain a Regular Fertilization Schedule:
Organic fertilizers release nutrients slowly over time. To provide consistent nourishment, plan a regular fertilization schedule based on the specific fertilizer's recommendations.
10. Balance Nutrient Needs:
Depending on the type of potted plants you have, adjust your fertilizer selection to meet their nutrient requirements. Some plants may benefit from balanced fertilizers, while others may require specialized formulations.
11. Rotate Fertilizers:
To ensure a well-rounded nutrient supply, consider rotating between different types of organic fertilizers. This practice can help prevent nutrient imbalances.
12. Soil Testing:
Periodically test the soil in your pots to check nutrient levels and pH. Soil testing can guide your fertilization choices and help you tailor your approach to each plant's needs.
Using organic fertilizers on potted plants is a sustainable and environmentally friendly way to maintain healthy and productive container gardens.
By following these steps and adjusting your fertilization practices based on plant response, you can support robust growth and vibrant blooms while minimizing the risk of overfertilization.
Read the full article
0 notes
Text
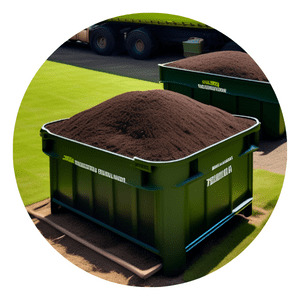
How To Compost Alpaca Manure?
Composting alpaca manure is an excellent way to transform it into a nutrient-rich soil amendment for your garden. Alpaca manure is lower in nitrogen than some other types of manure, making it a balanced and gentle fertilizer.
Here's how to compost alpaca manure effectively:
Materials You'll Need:
Alpaca manure
Carbon-rich materials (straw, dried leaves, or wood shavings)
Shovel or pitchfork
Compost bin or pile
Water source
Optional: a compost thermometer
Steps to Compost Alpaca Manure:
Gather the Manure:
Collect fresh alpaca manure from your barn or alpaca enclosure. Ensure that you're collecting both manure and bedding materials, as this mix will help create a balanced compost pile.
Layer with Carbon Material:
In your compost bin or pile, create layers of alpaca manure and carbon-rich materials. Aim for a roughly 50-50 mix by volume. Carbon-rich materials help balance the nitrogen content in the manure.
Moisten the Pile:
Alpaca manure typically has a moisture content that's suitable for composting. However, if the pile seems dry, lightly moisten it with a garden hose. The composting process requires adequate moisture but should not become waterlogged.
Turn the Pile:
To aerate the compost and facilitate decomposition, turn the pile regularly. Use a pitchfork or shovel to mix the materials thoroughly. This process adds oxygen and prevents odors.
Monitor Temperature:
If you have a compost thermometer, monitor the temperature of the pile. The ideal temperature range for composting is between 130°F to 160°F (54°C to 71°C). This heat helps kill weed seeds and pathogens.
Compost Curing:
Allow the compost pile to cure for several months to a year. During this time, the pile will cool down, and the compost will mature. It's ready to use when it resembles dark, crumbly soil and has no discernible odor.
Application:
Use your finished alpaca manure compost as a soil amendment in your garden. It adds valuable nutrients and improves soil structure. Work it into the soil before planting or use it as a top dressing around established plants.
Repeat the Process:
Continue to collect alpaca manure and bedding materials to maintain a steady supply of compost for your garden.
Composting alpaca manure is a sustainable way to recycle waste materials and create a valuable resource for your garden.
It enriches the soil, promotes plant growth, and contributes to a healthy and thriving garden ecosystem.
Read the full article
0 notes
Text
Which Organic Fertilizer Is Best For Vegetable?
Choosing the best organic fertilizer for all plants can be a versatile and effective way to nurture your garden.
Here are eight ideas for the best organic fertilizers that can benefit a wide range of plants:
Compost: Homemade or commercially available compost is an excellent all-purpose organic fertilizer. It enriches the soil with a variety of nutrients and improves soil structure.
Well-Aged Manure: Organic manure, such as composted cow, horse, or poultry manure, is rich in nitrogen and other essential nutrients. It can be a valuable addition to your garden.
Fish Emulsion: Derived from fish waste, this liquid fertilizer is high in nutrients like nitrogen and phosphorus. It's suitable for both soil and foliar application.
Bone Meal: Bone meal is a slow-release fertilizer rich in phosphorus and calcium. It promotes root development and flowering in a wide range of plants.
Blood Meal: Blood meal is an excellent source of nitrogen and can help green up plants quickly. It's particularly useful for leafy vegetables.
Seaweed/Kelp Meal: Seaweed and kelp meal provide a broad spectrum of micronutrients, growth hormones, and minerals. They enhance plant resilience and overall health.
Worm Castings: Vermicompost or worm castings are rich in nutrients and beneficial microorganisms. They improve soil structure and help with nutrient absorption.
Organic Pelleted Fertilizers: These are formulated with various organic materials and nutrients in pellet form. They release nutrients gradually, providing a steady supply to plants.
Remember that the best fertilizer depends on your specific plants' needs and your soil conditions. It's often a good practice to perform a soil test to determine any nutrient deficiencies before choosing a fertilizer.
Additionally, consider rotating fertilizers to provide a diverse range of nutrients for optimal plant health.
Read the full article
0 notes
Text
Maximizing Your Vegetable Garden's with Goat Manure Organic Fertilizer
Maximizing Your Vegetable Garden's Potential with Goat Manure Organic Fertilizer
When it comes to nurturing a thriving vegetable garden, organic fertilizers play a pivotal role in ensuring the health and productivity of your plants. One exceptional organic fertilizer that has gained popularity among gardeners is goat manure. Its nutrient-rich composition and numerous benefits make it a valuable addition to your gardening toolkit. In this guide, we'll explore how to maximize your vegetable garden's potential by harnessing the power of goat manure organic fertilizer.
Why Goat Manure?
Goat manure is prized for its well-balanced nutrient content, making it an ideal choice for vegetable gardens.
Here's why it's a standout option:
1. Balanced Nutrient Profile: Goat manure contains essential nutrients like nitrogen (N), phosphorus (P), and potassium (K), ensuring comprehensive plant nourishment.
2. Organic Matter: It enriches the soil with organic matter, enhancing soil structure, moisture retention, and microbial activity.
3. Slow-Release: Goat manure releases nutrients gradually, reducing the risk of nutrient leaching and ensuring long-lasting benefits.
4. Weed Suppression: When properly composted, it can help suppress weed growth, minimizing competition for resources.
Using Goat Manure Organic Fertilizer:
To maximize the benefits of goat manure in your vegetable garden, follow these guidelines:
1. Composting: Compost the goat manure to eliminate weed seeds and reduce the risk of burning your plants. Mix it with other organic materials like straw, leaves, and kitchen scraps for a balanced compost pile.
2. Ageing: Allow the composted goat manure to age for at least six months to a year. This aging process further breaks down the nutrients, making them more accessible to plants.
3. Soil Preparation: Incorporate the aged goat manure into your garden soil before planting or as a top dressing. Aim for a ratio of 1 part manure to 3 parts soil for optimal results.
4. Seasonal Application: Apply goat manure in the spring or fall, preferably several weeks before planting. This allows time for the soil to absorb the nutrients.
5. Mulching: Use composted goat manure as a mulch around your vegetable plants. It helps retain soil moisture, suppress weeds, and release nutrients gradually.
6. Avoid Overuse: While goat manure is beneficial, excessive application can lead to nutrient imbalances. Follow recommended guidelines and monitor your garden's performance.
Incorporating goat manure organic fertilizer into your vegetable garden care routine is a sustainable and eco-friendly way to boost plant health and yield. Its nutrient-rich composition, when properly composted and applied, can contribute to the thriving and bountiful garden you've always dreamed of.
So, harness the power of goat manure and watch your vegetables flourish like never before. Happy gardening!
Read the full article
0 notes
Text
What Is The Best Organic Fertilizer For All Plants?
Choosing the best organic fertilizer for all plants can be a versatile and effective way to nurture your garden.
Here are eight ideas for the best organic fertilizers that can benefit a wide range of plants:
Compost: Homemade or commercially available compost is an excellent all-purpose organic fertilizer. It enriches the soil with a variety of nutrients and improves soil structure.
Well-Aged Manure: Organic manure, such as composted cow, horse, or poultry manure, is rich in nitrogen and other essential nutrients. It can be a valuable addition to your garden.
Fish Emulsion: Derived from fish waste, this liquid fertilizer is high in nutrients like nitrogen and phosphorus. It's suitable for both soil and foliar application.
Bone Meal: Bone meal is a slow-release fertilizer rich in phosphorus and calcium. It promotes root development and flowering in a wide range of plants.
Blood Meal: Blood meal is an excellent source of nitrogen and can help green up plants quickly. It's particularly useful for leafy vegetables.
Seaweed/Kelp Meal: Seaweed and kelp meal provide a broad spectrum of micronutrients, growth hormones, and minerals. They enhance plant resilience and overall health.
Worm Castings: Vermicompost or worm castings are rich in nutrients and beneficial microorganisms. They improve soil structure and help with nutrient absorption.
Organic Pelleted Fertilizers: These are formulated with various organic materials and nutrients in pellet form. They release nutrients gradually, providing a steady supply to plants.
Remember that the best fertilizer depends on your specific plants' needs and your soil conditions. It's often a good practice to perform a soil test to determine any nutrient deficiencies before choosing a fertilizer.
Additionally, consider rotating fertilizers to provide a diverse range of nutrients for optimal plant health.
Read the full article
0 notes
Text
What Is the Most Popular Medium for Vertical Farming?
The most popular medium for vertical farming is hydroponics.
Hydroponics is a soilless cultivation method that relies on nutrient-rich water solutions to deliver essential nutrients directly to the plant roots. This approach is widely used in vertical farming for several reasons:
Space Efficiency: Hydroponic systems can be tailored to vertical farming setups, allowing for efficient use of limited space. Plants are typically grown in stacked trays or towers, maximizing vertical space.
Water Efficiency: Hydroponics uses significantly less water compared to traditional soil-based agriculture. The recirculating water systems minimize water wastage.
Nutrient Precision: Hydroponic systems enable precise control over nutrient delivery, ensuring that plants receive the exact nutrients they need for optimal growth.
Faster Growth: Plants grown hydroponically often grow faster than those in soil because they can access nutrients more readily.
Year-Round Cultivation: Vertical hydroponic systems can operate indoors or in controlled environments, allowing for year-round cultivation regardless of external weather conditions.
Reduced Pest and Disease Pressure: Soil-based pests and diseases are less common in hydroponic systems, reducing the need for pesticides and herbicides.
Sustainability: Hydroponics can be designed to be highly sustainable, with water and nutrient recycling systems that minimize environmental impact.
While hydroponics is the most popular medium for vertical farming, other methods like aeroponics (growing plants in an air/mist environment) and aquaponics (combining hydroponics with fish farming) are also gaining traction in the world of vertical farming due to their efficiency and sustainability. The choice of medium often depends on the specific goals, resources, and preferences of the vertical farm operator.
Read the full article
0 notes
Text
Best Pumpkin Varieties To Grow In Your Garden
Pumpkins come in a variety of shapes, sizes, and colors, making it fun to choose the best variety for your garden.
Here are some popular pumpkin varieties to consider growing:
Jack-o'-Lantern (Cucurbita pepo): Classic orange pumpkins perfect for carving into Halloween decorations and making pies. 'Howden' and 'Connecticut Field' are well-known cultivars.
Sugar Pie (Cucurbita pepo): Small, sweet, and perfect for making pumpkin pies. 'Baby Pam' and 'New England Pie' are excellent choices.
Butternut Squash (Cucurbita moschata): While technically a squash, butternut varieties like 'Waltham' and 'Butterbush' have a sweet, nutty flavor and are great for soups and roasting.
Cinderella (Cucurbita maxima): Named for its fairytale appearance, Cinderella pumpkins have a flattened shape and vibrant orange color. 'Rouge Vif d'Etampes' is a famous variety.
Blue Hubbard (Cucurbita maxima): Blue-gray and bumpy-skinned, Blue Hubbard pumpkins are known for their sweet and dry flesh, perfect for baking.
Miniature Pumpkins (Various Varieties): Tiny pumpkins, such as 'Jack Be Little' and 'Mini Harvest,' are great for decorative purposes, including table centerpieces and fall displays.
Giant Pumpkins (Cucurbita maxima): If you're looking for a challenge, try growing giant pumpkins. Varieties like 'Atlantic Giant' can reach massive sizes with proper care.
White Pumpkins (Various Varieties): White pumpkins, such as 'Cotton Candy' and 'Lumina,' offer a unique and elegant twist on traditional orange pumpkins.
Long Island Cheese (Cucurbita moschata): Named for its wheel-of-cheese shape, this pumpkin variety is ideal for pies and has a sweet, creamy flesh.
Musque de Provence (Cucurbita moschata): Known for its deeply ribbed and tan skin, this French heirloom pumpkin is prized for its sweet, aromatic flesh.
Jarrahdale (Cucurbita maxima): This Australian pumpkin has a striking blue-green skin and sweet, orange flesh, perfect for soups and baking.
Pink Banana (Cucurbita maxima): Named for its elongated, banana-like shape, this pumpkin has pink-orange skin and sweet, flavorful flesh.
When selecting pumpkin varieties, consider your gardening space, culinary preferences, and intended use (e.g., carving, baking, or decoration).
Pumpkin growing conditions vary, so be sure to check the specific requirements for the varieties you choose to ensure a successful harvest.
Read the full article
0 notes
Text
What Is The Easiest Plant To Grow In The Fall?
In the fall, many cool-season vegetables are relatively easy to grow, making them ideal choices for beginners and experienced gardeners alike.
Here are eight examples of some of the easiest plants to grow in the fall:
Lettuce (Lactuca sativa): Lettuce is one of the simplest and fastest-growing fall vegetables. You can start harvesting baby leaves in as little as a few weeks.
Spinach (Spinacia oleracea): Spinach is another fast-growing green that thrives in cooler temperatures. It's easy to grow from seed and can be harvested young for baby spinach or allowed to mature for larger leaves.
Radishes (Raphanus sativus): Radishes are one of the quickest vegetables to grow, often ready for harvest in just a few weeks. They're perfect for fall planting.
Kale (Brassica oleracea var. acephala): Kale is a cold-hardy leafy green that can tolerate light frosts. It's low-maintenance and offers a long harvesting period.
Arugula (Eruca sativa): Arugula is a fast-growing salad green with a peppery flavor. It's an excellent choice for fall salads and sandwiches.
Scallions (Allium fistulosum): Scallions, or green onions, are easy to grow from seed or transplant. They're ready for harvest when the green tops are about 6 inches tall.
Swiss Chard (Beta vulgaris var. cicla): Swiss chard is a versatile and forgiving green that can be harvested throughout the fall. Its colorful stems and tender leaves add variety to your dishes.
Cilantro (Coriandrum sativum): Cilantro prefers cooler temperatures, making it a great fall herb to grow. It's perfect for adding fresh flavor to your fall dishes.
These vegetables and herbs are well-suited for fall gardening because they thrive in cooler temperatures and require minimal care.
With proper watering and protection from early frosts, you can enjoy a fresh and homegrown harvest well into the autumn season.
Read the full article
0 notes
Text
What Are The Best Leafy Greens For Fall?
Growing leafy greens in the fall can be a great way to extend your harvest and enjoy fresh, nutritious produce well into the cooler months.
Here are some of the best leafy greens to consider planting in the fall:
Lettuce (Lactuca sativa): Varieties like 'Butterhead,' 'Romaine,' and 'Red Leaf' are excellent choices for fall. They're quick to mature and can be harvested as baby greens or full heads.
Spinach (Spinacia oleracea): Spinach is a cold-hardy green that thrives in cooler temperatures. Plant varieties like 'Winter Bloomsdale' or 'Tyee' for fall harvesting.
Kale (Brassica oleracea var. acephala): Kale is incredibly cold-tolerant and becomes sweeter after exposure to frost. Varieties like 'Curly Kale' and 'Lacinato' (Dinosaur Kale) are popular choices.
Swiss Chard (Beta vulgaris var. cicla): Swiss chard can be grown throughout the fall. The colorful stems and tender leaves are versatile in cooking.
Arugula (Eruca sativa): Arugula has a peppery flavor and is a fast-growing green, perfect for fall salads and sandwiches.
Mâche (Valerianella locusta): Also known as lamb's lettuce, mâche is a cold-hardy green with a mild, nutty flavor.
Endive (Cichorium endivia): Endive varieties like 'Escarole' and 'Frisee' can be grown in the fall for their slightly bitter leaves, which are excellent in salads and cooked dishes.
Mustard Greens (Brassica juncea): Mustard greens come in various flavors, from mild to spicy. Plant 'Southern Giant Curled' or 'Ruby Streaks' for fall harvesting.
Collard Greens (Brassica oleracea var. acephala): Collards are a traditional Southern green that thrives in cooler temperatures and becomes sweeter after a frost.
Asian Greens (Various Varieties): Bok choy, tatsoi, and komatsuna are Asian greens that do well in the fall garden. They have a range of flavors from mild to peppery.
Radicchio (Cichorium intybus): Radicchio is known for its bitter leaves and attractive red color. It's a cool-weather crop ideal for fall.
Cabbage (Brassica oleracea var. capitata): Some cabbage varieties, like 'Savoy' or 'Red Cabbage,' can be planted in late summer for fall harvests.
Sorrel (Rumex acetosa): Sorrel has tangy, lemony leaves and is a perennial green that can be harvested throughout the fall.
Chicory (Cichorium intybus): Chicory varieties like 'Radicchio' and 'Sugarloaf' are cold-hardy greens with slightly bitter flavors.
When planting fall greens, consider using row covers or cold frames to protect your plants from frost and extend the growing season.
Additionally, choose varieties that are specifically suited for fall growing, as they tend to be more cold-tolerant and bolt-resistant.
With the right care, you can enjoy a bountiful harvest of leafy greens well into autumn.
Read the full article
0 notes
Text
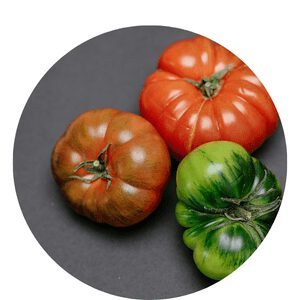
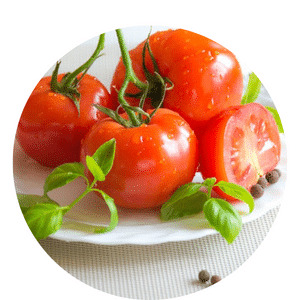
Best Tomato Varieties to Grow in Your Garden
Here are 15 popular tomato varieties that you can consider growing in your garden:
Roma Tomato (Solanum lycopersicum 'Roma'): Ideal for making sauces and canning due to its low moisture content and meaty texture.
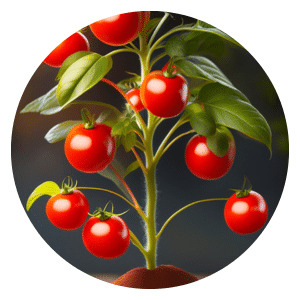
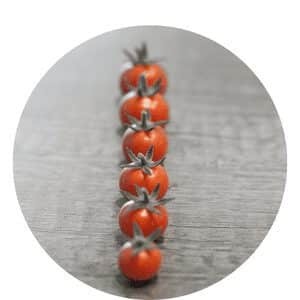
Cherry Tomato (Various Varieties): Sweet and bite-sized, perfect for snacking, salads, and garnishes. Varieties like 'Sun Gold' and 'Sweet 100' are popular.
Beefsteak Tomato (Solanum lycopersicum 'Beefsteak'): Known for their large, juicy, and flavorful fruits, they're great for sandwiches and slicing.
Early Girl Tomato (Solanum lycopersicum 'Early Girl'): As the name suggests, it's an early-ripening variety, perfect for regions with short growing seasons.
San Marzano Tomato (Solanum lycopersicum 'San Marzano'): A classic Italian plum tomato used in sauces and paste due to its excellent flavor and minimal seed content.
Yellow Pear Tomato (Solanum lycopersicum 'Yellow Pear'): Small, yellow, and pear-shaped, these tomatoes have a sweet and mild flavor.
Brandywine Tomato (Solanum lycopersicum 'Brandywine'): A favorite among heirloom enthusiasts, it offers rich, sweet, and slightly tangy flavor.
Celebrity Tomato (Solanum lycopersicum 'Celebrity'): Disease-resistant and reliable, producing medium-sized, red, and flavorful fruits.
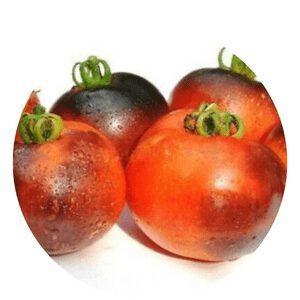
Black Krim Tomato (Solanum lycopersicum 'Black Krim'): This heirloom variety has a deep, earthy flavor and unique dark, reddish-purple color.
Green Zebra Tomato (Solanum lycopersicum 'Green Zebra'): Known for its striking green-striped skin and sweet-tart flavor.
Sungold Tomato (Solanum lycopersicum 'Sungold'): A sweet and tangy cherry tomato with vibrant orange fruits.
Alicante Tomato (Solanum lycopersicum 'Alicante'): A classic red slicing tomato with a rich, traditional tomato flavor.
Mortgage Lifter Tomato (Solanum lycopersicum 'Mortgage Lifter'): A large, meaty tomato known for its sweet taste and history of helping pay off a mortgage.
Pineapple Tomato (Solanum lycopersicum 'Pineapple'): Named for its tropical flavor, it's large, yellow with red streaks, and has a sweet, fruity taste.
Amish Paste Tomato (Solanum lycopersicum 'Amish Paste'): Another great paste tomato, ideal for making sauces and tomato paste with its meaty flesh and few seeds.
These tomato varieties offer a range of flavors, sizes, and purposes, so you can enjoy a diverse and delicious harvest in your garden.
Read the full article
0 notes
Text
Mastering the Art of Tomato Growing
Mastering the Art of Tomato Growing
Welcome to our guide on mastering the art of tomato growing!Whether you're a seasoned gardener or just starting out, tomatoes are a classic choice for any garden.
How To Grow
Organic Tomato
Shop
Tomato Seeds
Shop
Organic Fertilizer
Tomato Grow Methods

Raised Beds
Greenhouse
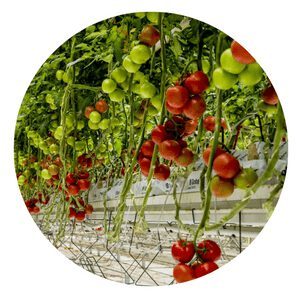
Hydroponic
The Best WayTo Grow Tomatoes
Maximize Your Tomato Harvest Expert Tips
Whether you're looking to grow tomatoes in containers, raised beds, or traditional in-ground plots, we've got you covered.So grab your gloves and trowel, and let's get started on the path to tomato gardening success!

Tomato & OkraCan You Plant Tomatoes Next to Okra?

Companion planting with tomatoesWhat to plant next to tomatoes

Flowers But No Fruit?Why Do Tomatoes Make Lots of flowers But No Fruit?

Late Planting?What happens if I plant tomatoes too late?
CareHow and When to Water Tomato Plants?

Tall How Tall is a Tomato Plant?

Tomato DiseasesPreventing and Treating Common Tomato Diseases
WinterWill Tomato Survive Winter?

How Many?How Many Tomatoes Do You Get From One Plant?
Tomato Seeds

Germinate How Do You Germinate Tomato Seeds?
Heirloom Tomato SeedsWhat is the Best Tomato Seed For Your Garden?

Saving Tomato SeedsHow To Do It Right
Tomato SeedlingsHow to Grow Organic Tomato Seedlings?
Best OrganicTomato Seeds
Tomatoes Bumper Crop
Wide World of Tomato Varieties
Welcome to our guide on tomato varieties!Let's discover the amazing diversity of tomatoes!
Roma
Cherry
Goth
Henderson's Pink
Yellow Pear
Ace 55
Plum Grape
Sungold Yellow
Yellow Brandywine
Berkley Pink
Costoluto Genovese Sauce
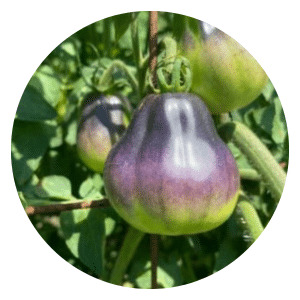
Fahrenheit Blue
Japanese Black Truffle
Beefsteak
Rainbow
Purple
White
Blue
Green
Yellow
Click To Grow
Organic Seeds
Shop Fertilizer

Shop
Helps Us Grow - Share If You Like
Facebook
Twitter
LinkedIn
Pinterest
Reddit
WhatsApp
Read the full article
0 notes
Text
What Is The Best Organic Vegetable Garden Fertilizer?
The best organic vegetable garden fertilizer can vary depending on your specific soil conditions and the needs of your plants.
However, here are several effective organic options to consider:
1. Compost:
Homemade or purchased compost is a rich source of organic matter and essential nutrients. It improves soil structure, enhances water retention, and provides a slow-release source of nutrients for your vegetables.
2. Well-Rotted Manure:
Aged and well-rotted manure from sources like cow, horse, or chicken can be a valuable organic fertilizer. Ensure that it's composted to avoid introducing weed seeds or pathogens.
3. Fish Emulsion:
Fish emulsion is a liquid organic fertilizer made from fish waste. It's a quick-acting source of nitrogen and other nutrients. Dilute it with water and apply it directly to the soil or as a foliar spray.
4. Bone Meal:
Bone meal is an excellent source of phosphorus, which is crucial for root development and flowering in plants. It's particularly useful for root crops like carrots and beets.
5. Blood Meal:
Blood meal is high in nitrogen and provides a quick nutrient boost to your plants. It's especially beneficial for leafy greens and other nitrogen-hungry vegetables.
6. Alfalfa Meal:
Alfalfa meal is a slow-release organic fertilizer that improves soil structure and provides a moderate amount of nitrogen and other essential nutrients.
7. Seaweed and Kelp Meal:
These organic amendments provide a wide range of nutrients and trace minerals. They can stimulate plant growth, improve soil health, and enhance resistance to stress.
8. Worm Castings:
Worm castings, or vermicompost, are nutrient-rich organic matter produced by earthworms. They're an excellent source of microorganisms and essential nutrients for plants.
9. Green Manure Cover Crops:
Planting cover crops like clover or legumes in the offseason can improve soil fertility by adding organic matter when turned into the soil.
10. Organic Fertilizer Blends:
- Commercial organic fertilizer blends are available, which combine various organic materials to provide a balanced nutrient profile. Look for products with balanced N-P-K ratios.
11. Epsom Salt (Magnesium Sulfate):
- Epsom salt can be used to supplement magnesium and sulfur in the soil. It's particularly beneficial for plants like tomatoes and peppers.
12. Homemade Organic Tea:
- You can make your own organic fertilizer "tea" by steeping compost or well-rotted manure in water. This nutrient-rich liquid can be used to water your plants.
The best choice depends on your garden's specific needs, the types of vegetables you're growing, and your soil's current nutrient levels. It's often beneficial to conduct a soil test to identify any deficiencies and tailor your fertilizer choices accordingly.
Additionally, rotating your fertilizer sources over time can help provide a broader spectrum of nutrients to your vegetable garden.
Read the full article
0 notes
Text
How Often to Water Cauliflower Plants
As an organic gardener, here are eight tips, points, and methods on how often to water cauliflower plants for optimal growth:
1. Soil Moisture Monitoring:
Regularly monitor the soil moisture around your cauliflower plants. Stick your finger into the soil near the base of the plants. If the soil feels dry to a depth of about 1 inch, it's time to water.
2. Consistent Moisture:
Cauliflower plants prefer consistent soil moisture levels. Aim to keep the soil consistently moist but not waterlogged. Uneven watering can lead to problems like head splitting or poor curd formation.
3. Morning Watering:
Water your cauliflower plants in the morning whenever possible. This allows the plants to dry off during the day, reducing the risk of fungal diseases.
4. Deep Root Watering:
Water deeply to encourage cauliflower plant roots to grow deep into the soil. Provide enough water so that it penetrates at least 6-8 inches below the surface.
5. Mulching:
Apply a layer of organic mulch, such as straw or compost, around the base of your cauliflower plants. Mulch helps retain soil moisture, regulate temperature, and reduce weed competition.
6. Adjust for Weather Conditions:
Be mindful of weather conditions. During hot and dry periods, you may need to water more frequently. Conversely, during periods of heavy rainfall, reduce watering to avoid waterlogged soil.
7. Avoid Overhead Watering:
Whenever possible, water at the base of the plants rather than overhead. Overhead watering can lead to fungal diseases and wash away soil amendments.
8. Drought Tolerance:
Once cauliflower plants establish a strong root system, they become somewhat drought-tolerant. Adjust your watering schedule accordingly, reducing frequency as the plants mature.
By following these organic gardening tips and methods, you can provide your cauliflower plants with the appropriate moisture levels they need to thrive and produce healthy heads.
Read the full article
0 notes
Text
How to Prepare the Soil For a Vegetable Garden
Preparing the soil for a vegetable garden is a critical step to ensure healthy plant growth and a productive harvest. Here's a comprehensive guide on how to prepare the soil for your vegetable garden:
1. Choose the Right Location:
Select a sunny spot for your garden that receives at least 6-8 hours of direct sunlight daily. Most vegetables thrive in full sun.
2. Clear the Area:
Remove any grass, weeds, or debris from the chosen area. You can use a shovel, hoe, or a sod cutter to clear the ground thoroughly.
3. Test the Soil:
Conduct a soil test to determine its pH and nutrient levels. You can purchase a soil testing kit or send a sample to a local agricultural extension office. Soil tests provide valuable information for adjusting pH and fertilization.
4. Adjust Soil pH:
If your soil test indicates a pH imbalance, you may need to adjust it. Lime can be added to raise pH (for acidic soil), and sulfur can be added to lower pH (for alkaline soil). Follow the recommendations from your soil test.
5. Improve Soil Structure:
Enhance soil structure by incorporating organic matter such as compost, well-rotted manure, or composted leaves. Spread a 2-4 inch layer of organic matter over the garden area and work it into the soil to a depth of 6-12 inches. This improves drainage and aeration.
6. Address Drainage:
Ensure proper drainage by amending heavy clay soils with coarse sand or organic matter. Raised beds can also help improve drainage in poorly draining areas.
7. Fertilize Appropriately:
Based on your soil test results, choose a balanced fertilizer or organic amendments that provide essential nutrients like nitrogen (N), phosphorus (P), and potassium (K). Follow the recommended application rates for your specific vegetables.
8. Mulch the Garden Beds:
Apply a layer of organic mulch, such as straw or shredded leaves, around your vegetable plants. Mulch helps conserve moisture, suppress weeds, and maintain a more consistent soil temperature.
9. Plan Garden Layout:
Arrange your garden beds in rows or raised beds, leaving adequate space between rows for easy access and plant growth.
10. Create Pathways:
- Design pathways between garden rows to provide walking space and reduce soil compaction in planting areas.
11. Install Irrigation or Watering Systems:
- Ensure your garden is easily accessible to water. Consider installing drip irrigation or soaker hoses to provide consistent moisture to your plants.
12. Protect Against Pests:
- Implement pest prevention measures such as installing fencing, row covers, or companion planting to deter unwanted garden visitors.
13. Monitor and Maintain:
- Regularly monitor your garden for signs of pests, diseases, or nutrient deficiencies. Maintain the soil's health by adding compost and adjusting nutrient levels as needed throughout the growing season.
By following these steps, you'll create a fertile and well-prepared soil environment for your vegetable garden, setting the stage for a successful and bountiful harvest.
Read the full article
0 notes
Text
How To Grow and Harvest Brussel Sprouts
Growing and harvesting Brussels sprouts can be a rewarding experience. These miniature cabbage-like vegetables thrive in cool weather and can be a delicious addition to your garden.
Here's a step-by-step guide on how to grow and harvest Brussels sprouts:
1. Start with the Right Variety:
Choose a Brussels sprout variety that suits your climate and growing conditions. Some popular varieties include 'Long Island Improved,' 'Jade Cross,' and 'Catskill.'
2. Planting Time:
Brussels sprouts are a cool-season crop. In most regions, start seeds indoors 8-10 weeks before the last expected spring frost date. Transplant the seedlings outdoors when they are 4-6 weeks old and have a few true leaves.
3. Soil Preparation:
Prepare a well-drained garden bed with rich, fertile soil. Brussels sprouts prefer a slightly acidic to neutral pH (around 6.5). Incorporate compost or well-rotted manure to improve soil fertility.
4. Transplanting:
Space Brussels sprout plants 18-24 inches apart in rows that are about 30 inches apart. Ensure the root ball is at the same depth as it was in the container.
5. Sunlight and Watering:
Plant Brussels sprouts in a location that receives at least 6 hours of direct sunlight daily. Keep the soil consistently moist but not waterlogged. Adequate moisture is crucial for sprout development.
6. Mulching:
Apply a layer of mulch around the plants to help retain moisture, regulate soil temperature, and reduce weed competition.
7. Fertilization:
Brussels sprouts benefit from a balanced, slow-release fertilizer or regular applications of compost. Avoid excessive nitrogen, which can promote leafy growth over sprout formation.
8. Support:
As Brussels sprouts grow, they can become top-heavy. Consider staking or providing support to prevent plants from toppling over.
9. Pest and Disease Management:
Monitor plants for common pests like aphids, cabbage worms, and cabbage loopers. Use organic pest control methods if needed. Watch for signs of disease, especially in wet conditions.
10. Timing is Key:
- Brussels sprouts can take 90-100 days or more to mature. Timing is crucial for a successful harvest. Sprouts are typically ready to pick when they are 1-2 inches in diameter and firm.
11. Harvesting:
- Harvest Brussels sprouts from the bottom of the stalk upwards as they mature. Use a sharp knife to cut the sprouts off the stalk, leaving a short stem attached. Sprouts will continue to mature from the bottom up, so you can harvest over an extended period.
12. Post-Harvest Care:
- Store harvested Brussels sprouts in the refrigerator for up to a few weeks. They can also be blanched and frozen for longer storage.
13. Cold Tolerance:
- Brussels sprouts can withstand light frosts and may even taste sweeter after a frost. In some regions, they can be left in the garden and harvested well into the winter months.
By following these steps and giving your Brussels sprout plants the care they need, you can enjoy a bountiful and delicious harvest of these tasty little green gems.
Read the full article
0 notes