#exercise2
Text
I recorded the first audio in an extremely quiet environment, and the second audio played the first audio in different rooms and collected the noise from other rooms.
0 notes
Text
#youtube#couplestherapy#coupletherapy#relationshiptherapy#counselling#sextherapy#sextherapist#sexuality#humansexuality
0 notes
Text
W8 SDL
#Exercise1

#Exercise2

#Exercise3

#Exercise4

0 notes
Video
youtube
Music video exercise
3 notes
·
View notes
Photo
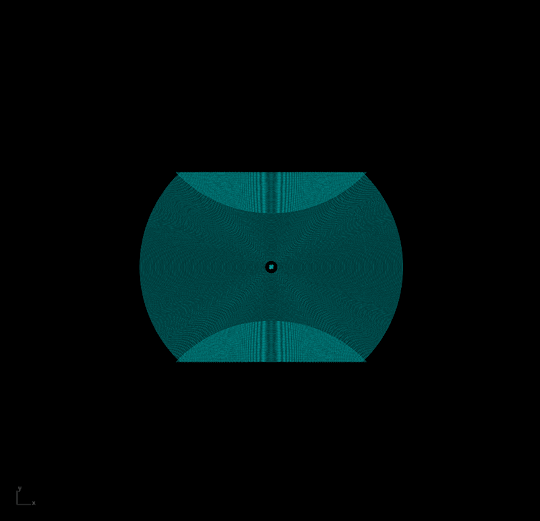
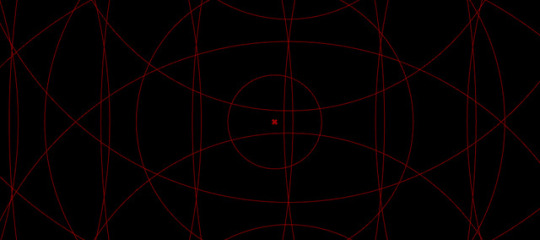
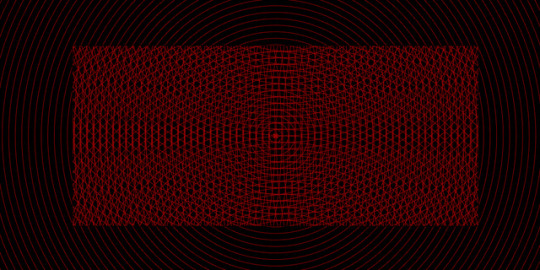
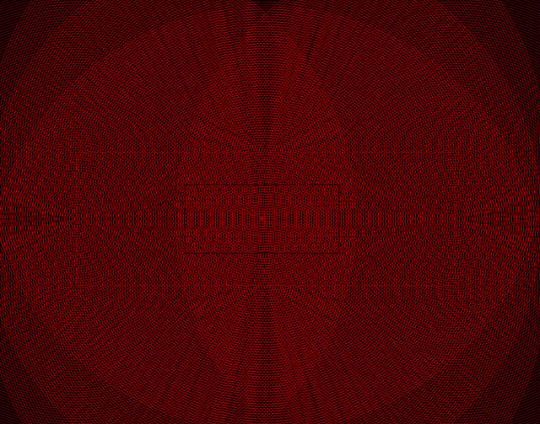
EXERCISE 2
The three gifs animate the three variables in the grasshopper code, and the stills show a gradual zooming out to emphasize the role of scale and frame in ordering that which from far away looks disordered.
The exercise encouraged us to make art with lines, to design with geometry and replicate a Sol LeWitt piece but reverse engineering it, breaking it down into circles, radii, midpoints, and frames.
1 note
·
View note
Photo
Exercise 2
Literally no better representation of Jenna Marbles than this gif. Was super interesting learning how to do it on photoshop! I’ve used tumblr gif maker and giphy before, so it was cool seeing a way that actually gives you a lot more freedom. This was a fun assignment!
19 notes
·
View notes
Photo
Sophie Wilson
Exercise 2 - High Key, Mid Key, Low Key
VAP240-01-FA18
1 note
·
View note
Photo


Exercise 2, Final 3
1 note
·
View note
Photo
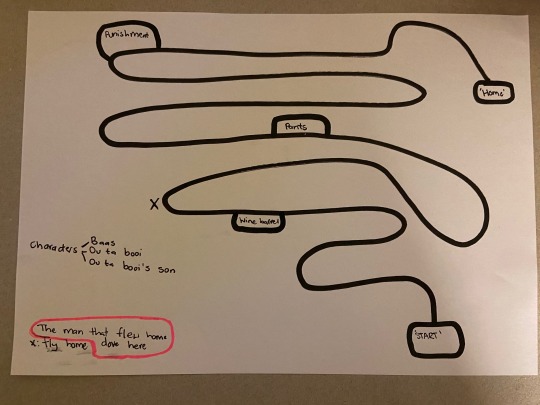
outa, pull down outa's pants
position your body over the wine barrel
outa, pull down outa’s pants
position your body over the wine barrel
position your body over the wine barrel
the Boer wants to discipline you
outa, please we want to go home
outa, we are tired
0 notes
Text
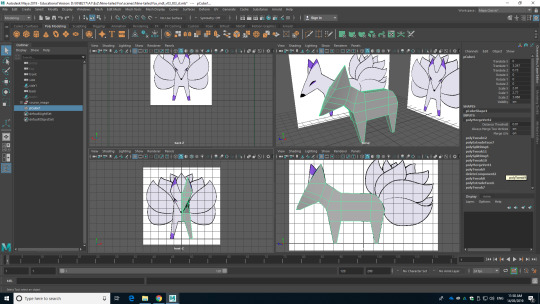
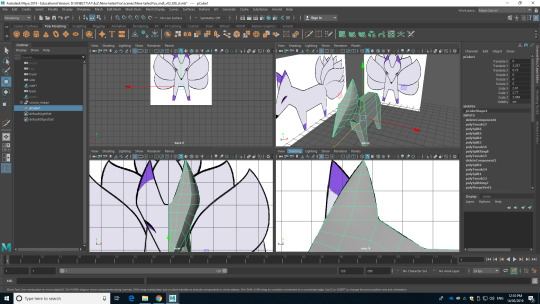
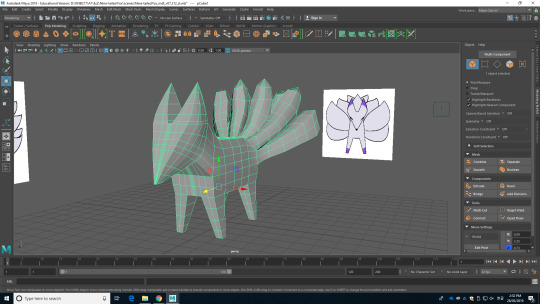
7. Modelling Nine-tailed Fox
Soojung Lee, n9667598
This week I am started to modelling my second character, which is a nine-tailed fox.
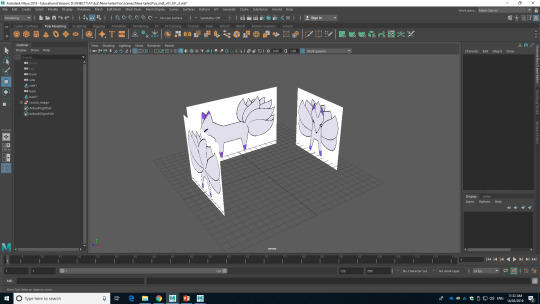
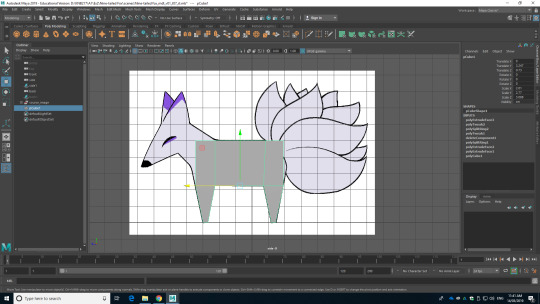
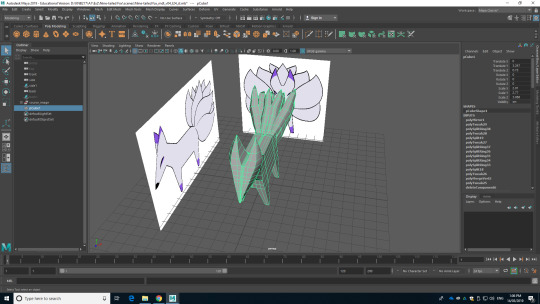
^ Figure 1: Import source images
The first thing I have to do was to import the source images to each perspective as I did in the previous modelling.
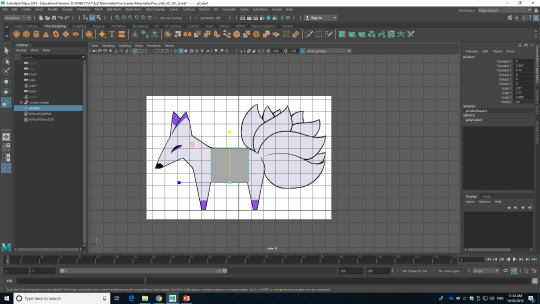
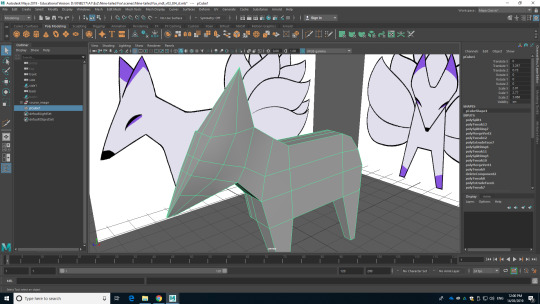
^ Figure 2: Create the body
After I import the source images, I apply the basic mesh. I decided to start with cube mesh as my character has angled body shape.
^ Figure 3: Extrude the faces
^ Figure 4: Cut the mesh into half
I extrude the cube as body length, but before I go any further process, as I have symmetrical character design, I have to cut it into half to make my work easier. Therefore, I added the edge loop to the centre of the cube mesh and delete the faces, as you can check in Figure 4.
^ Figure 5: Change the shape
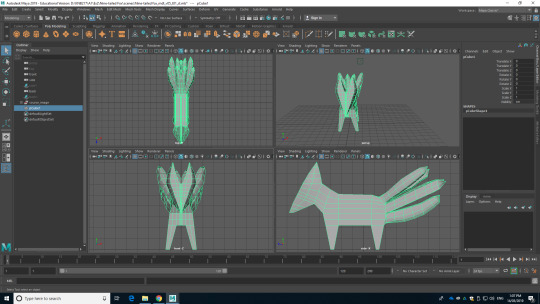
I changed to the front view and started to change the shape of the mesh as source images. I moved the vertex of the mesh to fit as source images. The reason I choose to work with vertex because this is much easy to transform the mesh compare to edges or faces.
^ Figure 6: Extrude the faces to create the legs
After I transform the mesh in front view, I moved back to the side view of the mesh to model the legs. I have to extrude the faces to model the legs and to do this, I have to add edge loops to where the legs need to be placed. As I added the edge loops, I grab the face for each place and extrude the faces. However, as you can see in Figure 6, the legs are not square. It was much close to the triangle. Therefore, I select the vertex and scale down to narrow the area.
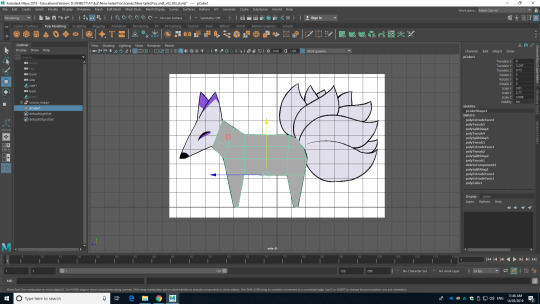
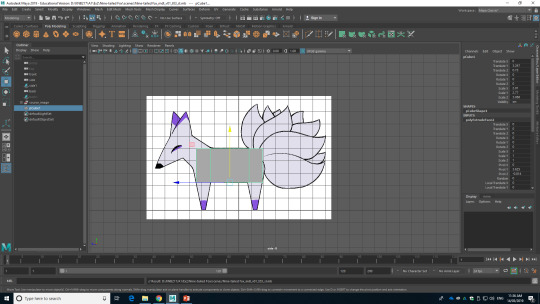
^ Figure 7: Extrude the faces to create the neck
^ Figure 8: Extrude the faces to create the head
The next step I moved on was to model the neck and head. This was done in similar steps with the legs. I added extra edge loops, grab faces and extrude the face.
^ Figure 9: Changing the shape of the mesh as source images
As I extrude the face to modelling the head, I have to check all the perspectives to check is it matching with the source images, and anything went wrong. During this step, I also change the place of the vertex to model as the source images.
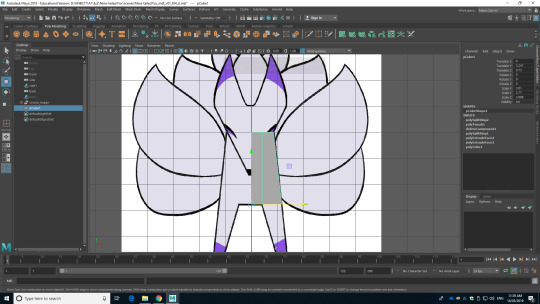
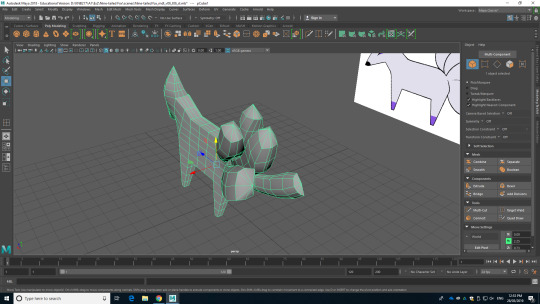
^ Figure 10: Extrude the faces to create ears
^ Figure 11: Add extra edge loops to the side of the face
^ Figure 12: Change head to be more round
I finished with modelling the head shape and I moved to model the ears. First thing I have done was to extrude the face, however, the extruded faces were square rather than triangle as showing in source images. Therefore, I merge the vertex to triangle shapes. After merging, I realised that the shape of the face does not look right. It was too angled compare to ears, so I add extra edge loops to the mesh and pull out the vertex to make the head more round and natural.
^ Figure 13: Add extra edge loops
^ Figure 14: Model the ears
I moved to more detail for the ears. The initial ears were angled, but the actual ears on the source image are more round and soft. Therefore, I add edge loops the ear model, grab the vertex, and pull it out to match with the source images. This result more rounded ears.
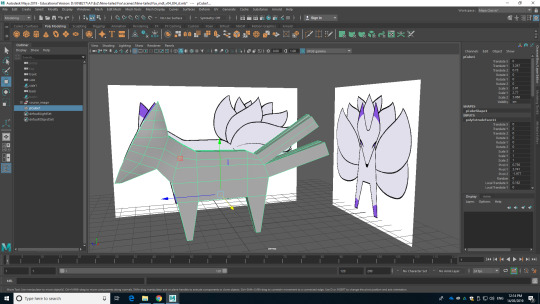
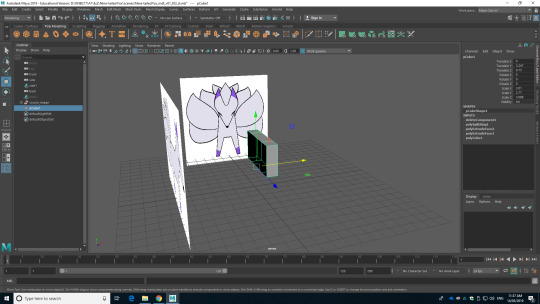
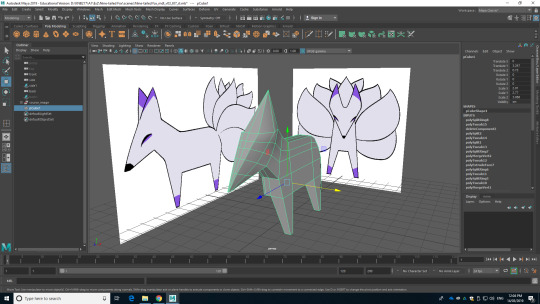
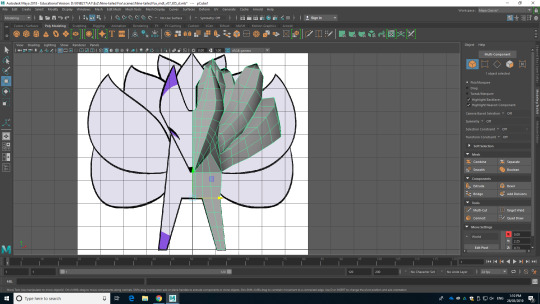
^ Figure 15: Extrude the faces for tails
^ Figure 16: Tails
I was having trouble with modelling the tails because I have to make nine of them and they are rounded rather than angled like triangle or cube. I tried various options that I can think of, but this final one is the best idea I can think of. I extruded the faces for four tails, and when I extruded the face of the last tail, I deleted the half of the face after I extrude the face. The reason I delete the half of the face was I have to mirror the mesh at the end, which means I only need to model half of the tail for the ninth tail.
Figure 15 is showing after the extruded the faces, and Figure 16 is showing the steps to modelling the tail. I merge the vertex to create the triangle mesh as I did to ear mesh, and I pull it out to create the end of the tail.
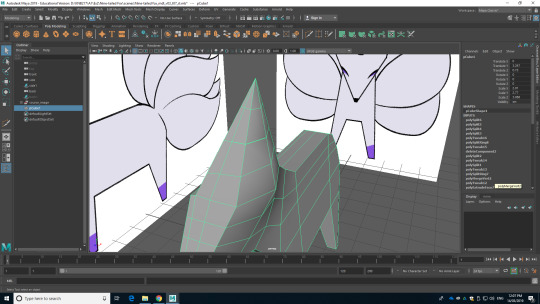
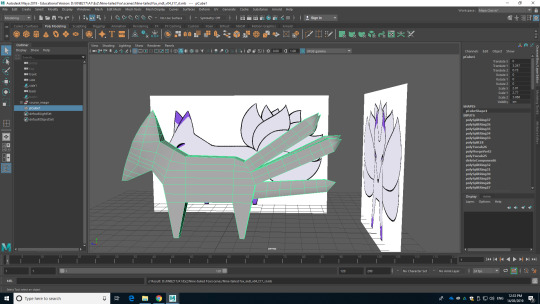
^ Figure 17: Finished all tails
Figure 17 is showing the end of the tail modelling. I added edge loops to the tails to model the round shape with square mesh. I grab the edges and scale up the gave them a volume, which will make more tail looking mesh.
^ Figure 18: Mirror
^ Figure 19: Finish modelling
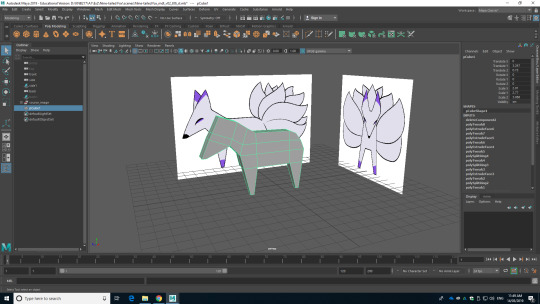
After I finished all the modelling that I need to be done for this character, I mirror the mesh to create a complete model.
This was complicated modelling, but this was also interesting and challenging. This was a great experience to research the story, set the character profile, design the character and modelling with my own designed character. However, through this process, I realised that I only like until drawing turnaround pose of the character. I also like 3D modelling, but personally, I am more comfortable and suitable for 2D drawing.
Sketchfab
https://skfb.ly/6IPMY
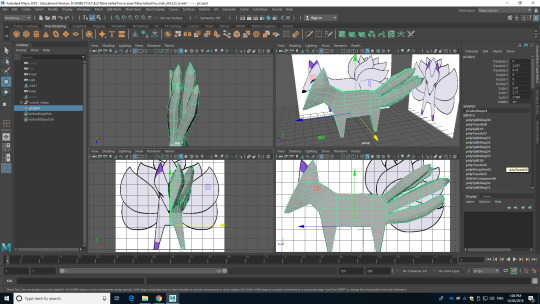
I sent the model to the tutor and received the feedback. He told me that the character is looking angle and broadening out the tail as they get close to the tips, like the mood board in the previous post. I will go to fix the tail as the feedback, but I might keep the boxy shape of the character because as I designed rounding and soft character before, I want to design the opposite character to the blue tongue lizard I have done. Therefore, I designed the fox with angles.
^ Figure 20: Fixed the tail
As the feedback I received, I started to change the shape of the tail. First thing I have done was to spread them out more for space. After I thought it now has enough space between each other, I started to angle and scale up the size of the tails by grabbing the faces and edge loops on the tails.
^ Figure 21: Angled tail and have more volume
This is the front view of the mesh after angling the tail and scale up the size of the tails’ edge loops. It now looks more natural compared to Figure 19. According to the feedback, the tails are now broadening out the tail as they get close to the tips.

^ Figure 22: Create the ear hole
After I fixed the tails, I thought the ear need more detail, such as ear hole so it will look more like the ear. Therefore, I add extra edge loops and grab the edges and pull it in. Now, I can add extra detail to the ear.
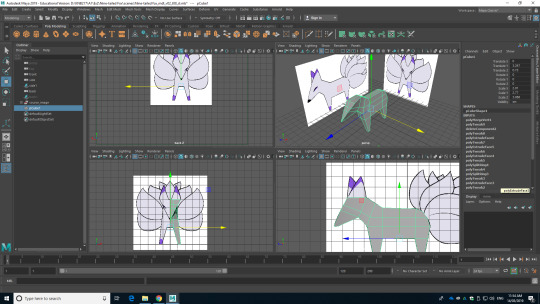
^ Figure 23: Mirror the character
As I think I finished with the modelling, I mirror the mesh to create the one mesh.
Sketchfab
https://skfb.ly/6ITG9
It was also difficult as the previous blue tongue lizard modelling even I decided to work as more boxy form. This is because of the tails. I have a lot of problem with modelling the tails with balance, the shape of the tails and place the tails. However, I can end up with final modelling with the tutor’s feedback.
As I finished with modelling the character, now it is time to move on to UV unwrapping and texturing steps.
0 notes
Photo
Chiquitico . . . . @assets4artists @assets4artists @chicagodcase #illinoisartscouncilagency #dcasegrants #readingwithoutreading #exercise2 (at MASS MoCA) https://www.instagram.com/barbaritapolster/p/BvH_3K8lTHC/?utm_source=ig_tumblr_share&igshid=zkjon5djs98p
0 notes


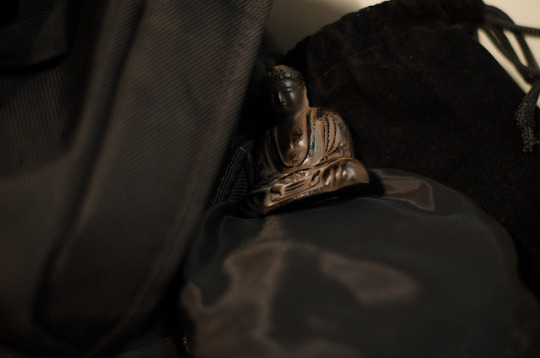
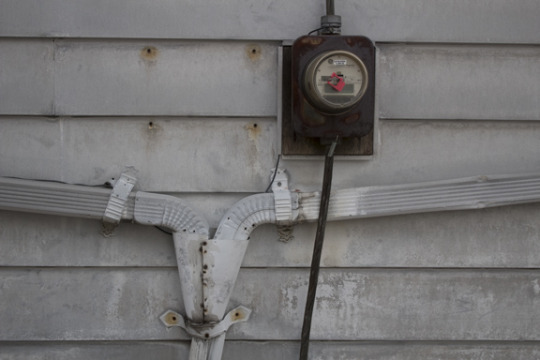
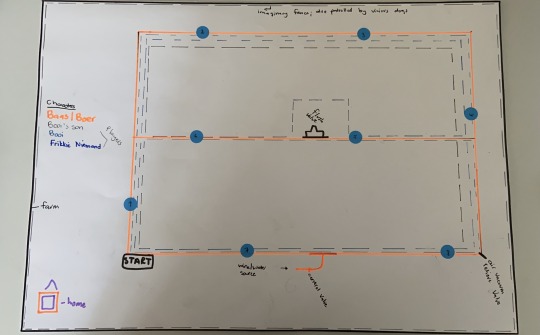
Photo
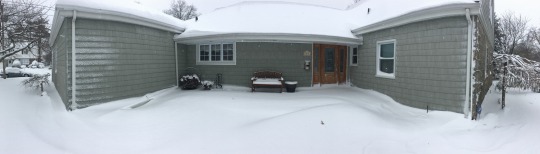
a. Noise is dampened in this exterior front yard due to snow fall
b. Snow and vinyl siding
c. 30′ x 20′
1 note
·
View note
Last Seen Blogs

neutraldead666
local asshole makes crappy art
makkoshark
The Otter Enthusiast

alnovnicuniverse
enes
storytellering
Professional Vergil Apologist