#freemotion
Text

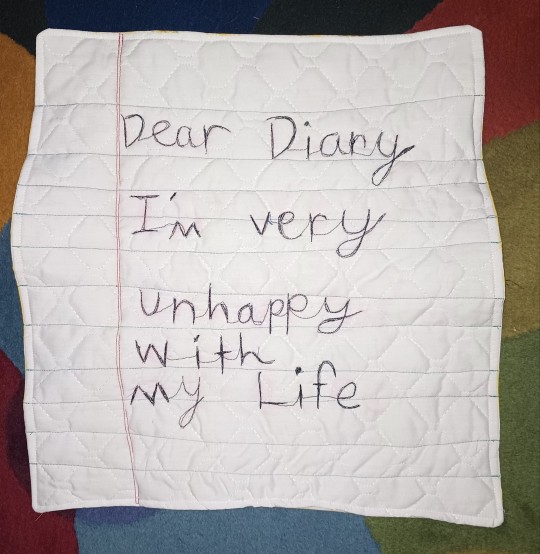

Sexuality in this here world
Instagram
#posting u cant wait to post abt this on tumblr where i read most fantasies and sex annectdotes#feels like a eeturn#myart#quilting#sewing#freemotion#please reblog pls#pls dont flop#lgbt#lgbt art
90 notes
·
View notes

Text
Free Motion initiatives by The Ranger. I tried my best to help others. During this holy Ramadan month all muslims around the world are fasting and follows all the rules of Ramadan. May Allah accept our good initiatives. From TheRanger365 I helped few people by distributing some foods and its a Ramadan Free Motion from The Ranger Channel.
0 notes
Text

Jailer (2023) | Dubbed in Hindi
Muthuvel Pandian lives a peaceful life with his family, but a sudden intrusion of unwelcome parties in the lives of his family forces him to turn to a path he had long left behind.
#movies#free movie download#free movies#free money#freemotion#tamilmovie#south movies#jailer movie#rajinikanth#indian cinema#kollywood#jailer review#tamil
0 notes
Text
Freemotion T22.9 Reflex Treadmill - A Good Buy for You?
Looking for a commercial, health-club treadmill with iFit?
You might want to consider the Freemotion T22.9 Reflex Treadmill.
Nordictrack is owned by ICON – who also owns the Freemotion name.
Freemotion is the treadmill brand that ICON sells to high-end health clubs and commercial gyms across the country.
The Freemotion T22.9 was built to stand up under 24-7 use in commercial gyms.
And now you…

View On WordPress
0 notes
Link
Let’s support humanity as much as we can do! Free Motion by The Ranger
0 notes
Photo
@freemotionbyfirozhasan #freemotion #atozofficial #atozofficial1 https://www.instagram.com/p/Ci5V6rrPUnu/?igshid=NGJjMDIxMWI=
0 notes
Video
Cybex and freemotion fitness equipments moving Baltimore Maryland . Call 240-714-3649..Furniture and fitness equipment moving services specialist in Washington DC, Maryland and Virginia by Furniture Experts corporation team .
#ashburnva#leesburgva#washingtondc#baltimore#silverspring#cybex#freemotion#pelotonmovers#cybexmovers#freemotionmovers#fitnessequipmentmovers#waldorfmd#annapolismd#annapolis#Waldorf#bethesda#rockville#potomac#gaithersburg#germantown#columbia#howardcounty#pgcounty#fairfaxcounty#alexandria#arlington#arlingtonva#tysonscorner
0 notes
Text
Problem:
#me: i dont need a freemotion and it wont fit anyways#freemotion: fits perfectly and now i think i need one
81 notes
·
View notes
Text
I love it when other springer owners ask me what size Røst uses for certain pieces of gear as a way to predict what size their springer will need. And then I have to warn them that Røst is a big boy and is maybe a poor point of reference.
#i told them his size and that it fits him well and tacked on a 'but he uses a size 6 freemotion'#cause i knew they had one for their dog#turns out their bitch uses a size 4#he a lorge lad
6 notes
·
View notes
Photo

Peter Frederiksen “Closer with every cut.” 6x8 Freemotion machine embroidery on linen 2022
1K notes
·
View notes
Text
youtube
Project Smile-Part-4: Free Motion by The Ranger is a continuous process of my channel. Project Smile is a initiatives by The Ranger. We try to help the needy people who don't have their business capital to invest on their small business. Though the amount isn't so big but we encourages not to begin on the street without trying to do work. Jalil vai don't have his capital for doing his betel leaf business. He has lost his investment for maintaining his family expenses. We provide an small investment to start his business. Pls do pray for him and his family. #FreeMotion #TheRanger365 #ProjectSmile
0 notes
Note
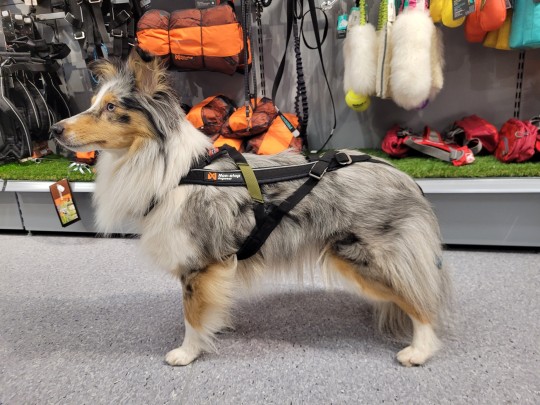
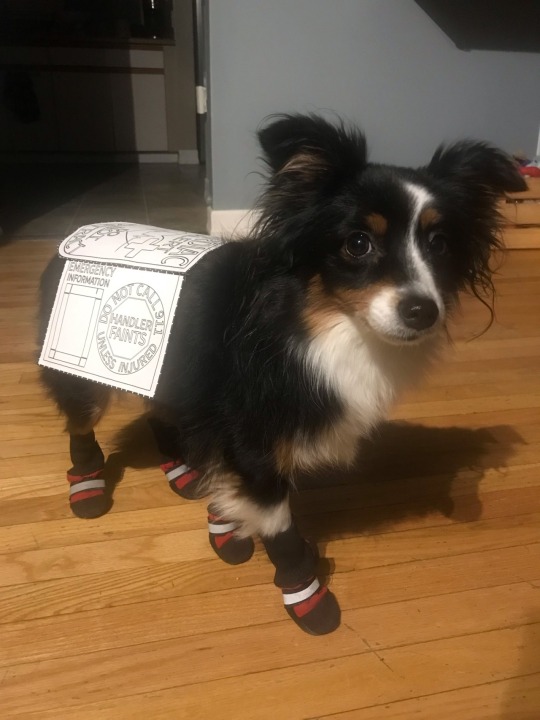
hi!! where do you get yoshi’s vests from?? or do you make them yourself? and if so, literally how? is there a particular pattern you use? they’re honestly gorgeous, and i’ve been looking for something similar for my girl
😭 literally the nicest compliment ever I made it myself!!

I was disappointed with a vest I had purchased from a maker, quickly realized that most makers don't specialize in little dogs and as a result the gear isn't legible/ there's a lot of wasted space which is a big deal when you have limited space to work with on a little dog already! So I made my own to maximize usable space instead.
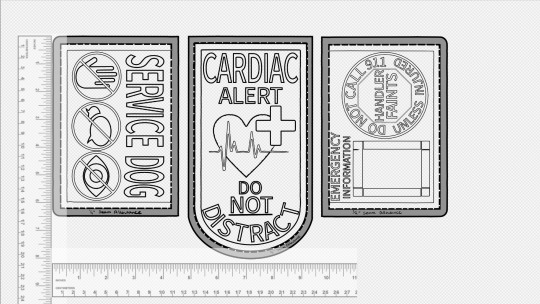
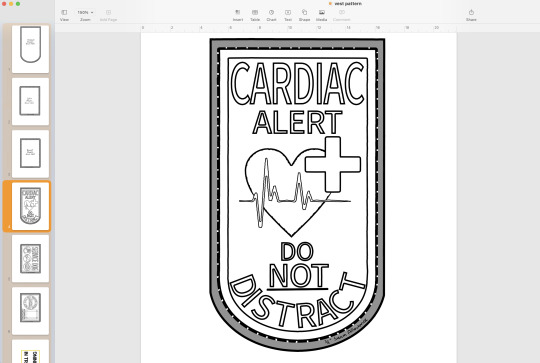
I'm sure there's patterns you could buy out there but I made mine from scratch (and it's not too complicated to figure out!). What I opted to do was measure her first, get an idea for how large the side panels and centre panel can be. I used a free art program (medibang) and dragged some rulers in there and drew things out to scale relative to the rulers. This way you have an accurate scale to work with to decide what can actually fit in the space. Print out the design (I put each panel in to a word file and printed that way) and check the size on your dog, make adjustments as needed until the paper printout sits how you'd like it to and your designs are legible! Word programs should have a ruler on the top of the page which allow you to see the exact measurement of each of your panels so it's easy to align them/ change the size as needed accurately.
There's lots of ways to make a vest, with or without webbing, multiple panels, one piece of fabric. Take a look at vests online and see what aspects you like and what you don't! I opted for webbing to stiffen the edges to prevent wear but it's not necessary! You can just stick two pieces of fabric together and call it done!
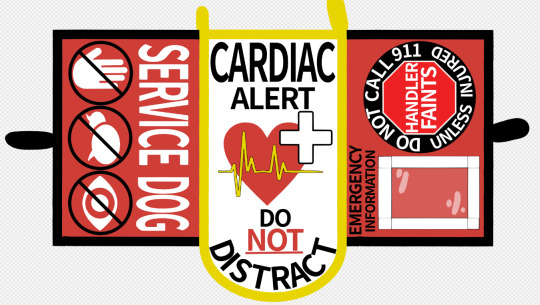
I colourized it on the computer first so I could ensure that the scheme would work and that all the fonts would be legible at their smaller size/ contrast well.
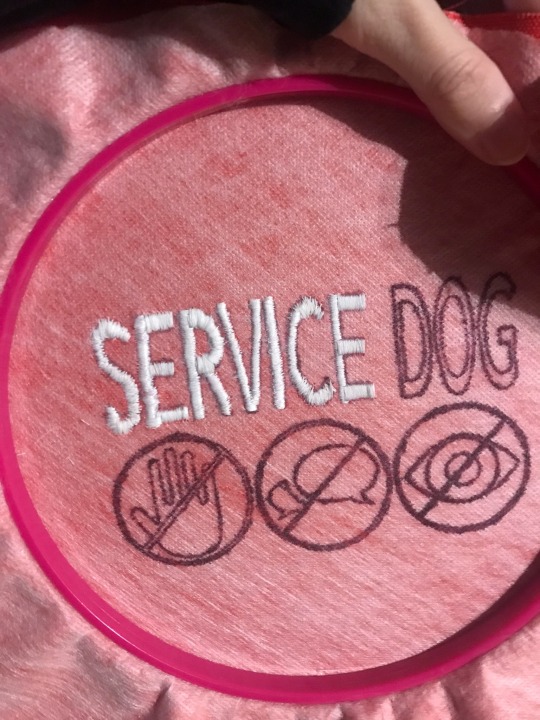
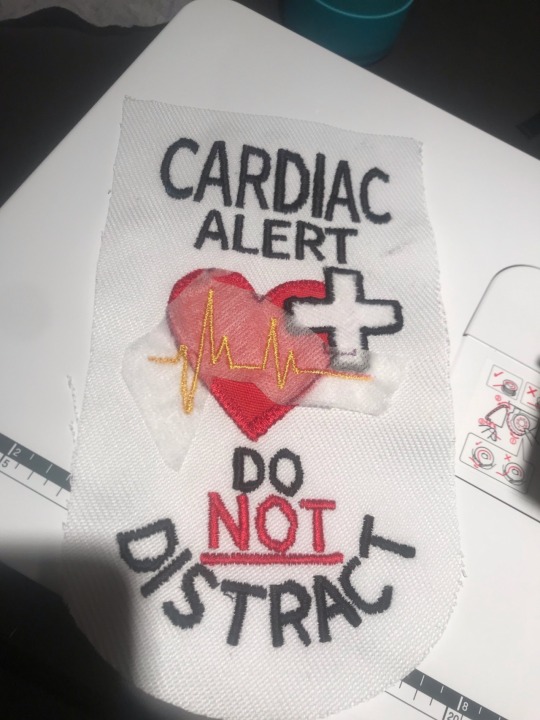
Embroidery will be the first thing you do once you're set on your design and it takes the most time. You CAN do it by hand! but it takes a long time and if you use a thick fabric it'll hurt! If you have a standard sewing machine you can embroider with that as well (which is what I did!). I literally bought my first personal sewing machine for this project, I used machines in middle school and to make a couple plushies like 7 years ago but that's it for my experience. You can absolutely do it if you're limited on experience! It's often referred to as 'free motion embroidery' which there's tutorials online for!
The basics of embroidery are to print out your design, you can sew right over the paper and follow it like tracing but paper will be stuck under the embroidery so if the set gets wet soggy paper will happen eventually! The better alternative is to get 'soluble embroidery stabilizer' which is a see through material that washes away with warm water! You can trace your design on to it with a pen, pin the stabilizer to your fabric, then simply trace the design with your thread!
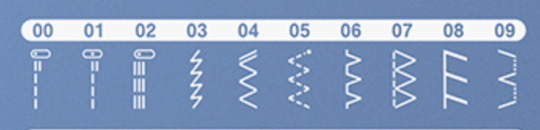
I used a zigzag stitch (#4 on my machine), think of it like drawing with a thick marker, you want the stitch to be wide enough to fill in the whole shape if possible. your machine will have two settings you can change, the width of your zig zag (thickness of your marker) and the amount of space between each stitch (opacity), so you want the zig zag to be as wide as the shape and the space between stitches to be as small as your machine will go without getting tangled ( I sit at 0.2)
Freemotion embroidery tutorials will tell you to drop the feed dogs down, don't do that. You'll break a lot of needles. Letters are just straight lines so you can leave them up, let the machine help guide the straight line, it'll be a LOT easier for you! Curvy letters like C and S will be hard the first few times but it gets easier, it's helpful to take it as a bunch of short straight lines instead of trying to turn with it. Fills in the shape better.
You'll end up tracing each letter 2-3 times at minimum to ensure it's nicely filled in and the fabric underneath doesn't show through. Don't forget to sew back over your ends to keep them locked in place otherwise it'll just unravel!
Once that's done the rest is EASY in comparison! 😂
When you're happy with your embroidery you can cut out each of your panels, be sure to leave a minimum 1/4 inch gap around the edge for the seam, you can leave more space if you want! if you think you'll be a bit wavy/ struggle to keep the needle near the edge then more seam allowance is better!
Attach the panels together (lay them together with the 'nice sides' together and sew along the edge)
You'll want a second fabric piece to be your underside, this makes the vest more sturdy, protects the embroidery, and makes a soft smooth surface for your dog! Once the top panels are all attached to each other you can cut out one big piece for the underside, a mirror copy of the shape of your top panels all sewn together!
The "best looking" way to leave a seam I would say is by folding the edges in and sewing around the outside, keeps the edges crisp and compressed. I would do it this way if I was leaving the edges of the vest panels exposed.

If you're going to put webbing along the edges anyways then you can do it a quicker way, just lay the two pieces (your top panels and your underside) together with the nice sides facing in and just sew quickly around the edge. Be sure to leave a space unsewn so you can flip it inside out again. This will be easier to do but leaves the piece looking a bit more bubbly and the corners will be a bit puffy/ not as crisp
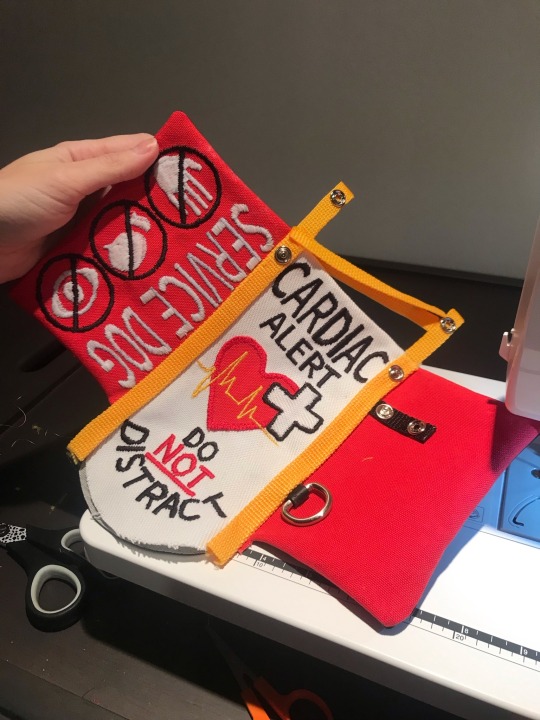
You can opt to put your buckles/ attachment points in now while you're sewing the top and bottom together or you can wait and attach it with the webbing. If you do it now you'll have to do the webbing as two separate pieces, if you do it later you can fold the webbing over the edge instead. I found two separate pieces (top and underside) to be cleaner and easier to work with on this tiny scale
From there you can seal up the little gap you left to flip it rightside out by hand stitching a 'invisible stitch' and attach your webbing to the edges. I learned the hard way that you should do the side panels first (the outer edges) and the centre panel last. You want the edge webbing to go underneath your centre panel's webbing so that it's a smooth transition when it flops down and bends at that joint! Otherwise the fabric ends up visible underneath when it bends there. So side panels first, centre panel last.
And that's it I think. it's a lot of trial and error as you gradually realize what order to do things in, what works and what doesn't.
If you do try it keep in mind that it's just thread! if you make a mistake it CAN be undone! cutting the threads is tiresome and redoing stuff sucks but it's nice to know that mistakes aren't permanent. If you're really happy with a panel and screw up an icon at the end it can be saved and you can try again without having to redo the whole thing!
Last note is that large fonts are easier than small ones. tiny font showcases every waver in your pathing, making shaky wonky letters: exhibit A my first try vs a few days later

So to avoid frustration I would stick to larger fonts at first. To go along with that try to allow the machine to go quickly, if you move really slow on a straight line it'll show every time you moved and turned it, letting it move fast on straights keeps them smoother and straighter!
For small fonts to limit frustration I would design your vest so they can be detached and you can work on them without having to change the whole panel while you work on your skill. You can make patches!
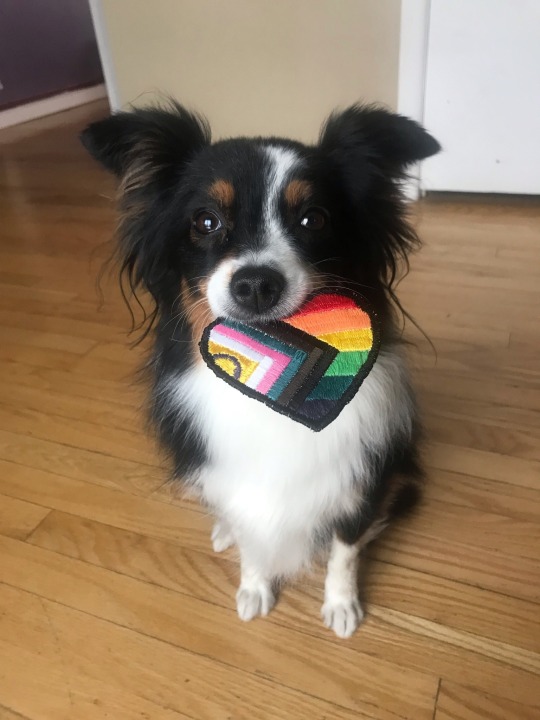
Same scrap fabric, do your design, and then cut it out right close to the shape and just do that exact same zig zag stitch around the edge. it'll be lined up so that the left of the zig hits the fabric (at whatever thickness you want your outline to be) and the right side of the zag is not hitting the fabric at all. this will cause the thread to wrap around the edge and give a clean look! the more passes you do the cleaner it'll be (above is just two or three quick passes, if I tried harder it could be way smoother). Then you have a patch you can tack on with thread, stick heat n bond on the back for iron-on, or secure velcro or make a little hanger. dealers choice really on that one.
Anyways this is a bit of a mess of information but I hope it gives you somewhere to start. If you want me to demo anything let me know I'm more than happy to help!

oh and feel free to take my pattern up there if you need somewhere to start! I just ask that you change the design up a bit so it's not a carbon copy
13 notes
·
View notes
Link
We at JOGGERS PARK are distributing some of the world’s best fitness equipment, that are sold and serviced in more than hundred countries. With a focus on providing premium products, they offer a range of fitness equipment that includes treadmills, exercise bikes, weights, and more. Choose Joggerspark for top-of-the-line gym equipment that will help you take your workout to the next level.
Contact us :- +919711188444
#24 fitness#athletic training equipment for commercial use#body fitness#cardio equipment#cardio equipment for commercial use#commercial exercise equipment#commercial fitness solutions#commercial gym equipment#commercial treadmill#crossfit equipment for commercial use#exercise machines#exercise machines for fitness centers#fitness accessories for commercial use#fitness center supplies#fitness equipment#fitness equipment leasing#fitness factory#fitness machines for gyms#fitness shop#freemotion#functional training equipment for gyms#group fitness equipment#gym equipment#gym equipment dealer#gym equipment for sale#gym equipment rental#gym equipment stores#gym flooring#gym setup#gym storage solutions
0 notes
Text


Peter Fredericksen, Not taking any chances, 2022, Freemotion machine embroidery on linen, 8” x 6”
6 notes
·
View notes
Link
⭐️⭐️⭐️⭐️⭐️ 5 star review: great experience! From start to finish, great experience! I was able to ask questions before purchasing and was able to submit an offer, which was later countered and accepted! I’m so glad we were able to come to an agreement and complete purchase! The package was shipped very quickly, next day when I expected at least the two days they mentioned on their page. Arrived in a few days, 3 days I think and very well packaged to protect item. Very trusted and reliable business to me, everything they said as far as the description of item was exact as well. I would love to do business in the future!
0 notes
Last Seen Blogs

gnomettesims2
Previously Gnomettesims
franesii-portfolio
Franesii
Francisca Aparicio

bpd-shuichi-togo
ASTROLOGUS MAGI BAYBEY

my-flight-of-fantasy
MyFlightOfFantasyBlog

yoritoshi
The Twosday Tumblr