#michirucosplay
Photo
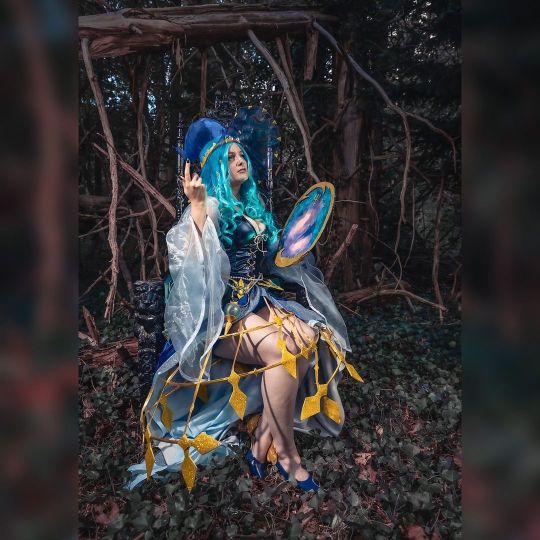
I put a spell on you! And now you’re mine❤️ I am going to King Richards faire today!!! If you are going let me know! Maybe I’ll see you there :) I have put together a steam punk pirate ensemble and I’m super excited for it. I will even have a little octopus on my shoulder ❤️ __________________________________ 📸 photographer is @eddiegphoto.cosplay ❤️ Cosplay based on the sailor moon neptune witch design by @kuttysark_art Wig is from @epiccosplaywigs __________________________________ Hashtags: #sailormoon #sailormooncosplay #kuttysarkart #kuttysark #kuttysarkartcosplay #sailormoonwitches #sailormoonwitch #sailormoonwitchcosplay #witchcosplay #sailormoonphotoshoot #sailorneptune #sailorneptunecosplay #michiru #michirukaioh #michirucosplay #michirukaiohcosplay #sailormoonhalloweenwitch #sailormoonhalloween #sailormoonhalloweencosplay #witchhat #witch #witchcostume #seasonofthewitch #iputaspellonyou #witchmas https://www.instagram.com/p/CjvLFrKrtxS/?igshid=NGJjMDIxMWI=
#sailormoon#sailormooncosplay#kuttysarkart#kuttysark#kuttysarkartcosplay#sailormoonwitches#sailormoonwitch#sailormoonwitchcosplay#witchcosplay#sailormoonphotoshoot#sailorneptune#sailorneptunecosplay#michiru#michirukaioh#michirucosplay#michirukaiohcosplay#sailormoonhalloweenwitch#sailormoonhalloween#sailormoonhalloweencosplay#witchhat#witch#witchcostume#seasonofthewitch#iputaspellonyou#witchmas
0 notes
Text

Kinktober day 27: kisses
Michiru by me, Haruka by my @rachasakawa
Photo by @mayucosart
Full set: >>>concretebeach.gumroad.com/<<<
#mycosplay#uranep#harumichi#harukacosplay#haruka tennou#haruka cosplay#michirucosplay#michiru cosplay#michiru#sailor neptune cosplay#sailor moon cosplay#sailormoon#sailor#sailor neptune#sailor moon#cosplay#cosplayer
210 notes
·
View notes
Photo
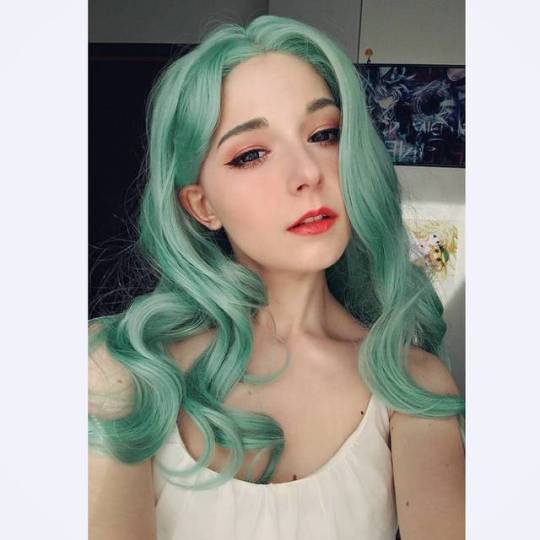
I think #michiru is one of my favorite characters now. You know, I was ashamed to like “girly things” (ex. Color pink, skirts, dresses, etc.) growing up, because everyone made me think that if I liked them, I couldn’t be strong. She has shown me that I can be as girly as I want, and still kick ass. She is... beautiful, she is grace, and she can and will kick you in the face. Being strong has nothing to do with the things one enjoys, so never be ashamed of the things you love 💕 (and that is an advice for EVERYONE). Stand proud 💕 . . . #cosplay #sailormoon #michirukaioh #michirukaiou #michirukaio #sailorneptune #sailorneptunecosplay #sailorneptuneedit #michirucosplay #michirukaiohcosplay #sailormooncosplay #mexicancosplayer #cosplaygirl #cosplayfun #kawaiicosplay #cosplayerofinstagram #cosplayergirl #positivevibes #positivenergy #positivethinking https://www.instagram.com/p/Bz0xzJoDFFa/?igshid=15xk797dazxrt
#michiru#cosplay#sailormoon#michirukaioh#michirukaiou#michirukaio#sailorneptune#sailorneptunecosplay#sailorneptuneedit#michirucosplay#michirukaiohcosplay#sailormooncosplay#mexicancosplayer#cosplaygirl#cosplayfun#kawaiicosplay#cosplayerofinstagram#cosplayergirl#positivevibes#positivenergy#positivethinking
1 note
·
View note
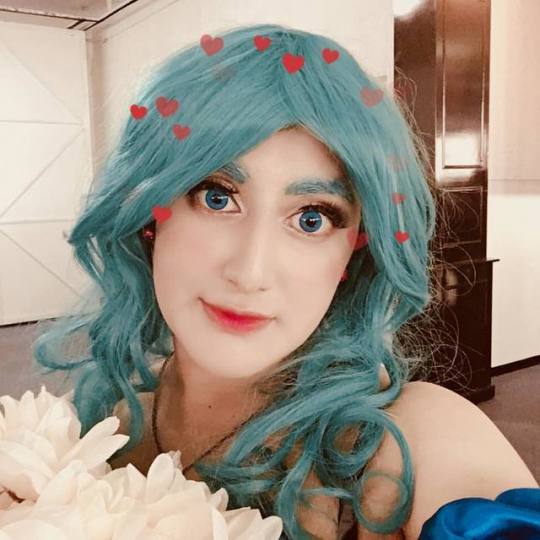
Photo
Thanks for all the birthday wishes! 💚 . . . #michirukaioh #michirucosplay #michirukaiohcosplay #海王みちる #sailorneptune #sailorneptunecosplay #sailorneptunecosplayer #sailormoon #cosplay #セーラーネプチューン #セーラームーン #magicalgirl https://www.instagram.com/p/BusrxAdj_Z0/?utm_source=ig_tumblr_share&igshid=fv3ccrgv4bz8
#michirukaioh#michirucosplay#michirukaiohcosplay#海王みちる#sailorneptune#sailorneptunecosplay#sailorneptunecosplayer#sailormoon#cosplay#セーラーネプチューン#セーラームーン#magicalgirl
6 notes
·
View notes
Photo
Sailor Meme👀💦 - - From Instagram
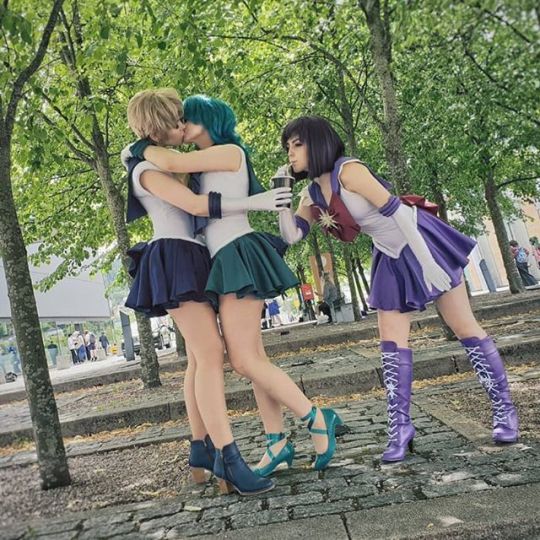
#cosplay#sailormoon#sailormooncosplay#sailormooncrystal#sailoruranus#sailoruranuscosplay#sailorneptune#sailorneptunecosplay#sailorsaturn#sailorsaturncosplay#hotarutomoe#hotarutomoecosplay#sailoruranusxsailorneptune#harukaxmichiru#haruka#harukatenoh#harukacosplay#harukatenohcosplay#michiru#michirucosplay#michirukaiohcosplay#michirukaioh#desucon#anime#yuri#ship#sailorfuku
3 notes
·
View notes
Text
Michiru School Uniform Cosplay Tutorial Part 2: The Blouse and Wig
Welcome back everyone! In part 1, I showed you how I put together the skirt and bow for Michiru’s school uniform. Click below to see how I completed the look with the blouse and wig!
So as you can see from the new cover photo, I decided to go with the short sleeve look at the last minute! Since the con is in September in AZ, short sleeves are definitely preferable. I personally like this look better as well.
The pattern instructions say to sew only the darts and shoulders of the shirt, then add the collar and facing before sewing up the sides. In my case, the green blouse stripe was added in after one side seam was finished. This method actually worked out pretty well as far as being able to move the blouse around in the machine. A couple of notes, though: the neck hole on this pattern is very very narrow. I actually cut out almost an inch wide strip in addition to the seam allowance, but this might not be necessary for everyone. The pattern also directs you to sew the collar and facing on at the same time. I did them one at a time to ensure everything was fitting properly. Getting in and out of this blouse is...a challenge to say the least, haha. It is capable of going on and off over your head without a zipper or a button down front, but I would definitely recommend wiping off your makeup before taking it off.
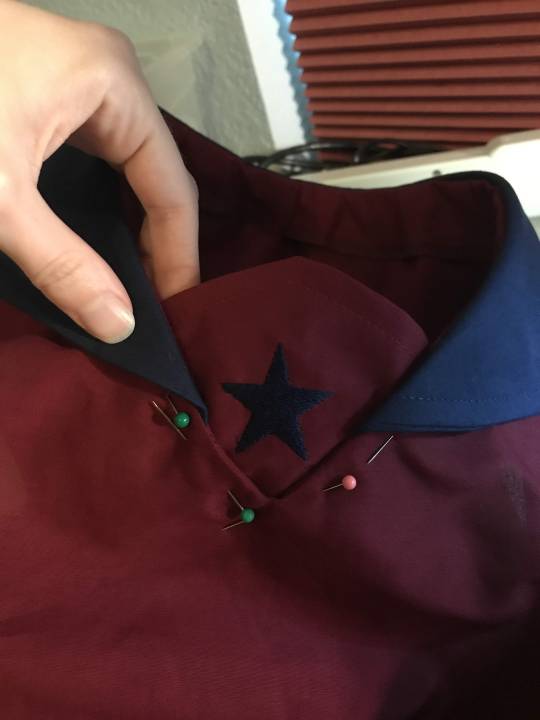
Here is the neck facing pinned on over the collar, which is already sewn in:
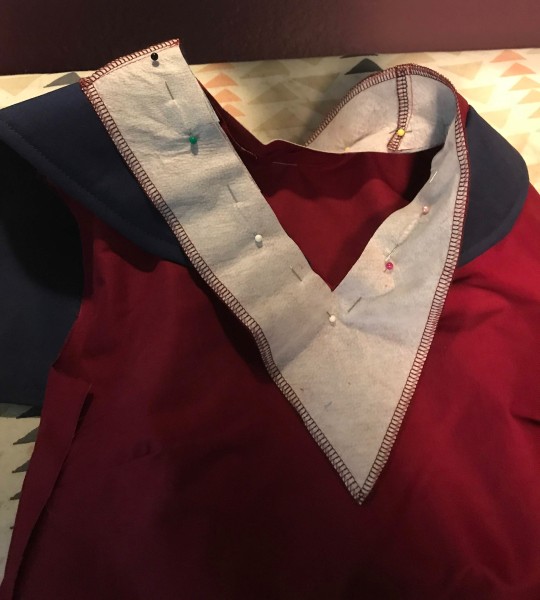
You can see I added top stitching to the collar edges as well.
Once the neck facing is sewn on, turn it in and press the new edges. I also tacked the facing down at strategic points on the shirt, mostly under the collar, to keep it from popping up.
For the inset front piece with the star, I digitized a star to be embroidered on. You could easily paint this though.
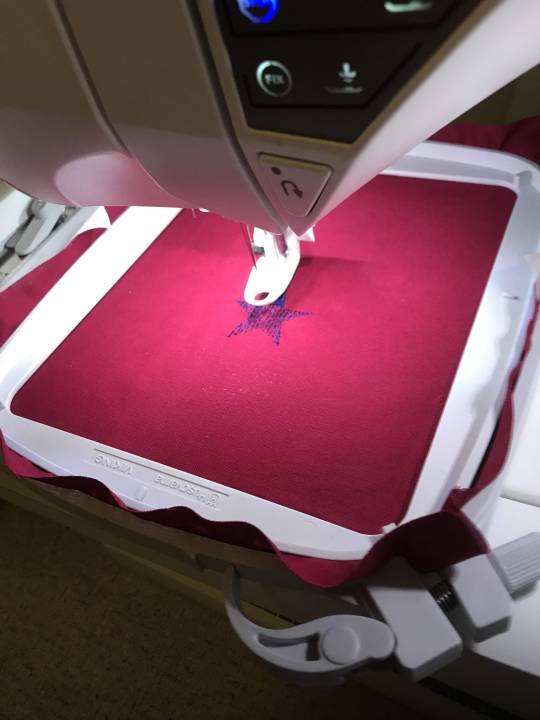
I embroidered the star before cutting out the pattern piece around it. Sew the top edges of the inset together and flip them right-side out to press.
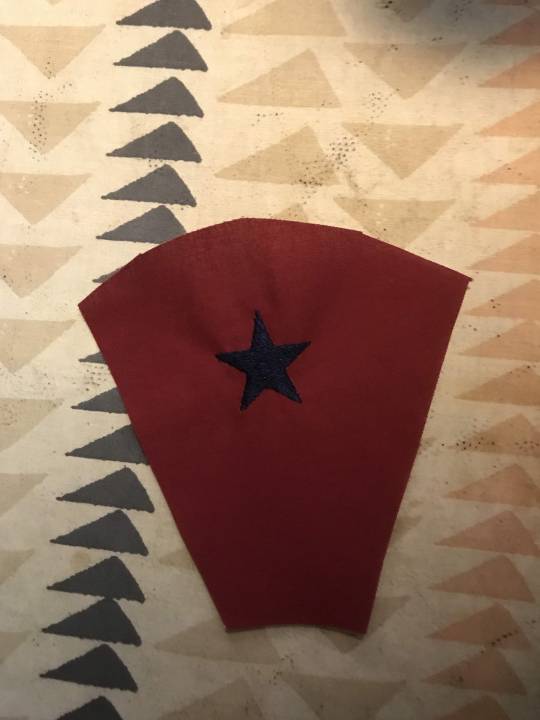
Finish the edges before pinning this piece onto the blouse to be sewn. I also checked the positioning on this piece while wearing the blouse, and moved it around until I was pleased with where it sat.
Before adding the green stripe along the bottom, sew up one side of the blouse. Also take into account how much space the green stripe takes up at the bottom; this same amount of red fabric should be cut away as it is being replaced. This is why I have the green stripe pinned so high on the blouse in the image below:

Definitely make sure at this point that the two blue stripes match up on the other side before you commit to sewing it in! However, if you are pleased with the placement, press the seam where the green and red pieces meet, and finish up the other side.

For the sleeves, I used the short puff sleeve and cuff pieces that came with the same pattern. I like to put my gathers in first, and then even them out until they meet the length of the cuff before attaching the two and sewing up the side sleeve seams.

Add the sleeves to the shirt, and it’s time to finish up with some details!

I hand-sewed the bow to the front of the shirt, and decided to make my own cover buttons so that they would match the shirt fabric. Cover button kits are readily available at most craft stores, and they are super fun and easy to make!

Sew those on, and the blouse is done! :)

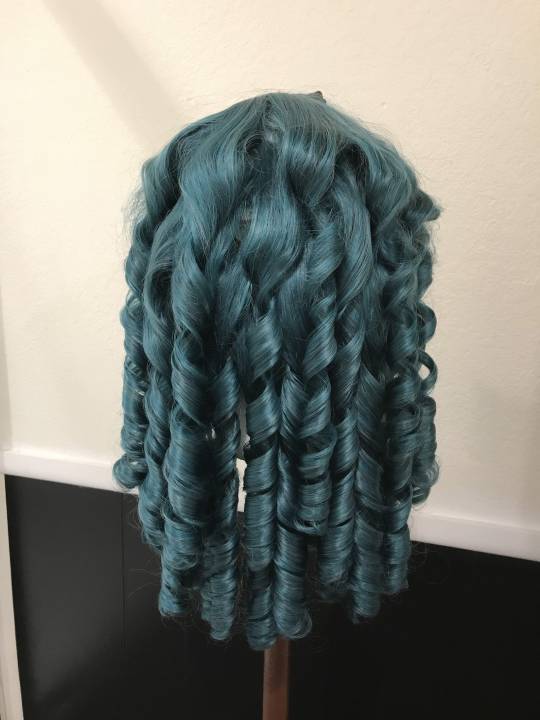
The wig I have for Michiru is an Arda Wig’s “Claudia” in Mako Green. Here is what it looks like out of the bag. I had only worn it once before, as is.
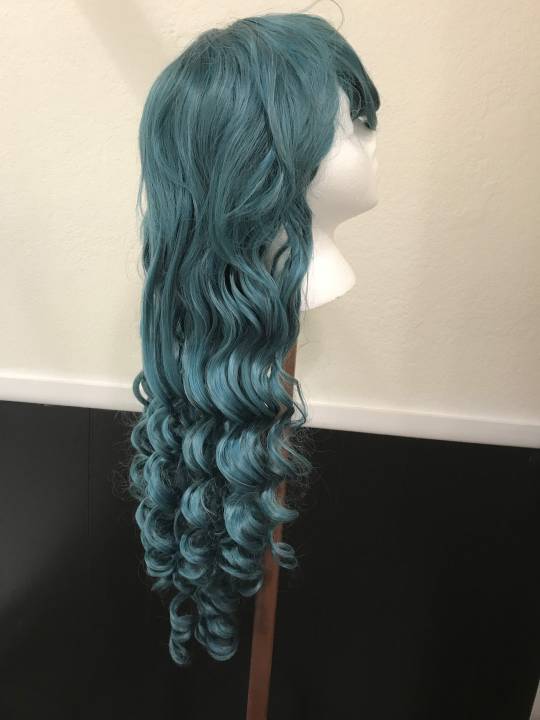
While the ringlets are beautiful, they don’t go as high up as I would like. The wig is also a touch long for Neptune in my opinion. I steamed and brushed the curls out, trimmed off about five inches, and recurled them in about 3 inch wide segments.
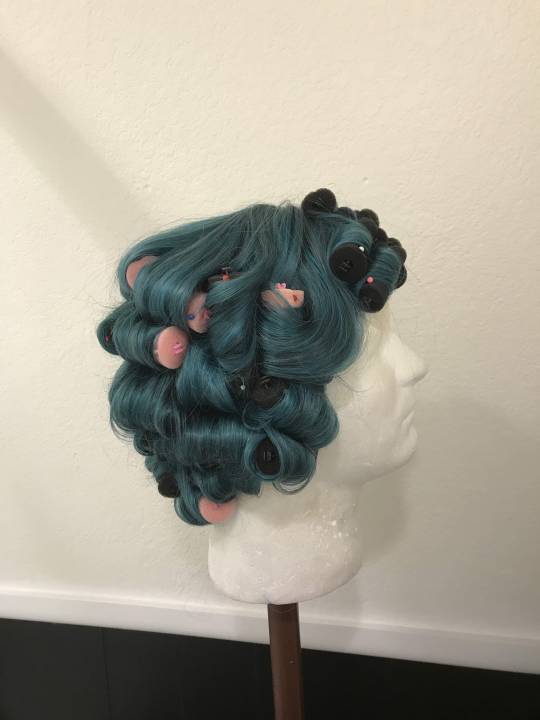
I also heavily curled the bangs, using about 9 rollers on them alone. I’m not sure I would curl them as heavily next time, as I had mixed results with the bangs.
After steaming the wig again and hitting it with the hair drier, this is what the curls looked like when they had cooled and been released:
To get the curls to go from Shirley Temple to ocean waves, I brushed through them with a wide paddle brush and reshaped them with my fingers (this helps eliminate any frizz that might occur as well).
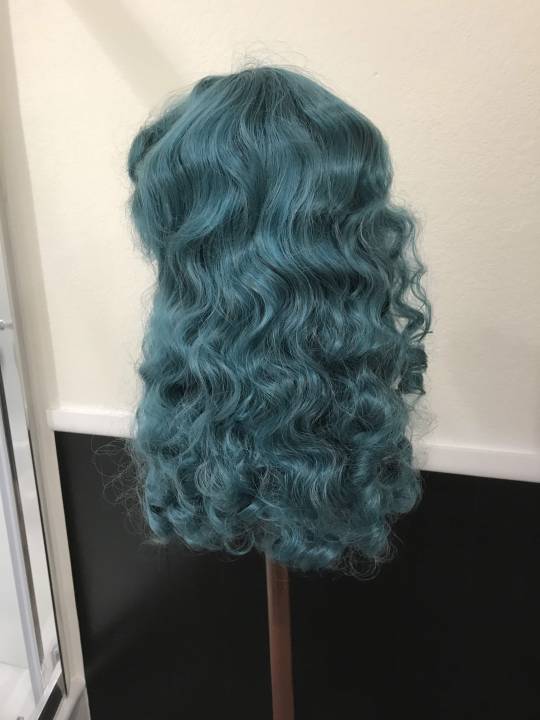
For the bangs, I back-combed them for some volume and shaped them with the hair dryer and my hands. They came out more asymmetrical than I would have liked, but seeing as it was the night before the con, they would have to do.
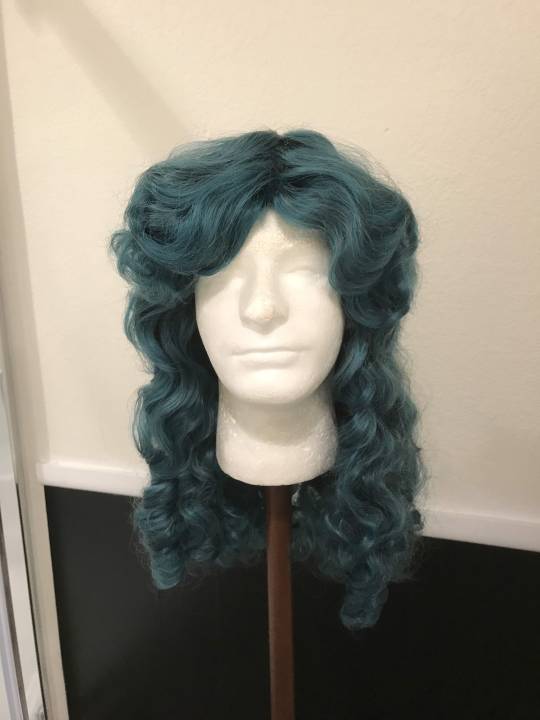
Add a few final Michiru touches: a navy hairband, her transformation wand, some cute frilly socks, her violin (if you have one!) and be the magical girl that you are!!! :D


I know I felt truly magical being Michiru for a day. Thank you so much for reading, I hope this tutorial helps you in your own cosplay pursuits! Neptune Planet Power, Make-up! ;)
#cosplay#cosplayer#cosplaytutorial#cosplayhelp#cosplaytips#sailormoon#sailorscout#sailorneptune#sailorneptunecosplay#michiru#michirucosplay#magicalgirl#ardawigs#cosplaylife#cosplayersofinstagram#womenofcosplay#saboten#sabotencon#sabotencon2018
7 notes
·
View notes
Photo
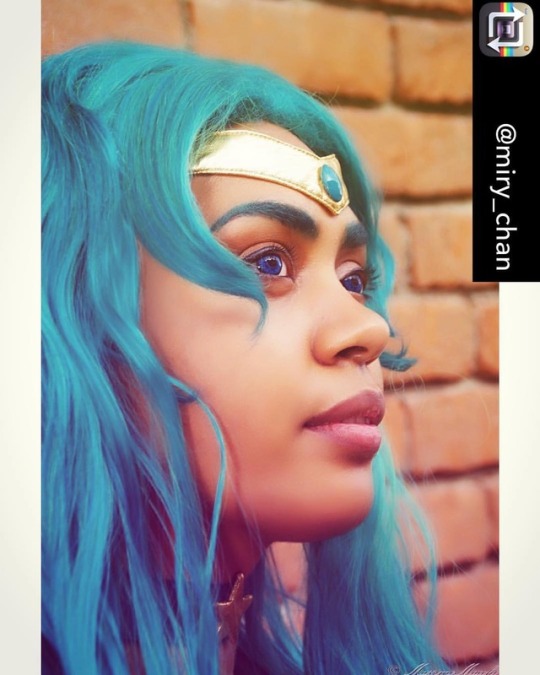
Repost from @miry_chan using @RepostRegramApp - 💖 Ph. @massimo_fotografo_per_caso Edit me. #cosplay#cosplayer#cosplaygirl#sailor#moon#sailormooncosplay#sailorneptune#neptune#sailorneptunecosplay#instamood#picoftheday#michiru#michirucosplay#outersenshi#outersenshicosplay#senshi#sailorsenshi#black#blackgirl#blackcosplayer#blackcosplayersrock#portrait#portraiture#portraitphotography
#sailorneptunecosplay#michirucosplay#cosplaygirl#picoftheday#blackcosplayersrock#sailormooncosplay#outersenshi#portraitphotography#cosplay#michiru#cosplayer#neptune#instamood#portraiture#blackcosplayer#sailorneptune#black#blackgirl#portrait#moon#sailor#sailorsenshi#outersenshicosplay#senshi
18 notes
·
View notes
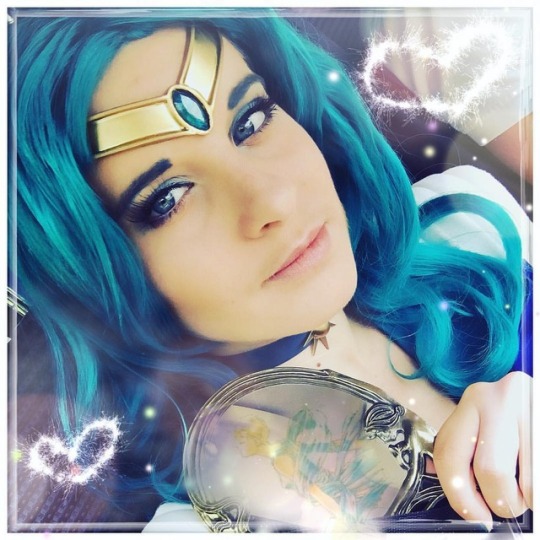
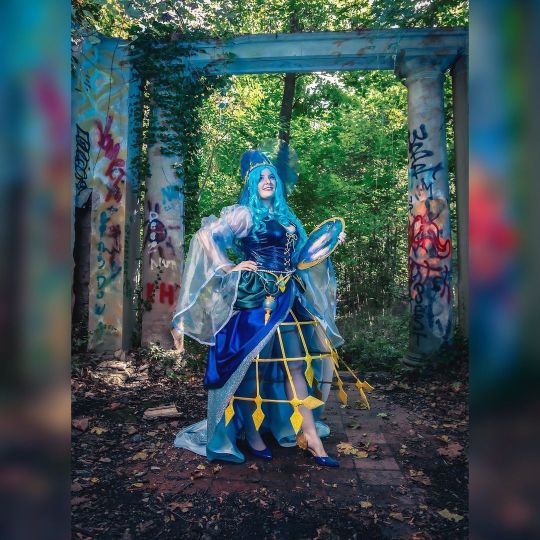
Photo
I'm super excited to show you this lovely wig from @evahairofficial !!!! Without knowing I got the perfect wig for #sailorneptune I couldn't resist in doing a costest 😂 the wig is sooooo cute ❤ I love it 😍😍😍 #evahair #evahairofficial #wig #sailormooncosplay #michirukaiou #michirucosplay #cosplay #cosplayer #sailormoon
#cosplayer#sailormooncosplay#evahairofficial#michirukaiou#cosplay#sailormoon#sailorneptune#wig#evahair#michirucosplay
12 notes
·
View notes
Photo
It is the season of the witch 🧙♀️🥰❤️ I was going through my album and realized I still had photos I never shared so here we go! This is one of my favorite cosplays I have made, the hat is still my favorite part since it was such an interesting challenge because it is see through. If you want to make your own check out my reels where I posted a tutorial for it ❤️ __________________________________ 📸 photographer is @eddiegphoto.cosplay ❤️ Cosplay based on the sailor moon neptune witch design by @kuttysark_art Wig is from @epiccosplaywigs __________________________________ Hashtags: #sailormoon #sailormooncosplay #kuttysarkart #kuttysark #kuttysarkartcosplay #sailormoonwitches #sailormoonwitch #sailormoonwitchcosplay #witchcosplay #sailormoonphotoshoot #sailorneptune #sailorneptunecosplay #michiru #michirukaioh #michirucosplay #michirukaiohcosplay #sailormoonhalloweenwitch #sailormoonhalloween #sailormoonhalloweencosplay #witchhat #witch #witchcostume #seasonofthewitch #witchmas https://www.instagram.com/p/Cjp56K-umLk/?igshid=NGJjMDIxMWI=
#sailormoon#sailormooncosplay#kuttysarkart#kuttysark#kuttysarkartcosplay#sailormoonwitches#sailormoonwitch#sailormoonwitchcosplay#witchcosplay#sailormoonphotoshoot#sailorneptune#sailorneptunecosplay#michiru#michirukaioh#michirucosplay#michirukaiohcosplay#sailormoonhalloweenwitch#sailormoonhalloween#sailormoonhalloweencosplay#witchhat#witch#witchcostume#seasonofthewitch#witchmas
0 notes
Text

More HaruMichi u-u
Neptune by me
Haruka by @rachasakawa
Photo by Santos Fotografia Cosplay
#mycosplay#cosplay#cosplay girl#cosplayer#cosplay girls#cosplayers#brazilian cosplayer#harumichi#harukacosplay#haruka cosplay#haruka tennou#haruka#michirucosplay#michiru cosplay#michiru#michiru kaioh#sailor neptune#sailor moon#sailormoon#sailor uranus
103 notes
·
View notes
Photo

Dumping all the cosplay photos these days.. . . . #cosplay #cosplayer #cosplaying #cosplaygirl #cosplayersofinstagram #anime #animecosplay #sailormoon #sailorneptune #sailormooncosplay #sailorneptunecosplay #animecentral2017 #acen #acen2017 #animecon #michiru #michirukaiou #mahoushoujo #magicalgirls #kawaii #animegirl #michirucosplay #bishojosenshisailormoon #bishoujosenshi
#anime#cosplay#animecosplay#cosplaying#magicalgirls#animegirl#bishoujosenshi#cosplayer#sailormoon#acen2017#animecon#sailormooncosplay#sailorneptune#cosplayersofinstagram#sailorneptunecosplay#bishojosenshisailormoon#michiru#cosplaygirl#kawaii#acen#michirucosplay#animecentral2017#mahoushoujo#michirukaiou
0 notes
Last Seen Blogs
island-monkie
MONTIE
kaleeid
wyann

sheetsforyouworld-blog
Sheets for you

tflish
无标题

princesscornchip
www.thecollegeofnlp.com