#iridescence tutorial
Text

Iridescent Skin Tutorial by Fruitegg
#art#digital art#iridescent#iridescence tutorial#painting iridescence#how to paint iridescent#digital painting tutorial#fruitegg#rainbow effect tutorial
697 notes
·
View notes
Text


#Digital Art#Digital Painting#How To Paint Skin#Skin Tones#Art Tutorial#Digital Art Tutorial#Iridescent Skin#Holographic Skin
157 notes
·
View notes
Text

i was asked for a glitter tutorial a couple of times so here it is <3 (i work in krita btw)
if i had to break it down step-by-step:
apply regular shading
add the glitter texture. i do it by turning the scatter feature on
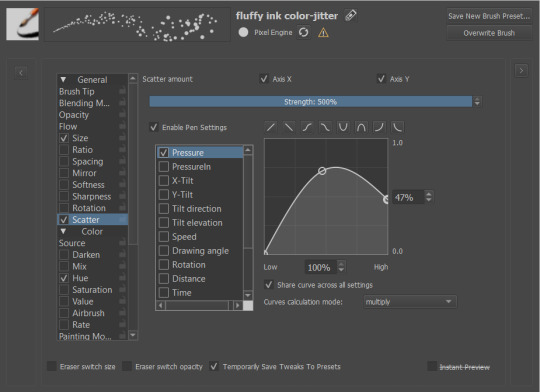
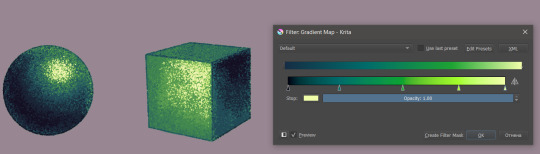
3. add color with a gradient map
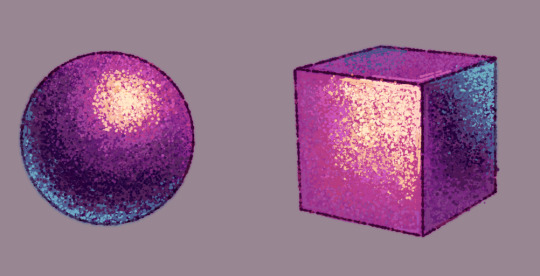
4. add reflected light. i usually go with blue because it's a good fit for my over-all very pink palettes
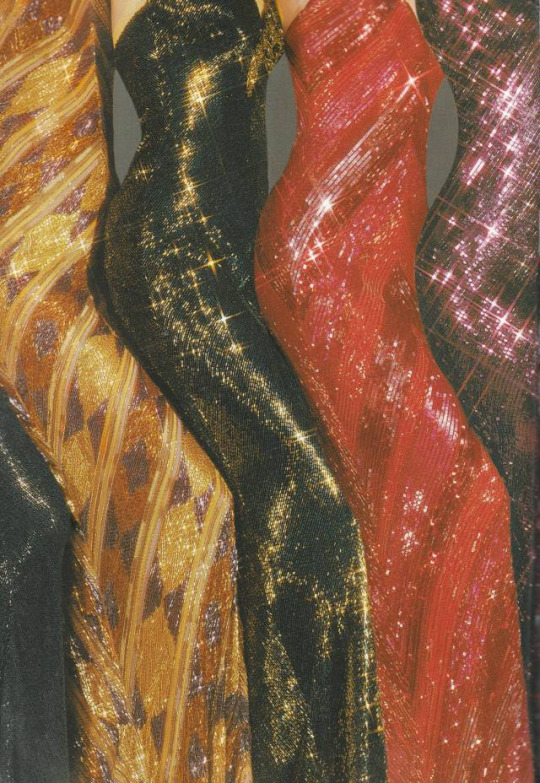
5. and in general: look at reference. glitter looks and feels very unreal and magical but it all exists irl and has been documented in all shapes, materials and lighting


1 2 3 4
that's all thank u <33
#never made a tutorial before#hope that's good enough#let me know if i should elaborate some more on any part#my art#tutorial#glitter tutorial#krita#also if you have more reference pictures for glittery iridescent holographic materials send them my way#i love that shit it's my favorite thing in the world to look at
787 notes
·
View notes
Text
youtube
A step by step Aurora gel Nails tutorial to do at home! An uruuru Spring nails design featuring blue skies, clouds, green grass gardens with cute flowers and iridescent butterflies, of course!
#aurora#uruuru#cute nails#nail art#diy nails#gel nails#iridescent#clouds#flower nails#floral nails#spring nails#rainbow nails#nail design#nail tutorial#aimeili#modelones#vettsy#3d nails#kawaii nails#kawaii#kawaii aesthetic#cute aesthetic#green nails#blue nails#sky#garden#spring#japanese nail art#Youtube
0 notes
Text
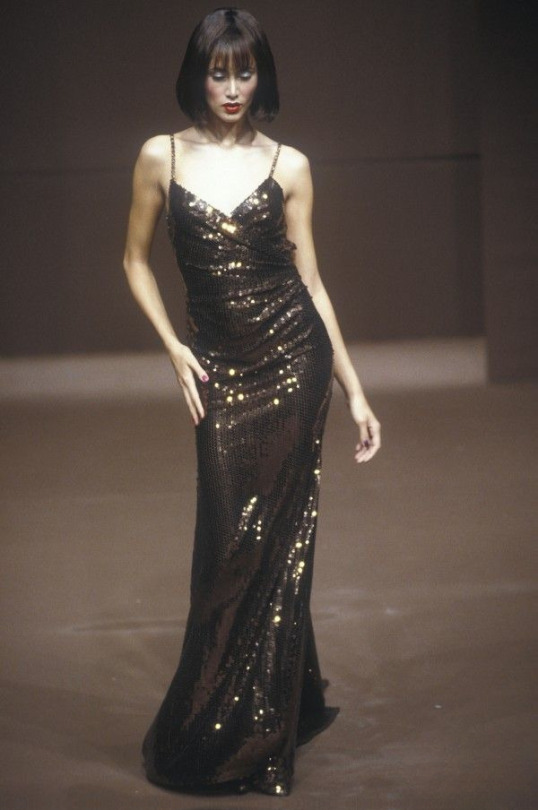
Houseki no Kuni/Land of the Lustrous Wig Tutorial: How to Create a Beautiful Gem-like Finish!
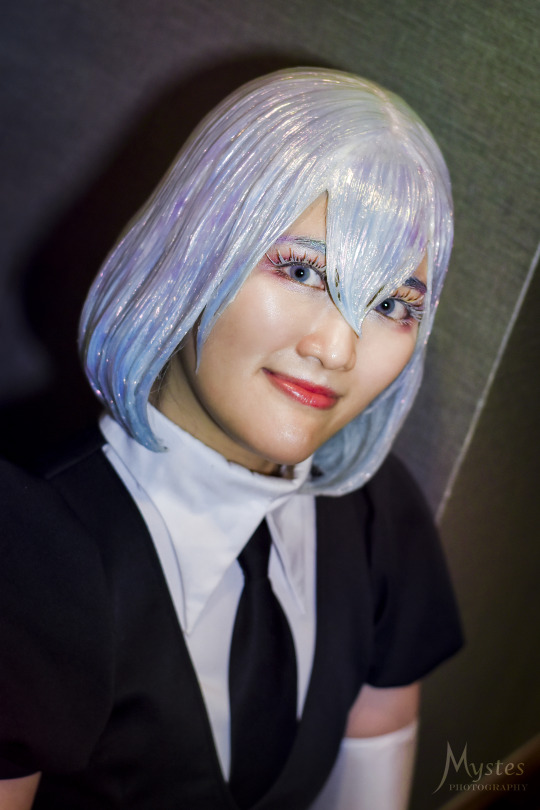

(Left photo taken by @/mystes_photo on Instagram)

When I first saw the characters in Houseki no Kuni, I knew right away that I wanted to cosplay Diamond, but to be honest, I did not like any of the commonly used methods to achieve the iridescent effect at the time (cellophane can easily be damaged, glitter doesn’t have the finish I want, resin is difficult to work with, etc.), so I did some research on ways to achieve a more convincing finish.
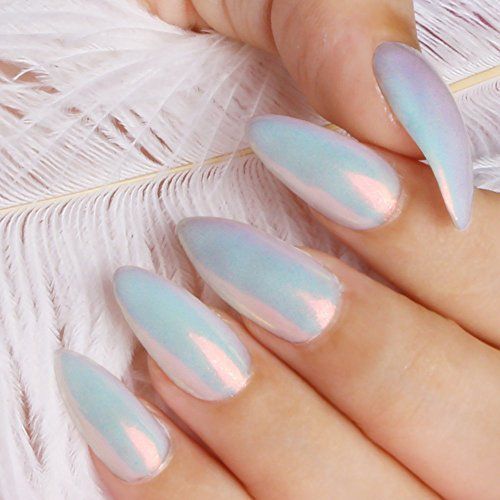
My main inspiration came from nail artists achieving a smooth iridescent finish similar to what I wanted for my wig (Fun fact, I became a SimplyNailogical fan during this whole process XD). Once I discovered that iridescent nail powder was the key material I needed, from there, I did some trial and error experiments to figure out the best method to apply it onto a wig and came up with this method!
This is not a styling tutorial on how to create a Diamond wig specifically, but rather how to create the unique gem-like finish on any wig! This tutorial can apply to any Houseki no Kuni/Land of the Lustrous character you’d like! :D
(Disclaimer, this method and the Diamond wig pictured above were created in 2021, but the wig featured in this tutorial was styled in 2024)
Skill level: Intermediate
Prerequisite: At least basic wig styling skills, dependent on character
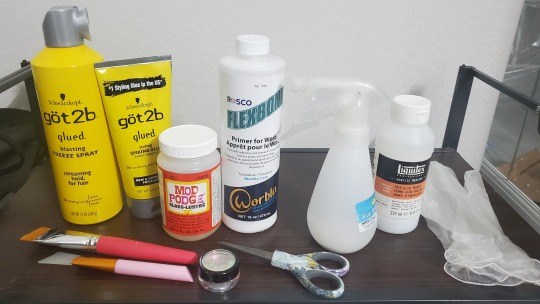
Materials needed:

Wig (style varies based on character, but I recommend using a thick base wig if you can! )
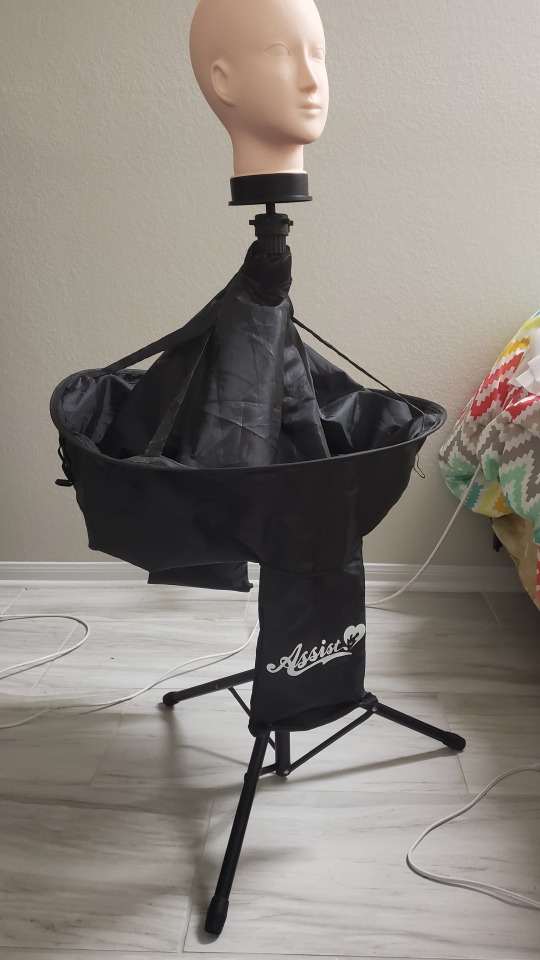
Wig head that’s close to the size of your head to ensure that style conforms properly to your head size
Wig stand
Got2b spray and glue
Flexbond primer (amount needed varies, but for reference, I was able to cover my Diamond wig with about ¾ of a 16 oz bottle)
Mod Podge Gloss waterbase sealer (optional if Flexbond is tacky enough on its own)
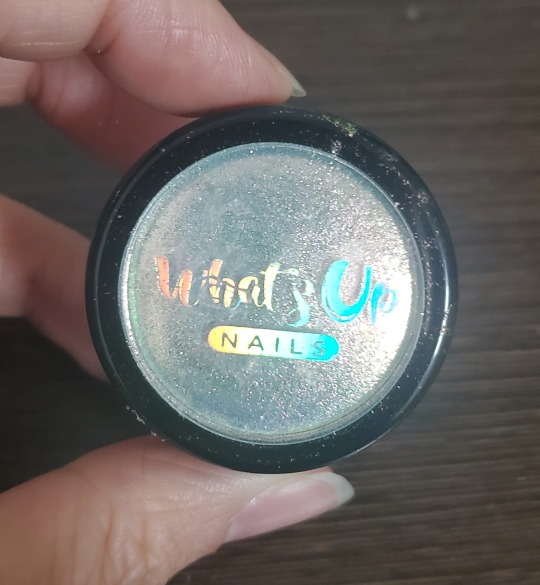
Iridescent/holographic nail powder (any can work depending on the finish you want, but I used the Aurora pigment powder from the brand What’s Up Nails. One little 1 gram jar was enough to cover two Diamond wigs with quite a bit left over, a little goes a long way!)
Clear gloss varnish
Spray bottle
Wide decoupage brush and/or any wide paintbrush
Silicone face mask brush (optional, but I find it great for smoothing out thick coats of Flexbond)
Mini scissors to trim stray hairs and/or excess Flexbond
Latex or vinyl gloves to rub on nail powder
Safety requirements:

Wear gloves to protect your hands. The nail powder is safe to touch barehanded, but the rubbing needed to buff the powder onto the wig may cause skin irritation or chafing if done excessively.
The nail powder is very fine, so I suggest wearing a face mask to avoid breathing it in/blowing it away. There are no toxic fumes or substances used in this tutorial, so a basic face mask should suffice.
Keep the floor covered to protect the Flexbond from getting on it and causing a slipping hazard (also great for easy cleanup!) I initially laid out a bunch of old Amazon bags around the wig stand, but I recently picked up a handy device from Assist Wigs in Japan that was originally designed to catch cut wig hair, but it does a pretty good job catching dripping glue and loose nail powder as well!
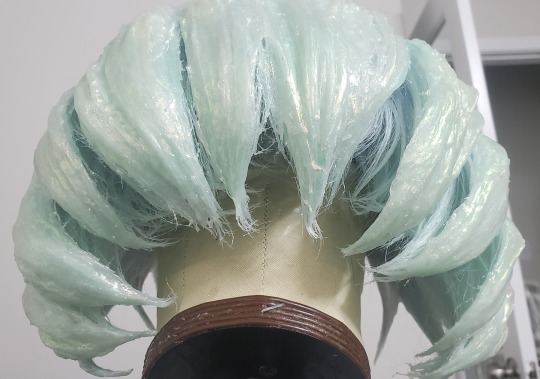
Step 1:


Style your wig as you would a normal wig. This is highly dependent on the character you choose, but from experience, I have two tips I would highly recommend:
Make your wig about 10-20% fuller than you want the final wig to be. Like how actual hair flattens when it’s wet, depending on how the wig is styled, the same thing may happen once the Flexbond is added.
Try to keep at least the outer layer of hair on your wig as smooth and free of tangles as possible. When you coat the wig with Flexbond, any knots or irregularities in the wig will be emphasized. To avoid this, thoroughly comb through your wig to get rid of tangles and straighten any kinks or irregularities. Teasing your wig can leave the outside looking messy, so try to stick to the crimping method to add volume to wigs if needed, or at least limit teasing to areas that will be hidden with smoother hair later on.
youtube
I was quite fortunate that there’s an official 3D model video with the perfect references for Diamond’s hair that I was able to use as reference for my wig!
Step 2:
If you haven't already, protect the floor underneath your wig with any sort of protective covering to catch the Flexbond that will drip down from your wig.
Step 3:
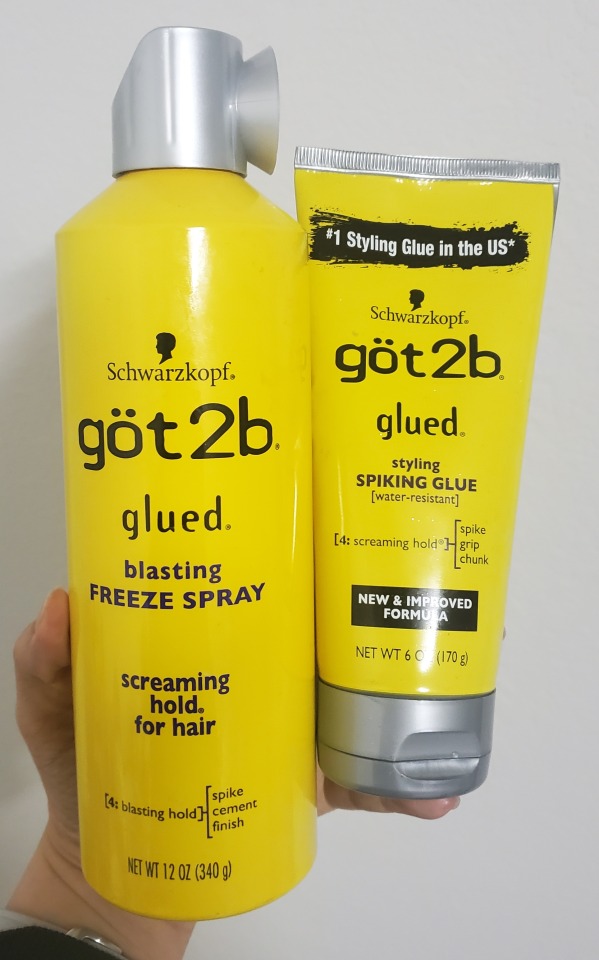
Use Got2B spray and spiking glue to hold the style in place to prepare for the next steps. Apply enough to make the wig relatively stiff, but avoid getting the hair saturated up to the point where the hair looks wet and stringy.
You'll know your wig is ready for Flexbond when your wig is quite stiff on the outside, as shown in the video above.
Step 4:

Take your Flexbond and dilute it with water to make a thin sprayable glue. I recommend about a 1 to 3 ratio of Flexbond to water to create a solution that is thin enough to easily spray yet still strong enough to be an effective glue. I would say the viscosity is similar to milk.
Step 5:
Apply the diluted Flexbond to the wig in a fine mist. If you see any significantly large droplets, use your fingers to carefully smooth them out. Do your best not to press down too hard or oversaturate the wig, as the goal is to create a hard outer shell on your wig rather than to saturate the entire wig in glue.
Repeat Step 5 a few times until your wig feels solid up to the point where the wig hair stays in place even when shaken around (or even turned upside down!) This step is very important because this creates the solid foundation for your wig that will support all the thick Flexbond layers you will be applying later.
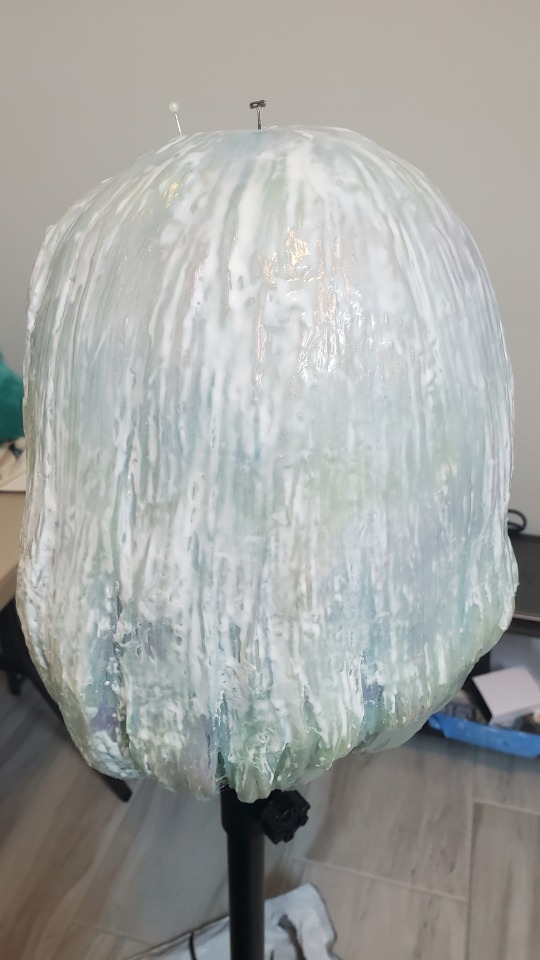
Step 6:
Once your wig is solid, coat the outer surface of the wig (you can cover all visible hair if desired, but I like having the hair inside soft against my skin) with a generous coat of Flexbond. You want this first coat to be thick enough to completely cover the outside of the wig’s surface, but not so much that the Flexbond is dripping.
However, if noticeable drips do occur, you can smooth them out with your brush while they’re still wet or trimmed off with scissors if already dried.
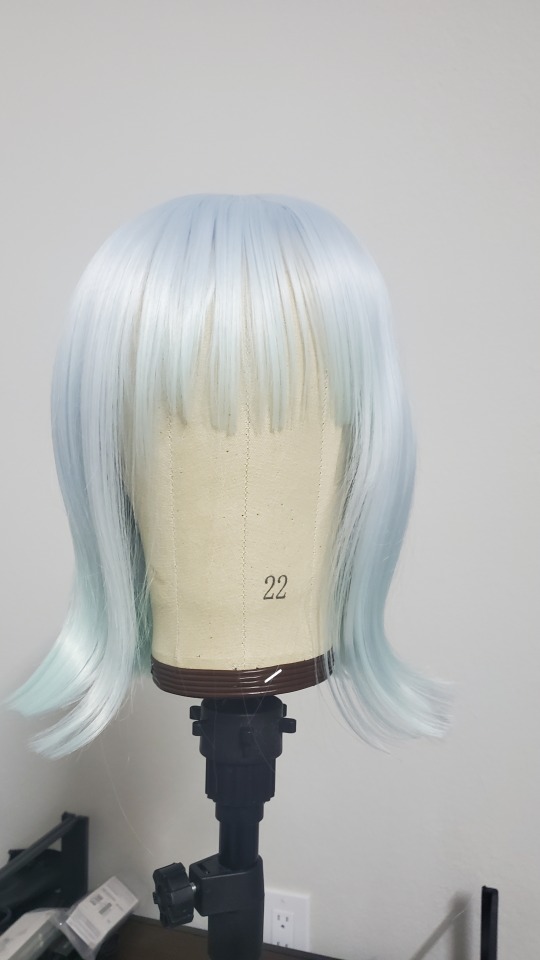
Repeat Step 6 for about 2-3 layers or until your wig has a smooth, almost glossy looking appearance, as pictured below.
Below are a few helpful tips to help you with this step!

Remember how if you did Step 5 correctly, you should be able to turn the wig upside down? You can use this to your advantage to help you coat the bottom half of the wig! Just be sure that the top half is completely dry before you place it on a surface. I would also alternate between coating the top half and the bottom half to keep the coats even.
2. You can use the Flexbond to gradually fill gaps between the fibers for a smoother appearance. Also, the more layers, the less emphasized the hair strands will be on the final product.
Step 7:

If you have stray hairs or glue strands that you find distracting, you can trim them off using a sharp pair of scissors. In the example above, you can see how I trimmed the frayed-looking ends of the hair to create nice clean points
Make sure to do this step prior to applying any nail powder to avoid wasting powder that be covering an area that will be cut off.
Step 8 (Possible extra step):
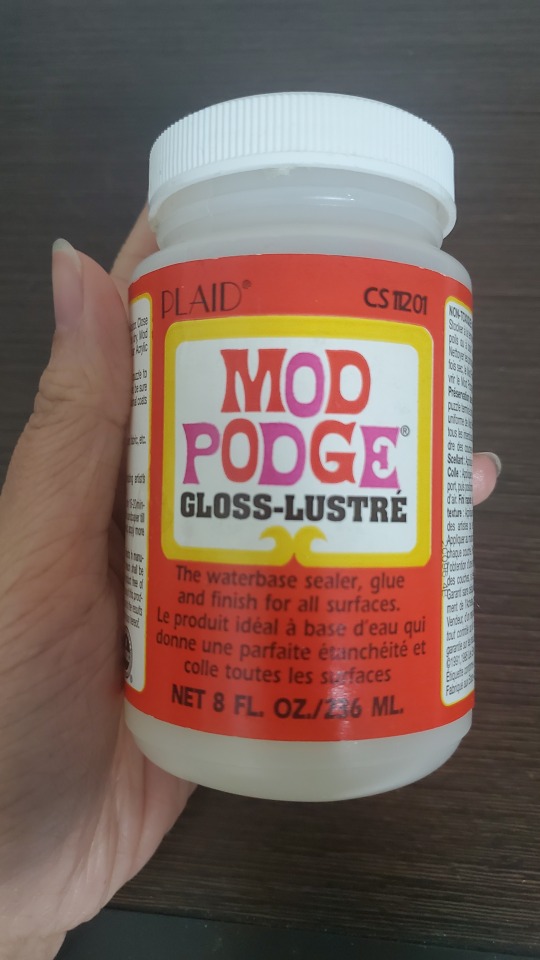
The first time I made my Diamond wig, I was able to rub the nail powder directly onto the Flexbond, which was just tacky enough for the powder to adhere itself to the wig. However, this time around, the Flexbond was not tacky enough and the powder would not adhere properly. I am unsure why this occurred, whether it was the weather/humidity (I created the first wig around Summer 2021 vs. this wig in late winter/early spring 2024) or Rosco tweaking the Flexbond formula sometime in the past few years. Thankfully, I was able to remedy this issue by applying a thin coat of Mod Podge Gloss, which I found stayed temporarily tacky for about 20 minutes after drying.
If you also encounter the same issue, apply a layer of Mod Podge Gloss over your wig. Check it frequently to able to apply the powder as soon as possible once it is dry before the Mod Podge loses its tackiness. Don't be too impatient though, as the Mod Podge will smear if you try to apply the powder before it is dried.
(I’m not sure if using only Mod Podge to create this outer shell would work as opposed to using the Flexbond due to its lower viscosity and lack of flexibility in thicker coats, but I do think it’d be an interesting experiment to try! If it’s successful, it’d be a much more accessible and budget-friendly option!)
*If the Flexbond you applied is tacky enough to apply powder onto directly, you can skip this step and jump ahead to Step 9.
Step 9:
Once your wig is dry, put on your gloves and dip your finger into the nail powder to coat it with a thin layer of powder. Take this powder and buff it onto the surface of your wig, similar to how you would buff nail powder onto your nails. Buff thoroughly until the surface is smooth and looks reflective. It should look almost like metallic/iridescent paint was applied rather than a powdery glitter. Continue this process on the entire wig.
Step 10
If you feel like you need more coverage with the nail powder after applying the first layer, coat the wig with another coat of Flexbond/Mod Podge (depending on what you use to adhere the nail powder), let it dry, then apply another layer of nail powder. You can repeat this process until you satisfied with the coverage. Depending on the powder used, I find that at least 3-4 coats are needed to obtain full coverage and a smooth finish!
Step 11:
Once you are satisfied with the finish, coat the wig in one last layer of Flexbond to protect the finish and add a bit of depth to the glassy finish as opposed to varnish alone.
Step 12:
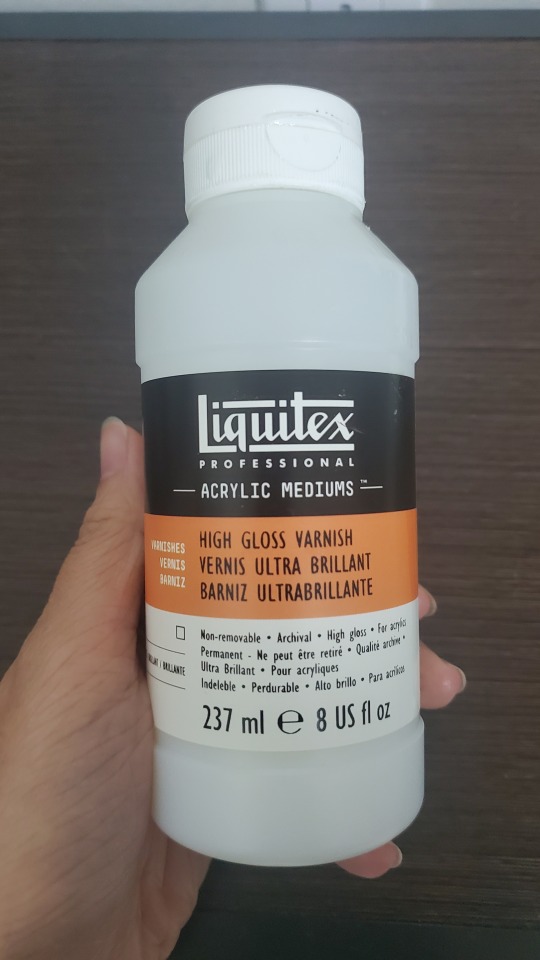
Add a final coat of gloss varnish to give your wig a beautiful glassy finish! You may notice the Flexbond turning white again underneath the varnish. Do not panic, Flexbond is known to do that when it gets wet! Once everything is dry again, it will return to being clear. :)
You Did it!
Now you have your finished Houseki no Kuni wig with a lovely iridescent finish that is not only beautiful, but also indestructible (seriously, I’ve thrown this thing at a wall and it stayed in perfect condition XD) and super easy to put on (very flexible and goes on like Lego hair XD)!
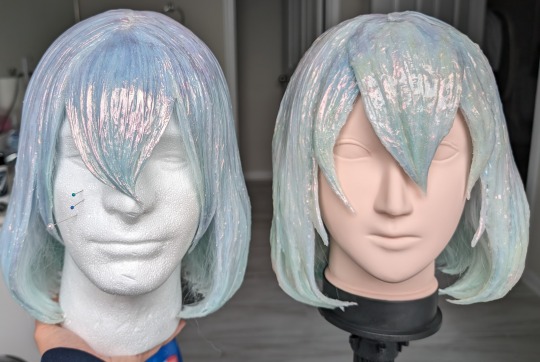


For my second Diamond wig, I wanted to be experimental and try remaking the wig with a shape more accurate to the show (less visible hair strands and more like solid shapes) and adding subtle stripes of color underneath the Flexbond. I will be honest, I actually ended up liking the first one a tad more ^^; It’s okay though, I still learned a lot, and I feel the mistakes I went through the second time around really helped me perfect the technique for this tutorial :)
Another key thing that I messed up on for the second wig is that due to lack of time, I was unable to apply as many layers of the nail powder as I would've liked. As mentioned in Step 10 above, adding at least 3-4 coats will result in a smooth lovely iridescent finish, as seen here on my first Diamond wig!
As mentioned before, this tutorial can apply to any Houseki no Kuni character! Here’s a little work-in-progress of my Phos wig! :) I actually used body glitter by Nyx Cosmetics instead of nail powder because it gave a similar smooth finish to the nail powder and gave the wig more of a blue-green-gold shift rather than a full iridescent rainbow spectrum.
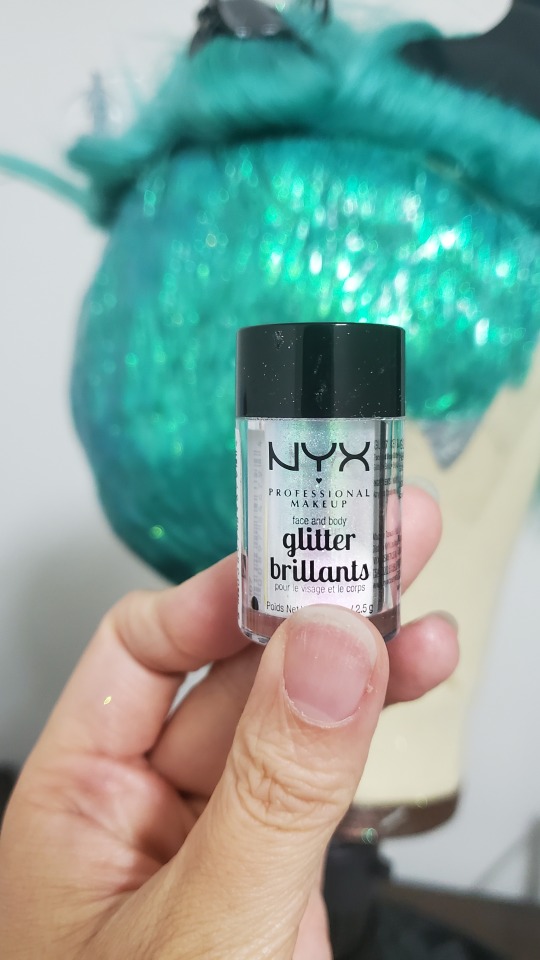
Bonus tip: for characters who have multiple distinct layers/sections in their hair, like Phos in this example (undercut and top half), I suggest applying the Flexbond and nail powder in sections as opposed to all at once.
Final words
Thank you so much for taking a look at my tutorial! I can’t wait to see all the lovely wigs that can be made using it~ ^_^
I'm not very active on Tumblr these days, so if you have any questions or need any clarifications for this tutorial, feel free to reach out to me on my Instagram account @/ashtheketchup!
(This tutorial is my entry for @/cosplaytutorialchallenge on IG's Online Cosplay Tutorial Challenge 2024)
20 notes
·
View notes
Note
If you don’t mind me asking, how do you do the iridescent effect? It’s really amazing 😭 been wanting to try it!!
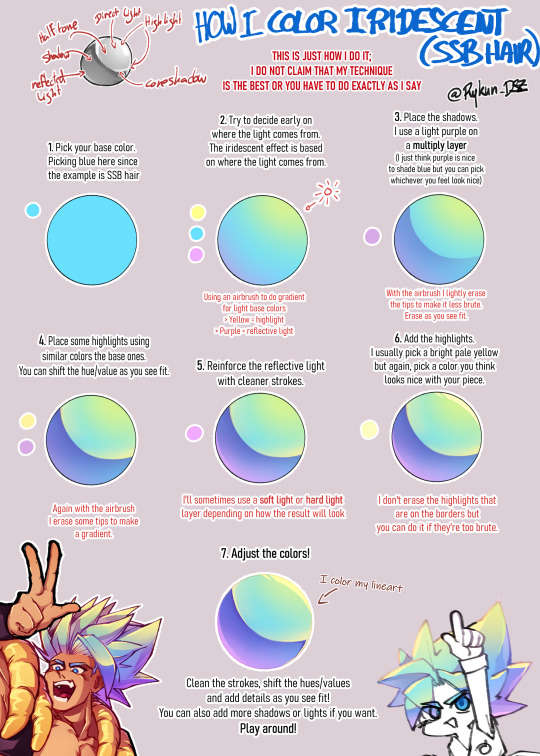

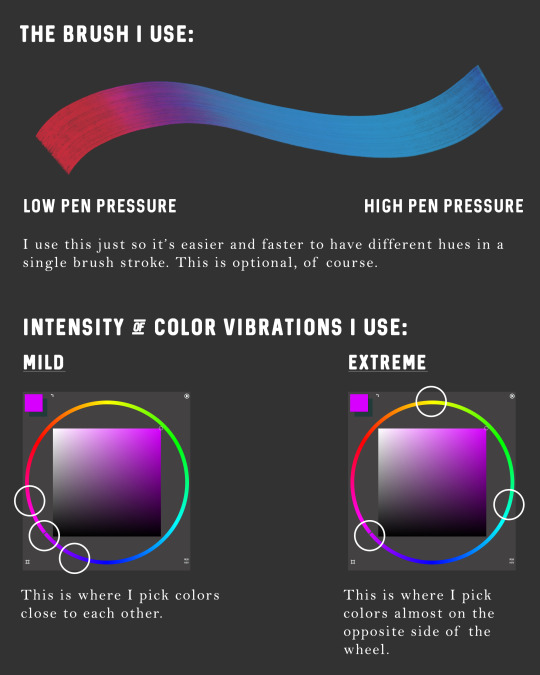
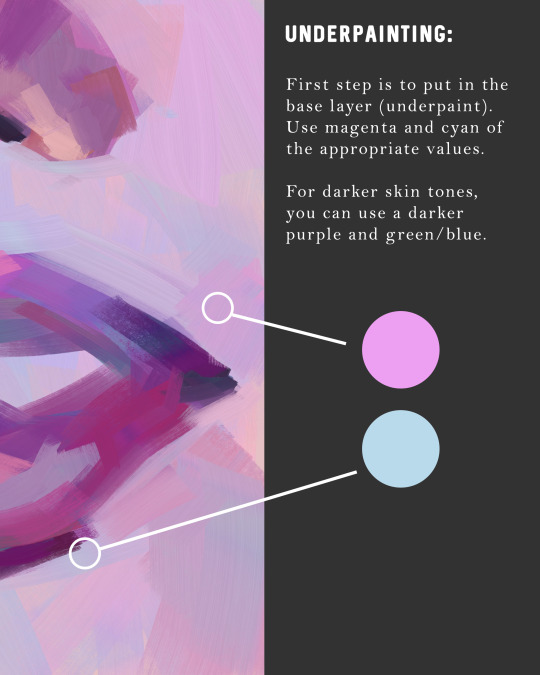
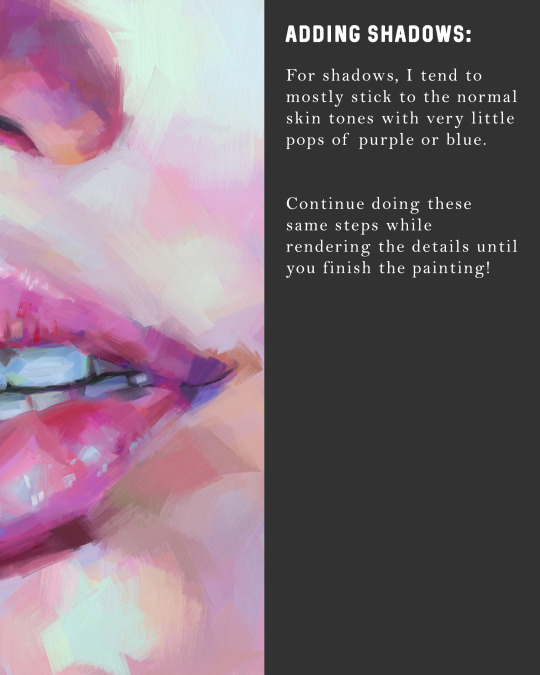
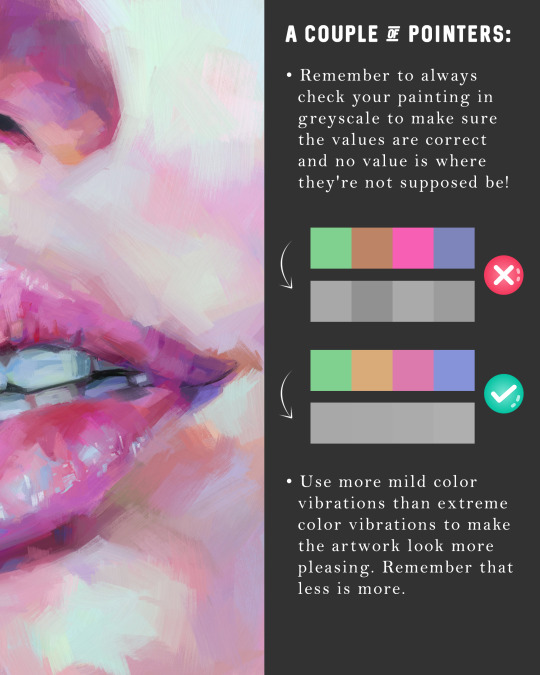
Hello Anon! I'm glad that you like how I do the iridescent effect.
I tried making a demo/tutorial (?) to show my process, I hope it's understandable!
I'm sorry if it's confusing, I'm not the best at making tutorials lmao.
I hope it's okay!
I want to specify that it's just my own process and that it's in no way something that you have to do or strictly follow.
It's all about playing around with colors and match it with your own pieces!
[Edit: I'm sorry for the typos it happens a lot and will happen again (not native english)]
148 notes
·
View notes
Text
The Slime Trend- What It Is and Why It's Great For Neurodivergent People

originally posted to www.onlyfunthings.org on December 13, 2016
Ciao Lovelies! I bet at least one or two of you have heard of the "Slime Trend" recently. If not, I'll explain everything below! (Images Updated as of January 2019)
(UPDATED AS OF 1/21/19 CLICK ME FOR PART 2!)
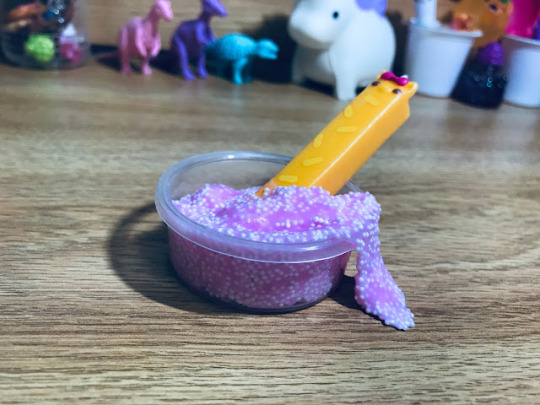
So recently, the subject of slime- all types, fishbowl, iridescent, traditional, floam, glitter, crystal, etc- has been trending everywhere. Anywhere you look, you can find YouTube tutorials for how to create slime, find "stim" blogs on tumblr and plenty of gifs of slime, kinetic sand, and more. There are even entire Instagram accounts dedicated to videos of slime!
But what IS stim, or stimming, you might be wondering?
Well, let's let Wikipedia sum it up for us!
"Self-stimulatory behavior, also known as stimming and self-stimulation, is the repetition of physical movements, sounds, or words, or the repetitive movement of objects common in individuals with developmental disabilities and most prevalent in people with autism spectrum disorders. It is also commonly seen in people with anxiety disorders such as obsessive–compulsive disorder, ADHD, and Tourette syndrome, and in people with neurological disorders or brain infections"
The Wikipedia article containing this information can be found HERE.
To summarize, stimming is some form of movement, sound, or texture that is common in neuro-divergent individuals and usually used to self soothe, control anxiety, or filter/block overwhelming sensations.

Autistic individuals are not the only people who stim, however. Some sufferers of anxiety stim to control themselves and calm down, often this manifests in behaviours like nail biting, hair twirling, or repetitive motions like rocking.
What does this mean in terms of the new slime (and other stimming toys) trend?
For one thing, it's good for neurodivergent people because now the things they do to relax are no longer stigmatized but seen as "normal" and acceptable. Colleges even have events around finals making "self-care" kits containing things like play-doh. While these are not advertised as "Stimming," many people use Play-Doh or other molding doughs and such to stim.
Another great thing coming from this trend is that it is opening up the discussions around being neurodivergent and normalizing the idea of talking about mental health. People are adknowledging that stress can be helped by non-conventional methods. Perhaps we are finally reaching the days where instead of someone saying "Oh, you're stressed? Just breathe! (or any other conventional method)", they would say "Well, try playing with some slime or chewing on a chewing necklace!"
Another great outcome of this "trend" is that stimming toys like chewing necklaces, fidget toys, tangles, kinetic sand, floam, and others are becoming much more common and inexpensive!
However, we need to ensure that this "trend" does not become offensive to autistic or neurodivergent individuals. All kinds of stimming are equally good, whether it's rocking, tapping, hand wringing or flapping, etc. If we are normalizing stimming methods like chewing and slime, we should also work to normalize non- "aesthetically pleasing" stimming!
Thank you for reading, remember to love yourself, stay awesome, and I'll see you in our next post!

#agere#age regression#sfw agere#sfw littlespace#age regressor#sfw age regression#agereg#sfw little blog#age dreaming#agere art#agere community#age re safe space#age regression blog#age regression community#age regression sfw#age regressive#agere activities#agere aesthetic#agere blog#agere boy#agere board#age regression caregiver#agere caregiver#agere cg#agere games#agere lifestyle#agere little#agere moodboard#agere outfit#agere outfits
22 notes
·
View notes
Note
how… how colors? The way you do your colors from lighting to just the pallets is so inspiring and beautiful
oh hey i did a tutorial for that!
but besides knowing color theory, a lot of me choosing colors involve "how different can i make this color be while still making it look like the color i intended it to be?" like my example in there with trucy's blue cape being light red but still looking blue, yannow?
as of now, it also involves me making things look really colorful so i'll be adding some random pops of color in places using a brush that randomizes color every stroke just to make it look more interesting for me, iridescence and stuff maybe afgh


60 notes
·
View notes
Text
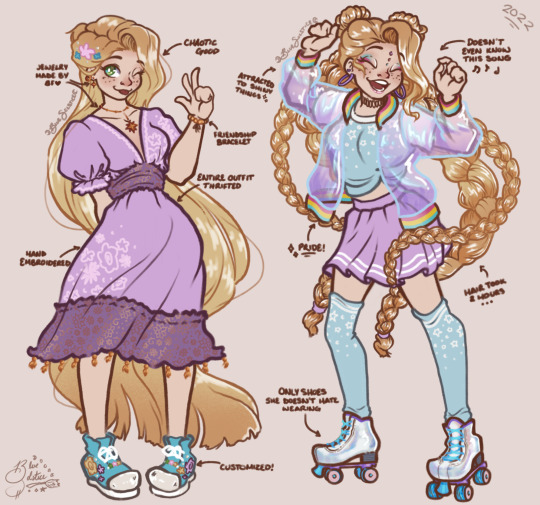
Colouring is really hard… The middle drawing absolutely would not cooperate for me so I hope these are enough to make up for it! I’m considering posting a tutorial for the iridescent jacket because I’m SO proud of it… Anyway, I hope you like the finished drawing!
#rapunzel#princess rapunzel#modern au#disney#tangled#tangled the series#rapunzels tangled adventure#disney characters#disney fanart#character art#character redesign#fanart#varipunzel#procreate#digital art#rta rapunzel#disney princess fanart#rta#tts fanart#tts au#tts fandom#finished wip
374 notes
·
View notes
Photo
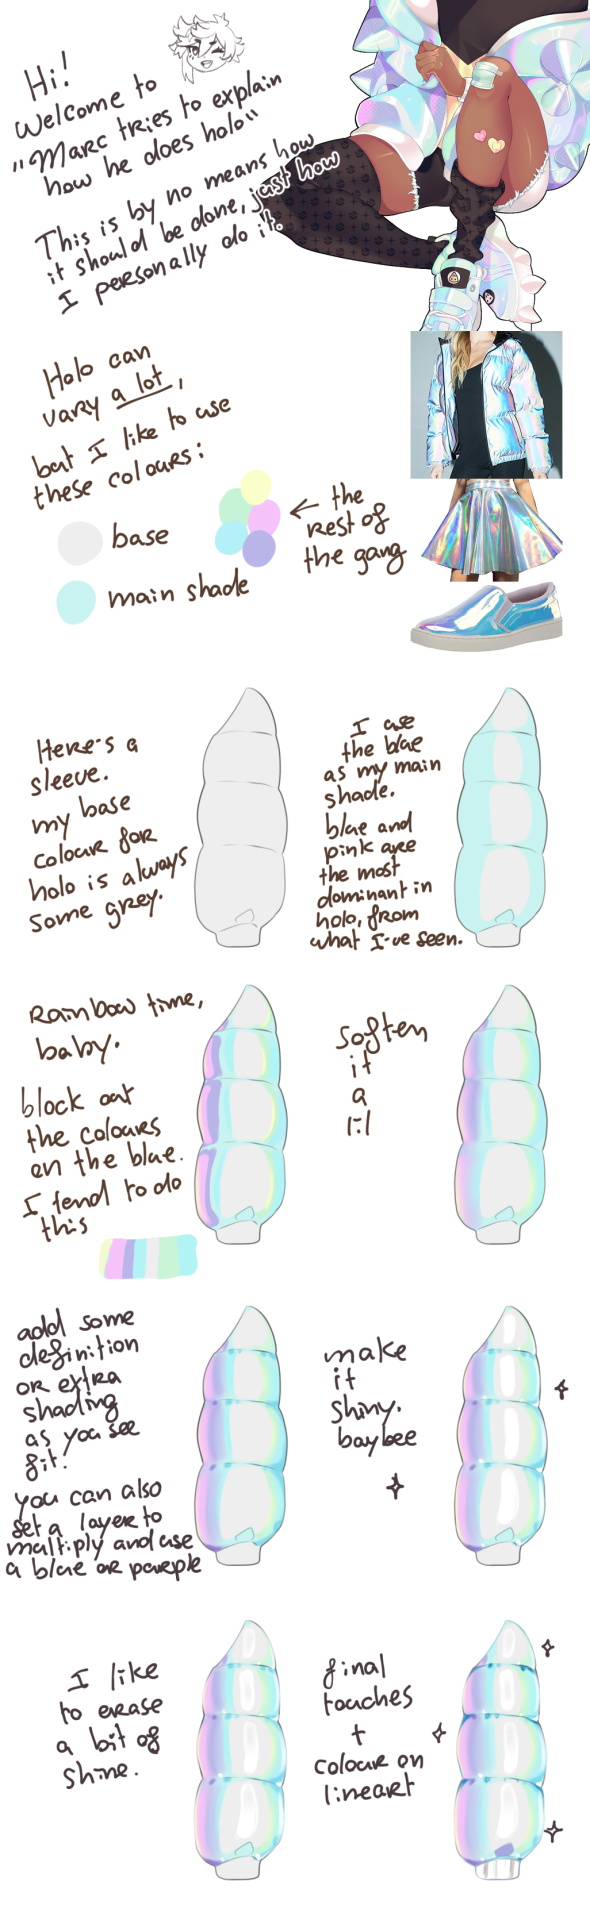
How Marc colours iridescent by Roxoah
#art#art tutorial#coloring tutorial#iridescent tutorial#how to color iridescent#iridescence#art help#holographic#how to color holographic#coloring iridescence#Roxoah
13K notes
·
View notes
Photo


A very special throwback Thursday! Again!
This time a walk through Asim’s character design and how it changed over time and my journey through colorizing traditional pencil drawings.
Breakdown under the readmore.
(note: when I say “my DM”, he is also my partner who I have been building a DnD setting with, I wasn’t bullying a random DM into what I wanted, I was working with my partner to build a new setting while he was really stuck in Standard DnD and was letting that inform pretty much all the worldbuilding decisions.)
2017: The first color picture of Asim, and an attempt to colorize a messy pen sketch that I had been close to giving up on. The filter modes I used on the inking made the shadows harsh and dramatic, and while good for the piece, did not give me much control over the color. He was a basic drow with a color scheme picked out by my DM - my DM also insisted on shorter elf ears that didn’t emote and an overall human-like appearance aside from skintone.
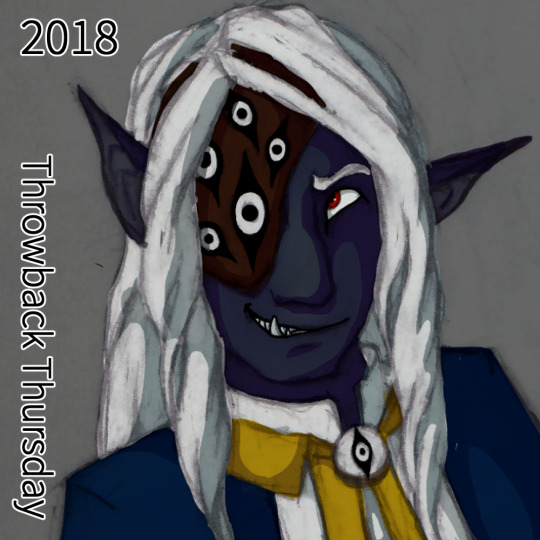
2018: The DM had noted in an expression sheet I had distinctly drawn Asim’s canines - he said it made him look part orc but it was really just a stylistic choice I was playing around with. I leaned into it and suggested his father was half orc for a chance to give him more monstery traits and made his tusks a bit more prominent. I also used large emotive elf ears in the sheet to show the DM how it was a fun trait to allow. He agreed. I did some semi clean line art of a new expression sheet and experimented with coloring that. the line art gave me a lot more control with coloring, but I wasn’t entirely happy with it. The DM had given me a halfmask/eyepatch with a design I wasn’t too keen on but used it in the design anyway.
2019: Fully leaning into his orcish heritage, Asim as his stage persona Balam Yunuen. It was a expression sketch that got out of hand and I ended up fully shading it in pencil I loved it so much. Some more playing around with filters, having remembered a tutorial I saw on digital artists tinting their lineart, and I hit gold. My painting skills were still a little shaky but I learned a lot and he gained +1 Iridescent Skin.
2019 part 2: Another 2019 because I learned a lot that year and his design gained another tweak - a small snout and hints at the animal-like nose he would soon have. I found my stride with shading hair and have been going ham on it ever since.
2021: His sideburns! His finalized snoot! His resting crooked ears! Redesigning his eyepatch because dammit it’s my character he’ll look how I want him to look! At this point I had really settled into my style of colorizing my pencil drawings.
2022: Return of the chin tattoo! Redesigned and simplified into a sun-eye motif. Playing around with his cultural braid, the Makhiorya, a braid that you put beads on for everyone you invite into your family. Magical neck scar where his neck was torn out! I was beyond settled in my colorizing, I was getting bold with colors and lighting, constantly trying new things and learning from it.
2023:???? my kofi supporters are in the know on what’s coming ;)
Comms | Shop | Tips
#dnd art#dungeons and dragons#drow art#drow#half drow#half orc#dnd#dark elf#half elf#dnd paladin#monster art#monster boy#dnd character#dnd character art#throwback thursday#art throwback thursday#fantasy art
37 notes
·
View notes
Text
Fossil Novembirb, the first nine days
Hello World. I never thought I'd be on this site, but here I am. This blog was created for the purpose of participating in a-dinosaur-a-day's Fossil Novembirb. Fossil Novembirb is a yearly art event founded by Meig Dickson, a vertebrate palaeontologist who, as far as I can tell, studies dinosaurs, especially theropods. Don't fight me or em over birds being theropod dinosaurs. Neither ey nor I want to have this conversation, so enjoy the art!
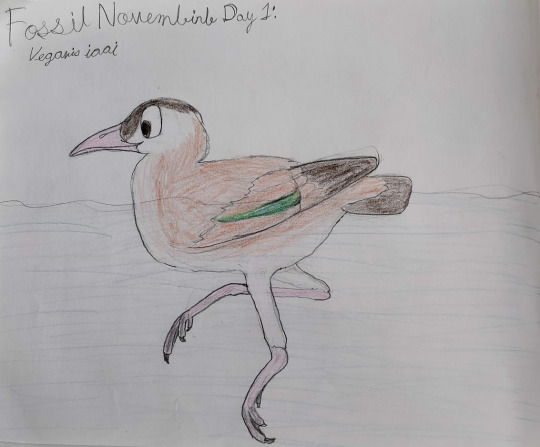
I started off my Fossil Novembirb with Vegavis iaai. What makes this fluffy anseriform special is that we found a fossilised syrinx (avian voice-maker) belonging to one of these, so we can reconstruct their sounds. This Vegavis was coloured based on a bunch of anseriforms that are alive today, like ruddy shelducks and cotton pygmy geese.

For Day 2, I did a bit of spec evo and pulled out a scientific name I told myself I'd assign to a newly-discovered fossil genus. This sketch has a Serina-like text description for Phantasmavis.
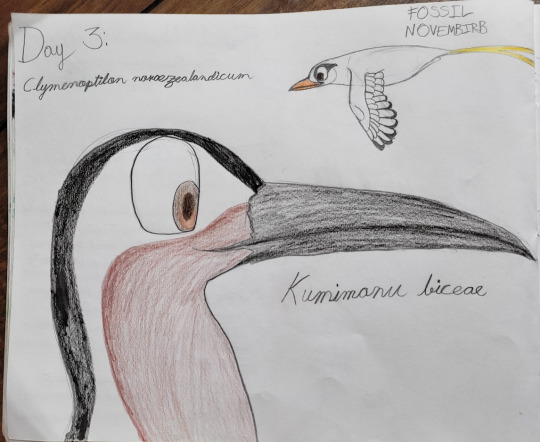
Tropicbirds! I chose to draw Clymenoptilon because I was hoping "tropicbird" meant "brightly coloured bird". Even though they aren't that brightly coloured, they're still cool. And Kumimanu (approximately to scale in this drawing) didn't really have the obligation to be black-and-white like most extant penguins (because Inkayacu), so I went... mild-wild with the colours.
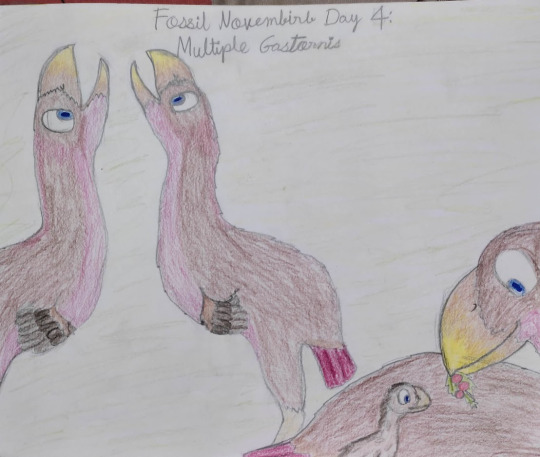
No... one's... tall like Gastornis, no one calls like Gastornis! In the bottom right, no one feeds small like Gastornis!
I've seen the "Andy's Prehistoric Adventures" episode featuring these megafowl, realised it was Walking With Dinosaurs with a human inserted, and drawn a mildly speculative colouration for these Gastornis. To the left, two adults have their necks out towards each other and are calling into the sky. Whether this is courtship or a challenge, nobody knows. But a calmer scene happens in the bottom right, where a mother shows her chick red berries on a branch to show them that it is food.
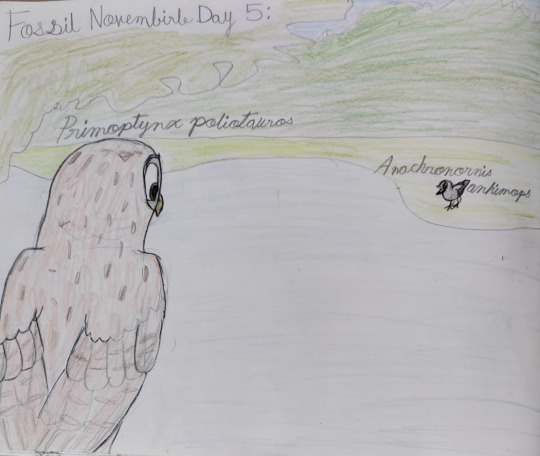
"Don't make me fly up there, you punk!" is one way to interpret the screamerduck Anachronornis' call in the direction of the Primoptynx owl. This scene unfolds in the Palaeocene-Eocene Thermal Maximum ecosystem of the Willwood Formation before it was rock.
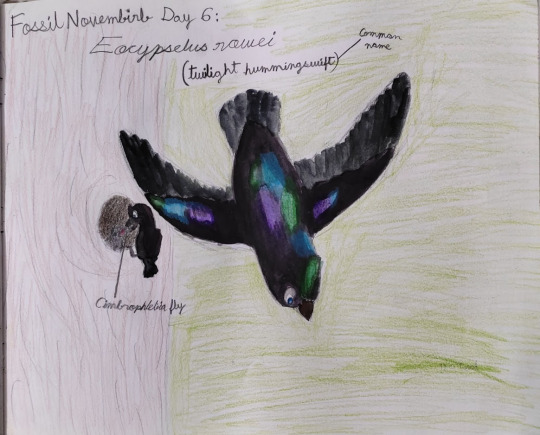
It's a twilight hummingswift! We know the colour of this iridescent little birb from the Danish Fur Formation. I watched a tutorial on painting iridescence, but I'm not really satisfied with the parent feeding their chick to the left of the flying Eocypselus rowei. It's hard to see, but there's a baby hummingswift being fed a Cimbrophlebia scorpionfly.
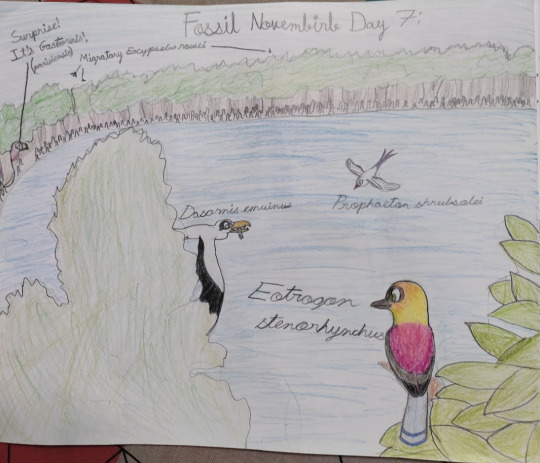
London Clay has a lot of plant fossils. Not all of them are listed on Wikipedia, but there's a photo of a pencil-root mangrove seed listed. Featuring a speculatively-coloured Eotrogon, a Dasornis carrying away a mackerel, and a Prophaeton just gliding, and repeat telecasts Gastornis parisiensis and Eocypelus rowei, Eocene London was a birder's dream (believe me, I'm a kinda-birder).
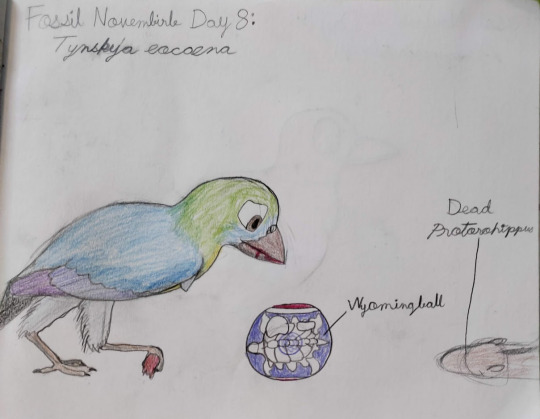
This Tynskya art was somewhat late, rather dissatisfactory, and mildly rushed. I had an exam the next day. Don't judge me.
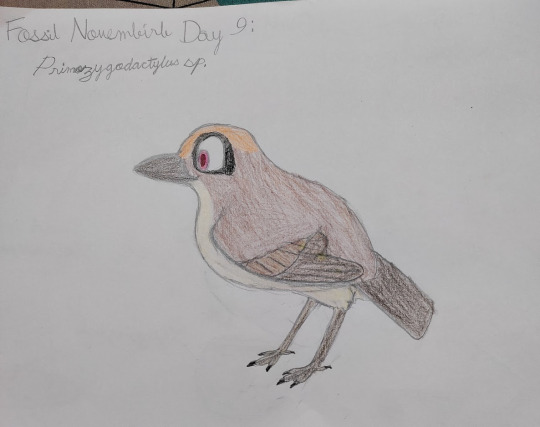
And here's a better Primozygodactylus! I couldn't tell the specific species because it wasn't listed for the Wikipedia image. But here we are: a bird that gives off ashy prinia/sparrow/orange-headed thrush vibes.
This concludes the first nine days! I don't know if I'll be doing the tenth because nobody's giving me straight answers about the palaeobotany of the Green River formation.
Enjoy!
#fossil novembirb#dinosaur#birds#paleoart#this site is as chaotic as it seemed when I first anonymously browsed eir blog#paleogene#palaeogene#eocene#cenozoic#maastrichtian
14 notes
·
View notes
Text
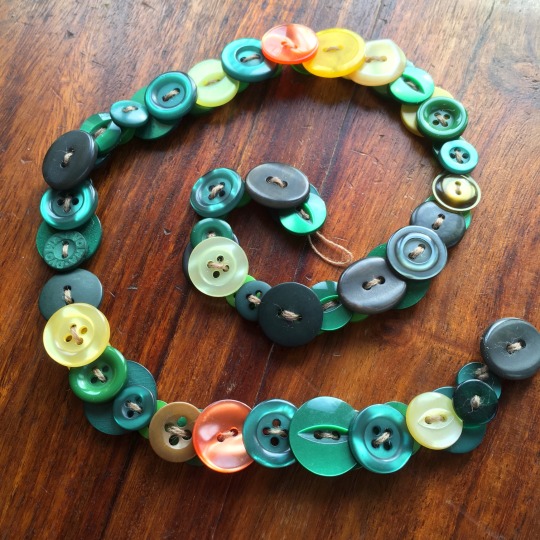


I made my first button necklace, based on Nott’s colours. i’ve got a lot to learn but it was fun and pretty simple to make! here’s the tutorial i followed in case you’re interested.
[ID: Three photos of a necklace made from buttons. Most of the buttons are dark green while a couple are amber, yellow or iridescent like Nott’s eyes. The last photo shows it around my neck over a woolen jumper. End ID]
#button necklace#nott the brave#veth brenatto#criticalrolefanart#critical role fanart#m#veth the brave
76 notes
·
View notes
Photo


Randomly came across a tutorial on how to draw iridescent stuff and wanted to test it real quick, so! Have two little merfairies~
13 notes
·
View notes
Text
Nine people I'd like to get to know better
I drew a blank so it took me some time to figure out what i wanted to put in for some of those. I'm so flattered @hey-august tagged me though! hehe!
Last song: bloodline x pony by ariana grande, ginuwine
i found this one specific youtube slowed + reverb version that is just so good ive been playing it on repeat
https://youtu.be/46C3zaZKdTI
Favourite Colour: Black
i do however love anything rainbow, not multicolored, rainbow.
Black iridescent things make me a happy little raven
Last Movie/TV Show: Apothecary Diaries/Frieren: Beyond Journey's End
I'm watching them both pretty much at the same time, and they both have my favorite characteristic, they have an autistic coded female lead, i see one of those, i watch.
Sweet/Spicy/Savoury: YES
I like strong flavours in general, and recently ive been desperate to eat korean fried chicken, the way i learned to make it is very spicy, sweet, and savory all in one!
Relationship Status: Extremely single
I'm not really looking for a relationship rn, and no one has tried to hit on me either, im just vibin and hanging out with my friends.
Last thing I googled: "chair 1/12 scale"
I have one of those art reference dolls and i thought a chair that is proportional to the doll would be nice to have
Current Obsession: so theres this game called WARFRAME
Robot ninjas in space that fight against eugenics, cult-capitalism, and zombies. It is my favorite game ever, and similar to one piece a lot of people find it hard to get into, thats because the tutorial is so long you dont even notice youre still in it till the game ACTUALLY starts. It has everything! Cool robots, social comentary, crazy weaponry, it makes you question your prejudices, you can customize EVERYTHING, there are amazingly handled metaphors for trauma, you can have a pet cleaning robot, you stare at the void and the void stares back, you can pet the cats and dogs!
I can and WILL go into heavy detail if given the slightest opportunity.
most people i thought of were already tagged by @hey-august, so ill just add in @rorywritesjunk and @lostfirefly
I dont remember much of anything off the top of my head, so i couldnt think of anyone else even though itll probably come to me about two day from now, oh well.
4 notes
·
View notes
Text
Graveyard of Unfinished Projects, Pt I
@anti-workshop asked me to do a deep dive on my Graveyard of Unfinished Projects, and i’m always thrilled to talk about my art!
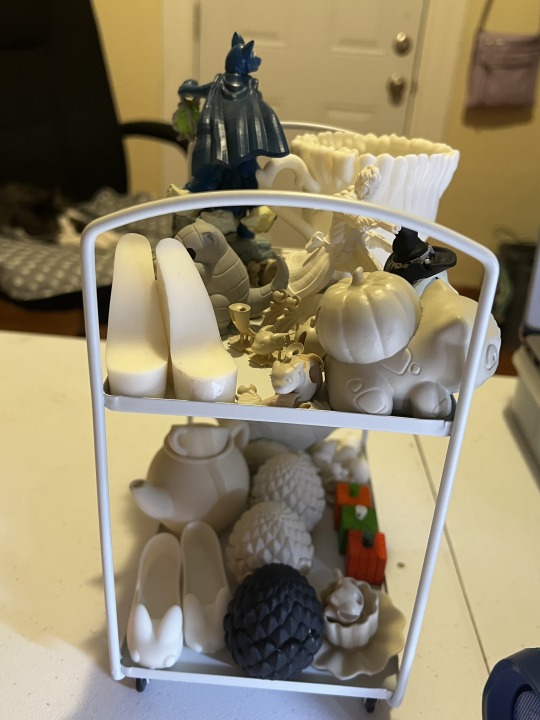
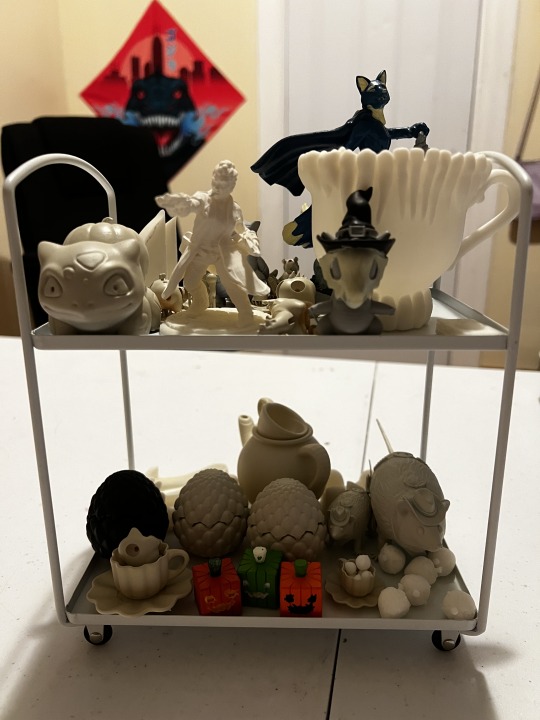
i got this little cart (with working wheels!!) at target for $5. i am forever finding the most amazing little doll accessories from their discount bins at the front of the store. i’ve also got some fake greenery tiles for photoshoots, a cute bike (although that came from michael’s, i think), and an adorable little orange wheelbarrow. once the projects on it are finished, it will become a doll-sized tea tray.
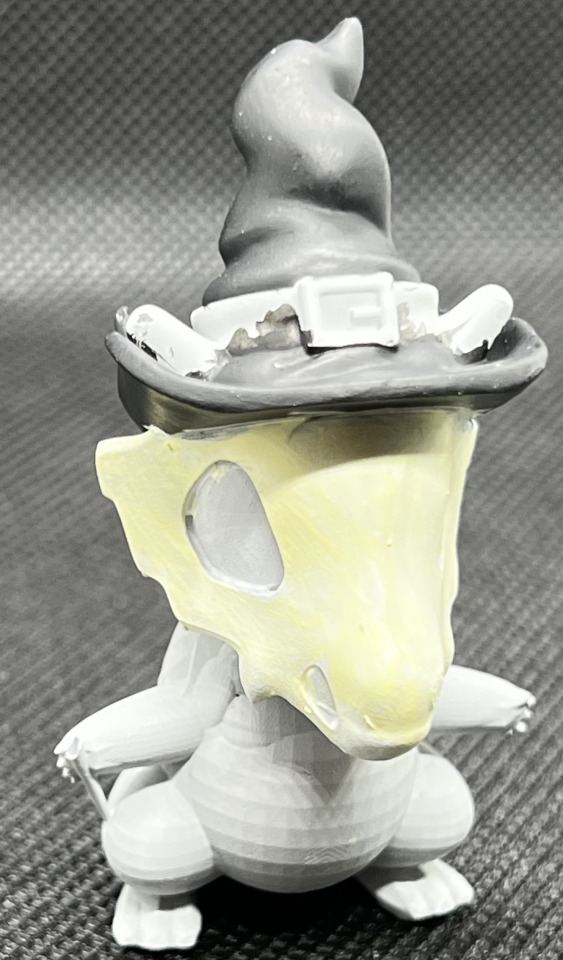
first up: witch cubone! he had a bone club but it was really thin and it broke at some point. this is from an stl i found on thingiverse.
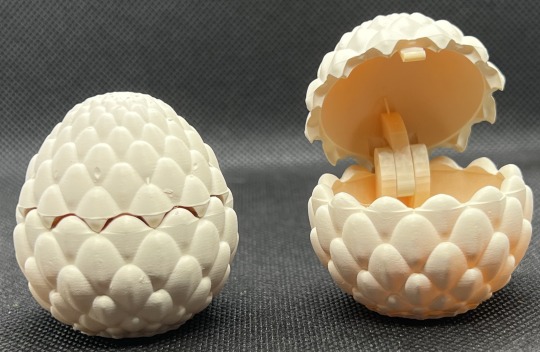
baby dragon eggs! I recently made an egg and a baby dragon for a coworker who is having a baby soon. i painted the egg iridescent pale pink and glued a deep pink heart jewel just above the clasp, and painted the dragon iridescent purple (purple is her favorite color). of course i forgot to take pictures before i gave it to her. >_< it was super cute though. stls from thingiverse.
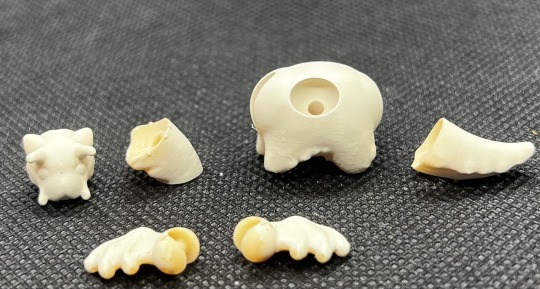
tiny snail dragon with wings! i have a few different versions of these tiny dragons, the stls were made by the same person who made the eggs.
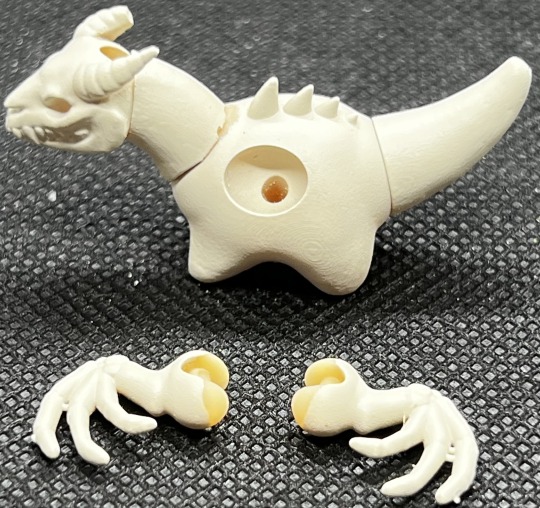
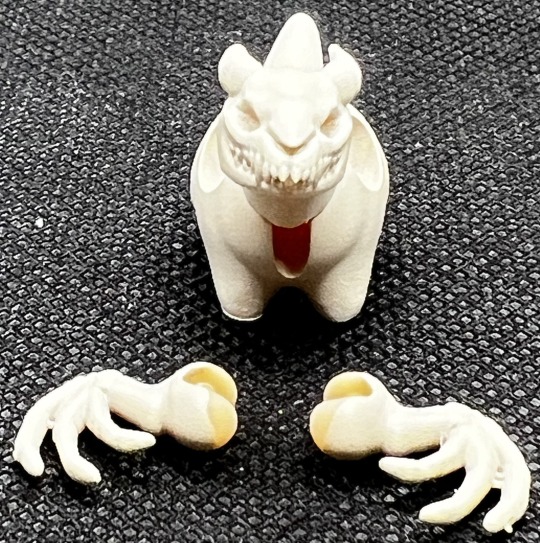
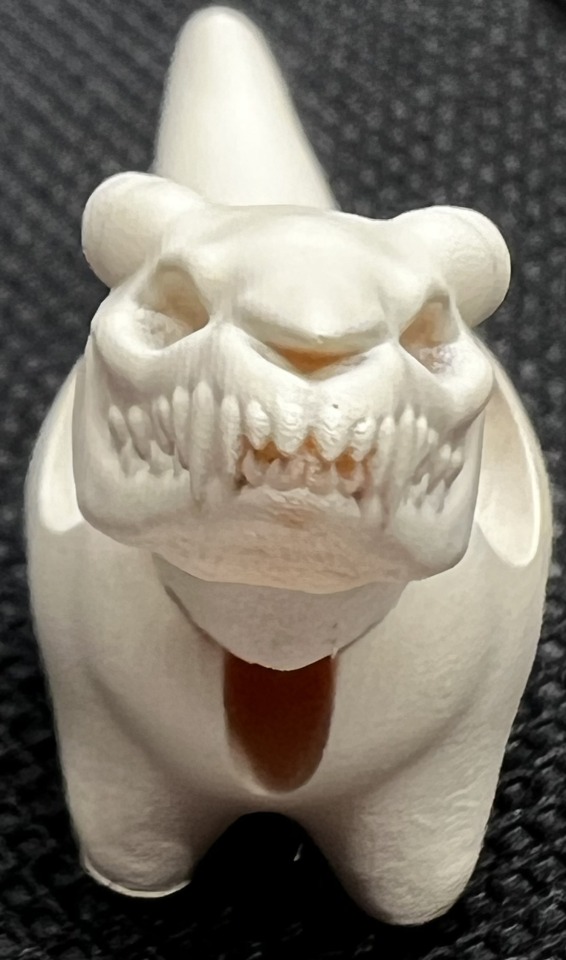
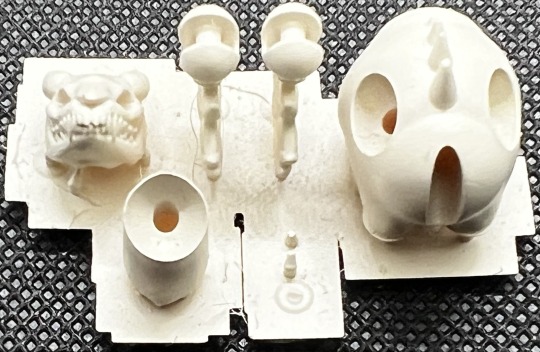
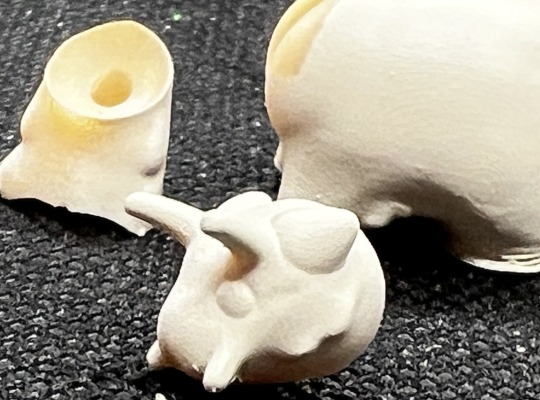
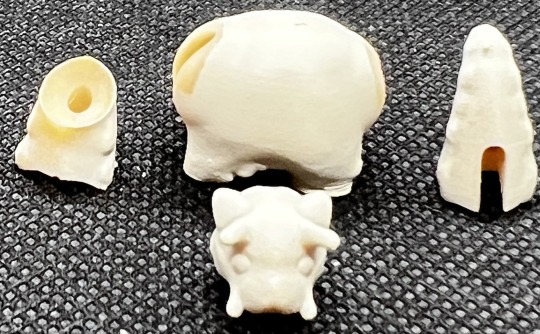
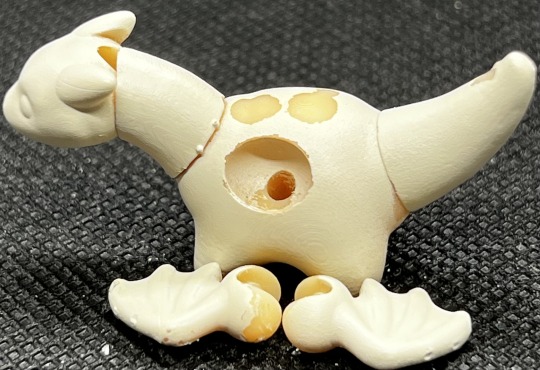
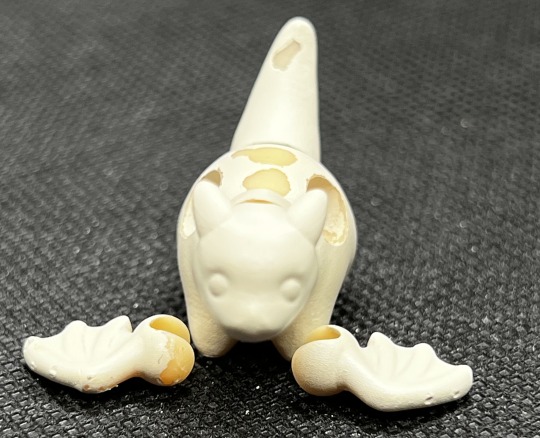
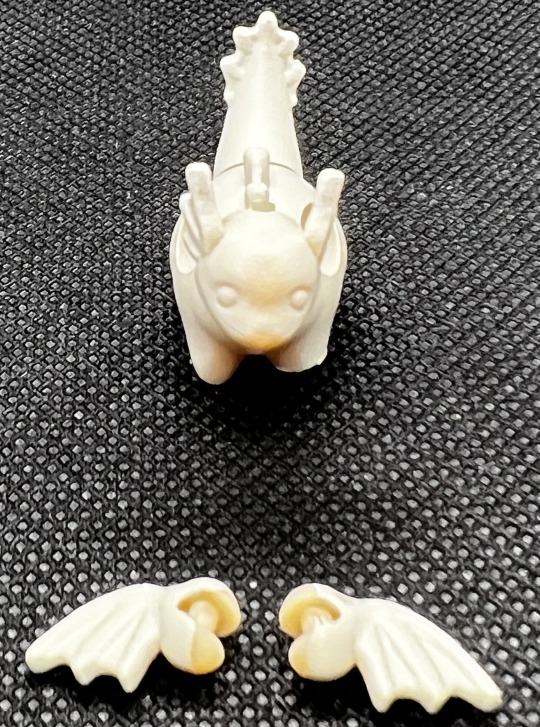
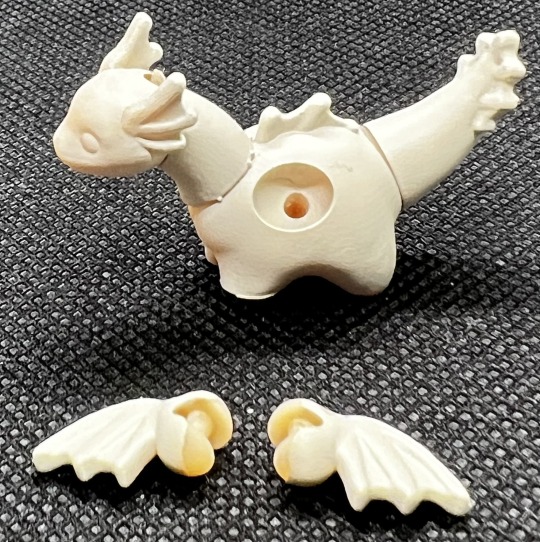
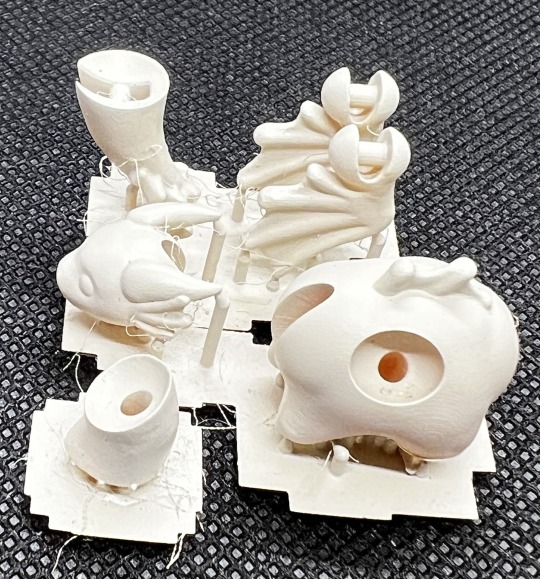
skeletal dragon, snail dragon with and without wings, regular dragon, sea dragon. i have a couple versions of each. here’s how they look on and off the sprue. they’re actually jointed and they’re held together by stringing with tiny hair elastics. i use the clear ones meant for braiding. the wings are strung separately from the rest of the body and let me tell you what a bitch it is to get the damn elastic threaded through the tiny holes. i need some really fine gauge jewelry wire to be able to string them without difficulty.
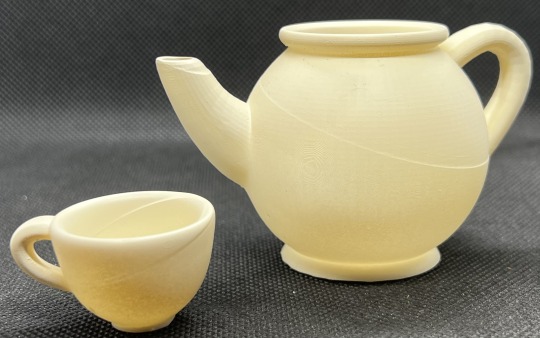
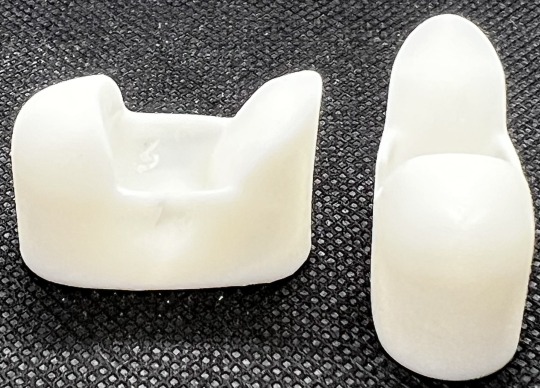
part of a tea set! these are roughly 1:4, or Mini Super Dollfie (MSD) scale. there’s more pieces in this collection, including a lid for the teapot, that i haven’t gotten around to printing yet. files from thingiverse.
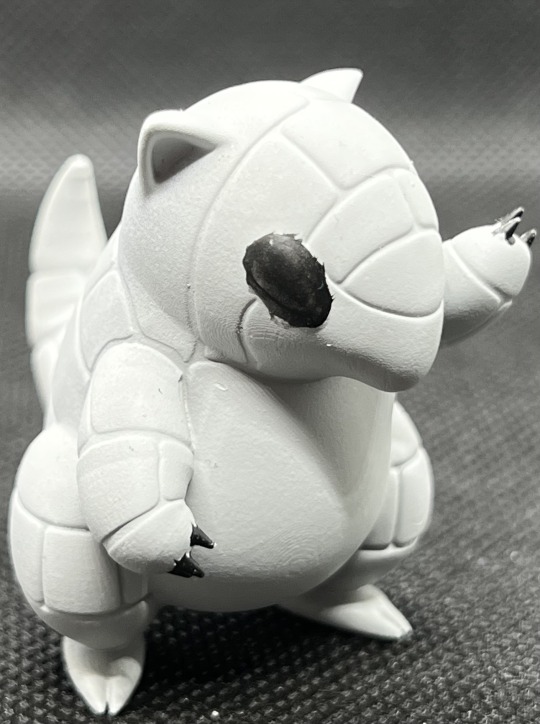
sandshrew!
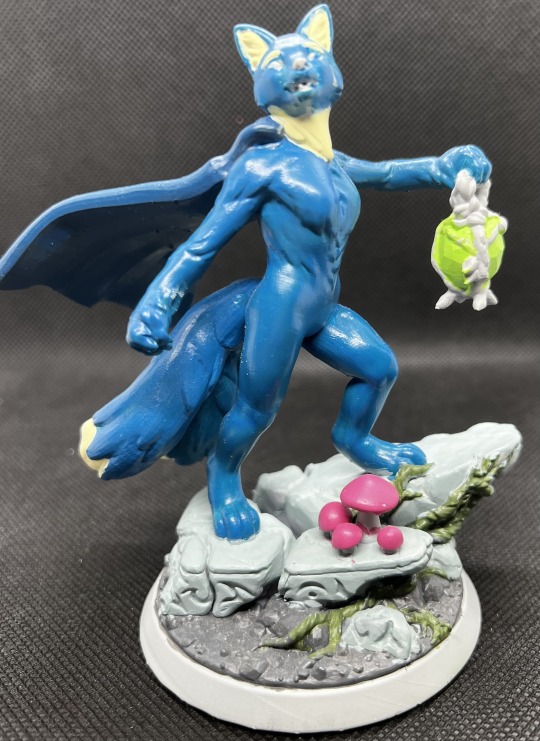
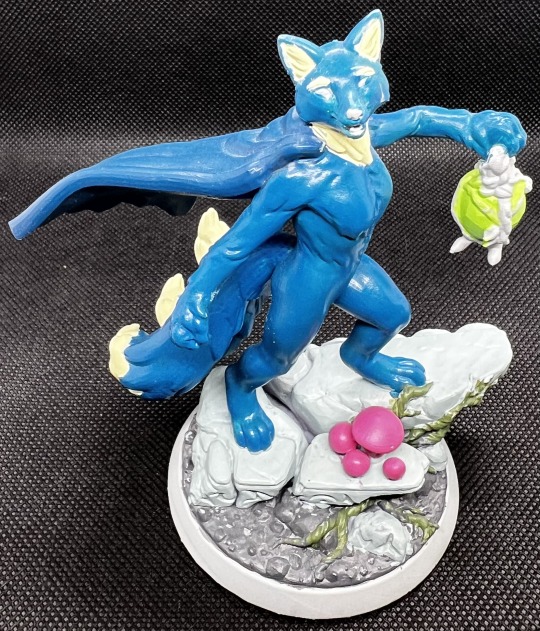
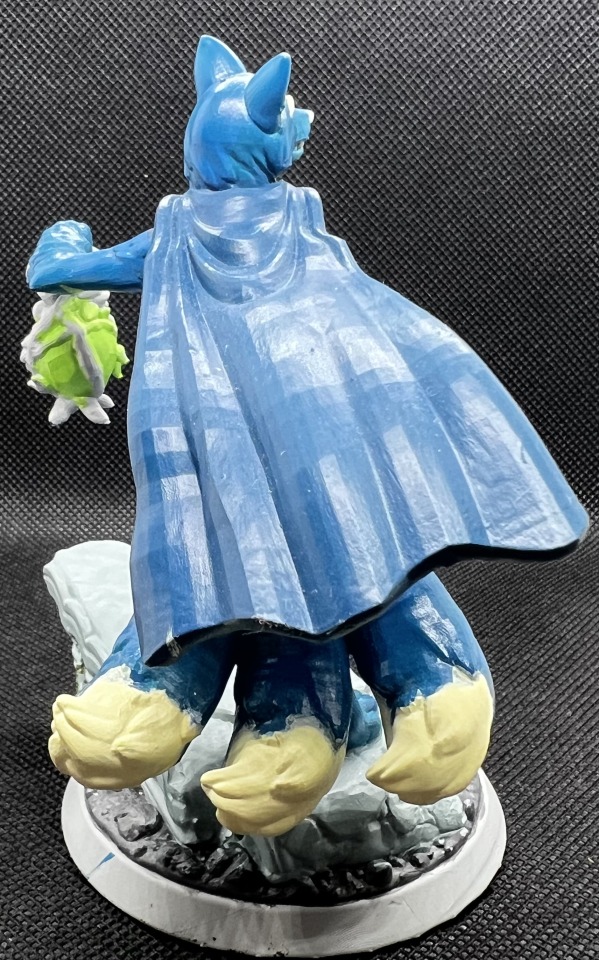
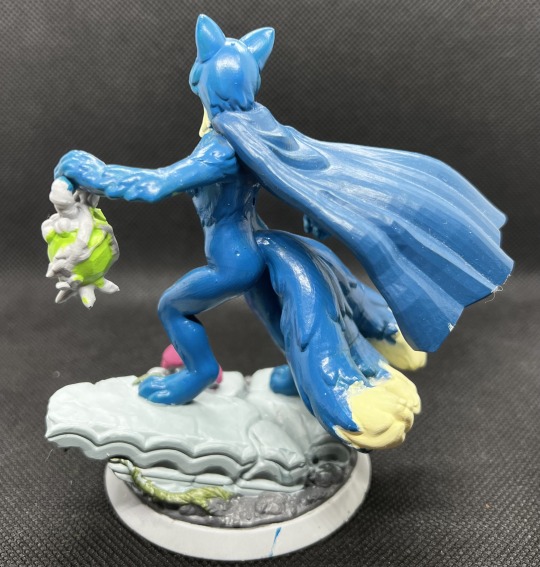
beacon the prussian blue (NOT navy blue) three-tailed kitsune, my fursona. she leads those who are lost out of the darkness by the light of her lantern. i customized and bought this stl from heroforge. their options for anthropomorphic characters have really expanded, and i’m here for it!
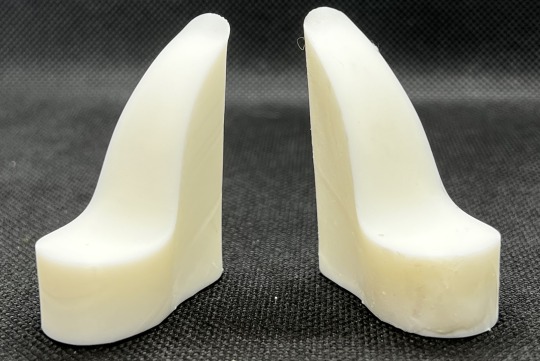
doll shoe bases. wedge heel on the left, platform heel on the right. i bought the files from moonlightjewel, they’re designed in monster high scale but 3D printing files are scalable so i scaled them up a bit for my MSD. haven’t decided what to do with them yet. i have plans for a retrofuture alien girl at some point maybe they’ll come in handy for that.
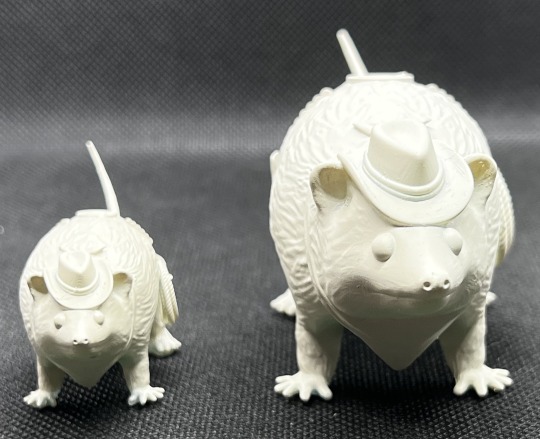
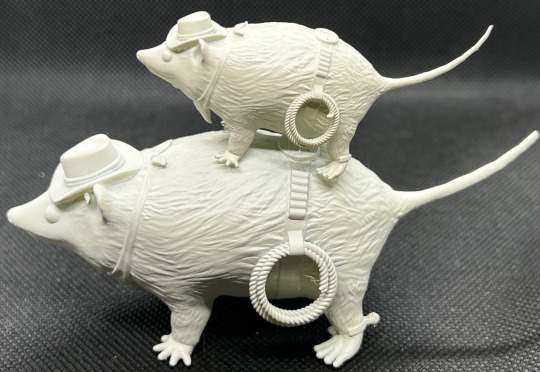
possum cowboys, aka the sheriff and her deputy! this was one of the first things i ever 3D printed. i believe the files for this came from thingiverse.
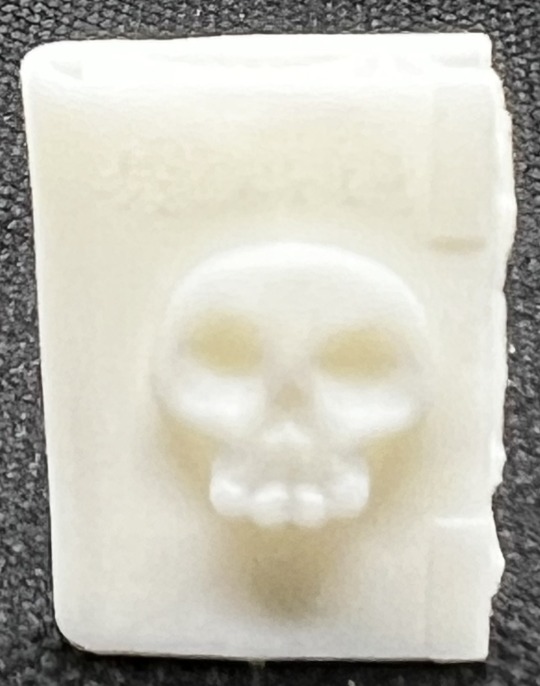

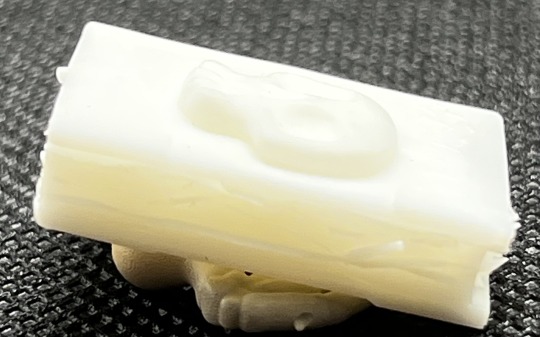
the PRIDE and JOY of the Unfinished Projects Graveyard; the only object in this post that i 3D sculpted myself. it was sculpted in nomad sculpt for the ipad, using a tutorial by erika casab of little robot studio. it was SO HARD but i didn’t even cry once. i’m still inordinately proud of it, but it is so freaking difficult to photograph!
tumblr only allows 30 images per post, so look out for pt 2!
#my art#3d printing#graveyard of unfinished projects#wips#pt I#cosmicstarshine creative diary#@cosmicstarshineart
12 notes
·
View notes
Last Seen Blogs

reemaer4u
Untitled

mistmist240
無標題

daryldixonisgod
"Am I the only one zen around here?"

lil-ravnmoon
Lil Miss Ravn

sci-fi
free palestine