#junkratcosplay
Photo

Some throwback to before Christmas when I got to cosplay with my friend who wore the Pachimari Roadhog I never ended up sharing them because I didn’t get my makeup right for junkrat and just had one of those days where I felt like I couldn’t get myself to like any photos or videos I took. (We’ve all been there before) so I’m trying to just edit a few and post them in spite of that because it was a long time coming getting to do this (I had the roadhog done back in 2021) . #crochetcosplay #yarnwig #crochetwig #owcosplay #overwatchcosplay #junkratcosplay #roadhogcosplay #pachimari #crochetprop https://www.instagram.com/p/Cn8kVo-s8kD/?igshid=NGJjMDIxMWI=
#crochetcosplay#yarnwig#crochetwig#owcosplay#overwatchcosplay#junkratcosplay#roadhogcosplay#pachimari#crochetprop
1 note
·
View note
Photo

Gracias al apoyo de mi buen amigo, se envió el primer pedido de cosplay: Batman, Spiderman, Flash 😎😎Contactanos me https://wa.me/8615692408259 💳PayPal, Western Union #cosplay #bodysuit #miccostumes #herocosplay #cosplayhero #avatarthelastairbender#avatar#avatarcosplay#tyleecosplay#cosplaygirl#cosplayphoto#firenation#cosplaying#avatarlegendofaang#avatartylee#cosplayshooting#cosplayshoot #junkrat#junkratcosplay#overwatch#overwatchcosplay#overwatchjunkrat#gameing#gamer#shooting#avatarthelastairbender#avatar#avatarcosplay#tyleecosplay#cosplaygirl#cosplay#cosplayphoto#firenation#cosplaying#avatarlegendofaang#avatartylee#cosplayshooting#cosplayshoot(在 Miami) https://www.instagram.com/p/Cf7yA5aJu9o/?igshid=NGJjMDIxMWI=
#cosplay#bodysuit#miccostumes#herocosplay#cosplayhero#avatarthelastairbender#avatar#avatarcosplay#tyleecosplay#cosplaygirl#cosplayphoto#firenation#cosplaying#avatarlegendofaang#avatartylee#cosplayshooting#cosplayshoot#junkrat#junkratcosplay#overwatch#overwatchcosplay#overwatchjunkrat#gameing#gamer#shooting
0 notes
Photo
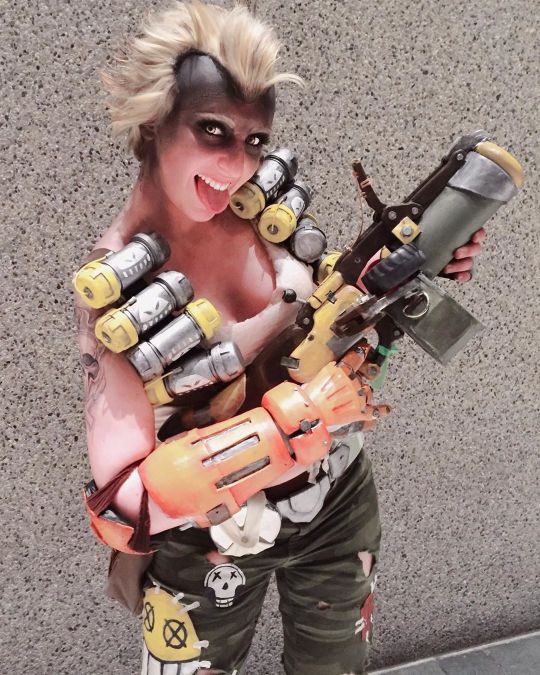

Holy throwback it’s time for a Junkrat pic. Here’s a little Cosplay vs Character for you on this fine Friday. I am so excited to work on more masculine cosplays again. I really want Trevor to be a true crossplay so I’ll be working on my makeup transformation skills. ✨ Hopefully I will have progress to share on my story sometime this weekend~
#junkrat#my cosplay#junkratcosplay#overwatch#overwatchcosplay#cosplay#cosplayvscharacter#foamsmith#cosplayarmor#cosplayweapon#crossplay#genderbendcosplay#jamisonfawkes#blizzard#blizzardentertainment#blizzardcosplay#eccc#eccc2018#cosplaymakeup#sfxmakeup
32 notes
·
View notes
Photo


youtube
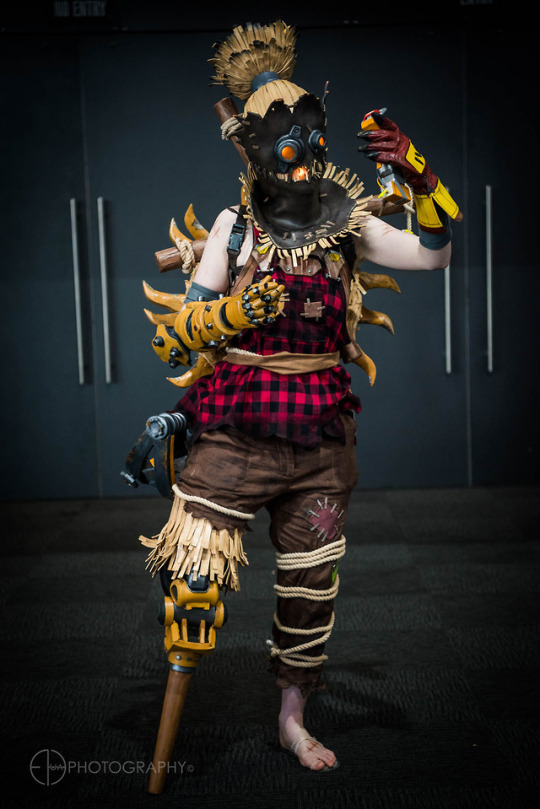
🔥 Hayseed Junkrat cosplay [ Overwatch ] 🔥
Love this skin design! ❤️🧡💛 I’ve been upgrading this project over 2 years.
📷 tags: (1) E.Hua Photography (3) Snap Happy Ian (4) Magic Missile Studios
(The rest are from my solo shoot)
⚙️ Detonator 3D printed kit: birchprops
Some progress shots can be found on my Instagram: dashycrafts
Construction notes below in ‘read more’ link:
💥 Mask:
Mostly eva foam; heat formed around a cast of my head
Foam sealed with Flexbond, painted with Angelus acrylics and finished with a satin acrylic clear coat
Hair dome is detachable from the mask (3 velcro+elastic attachments)
Pony tail section is detachable from the dome via velcro inside the grey band on one half of the circle; an LED battery pack for the two pony tail lights is stored inside that band in the other half of the space
Flickering LEDs are from those LED candles; I've removed the LEDs and re-wired them to some compact, thin button cell battery holders
Orange plastic sheet (document folder) for the lenses - sprayed with “CLEAR DE-FOG”
Vision is fairly limited, especially in low light with the LEDs on
RE: Breathing: There are gaps in the mouth hay and between the hay dome and mask at the top
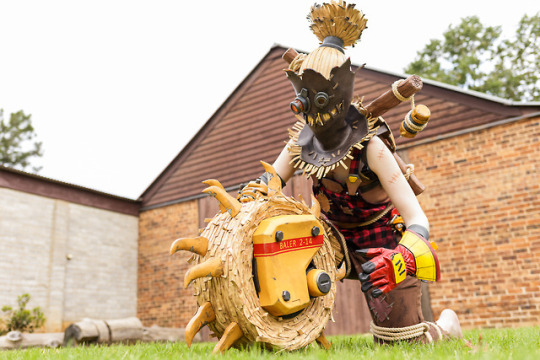
💥 Tyre, back mount and logs:
Hay is individual strips of eva foam glued on covering a foam base
Back panel removable, small items can be stored inside
Spikes are eva foam and worbla, attached with bolts and wing nuts (ended up being a hassle to screw them on/off, I should have tried something else)
Tyre attaches with a wooden peg that fits into a slot on the back mount - Apoxie Sculpt molded around the peg inside a PVC end cap which is bolted to the mount
Back mount is worbla heat-shaped over a bowl and eva foam
Logs rest on a metal bracket bolted inside the back mount, there is also webbing bolted on which wraps around the logs to secure them
Logs are eva foam cylinders with scored and heated detailing
Logs can be dissembled for travel with a threaded plastic rod inside
Rope has been tinted with some acrylic paint
💥 Singlet and waist wrap:
Cotton flannel 'buffalo check plaid' found on Etsy
Started the pattern by cutting up a cheap plain singlet, transferred that basic shape to paper then drafted the rest
Shoulder straps have strips of eva foam inside to make them sturdier, these are embedded inside the clips
Clips and patches are eva foam
I ironed on fusable interfacing to the patches and clips to try sewing them on but had some issues with the edges not sitting flat so finished them off with some glue
Darkened areas of the flannel with some watered down fabric paint, sponged on
Bottom raw edges were coated with 'Fray Stoppa'
Rivets are googly eyes
Waist wrap fabric is from the right pant leg cut off! The original colour of the pants is close enough and has a nice linen texture; dug out some fabric from my stash for the backing to make it sturdier; features sewn-in snaps
Attached a clip and keyring combo to the rope with electrical tape
💥 Arm armour and hand:
Eva foam and worbla for fingers
Hand patterned by drawing onto a disposable rubber glove (should have allowed for wider gaps for better flexibility, also probably should have used eva foam instead)
Hand pieces completely separate from black under glove, joined together by elastic (this ended up being annoying to put on/take off, next time I make gloves I’ll try attaching the pieces directly to a glove)
💥 Pants:
Started off as 2nd hand linen pants found on Ebay; dyed darker brown
Rope and patches hot glued on
Weathered with some fabric paint
Hay thigh held in place with elastic that loops around a belt
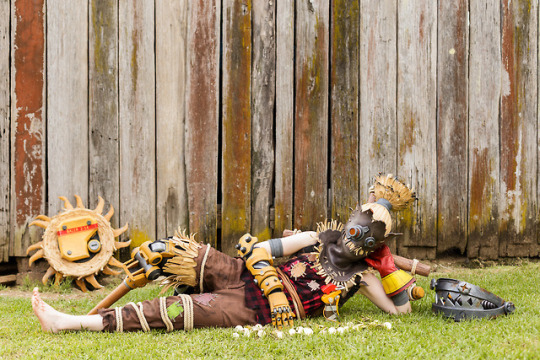
💥 Peg leg:
Pine furniture leg
Upper section is eva foam construction, front and sides only
When posing my knee rests on a support inside - dowel screwed into the leg, part of a knee pad screwed into dowel (ended up trimming most of it off as it was too bulky), added some worbla to make a curve then some foam on top for padding
Elastic straps attached to secure it around my leg, also one longer strip goes up to my belt and loops around tightly
💥 Red glove:
Started as a yellow leather glove bought on Ebay
Patterned a gauntlet cuff, made with eva foam; other details also foam
Painted with Angelus acrylics
💥 Trap:
More eva foam construction!
PVC pipe base
Jaws swivel open and closed
💥 ‘Bare’ foot shoe:
Traced around my foot to make a pattern, added a bit extra all the way around to ensure my foot doesn’t touch the ground
Clear PETG base cut with small holes drilled in for the straps (two overlapping like a cross at the middle, another over my big toe)
Eva foam added for padding/comfort, cut slightly smaller than foot, matching holes, taped on
Mesh fabric straps threaded through the holes, ends taped down (holes kept the fabric tight)
💥 Detonator - 3D printed kit by @birchprops
Glued parts together
Hours of sanding the raw PLA
Sprayed layers of filler primer
Hours of wet sanding primer
Masked and sprayed the colours on then more sanding
Completely reconstructed the printed bracket from thermoplastic as I accidentally broke the section where it bends; fragile part that ideally should be actual metal. I think it has a bit more flex than the PLA now; screwed into the body
Drilled a hole into the bracket so the antenna could be attached with a screw
Drilled out a large cavity in the top of the main body underneath the button plate to make space for an LED and button cell battery holder
Drilled out holes for magnets to hold the plate on
Glued magnets onto the plate
Filled in the magnet holes with Apoxie Sculpt and squished in the magnets to help with making the holes the right depth and alignment
Made a new translucent button that can be illuminated to replace the original opaque one. Cut and sanded acrylic rod. Dyed red.
Drilled hole for button to fit into
Wired a red LED to a button cell (2) battery holder
Glued magnets into the 'metal' ring at the top so it can swivel separately to the red cap
Cut, sanded and painted the orange and grey wiring
Drilled holes for the wiring to slot into
Made a thermoplastic cover piece for the grey wiring
Wrapped 2 different kinds of tape around; bottom layer is silver cloth tape, top is Scotch transparent tough tape for more noticable texture
Applied Rub n Buff to 'metal' parts
Painted weathering details
Sprayed clear coat
#junkrat#overwatch#junkratcosplay#overwatchcosplay#blizzard#hayseed#junkertown#evafoam#foamsmith#cosplay
419 notes
·
View notes
Photo

FIRE IN THE HOLE!🔥 ° ° ° This cosplay has been a challenge for me: it brought me out of my comfort zone. Junkrat is an amazing charactet, very different from me in several aspects and it has been fun to try to bring him to life. ° ° ° Ph: @nashtory 💛 ° ° ° #overwhatch#junkrat#overwatchcosplay#junkratcosplay#gamesweeek2019#italiancosplayer#cosplayeritaliani#genderbendcosplay#overwatchjunkrat#gamesweek#milangamesweek#fireinthehole#handmadecosplay (presso Milan Games Week) https://www.instagram.com/p/B3EXoeKImXd/?igshid=51hlupa3gko3
#overwhatch#junkrat#overwatchcosplay#junkratcosplay#gamesweeek2019#italiancosplayer#cosplayeritaliani#genderbendcosplay#overwatchjunkrat#gamesweek#milangamesweek#fireinthehole#handmadecosplay
3 notes
·
View notes
Video
There comes a time in your life when the right person asks you an important question… and all you’ve gotta do is say yes ❤️❤️❤️
.
.
.
#Proposal #Marriage #Marry #Cosplay #CosplayProposal #Overwatch #OverwatchCosplay #Mei #MeiLingZhou #Junkrat #JamisonFawkes #MeiCosplay #JunkratCosplay #OTP #OTPForLife #Love #Blessed #Meihem #Junkmei
https://www.instagram.com/p/BrW4iNIgel1/?utm_source=ig_tumblr_share&igshid=wv3vcu47s7d8
#proposal#marriage#marry#cosplay#cosplayproposal#overwatch#overwatchcosplay#mei#meilingzhou#junkrat#jamisonfawkes#meicosplay#junkratcosplay#otp#otpforlife#love#blessed#meihem#junkmei
65 notes
·
View notes
Photo
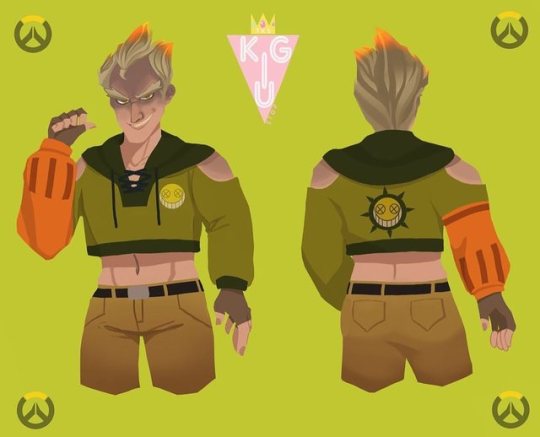
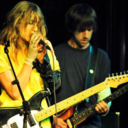
💣 🔥Fire in the Hole! 🔥💣 — AHHH MY FIRE BOIIIIII!!! — I love the energy of this crazy mofo lol and his crop will be up later today!! — Crop collab with @t0kwah ... Hoodie/jogger collab with @rhythmicartist —- #overwatch #overwatchcosplay #junkrat #junkratcosplay #overwatchjunkrat #thekigustop #cosplayer #cosplay #blizzard #blizzardentertainment #fashion https://www.instagram.com/p/By-a174pM3p/?igshid=1m7w0w4bcc6qp
#overwatch#overwatchcosplay#junkrat#junkratcosplay#overwatchjunkrat#thekigustop#cosplayer#cosplay#blizzard#blizzardentertainment#fashion
3 notes
·
View notes
Photo
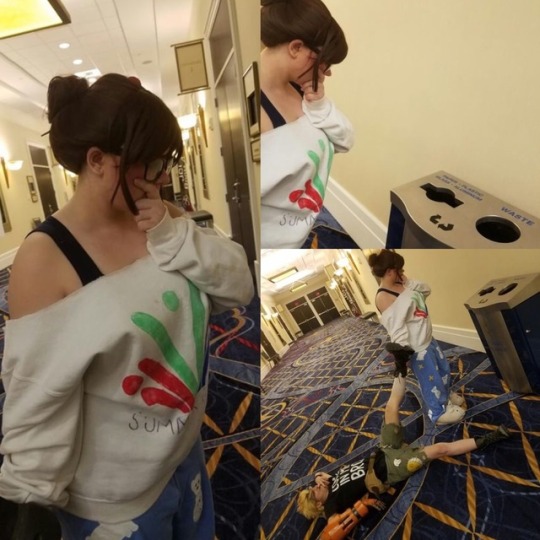
Decisions
Mei is me, @heyykristique Junkrat is @ratnocarecosplay Photo credit goes to @tunaboy2!
#junkratcosplay#Mei#overwatch#junkrat#funny#humor#meme#katsucon2018#katsucon#cosplay#recreation#meicosplay#overwatchcosplay#trash#meihem
2K notes
·
View notes
Photo

unexpected project. rat leg. everything is moving. knee mount #junkrat #junkratkrampus #winterwonderland #junkratcosplay #blizzard #blizzardcosplay #overwatch #overwatchcosplay #3dprinting #3dmodeling #spearmaster #krampus #christmas #weapons #props https://www.instagram.com/p/BrqO9eLDGoU/?utm_source=ig_tumblr_share&igshid=my6vb6g8y15x
#junkrat#junkratkrampus#winterwonderland#junkratcosplay#blizzard#blizzardcosplay#overwatch#overwatchcosplay#3dprinting#3dmodeling#spearmaster#krampus#christmas#weapons#props
3 notes
·
View notes
Video
@morrissworld reminded me that I also forgot to post one of my Payload Tour videos from Dragon Con! This one is especially silly: we grabbed random weapons & accessories and just goofed around 🤣 The awesome Blizzard people were so nice to let us have another turn! Also I almost fell so many times! That platform is scary, and I'm by no means an expert in heels! 😂 . Tracer: @morrissworld Junkrat: @justcallmezer0 Mercy: me! . . . . . #overwatchpayloadtour #overwatchgame #overwatchmercy #overwatch #blizzard #blizzcon2018 #blizzcon #overwatchcosplay #junkratcosplay #junkrat #mercy #mercyoverwatch #mercycosplay #tracercosplay #tracer #pinkmercyskin #pinkmercy #dragonconcosplay #dragoncon #dragonwatch #dragoncon2018 (at Dragon*Con) https://www.instagram.com/p/Bp5Pj8Rn-Te/?utm_source=ig_tumblr_share&igshid=6kh6fx225zmd
#overwatchpayloadtour#overwatchgame#overwatchmercy#overwatch#blizzard#blizzcon2018#blizzcon#overwatchcosplay#junkratcosplay#junkrat#mercy#mercyoverwatch#mercycosplay#tracercosplay#tracer#pinkmercyskin#pinkmercy#dragonconcosplay#dragoncon#dragonwatch#dragoncon2018
4 notes
·
View notes
Video
Go check out @ishinobistudios 's new cosplay video for AWA! He made me and the rest of the squad from Saturday look so cool in this clip 😩👌✨ if you know the ana and mercy please tag them so i can tag them! 🐭- @justcallmezer0 🏃- @morrissworld 🔧- @average.mo 🐸- @wandering_chaos 🛑-@evangelinelaveau 💜-@xpsychohogx . . . #awa #animeweekendatlanta #overwatch #overwatchcosplay #sombracosplay #mercycosplay #orisacosplay #luciocosplay #tracercosplay #junkratcosplay #anaamaricosplay #brigittecosplay https://www.instagram.com/p/BoVphvyFwVd/?utm_source=ig_tumblr_share&igshid=1mjl03ggmvo6u
#awa#animeweekendatlanta#overwatch#overwatchcosplay#sombracosplay#mercycosplay#orisacosplay#luciocosplay#tracercosplay#junkratcosplay#anaamaricosplay#brigittecosplay
7 notes
·
View notes
Photo
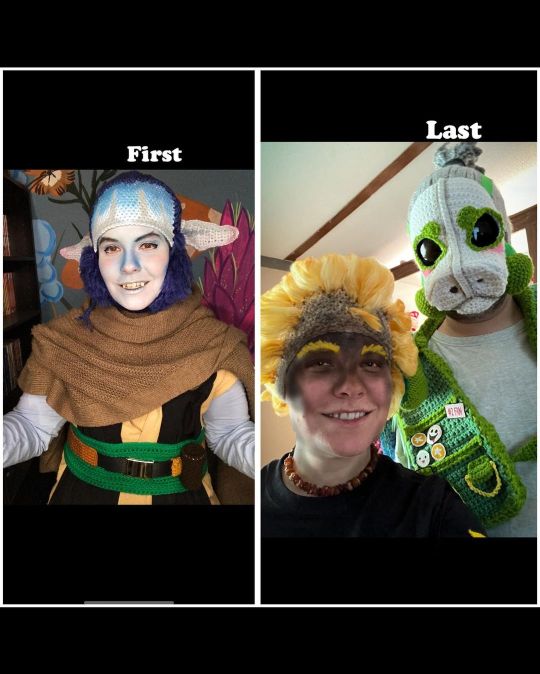
Rather late 2022 wrap up: ⭐️ My first and last cosplay I wore in 2022; a Farzala test and then junkrat and roadhog I did when my friend came to visit. . ⭐️ All the plushies I made this year, it was more than usual for me. . ⭐️ Something new I made this year- nerd purses and a little mini skirt were new adventures this year for me, both of which were super fun! . ⭐️ Finished cosplays; Farzala’s full outfit, I made 2 new outfits for my twilek, and my spaceballs Barf outfit I don’t think I ever remembered to post (oops lol) . ⭐️ And some of my favorite things I made; Stellan’s lightsabers were really fun and figuring out lightsaber cozies was huge for me and the fnaf mask that turned out better and creepier than I’d expected and still brings me joy to see and creeps me out in the middle of the night lol! . Here’s to another year of cosplay and crocheting and I hope I make more finished cosplays next year! . #crochetcosplay #junkratcosplay #farzalatarabalcosplay #starwarscosplay #overwatchcosplay #yarnwig #crochetprops https://www.instagram.com/p/Cm9-W-6LM_J/?igshid=NGJjMDIxMWI=
#crochetcosplay#junkratcosplay#farzalatarabalcosplay#starwarscosplay#overwatchcosplay#yarnwig#crochetprops
1 note
·
View note
Photo

I had an amazing time judging the cosplay cosplay contest at Hamacon this past weekend. Here is the awesome Junkrat who was my judges pick @justcallmezer0 @hamagrams #overwatchcosplay #junkratcosplay #hamacon2018 #hama #hamacon (at Huntsville, Alabama)
30 notes
·
View notes
Photo

“Mess with the best, die like the rest.” . . 📷: @mikittyvicious Moira: @sugar_lumps Ana: @katerpie91 . . Throwback to Katsu because I appreciate these two so much and am really glad they willingly go along with my shenanigans all the time. 💖 . . #overwatch #overwatchcosplay #junkrat #anaamari #moira #playoverwatch #junkratcosplay #cosplayer #cosplayers #cosplayersofinstagram #cosplaying #cosplay #cosplayers #groupcosplay #blizzardentertainment #videogames #gamer #cosplaylife #cosplayphotography (at Katsucon) https://www.instagram.com/p/BowraeIFHU_/?utm_source=ig_tumblr_share&igshid=1jdw8cn9qmjse
#overwatch#overwatchcosplay#junkrat#anaamari#moira#playoverwatch#junkratcosplay#cosplayer#cosplayers#cosplayersofinstagram#cosplaying#cosplay#groupcosplay#blizzardentertainment#videogames#gamer#cosplaylife#cosplayphotography
1 note
·
View note
Photo

It's hard to just sit around knowing there's someone out there that needs to be blown up! 💥💣💥💣 Another genderbent Junkrat photo! Again, costume not even close to being done, this was just a makeup test. I love it though!! And the test photos look pretty good. 💚💜 Thank you @mehronmakeup for making such awesome paints. I used the black Paradise Paint and it worked out perfectly, Paradise Paints are some of my FAVORITE products to use. Ever. . #overwatch #overwatchcosplay #overwatchjunkrat #overwatchcosplayer #overwatchcosplays #junkrat #junkratoverwatch #genderbending #genderbender #genderbent #genderbentcosplay #genderbentjunkrat #junkratoverwatchcosplay #junkratcosplay #junkratmain #junkratcosplayer #cosplay #cosplayer #cosplaytest #cosplaymakeuptest #cosplaymakeup #cosplaygirl #cosplaygirls #cosplaybabe #cosplaygirlsofinstagram #cosplaygirlsofig #cosplayersofig #cosplayergirl #cosplayersofinstagram #mehrongirl
#junkratoverwatch#cosplayersofinstagram#junkratmain#genderbender#overwatch#junkratoverwatchcosplay#cosplaygirlsofinstagram#cosplaymakeuptest#junkrat#overwatchcosplay#junkratcosplay#junkratcosplayer#cosplaymakeup#overwatchcosplays#cosplaybabe#genderbentjunkrat#cosplaytest#genderbending#overwatchjunkrat#overwatchcosplayer#cosplaygirlsofig#cosplayergirl#cosplayer#mehrongirl#cosplayersofig#genderbentcosplay#cosplaygirls#cosplaygirl#genderbent#cosplay
1 note
·
View note
Photo

special attention to ammo and bear #junkrat #junkratkrampus #winterwonderland #junkratcosplay #blizzard #blizzardcosplay #overwatch #overwatchcosplay #3dprinting #3dmodeling #spearmaster #krampus #christmas #weapons #props https://www.instagram.com/p/Brka1_IDIoY/?utm_source=ig_tumblr_share&igshid=1oouhr9mmvudw
#junkrat#junkratkrampus#winterwonderland#junkratcosplay#blizzard#blizzardcosplay#overwatch#overwatchcosplay#3dprinting#3dmodeling#spearmaster#krampus#christmas#weapons#props
1 note
·
View note
Last Seen Blogs

alkirilatori
Alkiri
mandopopguin
(*´Д`)
crym94
Crym's Corner
chilechilelindo
Ce Ache I, Ele E !!

susiemua
Susie🦋