
prophecysgirl
way up in the clouds
kim, 22. twitter: irisanwest ♡ gifmaker
7418 posts
Don't wanna be here? Send us removal request.
Last Seen Blogs
apronelegance-blog
Apron Elegance
mig8fan
Mig8
slendermanmom
Slenderman's Mom
apofestofel
never mind
inthehootwetrust
In The Hoot We Trust
Text

ALWAYS AN ANGEL NEVER A GOD !!!
#i kid you not screaming this live in the rain will change your life#i don't make the rules#boygenius
16K notes
·
View notes
Text

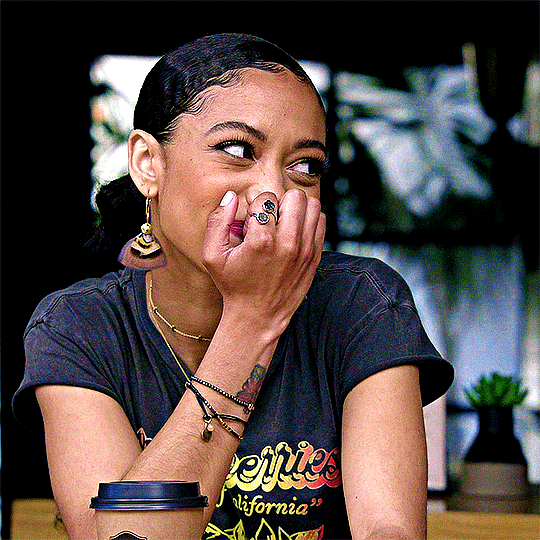
she was sooo real for this. straight up, you're not.
11K notes
·
View notes
Text
it's crazy that people can consume the same media yet come away with vastly different & wrong opinions. not me though because i'm always right
51K notes
·
View notes
Text


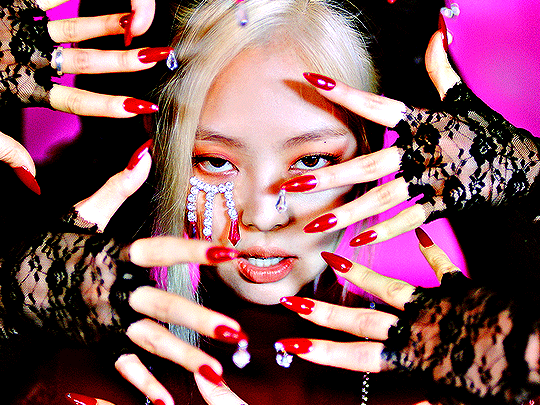

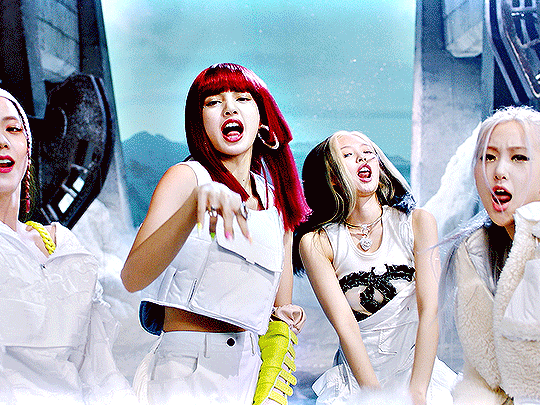
HOW YOU LIKE THAT
BLACKPINK, 2020
245 notes
·
View notes
Text
my oversized sweatshirt will protect me from Everything
123K notes
·
View notes
Note
Hello!! First your Tumblr and edits are so gorgeous! Second I was wondering if you were willing to share how you did the second gif of this edit please? Have a great day! (Or night)
https://www.tumblr.com/thereigning-lorelai/713794704750362624/usergif-1-year-celebrationshuffle-challenge?source=share
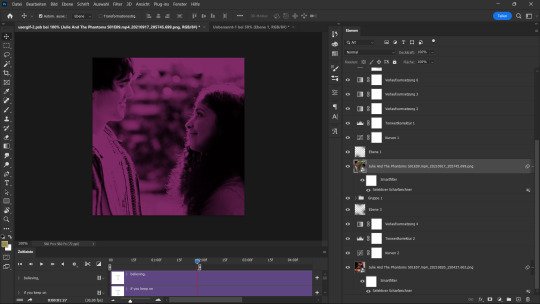
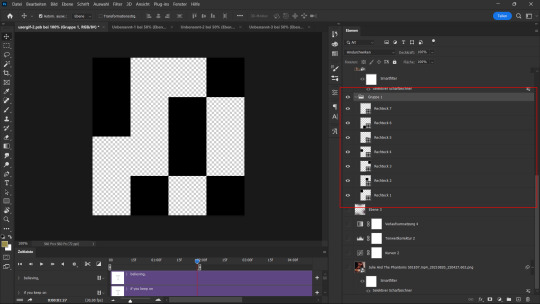
hi nonny, thanks for the nice words! really appreciated. ♥️ so, you're looking for this grid effect:

you're starting off with two gifs. i'd recommend choosing scenes that are not too close up because otherwise they'll overlap too much and you won't be able to delete enough parts to make the most of this effect.
so, here's my base gif that i just did in black and white with some minor purple brush strokes set to screen:

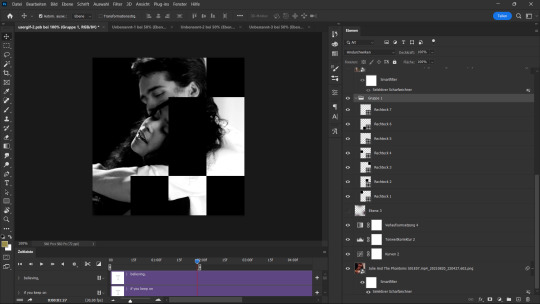
i then chose my second gif and coloured it with a purple gradient map and a purple colour fill set to multiply. the colouring of the gifs is entirely up to you and what you think looks best. so here's my second gif, still without the grid:
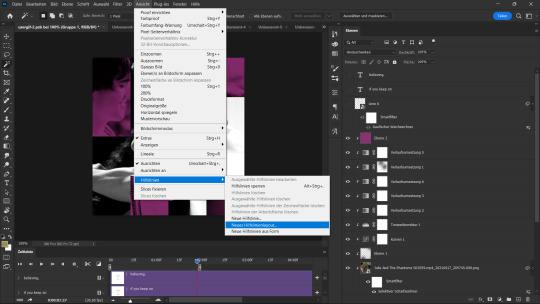
this is where the fun part starts - the grid layout. i created that with a new guide layout. this is a super neat tool in photoshop that helps you align shapes or selections on your image. the guide lines basically float over it and help you set up symmetric shapes or layouts. you can define how many columns and rows you want to have and then photoshop creates the guide layout for you. for this gif i chose 4 columns and 4 rows:

with this set up, i started creating the rectangles to make the purple gif visible on top of the black and white one. this is my final layout for my shapes:
you can move around the shapes to your liking and what works best with your gifs. i didn't want to cover too much of my base gif but also tried to make their faces in the top gif all be in the gif as much as possible.
this step is just a lot of moving around your shapes and seeing what looks good tbh.
i then grouped my shapes and clipped my top gif (including all layers for the colouring) to my shapes group:

looking good so far. the only thing missing are the lines for the grid. this is where your guide layout comes in again. i just reopened it and then traced the guide lines with my line tool to create the white grid overlay:
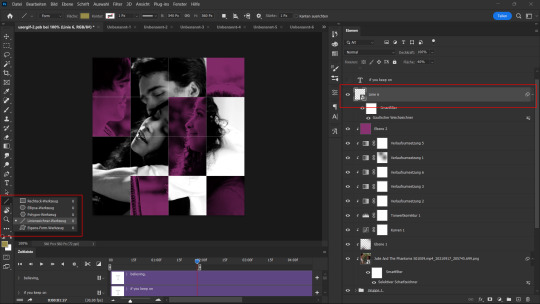
(for editing purposes i turned all of the line layers into a single smart object at the end. this is why you only see one layer for all the lines in this screenshot.)
finally, i used a gaussian blur (0,5 px radius, 100% fill for the filter, 40% fill for the overall layer) on the smart layer to make the lines a little bit smoother and softer looking. this is totally optional and again, up to what looks best to you.
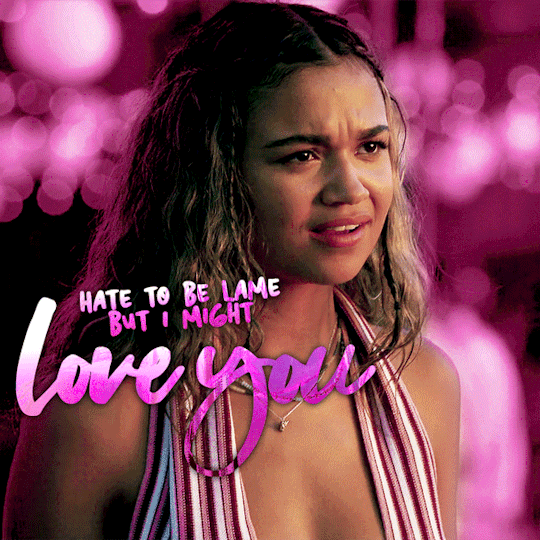
added some text et voilà:
298 notes
·
View notes


Text

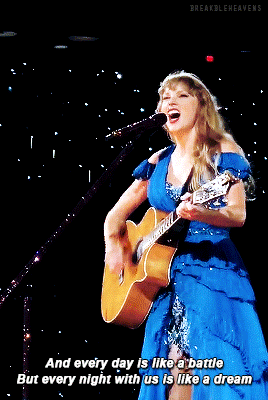
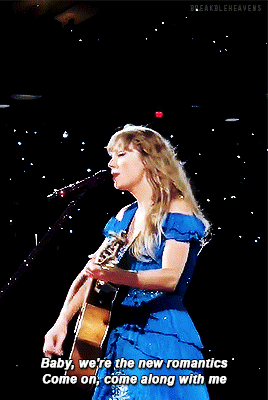
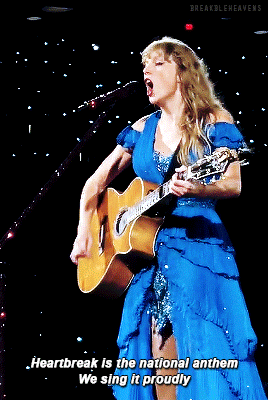
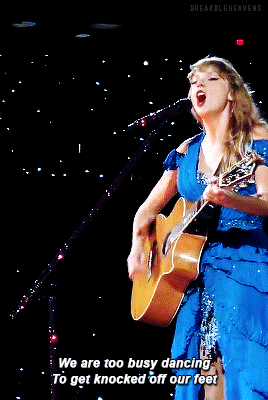

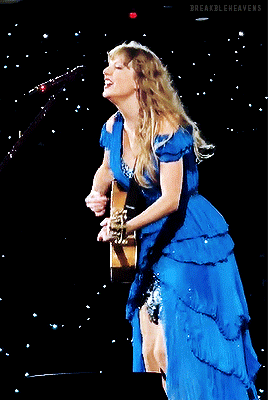
NEW ROMANTICS
The Eras Tour — Los Angeles, California (Night 6) | August 9, 2023
+ bonus: A happy happy Taylor ♡

2K notes
·
View notes


Text

OLIVIA BAKER
ALL AMERICAN | 3.11 “The Bigger Picture”
284 notes
·
View notes
Text
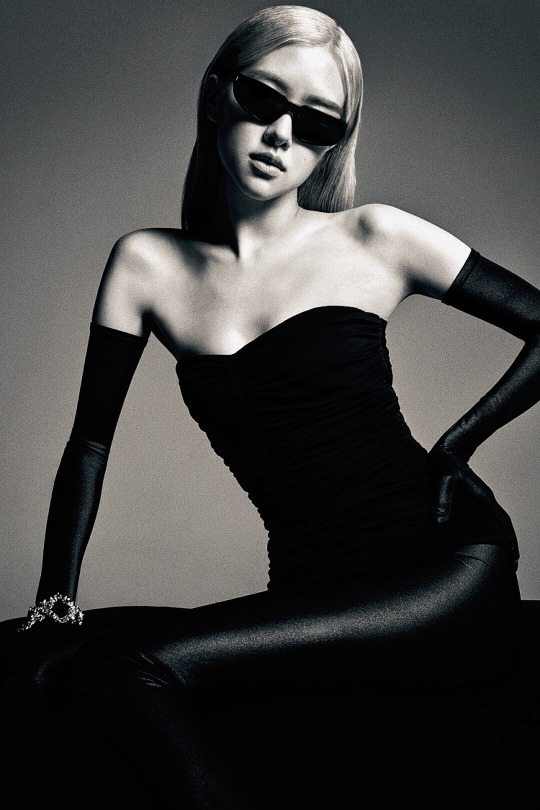
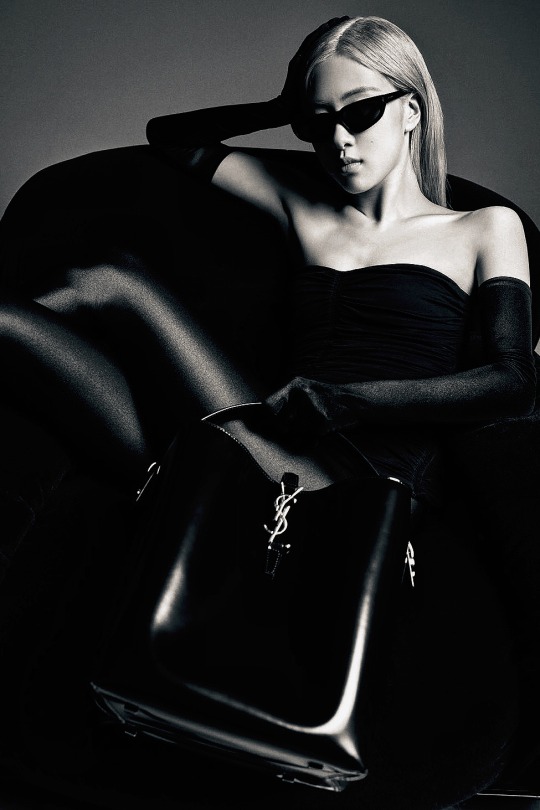
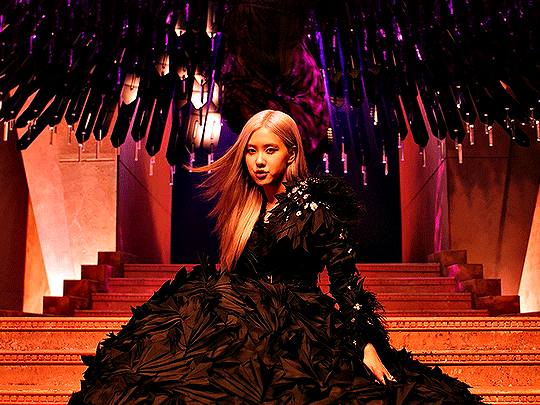
ROSÉ 𓆩☆𓆪 SAINT LAURENT
216 notes
·
View notes
Text

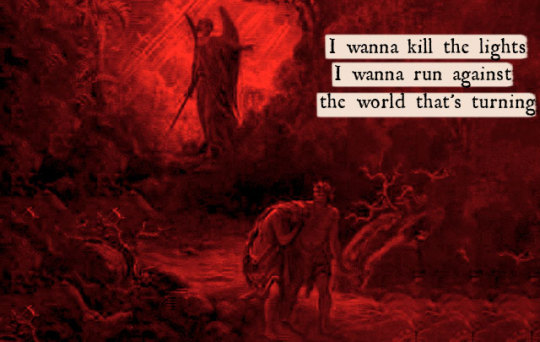
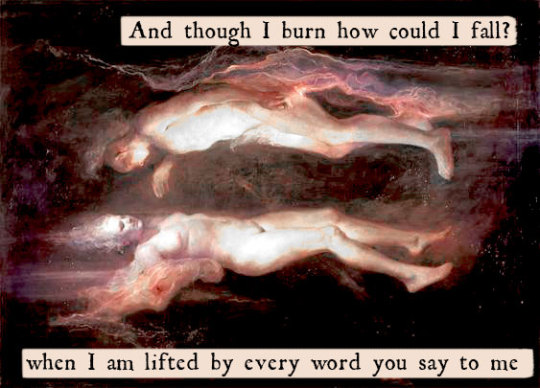

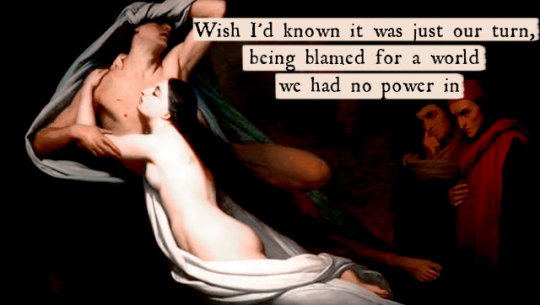
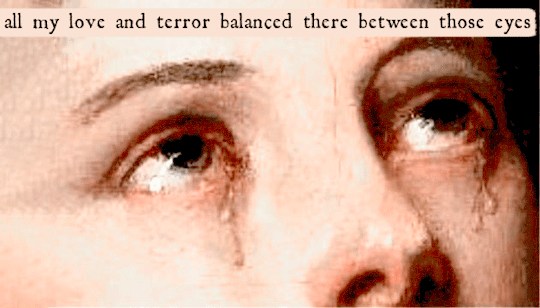


Unreal Unearth + paintings (pt 1) (pt 2)
2K notes
·
View notes
Text
The purest form of love is consideration. When someone thinks about how things would make you feel. Pays attention to detail. Holds you in regard when making decisions that could affect you. In any bond, how much they care about you can be found in how much they consider you
95K notes
·
View notes
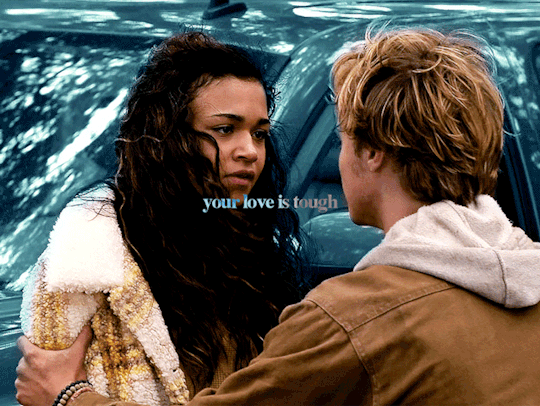
Text

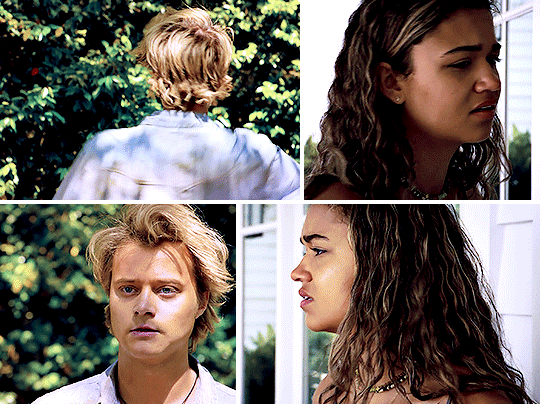


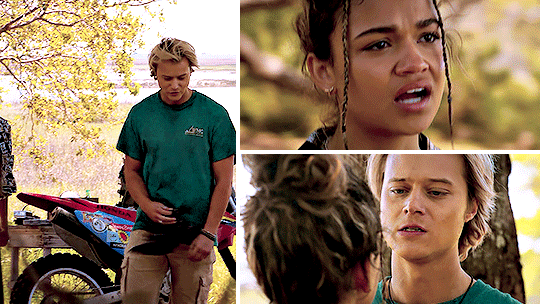
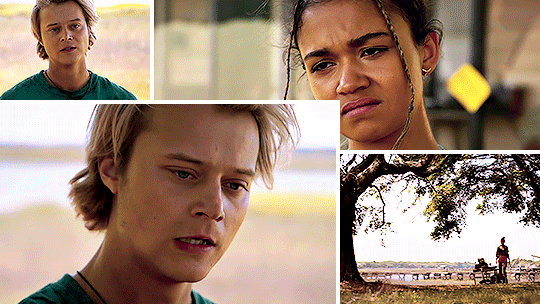
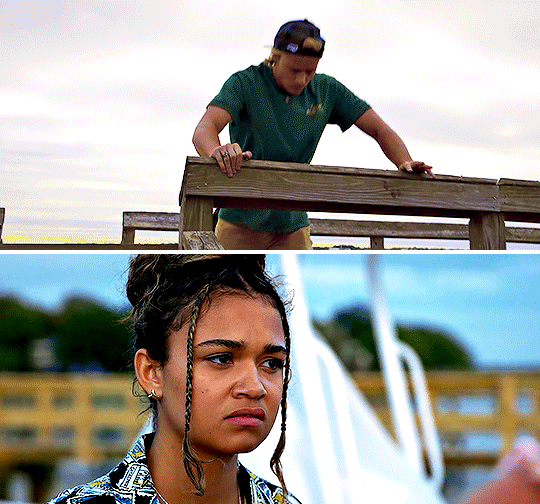


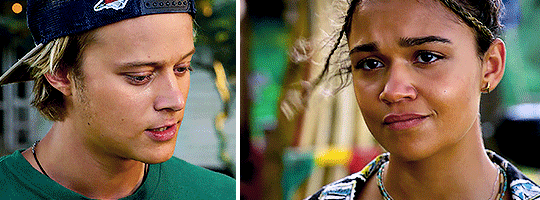
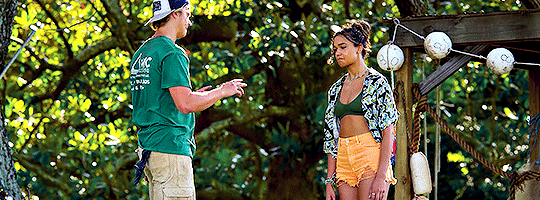
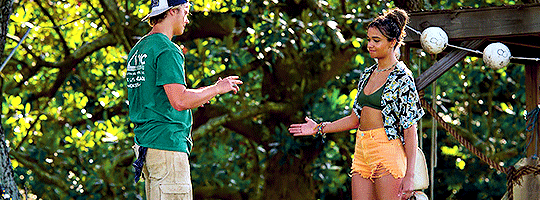
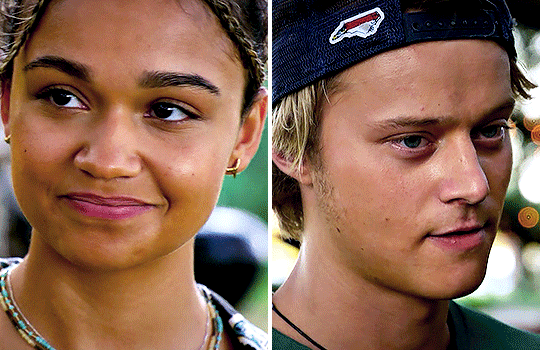
jiara + favorite episodes→ 3x04 ‘The Diary’
Something almost happened between us on the boat. And I know that's gotta freak you out. It caught me off guard too. And I know, your whole life, I know you freak when people get close, and I get it. I don't blame you. Just please don't ever say that I don't care about you.
298 notes
·
View notes
Text


I remember who I am when I'm with you
253 notes
·
View notes