#but still the classic 1:1 flour water ratio
Text
guyyyyssss
so we're out for a meal at one of those fancy tasting menu places and they went on about the sourdough for some elements of it so i was obv delighted to talk yeast with the chef
and when they bring us out our bill stuff and little extras at the end of the night look what i was gifted:

he's goin in my checked luggage, looks like lassy is getting a NEW SIBLING SOURDOUGH!
#food#sourdough#care and feeding for this lad seems to be higher frequency and with softer flour#but still the classic 1:1 flour water ratio#hopefully he doesn't explode in the checked luggage process and fuck up my clothes lol
5K notes
·
View notes
Text
Since the Mid-Autumn Moon Festival is coming up this friday September 29th in the northern hemisphere, I tasked myself with making many mooncakes, and they all came out differently than any mooncakes of mine have ever come out.
So if anyone has any recipes they like, or filling ideas, or stories about mooncake making or eating, comment or reply it write in the tags
I'm including pictures of this years mooncake baking adventures under the cut
Along with my usual recipe that I've made 2 years previously, I made a second recipe that has slightly different ratios:

The lump on the left is the new recipe, while the lump on the right is the normal recipe, which is especially wild because both recipes make roughly the same volume of filling and intend to use every bit of dough for every bit of filling. So, the ratios are wildly different.
Mooncake dough is also only 4 ingredients, like any pastry: flour, fat, sugar, salt. For mooncakes, the flour is typically low-gluten flour like cake flour or glutinous rice flour (which actually has zero gluten, but it's very starchy and mimics gluten), the fat is a neutral-flavored oil like canola or peanut oil, the sugar is ~golden syrup~ which is an invert sugar like corn syrup or (to some degree) honey, and the salt is actually created through adding something called "kansui" (pronounced sort of like "can" like a can of soup, and "shway" like you're saying the word "sway" with an "sh" at the beginning instead of just the "s") or alkaline lye water. The golden syrup is acidic because of the inversion of the sugars, so the basic kansui neutralizes the acid and creates a salt. You can also add extra salt if the dough isn't the proper saltiness, but you dont have to.
My 3 fillings were very non-traditional because I've been making the same honey pistachio filling for years and wanted to try something different:

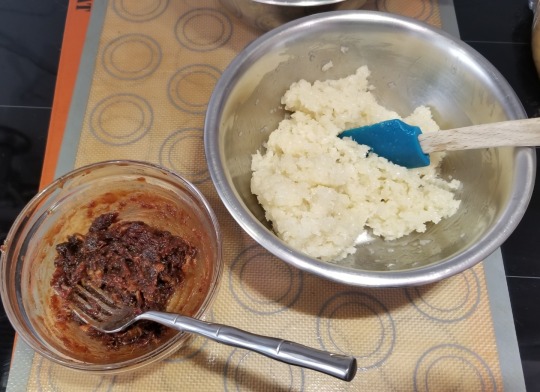

Image 1: pistachio, honey, and rose
Image 2: coconut, honey, and date
Image 3: dried apricots in apricot preserves
I had tried to make filling that would be sturdy enough to hold up the pastry, because in previous years, the pistachio filling (without rosewater) did a decent job but always created kind of fat bottoms as the pastry heated and sagged. So I was like, "I'm sure I can just add rosewater to the pistachio mix, and I'm sure medjool date balls wrapped in coconut with honey would work well, and I'm sure the dried apricots would absorb the extra apricot preserves moisture, and these should all work."
Turns out the 2 different doughs didnt actually make too much difference, because the fillings were kind of a disaster lol. A delicious disaster, but still a disaster:

The coconut honey date ones are on the far left, the pistachio rose ones are in the middle with floral muffin wrappers, and the apricot ones are on the far right in a random assortment of solid colored and floral muffin wrappers.
The coconut honey date ones had the most difficult filling to wrap because the coconut somehow got incredibly wet, though I am unsure from where the moisture came. The coconut mixture was literally sweetened shredded coconut, canola oil, and honey, and something happened to make the sugar syrup in the coconut itself come out. It was very weird and made nestling the little ball of date deliciousness in the center very difficult. But then they baked up perfectly??? And taste great, which is unsurprising since dates dipped in honey and rolled in coconut is a classic egyptian snack/dessert.
The pistachio ones were the ones in which I was most confident, and yet they started to collapse halfway through baking, so I evacuated them from the flat baking sheet and into a muffin tin for the remainder of their baking. However, this resulted in them kind of collapsing in the middle because the diameter of their spread-out bottoms was the diameter of the TOP of the muffin tin wells, so they kind continued spreading into the open space under them and thus collapsed. But they taste amazing, so I'm not complaining.
The apricot ones were clearly going to be a problem from the moment I scooped the filling into the first pastry disc to make the first apricot mooncake. Way too runny, no amount of cornstarch would help me. I hoped for the best and made 3 mooncakes and put them on a baking sheet, but a minute into baking revealed that they would not be able to actually hold themselves up. So again, I evacuated them into a muffin tin and then made the remaining apricot mooncakes in the muffin tin from the start. They ended up browning way differently and the material between the mooncake walls and the hot oven air definitely made the mooncakes cook slower. However, since the fillings are precooked, I simply had to cook the mooncakes enough for the pastry outside to cook, and then I could take them out of the oven. And they taste pretty dang good, if I do say so myself, but I am also a slut for apricots and am clearly biased.
So that is my Mid-Autumn Moon Festival Mooncake Adventure 2023. I will be troubleshooting all 3 of these fillings, and also trying new fillings around the december holidays because marzipan/almond paste would make an excellent filling, as would some weird gingerbread filling. Or pumpkin pie? So many options, so many mooncake possibilities.
2 notes
·
View notes
Text
Indulge Without Worry: Gluten Free Churro Recipe for Celiac-Friendly Treats

Discover the perfect gluten free churro recipe! Enjoy all the classic flavors and textures of your favorite churros without compromising on taste or satisfaction. This recipe is ideal for those with gluten sensitivities or anyone seeking a delicious gluten free dessert option. For more gluten free treats and expert churro making guides, visit CreamFilledChurros.com
Gluten Free Churro

This recipe caters to those with gluten sensitivities, ensuring a delicious churro experience without compromising on texture.
- Medium saucepan
- Whisk
- Wooden Spoon or Spatula
- Large pastry bag fitted with a large star tip
- Deep fryer or large pot
- Tongs or slotted spoon
- Paper towel-lined plate
- Shallow dish for cinnamon-sugar mixture
- 1 Cup Water
- 1/4 Cup Unsalted butter or vegan butter substitute
- 1 Tbsp Granulated sugar
- 1/4 Tsp Salt
- 1 Cup Gluten free flour blend (1:1 ratio or a blend designed for baking)
- 1 Large Egg
- 1/2 Tsp Xanthan gum (if your flour blend doesn't contain it)
- Vegetable or canola oil, for frying
- 1/2 Cup Granulated sugar, for coating
- 1 Tsp Ground cinnamon, for coating
- Make the Dough: In a saucepan, heat water, butter, sugar, and salt over medium heat. Bring to a boil, stirring constantly. Reduce heat to low. Add gluten-free flour blend (and xanthan gum, if needed) and stir vigorously until the dough pulls away from the sides and forms a ball.
- Incorporate Egg: Remove pan from heat. Transfer dough to a large bowl and let cool for 5 minutes. Beat in the egg until fully incorporated.
- Heat Oil: Fill a deep fryer or large pot with 2 inches of oil. Heat to 360°F (180°C). Use a candy thermometer for accuracy.
- Pipe and Fry: Transfer dough to the pastry bag. Pipe 4-5 inch ropes of dough directly into the hot oil, using a knife or scissors to cut the dough. Fry in batches until golden brown, flipping once.
- Drain and Coat: Remove churros with tongs or a slotted spoon and drain on paper towels. Immediately roll in the cinnamon-sugar mixture.
Serving Suggestions: Enjoy warm with your favorite dairy-free dipping sauces like a creamy cashew-based caramel or a melted dark chocolate drizzle.
Storage Guidance: Best eaten fresh, but leftovers can be stored in an airtight container at room temperature for a day.
Recipe Notes:
Dairy-Free Choices: Be mindful of your dairy-free milk and butter choices. Some substitutes can subtly affect the flavor of the churro.
Flavor Adjustments: Consider slightly increasing spices or adding a touch of vanilla extract to compensate for any subtle flavor impact from dairy-free replacements.
DessertAmerican, Mexican, SpanishBaked Churro, Baked Churro Recipe, Basic Baked Churro, Gluten Free Churro, Gluten Free Churro Recipe
This Gluten Free Churro Recipe allows you to indulge in your favorite dessert without sacrificing flavor or texture. While the texture might be subtly different from traditional churros, they still provide the satisfying crispy exterior and tender interior that churros are known for. Enjoy them warm, freshly dipped in cinnamon sugar, for the ultimate comfort snack.
Dress up your Gluten-Free Churros with delicious dipping sauces and toppings! Experiment with gluten-free chocolate ganache, dairy-free whipped cream, fresh fruit compotes, or a drizzle of melted nut butter for extra decadence.
Ready to explore more gluten-free dessert options? Discover a variety of delicious variations along with expert baking tips within our comprehensive guide. And don't forget to check out our selection of fun churro-themed merchandise for the ultimate enthusiast!
Read the full article
1 note
·
View note
Note
hey Miceál! if you are in the mood, i'd like to ask you for a great favor. could you share some irish recipes with me? even just one would mean a lot to me. i am half irish, but i am an orphan and i grew up in another part of europe, so i have very little connection to that side of me, and i believe it is very intimate to share something that my ancestors also shared, in order to commune and get to know them through my body in whatever way i can. thank you in advance fellow fenian!
hello, fellow Irish orphan! there are lots of wonderful Irish recipes out there, but I’ll share a couple that have special meaning to me and that I have fond memories of. it’s a classic: Irish stew and soda bread! this is a classic for a reason. there’s nothing more comforting on a cold and rainy day than a steaming bowl of Irish stew, and soda bread is probably the easiest kind of bread to make. it requires no waiting around for the dough to rise; you just make that dough and get that bread.
soda bread
first, the soda bread. it’s a great accompaniment, but it can also be made on its own and eaten whenever you need a good wholesome snack. slather a bit of butter on that badboy and indulge.
soda bread ingredients:
250g plain white flour (not self-raising, just plain)
250g plain wholemeal flour
100g porridge oats (I have made it without these before but if you want that authentic experience you’ll probably want the oats)
1 tsp bicarbonate of soda
1 tsp salt
25g butter, cut into small cubes
500ml buttermilk (if you have no buttermilk, I find adding 1 tablespoon of lemon juice to a cup of milk and stirring for a few minutes works fine)
soda bread creation time:
preheat oven to [takes a deep breath] regular oven 200C, fan oven 180C, or if you work with Fahrenheit (holy shit I spelled that right first time??) that’s around 390F and 355F respectively.
mix together all the dry ingredients, so your two flours, your oats, your bicarbonate of soda, and your salt.
rub in the butter so it’s all good and mixed in. remember to go easy on the dough, it has to be treated very gently.
add the buttermilk and stir the mixture carefully but quickly with a kitchen knife. you don’t want to be doing anything remotely near kneading, so you get to stir with a knife because apparently that’s somehow more gentle.
once everything is mixed, shape the dough into a round, flat-ish lump. just like the round loaves you see.
use the knife to score a nice good cross over the top of the dough. according to tradition, this is to allow the fairies to escape, but it’s also really good for allowing the bread to cook through properly.
put on a baking sheet and bake until it sounds hollow when you knock on it. this takes between 30-45 minutes in my experience, but after the 30-minute mark check regularly because it can be any time.
if for whatever reason it’s not ready yet, just flip ‘er upside-down for a few minutes.
leave to cool on a wire rack (to prevent the bottom from getting soggy) and covered with a tea towel (to keep the crust crusty).
from my experience this bread can sometimes be very dense, but experimenting with cooking times and flour ratios will shift it. I’ve found wholemeal to be slightly denser than plain flour, so once you get the hang of it tweak the recipe until it’s to your liking!
Irish stew
now times have changed you can make this in a slow cooker if you like, but I’ve never done that (yet -- I shall this winter and report back). this is how I used to eat it: sitting at the old wooden table in my friend’s kitchen, while her mam ladled it out of the massive saucepan that could drain a small lough.
(I have since become vegetarian, but this recipe would be just as nice as a hearty vegetable stew. if you’re vegetarian or there are any vegetarians out there who’d like to try it, hit me up for a recipe as I’d change this one pretty significantly in terms of technique if there was no meat.)
there’s a little controversy, as there always is with classic recipes: traditionally Irish stew is made with mutton, but mostly everyone just uses lamb. there’s also a debate raging about whether or not it should just have potatoes and onions in it, but honestly go ham. so long as there’s some nice tasty root veggies in there it’s grand, but of course potatoes are a must.
Irish stew ingredients
2 tablespoons vegetable oil
lamb chunks (I just get them already cut from the supermarket)
potatoes
roughly chopped onion
finely sliced leeks
roughly chopped carrots
2 tablespoons plain flour
1 1/2 pints beef stock (I just use a stock cube or two)
note how the vegetables have no measurements. this is just because I tend to make whatever looks right for the amount of people I’m cooking for.
Irish stew creation time:
heat the oven to 180C (or 355F)
take half of your vegetable oil and heat it up until it’s warm but not going crazy, and then add half your lamb and brown it.
take the lamb out and put it into a big casserole dish (or any large dish that has a lid and can go in the oven).
cover the lamb with half the potatoes, carrots, onions, and leeks.
add the rest of the oil to your frying pan and brown the rest of the lamb, and then add that into your casserole dish (or equivalent) over the veggies.
cover with the rest of the veggies so you have a weird veggie-meat lasagne.
add the flour to the frying pan and stir it around to soak up all the juices, then heat for a couple of minutes. add the stock a little at a time until everything turns to a nice, thick sauce with no lumps. it’ll kind of look like thick soup or brown gravy.
pour this sauce into your dish with all the meat and veggies.
if you have any stock left over, throw that in too. put the lid on and cook it in the oven for about an hour.
after an hour check to make sure there’s still plenty of sauce. if there isn’t, add some boiling water. the meat and veggies must always be covered with liquid, or they’ll dry out. once this is done (or if everything is fine!) bake for another hour, checking a little more regularly to make sure it’s nice and saucy.
if there’s too much sauce at the end, bake for a little longer with the lid off.
once the hour is up, it’s done! add salt and pepper if you like. best served piping hot with a hunk of thick crusty bread, while the wind and rain howls outside.
I hope these work out well for you and I hope they succeed in making you feel a little closer to your family. as part of your wider Irish family and the slightly narrower Irish orphan family, I hope these recipes bring you warmth and comfort as the days get colder.
33 notes
·
View notes
Link
This is a link for writers who have ever stopped to consider where their characters get their daily bread, and more specifically, their daily flour for their daily bread.
This can be useful for “homemaker” type characters in a modern setting, for villagers or cooks in historical settings, and even for post-apocalyptic survivors who have successfully harvested and threshed and stored a crop, and now have to figure out how to turn those hard kernels of wheat (aka wheat ‘berries’) into nice soft easily mixed and manipulated flour.
It gives a quick overview of thevariou tools used in the past to grind various kinds of grains and legumes into flour, whether it was wheat, rice, corn, oats, barley, millet, wild rice, peas (yes, peas were used for bread flour!), lentils, beans, or whatever, and goes over the plusses and minuses of stone versus steel plates, so on and so forth.
When I was a teenager, I grew a bit of wheat in our back yard, in a little patch only a few feet on each side. I weeded it, harvested it, carefully hand-threshed it, and then my mother got out her hand-cranked meatgrinder, put on the grain attachment, and had me try grinding up grain. I was a kid, so...it didn’t go very well. After a bit of laughing on both our parts, she and I took the grain to the house of one of her friends, who had an electric tabletop flour mill.
In the end, I managed to get just enough whole wheat flour out of the batch to make 20 shortbread cookies, and they were tasty...but I remember how much work it was to try to hand-crank the meat grinder, how it shifted because we hadn’t clamped it tightly enough to the counter... It gave me a real appreciation for our modern conveniences, and a lasting impression on “the daily grind,” which is a turn of phrase that literally comes from having to grind, day in and day out, that day’s amount of flour for bread, thickening for gravies, crust for pastries, and so forth.
If you blithely assume your character just magically has bread in their cupboard...it’s best to have a realm of magic where bread can indeed just “magically appear in there”...though a good number of your readers are going to be wondering how the magic words, and if it’s conjured, is it real, or is the character going to feel full for an hour, but be literally starving by the end of the day?
And no, you don’t have to show your characters in a Classical Age or Medieval era setting hand-grinding their grain, nor do you have to show them lugging sacks of grain to flour mills and sacks of flour back home again. If they live near a market, and if they have an income, they can buy what they need, either bread outright, or pre-milled flour.
...The one thing you really shouldn’t try to do--even if it’s literally a paleo-era, pre-agricultural setting--is try to convince your readers that primitive man didn’t need grains to survive. Carbohydrates are a vital part of one’s diet. While you can survive for a while on a ketogenic (high protein) diet, your character will lose a lot of weight. (Zachary Fowler, winner of Alone season 3, lost 72 pounds in 87 days, on an extremely high protein diet...but then he also was eating not quite one whole fish--and I do mean the whole fish, bones and scales and everything--perr day.)
Grains (milling them into flour to make them easier to chew and digest) are the easiest carb around. Other sources include acorns and pine nuts, both of which need to be “leached” or soaked in running water for several days after being shelled and cracked, to reduce the bitterness. (Tannins for oak acorns, and pine resin for pine nuts.) Taro roots, potatoes, yams, and winter squashes (not like zucchini, but like butternut, acorn, pumpkin, those kinds) are also a source of carbs, though they don’t have to be milled. Cattail roots are also a will-known source of starch, while the indigenous peoples of the Pacific Northwest actually ate several varieties of fern roots, with certain species being both revered and highly prized as the most starchy and nutritious.
Other carbs can come from fruits, nuts, and berries, plus of course the ever-popular honey. If you live in a warmer cilmate, cane sugar can be extracted from those plants, but if you live in a colder climate, you can tap various species of maple and birch trees to make syrups. I was surprised to learn recently that bigleaf maples, which are found locally here on the West Coast, can produce the same ratio of 40-to-1 sugars in their sap as actual sugar maple trees! That means 40 gallons of sap will boil down to 1 gallon of syrup. (You have to boil it down to at least that thick to get it to the point that bacterial will not grow in it; otherwise, it wills poil.) Birch was more like 60-to-1 or even 100-to-1, depending on the species.
There is evidence that even back in the Stone Ages, paleolithic people put a lot of effort into harvesting things like hazel nuts, acorns, berries, cattail roots, so on and so forth, all in the pursuit of collecting and storing carbs to last them the year.
And yes, they’d take the hand-harvested grains of millet and so forth, and grind them between rocks to break up the coarse outer coating, to make them easier to bake and chew and digest.
I honestly don’t see the far distant future abandoning the need to mill or otherwise have the means to process flour for our daily bread, either. It might get super fancy in how they do it, but it’ll still be a human need.
4 notes
·
View notes
Text
Zero Carb Pizza Crust
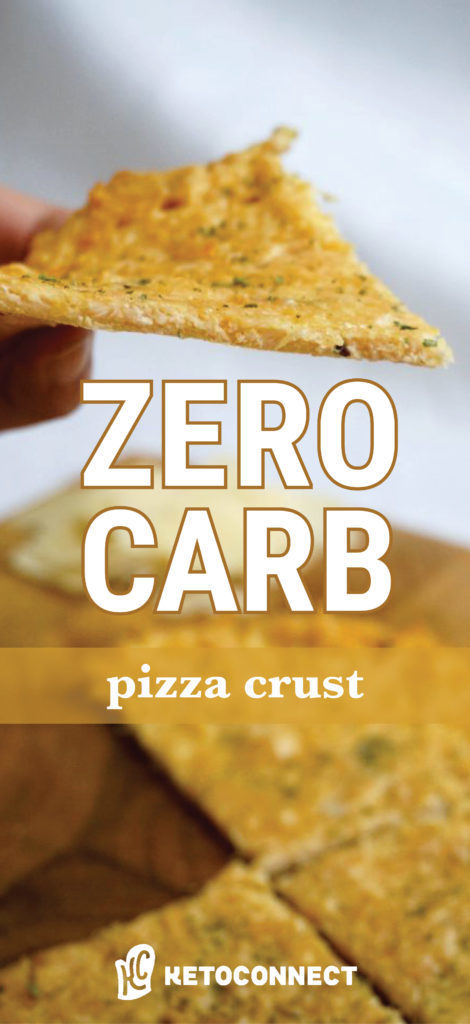
The Original Zero Carb Pizza Crust
Your dreams are now reality with this amazing No-Carb Pizza Crust Recipe. It sounds too good to be true, but believe us when we say this is the best keto pizza crust we have ever created. All you need is three ingredients, 15 minutes, and all of your favorite low-carb toppings.
Reading isn’t for everyone, so we put together a quick keto pizza crust recipe video here to show you exactly how to make this.
This is not a Fathead Pizza Crust
Whether you’re new to the keto diet, or a long-time veteran, you’ve most likely heard of fathead dough, which is a blend of almond flour, cream cheese, shredded cheese and egg. What is the No-Carb crust made with? Chicken. Yep, you read that right.
Fathead “dough” mimics traditional bread dough in some recipes pretty well like in our Sausage Balls, but not all the time. Here are a few reasons why we prefer chicken crust pizza to the classic fathead dough.
Why Chicken Crust Pizza is Better than Fathead Crust
1. Chicken crust pizza is lower carb – in fact it is nearly zero carbs.
There are a couple carbs from the egg and cheese, but other than that this crust is essentially zero-carb. Fathead dough is made from almond flour, cream cheese, egg, and shredded cheese which can add up to quite a few carbs, especially when you’re topping it with lots of veggies and tomato sauce.
2. There is too much cheese on Fathead pizza.
Everyone loves cheese on top of their pizza, but then you’re essentially eating a cheese crust topped with MORE cheese. If you have dairy sensitivities, fathead dough is a no-go.
3. Fathead is higher in calories
Not everyone counts calories when on a keto diet, but if you are, then the chicken crust is a far better option than the fathead dough. Almond flour is very calorie-dense and cheese is one of those foods that you can eat a lot of without realizing it.
4. Chicken Crust is more filling
The crust of this pizza is essentially pure protein, making it extremely filling in comparison to the cheese and almond flour fathead dough. Top it with some fat of your choice like pesto, cheese, or sausage and you have a great keto meal that satisfies for hours.
How to Make the Chicken Crust
1. Choose your chicken
When you’re looking for canned chicken it’s important to read the label. A lot of them will be full of starches, maltodextrin and other preservatives. It is possible to find some that are only chicken, water and salt though! If you can score one of those, definitely pick it up!
# Here is an example of a good canned chicken option.
# Here is an example of a not so good canned chicken option.(It’s still ok if you can’t find anything better though)
2. Pick your Parmesan cheese
We’ve found freshly grated parmesan cheese adds to the overall flavor and texture of this crust, but it’s not required. If all you can get is the can of grated parmesan, that’s fine. This can even work with shredded or shaved parmesan, but grated is preferred.
3. Bind with a beaten egg
Egg is the third and final ingredient of this no-carb pizza crust. Just one egg goes a long way in making sure this crust stays together.
4. Add seasonings, if you want
You can add whatever seasonings you like to your crust, but we recommend an Italian blend or even some basil to give it that Italian touch every pizza should have.
Keto Pizza Toppings
We hate to break it to you, but if you like pineapple on pizza, you’re going to have to cut it out or at least cut back when you’re making a keto pizza. Don’t worry, there are plenty of low-carb toppings you are going to love.
Low-Carb Pizza Sauce Options
1. BUY NO SUGAR ADDED PIZZA SAUCE
All pizza sauce is going to have some amount of sugar just because tomatoes have naturally occurring sugars in them. The best you can do is find an option with no added sugar. The brands that are widely available, and that we usually opt for are as follows:
# Rao’s Homemade Pizza Sauce
# Yo Mama’s Marinara Sauce
# Cucina Antica Marinara Sauce
You’re usually looking at 3-4 grams of carbs per 1/4 cup of pizza sauce, which isn’t too bad if you use less than 1 cup per pizza.
2. PESTO SAUCE
Pesto sauce is actually going to be your best option when it comes to keto pizza sauce. It’s typically made with a combination of oil, nuts, cheese, herbs and spices. Pesto sauce packs more flavor than traditional pizza sauce – so a little will go a long way.
The carb count on pesto will always be lower than normal pizza sauce. You just want to check and make sure the pesto is made with good fats (typically olive oil) and not with harmful vegetable oils (like canola or soybean oil). Here is some of our favorites:
# Our homemade pesto recipe
# Alessi Pesto
3. NO SAUCE
You can always opt to skip the sauce. When we don’t have sauce at home and don’t feel like taking the time to make some from scratch, we will often just drizzle some olive oil on the crust and fill it up with toppings.
Low-Carb Pizza Toppings
Pepperoni
Bacon
Salami
Chicken
Sausage
Onion
Bell Pepper
Jalapeno Pepper
Mushrooms
Our Favorite Keto Pizza Toppings
Toppings mostly come down to personal preference, but you’ll be happy to know that just about every traditional pizza topping is keto friendly. Some of our favorite keto pizza toppings are:
1. Pesto sauce with fresh mozzarella cheese.
2. Classic cheese and pepperoni.
3. Prosciutto, olive oil and walnuts (when we’re feeling fancy).
The topping combinations are truly endless. We hope you take this chicken crust pizza recipe and make it your own. Experiment with different flavors and toppings. Make mini crusts and let the whole family choose their own toppings.
Keto Pizzas for Everyone
At KetoConnect, we pride ourselves on making the most delicious keto recipes we possibly can. We are strong believers that by creating tasty recipes, such as this No-Carb Pizza Crust, and making them simple and straightforward, we make a ketogenic diet easier to follow. That is our mission. This No-Carb Pizza crust is one of our strongest contributions toward that mission so far.
The ingredients are as simple as can be, the steps are easy to follow, and the end product is truly sensational. With that being said, you might be looking for a different keto crust recipe. We’ve told you our favorite recipe, now it’s time to let you decide on your favorite. Here are the other contenders for best keto pizza.
# Deep Dish Low Carb Pizza
# Fathead Pizza Crust
# Keto Cauliflower Pizza
# Coconut Flour Pizza Crust
# Blaze Keto Pizza Guide
Buy Keto Pizza at the Grocery Store
We contacted Real Good Pizza to do a review of their low-carb pizzas. We did the review which can be found here (YouTube Review, Blog Post Review), and we loved them. Real Good Pizzas are great if you’re in a time crunch, but the downside is that they are quite costly.
In Summary
# No-carb crust is more filling than fathead dough.
# Chicken crust is lower in calories and carbs than other keto pizza crusts.
# Certain brands of tomato sauce offer no-sugar added which is great for pizza sauce.
# Pesto makes for a delicious high fat keto pizza sauce and balances out the protein to # fat ratio in this keto recipe.
# Most veggies are fair game when making a keto pizza, except for pineapple.
# There are several keto recipes on our blog that you are sure to love.
youtube
For easy adding to MyFitnessPal search – “KetoConnect No Carb Pizza Crust”
0 notes
Text
The Complete Guide to Egg Replacers in Paleo Baking
Avoiding recipes containing eggs in Paleo-world may seem next to impossible, but there are plenty of healthy, clean, and easy alternatives that fit the Paleo bill! If you are allergic to eggs or following the AIP, you have options and can still enjoy delicious baked goods. So hang tight: there is hope for you and your delicious Paleo baked goods, and your savory favorites, too!
Eggs Replacers in Baking
Eggs provide the classic and often expected mouthfeel and texture to recipes that include them. When you use egg replacers, there might be a slightly different result in density and/or texture to the finished product. You will most likely notice that your baked goods may be a touch sweeter and perhaps not as fluffy as a classical muffin that uses whole eggs.
For batters like pancake batter, without the binding capabilities of an egg, your egg-free version may need a touch of TLC during the flipping process while cooking.
Understanding that foods may act differently when experimenting with these egg replacers is a great way to learn and substitute other favorite recipes on your own.
Without the magical properties of an egg in your recipes—their viscosity, emulsifying, leavening, and binding abilities—you will more likely have a looser batter, a denser muffin, a more fragile dough, or a dish that may just need a little more attention and patience. But once you are accustomed to the differences in preparation methods when using these egg swaps, the payoff is delicious. Pancakes are always worth the effort in my book!
Basic Egg Replacing Rules
Swapping eggs in many recipes only works for dishes that have up to no more than four eggs. It is a far-fetched idea, for example, to think that you might be able to pull off a quiche with egg replacers! Once you get into recipes that typically call for mostly eggs or ask for more than four eggs, replacing them gets a little hairy and unmanageable. Stick to 2-4 egg recipes with these substitutions.
You can sometimes mix a few different egg-replacers together at a time for a single recipe. For example, chia seed and applesauce to replace the two eggs in a muffin recipe not only adds two different ways of binding your batter, but they both offer the pleasant additions of more moisture, sweetness, and texture!
Collagen egg
Just as collagens in the human body are strong and flexible, using animal-based collagen as an ‘egg’ is not a farfetched idea!
All gelatin is not created equal. Be sure to use a reputable company and not factory-farmed gelatin sources. Gelatin will inhibit some recipes from rising, which is typical of those that use leavener, yeast, and egg, but gelatin eggs will get the job done and create a great texture and is a very strong 1:1 replacement for swapping up to four eggs for baking recipes.
How to make a collagen egg:
1 T gelatin to 3 -4 T water
In a saucepan stovetop, without turning on heat, sprinkle gelatin into water a pinch at a time to let the gelatin absorb the water. Whisk a bit to avoid clumping.
Let stand for 2 minutes or so to gel up slightly.
Turn on stovetop to medium heat and whisk until all gelatin is melted, turn off heat, and whisk vigorously until frothy. Use immediately in recipe.
Try in these recipes: Paleo Irish Scones, Chocolate Coconut Banana Muffins
Flax egg
Flaxseeds have been popularized as a superfood for their omega-3 fatty acid content, and are most likely on the shelf at your local grocery store. For the flax egg to become gelatinous enough to suffice as a binder, you must first grind up the seed until it becomes a meal or powder. You can use a high-powered blender or a coffee grinder works great, too.
Flax has a strong and nutty flavor so this is best reserved for savory and hearty goods. Flax also contains a lot of oil, which will go rancid if left out. For best results, store whole flaxseeds in the refrigerator and grind seeds as needed.
How to make a flax egg:
1 T ground flax meal to 1 T water
Stir one T flax into water, let sit for 10 minutes to thicken.
Use the flax egg in a 1:1 ratio. For best results, substitute in recipes that only use up to two eggs.
Try in these recipes: Garden Fresh Zucchini Bread, Bacon Pancakes with Coconut Flour
Chia seed egg
Chia seeds are great in many recipes because they do not impart a strong flavor. They do however, offer quite a bit of texture, which tends to be favorable in many recipes, not unlike the pleasant little crunch of a poppy seed in lemon-poppy muffins!
Chia seeds have a viscous character when soaked, and you will often see them added to fresh juices and teas to make a ‘bubble tea’ effect on a beverage. Chia seeds can also be found at your local grocer, and are known for many health benefits like fiber, as well as omega-3 fatty acids.
How to make a chia seed egg:
1 T chia seeds to 2 T water
Mix chia seed with water, let sit for 10 minutes to become gelatinous.
Use chia seeds in a 1:1 ratio and replace in recipes that use up to two or three eggs.
Try in these recipes: Bananalicious Nut-Free Banana Bread, Chocolate Avocado Blueberry Muffins
Banana
Banana is a great way to replace egg in your baking and add a little sweetness and moisture. Due to unmistakable banana flavor, this way of replacing your eggs will lend itself best to sweets. The natural sugar content of bananas will create yummy caramelization to pancakes and muffins during the cooking process as well.
How to make a banana egg replacer:
½ mashed or blended banana per each egg replaced
You can replace up to four eggs with banana comfortably in most baked goods like muffins, breads, and cookies, as well as crepes and pancakes.
Try in these recipes: Pumpkin Bread, Paleo Cassava Flour Pancakes
Applesauce
Applesauce is similar to banana in that it will add sweetness as well as moisture when swapping for eggs in recipes. Also like banana, apples have a natural sweetness that lends itself very well to baked goods and sweet items. There are some savory recipes that may also benefit from having the sweetness of apples, too, like root vegetable patties, meatballs, and meatloaf.
How to use applesauce to replace eggs:
¼ cup applesauce replaces 1 egg
You can replace eggs fairly comfortably for recipes that have 2-3 eggs included.
Try in these recipes: Banana Bread Donuts, Morning Glory Muffins
Pureed Fruit
Peaches, pears, and avocados all work great as egg substitutes. Depending on the flavor profiles of your recipe, you have options as far as which egg replacer will work best. Peaches are sweet and have natural sugars that will caramelize nicely when cooked. Pears will have a similar texture to that of applesauce and a more floral note that would be delicious with warming spices like cinnamon and clove in your baked goods. Avocado surprisingly lends itself to recipes that use cacao and chocolate!
How to make a pureed fruit egg replacer:
¼ cup pureed fruit replaces 1 egg
Try in these recipes: Sweet Potato Turmeric Muffins, Coconut Lime Muffins
Pureed Vegetables
Pureed vegetables like sweet potatoes, squash, pumpkin, and beets work well for savory, and sometimes very colorful, egg swaps.
How to make a pureed vegetable egg replacer:
¼ cup steamed and pureed vegetables replaces 1 egg
Try in these recipes: Zucchini Fritters, Apple Cinnamon Bread
SaveSaveSaveSaveSaveSaveSaveSaveSaveSaveSaveSave
The post The Complete Guide to Egg Replacers in Paleo Baking appeared first on Paleo Plan.
Source: http://ift.tt/10qRbxJ
3 notes
·
View notes
Text
Gyoza with Wings (Hanetsuki Gyoza) 羽根つき餃子
Gyoza with Wings (or Hanetsuki Gyoza) is a type of Japanese dumpling filled with juicy, savory ingredients that is pan-fried to crispy perfection. They have a fancy look with crispy thin wings just ready for you to bite into.
As far as Japanese dumplings go, you are probably most familiar with the classic gyoza that come in the crescent-shaped pouch with crisp bottoms and tender-white skins that have been pan-fried and steamed. But do you know there are some other great varieties of gyoza in Japan?
One of them is these eye-catching gyoza that are clumped together in a solid, thin crispy sheet of fried starch. Whenever I share these gyoza pictures from Japan on social media, I immediately received a lot of curious comments. To those who have yet to see them, these dumplings are known as Gyoza with Wings or Hanetsuki Gyoza (羽根つき餃子) in Japanese. They got their names from the super fun presentation where the gyoza look like they have wings when you break them apart from the crispy sheet.
Although this style of gyoza is quite common in Japan, it is still fairly unknown outside of Japan. So today we’re going to make this at home! As I explained below, there are many varieties of ‘wings’ too. Hope you can figure out your favorite style wings and make these addicting Hanetsuki Gyoza at home!
Watch How to Make Gyoza with Wings (Hanetsuki Gyoza)
youtube
Gyoza with Wings (or Hanetsuki Gyoza) is a type of Japanese dumpling filled with juicy, savory ingredients that is pan-fried to crispy perfection. They have a fancy look with crispy thin wings just ready for you to bite into.
What is Hanetsuki Gyoza aka Gyoza with Wings?
Gyoza with Wings are pretty much the same dumplings as the classic gyoza. The only difference is its unique presentation where a group of gyoza are all connected with a crisp sheet of fried starch made out of flour and water. They look like they have wings and that’s how they get their name – Gyoza with Wings or Hanetsuki Gyoza (羽根つき餃子).
This type of gyoza was created for the first time in Kamata, Tokyo about 30 years ago by the Japanese owner/chef at the restaurant Niihao (你好). He was one of the Japanese children left behind in China at the end of World War II. He got the idea of Hanetsuki Gyoza from a dumpling dish in Dalian.
Gyoza with Wings (Hanetsuki Gyoza) on Google image
The rectangular or round shape are two common looks for Hanetsuki Gyoza. A rectangular shape Hanetsuki Gyoza are more commonly served at restaurants and most people make a round shape Hanetsuki Gyoza at home as it’s easier to prepare, like one I shared in this post.
To make Gyoza with Wings, you can use either store-bought gyoza or homemade gyoza from scratch. I’ve covered some important tips and techniques for gyoza-making in my previous articles you can check out:
How to wrap gyoza with step-by-step pictures
Classic gyoza recipe with video tutorial (and recommended fillings and gyoza wrappers)
How to make gyoza wrappers from scratch
In this particular recipe, we’ll focus on how to make the crispy wings and the pan frying technique.
5 Important Factors to Consider When Making Gyoza with Wings
1. Use a non-stick frying pan
With this recipe, you have to shake the pan while cooking and flip the pan to serve the gyoza. Therefore, a good quality non-stick frying pan works the best instead of heavy pan like cast iron skillet. In terms of the size of the pan, I think a 10-inch frying pan works the best.
2. Start with 6 gyoza, and increase the amount up to 10
For the first timer, practice with 6 gyoza first with smaller wings (you can use a 10-inch frying pan). As you increase the amount of gyoza, the pan gets heavy to handle.
3. Adjust the ratio for flour vs. water to your liking
When comes to making the wings, all the recipes are very similar where you need 1-2 tsp flour or potato starch for 100 ml of water. This flour mixture creates the type of wings you like and you can decide how thick or thin you wish your wings to be.
As shown in Google images above, there are many versions of Gyoza with Wings at home and restaurants. Some prefer thick crunchy wings while others prefer super thin and fragile wings (including me). Some prefer wings with more holes like lattice while others prefer no hole or almost no holes (my daughter is trypophobia – a fear or disgust of closely-packed holes).
So play with the amount of flour (1 tsp to 2 tsp), as well as the kind of flour – all-purpose flour, cake flour, potato starch, rice flour, or a mixture of some of these flours.
If you don’t plan to serve the gyoza immediately, use flour instead of potato starch. Potato starch absorbs moisture so the wings will not stay crispy for too long.
4. Have a good control of the heat when pan-frying
This could be the most difficult part when comes to pan-frying the gyoza. To be honest, I get nervous about burning the bottom of the gyoza, especially when the gyoza are meant for a party (or for blog/video) other than myself.
Every stove also functions differently. Since I am using an industrial stove, my “medium” heat could mean your “lower end of medium-high” heat. So it’s important to pay attention to how your stove works.
When frying the gyoza prior to adding flour mixture, careful not to burn your gyoza. They will be in contact with the bottom of the pan for a bit longer as we have to wait for the wings to get brown and crisp. When the gyoza are relatively lighter in color (like my gyoza here), you can increase the heat to brown further. It’s a bit tricky to peak the color of gyoza wing as you can’t quite lift up the fragile sheet.
5. Sesame oil does the final trick for crispy gyoza
At the end of cooking gyoza, make sure to drizzle some sesame oil. Not only it gives a lovely nutty aroma, it also adds extra crunch and extra crispiness to the gyoza.
Aside from its WOW factor and imaginative name, these gyoza are really fun to eat. It’s like breaking bread, only this time is breaking gyoza with crispy wings – Japanese style! Dumpling lovers, you have to try this at home!
Don’t want to miss a recipe? Sign up for the FREE Just One Cookbook newsletter delivered to your inbox! And stay in touch with me on Facebook, Pinterest, and Instagram for all the latest updates.
Gyoza with Wings
Gyoza with Wings (or Hanetsuki Gyoza) is a type of Japanese dumpling filled with juicy, savory ingredients that is pan-fried to crispy perfection. They have a fancy look with crispy thin wings just ready for you to bite into.
6-8 gyoza ((You can put up to 10 gyoza))
100 ml water ((To make 100 ml, take away 1 Tbsp from ½ cup))
2 tsp flour ((6 g) (See Notes))
1 Tbsp neutral flavor oil (vegetable, canola, etc)
1-2 tsp sesame oil
Gather ingredients. You can use homemade gyoza or store-bought gyoza for this recipe.
Combine 100 ml water and 2 tsp all-purpose flour.
Heat 1 Tbsp neutral flavor oil in a frying pan over medium to medium-high heat.
Cook the gyoza until the bottom is golden brown (more toward light golden brown).
Remove the hot frying pan from the heat and press on a damp cold towel for 3-5 seconds to cool the pan immediately.
Put the frying pan back to the heat. Whisk the flour mixture well one more time and pour the flour mixture into the pan. Cover the pan with a lid. Make sure the mixture covers up 1/3 of the gyoza (This may slightly different based on your pan size).
If you have a glass lid, you can see the cooking process. If you don’t have a glass lid, check the amount of the liquid once in a while.
When gyoza is cooked through (skin is more see-through) and the flour mixture is almost evaporated, open the lid. It should take about 3-4 minutes since you close the lid.
Since the gyoza is cooked already, all you need to do is to let the water evaporated. When the edges of the wings start to peel off from the pan (see right picture below), drizzle sesame oil around the edge of the wings. Adjust the heat according to the color of the wings. If it’s lighter, you can increase the heat slightly.
The sesame oil not only gives the delicious flavor, but also helps cook the flour mixture and loosen up the wings. Shake the pan a few times to detach the wings from the pan. You can use chopsticks to gently poke around the edges.
Put a plate over the gyoza and flip over. Tip: If you use a plate that’s smaller than a frying pan, you can gently press the gyoza so it doesn’t move around. It’s much easier to flip than using a larger plate. Be very careful as the oil might drip from the pan while you flip.
Serve the gyoza with wings with soy sauce. Optionally, you can add tiny bit of rice vinegar or/and La-Yu (Japanese chili oil).
Flour: For crunchy texture of wings, use cake flour or all purpose flour. For lighter and crispy texture, use potato/corn starch. I personally like flour rather than potato starch. Try half flour and half potato starch for both texture! You can also make it with rice flour as well.
If you want to make wings with bigger and more holes like lattice look, use less flour (about 1 to 1 ½ tsp). If you want to make thicker and stronger wings, then add 2 ½ tsp flour.
The post Gyoza with Wings (Hanetsuki Gyoza) 羽根つき餃子 appeared first on Just One Cookbook.
Gyoza with Wings (Hanetsuki Gyoza) 羽根つき餃子 published first on https://zenramensushi.tumblr.com/
0 notes
Text
KETO MINI CHEESECAKE BITES
These low-carb mini cheesecake bites simply might be my favored keto-friendly dessert. They are velvety, tasty, as well as oh-so-easy to make.
Attempt these single-serving keto cheesecakes if you like a classic New York design cheesecake!
KETO MINI CHEESECAKE BITES
These mini cheesecakes are perfectly wonderful, velvety, as well as tasty. But moreover– they’re reduced in carbs, gluten-free, as well as keto pleasant. You can serve these keto cheesecakes plain, or leading them with a drizzle of strawberry puree as well as some fresh sliced berries.
Keto cheesecakes are made with typical ingredients like lotion cheese and also eggs, and also sweetened with a low-carb sugar like Swerve or erythritol. You can make all type of tastes of keto cheesecake. Have a look at this reader-favorite Keto Pumpkin Cheesecake for a delicious holiday variation.
You can choose to make these mini cheesecakes with or without a crust. My preferred keto cheesecake crust is made with almond flour, a little butter, as well as a pinch of low-carb sweetener.
IS CHEESECAKE KETO FRIENDLY?
Cheesecake is just one of my favored keto pleasant treats. It’s actually among the most convenient desserts to suit a low-carb way of living. Except for the sugar, the majority of the components in a traditional cheesecake are already low-carb.
Lotion cheese is a typical active ingredient used in many keto as well as low-carb dishes. The carbohydrate count of cream cheese differs according to the brand name. As an example, Philadelphia brand name lotion cheese has less than 1 carb per offering. A whole 8 oz block of lotion cheese– like we utilize in this dish– has 4 carbs.
Other low-carb active ingredients in cheesecake consist of eggs (less than 1 carb per egg), erythritol (0 net carbohydrates per serving), and also almond flour (which adds 1 carbohydrate per mini cheesecake crust).
CARBS IN CHEESECAKE
This dish for mini keto cheesecakes makes 6 muffin-tin dimension cheesecakes. Each tiny cheesecake has 2 carbs with the crust, or 1 carb if you pick not to make the crust. If you top each cheesecake with one big strawberry (like I’ve done for these pictures), the total dessert has 3 web carbohydrates per serving.
COMPONENTS IN LOW CARB CHEESECAKE BITES
Normal cheesecake is quite high in carbohydrates because of its sugar material as well as conventional graham cracker crust. However, these mini cheesecake bites are made with cream cheese, a different sugar-free sugar, as well as an almond flour crust– so they are low as well as normally gluten-free in carbohydrates.
Right here’s what else you’ll require for this recipe.
For the cheesecake filling:
Cream cheese. Choose full-fat cream cheese for this recipe. Be sure to let your cream cheese come to space temperature prior to you start baking. Area temperature level ingredients include much more easily– aiding you to prevent lumpy cheesecake!
Powdered erythritol sweetener. I like Swerve granulated sugar for this dish. If that’s what you have at residence, you can likewise make use of powdered Swerve.
Eggs. I use big eggs in all of my dishes. Much like with your lotion cheese, allow your eggs come to space temperature level before beginning to make this cheesecake. You can put them in a big dish of hot water for a few mins if you need to bring eggs to area temperature quickly.
Vanilla remove.
A pinch of salt to stabilize the sweetness.
For the gluten-free crust:
Almond flour. I usually suggest super-fine paled almond flour in my keto baking dishes. Paled almond flour offers the finished baked great a great appearance as well as light crumb. That said– in this particular crust recipe, you can substitute natural almond meal without any issues.
Butter. You can additionally make use of coconut oil in a pinch.
Erythritol sugar. I such as Swerve brand. Sweeteners like Xylitol and Pyure brand name sweetener can additionally function. You’ll simply want to examine the conversion graph on the back of the bag prior to you begin cooking. For instance, Swerve has a 1:1 ratio of sweetness to sugar.
A pinch of cinnamon.
HOW TO MAKE LOW CARB CHEESECAKE CRUST
I assume that this keto cheesecake crust is a scrumptious complement to the creamy filling. It takes just a couple of active ingredients and also it’s fast to make.
Like a lot of low-carb crust recipes, this recipe starts out with almond flour. To the almond flour, I add a couple of tablespoons of melted butter. I additionally include a tbsp of sugar as well as a pinch of salt and cinnamon. After that, I blend every one of the components together in a little mixing dish. The appearance needs to feel like wet sand.
Next, I separate the crust mixture in between 6 muffin tins. You can utilize your fingertips or all-time low of a small determining cup to press the crust right into all-time low of the muffin tin. In my situation, my 1/4 mug measuring cup was simply the best size to press the crust mixture into all-time low of my muffin tins.
All that claimed, if you do not like crust or do not feel like taking the extra action– feel free to miss it. If you make a decision to make a crustless cheesecake, simply make sure to oil the muffin tins really well, or make use of paper cupcake liners.
IDEAS FOR THE BEST KETO CHEESECAKE
For a luscious cheesecake without any lumps, here are my ideal suggestions.
For the smoothest cheesecake, see to it that every one of your ingredients go to room temperature before mixing the batter.
Check your oven temperature level. Often ovens run warm. And also baking a cheesecake at too expensive of a temperature level might cause it to fracture. If you are not sure if your oven temperature, I advise utilizing an inexpensive stove thermostat to check. In my experience, cheesecakes are best baked between 300 and 325 ° F.
Bake the cheesecake until it is simply done. Keep in mind that cheesecake is a custard, so it’s not meant to be incredibly firm. A cheesecake is made with the facility is almost established, however will certainly still totter or jiggle a bit. A cheesecake will certainly establish more as it cools. So, see to it to take the cake out of the oven while the facility still wiggles when you touch the side of the pan.
Oil the sides of your frying pan. Often you’ll pull out a beautiful cheesecake (with no cracks) that will certainly establish fractures as it cools. This is since the cake diminished throughout cooling, but adhered to the sides of the frying pan, making a crack in the facility. To prevent this, make certain to grease the sides of your frying pan. For additional insurance, run a thin paring blade around the sides of the muffin tin to launch the cheesecakes after you pull it from the stove.
EVEN MORE KETO DESSERTS
Inspect out this reader-favorite Keto Pumpkin Cheesecakeor these Strawberry Cheesecake Fat Bombs if you are looking for various other kinds of keto cheesecake.
As well as, if you ‘d to take a look at our other keto cooking dishes, why not attempt Keto Oreo cookies, Cinnamon Crumb cake donuts, or Keto Vanilla Cupcakes with Buttercream Frosting?
PIN FOR LATER
Pin this article to your Keto Desserts board to remember it for following time!
Print
KETO MINI CHEESECAKE BITES
Delicious and velvety mini cheescakes are just one of the most effective keto-friendly treats. These keto cheesecake bites are gluten-free and low-carb, but you 'd never think with just how amazing they taste!
Prep Time 10 minutes
Cook Time 20 minutes
Additional Time 1 hour
Total Time 30 minutes
Calories 194kcal
Ingredients
For the Cheesecake
8 oz cream cheese
½ cup sweetener
1 cup sweetener
½ tsp vanilla extract
½ tsp salt
For the Crust
½ cup almond flour
1 tbsp sweetener
1 tsp cinnamon
1 pinch salt
2 tbsp butter, melted
Instructions
Preheat oven to 300 degrees F. Grease a 6 cup muffin tin, or prepare with paper cupcake linings.
Make the crust: Combine almond flour, sweetener, cinnamon and also salt in a mixing dish. Stir well to separate any kind of lumps in the almond flour.
Add the melted butter to the dry components, and also mix to integrate. Utilizing your fingertips, press down level into all-time low of the muffin tin.
Put the cheesecake batter in addition to the crusts. Bake for 18-20 minutes. Examine the cheesecakes for doneness, eliminating when the facility of the cheesecakes still jiggles a little bit when you tap the side of the frying pan.
Get rid of the stove. Let cool on the counter for 30 minutes, then cover and also cool in the refrigerator. (See unmolding suggestions in the notes.
Notes
To unmold the cheescakes, run a slim paring blade around the edge of the cheesecakes to aid release it from the muffin frying pan.
If your cheesecakes are truly stuck, you can position all-time low of the muffin frying pan into a sink of hot water for regarding 15-30 secs.
If you want the crust to reach all the way up the sides of the cheesecakes, you can increase the crust dish.
Serve with a blob of strawberry puree, fresh berries, or sugar-free jam.
The post KETO MINI CHEESECAKE BITES appeared first on Healthy Addictions.
0 notes
Link
No Flour, Eggs or Butter? No Problem! 23 Cake Recipes for When You’re Missing an Ingredient
Feeling the urge to bake, but missing something apparently vital? Then pinch some ideas from great bakers past and present.
The Guardian - Dale Berning Sawa
Cake has taken on a new significance now that most of us are stuck at home all day, every day. We’re comfort-eating and baking like there’s no tomorrow. But what do you do when you fancy a sponge, but can’t find eggs or your oven is broken and no one will fix it? Here are some recipes to get you through every ingredient shortfall.
If we suggest you replace one missing ingredient with another that you don’t have, or that you would normally never dream of buying, bear in mind that no two kitchen cupboards are the same and you may find that grocers can still supply “fancy” alternatives such as ricotta or flaxseeds while the staples are but a memory.
No Self-Raising Flour
You can make any cake that calls for self-raising flour without it. Nigella Lawson doesn’t even bother keeping any, as she explained a few years back. As long as you know the ratio (2 tsp baking powder to 150g plain flour), it’s easy to make some. There are a lot of decent bakes that include this process in the method, from Dan Lepard’s sour cream butter cake (billed as the easiest cake in the world) to Claire Ptak’s picture-perfect raspberry vanilla sandwich.
No Baking Powder
Baking powder isn’t the only way to get some rise into your bakes. German yeasted cakes are a wonder – wholesome and weighty; as close as a sweet can get to lunch, and all the better for it. If you’re baking bread, set aside a bit of the leavened dough for Felicity Cloake’s perfect plum cake, German baking expert Luisa Weiss’s Apfelkuchen or the myriad other cinnamon, cardamom and honey-scented options to be found elsewhere.
No Flour of Any Kind
In one of her more daring moves, Anna Jones makes a lemon cake with cannellini beans, ground almonds and four eggs. It is a stone-cold winner – fudgy, rich and sweet. For something more decadent, try the classic flourless chocolate cake. The recipe I have used for years is as follows: melt 200g butter with 100g dark chocolate over a bain-marie, then mix four egg yolks with 100g sugar, and fold that into the chocolate mix. In another bowl, beat the egg whites into stiff peaks, gradually adding a further 100g sugar, then fold into the chocolate mix and bake in a buttered tin at 180C (160C fan)/350F/gas mark 4 for 45 minutes or until set in the middle. Serve with whipped cream, Greek yoghurt or creme fraiche – if you have any – and a dusting of icing sugar.
No Sugar
Bakers keen to avoid refined sugar have plenty of options, such as syrups (maple, agave, date), fruit (dried and fresh) and sweet root veg (carrots, sweet potato). Nadia Lim does a beautiful banana loaf with coconut. Leela Cyd does one with dates. But having no sugar in lockdown times may call for a more 1950s approach. In her book, Oats in the North & Wheat from the South, Regula Ysewijn makes a very old-school slab of parkin using only tinned sweeteners: heat up 200g golden syrup with 45g treacle and 200g butter, then mix in 200g oat flour (just blitz up some oats in a food processor if you have none), another 100g oats that have been less finely blitzed, 2 tsp each of bicarb and ground ginger, a pinch each of nutmeg and salt, one egg and 2 tbsp whisky (or milk). Bake at 160C (140C fan)/325F/gas mark 3 for about an hour then leave it to cool in the tin. (As an aside, Ysewijn says: “Never fan! Fan is super-evil and should be avoided at all times!”)
If you stashed away a tin of Nestlé Carnation instead, you could opt for this recipe from Australia (although obviously you won’t want to sprinkle icing sugar on top).
No Eggs
Vegan bakers have a few tricks up their sleeves. Mix 1 tbsp chia seeds or milled flaxseeds with 3 tbsp water and set aside for 15-20 minutes, and you have what’s known as a vegan egg, which generally works as a direct swap-in, say, for a brownie or a loaf cake. If your recipe calls for whipped-up egg whites, as it may for an airy sponge, you can (with some effort) whip up aquafaba (AKA chickpea brine) into frothy white peaks. Again, 3 tbsp is the equivalent of one egg and 2 tbsp for an egg white; Anna Jones tells you what to do here.
Or take a tip from Ruby Tandoh’s moist chocolate fudge cake. Where most recipes caution that you should not overmix the batter once you have added in the flour, Tandoh’s solution for not using eggs is to do exactly that. You flavour the mix with sweet spices, sweeten it with dates and brown sugar and then beat it for a good minute to give it some structure. Once baked, it is slathered with a mix of melted dark chocolate and golden syrup.
No Butter
This one is easy. Use olive oil. Ideally you’d make Maialino’s version with Grand Marnier and orange, but Rachel Roddy does an excellent stand-in with ricotta (which you could replace with strained full-fat yoghurt) and lemon. The citrus or dairy gives the bake a good tang, but I would happily eat a really basic one, too, flavoured only with vanilla essence (such as this Kim Boyce recipe, only using plain flour and without the chocolate or rosemary.) And then there’s the similarly basic French gateau au yaourt. Clotilde Dusoulier’s version calls for vegetable oil, but I’ve tried with the dregs of many bottles, and it’s always a winner.
https://getpocket.com/explore/item/no-flour-eggs-or-butter-no-problem-23-cake-recipes-for-when-you-re-missing-an-ingredient?utm_source=pocket-newtab
0 notes
Text
How to Use a Grain Mill to Make Your Own Flour from Wheat Berries
Someday I’m gonna tell my grandkids about the Great Flour Shortage of 2020.
I don’t think any of us expected a global pandemic to result in an extreme shortage of toilet paper, yeast, and flour…
Strange times, man.
Even though our grocery stores are a little better stocked than they were several months ago, supply on many of the items are still a bit sketchy…
Which is making me more determined that ever to have a pantry stocked with ingredients that enables me to not be 100% dependent on a volatile supply chain.
Over the past few months I’ve been flooded with emails from those of you who are working on stabilizing your own personal food supply and you’re curious how to address the flour issue.
Honestly, flour can be slightly tricky because it’s tough to store-long term. Not only does it tend to go stale or rancid after a little while, it’s also susceptible to bugs.
So while pre-ground flour might not be your best option for long-term pantry storage, wheat berries are pretty much magical. Here’s the scoop:
What are Wheat Berries?
Wheat berries are the edible part of wheat kernels, and include the germ, bran, and endosperm of wheat. It is the grain before it undergoes any processing and only the inedible outer layer of the wheat has been removed.
Basically– if you walk out to the middle of a wheat field, pick a stalk and shake out the wheat head, what comes out are the berries.
They have a similar appearance to brown rice or other whole grains and have a chewy texture and nutty flavor. Since wheat berries have not been processed, the berries retain all of the grain’s vitamins, minerals, and nutrients.
Why Bother with Wheat Berries?
1. Wheat Berries have a Long Shelf Life.
If stored properly (see below for more tips on storage), wheat berries can last for decades in storage. While ground flour loses nutrients and shelf life relatively quickly, like other whole nuts or seeds, wheat berries will stay fresh in their whole-form for a looooong time.
As I mentioned in my podcast episode about wheat berries that I had a long-forgotten bucket of wheat berries in a corner of our basement. They were still fresh and viable, even though I had ignored them for years, which was super handy when the flour shortage hit.
2. Wheat Berries are Versatile.
Beyond grinding wheat berries to make your own flour, you can also use them like you would many other grains. You can make oatmeal or porridge with them for breakfast. You can use them as an alternative to rice as a side dish; you can pop them like popcorn; and you can even make sprouts with them (check out my Guide to Growing Sprouts for instructions) for a crunchy and nutritious topping to your salads and sandwiches.
Whole wheat can also be used to feed your livestock by making fodder (I was originally going to feed my wheat berries to the chickens, but with the recent flour shortage, I was super happy that I still had them available to make flour instead).
3. Wheat Berries are Good for You.
Since wheat berries are not processed, they retain their nutritional value much better than ground flour from the store. Wheat berries are an excellent source of fiber, protein, iron, several vitamins, and minerals. And when you grind the wheat berries for immediate use as flour, that flour contains more nutrients than store-bought ground flour since it’s so fresh and has not had any edible parts removed. You can learn more about the health benefits of whole wheat in this article.
Types of Wheat Berries
There are a few different types of wheat berries and it can be a bit confusing when you see all the names and descriptions. The different names are based on a few factors: the color (red or white), the growing season for the wheat berries (winter or spring), and the gluten content (hard or soft).
Hard vs. Soft
Hard varieties generally contain more protein and gluten, while soft varieties usually contain more starch. Soft wheat berries are usually used for pastries and cakes while hard wheat berries are more often used in bread. Hard wheat berries often need a bit of extra time to cook into porridges and other such meals as well.
The good news though is that hard/soft wheat berries can almost always be used interchangeably, but it’s still nice to understand the differences.
P.S. Hard and soft wheat looks and feels practically the same when you look at it in berry-form– you won’t be able to tell the difference unless you have a trained eye.
Red vs. White
1. Red Wheat Berries
Red wheat berries are darker in color than white wheat berries and are used to make whole wheat flour (not to be confused with whole white wheat flour, which comes from white berries). They have a slightly higher protein content and is best used in hearty and heavy bread recipes. People who try to make whole wheat breads with 100% red wheat can sometimes be disappointed because the loaves usually turn out darker and denser.
Hard red wheat berries (both winter and spring varieties) are the classic wheat used in many yeast breads. They can be more difficult to digest due to their heavy nature and since they are hard, they have a higher gluten content.
2. White Wheat Berries
White wheat berries are used to make whole white wheat flour. They are also slightly lighter in color than red wheat berries. White wheat berries are a good place for bread-making newbies to start, you’ll tend to get a lighter bread with white berries compared to red. However, keep in mind that white wheat flour is still whole wheat— it will not be as fluffy as all-purpose flour, which has been processed and sifted.
Hard white wheat berries are great for making all-purpose white wheat flour and works great for yeast bread recipes. It is also what is most often used in home beer-brewing.
Soft white wheat berries are the lightest colored wheat berries. They are most often used to make pastry flour and are best used in pie crusts, pastries, and cookies.
How Can Wheat Berries Be Used for Cooking?
I mainly use my wheat berries to grind into fresh flour (check the next section below for details on that).
But wheat berries have plenty of other uses, too. Basically, you can use them however you might use rice or other whole grains.
Here are the basics to cooking with wheat berries:
Cooking Wheat Berries:
This is similar to how you cook rice, quinoa, or other grains. Rinse 1 cup of raw wheat berries in a colander in the sink. Bring 2.5 cups water to a boil, add 1 cup of raw wheat berries. Reduce the heat, cover and simmer for 1 hour (or until wheat berries are tender). Drain and fluff with a fork. This will make approximately 2.5 cups of cooked wheat berries.
Just like with rice or other grains, you can also use your pressure cooker or crockpot to cook wheat berries and save time in the kitchen.
Toasting Wheat Berries:
This is optional, but it can help bring out the nutty flavors of the whole grains. Preheat the oven to 375°F. Spread the wheat berries on a baking sheet and toast in the oven for about 10 minutes, or until lightly colored.
You can also easily store cooked wheat berries in the refrigerator. If not using them right away, store the cooked wheat berries in a tightly covered container in the refrigerator for up to a week. Gently reheat in a frying pan over low heat until hot, or serve at room temperature.
Here are a few basic recipes/ideas for using wheat berries:
Breakfast Porridge:
Make cooked wheat berries and add your favorite porridge flavors, such as milk, diced apples, cinnamon, and honey.
Breakfast Parfait:
Top yogurt (homemade yogurt is amazing!) with layers of fruit, nuts, and cooled cooked wheat berries.
Soups:
Use cooked wheat berries in place of rice or lentils in your favorite soup recipes.
Salads:
Add texture and extra protein to your salads with a scoopful of warm or cold cooked wheat berries.
Dinners:
You can add the cooked wheat berries to stuffed peppers, as a side (like you would use rice) with stir-fries, in taco recipes as a topping, and more.
How to Grind Your Own Flour
Freshly-ground whole wheat flour contains more nutrients than whole wheat flours you’ll find at the grocery store since grinding up whole nuts/seeds/grains causes them to lose their quality quickly.
HOWEVER, freshly ground flour does have a few learning curves. For example, depending on the wheat berries you have, it can produce a denser, heavier bread if you don’t know what you’re doing.
If you’ve only ever baked with all-purpose flour, a quick switch to 100% whole wheat can be quite the shock (and leave you with loaves that double as bricks.)
When you grind the wheat berries, the resulting flour is full of air from shooting out of the grinder so measuring freshly ground wheat can also be a bit tricky. Try letting the flour settle for about 30 minutes to let it settle before using it.
It’s best to only grind wheat berries right before you plan to use the flour, as freshly ground wheat berries can go rancid very quickly. Store-bought flours are usually treated or processed in a way to prevent the oils in wheat from turning rancid after grinding so they can be shelf-stable.
Therefore, as tempting as it may be, I don’t suggest grinding 30 pounds of wheat flour to use for later. (One exception to this is if you have room in your freezer to store the fresh flour– freezing helps to slow down the oxidation process.)
It’s wise to only grind enough wheat berries for what you need in your current recipe or for the baking you plant to do that week. If you do want to grind a little extra, store the freshly-ground flour in the freezer or refrigerator.
How many wheat berries equals one cup of flour?
It’s hard to make a completely accurate ratio, since it depends on the how finely you grind your wheat berries and there will also be extra air in the freshly-ground flour. However, a good rule of thumb is that 1 cup of wheat berries will produce slightly less than 2 cups of flour.
Choosing a Grain Mill for Grinding Wheat Berries
There are plenty of different types of grain mills on the market. Some are stand-alone appliances while others are attachments for your mixer or attach to your counter. There are also vintage hand-cranked ones and electric ones.
It really depends on what works best for you and your kitchen. For example, I started with a huge grain mill that couldn’t fit in my kitchen cupboards before purchasing this smaller Nutri-Mill grain mill that fits better in my kitchen (both stylistically and size).
Lehman’s, my favorite online store for kitchen supplies, has a bunch of grain mill options, varying from hand-cranked to electric on their website.
Keep these things in mind while making your grain mill purchase:
Do you have to feed a large family? If so, you might need a larger grain mill so you can make multiple bread loaves at a time. Otherwise, a smaller one like I have can work great.
What type of space do you have for grain mill in your kitchen? You might only have space for an attachment for your Kitchen-Aid mixer instead of a stand-alone grain mill.
Do you love decorating your kitchen with vintage-looking kitchen pieces? If you like to decorate with your kitchen appliances and/or you have a LOT of patience, you might want a hand-cranking grain mill.
What Other Grains Can Be Ground into Flour with a Grain Mill?
Grain mills can also grind rye, corn, rice, barley, oats, buckwheat, millet, quinoa, lentils, dried beans, seeds, and nuts.
You can even grind popcorn in your grain mill to use as an alternative for corn meal (which I spread on the bottom of my Dutch Oven when I’m making homemade sourdough bread).
Where to Buy Wheat Berries
Eh, it’s normally pretty easy to buy wheat berries, but a lot of locations are sold out right now. However, sometimes you can find wheat berries at normal grocery stores and apparently, even Walmart carries wheat berries from time to time (this probably depends where you live).
Otherwise, check your local natural food store or try to contact a local organic mill (check out my tips here for finding local food sources).
If you can’t find them at local stores, you can also purchase them online. Azure Standard is an online option for many parts of the United States, and they often carry wheat berries. You can also find wheat berries at True Leaf Market and I found some Hard Red Winter Wheat Berries at Lehman’s store.
We have a local organic wheat farmer in our area, and I will be making my future purchases from them.
Don’t want to grind your own wheat, but yet still want to feed your family wholesome flour? There are many great sources for purchasing organic, unbleached flour, both online and most likely local to your area as well.
How to Store Wheat Berries
As long as you store wheat berries properly, they can stay fresh for at least a year or longer.
Store wheat berries in a cool, dry place in an air-tight container with a well-fitting lid.
I store mine in food-grade 5-gallon buckets in our basement, and keep a smaller jar upstairs that I refresh when needed. Something like these would work well.
Cooked wheat berries store very well in the freezer, so you can prepare them in advance so you have quick meals ready as needed. Simply cook them like normal (instructions in an above section), then let them cool completely. Store them in your freezer in a freezer-safe container for 3 months (or a little longer if you like).
All in all, I think a generous supply of whole wheat and a grain mill is a fantastic addition to any everyday preparedness pantry. It’s one of the best ways to protect yourself from future flour shortages, and only expands your homestead skill repertoire.
Happy milling, friends!
More From-Scratch & Heritage Food Tips:
My Heritage Cooking Crash Course will help teach you how to make from-scratch recipes without spending hours in the kitchen
Troubleshooting Sourdough (your questions answered on sourdough troubles)
My super easy & versatile Bread Dough Recipe (for bread, pizza, cinnamon rolls, and more)
The Ultimate Guide to Canning Safety
How to Use a Fermenting Crock
Listen to the Old Fashioned On Purpose podcast episode #107 all about grain mills, flour shortages, and whole wheat:
The post How to Use a Grain Mill to Make Your Own Flour from Wheat Berries appeared first on The Prairie Homestead.
from Gardening https://www.theprairiehomestead.com/2020/06/make-own-flour.html
via http://www.rssmix.com/
0 notes
Text
extra-flaky pie crust
[Welcome back to ✨ Newer, Better Month ✨ on Smitten Kitchen, when I get update a few SK classics with new knowledge, new techniques, and with real-life time constraints in mind. Previously.]
The concept of “newer better” is always going to be relative, and no more so than in this recipe. For all of the years I’ve been cooking, I’ve made pie dough one way. I shared the recipe with you in 2008, have referenced it in every recipe for pie since, and, until a couple years ago, never veered from it. My recipe is not an outlier; it contains the same ingredient ratios as 99% of American-style pie crust recipes out there. There might be variations in types of fats, preferred flours, sometimes there’s a little buttermilk or apple cider vinegar instead of some of the water or a little more or less sugar and salt, but they’re almost all the same ratio of fat to flour to water. It makes a great pie crust. Here’s where the relativity comes in: If you make pie crusts the way I’ve long made pie crusts and you’re happy with these pies, stop reading now. There’s nothing to see here! This isn’t for you! This is for people who have tried that fairly standard formula and found it lacking. A little tough. Not flaky enough. It comes up! I’m listening.
So let’s talk about what that last one percent of pie doughs do differently. It’s not the butter or the liquid; by and large, these recipes use the same amount. It’s the flour — they use less. If you’re thinking, “but if you use less flour and the same amount of butter and water, the dough might be stickier and harder to work with?” — you are correct. I began auditioning these lighter-on-the-flour doughs a few years ago and found them a little pesky and if you’re wondering if “pesky” is smiled through gritted teeth, well, you are correct again. And I feel pretty comfortable with butter-flour doughs! What does this mean for people who do not? Given that making pie dough at all from scratch is even for some of the most skilled home cooks a hurdle they do not wish to surmount (hi mom!), why suggest a trickier recipe? Why raise the hurdle? (Why download DuoLingo and start with Russian, Deb? Ahem, I digress.)
It’s because it’s worth it. This is the croissant-flaky pie dough of dreams. If my eyes were closed, I would not know that I wasn’t biting into puff pastry, which shatters into thousands of featherweight-but-crisp shards on impact. It’s undeniably flakier, but also of course it is: less flour means less weight, less density. And yes, it softens up a little faster. You’ll need more flour to keep it loose from the counter when rolling it out. A little folding improves structure and increases the expansion of flaky layers. These were small adjustments I had to make to get the hang of it but it’s absolutely worth it because you get this when you’re done:
And this.
Also this.
And you made this with your hands! It took 5 minutes to assemble and 5 minutes to roll out. You did this. You’re amazing. Honestly, I always knew you had it in you.
Previously
One year ago: Sweet Potato Tacos
Two years ago: Punjabi-Style Black Lentils
Three years ago: Churros
Four years ago: Red Bean and Green Grain Taco Bowl
Five years ago: Broccoli, Cheddar and Wild Rice Casserole
Six years ago: My Favorite Buttermilk Biscuits
Seven years ago: Potato Knish, Two Ways
Eight years ago: The Best Baked Spinach
Nine years ago: Thick, Chewy Granola Bars and Arroz con Leche (Rice Pudding)
Ten years ago: Thick, Chewy Oatmeal Raisin Cookies, Key Lime Coconut Cake, and Steak Sandwiches
Eleven years ago: Alex’s Chicken and Mushroom Marsala, Almond Biscotti
Twelve years ago: Mediterranean Eggplant and Barley Salad
And for the other side of the world:
Six Months Ago: Flapjacks
1.5 Years Ago: Marbled Banana Bread
2.5 Years Ago: Even More Perfect Blueberry Muffins and Plum Squares with Marzipan Crumble
3.5 Years Ago: Caponata and Zucchini Rice and Cheese Gratin
4.5 Years Ago: Corn Cheddar and Scallion Strata and Chocolate and Toasted Hazelnut Milk
Extra-Flaky Pie Crust
Servings: For one standard double-crust pie, two single-crust pies, or this lattice-slab shown here
Time: 15 minutes prep, 1 to 2 hours to chill
Source: Smitten Kitchen
Print
Previously, my pie dough rules were: use all butter (it’s very flaky if used well, and tasty too), keep everything cold, use a pastry blender, work the butter into the flour until the largest bits are the size of small peas, and only use enough water to pull the dough together. I am still loyal to all-butter crusts, but I’ve come around to mixing your dough with your fingers (with a satisfying squash of each cube, although I’m never giving up my pastry blender), I’ve added a little folding to the rolling-out steps, which improves structure and increases the expansion of flaky layer, and that with this, you can get away with leaving the butter in larger, lima bean-sized pieces. Finally, I actually get the dough pretty damp — you’ll be sure it’s too soft and sticky, but I promise, it’s not — and it’s not a problem at all. In fact, because we’re using a higher proportion of butter in this dough, and butter is very hard when it’s cold, I find that this extra moisture makes what would otherwise be a very firm dough easier to roll.
Many thanks to Stella Park’s No-Stress, Super-Flaky Pie Crust technique for helping me overcome my stubborness/showing me the light about wetter doughs and folded roll-outs.
2 cups (260 grams) all-purpose flour
1 tablespoon (15 grams) granulated sugar
3/4 teaspoon fine sea or table salt
1 cup (230 grams, 8 ounces, or 16 tablespoons) cold, unsalted butter
1/2 cup (120 grams) very cold water
Place your flour, sugar, and salt in a large bowl and whisk to combine. Cut your butter into small cubes (1/2-inch is ideal here) and add them into the flour mixture. Toss them around so that they’re coated and used your fingers to squash each butter cube into flatter, lima-bean like pieces. It’s totally fine if this is bigger than you’re used to.
[You could also use a pastry blender, stand mixer, or a food processor, but go very easy on it, especially the food processor — you want flat-ish, lima bean-sized pieces of butter, not the usual “coarse meal” or “small pea-sized” mixture. If using a food processor, when you’re done, dump this butter-flour mixture into a large bowl before continuing.]
Pour water over butter-flour mixture and use a flexible silicone spatula or scraper to bring it together into a dough that will seem too wet and sticky, but will be just fine. Divide dough into two parts, and wrap each half into flat-ish packets wrapped in plastic, waxed or parchment paper.
Chill in the fridge until firm — one to two hours.
Unwrap first packet of dough, place on a well-floured counter, sprinkle the top generously with flour, and roll it out into a thick-ish long rectangle. Brush of excess flour off dough with your hands and fold it as you would a business letter, into thirds. Continue to roll this packet into the shape needed for your final pie — shown here 10×15-inch, but a 14-inch round is the usual size for a standard pie crust.
From here, you’ll want to follow the instructions for the pie you’re making. Looking for ideas? Start here!
A fun breakfast pastry I only made to showcase this awesome pie crust but actually ended up abundantly flaky and just a little sweet: Heat oven to 425 degrees F. Mix 4 cups sliced rhubarb (here about 1/4-inch thick), 3 tablespoons tapioca starch, 1/3 cup granulated sugar, a pinch of salt, a pinch of ginger, and the juice of half a lemon. Roll both pie dough halves into 10×15-inch rectangles; keep them firm and cool in the fridge while not using them, especially if they’ve gotten soft or your kitchen is hot. Place first half on a parchment-lined baking sheet. Spoon filling on, leaving a 1.5-inch border. Cut second dough into on the diagonal into strips, whatever width you’d like. Lay every other strip over rhubarb filling in one angled direction. Form a lattice with remaining strips in the opposite direction. Trim strips so that they’re flush with bottom crust area. Fold crust over the lattice top and filling all around the pie, crimping to tighten the seal. Brush with an egg wash (1 egg, beaten lightly with 1 teaspoon water) and sprinkle with coarse or raw sugar. Bake for about 25 minutes, until golden all over. Let cool to warm before cutting into squares.
Source: https://smittenkitchen.com/2019/03/extra-flaky-pie-crust/
0 notes
Text
JALAPENO POPPER DUMPLINGS W/ PICKLING JUICE DIPPING SAUCE
ONE DOES NOT TELL YOU THAT WHEN PICKLED JALAPENO AND CHEDDAR CHEESE ARE IN THE COMPANY OF GROUND PORK, DELIVERED IN CAPSULE-FORM, THEN FURTHER DIPPED INTO A REDUCTION OF ITS OWN PICKLING JUICE, THE COMBO CAN BE BORN ANEW.
My speculation into a jalapeño popper dumpling began many years ago. It was first brought into light by a specimen from my brother-in-law, who gave us two dozens of online-ordered frozen dumplings which, I was told, had become somewhat of a local internet sensation at the time. The entire makeup of the dumpling was very well-balanced, a perfect ratio between silky and chewy wrapper, not too thin, not too thick, and a fully-housed filling of pork, chopped Taiwanese-style peeled and pickled chili, cilantro, plus some other secret stuffs that I couldn’t quite put my finger on. It was unexpected, well-flavored, totally legit.
I have since then, for a handful of times, attempted to replicate that particular dumpling outside of Taiwan where Taiwanese-style peeled and pickled chili aren’t always a common item, and had found such task to be extremely impractical at best. First of all, Taiwanese-style peeled and pickled chilis are, even when available, highly inconsistent in quality between various brands, ranging from awesomely crunchy and peppery with a tinge of sweetness, to barbarically over-sweetened, flaccid and tasteless. Then what complicated the matter even further was that every attempts to replace it with another type of pickled chilis, had resulted in a flavor profile that was completely unrecognizable. In some work, documentary for example, there are certain values in writing recipes involving ingredients that are highly specific and exclusive, necessary even. This, I decided, isn’t one of’em.
I decided that the idea of a dumpling involving a delicious pickled chili, one that is available and reliable nonetheless, could only be realized from a perspective ungoverned by its original inspiration. Which brings us to, jalapeño popper dumpling.
I made a jadeite-green wrappers colored by green scallion puree, sturdy yet soft, smooth yet chewy, a proper capsule for a filling that is fully specked with spicy and peppery chopped pickled jalapeño and cubes of sharp cheddar cheese, each occupying tiny gooey pockets throughout a fatty pork filling that is brightened with fresh cilantro. The compatibility between pickled jalapeño and cheddar cheese requires no dispute, but one does not tell you that when they’re in the company of ground pork, delivered in capsule-form, then further dipped into a spicy, briny and tangy reduction of its own pickling juice, this classic combo can be born anew.
Sometimes the destination isn’t where the starting point had intended. And often times that pisses me off. In this case, I am not.
Print
JALAPENO POPPER DUMPLINGS IN PICKLING JUICE DIPPING SAUCE
Yield: 30~35 dumplings
Ingredients
GREEN SCALLION WRAPPER: (see note *)
2 1/4 cup (290 grams) bread flour
1/2 cup (125 grams) water
1 large handful (40 grams) scallions green parts only
1/2 tsp salt
JALAPENO POPPER FILLING:
1 lb (460 grams) fatty ground pork
1 cup packed coarsely shredded or finely diced sharp cheddar cheese
3/4 cup packed chopped pickled jalapeno
1 handful of fresh cilantro, finely chopped
1 medium shallot, finely minced
2 1/2 tbsp soy sauce
2 tbsp cornstarch
2 tbsp chicken stock
1 1/2 tsp light brown sugar
PICKLING JUICE DIPPING SAUCE:
1 cup jalapeno pickling juice
2 cloves of garlics, smashed
1 tsp light brown sugar
2 tsp toasted sesame oil
2 tsp extra virgin olive oil
Soy sauce to drizzle
Black pepper to dust
Instructions
PREPARE DOUGH: (You can use store-bought dumpling wrapper as well). Place bread flour in a large bowl. In a blender, blend water, green scallions (green parts only) and salt until smoothly pureed. Add the liquid to the flour and stir the mixture together with a large fork, then knead until a shaggy and relatively dry dough comes together. Transfer the dough onto a working surface, and continue to knead for 5 minutes. The dough is definitely on the dry side, not sticking to the counter at all and may still have bumps and cracks even after kneading. If your dough is so dry that it has difficulty coming together at all, knead in a bit more water. Plastic-wrap the dough and let rest on the counter for at least 2 hours. The dough should be much smoother after resting.
MEANWHILE, PREPARE FILLING: In a large bowl, combine all the ingredients under "Jalapeno popper filing". Mix evenly with your hands, then cover with plastic-wrap and keep in the fridge until needed.
FORM THE DUMPLINGS: My favorite, easy way to roll out the wrappers is by using the pasta sheet-attachment on my Kitchenaid. I roll the dough out into a flat rectangle, then pass it through the machine starting from number 1 setting, until it reaches the number 4 setting of thickness. I cut the circles out with a cookie cutter (3 1/4" or 8 cm in diameter), then gather the scraps and repeat. You can of course do it the traditional way, dividing the dough into small nubs (about a tbsp each), then roll each one out with a wooden roller. Whichever way you choose, make sure each wrappers are thoroughly dusted with flour to prevent sticking.
To make the dumplings, place a heaping tbsp of filling in the center of the wrapper. Dab the edges of the wrapper with water, then bring the edges upwards and pinch tightly to close. I really don't think there's any right way to do this. As long as the wrapper isn't broken, or stretched too thinly that it may break during cooking, and the filling is securely encased, it's all fine I think. Place the dumplings on a well-floured sheet-tray. Once the tray is filled, flash freeze it in the freezer for 1 hour until the dumplings are hardened. After which, you can transfer the dumplings into a zip-lock bag and keep frozen until needed.
TO SERVE: In a small pot, boil the jalapeno pickling juice until it's reduced down to 1/4 cup. Whisk in the smashed garlic, light brown sugar, toasted sesame oil and extra virgin olive oil, and set aside.
Bring a large pot of water to boil on high heat, then add the dumplings. Swirl it gently to prevent it from sticking to the bottom of the pot. Once the water comes back to a raging boil, add a few ice cubes to chill the water down, and repeat. This boiling and cooling process tightens the wrappers and yields a better texture as a result. After a few repetition, the dumplings will float to the surface of the cooking water. You can open one to see if they're fully cooked. If not, boil for 30 seconds to 1 minute more. I like to add more ice cubes right before I remove the dumplings from the cooking water with a slotted spoon, to give them a final shocking.
Give the dumplings a generous dousing of the pickling juice dipping sauce, and a few drizzle of soy sauce (the black spots make it prettier to look at) and dustings of black pepper. Dumplings are equally awesome hot or cold.
Notes
* The green scallions mainly gives the wrapper its color, not so much for flavorings. If you want to use store-bought wrappers, that's totally fine as well.
3.1
http://ladyandpups.com/2018/06/28/jalapeno-popper-dumplings-w-pickling-juice-dipping-sauce/
Share the post "JALAPENO POPPER DUMPLINGS W/ PICKLING JUICE DIPPING SAUCE"
Facebook
Twitter
Google+
Pinterest
StumbleUpon
Weibo
E-mail
Source: http://ladyandpups.com/2018/06/28/jalapeno-popper-dumplings-w-pickling-juice-dipping-sauce/
0 notes
Last Seen Blogs

fotoresearch
FotoResearch.com

goldenredleaf
That period of the year☕☃️

anenemyspy
An Enemy Spy

darkempressofchaos
Taka/Darc ˙✧˖°📓 ༘ (Follows back lol)

kwittenjpg
Aya~ ♡