#it is so hard to edit pics without topaz :')
Note
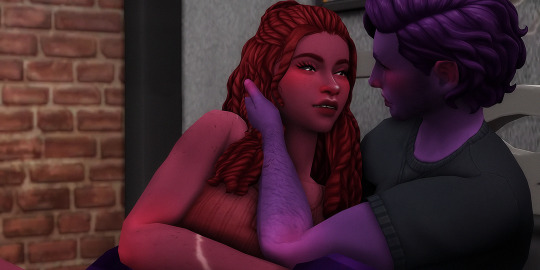
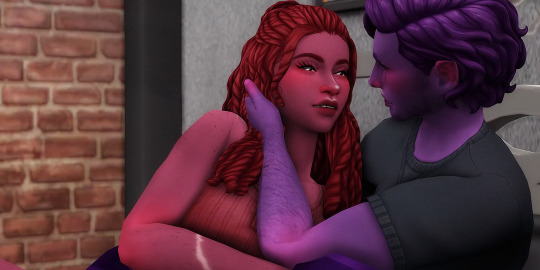
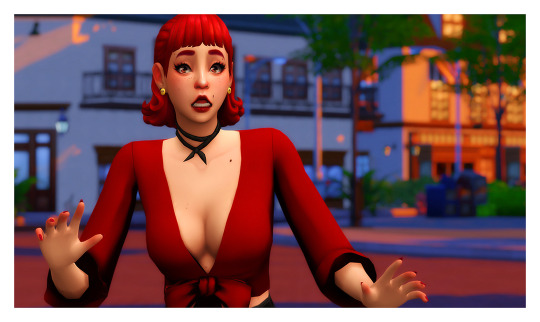
Hi, you are more than welcome to ignore especially if you have answered before and I missed it/it's elsewhere on your blog but can I please just ask how you get your CAS photos to look so incredibly clean? Especially around the edges, they're so smooth it's incredible. Thank you in advance, I really appreciate it! You inspire me so much tbh, everything you post is so beautiful. (Also also also the eyebags you released recently are my new gold standard and I use them for everything now tysm for sharing them) 🖤
thank you!
ok so here are a few tips, you don’t need to follow all of them, but if you like exactly my cas style, maybe some of them will help
1. edge smoothing. sorry for being obvious, but use either in-game anti-aliasing, or a smaa shader if you’re a reshade/gshade user, or you’ll get a pixelated staircase for the edges that will be hard to fix. if your PC doesn’t handle high graphics well and you play without edge smoothing, you can toggle it on temporarily just for taking a few good cas pictures and then turn it back off.
2. use MXAO. if you use reshades, use mxao shader for pictures, it's really a life changer. though i don't use it during the regular gameplay and only turn it on when i take pictures, because moving a lot with it is a visual overload for me.
3. but don’t overdo it with MXAO. seriously, don’t go all out with mxao. for a cleaner look shadows need to be delicate, just to overline shapes and give your sim more dimension. every time i tweaked my reshade presets, i made mxao even more thin and gentle and realized that it only got better.
4. background makes a huge difference. solid colors. in my personal opinion, grey gives the "cleanest" look (i said while still using my old dirty yellowish that i'm too lazy to find a replacement for). also, if i want to use black or white background, i make it a little darker than white and a little lighter than black, they look pretty much the same but will attack your eyes less (especially the white one).
5. CAS lighting makes a huge difference. maxis light isn't that bad, but cc lighting definitely give you more clean, crisp image. my personal favorite neutral one that i use by default is v2 by helgatisha. sometimes i use lightings with side highlights for more “rendered” look, but they aren’t always comfortable for everyday use and i only use them for specific pictures and then get back to my default neutral one.
6. shadow overlays. i mean cc that imitates shadows on sim's face, it gives sim's face so much dimension. there are spotlight v1 and v2 by simandy and lighting overlay v1 and v2 by joshseoh. i'd say josh's overlays are for fancy portrait pictures (they imitate a very strong light source from different angles, cool for sim photographers), and simandy's are more neutral. personally, i only use v2 by simandy, it's my holy grail and i don't take sim's pictures without it.
7. SRWE. it's a program that emulates having a bigger display resolution than your monitor can afford, meaning much better screenshot quality and cleanliness for small details. srwe can be a bit of a hassle to use for a lot of pics and most of the time i’m too lazy to use it and just take my regular small pixelated screenshots, but sometimes i want just one, but extra clean picture.
8. Topaz Clean 3 (photoshop). i don't usually edit my pictures and just drop them like whatever, mostly because i can't, but i make them sharper and cleaner with a gentle touch of topaz on very low strength.
36 notes
·
View notes
Photo


seventeen x cosmopolitan korea (2021)
#seventeen#svtcreations#svtsource#cheyedits#jeonghan#wonwoo#the8#mingyu#yoon jeonghan#jeon wonwoo#xu minghao#kim mingyu#it is so hard to edit pics without topaz :')
388 notes
·
View notes
Note
your pictures are stunning! can you share the rehade your using and how you edit your pics?
aww thank you so much! i try very hard to make my pictures look good. 🙈
sadly i can’t tell you exactly how i’m editing my pictures because it’s honestly a lot of different actions running together and then some own adjustments - plus i made the actions quite some time ago so i don’t really remember myself what all went into it. and all my saves have a different action that i run on the pictures.
but i’m gonna try my best to commulate all my resources and process under the cut so you can try yourself! oh, and i use photoshop cc 2018 (i don’t like the newer interface).
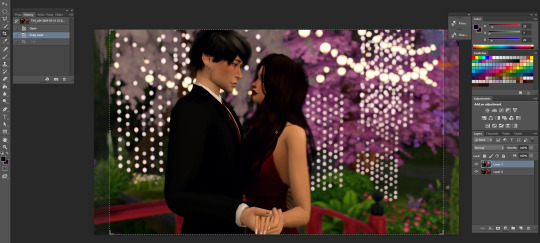
so let’s start with my entangled pictures. i use intramoon‘s elysian reshade preset with some slight adjustment. this is how a picture with just the reshade looks like:
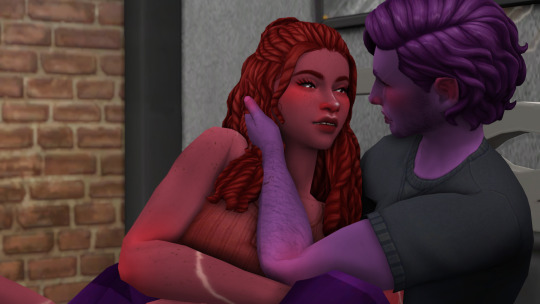
then i run my first action which is really just running topaz clean & topaz denoise (those are photoshop plugins, a guide on how to install them should be on the website) to clean up the texture and make it look smoother and then some vibrance adjustments and crop the image (2:1 dimensions for entangled). so i have this:
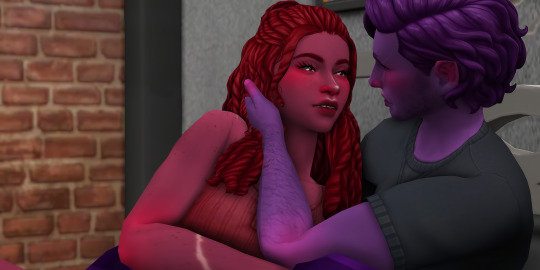
after that i have lots of adjustments running that tweak the vibrance, hue, colour balance, and levels of the picture. for the kearemy entangled pictures i like it when they have some cooler tones. i also resize the image to be 1080 pixels wide (because that makes them look at least a little sharp on tumblr) and flatten all my layers.
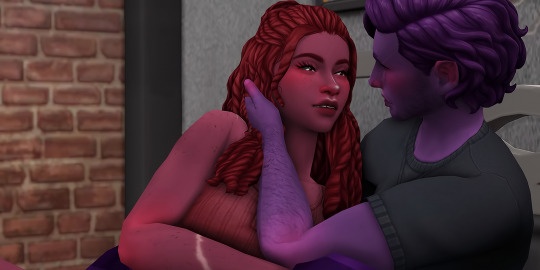
usually that would be it but recently i started adding noise by duplicating the layer and using the noise filter in photoshop on the top layer (and then play with the opacity until it looks how i want it):

this change is very subtle but i feel like it gives the image a bit more life. and then i run aveira’s preview pictures action and play a little with the opacity there too until i get a picture that i like and that’s it for the entangled kearemy pictures. oh, and flatten the entire image:
when i feel a picture is too dark i duplace the layer again and set the top layer style to screen and the opacity to around 50%:
for cahlby pictures, their tweaks are a little different but the main difference is that i add a yellow gradient layer in the end to make everything sem a bit warmer:

for my nsb pictures, i use berryconfetti’s confetti clover reshade preset, also with some minor tweaks. this is how those pictures look without any editing and just the reshade:

then, i run aveira’s preview picture action on it (the option with topaz):
after that, i use the create a sim action from pxelbox’s color POP action set:

don’t forget to flatten the image after running each action! then i first run the sharp action of the same set, and then the smooth action, crop the image & resize it (i take a little away on each side and from the top and bottom):
and finally, i change the canvas size so the pictures get a white border (set the canvas extension colour to white!), and once again resize the image to be 1080 pixels wide:
and that’s it! i hope i could help you with this!!
16 notes
·
View notes
Photo

HELLO EVERYONE ok i’m finally doing this after like 84 years lmao
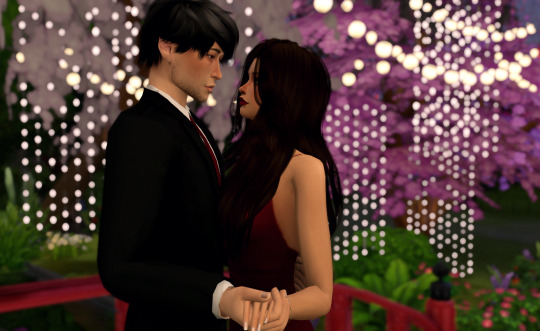
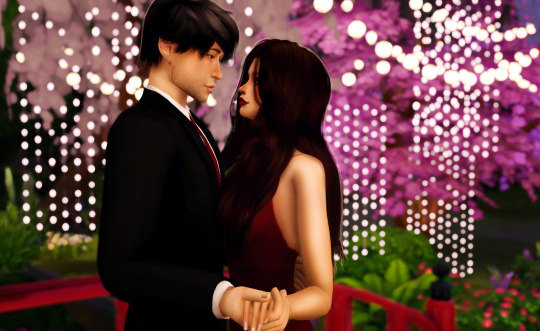
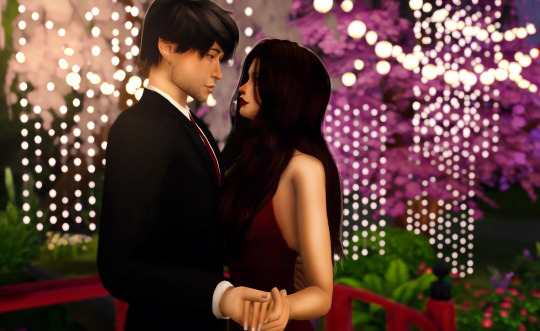
SO yeah several people in the past few months have asked me about my editing process and i said that i’d hopefully do it after gen 2 stuff and since i’m taking a break from gen 2 and wanna stall bc returning to gen 1 will be painful, ya girl got her ass to go through with it. keep in mind, this tutorial is for people who already know the basics of photoshop. if you don’t there’s many tutorials online that’ll help beginners. i’m gonna be editing a pic of val and chance all dressed up and ready to crash a prom to get lit with their homies maggie and eli
*rosanna pansino voice* LET’S GET STARTED
so i use reshade and i believe the version i have is 3.0.7 or something idk but it’s 3.0 and i switch between 3 presets that are my own. the one i use the most started with pickypikachu’s cinematic preset as a base.
now, i know not everyone has reshade, but there’s still a way you can mimic the DOF effect with photoshop. when my stubborn ass edited everything myself all i did was duplicate the photo, apply field blur and adjust the bokeh lighting, added a layer mask and with a brush using the color black, i “colored” in what i didn’t want to be blurry and BOOM ya got that DOF goodness
so for DOF i use either the marty mcfly shader or the matso shader and even both, like in this case. i also love that sweet mxao bc ooh yess them SHADOWS. but unfortunately bc i’ll never ever let go of alpha hair and you’ll have to rip them away from my cold dead hands, ya get this shit.

the dof and shadows cutting through the hair making it look ugly and blurry and just all around BLECH

so when taking screenshots, i take two photos. one with the dof and mxao and another without those shaders
now i open both pics in photoshop and layer the photo with the effects over the one without
ok this is totally optional and you don’t have to do it but i like to crop my photos and the preset for my cropping dimensions is 1150 x 705 bc that’s what i’m going to resize my photos to (w/ 300 resolution). again, totally optional, you don’t have to do this part but i do.
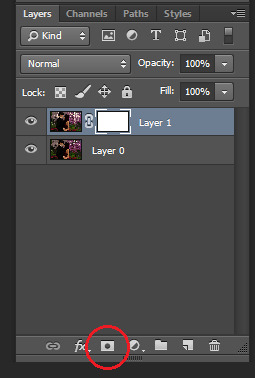
so now i add a layer mask to the top layer
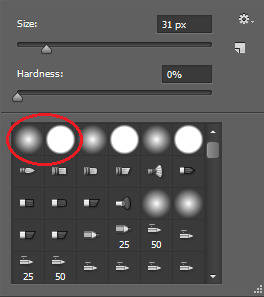
next i select the brush tool and choose whatever brush i wanna use. i usually switch between these two brushes depending on what i need at the moment. and make sure the color you’re painting with is black.
and now just “paint” over the ugly parts to erase them. depending on your photo this can sometimes take a while, but hey ya get that dof and beautiful alpha hair. i also take this time to erase some of the blurriness that forms around my sims from the dof effect


right click on the layer and select “merge down” and i’m left with this. obviously, you see some parts that aren’t blurred anymore but i just fix it with the blur tool at 100% opacity, zoom in on the unblurred edges and blur them in with whatever brush i choose. i personally choose the one with hard edges and i make sure the brush size is very very small. this part’s also a lil time consuming so ya gotta be patient.
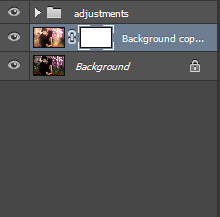
doesn’t that look better? now it’s time to get to the actual editing lmao. first, click layer > background layer to make it a background. this is necessary for me bc of the photoshop action i use.
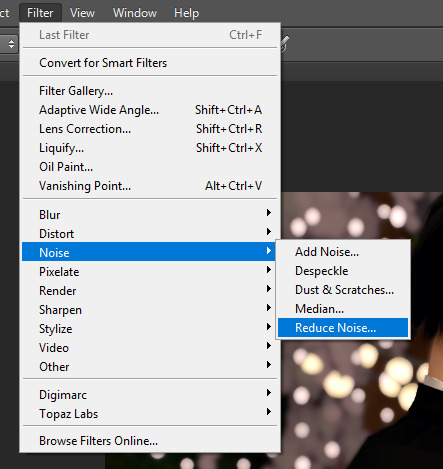
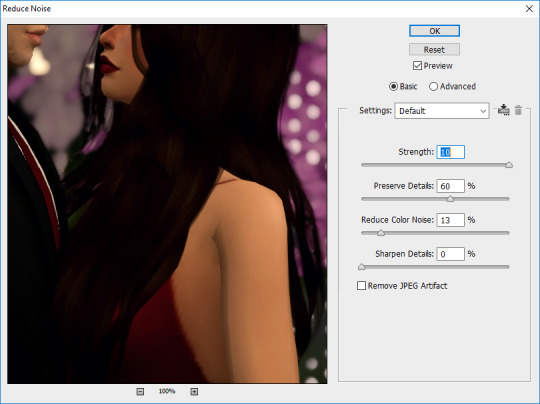
so in order to give my pics that “crisp” look, i first reduce noise and these are my default settings

then i do topaz clean
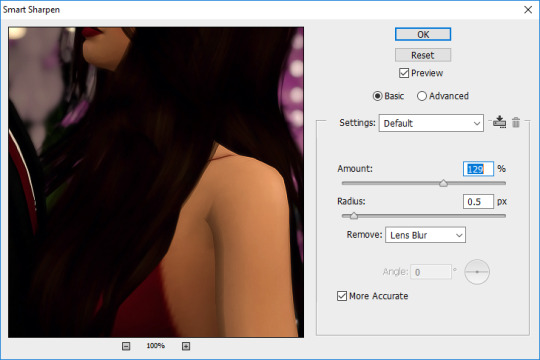
then smart sharpen
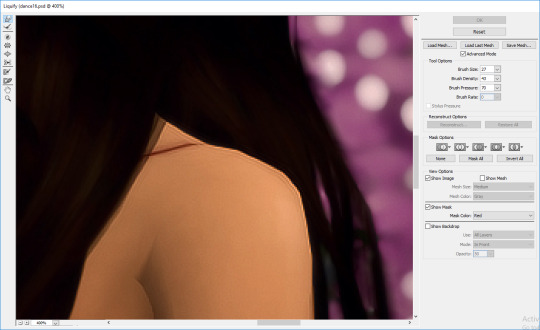
then i use the liquify tool bc sometimes there’s jagged edges on the shoulders, elbows, chins, etc. that i wanna smooth out. i also use this to adjust facial expressions, like for this i wanna make the smiles curve up a lil bit more bc chalerie are in love and happy

now this is the part where i kinda nitpick bc i’m a perfectionist lmao like i clean up some lines on val’s arms and fix that weird spot on the collar of chance’s shirt, all that small stuff people wouldn’t notice but I DO so i fix it

alright now it’s time for me to draw hair! again, this is optional and i understand not everyone has a tablet or likes drawing hair so skip this if it ain’t your thang. first add a new layer for the hair.
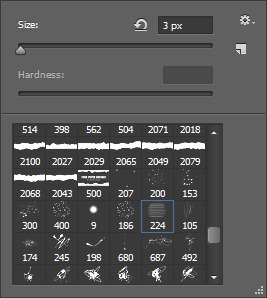
i like to add extra hair to make it more full or fix clipping and “highlights” to kinda emphasize the lighting effects i’ll do later and i usually go with a lighter color of the hair for the highlights OR i do the color of the lighting. in this case i’m just going with a very light brown color. this brush is from this set by castrochew and i have the opacity at 100% and size at 3 px.

this is what it looks like after i draw all the hair. and for the highlights i always reduce the layer opacity to 50-60% or even less than that depending on how subtle i want them to be. after that, i merge them all down.

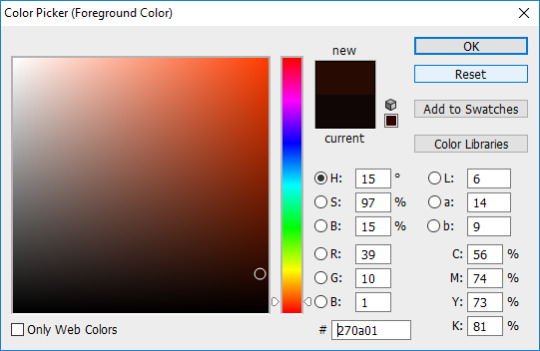
now it’s time to do all the shading and highlighting. make sure you do it all as separate layers, too. even tho i use mxao it still doesn’t do enough for me, so i always add shadows and i recommend you use dark brown for the shadows as black is a a bit too dark especially when you’re adding shadows around the faces. like y’all don’t want it to look like your sims put mud on their face. trust me guys i contour my face.

now take a hard edge brush and draw where you wanna add shadows

apply gaussian blur and erase any excess “shadows” then reduce the layer opacity to your liking. now keep doing that in other areas where you wanna add shadows. it all depends on the picture and i really just use my general knowledge of how lighting and shadows work. remember, make sure each shadow and highlight you add is a separate layer!
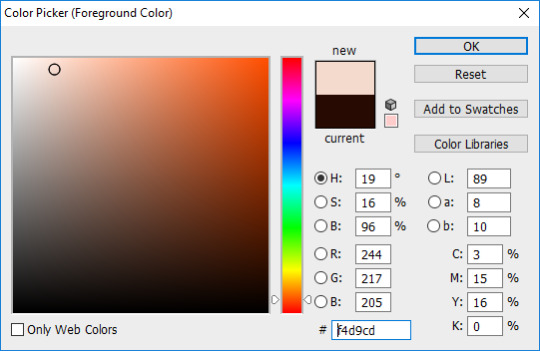

for highlights, use a light color, a soft edge brush, change the brush opacity to 60% and change the layer mode to “soft light”. like with the shadows, just paint whatever you wanna highlight, gaussian blur, reduce layer opacity, etc. then after you’re done shading and highlighting, merge all the layers down.

then to enhance the highlights even more i use the dodge tool with the exposure at 25% and paint over all the highlighted areas

so this is how it looks after i did all the time consuming stuff and now it’s time to play with COLOR YEAHHHHHH
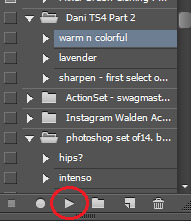
this is the action i’ve been using forever and it’s a ride or die, always got my back, never fails me, always there when i need it. all i gotta do is click on that and press the “play” button and everything’s beautiful and colorful and all my problems seem to go away and suddenly the your lie in april soundtrack is playing the background
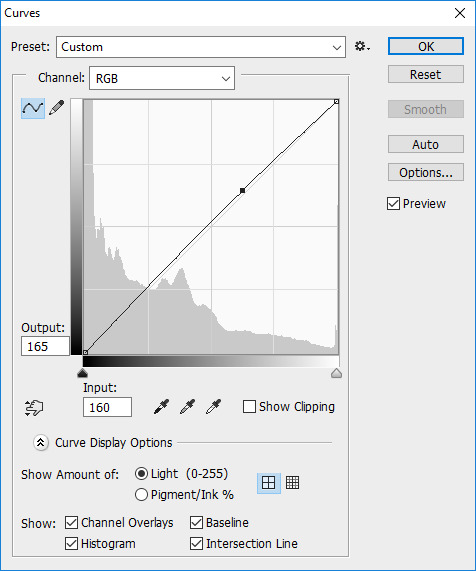

but most of the time i untick the “curves” layer from the action as it can be too bright for me and i just adjust the curves of the image to what i prefer.
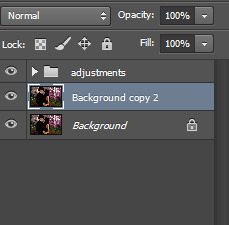

now it’s my favorite part! time to add that good-ass LIGHTING and since i went crazy with the lights for the background, it’s gonna be fun to do this one hehehe. ok so first duplicate your image and then choose the color of the lighting you want. for this pic, i want the lighting to be a nice light warm yellow/orange color

now for the brush mode, choose “linear dodge (add)” and change the opacity to 35%-45% or hey even higher if ya wanna go bright as fuck. and get a soft edge brush and make it big. like fucking BIG. you see the size i put it at? yeah, make it big bc we want that beautiful shit EVERYWHERE
YEAH DAS DAT SHIT I LIKE. keep painting over areas ya wanna see glow and even paint over the same area twice to make it brighter. hell, don’t just stop at one color. add other colors of light if ya want. add some pinks or blue or purple, adjust the brush size, go crazy. BLIND EVERYONE.

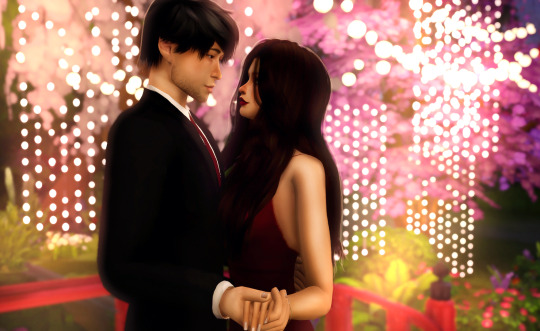
buuuuuuut with all the sweet lighting, it tends to make your pretty pic look all washed out and also lighting doesn’t always work that way. and that’s why i told y’all to duplicate your image bc we’re gonna add a layer mask again and with a soft edge brush you gotta erase some of that lighting. change the brush mode back to normal, put the opacity at 100% and make sure your brush is black and get rid of what you need to. but what’s good about this is you don’t have to be perfect and it’s ok if there’s still some lights on your sims bc now it looks like the light is shining on them awwww. now merge that layer down
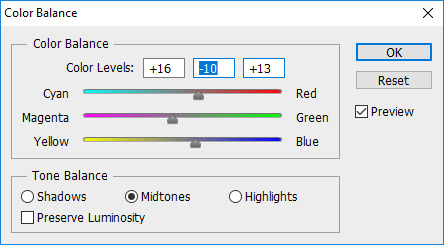
now color balance! i like to enhance the red, magenta, and blue most of the time but as always it all depends on the photo and what your preference is.

all that’s left to do now is change the image size. i change the resolution to 300 ppi (it doesn’t really do anything but like it’s become a habit of me to do it so i do it idk) and make sure if you’re making your image smaller, you apply “bicubic sharper” so your image stays sharp when you change the size

AND THIS IS THE FINAL PRODUCT.
so this is my editing process and i hope some of you learned some stuff from this. also please keep in mind that i also encourage y’all to do your own spin on things when you edit. i’m all for taking tips from others and learning cool new tricks but develop a style that fits YOU. eventually you’ll find it and i know that you’ll end up creating something amazing that shows how unique and lovely you are.
anyways, i’m so glad i finally got this done. love you guys 💖💖💖
#the sims 4#sims 4#ts4#simblr#tutorial#aliya's editing tutorial#giving it that tag so i can make a link on my blog#i really hope i explained things well#like i don't do tutorials#but here ya go#now i gotta edit the other photos for this photoshoot byyyyeee
90 notes
·
View notes
Last Seen Blogs
disbabeled
Disabled Icon
orion-child
.~shanti~.
knightsintodreams
☆ Life's a drag ☆

mabonsdad
All The Monsters Of My Mind
psorrell
Peter Sorrell