
wwhatisstutorials
And sew on...
Hello. I am ironically a tailor named Taylor. send me asks about cosplay | send me any questions you'd like and I'll try to help to the best of my ability | wwhatiss (Insta / personal tumblr) |
127 posts
Don't wanna be here? Send us removal request.
Last Seen Blogs

gothixbaby
Gothix Baby

pbankcaptions
PBankCaptions

psy-faerie
Elle Faye

jaeslay1
Just playin’ but I'm serious

musik-montag
Musik Montag
Photo

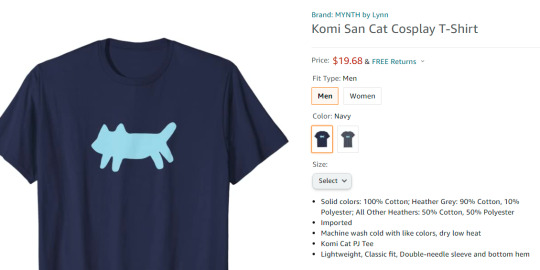
Isn’t She so adorable?? I had to make the tee for it
It’s on Amazon here
Pair with cute ears and crippling social anxiety OwO
17 notes
·
View notes
Photo
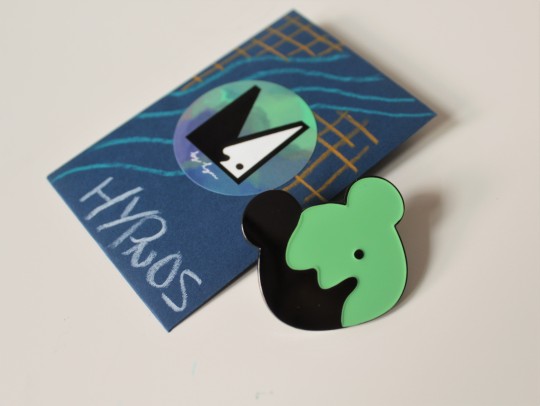
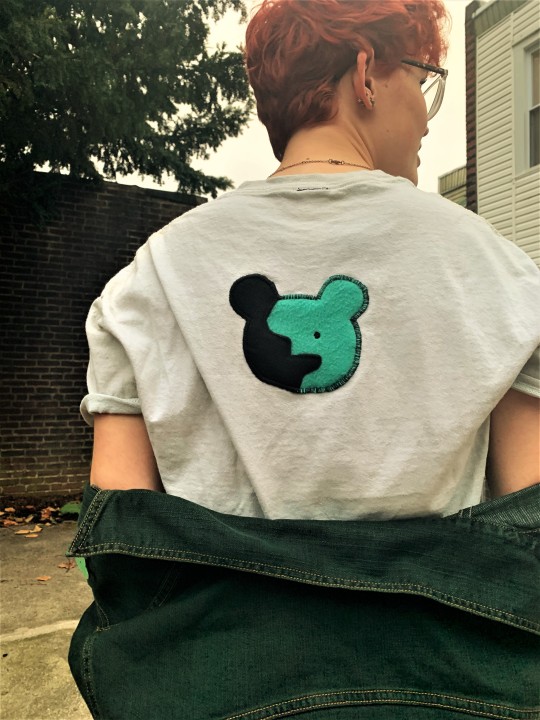
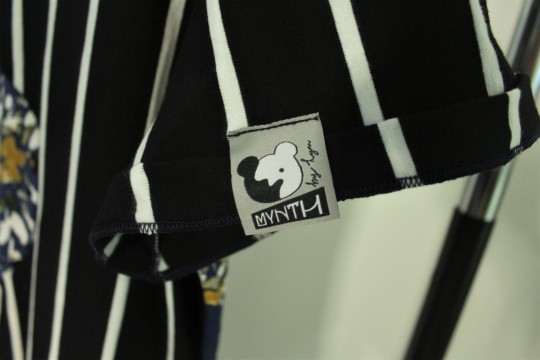
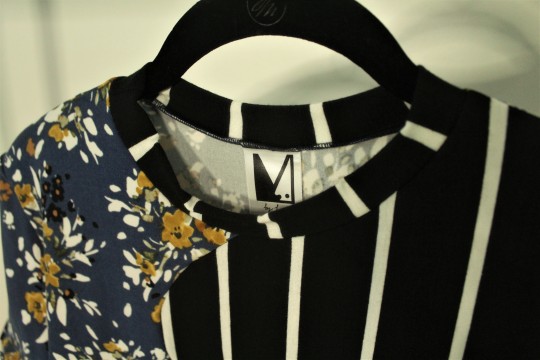
MYNTH by Lynn
Hypnos Part 1: Illusion
mynthshop.etsy.com
LGBTQ new business owner trying to pay off student debt. :’)
All clothing is hand sewn/dyed/printed/embroidered by yours truly.
#I invested a lot of my time and funds to jumpstart my own business!#I'm doing my best to create quality items that are each uniquely hand made.#small business#lgbt business#etsy#artists on etsy#artist on etsy
11 notes
·
View notes
Photo


I made lil Obey Me! doodads!!!
Redbubble
101 notes
·
View notes
Photo
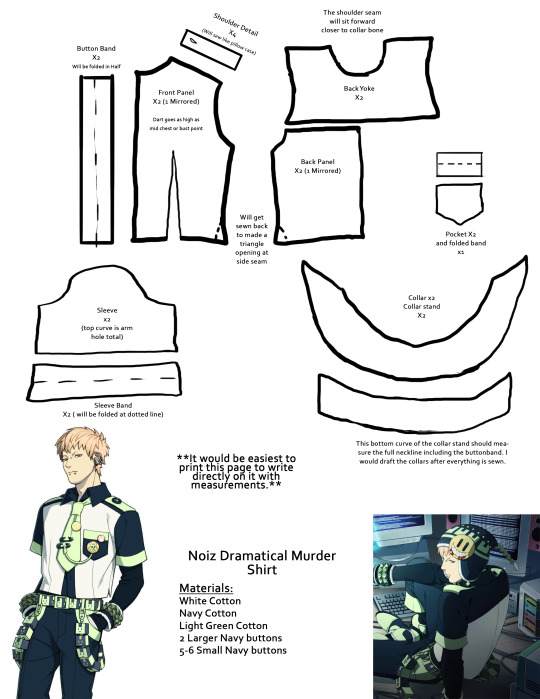
To start measuring out each pattern, It might be easiest to have a garment that is most similar to the one you’re trying to sew. In this case, any button down will do. It will help you get the shape you want as well as a size that you know fits you. If you don’t own one, then be sure to use scrap fabric to get the pieces you want before using your final fabric. I find it helpful to hold a piece of fabric up to my own body and use a pen or chalk to draw on it while looking in the mirror.
Quick Sew Guide.
1. Close up the Dart on Both Front Panels (make sure the dart Seam allowance is towards the inside of the garment).
2. Sew the Center Back seams of the Back Panels together
3. Attach the yoke by Sandwiching the top of the back panel so that when sewn, the Seam allowance will be inside the yoke. (Need Help? Search how to sew a yoke on youtube)
4. Sew Shoulder Seams and Side Seams together. (make sure they match up measurement wise).
a. Stop about 1.5-2 inches from the bottom of the side seam as that will get sewn back to make a triangle opening.
b. Hem around the bottom. Try it on first to make sure you have the desired length.
5. Starting the sleeve, There are two different ways to sew this. The easier way is to Fold the Sleeve Band in half then sew it to the sleeve so that the Seam allowance is inside. Then sew up the side of the combined sleeve making sure all the seam lines match up. The harder but cleaner way is to first sew the side seam of the sleeve. Then Sew the Sleeve band edges so that its a circle. Finally, match up the open edge of the circle to the bottom circle of the sleeve. That way the end of the sleeve is clean without seam allowance being shown.
6. The shoulder detail. Okay so this will be sewn like a pillowcase. You can leave the edge that will be sewn into the arm hole open. This will be sewn into the top most part of your shoulder. I recommend trying on what would now be a vest and marking where exactly you want these shoulder details to sit. It should be totally on top of the navy. Combine with #7
7. Pin the sleeve into the arm hole. Adjust sizes as needed. Make sure the top of the sleeve is at the top of the shoulder for best fit. Don’t forget to pin the shoulder detail in-between the shoulder and the sleeve. Do this on both sides.
a. Need help? Look up how to sew a set-in sleeve on youtube.
8. Great the shirt is coming together now! Okay onto the button bands. Fold both in half. Sew along front edge. Do to both sides.
a. Need help? Look up how to sew a button band on youtube.
9. Next is the collar. Sew both collar pieces together like a pillowcase leaving the smaller curve open. This curve should match the bigger curve of the collar stand. The collar should then be turned out so that all the seam allowances are inside. The collar stand gets sewn onto the collar similarly to the yoke.
a. Look up How to sew a collar with a collar stand on youtube.
10. Attach collar to neckline of shirt. The collar stand should measure to the edge of the buttonband. Try using the “burrito method” for the cleanest results
11. Attach the buttons as well as putting in button holes. Some machines have an option to sew them for you. Youll need them on the button bands as well as the Shoulder detail. Carefully line everything up and space everything properly.
12. Make the pocket. Sew pocket pieces together like pillow, leaving the top open. Then sew the folded piece to the top. Iron the raw edges around the side to the back about a ¼”. Then pin to shirt where you want it. Put it on to make sure its straight. Then sew around the ironed edges.
#drammatical murder#dmmd#dmmd cosplay#noiz cosplay#noiz#noiz dmmd#cosplay tutorial#tutorial#tutorials#sewing tutorials#patterning
102 notes
·
View notes
Photo
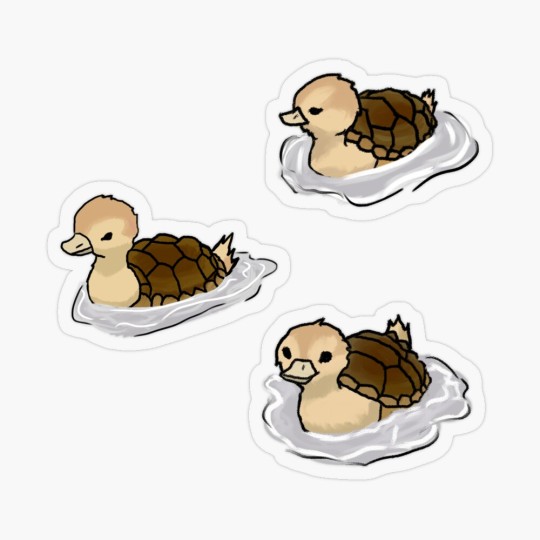
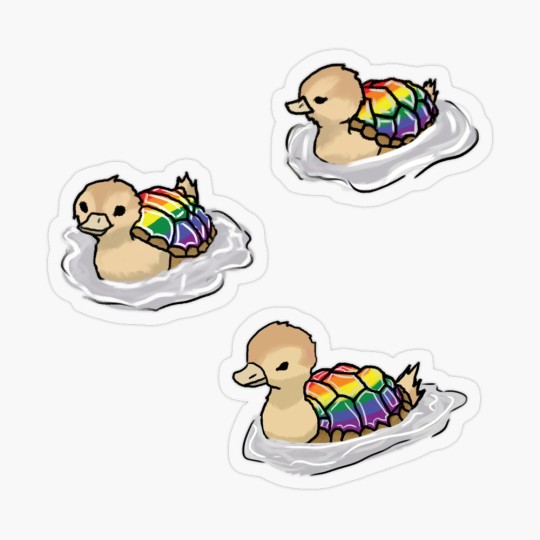
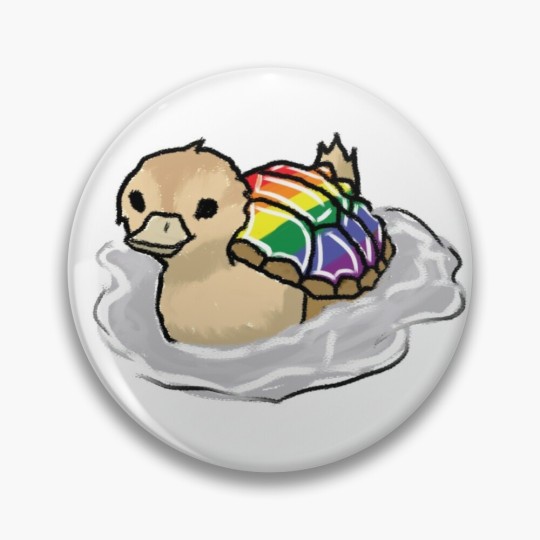

Turtle Ducks! & Pride!!!!!
I love these cuties. You can find them Here
34 notes
·
View notes
Photo
Michiru Kagemori <3
Just finished BNA. I love herrrr
You can get her as a really cool sticker here!
33 notes
·
View notes
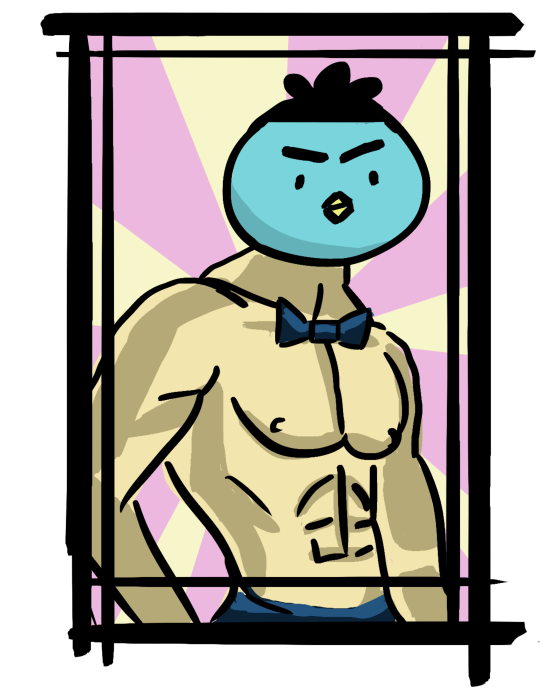
Photo
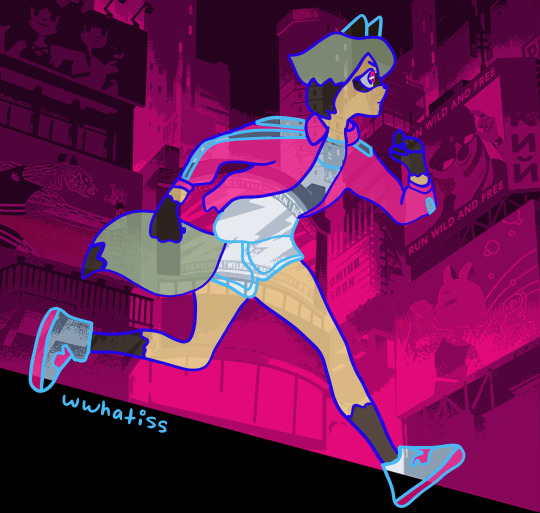
My Skin is Clear, The Stars are Bright. I couldn’t ask for anything more.
Support me on RedBubble
122 notes
·
View notes
Photo

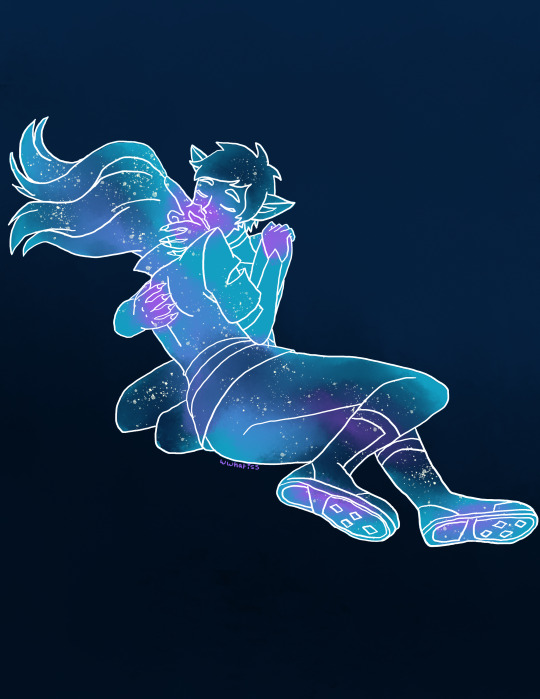
I love them so much! Finally got around to drawing Thirteen. She is everything, my queen.
Get matching pins and stickers on my Redbubble
Honestly though, this show doesn’t get enough hype.
121 notes
·
View notes
Photo
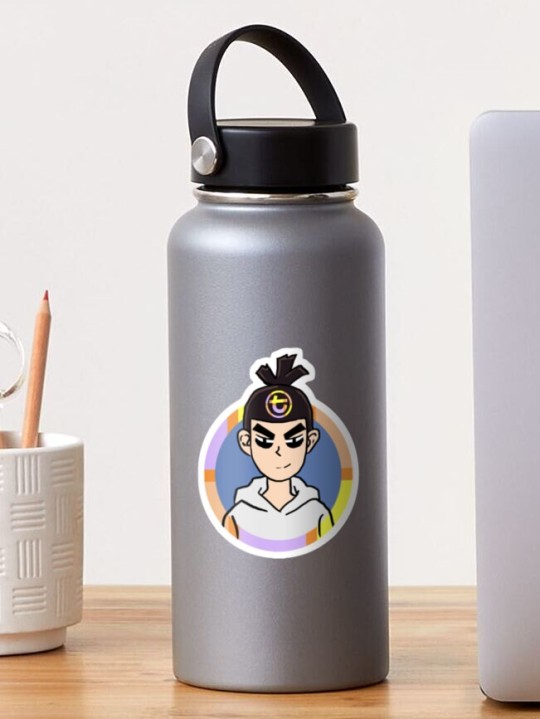


View My shop on Red Bubble!
User Wwhatiss
More people Need to Watch This Show
67 notes
·
View notes
Text
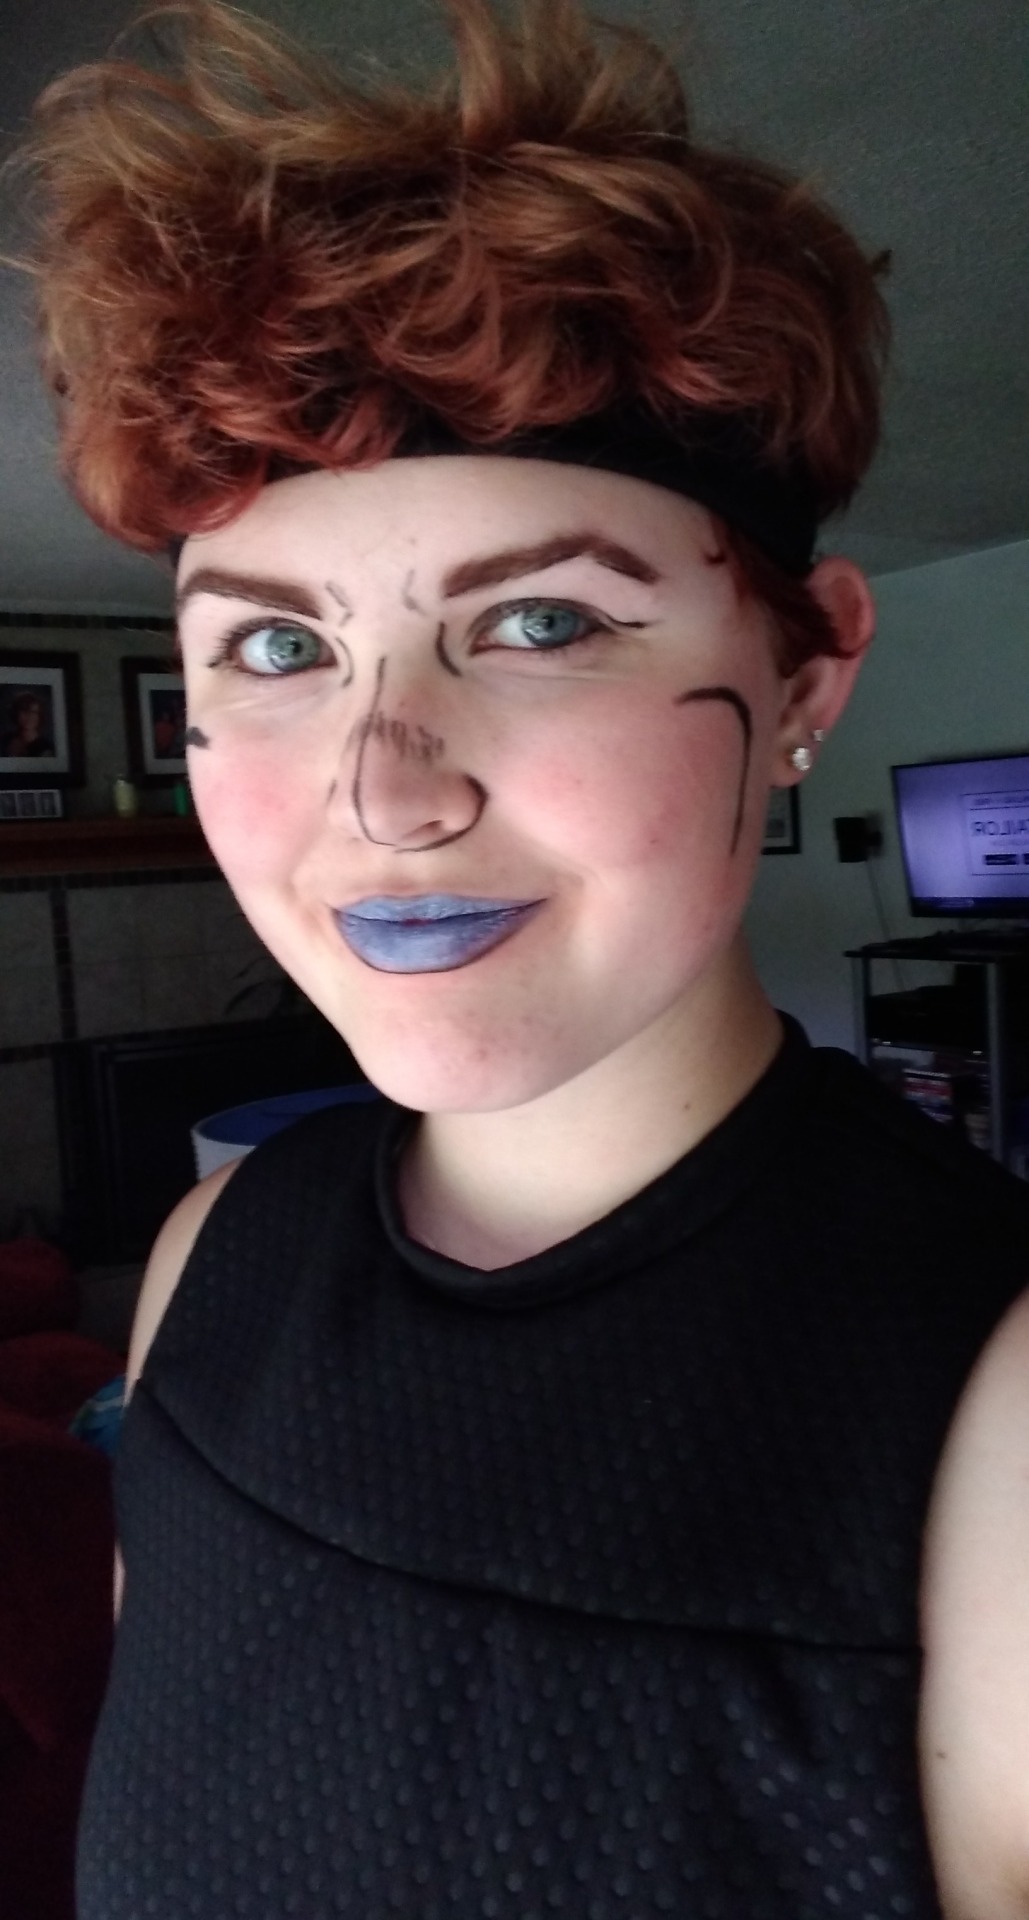
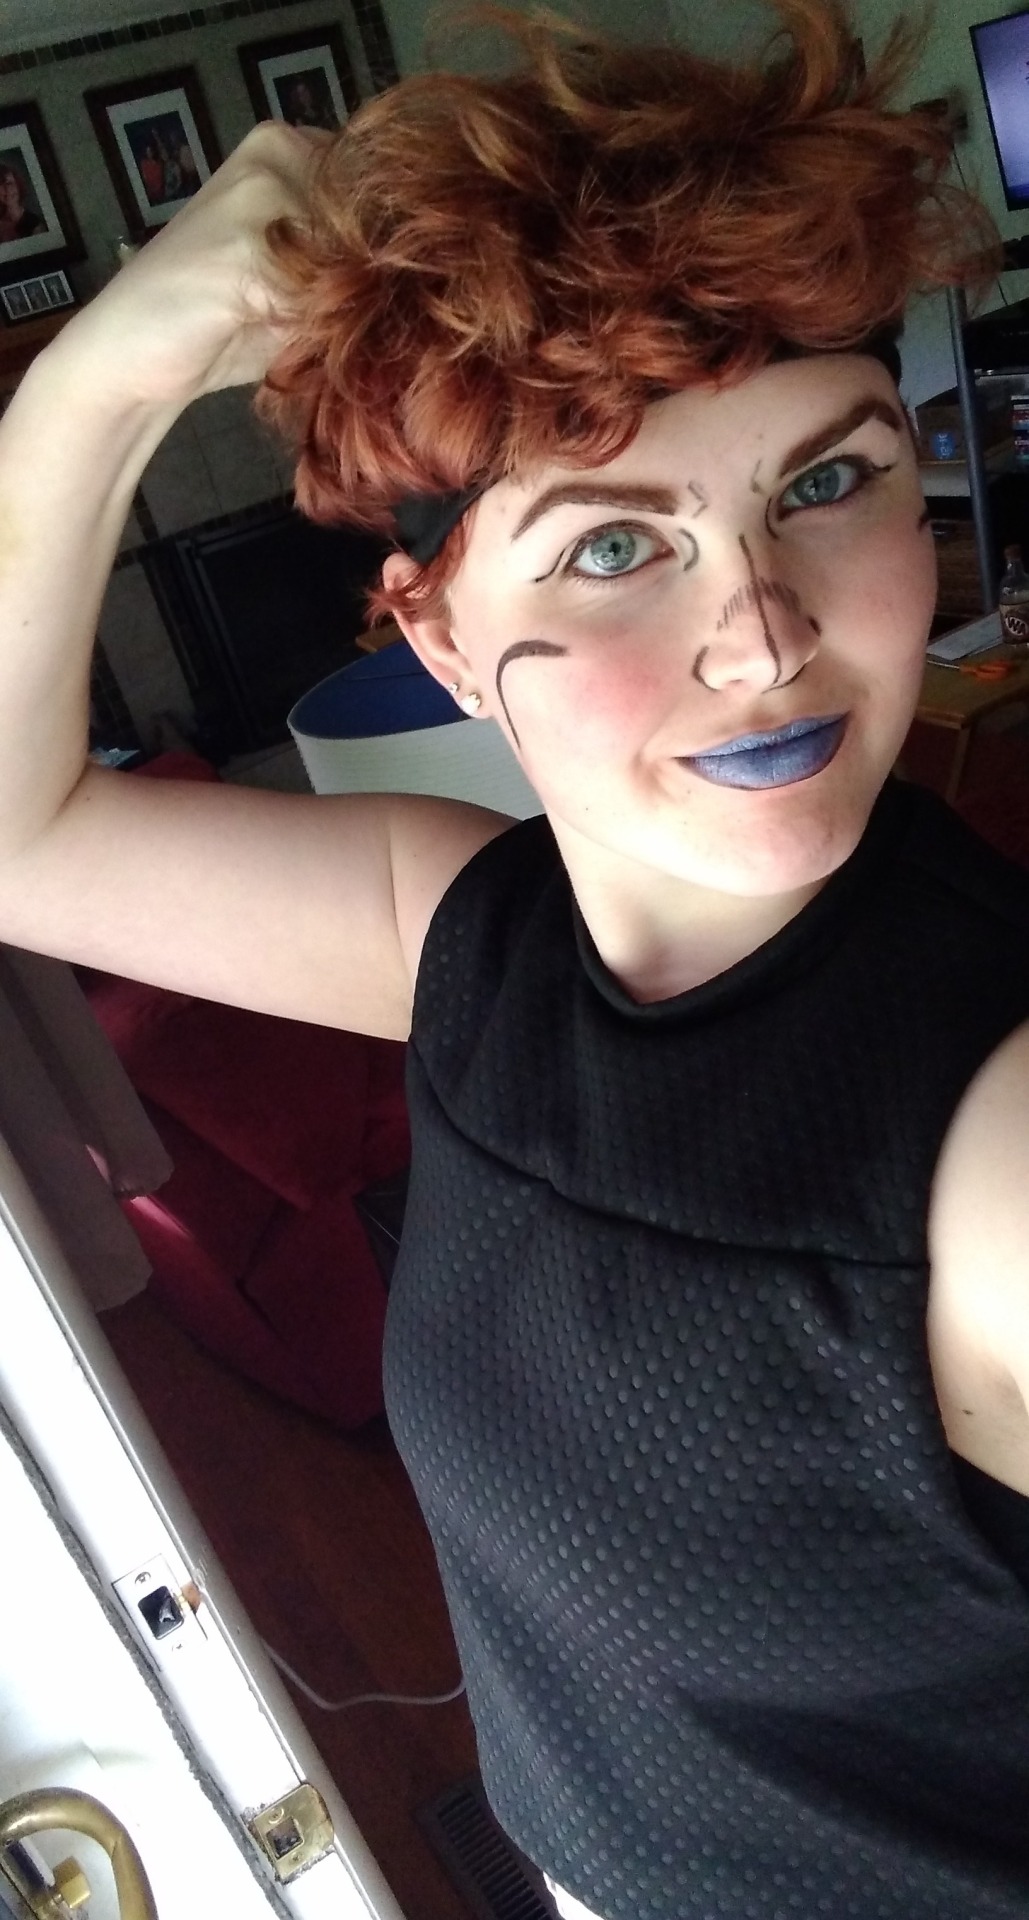
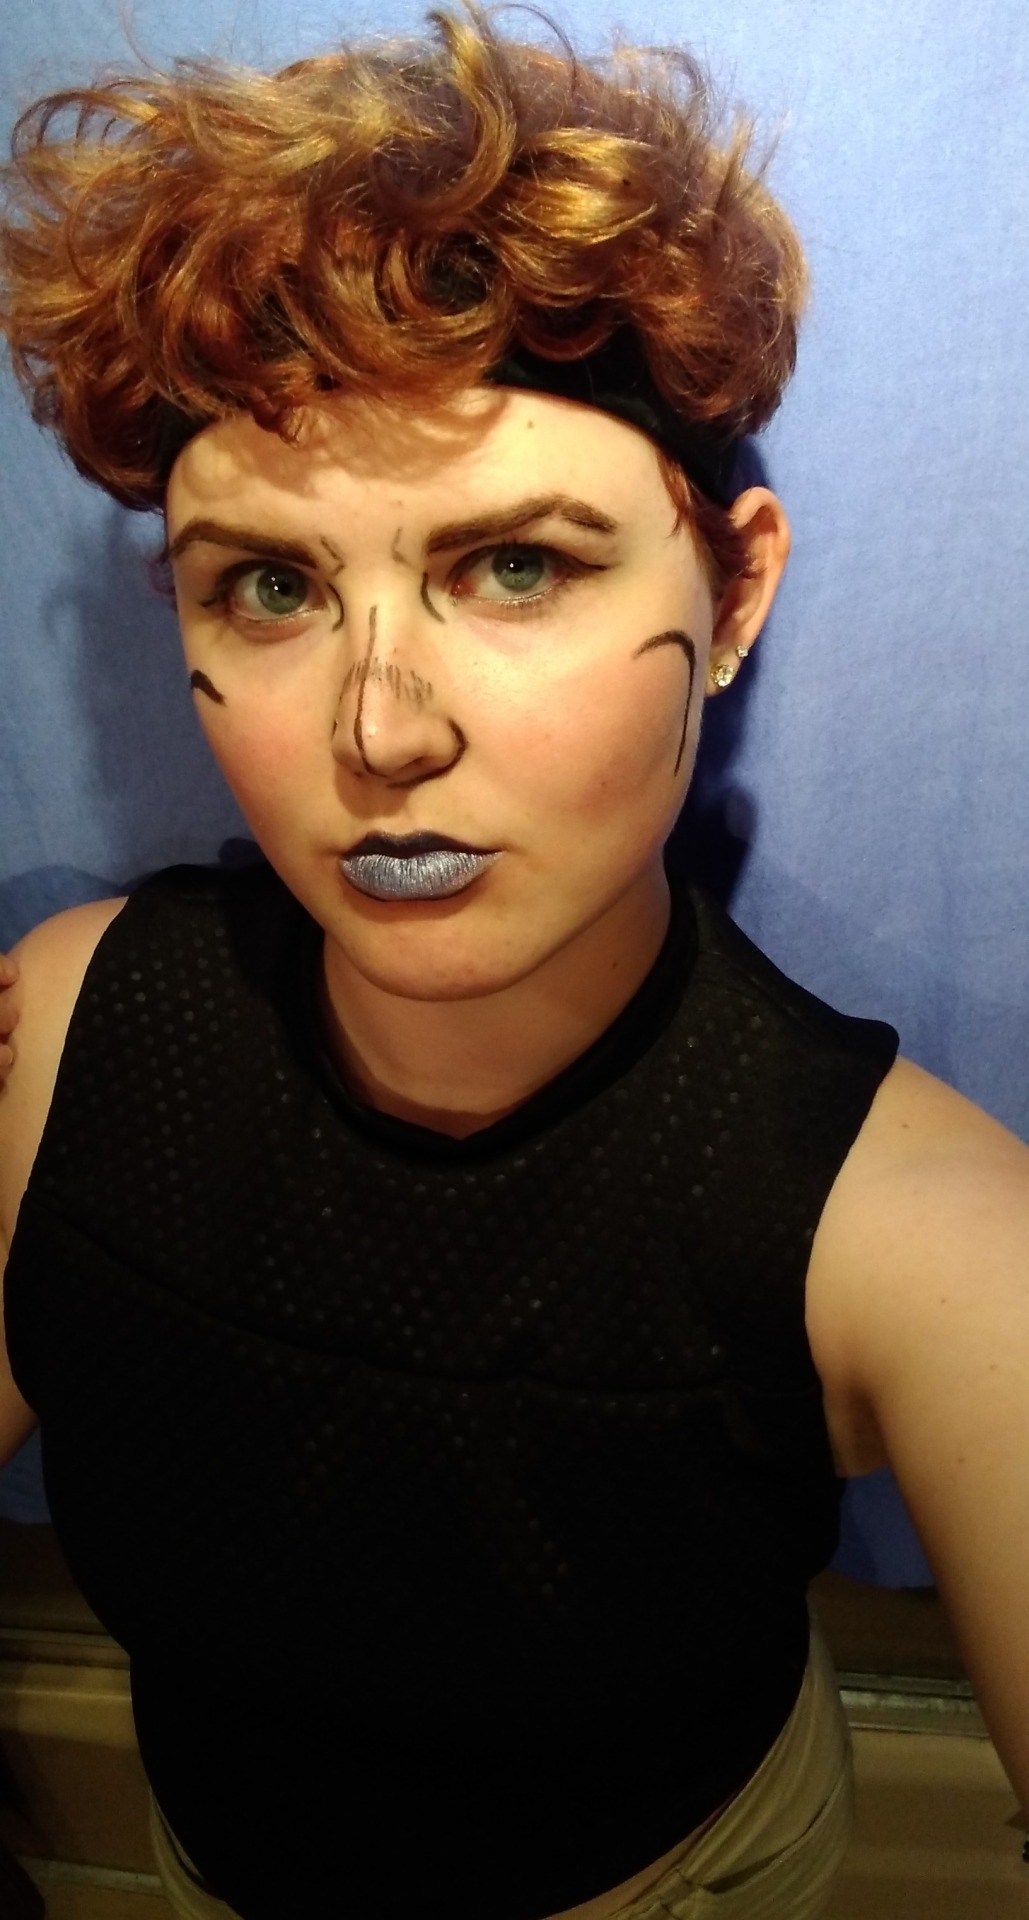
My favorite thing ever is doing JoJo inspired makeup. It's just too fun.
Main inspiration was Giorno Giovanna
#jojo#jojos bizarre adventure#jjba#cosplay#closet cosplay#golden wind#giorno giovanna#makeup#cosplay makeup#copper hair#specifically based on giornos style#ive done jolyne inspired in the past
6 notes
·
View notes
Text
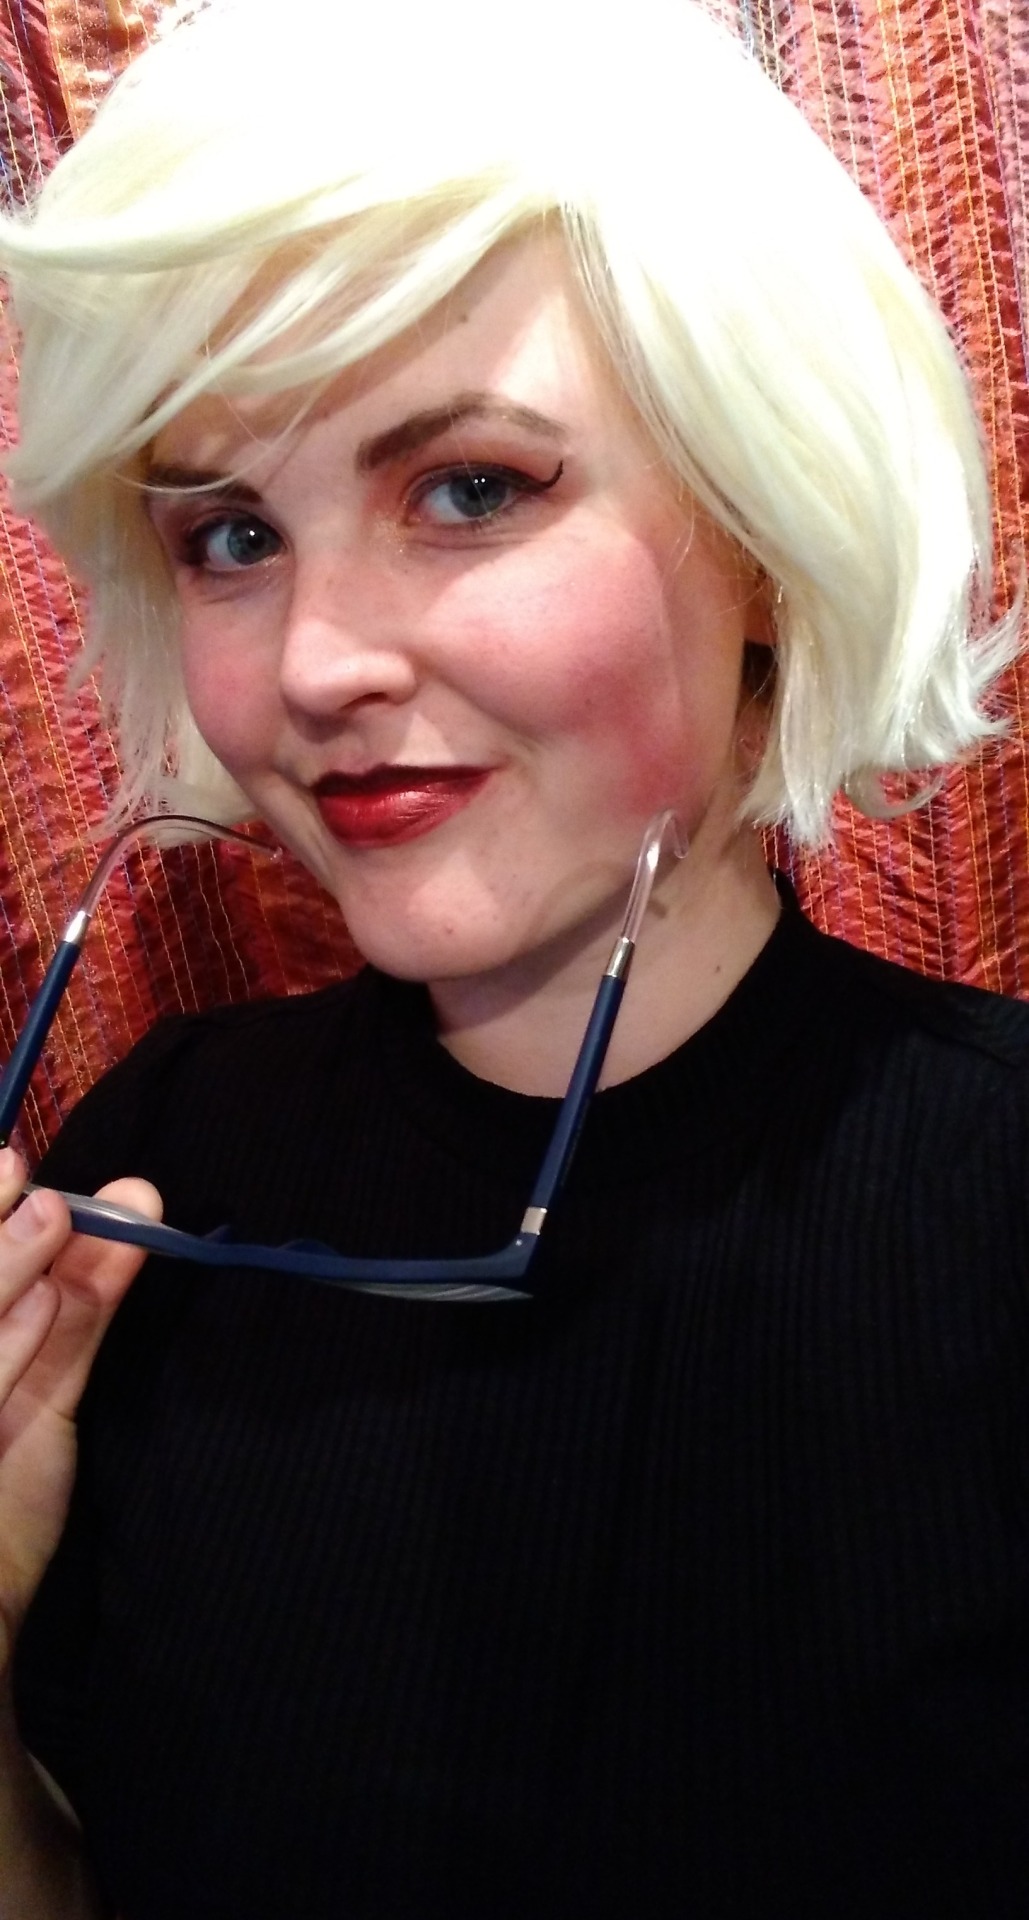

Make-up that my friend Helen did for my glimmer jacket photoshoot! She's so talented ❤️❤️❤️
2 notes
·
View notes
Text
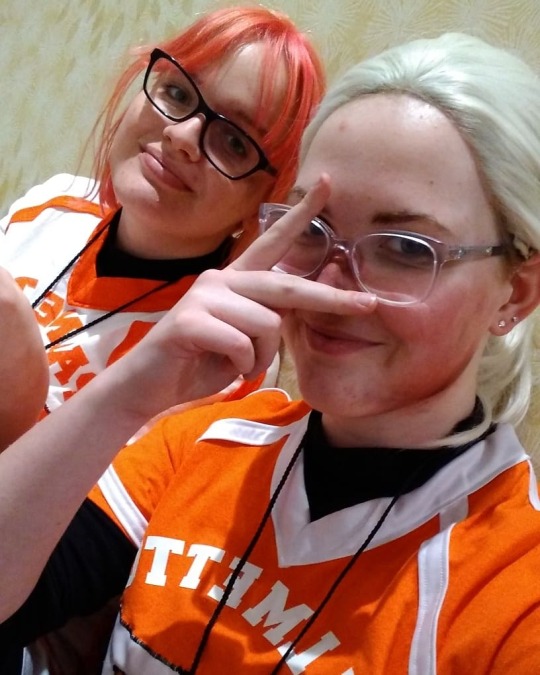
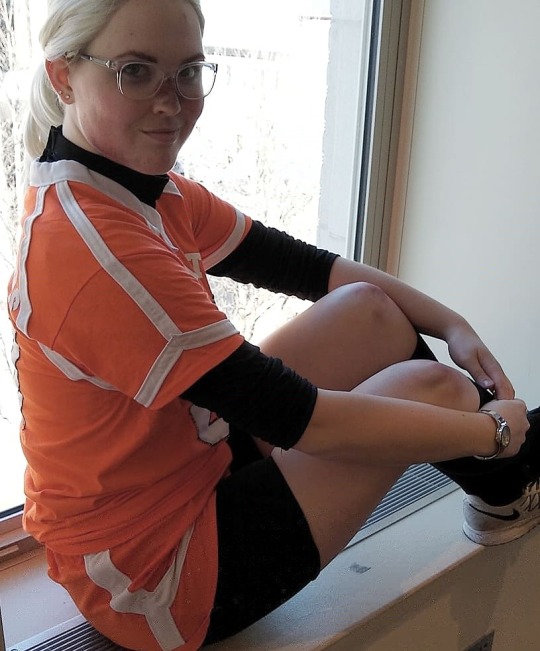
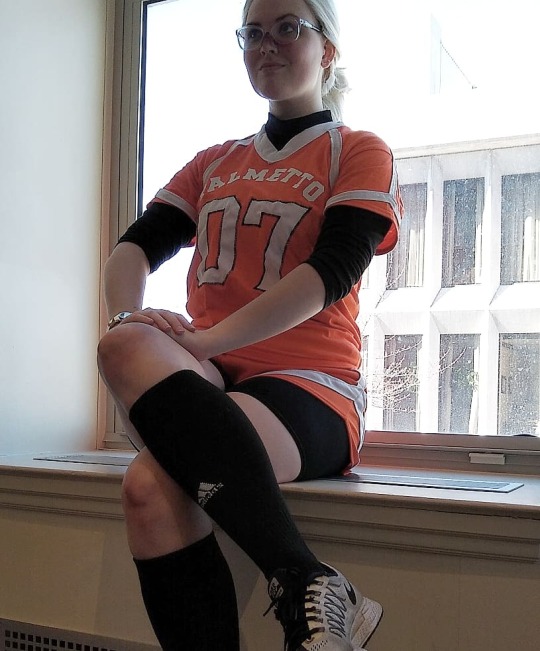
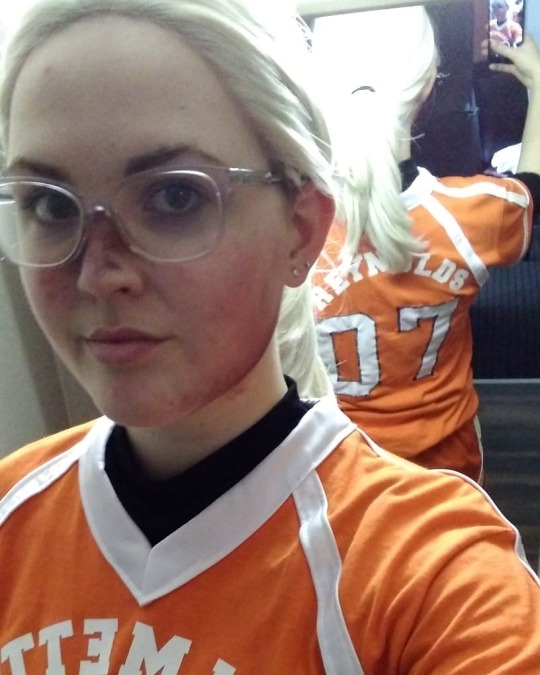
Allison Reynolds w Renee Walker
Zenkaikon 2019
#tfc#the foxhole court cosplay#the foxhole court#allison reynolds#renee walker#tfc cosplay#andreil#zenkaikon#i keep forgetting that nobody gives a cent about my cosplays on instagram haha. my people are still on tumblr and thats where i gotta stay#cosplay#bruise#make-up
5 notes
·
View notes
Photo
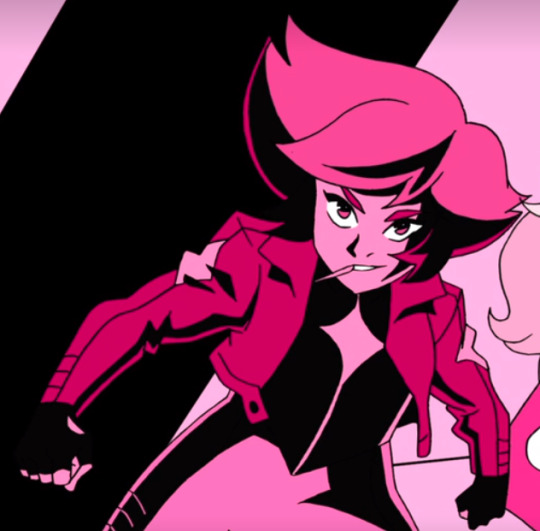

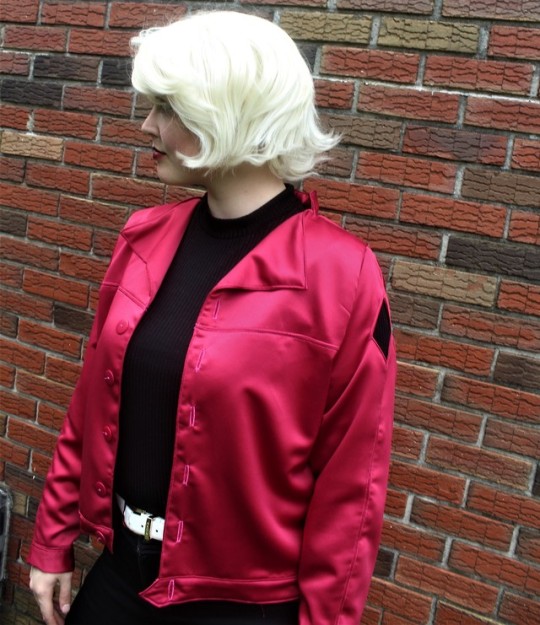
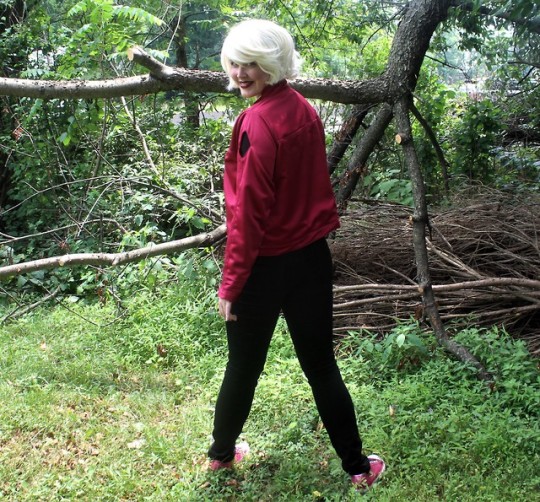
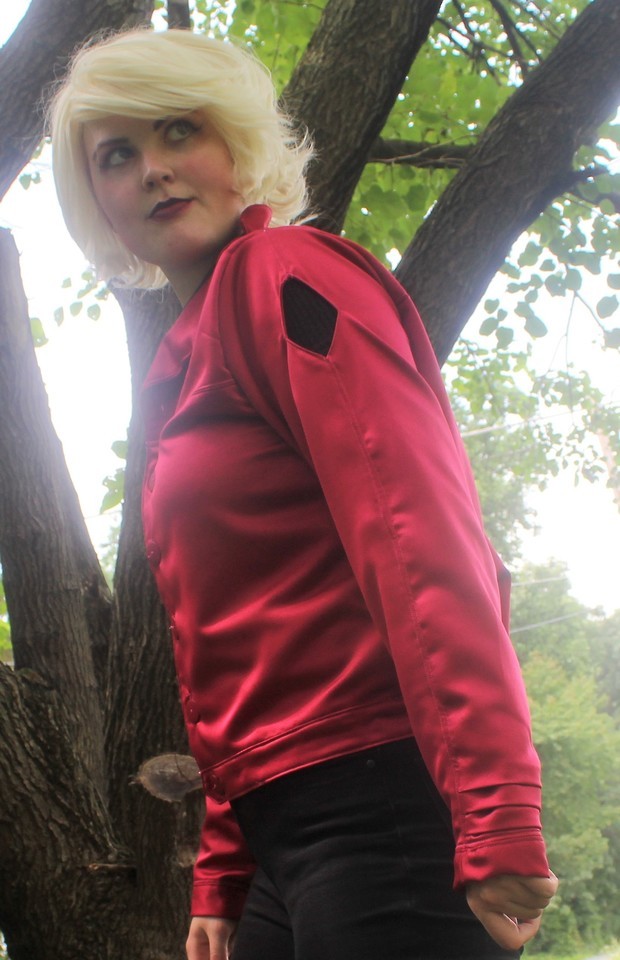
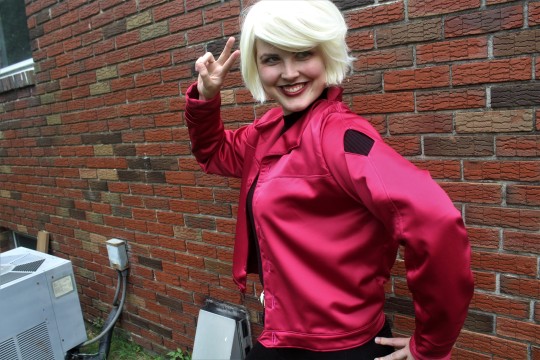
Glimmer She-Ra Season 2 Episode: Roll with it TUTORIAL
Pattern and Sewing below
Hello friends!! I know its been so long since I’ve made a tutorial but- it is summer now and I decided to try out doing another tutorial but adding gifs and more pics. I now have a lot more knowledge of sewing and patterning from school so hopefully I can teach you some things too. Okay lets get right to it!
Note: I am putting my own flare on the sleeve. Instead of having the light pink diamond on the sleeve, I’m making it a cut out instead. You don’t have to do this as it is very complicated to sew and it’s not cannon! I am also adding a collar to the top for some flare.
If you have any questions, please dm me on instagram as I don’t check my tumblr inbox very often! @wwhatiss
Materials
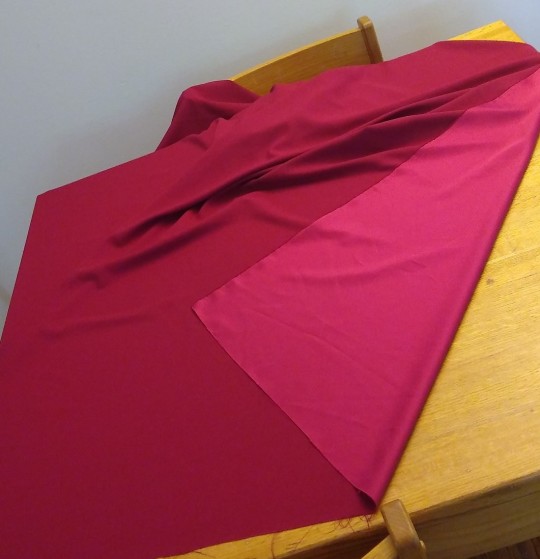
· Pink Fabric of your choosing (make sure it is jacket appropriate. You can also use a different fabric for the lining, but I am using the same fabric for both that and the shell.) I used Stretch Crepe Satin for mine that was $7/yd. I got 3 yards. And I had just Enough. Keep in mind I am also 5’10” and built like an amazon woman so you might not need as much or you may need more.
· Matching Thread
· Large sheets of paper to figure out the pattern (a pad of newsprint works great)
· Ruler/measuring tape
· Scissors
· Sewing Machine
· Hand Sewing Needle
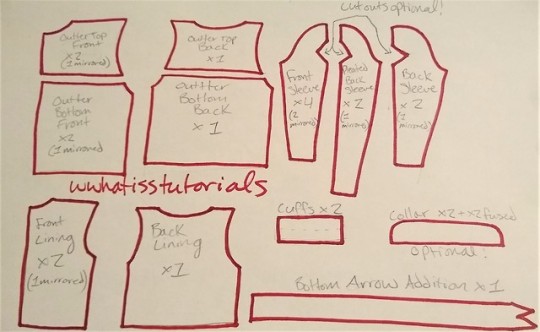
Pattern Making
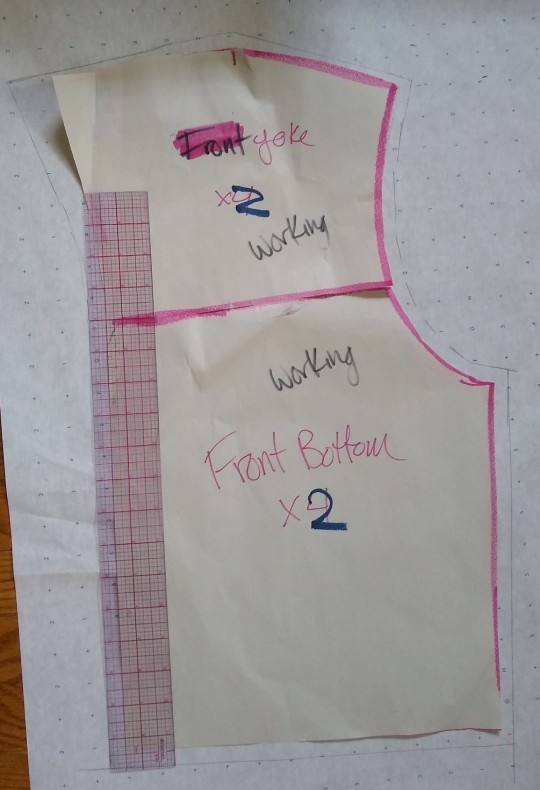
1.Front pattern
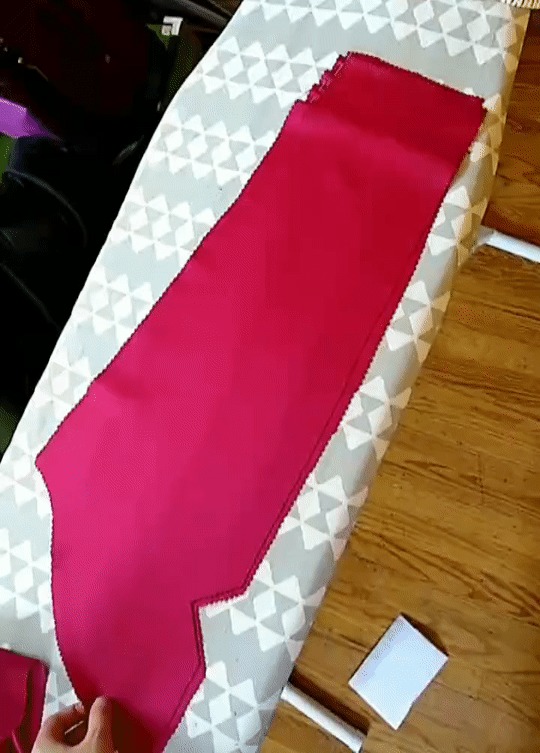
For starters with this, I took a jacket that already fits well and got the measurements of the pattern piece straight from that. Just traced right over it. Work Smarter Not Harder!! I started with the front pattern.
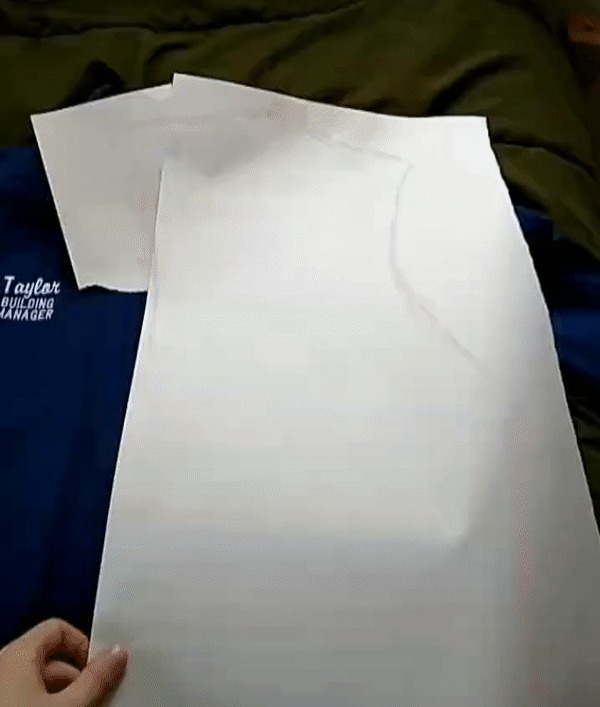
-Now that you have the base pattern of the front of the jacket, you can start altering it. First, I put on the jacket and looked to see where I wanted the hem to end and put a pin to mark it. Glimmer’s jacket ends a little higher than the hips. Then just keep shaping it to where it needs to be. This particular garment has a little flap off the hem at the top so you’re going to have to extend the top a bit like I have shown. I taped an extra piece of paper to the original and drew where I wanted it extended.
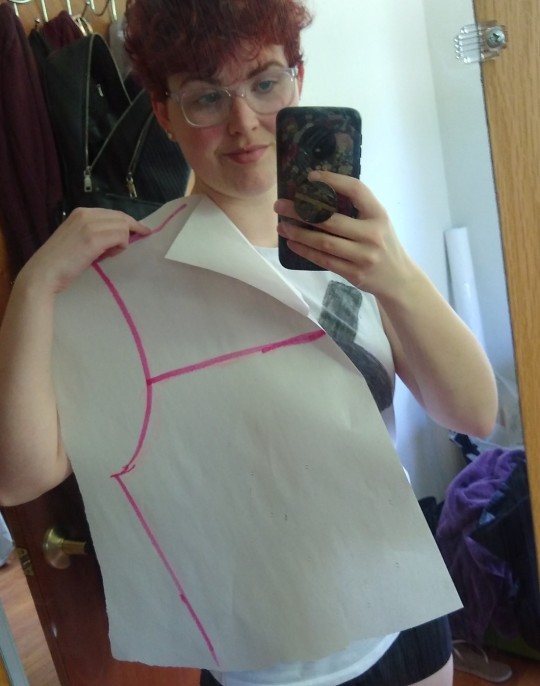
You can also see that I drew the line where there is going to be a seam for detail. Once you have a front piece that you like, cut it out. You can either wait to cut where the decorative seam is going to be or you can cut it now and just tape it together to get your final lining piece.
2.The Back
So you want to start off the same way you did the front and trace the back of the jacket. I only traced half of the back and just wrote on it to cut on the fold. It is very very important that you take your front pattern piece and match it up with the back. Make sure the side seams are the same length as well as the shoulder seams. Trim and extend where needed. You also want to align where the divided seam is located. Measure that from the bottom up because the back will always be different at the top. Below are all of my working patterns.
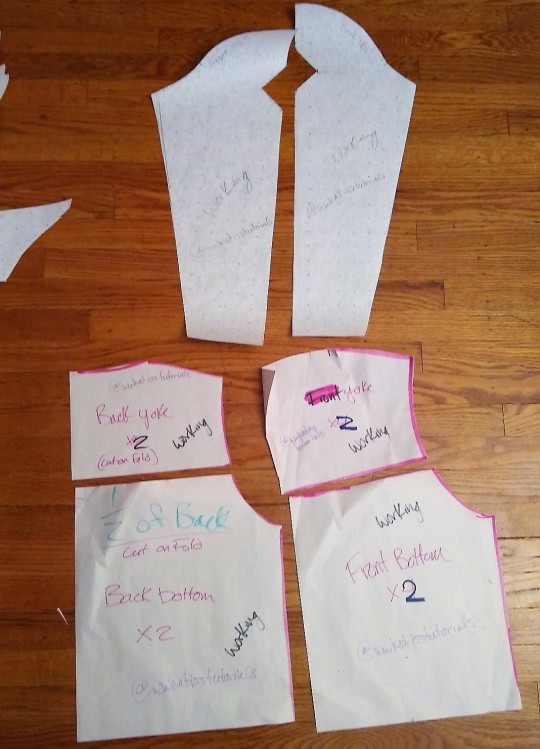
3.Making final patterns
Before we get to the sleeve pattern, you want to add Seam Allowance (SA) to the edges. I always add ½” SA to everything except the neckline at ¼”.
In the picture I have provided, I used both of the front pieces together to make the final lining pattern, but you will also need to do this with the separate pieces.
4. The Sleeve
Alrighty, so there is a lot going on with the sleeve. I will show how I am making this sleeve with the cut out. You do not have to cut out the diamond at all, but you will still need the middle seam because of the pleats.
The same thing as the front and back, we are going to get our information from the reference jacket. Lay it out so that the sleeve is completely flat. The bodice of the jacket will probably need to get bunched to do this. Now you should see a curve in this if done correctly. Get the shape and size of this as well as the length that you want the full arm. Now we will be adding a 1.5” cuff onto the end of this so please keep that in mind. Trace this onto a folded sheet of paper so that you can then make the full sleeve.
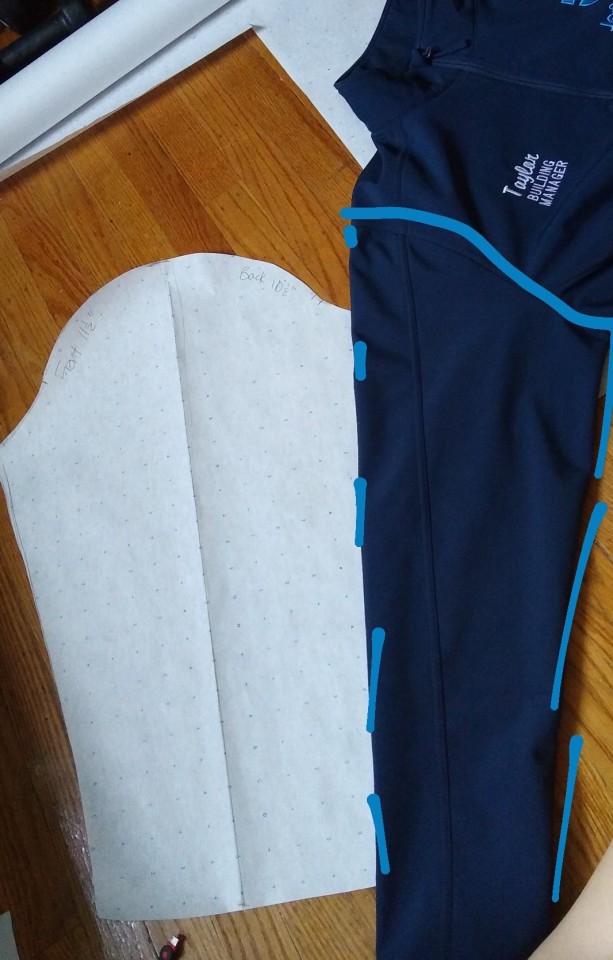
You’ll notice that I have measurements on either side of my pattern. That’s relevant to the sizes of the arm holes of both the front and back bodices. You will want to measure those and adjust the curve to match the measurements. I know it’s a lot but I also know you can do it!!
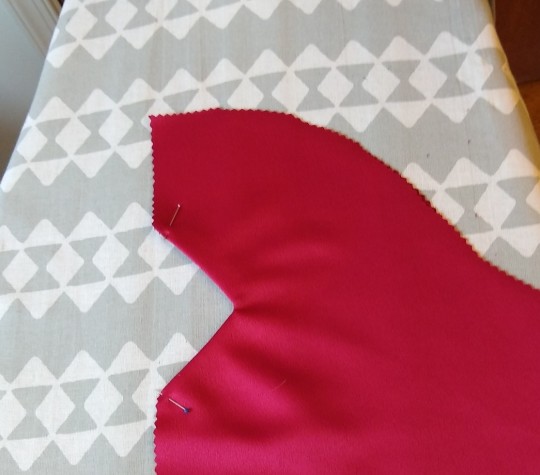
Once you have that adjusted, If you are doing the arm cut out, you will need to cut out the diamond if you decide to go that route.

Mark where you want it on your jacket and then transfer the measurements. I didn’t want it too big, but also, I didn’t want it too small either. Go with your best judgement! Make sure it is even on both sides and cut down the middle of the sleeve as you will need a seam here whether you are doing the cut out or the applique. Cut the diamond out as well.
So now that you have your two base pieces for the sleeve, the outer part of the undersleeve is going to need to be extended for the pleats. This is a very chaotic process so just take your time.
First, grab a piece of paper and figure out what size accordion style pleat you like the most. This is how I measured and folded it out. Also keep in mind that you will want the pleats facing down.
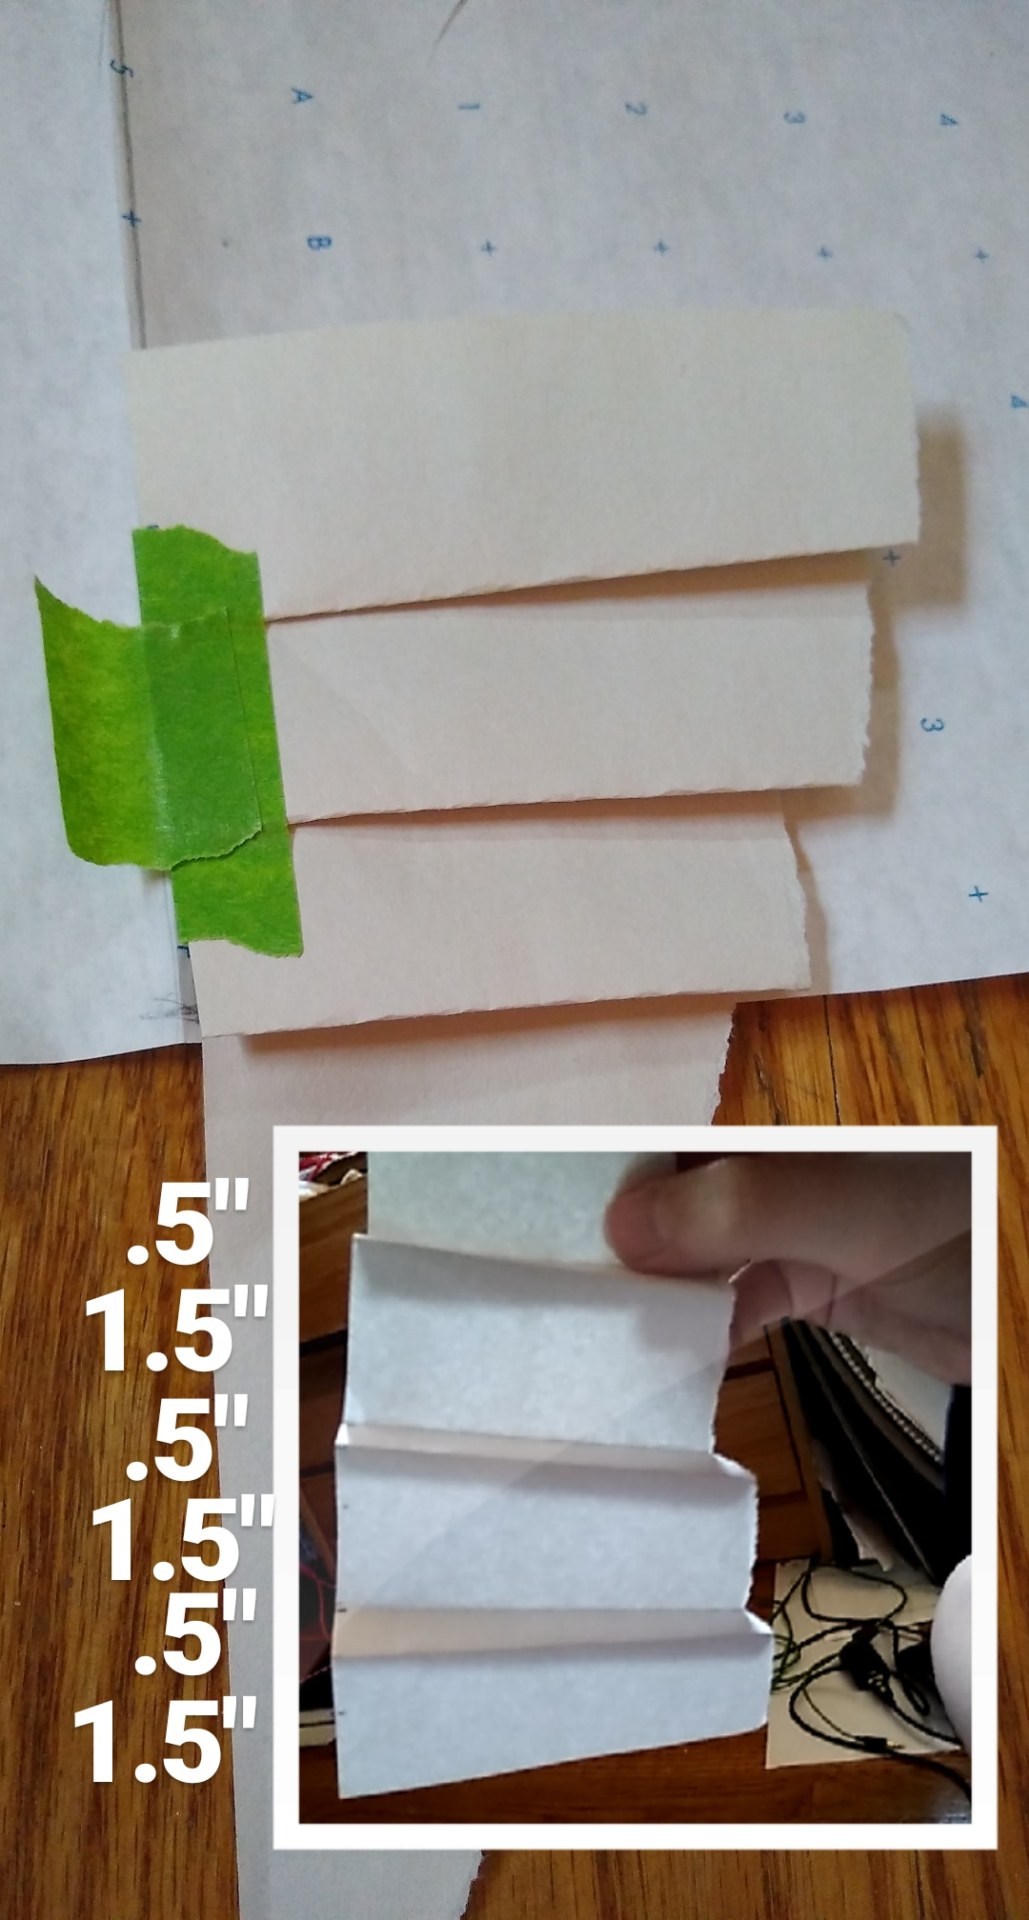
Alrighty! So do not look at the +6 on my image because I realized later that it was wrong! I’m here to make the mistakes you don’t have to haha. Okay so to figure out how much to add to the sleeve, unfold the paper pleats and measure what you have. Then, subtract that by the length of the pleats that was added. This is the length you will add to the sleeve.
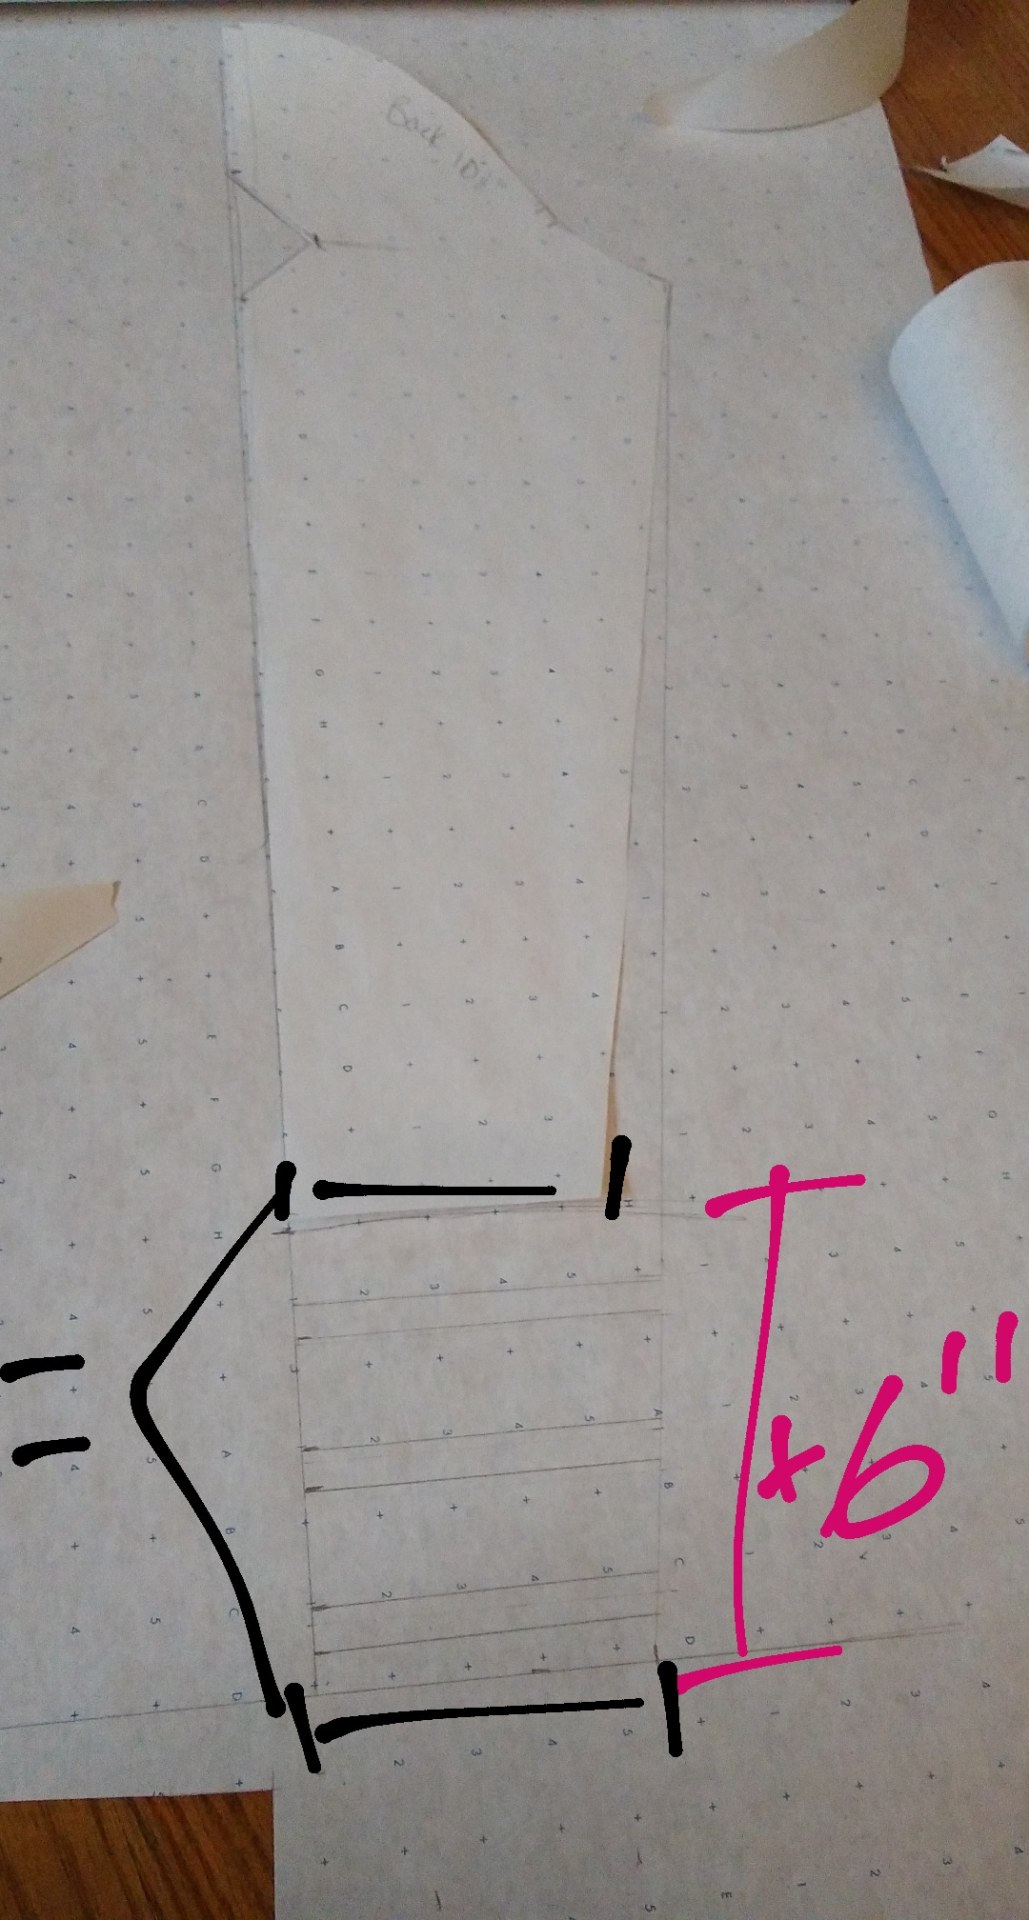
Now, you are going to want the end of the sleeve to still be the same width as the end of the lining piece. From the bottom seam of the arm hole, drop a new line connecting to the extension. Mark the folds as I did with horizontal lines. (When cutting from fabric just make little tick marks within your given ½” seam allowance).
Add your SA of ½” all the way around for your final pattern. You should have a front sleeve final pattern, a back sleeve final lining pattern, and a back sleeve top pattern (the lining will not need to be pleated).
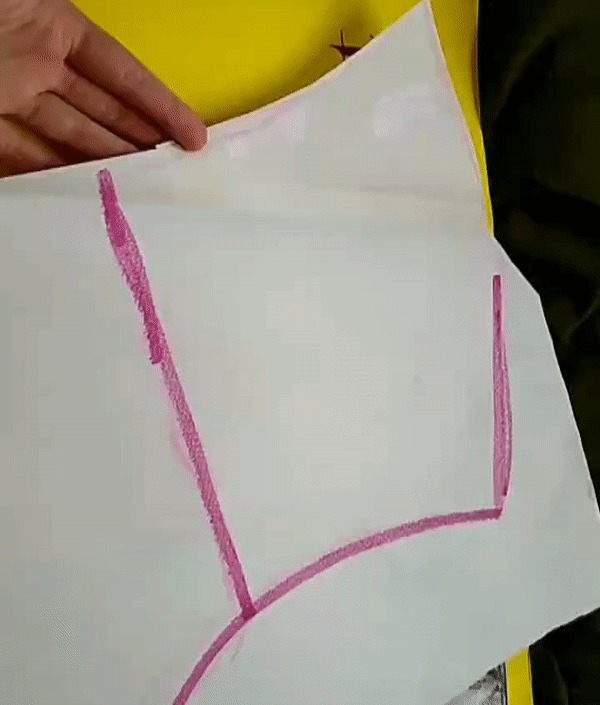
5. The waist band
Alrighty, pull out the original working pattern of the front and back bodice. Measure the bottom x2 and the back x2 to get the full length around the bottom of the jacket. I attached my exact measurements for how I did the little arrow at the bottom. This is added to the hem length that you just got since it sticks out.
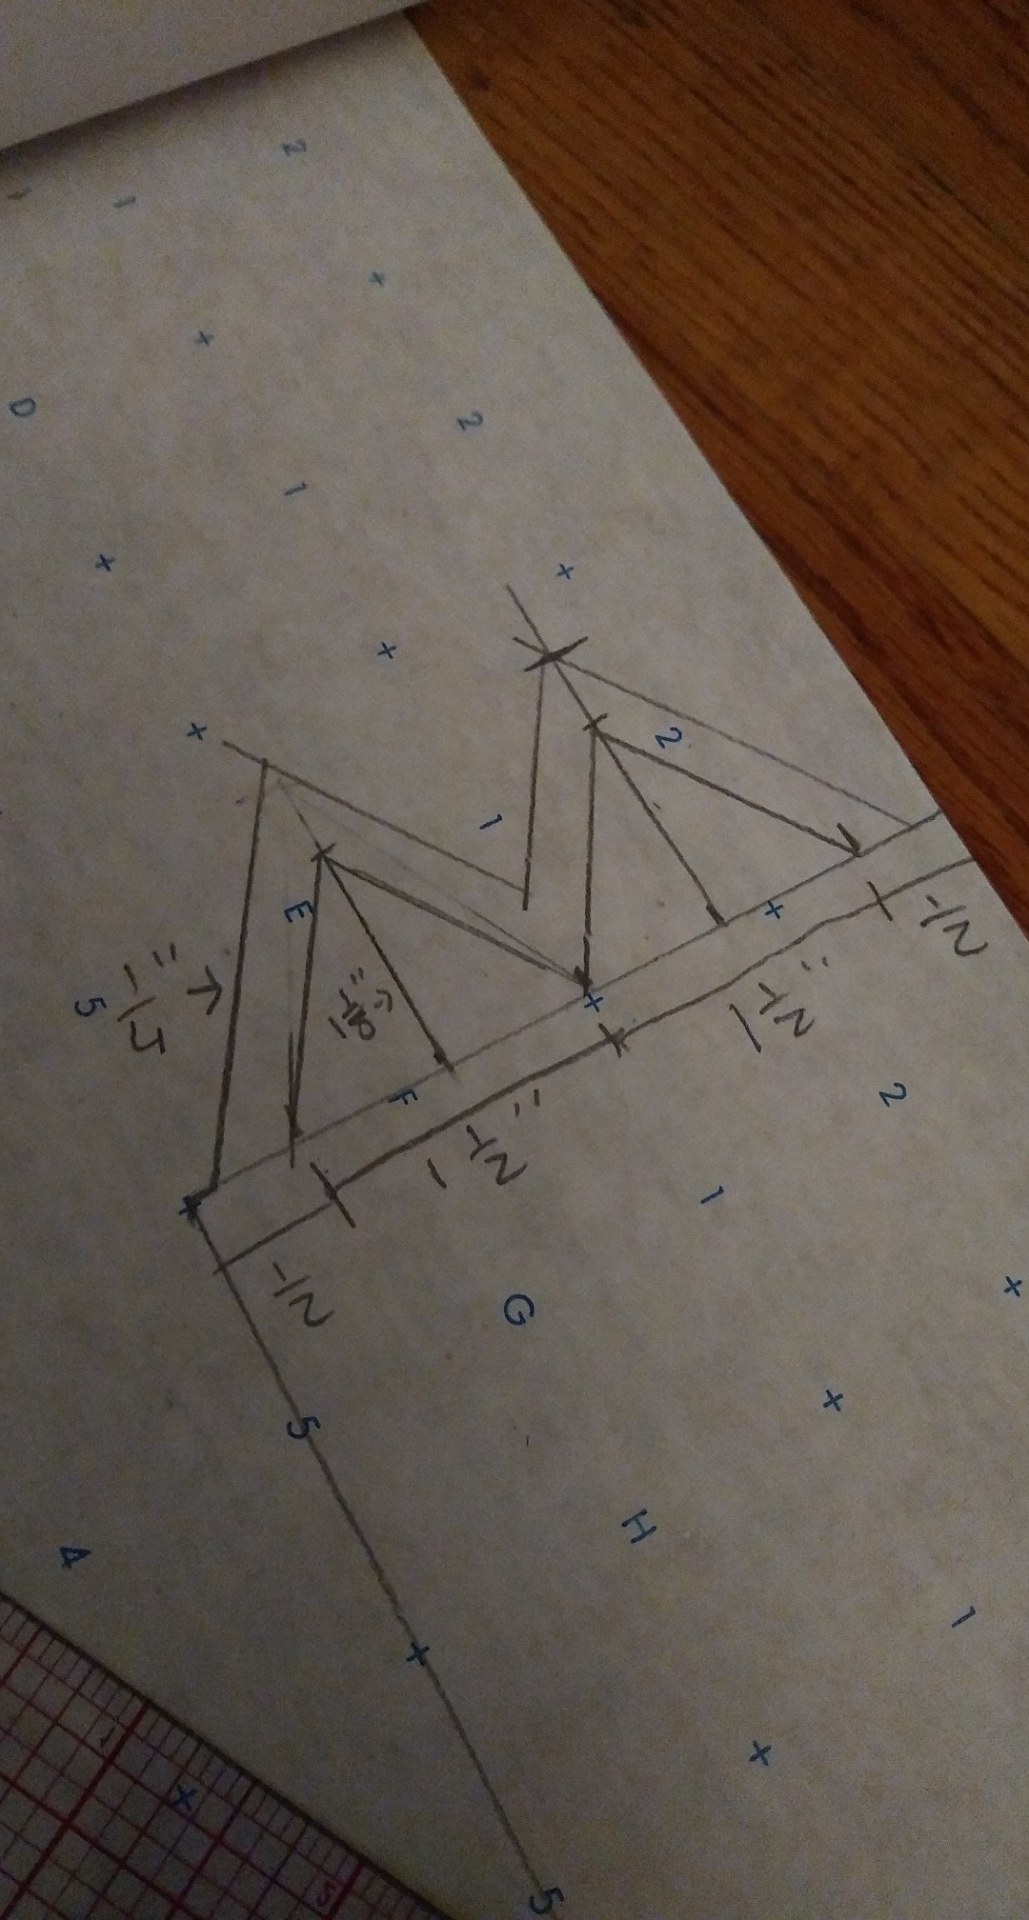
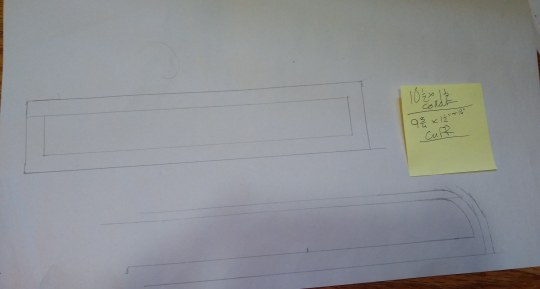
6. Cuff
I decided to add a cuff to this jacket just to finish off the sleeve. I thought It would look nicer. To get the measurement of this, measure the circumference of the end for the length and for the width do which ever you would prefer. I originally measured it for a 1 ¼” extension which you need to multiply by two since its folded over. You may want it to be the same width of the pleats to allow it to flow more. Adjust as you’d like!
7. Added Collar
Okay so I know the show does not depict a collar on this jacket, but I honestly did not like the way the neckline looked without it. I decided to put this on at the end, but it would probably be easiest to sandwich it in between the inner and outer layer of the jacket. I measured from where the jacket folds back in the front, around to the other side where it folds to get my measurement. I went for a 1 ½” extension and then rounded the ends to be like a mandarin collar.
Sewing the Garment
1.The Bodice
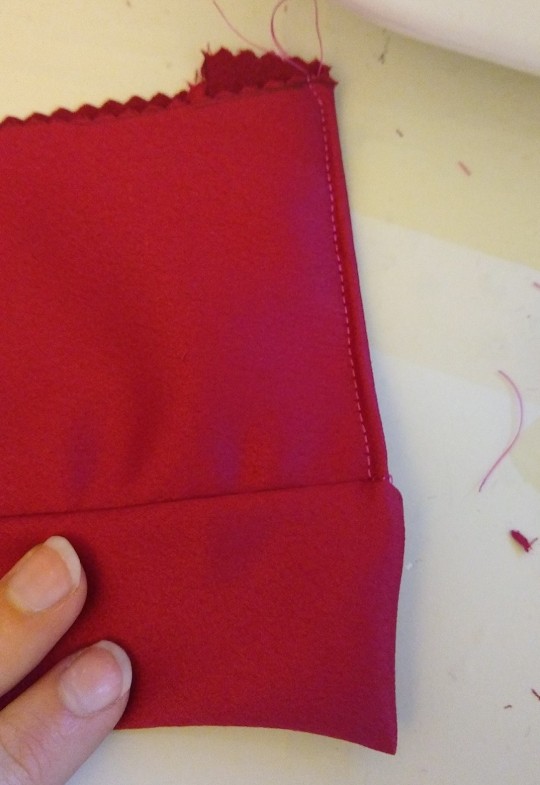
Okay for the outer layer you have the panels with the seam going through them. Go ahead and sew those so that they then match the lining panels. Be sure to iron the seams!
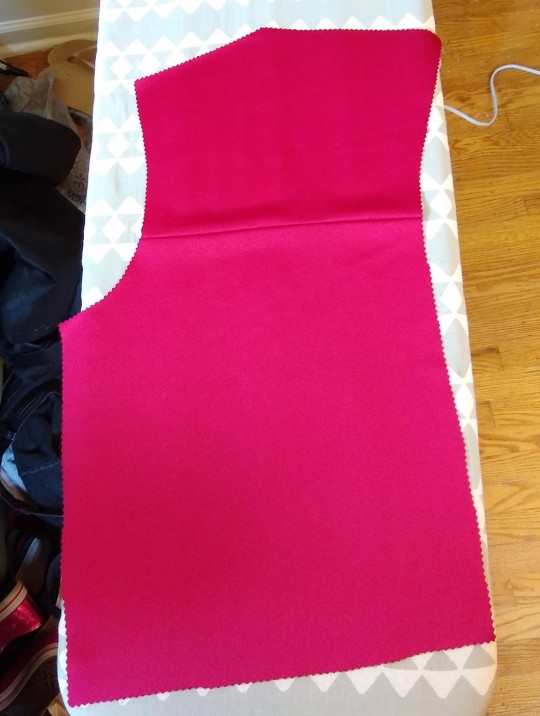
Sew the side seams and shoulder seams of both the outer layer and the lining separately.
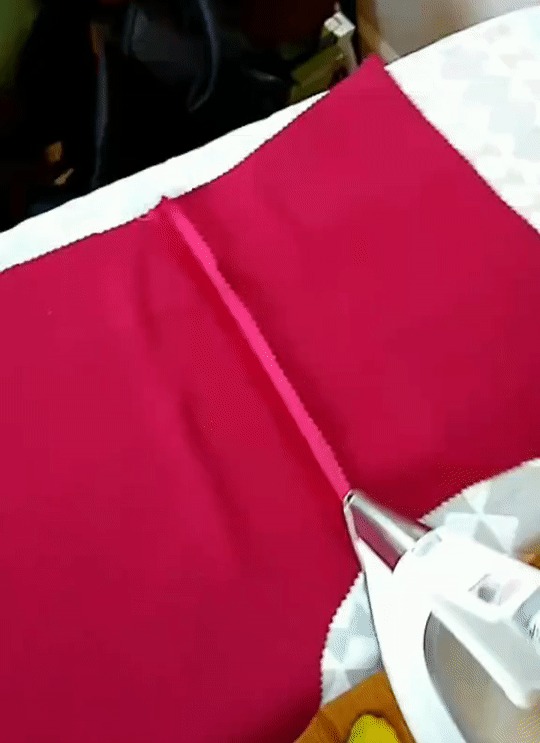
Then match up the two pieces so that you can put the layers together. The right sides are together and the wrong sides should be the only things visible. Sew the front panels all the way around the neck to the other side.
When it gets turned right side out it will look like the picture below. This can be fixed by adding top stitching around where you sewed. I also top stitched the front seams as well as the shoulder seams.
2. The Sleeves: Part 1
The sleeves themselves and attaching the sleeves are very difficult. I managed to have to re-do them 3 times. I am just glad that my fabric is very forgiving when it comes to mistakes.
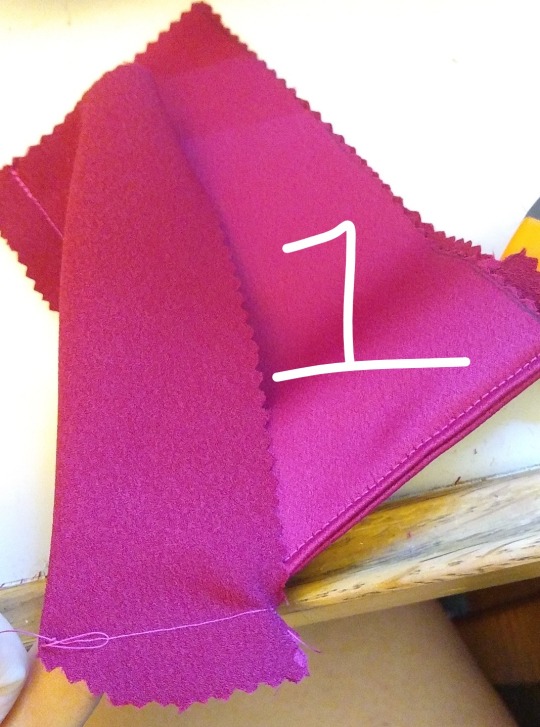
I hope you still have the paper that you used to measure out the length of the pleats because it will make the next steps so much easier. With the markings on the fabric for measurements, fold out the pleats the same as you did the paper. The inside back piece should now be equal to the length of the folded piece.
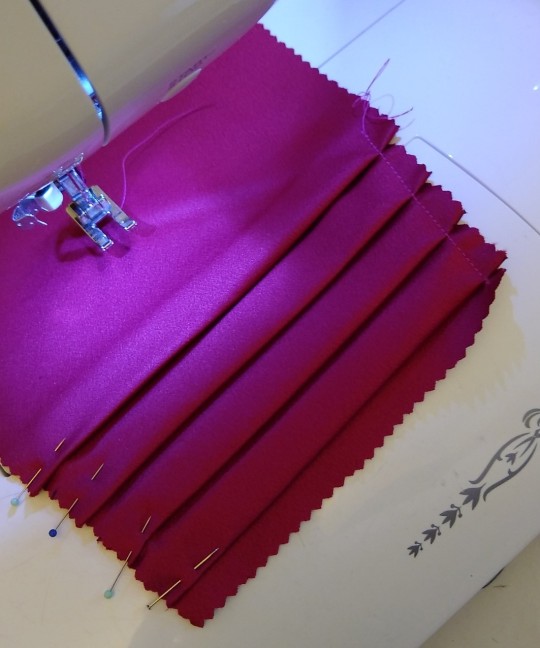
You are going to want to stitch down the side to keep the pleats in place. My sleeve happens to have 4 pleats in this image instead of three because I measured out my sleeve wrong. If you followed the tutorial, it will be right. I later adjusted when I was putting the cuff on.
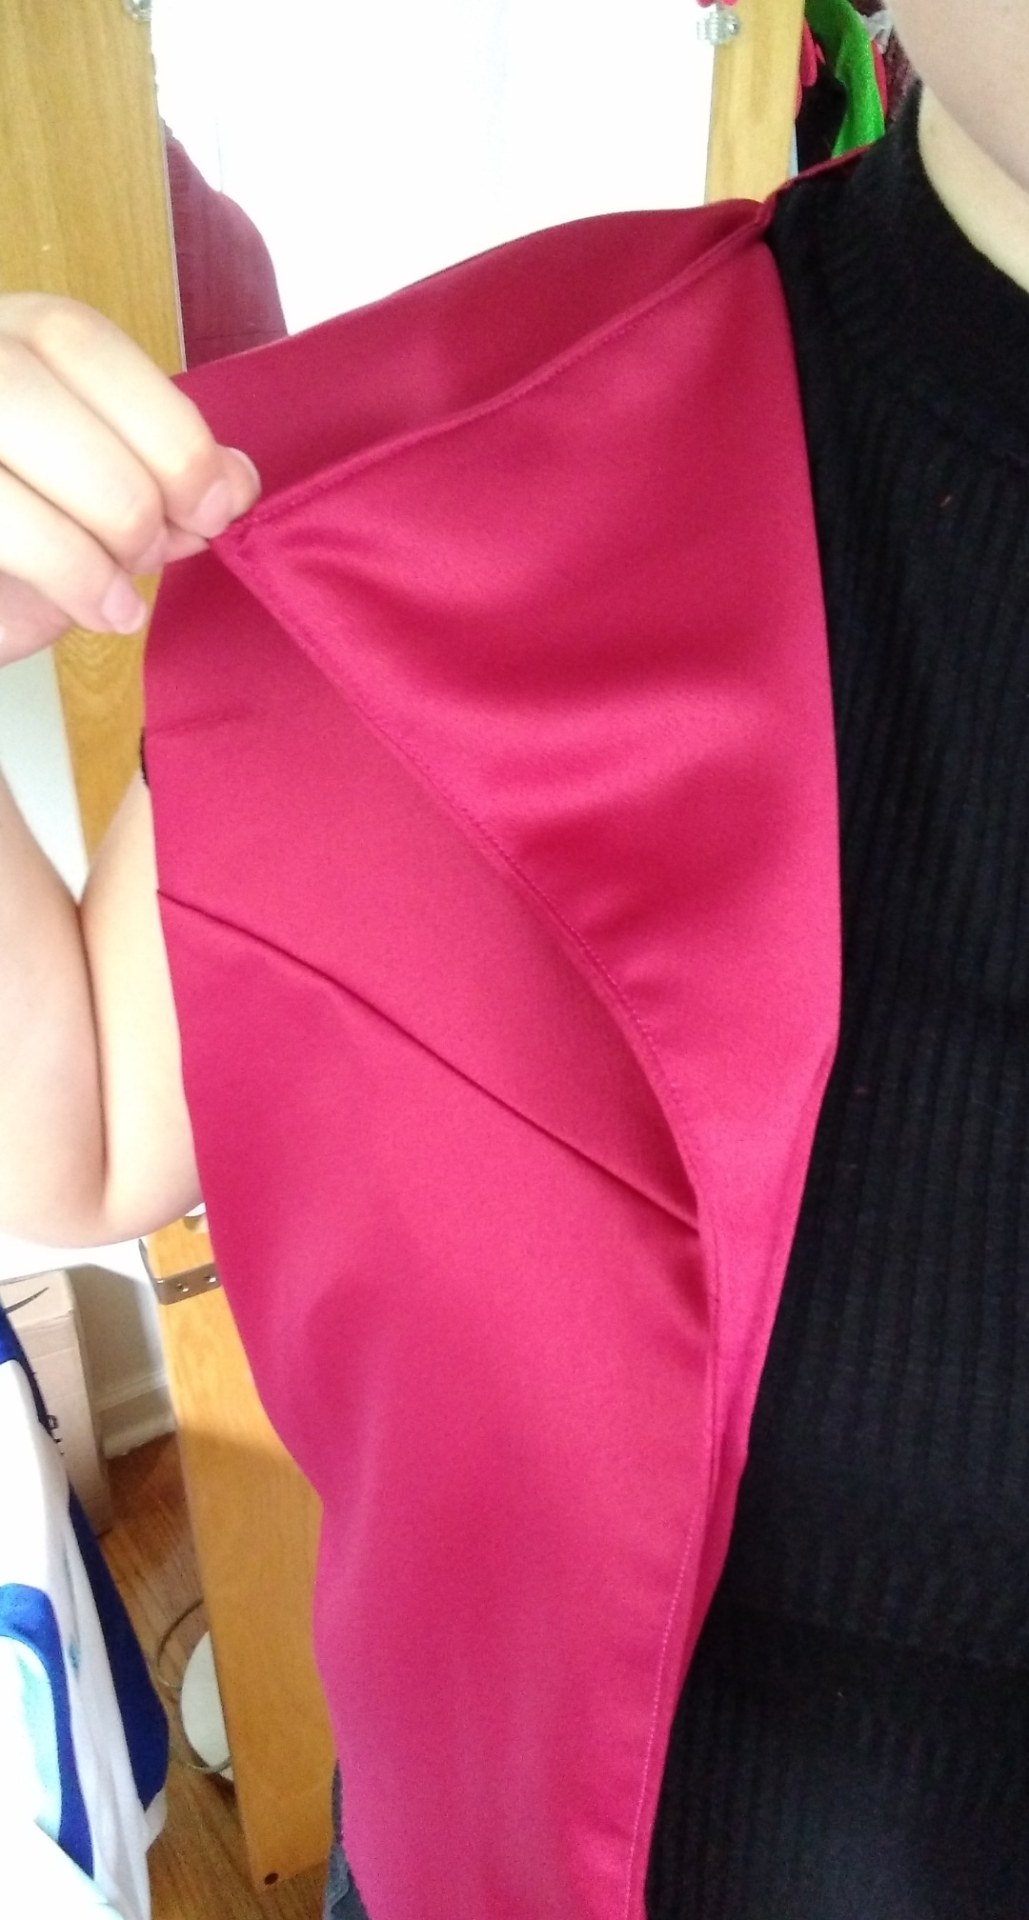
3. The Sleeves: Part 2
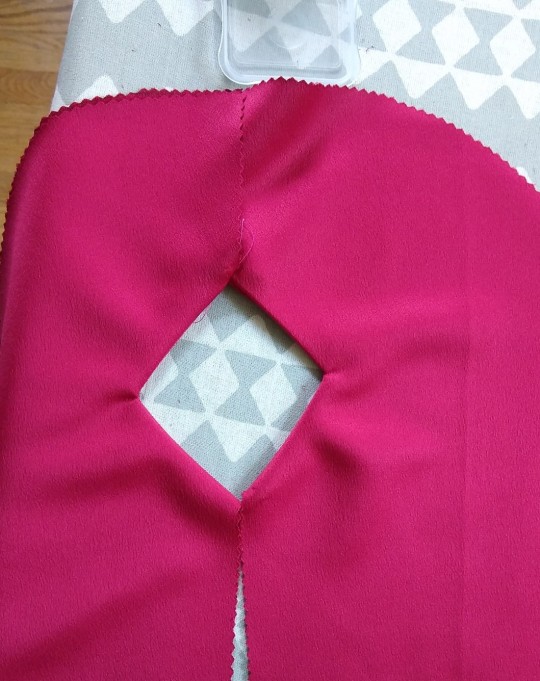
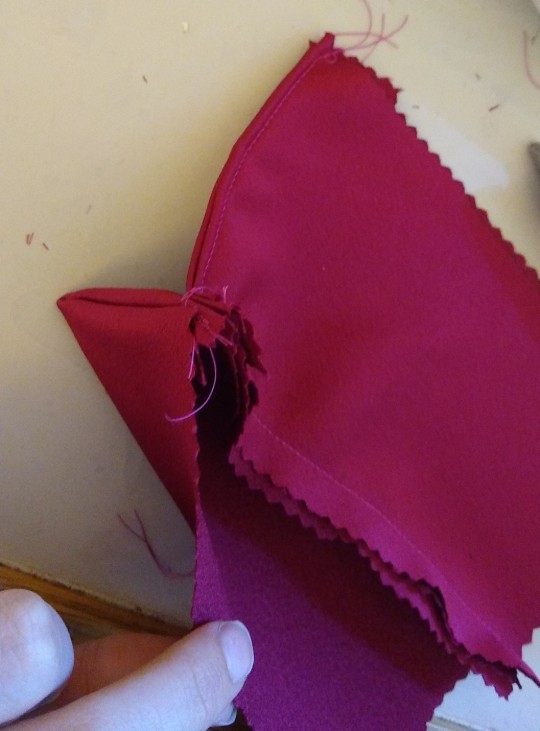
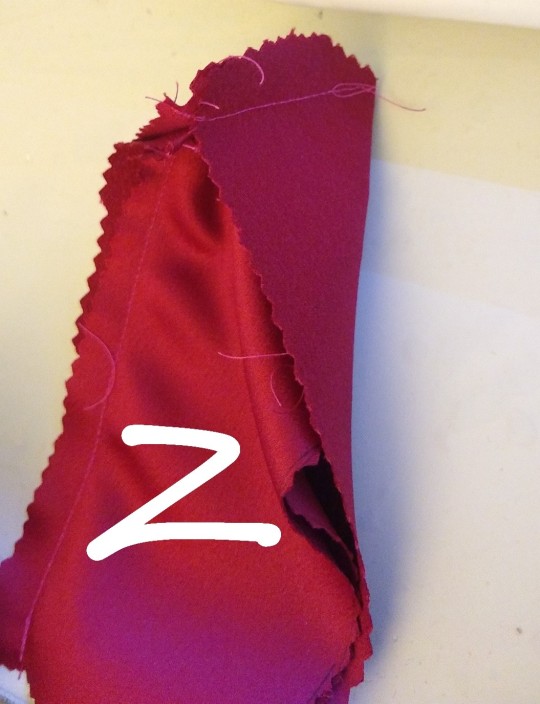
Alright If you do the cut out then you have to do this step. Put the wrong sides together of the front outer and front lining piece. Sew just the cut out at ½” SA. When you are done stitching it, snip at the corner until right up against the stitching.
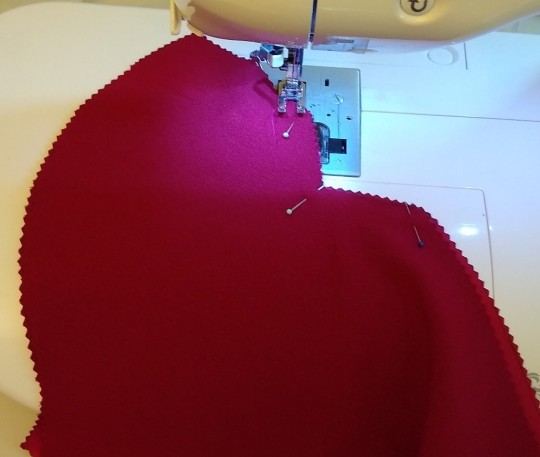
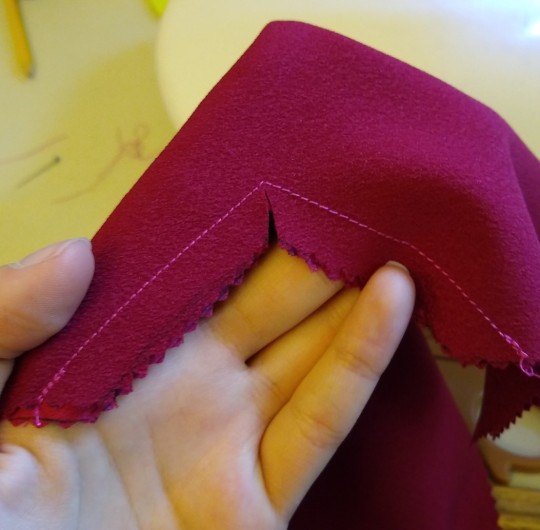
Do the same for the back lining and the back-outer piece. Flip it out so it looks clean and iron.
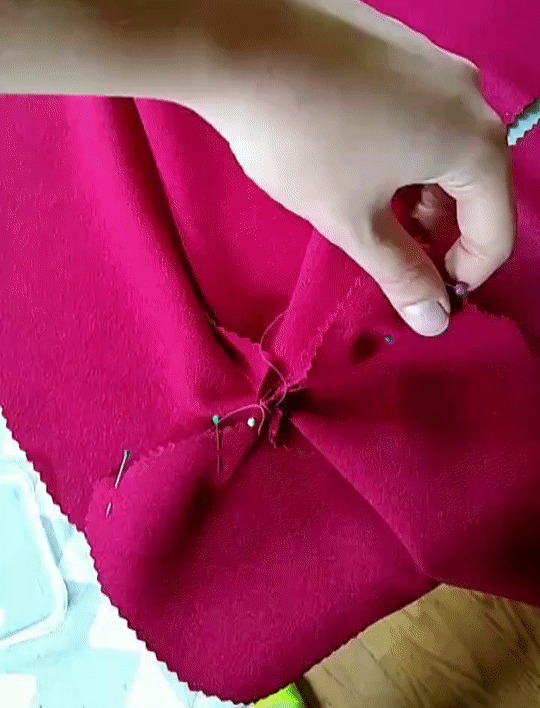
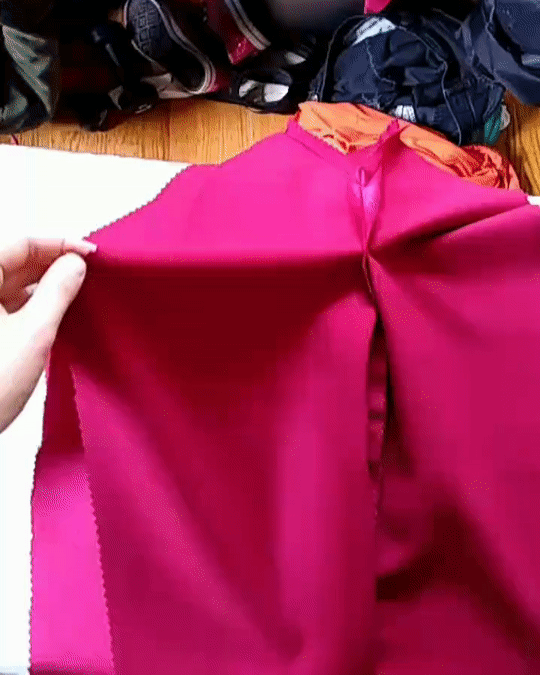
Next we will be putting together the two pieces above. I have both a gif and image on how it will look. The top middle seam will be sewn together as well as the bottom middle seam.
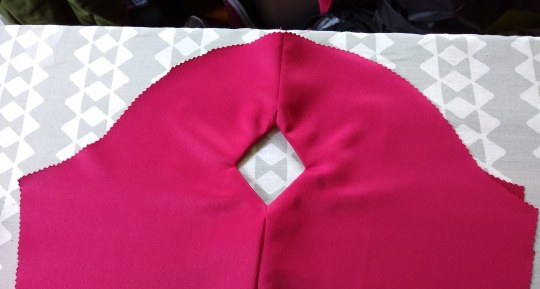
I then added top stitching to my sleeve as well. Try to make the top stitching the same through out the whole piece unless it’s a designer choice.
Next to get the whole thing together and still have it be clean on the inside we have to sew each layer separately for the underside seam. Just match up the sides of the outer layer and the sides of the inner layer. Refer to the image and the gif below.
While it is in this state, I highly recommend you iron open the seams so that it lays nicely on the inside.
Okay, then you have to turn it right side in. to do that, put your arm through the opening with the pleats. Hold onto the end closest to your hand and use your other arm to pull it back over the sleeve until its completely turned right side in. Gif for Reference.
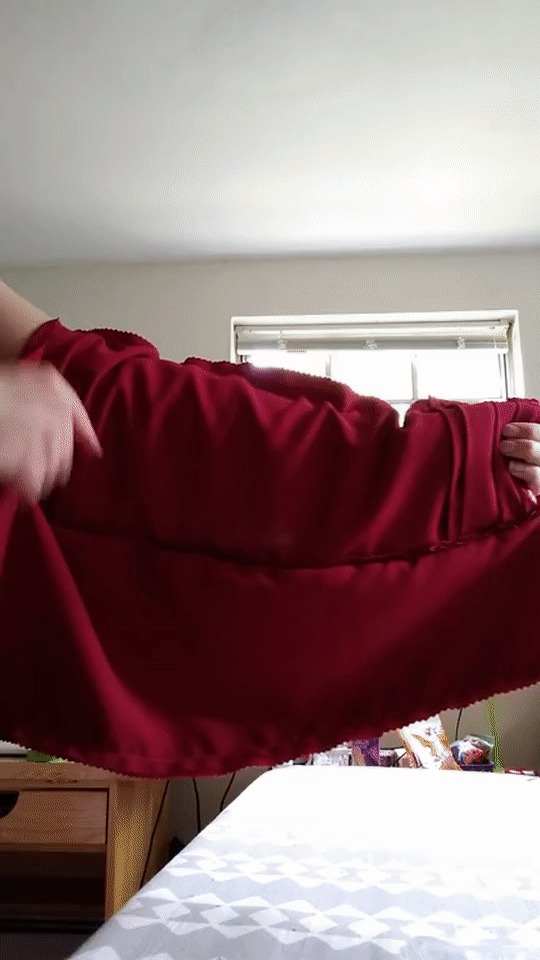

BAM! SLEEVES.
4. The Sleeves: Part 3
Okay so there are a few things going on when attaching the sleeve. A) You don’t want to have an unfinished edge in your jacket so I did a french seam. Here is a good video reference to how to do that. And instead of each at ½ SA, you will do ¼ both ways https://www.youtube.com/watch?v=YYa86gQbN6c
B) We are working with a Set in Sleeve so there are a few steps to that. https://www.youtube.com/watch?v=9E1_NcRrDB8
Here is another good video reference for further help. For this project you will want to use the first suggestion used.
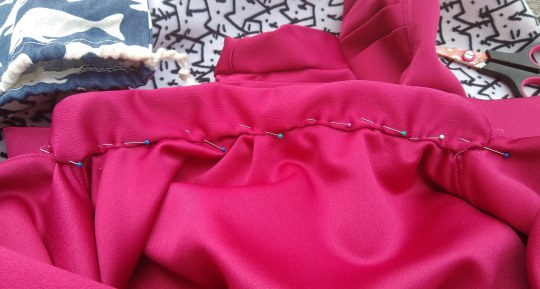
You have to ease the arm whole which means along the top of the sleeve you will baste it and then when you are connecting the sleeve to the bodice you can pull the stitching tighter to bunch the fabric to fit. BE CAREFUL AS YOU DO NOT WANT FOLDS AT ALL. Don’t worry, It will work. Another tip is to try to get as much fullness in at the top by the shoulder seam rather than the sides because it lays nicer and gives some extra space.
Now we gotta combine these two things. I HIGHLY HIGHLY HIGHLY suggest testing this out first before using the actual sleeves. The number of times that I had to seam rip the whole thing apart will haunt me. I do tests all the time and it usually saves me the headache later, but I decided that I would be fine and went for it. A mistAKE. Your fabric may not be as forgiving as mine either. It doesn’t have to be a whole sleeve either. Just practicing being able to ease the arm hole while also french seaming serves the purpose!
The image below is pinned to do the second run of the French Seam.
Bam. Progress pic

5. The Cuffs
For the cuffs, I apologize but at the end here I neglected to take photos. In a lot of ways though putting some videos on here will probably help you much more.
https://www.youtube.com/watch?v=g0V1jpvxC0c
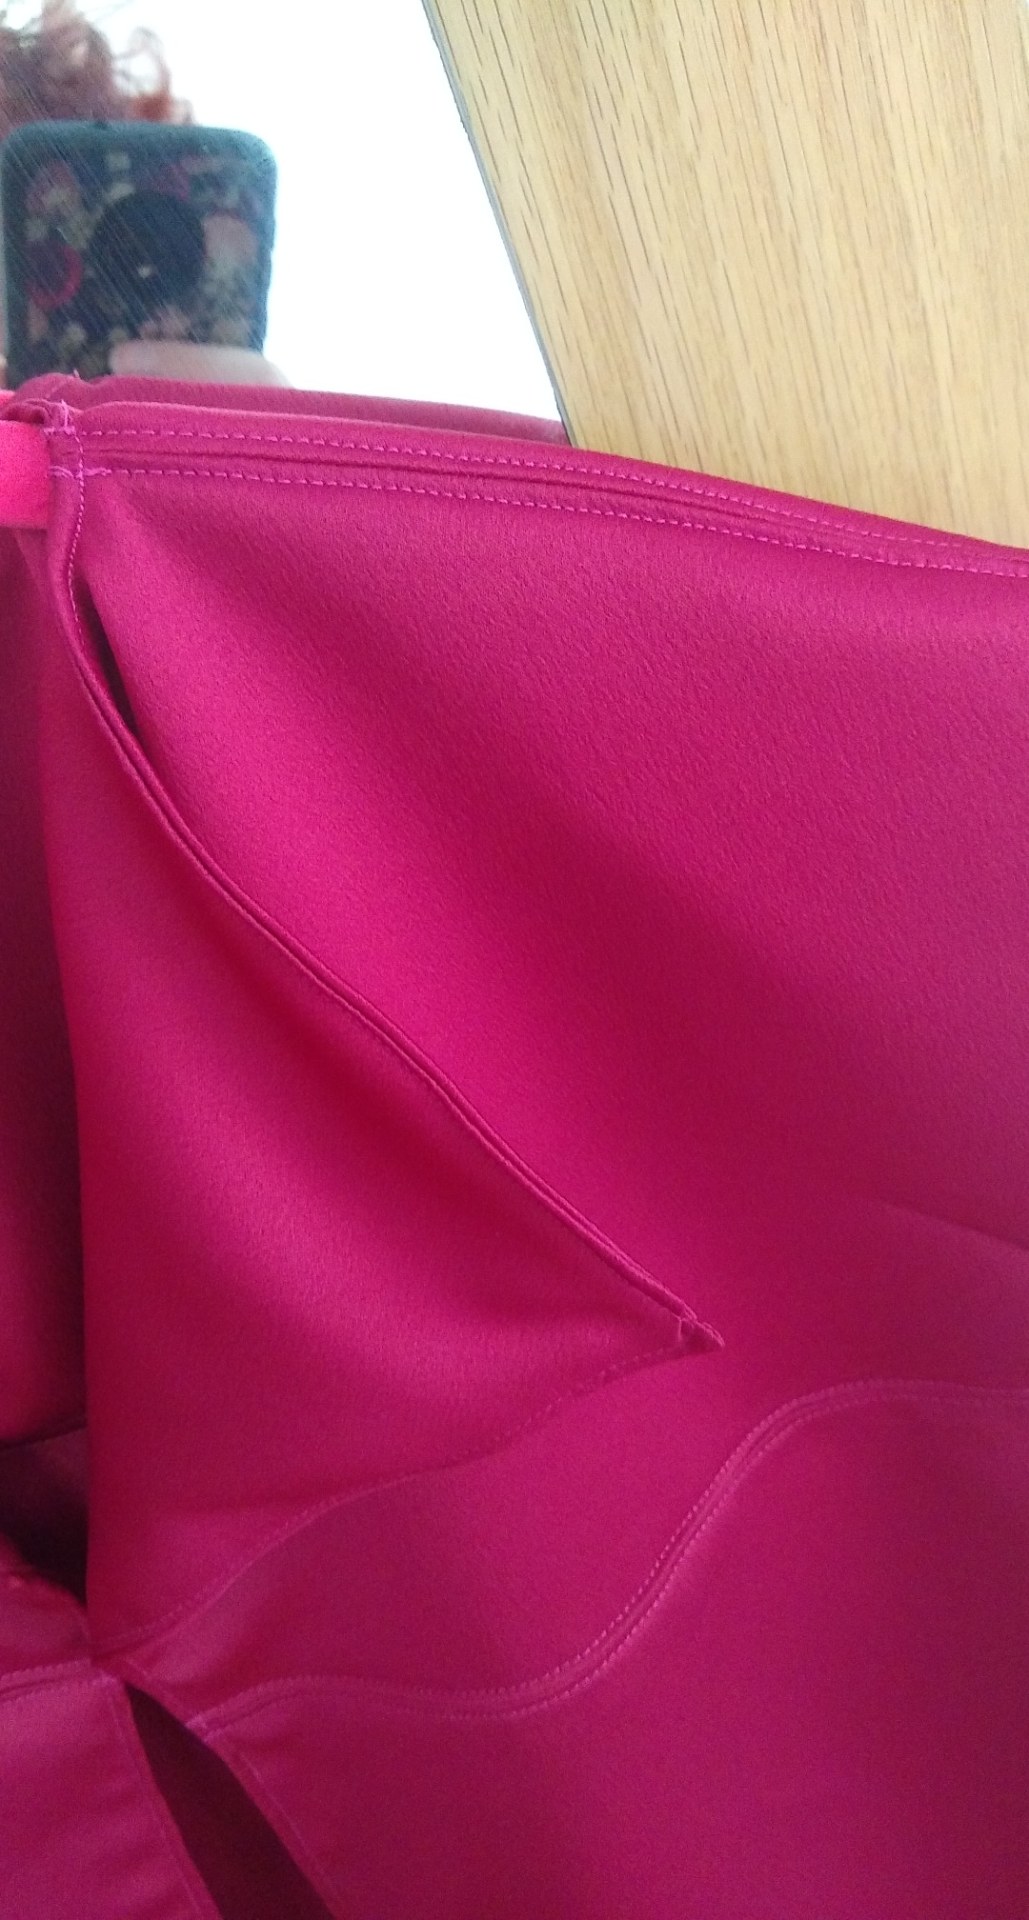
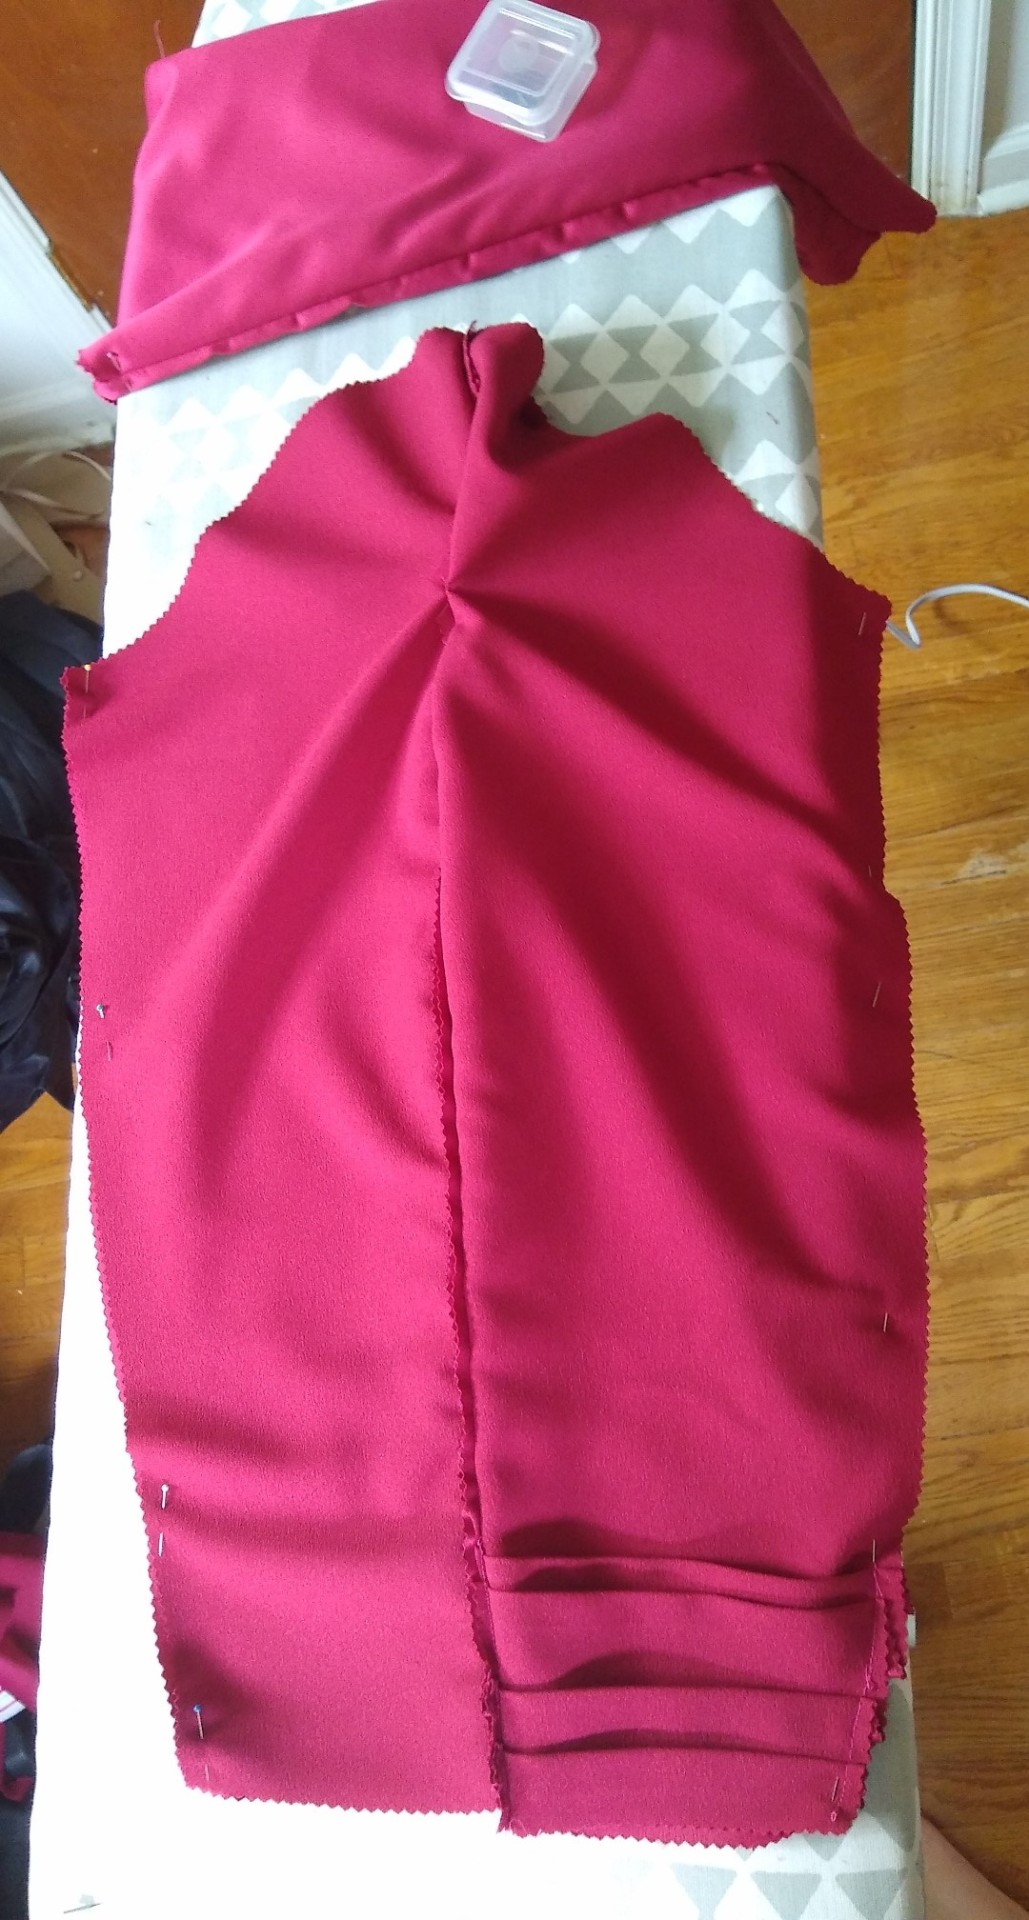
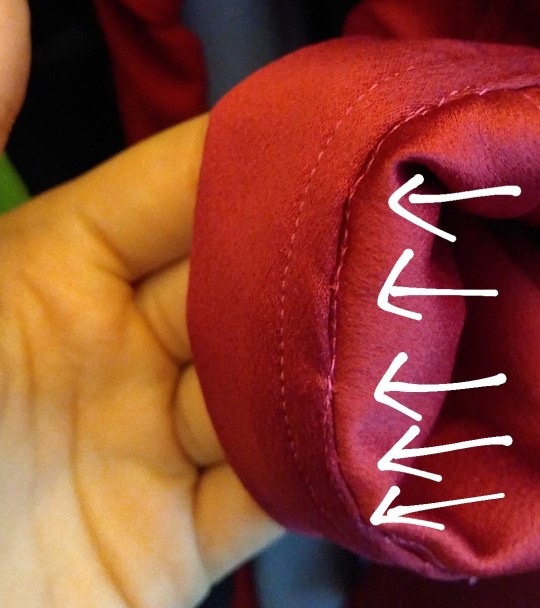
The picture below shows the inside of the cuffs and the arrows show where I hand sewed the inside together so that the outside looked clean. Add the topstitch then as well.
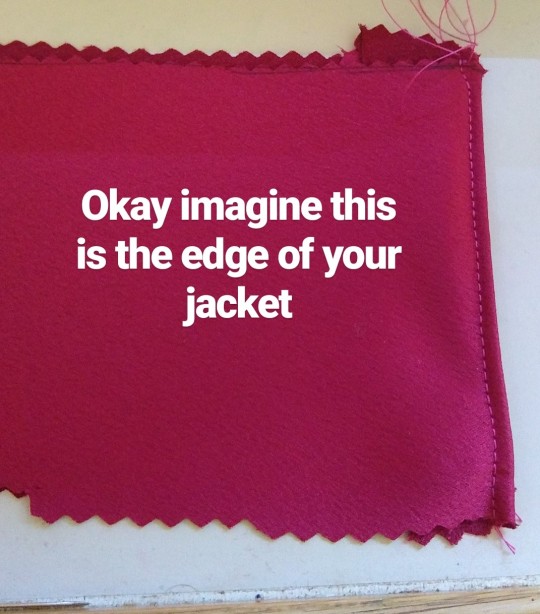
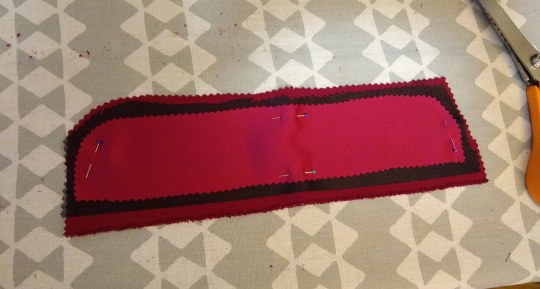
6. The Bottom Arrow Addition
Sorry its not directly on the jacket. I made a sample to make up for it. It would be very hard to understand otherwise.
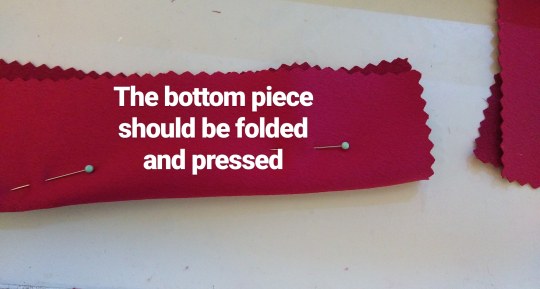
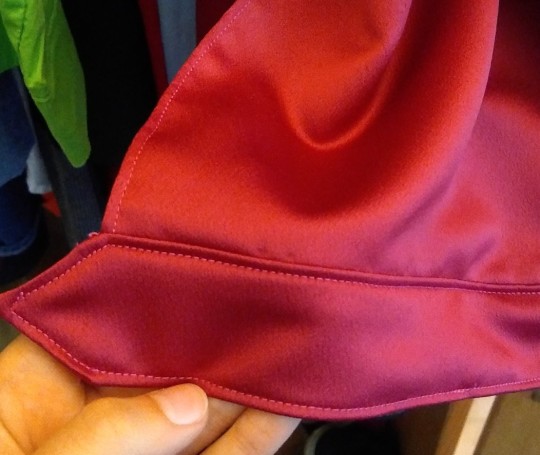
Now when you go to attach the bottom be sure to off set it by a half inch. You are going to “pillow case” it later. The part of the jacket that is going to be seen from the outside should have the clean machine stitching.
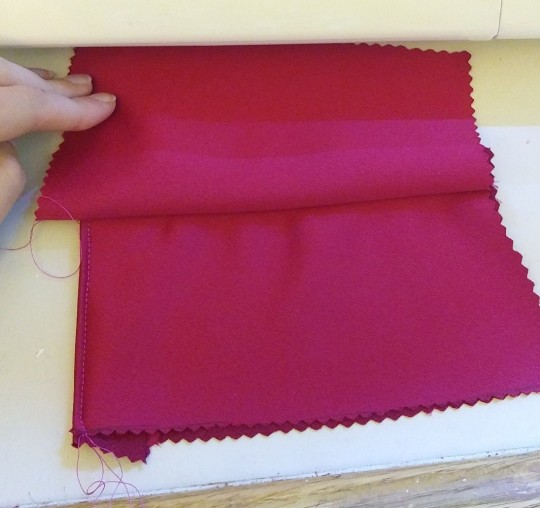
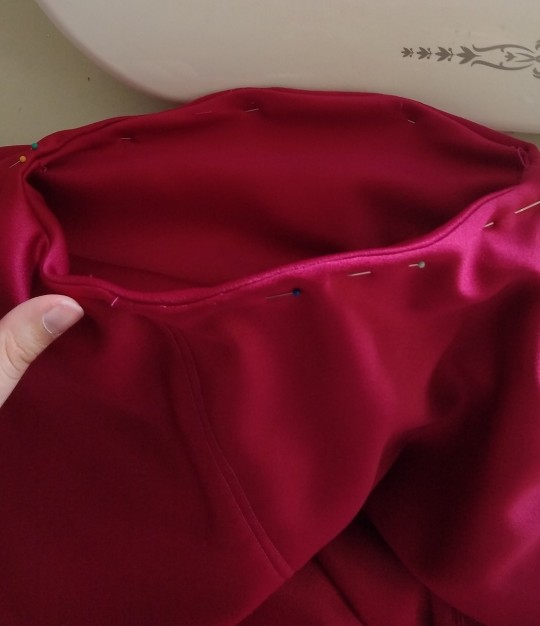
This is where the pillow casing comes in. since you offset it by a half inch you can do the usual half inch seam with the good sides facing each other. The image above is what the bottom end of your jacket should look like currently.
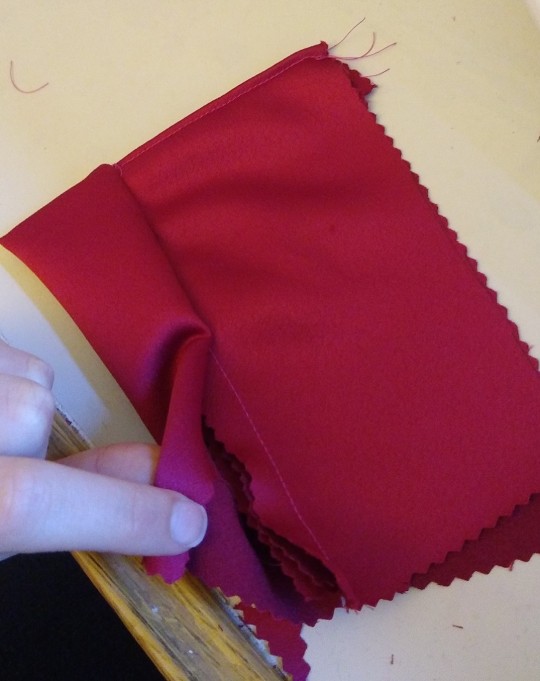
Okay now the most chaotic thing to do now is what we call burritoing to get a good clean finish on the ends. You are going to fold the jacket inside the addition to where you end up in 3 being able to machine stitch it at half inch SA. You will not get the whole jacket done this way, only a few inches but it does look nice. The rest of the middle will have to be hand stitched but it’s worth it. I promise.

This is what the finished end looks like.
Below is a perspective of the inside before it gets hand sewn
Do the same with the Arrow end but it is just a bit more complicated
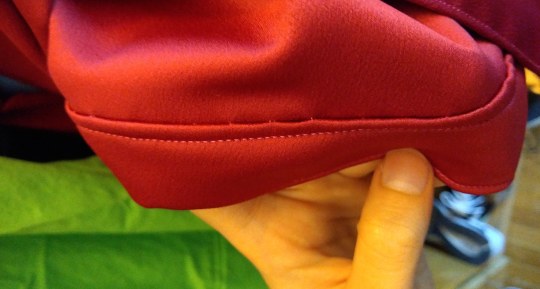
You can see above where I hand stitched the inside before I top stitched it.
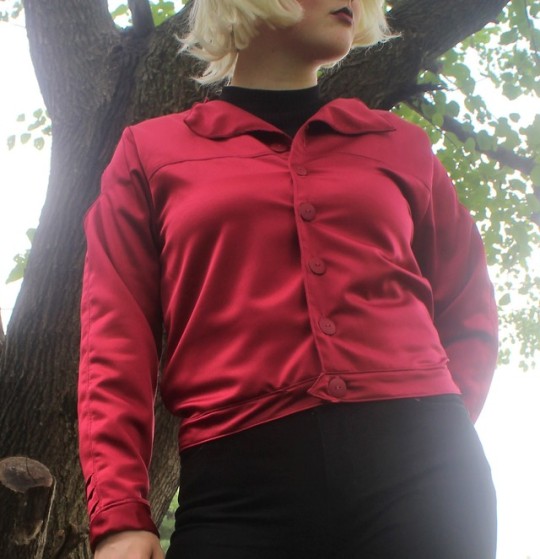
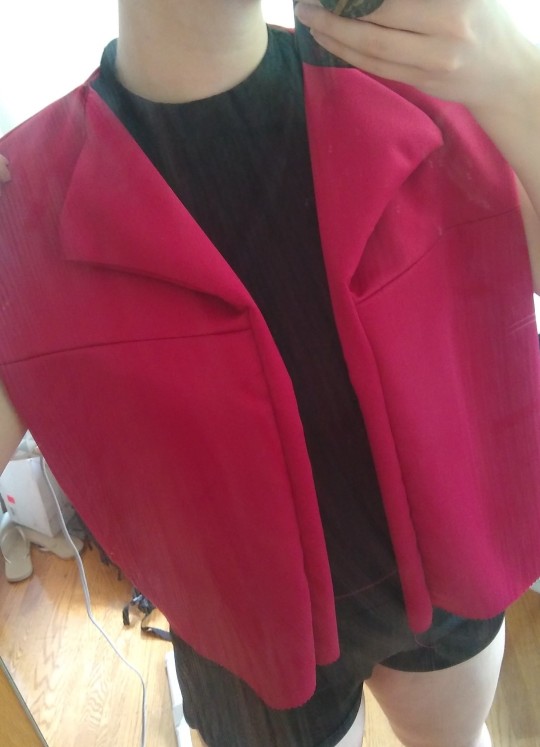
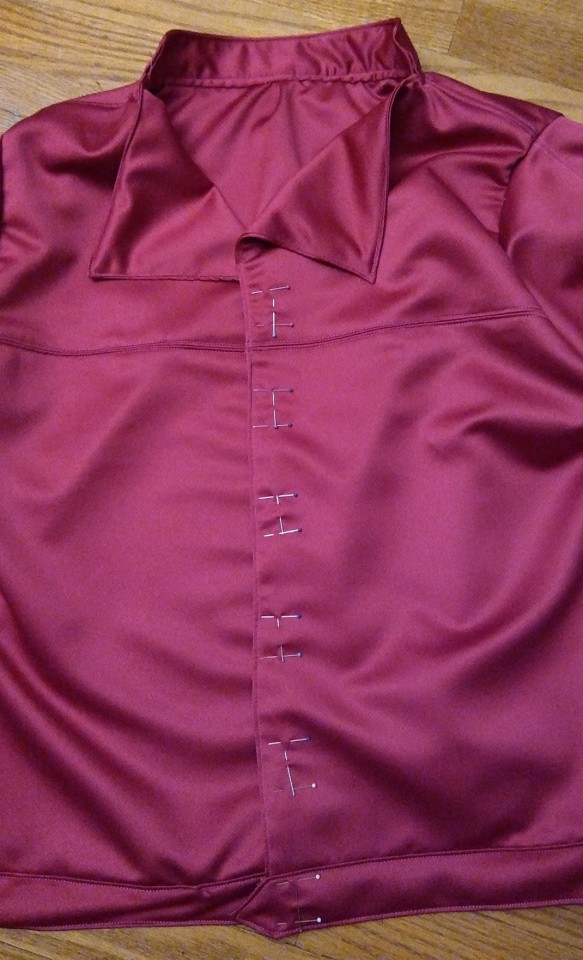
7. The Collar
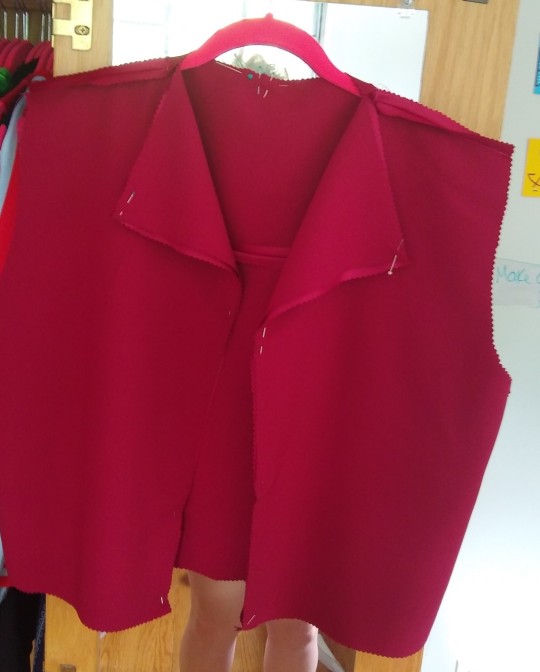
Alrighty. Admittedly I hated the way my neckline turned out. I decided to add a little mandarin collar around the top to cover it up. It was a very good decision in my opinion. I’ll show how I did it but IF YOU DECIDE YOU WANT THE COLLAR FROM THE BEGINNING THEN SANDWHICH IT BETWEEN THE LINING AND OUTTER LAYER.
You will need to fuse the collar pieces if you want them stable to stand up. Cut out 2 pieces, one of them being mirrored.
When I added the collar on top, I sewed the basic collar, leaving about a half inch along the bottom unsewn on the sides. Much like the cuffs and bottom of this jacket, you want to sew the whole outward facing layer with the machine and then unfortunately, it may be best to hand stitch the inside collar to the rest of the jacket. I then added Top Stitch.
8. The Buttons
I used my Singer sewing machine function for my button holes. Since I did that, I first laid out the buttons to where they were even and marked with pins where the middle of the button was and where the top and bottom ended so I knew where to turn my machine.
Congratulations if you made it though this tutorial. I know it was a LOT but the ending product is pretty rad.
#cosplay#cosplay tutorial#shera#she ra#glimmer#glimmer shera#she ra and the princesses of power#sheracosplay#glimmer cosplay#shera cosplay#She-ra#tutorial#jacket tutorial#Shera season 2#shera season 3#She ra spoilers#she ra cosplay#fashion#sewing#sewing references#sewing tutorial
226 notes
·
View notes
Photo
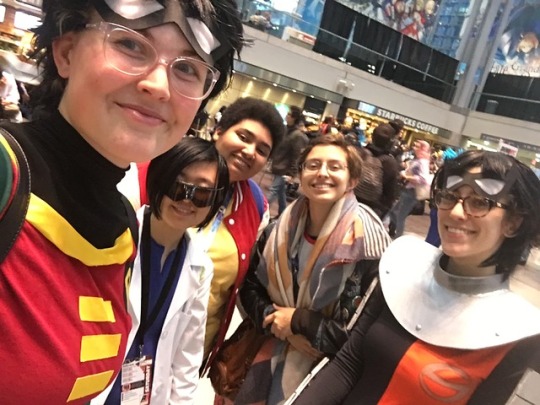
I realized I never posed my Anime NYC photos here lmao.
We were all Robin from the OG Teen titans.
It was super cool meeting up with the other people from teen titans as well!
7 notes
·
View notes
Photo
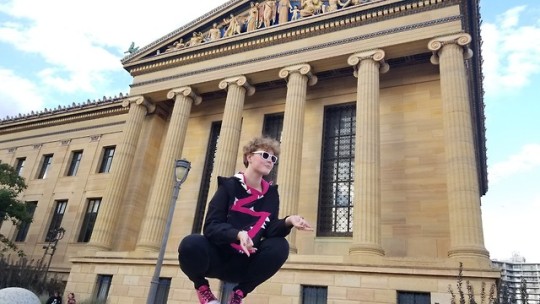
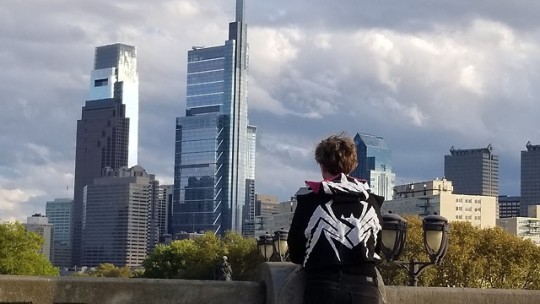

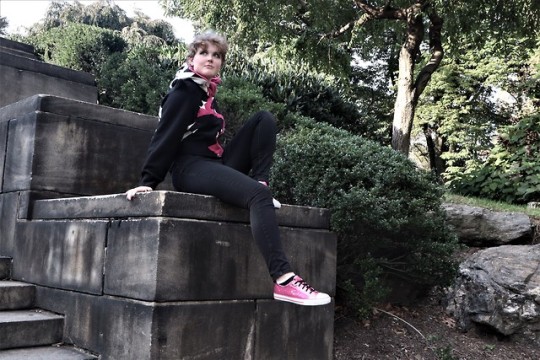
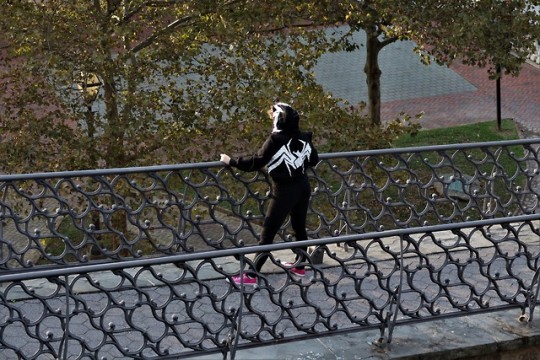
Casual Gwenom!!
I loved making this sweatshirt. I was super inspired to do it the moment I saw the concept art by Jason Latour, Robbi R, and Rico Renzi
Also i really really love Philly
#spiderman#spiderman into the spiderverse#marvel cosplay#marvel#gwenom#spider gwen#gwen stacy#I remember there were like 4 weddings going on on the rocky steps when we took these photos. It was so wild
11 notes
·
View notes
Photo


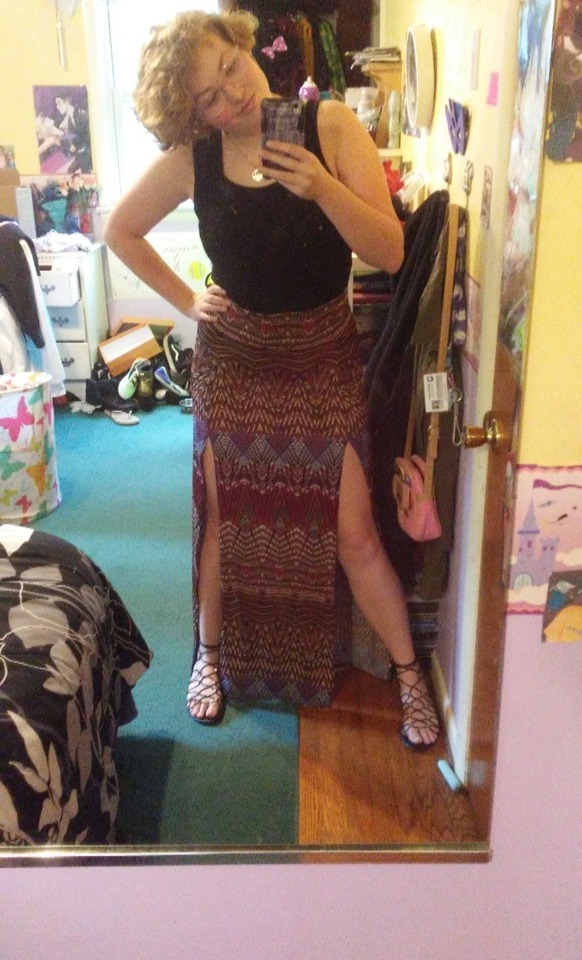

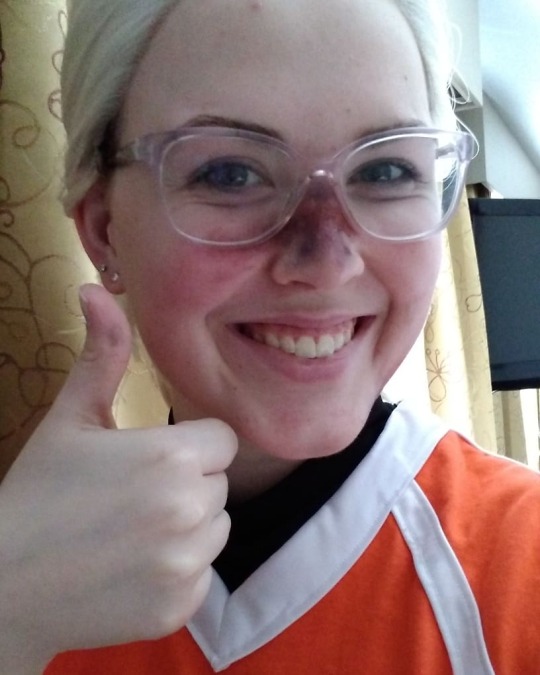
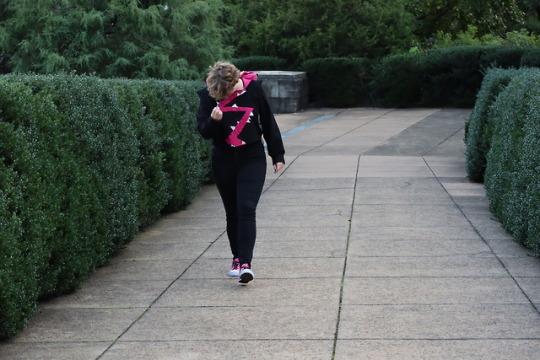
Fun fact: Closet cosplaying to work is the best thing I have ever done.
Life be wild right now haha. Just thought I would post some of the more recent designs and closet cosplays I’ve done. I still have 2 other projects completed (just need some cool photos) and am working on 3 more cosplays (just wait for it. my friends and I are gonna be such memes) College be stressful af and throwing cosplays on top of the stuff I have to sew for garment structures is rough. College seriously takes over to the point where its hard to do or focus on anything that is not school work. I apologize for not really posting tutorials anymore, but my education is hopefully gonna take me somewhere someday. Jefferson is def a great design school if you’re looking for colleges and its so close to center city philadelphia without all the hustle/bustle.
#god I love doing closet pidge#pidge gunderson#cosplay#closet cosplay#me#original design#origional design#adrien agreste#cosplay selfies
24 notes
·
View notes
Photo

I was sh00k today when I couldn’t find a good image of Adrien’s stripes online to iron them on a tshirt. I opened up paint and made my own instead.
Feel Free to Use
Me: *holds cheese* Cheers mate
20 notes
·
View notes